Spring’s arrival signals the perfect time to shed those dark winter nail colors and embrace fresh vibrant designs that capture the season’s essence. We’re ready to transform our nails into stunning canvases that celebrate blooming flowers warm sunshine and renewed energy.
This season’s nail art trends offer endless possibilities for creative expression. From delicate floral patterns to bold geometric shapes we’ve curated the most captivating spring designs that’ll make your manicure the center of attention. Whether you’re a DIY enthusiast or prefer professional salon visits these ideas work perfectly for any skill level.
We’ll explore everything from soft pastel gradients to eye-catching botanical motifs that perfectly complement spring’s refreshing atmosphere. Get ready to discover nail art inspiration that’ll keep your fingertips looking absolutely gorgeous throughout the entire season.
Fresh Floral Nail Art Designs for Spring
Floral nail art captures the essence of blooming gardens and transforms your fingertips into miniature canvases of natural beauty. We’ve curated the most enchanting botanical designs that’ll make your manicure the perfect accessory for the season.
Cherry Blossom Petals
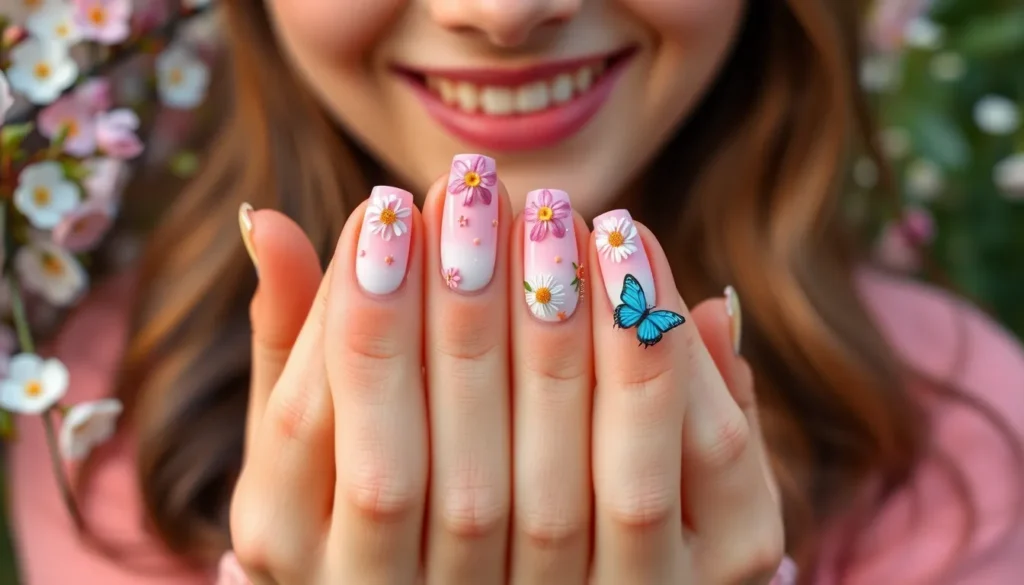
Cherry blossom nail art brings delicate pink and white petals to life on your nails with soft brushstrokes and subtle shading. We recommend starting with a nude or pale pink base color to create the perfect canvas for these graceful blooms. Paint small clusters of five petaled flowers using light pink polish, then add white highlights to each petal’s center for dimension.
Scattered petals across your accent nails create a romantic floating effect that mimics cherry trees in full bloom. You can achieve this look by dotting pink polish randomly across your nails, then using a thin brush to create petal shapes around each dot. Adding a few brown branches with a detail brush connects the petals and completes this dreamy spring design.
Dainty Daisy Chains
Daisy chain designs offer a playful twist on classic floral nail art with their simple white petals and sunny yellow centers. We suggest using a light blue or mint green base to make the white daisies pop against the spring sky backdrop. Create each daisy by painting small white oval petals in a circular pattern, leaving space in the center for a bright yellow dot.
Connecting your daisies with thin green stems and tiny leaves transforms individual flowers into charming chains that wrap around your nails. This technique works especially well on longer nail shapes where you have more space to create flowing patterns. You can vary the daisy sizes across different nails to add visual interest and movement to your manicure.
Tulip Garden Motifs
Tulip nail art celebrates spring’s most iconic flower with bold, cup shaped blooms in vibrant colors like coral, purple, and yellow. We love creating tulip gardens by painting different colored tulips on each nail, using a small flat brush to achieve the characteristic rounded petal shape. Start with the outer petals and work inward, layering colors for depth and realism.
Grouping tulips at different heights with varying green stems creates a natural garden effect across your nail set. You can add texture to your tulip petals by blending two similar shades together while the polish is still wet. Small white highlights on the petal edges and darker shading at the base give your tulips a three dimensional appearance that makes them appear to bloom right off your nails.
Pastel Color Combinations That Pop

Soft pastels create the perfect foundation for spring nail art that feels fresh without overwhelming the senses. We’ve curated these dreamy color pairings that bring sophistication to your seasonal manicure game.
Mint Green and Lavender Pairings
Mint green and lavender create the most serene spring combination that instantly elevates any nail look. This duo works beautifully in ombre designs where mint fades seamlessly into soft lavender at the tips. Try alternating these colors across your nails, using mint green on your thumb and ring finger while painting your index, middle, and pinky with lavender.
Geometric patterns shine when we combine these cooling tones in half-moon designs or diagonal color blocks. The mint serves as a perfect base for delicate lavender polka dots, while lavender nails look stunning with tiny mint green hearts or stars. Both colors complement each other naturally, making them foolproof for nail art beginners.
Accent nail techniques work exceptionally well with this pairing, especially when we add white or silver details. Consider painting four nails in mint green and creating a lavender accent nail with small mint geometric shapes. This creates visual interest while maintaining the soft, dreamy aesthetic that defines spring nail trends.
Soft Pink and Peach Gradients
Soft Pink and Peach Gradients deliver the ultimate feminine spring vibe that flatters every skin tone. We love how these warm pastels blend together to create sunset inspired designs that feel both romantic and modern. The key lies in using a makeup sponge to dab the colors together, creating smooth transitions between the pink base and peach tips.
Vertical gradient techniques transform these colors into stunning nail art that mimics cotton candy skies. Start with a soft pink base coat, then apply peach to the upper third of each nail, blending downward with gentle dabbing motions. This creates depth while keeping the overall look delicate and spring appropriate.
Reverse gradients offer exciting variations where peach serves as the base color with soft pink concentrated at the cuticle area. We recommend adding tiny white dots or gold foil accents to enhance these gradient designs. The combination photographs beautifully in natural light, making it perfect for social media worthy spring manicures.
Baby Blue and Cream Accents
Baby Blue and Cream Accents bring a fresh, airy quality that perfectly captures spring’s gentle awakening. This sophisticated pairing works particularly well in cloud inspired designs where cream serves as the base with wispy baby blue patterns painted on top. The contrast remains subtle yet striking enough to make a statement.
French manicure variations take on new life when we swap traditional white tips for baby blue, paired with cream colored nail beds. This modern twist feels current while maintaining the classic elegance that makes French manicures timeless. Adding tiny cream colored dots along the blue tips creates additional visual texture.
Negative space designs showcase both colors beautifully, especially when we use baby blue as the primary color with cream geometric cutouts. These designs work well on shorter nails and create the illusion of longer nail beds. Try painting baby blue nails with cream triangles at the base, or create cream stripes across baby blue backgrounds for a nautical inspired spring look.
Butterfly and Nature-Inspired Spring Nail Art Ideas

Nature’s awakening brings endless inspiration for spring nail art, from delicate butterfly motifs to charming garden creatures that celebrate the season’s renewal.
Delicate Butterfly Wings
Butterfly wing designs create ethereal nail art that captures spring’s groundbreaking spirit. Watercolor techniques work beautifully for creating realistic wing patterns, using soft oranges, blues, and purples that blend seamlessly across each nail. Sheer base coats allow the colors to appear translucent, mimicking actual butterfly wings’ delicate nature.
Monarch butterfly patterns offer bold orange and black combinations that make striking accent nails. We recommend starting with a coral or peach base, then adding black veining details using a fine brush or nail art pen. Glitter accents along the wing edges enhance the magical quality while catching light beautifully.
Detailed wing textures require layering techniques that build depth gradually. Sponge dabbing creates natural color variations, while tiny dots applied with a dotting tool form authentic wing spot patterns. Clear topcoat seals these intricate details, ensuring your butterfly nail art lasts throughout spring’s activities.
Ladybug and Bee Accents
Ladybug designs bring playful charm to spring manicures through classic red and black color schemes. Single accent nails work perfectly for ladybug motifs, featuring bright red bases with black polka dots and tiny black heads. Matte finish options create a more sophisticated take on these beloved garden insects.
Bee inspired nails combine yellow and black stripes with delicate wing details for adorable spring themes. Horizontal stripes across the nail bed mimic bee bodies, while iridescent polish adds realistic wing shimmer. Small white dots create texture that resembles fuzzy bee fur, adding authentic touches to your design.
Garden bug collections allow mixing multiple insect designs across different nails for whimsical variety. Combining ladybugs on ring fingers with bee accents on thumbs creates balanced, nature themed manicures. These designs work especially well with short to medium nail lengths, allowing each tiny detail to shine clearly.
Leaf and Vine Patterns
Vine patterns flow gracefully across nail surfaces, creating organic movement that celebrates spring growth. Thin brush strokes form curving vine lines, while small leaves branch naturally from main stems. Green gradient bases enhance the botanical effect, transitioning from deep forest green at cuticles to bright lime green at tips.
Maple leaf silhouettes offer bold geometric shapes that work beautifully as negative space designs. Clear or nude bases allow green leaf outlines to stand out dramatically, while metallic gold veining adds luxurious finishing touches. These designs translate perfectly to both long and short nail lengths.
Tropical leaf motifs bring exotic spring vibes through palm fronds and monstera patterns. Large leaves work best on thumb and ring finger accent nails, while smaller fern patterns complement remaining nails beautifully. Glossy topcoats enhance the fresh, dewy appearance that makes these botanical designs truly spring ready.
Easter-Themed Nail Art Concepts

Easter celebrations bring unique opportunities to showcase adorable and festive nail art that captures the holiday’s playful spirit. These charming designs complement our spring nail art journey with seasonal symbols and cheerful motifs.
Bunny Silhouettes and Ears
Creating bunny silhouettes transforms nails into miniature Easter scenes with simple yet striking designs. We recommend starting with a soft pink or lavender base coat, then using a thin brush to paint small black bunny profiles on accent nails. The silhouette technique works beautifully when you position tiny rabbits along the nail’s edge, creating a whimsical border effect.
Bunny ear designs offer a more playful approach that’s perfect for shorter nails. Paint two small oval shapes in white or light pink near your cuticle area, then add tiny pink centers to represent the inner ears. These ears peek over the nail tip when you add them to a gradient background of spring pastels like mint green or soft yellow.
Three dimensional bunny faces create the most detailed Easter nail art option. Start with a white or cream base, then use dotting tools to create round faces on your ring finger nails. Add black dots for eyes, pink triangles for noses, and thin white lines for whiskers to complete these adorable characters.
Colorful Egg Designs
Traditional Easter eggs translate beautifully into nail art with their vibrant colors and intricate patterns. We suggest creating miniature egg shapes using different colored polishes on each nail, alternating between pastel blues, pinks, yellows, and greens. Oval shapes work best when painted vertically along the nail bed, leaving small spaces between each egg design.
Striped egg patterns offer endless creative possibilities with their classic Easter appeal. Paint thin horizontal lines in contrasting colors like purple and yellow or blue and orange across your nails. These stripes can vary in thickness, creating ever-changing visual interest that mimics traditional egg decorating techniques.
Polka dot egg designs provide a cheerful and easy to achieve Easter nail look. Apply a solid pastel base color, then use dotting tools to create small circles in complementary shades. We love combining soft pink bases with white dots or lavender backgrounds with tiny yellow spots for that perfect spring egg aesthetic.
Spring Basket Motifs
Woven basket patterns capture the essence of Easter egg hunts with their textured, rustic charm. Create this design by painting thin brown lines in a crisscross pattern across your nails, mimicking the appearance of wicker baskets. The weaving effect works best on longer nails where you have more space to develop the intricate pattern.
Easter grass details add realistic touches to your basket themed nails. Use a fan brush or thin liner to paint short, upward strokes in bright green across the bottom third of your nails. This grass effect serves as the perfect base for adding tiny egg designs or small flower accents on top.
Handle details complete the basket look with simple curved lines painted in darker brown shades. These handles arch gracefully over the basket weave pattern, connecting at both sides of the nail. We recommend adding these handles as the final step to ensure they stand out against the woven background design.
Ombre and Gradient Techniques for Spring

Gradient nail art creates stunning visual depth that perfectly captures spring’s natural beauty. We’ll explore three mesmerizing ombre techniques that transform your nails into captivating works of art.
Sunset-Inspired Color Transitions
Creating sunset gradients brings warm spring evenings to your fingertips with breathtaking color blends. We start with a golden yellow base near the cuticle and transition through coral pink to deep peach at the nail tips. Blending these colors requires a damp makeup sponge to dab and merge the shades seamlessly.
Tropical sunset effects work beautifully with orange, magenta, and purple combinations that mirror those magical golden hour moments. We recommend applying each color in thin layers and using circular motions to create smooth transitions. Finishing with a glossy top coat intensifies the gradient effect and creates that perfect sunset glow.
Spring evening gradients feature softer transitions using peach, lavender, and cream tones that evoke gentle twilight skies. We layer these colors starting from the darkest shade at the base and gradually lightening toward the tips. Adding tiny gold flecks enhances the sunset illusion and catches light beautifully throughout the day.
Cloud and Sky Effects
Sky inspired gradients capture the ethereal beauty of spring mornings with soft blue to white transitions. We begin with baby blue at the cuticle area and fade to pristine white at the nail tips using gentle dabbing motions. Creating realistic cloud effects involves using a small detail brush to add wispy white streaks across the blue gradient.
Stormy sky designs feature dramatic gray to silver transitions that add sophisticated edge to spring nail art. We blend charcoal gray with metallic silver using vertical strokes to mimic storm cloud movements. Lightning accent details using thin white lines create ever-changing visual interest and complete the stormy sky aesthetic.
Morning mist effects combine pale pink, soft gray, and ivory tones that recreate those dreamy spring dawn moments. We apply these colors in horizontal bands and blend them using horizontal sponging motions. Subtle shimmer powder dusted over the gradient creates that perfect misty morning sparkle that catches spring sunlight beautifully.
Rainbow Fade Designs
Classic rainbow gradients celebrate spring’s vibrant energy using traditional ROYGBIV color sequences across each nail. We position red at the cuticle and transition through orange, yellow, green, blue, indigo, and violet toward the tip. Creating smooth rainbow transitions requires patience and multiple thin color layers blended while still wet.
Pastel rainbow effects offer gentler alternatives using soft versions of traditional rainbow colors that perfectly suit spring aesthetics. We use baby pink, peach, butter yellow, mint green, sky blue, and lilac purple for dreamy rainbow gradients. These softer tones blend more easily and create romantic rainbow effects that complement spring wardrobes beautifully.
Unicorn inspired gradients feature magical color combinations with holographic elements that create enchanting spring nail art. We blend cotton candy pink with lavender and add iridescent topcoats for that mystical unicorn effect. Incorporating fine rainbow glitter creates dimension and movement that makes these gradients truly magical for spring celebrations.
Minimalist Spring Nail Art Ideas

Sometimes less truly is more when it comes to celebrating spring’s fresh energy. Clean, understated designs can capture the season’s essence while maintaining sophisticated elegance.
Simple Dot Patterns
Dotted nail art brings playful charm without overwhelming complexity. We create stunning looks using a dotting tool or bobby pin to place small circles across each nail. Pastel green dots scattered on a clear base evoke dewdrops on morning grass. Alternating pink and white dots in straight lines offer structured beauty that’s perfect for professional settings.
Two-tone dot combinations add visual interest while staying minimal. Lavender dots paired with mint green create a soft spring garden effect. We place larger dots at the base and smaller ones toward the tips for natural gradient appeal. Baby blue dots on a cream background mirror spring sky patterns beautifully.
Single accent nails with dot patterns provide subtle sophistication. We apply dots only to the ring finger while keeping other nails in solid pastel shades. This technique draws attention without creating busy designs across all ten fingers.
Thin Line Accents
Fine line designs offer elegant simplicity that complements spring’s clean aesthetic. We use striping tape or thin brushes to create delicate geometric patterns. Single gold lines across nude bases add luxurious touches to everyday manicures. Vertical lines in soft pink elongate nail beds while maintaining minimal appeal.
Intersecting lines create modern grid patterns perfect for contemporary spring looks. We apply horizontal and vertical lines in matching pastel colors for cohesive designs. Mint green lines on white bases create fresh, architectural beauty. These patterns work exceptionally well on shorter nail lengths.
Curved line accents soften geometric elements with organic flow. We paint gentle arcs that follow natural nail shapes for flattering results. Soft peach curves on neutral backgrounds evoke spring’s gentle breezes. Multiple curved lines in varying lengths create movement without complexity.
Negative Space Designs
Negative space techniques showcase natural nail beauty while adding artistic elements. We leave portions of the nail bare to create interesting shapes and patterns. Heart cutouts near the cuticle area surrounded by pastel polish create romantic spring vibes. Geometric negative space in triangular forms offers modern minimalist appeal.
Half-moon designs use negative space for classic elegance with contemporary twists. We paint only the top portion of nails while leaving the base area natural. Soft yellow half-moons on clear nails capture spring sunshine perfectly. This technique works beautifully with any pastel shade for versatile styling options.
Striped negative space patterns create sophisticated texture through strategic placement. We alternate painted and natural sections for striking visual contrast. Thin negative space stripes between mint green sections offer fresh, airy appearances. These designs photograph beautifully and transition seamlessly from casual to formal occasions.
French Manicure Spring Twists

The classic French manicure gets a vibrant makeover for spring with fresh colors, botanical elements, and sparkling accents. We’ll explore modern variations that maintain elegance while celebrating the season’s renewal.
Colored French Tips
Pastel French tips replace traditional white with soft spring hues that capture the season’s gentle beauty. We love mint green tips paired with a sheer nude base for a fresh, garden inspired look that works beautifully for everyday wear. Lavender tips create a romantic vibe when applied over a clear or pale pink base, while coral tips bring warmth and energy to your fingertips.
Two toned French tips add visual interest by combining complementary spring colors on each nail. Try alternating between baby blue and soft yellow tips across your fingers, or create an ombre effect by gradually transitioning from pink to peach tips. These colorful variations work especially well when you keep the base coat neutral, allowing the colored tips to be the star of your spring manicure.
Floral French Accents
Tiny flowers along the tip line transform the classic French into a botanical masterpiece perfect for spring celebrations. We recommend painting small daisies or cherry blossoms directly on the white French tip using a dotting tool and acrylic paints. Rose buds look stunning when placed at the corner of each tip, creating an asymmetrical design that feels modern and fresh.
Botanical French designs incorporate leaves and vines that flow naturally along the tip edge. Paint delicate green leaves extending from the corner of your French tip, or add tiny vine details that wrap around the nail’s edge. These nature inspired accents work beautifully with both classic white tips and the colored variations we mentioned earlier.
Glitter French Variations
Sparkly French tips catch the light beautifully and add glamour to your spring nail art repertoire. We suggest using fine holographic glitter over a white French base for maximum impact, or try gold glitter tips paired with a nude base for elegant sophistication. Silver glitter creates a cool, modern look that complements both casual and formal spring outfits.
Gradient glitter French manicures blend sparkles from dense to sparse, creating a stunning ombre effect along the tip. Start with heavy glitter concentration at the tip edge and gradually decrease the density as you move toward the nail bed. This technique works wonderfully with rainbow glitters that capture spring’s vibrant energy, or stick to monochromatic glitters for a more refined appearance.
DIY Spring Nail Art Tools and Techniques

Creating stunning spring nail art requires the right tools and techniques to bring your seasonal designs to life. We’ll explore essential equipment and methods that make professional-looking manicures achievable at home.
Essential Brushes and Dotting Tools
Fine detail brushes transform basic manicures into intricate works of art perfect for spring florals and delicate patterns. We recommend purchasing brushes with synthetic bristles ranging from size 00 to size 2 for optimal control. Liner brushes excel at creating thin stems for daisy chains and tulip gardens, while flat brushes work beautifully for petal shapes and leaf details.
Dotting tools come in various sizes to create everything from tiny flower centers to bold polka dot patterns. Small dotting tools produce delicate cherry blossom centers and ladybug spots, while larger ones create prominent butterfly wing details. We suggest investing in a dual-ended dotting tool set with at least four different tip sizes for maximum versatility.
Striper brushes deliver precise lines essential for geometric spring patterns and negative space designs. These long, thin brushes maintain consistent paint flow, making them ideal for creating vine patterns and basket weave textures. Fan brushes add texture to designs and work exceptionally well for creating grass effects in Easter basket motifs.
Stamping Plate Options
Floral stamping plates offer intricate botanical designs that capture spring’s essence without requiring advanced painting skills. Popular plates feature cherry blossom branches, tulip gardens, and daisy chains that complement pastel color palettes perfectly. We’ve found that stainless steel plates provide the crispest image transfer and longest durability.
Geometric pattern plates create modern spring looks with clean lines and negative space elements. These plates include triangle patterns, hexagonal designs, and linear motifs that pair beautifully with mint green and lavender color combinations. Reverse stamping techniques allow for multicolored designs using these geometric templates.
Seasonal theme plates specifically designed for spring include butterfly wings, Easter eggs, and nature motifs. Butterfly stamping plates feature detailed wing patterns that eliminate the need for freehand painting while maintaining professional results. Easter-themed plates include bunny silhouettes, egg patterns, and basket weave designs perfect for holiday nail art.
Water Marble Methods
Classic water marble technique creates stunning ombre and gradient effects reminiscent of spring sky patterns. We drop nail polish colors into room temperature water, creating concentric circles before drawing patterns with a toothpick. This method works exceptionally well with pastel combinations like soft pink and peach or baby blue with cream accents.
Gradient marble effects produce subtle color transitions perfect for sunset-inspired designs and cloud patterns. Start with lighter colors in the center and gradually add deeper shades around the edges for natural-looking gradients. Spring colors like mint green flowing into lavender create ethereal, dreamy effects.
Multi-color marble patterns allow for complex rainbow fade designs and tropical sunset effects on a single nail. We recommend using three to four complementary spring colors for optimal visual impact without muddiness. Quick, decisive movements create the most defined patterns, while slower motions produce softer, more blended effects.
Seasonal Nail Care Tips for Spring

Transitioning from winter to spring requires special attention to nail health and preparation. Our nails need extra care after months of cold weather exposure and heavy winter polishes.
Cuticle Maintenance
Cuticle care forms the foundation of stunning spring nail art results. We recommend gently pushing back cuticles with a wooden orange stick after soaking hands in warm water for 3-5 minutes. Moisturizing cuticle oil applications twice daily help restore flexibility and prevent painful hangnails that can ruin perfect manicures.
Dead skin removal becomes crucial during seasonal transitions when cuticles appear dry and overgrown. We suggest using a cuticle remover gel containing alpha hydroxy acids to dissolve excess skin safely. Regular cuticle trimming should only target loose, dead skin rather than healthy tissue to avoid infection risks.
Hydration maintenance requires consistent daily attention throughout spring months. We apply vitamin E enriched cuticle creams before bedtime to promote overnight healing and repair. Fresh spring air can dry out nail beds quickly, making protective cuticle balms essential for outdoor activities and gardening sessions.
Base Coat Preparation
Base coat application creates the perfect canvas for vibrant spring nail art designs. We always start with clean, oil free nail surfaces by wiping each nail with rubbing alcohol or nail dehydrator. Proper surface preparation ensures maximum adhesion and prevents chipping that can ruin delicate floral patterns and pastel gradients.
Ridge filling base coats work wonders for uneven nail surfaces that developed during winter months. We recommend smoothing formulas containing nylon fibers that create perfectly level surfaces for intricate spring designs. Natural nail imperfections disappear under quality ridge fillers, allowing butterfly motifs and geometric patterns to appear flawless.
Strengthening treatments become essential for brittle nails weakened by cold weather exposure. We prefer protein enriched base coats containing keratin and calcium that rebuild nail structure over 7-14 days. Consistent strengthening applications prevent breakage during spring activities like gardening and outdoor sports.
Color correcting base coats help neutralize yellow stains left by dark winter polishes. We use pink tinted formulas to brighten natural nails before applying light spring shades like mint green and lavender. Proper color correction ensures true color payoff for pastel Easter themes and delicate floral designs.
Top Coat Longevity
Top coat selection significantly impacts how long our beautiful spring nail art lasts. We choose fast drying formulas containing UV filters that protect delicate pastel colors from fading in bright spring sunlight. Quick dry technology reduces smudging risks during busy spring schedules filled with outdoor activities and social events.
Application technique determines overall manicure durability and professional appearance. We apply thin, even coats that cover nail art completely while sealing edges to prevent water damage and chipping. Proper edge sealing becomes especially important for gradient designs and negative space patterns that require crisp, clean lines.
Maintenance touch ups extend manicure life by 3-5 additional days when done correctly. We recommend applying fresh top coat every 2-3 days to restore shine and strengthen protective barriers. Regular maintenance prevents minor chips from spreading and keeps intricate spring designs looking salon fresh throughout the week.
Removal preparation helps preserve nail health for future spring nail art sessions. We use acetone free removers containing nourishing oils that dissolve polish without damaging natural nails. Gentle removal techniques prevent peeling and brittleness that can interfere with next week’s butterfly designs or Easter themed manicures.
Conclusion
Spring offers us the perfect opportunity to transform our nails into stunning works of art that celebrate the season’s vibrant energy. From delicate florals to playful Easter themes we’ve explored countless ways to refresh our manicures and embrace the warmer months ahead.
Whether you’re drawn to minimalist designs or bold gradient effects there’s a spring nail art style that perfectly matches your personality and skill level. The key is experimenting with different techniques and finding what makes you feel most confident and creative.
Remember that proper nail care forms the foundation of any beautiful manicure. With the right tools techniques and a little practice you’ll be creating salon-worthy spring nail art from the comfort of your own home.
Frequently Asked Questions
What are the most popular spring nail art trends this year?
The most popular spring nail art trends include fresh floral patterns (cherry blossoms, daisies, tulips), pastel ombre and gradient designs, butterfly and nature-inspired motifs, minimalist dot patterns, and modern twists on French manicures. These designs embrace spring’s vibrant energy while offering both bold and subtle styling options.
Which pastel color combinations work best for spring nails?
The top pastel combinations for spring include mint green with lavender for ombre designs, soft pink with peach for romantic sunset gradients, and baby blue with cream accents for cloud-inspired looks. These pairings create fresh, airy aesthetics that perfectly capture spring’s essence.
How can I create floral nail art at home?
Use fine detail brushes for petals and leaves, dotting tools for flower centers, and stamping plates for intricate patterns. Start with a light base color, then build layers gradually. Practice simple designs like daisies or cherry blossoms before attempting complex botanical motifs.
What tools do I need for DIY spring nail art?
Essential tools include various brush sizes (detail, striper, flat), dotting tools, stamping plates with floral patterns, striping tape for geometric designs, and water marbling supplies. Having quality base and top coats is also crucial for professional-looking results.
How do I maintain healthy nails during spring nail art sessions?
Focus on cuticle care with regular moisturizing and gentle pushing, use strengthening base coats, choose quality top coats for protection, and practice gentle polish removal techniques. Regular maintenance touch-ups help extend manicure life while preserving nail health.
What are some easy Easter-themed nail designs for beginners?
Simple Easter designs include bunny silhouettes on pastel bases, colorful polka dot eggs, and basic basket weave patterns. Use stencils or stamping plates for clean lines, and stick to 2-3 colors per design to avoid overwhelming the look.
How can I make my spring nail art last longer?
Apply a quality base coat, use thin polish layers, seal with a durable top coat, and perform weekly maintenance touch-ups. Avoid harsh chemicals, wear gloves during cleaning, and moisturize cuticles regularly to prevent chipping and extend wear time.
What’s the difference between ombre and gradient nail techniques?
Ombre typically features a smooth transition between two colors, while gradients can incorporate multiple colors blending seamlessly. Both techniques use sponging or brush methods, but gradients often create more complex color stories like sunset or rainbow effects.


