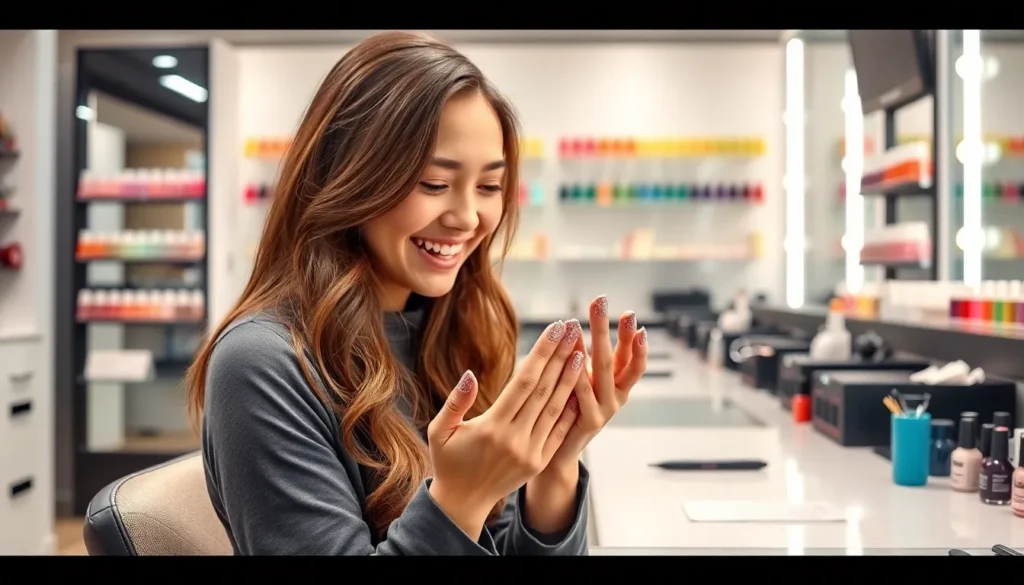
We’ve all been there – staring at our nails and craving something more than basic polish. There’s something magical about sparkly nails that instantly elevates any look from ordinary to extraordinary. Whether you’re prepping for a special occasion or simply want to add some glamour to your everyday style sparkly nail designs deliver that perfect touch of dazzle.
From subtle shimmer that catches the light just right to full-on glitter bomb manicures that command attention we’re diving into the most stunning sparkly nail ideas you’ll want to try immediately. These designs aren’t just about looking pretty – they’re about expressing your personality and making a statement with every gesture.
Ready to transform your fingertips into tiny works of art? We’ve gathered the most gorgeous sparkly nail inspirations that’ll have you booking your next manicure appointment before you finish reading. Let’s explore how a little sparkle can make a big difference in your nail game.
Classic Glitter French Tips for Timeless Sparkle
French tips get a glamorous upgrade when we add sparkly elements to this beloved nail art classic. These sophisticated designs blend traditional elegance with modern shimmer to create manicures that work for any occasion.
Traditional White Base with Silver Glitter
White bases create the perfect canvas for silver glitter accents that catch light beautifully. We recommend applying a crisp white polish first and letting it dry completely before adding the glitter tips. Silver glitter powder works exceptionally well when pressed into slightly tacky topcoat for maximum adherence.
Fine silver glitter creates subtle sophistication while chunky pieces deliver dramatic impact. Start with light application and build up coverage gradually to avoid overwhelming the classic French tip shape. This combination works perfectly for weddings, formal events, and professional settings where understated glamour is essential.
Rose Gold Glitter on Nude Base
Nude bases paired with rose gold glitter offer a warm and romantic twist on traditional French tips. This color combination complements most skin tones and provides versatility for both casual and dressy occasions. Apply your favorite nude shade first and ensure complete opacity before adding the rose gold elements.
Rose gold glitter comes in various sizes from micro-fine to large hexagonal shapes. We suggest mixing different glitter sizes for dimensional texture that catches light from multiple angles. This particular combination photographs beautifully and has become increasingly popular for special events and everyday wear.
Colorful Glitter Tips with Clear Base
Clear bases allow colorful glitter to take center stage while maintaining the classic French tip silhouette. Rainbow glitter creates playful energy while single colors like emerald green or sapphire blue offer sophisticated pops of color. The transparent base lets your natural nail show through while the glitter tips provide the perfect amount of sparkle.
Holographic glitters work exceptionally well with clear bases because they shift colors in different lighting conditions. Apply thin coats of glitter polish or press loose glitter into wet topcoat for the most vibrant results. This approach lets you experiment with bold colors while keeping the overall look balanced and wearable.
Ombré Glitter Nails for Gradient Glamour

Gradient glitter nails create the ultimate sparkly transition from subtle shimmer to full glamour. We’ll explore how to master this sophisticated technique that delivers stunning dimensional effects.
Light to Dark Glitter Fade
Starting with a light base creates the foundation for a perfect glitter gradient. We recommend beginning with fine silver or champagne glitter at the nail bed and gradually building intensity toward the tips. Professional nail artists suggest using a makeup sponge to dab progressively denser layers of darker glitter particles.
Blending multiple shades of the same color family produces seamless transitions. Consider combining light gold with bronze and copper for warm tones, or silver with charcoal and black for cool dramatic effects. We’ve found that using three coordinating shades creates the most natural looking fade.
Application timing makes all the difference for smooth gradients. Work on one nail at a time while the base coat remains slightly tacky for optimal glitter adhesion. We suggest waiting 30 seconds between each gradient layer to prevent smudging while maintaining workability.
Multi-Color Rainbow Ombré
Rainbow gradients transform nails into miniature works of art. We start with red glitter at the cuticle area and transition through orange, yellow, green, blue, and purple toward the nail tips. Each color section should blend seamlessly into the next for a cohesive rainbow effect.
Holographic glitter creates stunning rainbow effects with minimal effort. These special particles reflect multiple colors simultaneously, eliminating the need for individual color application. We particularly love holographic silver or clear glitter over different colored base coats for customizable rainbow shimmer.
Strategic color placement maximizes visual impact on shorter nails. Focus the brightest colors like yellow and orange in the nail center where they’ll be most visible. We recommend using deeper colors like purple and blue near the cuticle and tip areas for balanced proportions.
Glitter Concentration Techniques
Dense packing at the tips creates bold statement nails. We apply multiple thick layers of glitter concentrate at the free edge and gradually thin the application toward the base. This technique works especially well with chunky hex glitter for maximum sparkle impact.
Scattered placement mimics natural light reflection patterns. Random glitter distribution across the nail surface creates organic shimmer that catches light beautifully. We use tweezers to place larger glitter pieces strategically for controlled sparkle placement.
Layering different glitter sizes adds dimensional depth. Start with fine glitter as your base layer, then add medium particles, and finish with larger accent pieces. We’ve discovered that using three different sizes creates the most professional looking gradient with optimal light reflection.
Full Coverage Glitter Nails for Maximum Impact

Bold sparkle enthusiasts know that full coverage glitter nails deliver the ultimate glamorous statement. We’ve perfected techniques that transform your entire nail surface into a dazzling masterpiece.
Fine Glitter Application Methods
Dense packing creates the most opaque sparkly nail coverage when we apply fine glitter particles. Start with a black or dark base color to make the glitter pop more intensely against the darker backdrop. Polish on a thin coat of clear topcoat while it’s still tacky for better glitter adhesion.
Brush application works best when we dip a flat brush into loose fine glitter and press it onto the wet polish surface. Pat the glitter down rather than brushing it to avoid streaking or uneven distribution across the nail bed. Build up coverage gradually with multiple thin layers rather than attempting full opacity in one heavy application.
Sponge dabbing gives us the most even fine glitter distribution for professional looking results. We dampen a makeup sponge slightly and dip it into the glitter before gently pressing it onto each nail. Rotate the sponge between applications to prevent glitter buildup in one spot.
Chunky Glitter Statement Nails
Large hexagon glitter creates the most dramatic sparkly nail impact when we place each piece individually for precision. Use tweezers to position larger glitter pieces exactly where we want them for maximum visual effect. Apply a base coat of complementary color that shows through the gaps between glitter pieces.
Mixed size combinations work beautifully when we layer chunky glitter over fine particles for dimensional depth. Place the largest pieces first then fill gaps with medium sized glitter for complete coverage. Smaller particles help bridge spaces between chunky elements for a cohesive finished look.
Textured layering requires multiple topcoat applications to smooth the surface when we use thick glitter pieces. We apply one coat to secure the glitter then add two more thin coats for a smooth finish. File gently between coats if any glitter edges stick up above the surface level.
Holographic Full Coverage Options
Rainbow prisms shift colors dramatically under different lighting when we choose high quality holographic glitter for full nail coverage. These sparkly nail designs work best over black bases to maximize the color shifting effects. Apply holographic particles while the base coat is still slightly wet for better adhesion.
Linear holographic creates stunning nail art when we align the particles in the same direction during application. Use a small brush to orient each piece of linear holo glitter for consistent light reflection patterns. This technique produces the most dramatic color shifts when fingers move in different positions.
Scattered holographic placement gives us a more natural sparkly look when we apply holo particles randomly across the nail surface. Mix different sizes of holographic glitter for varied reflection points that catch light from multiple angles. We seal everything with a quality topcoat to prevent chipping and maintain the holographic effects.
Accent Nail Sparkle Designs for Subtle Elegance

Accent nails offer the perfect balance between everyday wearability and glamorous sparkle. We’ve curated elegant designs that add just the right amount of shimmer without overwhelming your overall look.
Single Feature Nail Ideas
Choose one nail per hand to showcase your sparkly design while keeping other nails neutral. Selecting your middle finger creates a bold focal point that draws attention without appearing overdone. Apply a nude or clear base coat to remaining nails for a sophisticated contrast that allows your sparkly accent to shine.
Position your glitter accent on the thumb for maximum visibility during daily activities. This placement ensures your sparkly design gets noticed while maintaining professional elegance. Use fine silver or champagne glitter over a matching nude base to create a subtle yet stunning effect.
Create asymmetrical accent placement by choosing different fingers on each hand. Try the ring finger on your dominant hand and the middle finger on your non-dominant hand for an intentionally imperfect look. This modern approach to accent nails feels fresh and contemporary while keeping sparkle levels manageable.
Ring Finger Glitter Accent
Transform your ring finger into a subtle statement piece using delicate glitter application. Apply a sheer pink or nude base coat before adding fine holographic glitter in a light gradient pattern. The ring finger placement feels natural and draws attention to jewelry while maintaining workplace appropriateness.
Layer different glitter sizes on your ring finger to create dimensional sparkle. Start with ultra-fine glitter as your base layer, then add medium-sized hexagonal pieces for texture. Focus the heaviest glitter concentration near the cuticle area and blend outward for a professional fade effect.
Combine matte finish base nails with a glossy glitter ring finger accent. Paint your remaining nails with a matte topcoat in neutral tones like beige, taupe, or soft gray. Your sparkly ring finger becomes the star while the matte finish provides sophisticated contrast that works for any occasion.
Mix and Match Glitter Combinations
Alternate between two complementary glitter shades across your accent nails for visual interest. Use rose gold glitter on your ring finger and silver glitter on your thumb to create a harmonious yet varied look. Keep your remaining nails in a coordinating neutral shade to tie the design together.
Combine different glitter textures on alternating hands for a curated manicure approach. Apply fine shimmer glitter to your left ring finger and chunky holographic pieces to your right ring finger. This technique creates intentional asymmetry that feels modern and artistic while maintaining subtle elegance.
Mix warm and cool glitter tones strategically across your chosen accent nails. Pair champagne glitter with soft blue shimmer or combine copper tones with sage green sparkle for unexpected sophistication. Balance these contrasting accents with a unifying neutral base color on your remaining nails to maintain cohesion.
Geometric Glitter Patterns for Modern Appeal

Clean lines and structured shapes create striking sparkly nail designs that perfectly capture contemporary style. We’ll show you how to achieve these sophisticated geometric patterns that transform basic glitter into architectural art on your nails.
Striped Glitter Designs
Vertical glitter stripes elongate your nails while adding structured sparkle to any manicure. Apply your base color first, then use striping tape to create perfectly straight lines before filling each section with different glitter shades like silver, gold, and rose gold.
Horizontal stripe patterns offer a bold geometric look that works beautifully with contrasting glitter colors. Paint alternating bands using fine brushes, spacing each glitter stripe evenly across the nail surface for a balanced appearance.
Diagonal glitter lines create ever-changing movement and visual interest on shorter nail lengths. Start from one corner and work across at a 45 degree angle, using metallic glitters in copper, bronze, or platinum for maximum impact.
Mixed width striping combines thick and thin glitter bands for a contemporary asymmetrical design. Vary your stripe widths from 2mm to 5mm, alternating between dense chunky glitter and fine shimmer particles for textural contrast.
Triangle and Diamond Shapes
Pointed triangle tips replace traditional French manicures with angular geometric flair using holographic glitter. Create sharp triangular points at each nail tip, filling the space with dense glitter application for a futuristic finish.
Diamond accent placements position geometric shapes strategically on ring fingers or thumbs as statement pieces. Use nail stencils to achieve perfect diamond outlines, then pack fine glitter tightly within the borders for crisp, clean edges.
Negative space triangles combine bare nail areas with glitter filled sections for modern minimalist appeal. Leave triangular sections of your natural nail exposed while surrounding them with gradient glitter applications in complementary shades.
Interconnected geometric patterns link multiple triangular shapes across your nail surface for complex artistic designs. Connect each triangle with thin glitter lines using a detail brush, creating web like patterns that catch light beautifully.
Half-Moon Glitter Applications
Reverse half moon designs flip traditional cuticle area patterns by placing glitter crescents at your nail tips instead. Use curved nail guides to create perfect semicircles, filling them with dense micro glitter in jewel tones like emerald, sapphire, or ruby.
Double half moon techniques layer two crescent shapes in different glitter colors for dimensional geometric appeal. Apply the larger half moon first in a neutral shade, then add a smaller inner crescent using contrasting glitter for sophisticated layering.
Off center moon placements position your glitter crescents asymmetrically for contemporary artistic effects. Shift the half moon shape toward one side of your nail, creating an unbalanced yet visually striking geometric pattern.
Gradient half moon fades blend glitter density from opaque at the curve to transparent at the edges for soft geometric transitions. Use makeup sponges to dab and blend the glitter particles, creating seamless fades that maintain the crescent shape definition.
Holiday-Themed Sparkly Nail Ideas

Holiday seasons call for extra glamorous nail designs that capture the festive spirit. These sparkly combinations help us celebrate special occasions with nails that perfectly match our holiday outfits and mood.
Christmas Red and Gold Combinations
Classic Christmas colors create stunning sparkly manicures that embody holiday elegance. We recommend pairing deep crimson red bases with fine gold glitter for a traditional festive look that works beautifully for holiday parties and family gatherings.
Alternating red and gold accent nails provide a sophisticated approach to Christmas nail art. Apply metallic gold glitter polish on your ring and middle fingers while keeping the remaining nails in rich red for a balanced design that isn’t overwhelming.
Ombré Christmas gradients blend red and gold seamlessly from cuticle to tip. Start with a red base coat and use a makeup sponge to dab gold glitter concentrate toward the tips, creating a natural fade that catches light beautifully under holiday decorations.
Christmas tree inspired designs feature gold glitter triangles on red bases. Use striping tape to create clean triangular shapes and fill them with dense gold glitter for a festive geometric pattern that celebrates the season.
New Year’s Eve Silver and Black
Midnight celebrations demand bold sparkly combinations that reflect the glamour of New Year’s festivities. We suggest mixing jet black bases with silver glitter accents to create sophisticated manicures perfect for champagne toasts and countdown celebrations.
Full coverage silver glitter nails paired with black accent fingers create dramatic contrast. Apply chunky silver holographic glitter densely on three nails while keeping your ring and thumb fingers in glossy black for an elegant statement look.
Black to silver ombré gradients capture the essence of midnight transitions. Begin with black polish at the cuticle and blend upward with fine silver glitter using a sponge application technique that mimics the sparkle of fireworks against a dark sky.
Geometric silver patterns on black offer modern New Year’s sophistication. Create diagonal stripes, triangular sections, or half moon designs using silver glitter tape and filling designated areas with dense metallic sparkle for contemporary holiday nail art.
Valentine’s Day Pink and Rose Gold
Romantic celebrations inspire soft sparkly designs that complement the love filled atmosphere. We love combining blush pink bases with rose gold glitter accents to create feminine manicures that perfectly capture Valentine’s Day romance.
Soft pink bases with rose gold tips modernize traditional French manicures for romantic occasions. Apply sheer pink polish as your base and create curved smile lines using fine rose gold glitter for a delicate look that pairs beautifully with romantic dinner outfits.
Heart shaped rose gold accents on pink backgrounds add playful romance to your manicure. Use heart shaped stencils or freehand small heart designs with dense rose gold glitter on one or two accent nails while maintaining pink polish on remaining fingers.
Pink to rose gold gradient fades create dreamy romantic effects. Start with light pink at the cuticle and gradually blend rose gold glitter toward the tips using circular dabbing motions with a makeup sponge for a sunset inspired romantic look.
Mixed pink and rose gold glitter coverage provides full glamour for Valentine’s celebrations. Alternate between cotton candy pink glitter and rose gold glitter on different nails, or layer both shades together for dimensional sparkle that captures light beautifully during romantic candlelit dinners.
Textured Glitter Nail Art Techniques

Textured glitter techniques add dimensional depth to sparkly manicures beyond traditional flat applications. We’ll explore three standout methods that create stunning tactile effects while maximizing visual impact.
Sugar Coat Glitter Effect
Creating the sugar coat technique starts with applying a base color and layering coarse glitter while the polish remains tacky. We recommend using granulated glitter particles that range from 0.5mm to 1mm in diameter for the most authentic sugar crystal appearance. Press the glitter gently into the wet base coat using a silicone tool or clean finger to ensure proper adhesion without disturbing the underlying color.
Building layers gradually produces the most realistic sugar texture effect. Apply thin coats of clear top coat between glitter layers to create varying heights and depths. We suggest using three to four layers of different glitter sizes, starting with the largest particles as your foundation and finishing with fine sparkles for fill coverage.
Sealing the sugar coat effect requires patience and the right finishing products. Use a thick gel top coat applied in thin layers to avoid displacing the textured glitter. We recommend curing each layer under LED light for 30 seconds if using gel products, or allowing 5 minutes drying time between coats with traditional polish.
Caviar Bead Applications
Caviar beads transform ordinary manicures into luxurious textured masterpieces using tiny spherical embellishments. We source premium micro beads ranging from 0.6mm to 1.5mm in diameter for optimal coverage and durability. Apply these beads over wet polish or specialized bead adhesive for maximum staying power.
Placement techniques determine the final caviar effect’s sophistication and wearability. Dense application creates full coverage luxury, while scattered placement offers subtle elegance for everyday wear. We recommend using tweezers or a bead picker tool for precise placement on accent nails, and the rolling method for full coverage applications.
Color coordination elevates caviar bead designs from basic to breathtaking. Monochromatic schemes using silver beads over gray bases create understated elegance. We prefer contrasting combinations like gold beads over deep burgundy or holographic beads over black for maximum visual impact.
Maintenance tips ensure caviar manicures last longer than standard applications. Apply cuticle oil daily to prevent bead loosening and avoid harsh chemicals that can dissolve adhesive bonds. We suggest gentle filing to smooth any raised edges and reapplying top coat weekly to maintain the textured finish.
Mixed Media Sparkle Designs
Combining different textural elements creates unique sparkly nail art that stands apart from single technique applications. We blend fine glitter, chunky hexagons, caviar beads, and metallic foils within single designs for maximum dimensional impact. Layer each element strategically to avoid overwhelming the nail surface while maintaining visual balance.
Strategic placement maximizes mixed media effectiveness without creating chaos. Establish focal points using larger elements like rhinestones or chunky glitter as anchors. We recommend filling surrounding areas with complementary fine sparkles and using linear elements like striping tape to create structure and flow.
Color harmony prevents mixed media designs from appearing cluttered or disconnected. Choose a cohesive palette of three colors maximum and vary the textures within that scheme. We prefer metallic themes combining rose gold glitter, copper beads, and bronze foil for warm elegance, or cool palettes featuring silver, holographic, and crystal elements.
Application order affects the final mixed media outcome significantly. Start with your base sparkle layer, add medium sized elements, and finish with fine details and topmost accents. We apply each component while previous layers remain slightly tacky to ensure proper adhesion and seamless integration between different textural elements.
DIY Sparkly Nail Application Tips

Mastering sparkly nail art at home requires the right tools and proven techniques to achieve salon-quality results.
Essential Tools and Supplies
We recommend gathering high-quality nail files in 180/240 grit for shaping and smoothing the nail surface. Cuticle pushers and nippers help create clean nail beds that showcase glitter more effectively. Base coat serves as the foundation for better glitter adhesion and prevents staining.
Glitter application tools include makeup sponges for ombré effects, flat brushes for precise placement, and tweezers for positioning chunky glitter pieces. Small detail brushes work perfectly for geometric patterns and accent designs. Dotting tools create perfect circles and help with glitter positioning.
Top coat varieties include quick-dry formulas for everyday wear, gel topcoats for extended durability, and matte finishes for unique texture contrasts. We suggest having both thin and thick consistency top coats available. Glitter-exact top coats contain filling agents that smooth textured surfaces.
Acetone and rubbing alcohol ensure proper nail preparation by removing oils and residue. Cotton pads and aluminum foil streamline the removal process. LED or UV lamps become necessary when using gel-based glitter polishes.
Step-by-Step Application Process
Preparation starts with pushing back cuticles and filing nails to your desired shape. Clean the nail surface with rubbing alcohol to remove any oils or debris. Apply a thin base coat and let it dry completely before proceeding.
Glitter application varies by technique but follows similar principles for best results. Press fine glitter onto wet polish using a makeup sponge for even distribution. Place chunky glitter pieces individually with tweezers while the base is still tacky. Build coverage gradually with multiple thin layers rather than one thick application.
Ombré technique requires dabbing glitter-loaded sponges from the nail tip toward the cuticle in gentle pressing motions. Blend colors by overlapping application areas while the polish remains workable. Clean the sponge between color changes to prevent muddy results.
Geometric patterns need steady hands and proper tools for clean lines. Use tape or nail vinyls as guides for straight edges and sharp angles. Apply glitter within defined areas using small brushes or dotting tools. Remove guides while the polish is slightly wet for crisp lines.
Sealing and Longevity Techniques
Top coat application determines how long your sparkly manicure will last and how smooth it feels. Apply the first thin layer to encapsulate loose glitter particles. Allow complete drying before adding a second coat for durability. We use three coats total for heavily textured glitter nails.
Edge sealing prevents premature chipping by wrapping the top coat around the nail tip. Paint the free edge of each nail with top coat to create a protective barrier. This technique works especially well for glitter French tips and ombré designs.
Maintenance practices extend wear time significantly when followed consistently. Wear gloves during household chores to protect the manicure from harsh chemicals and impacts. Apply cuticle oil daily to keep the nail area hydrated and flexible. Touch up small chips immediately with matching glitter and top coat.
Removal preparation makes future manicure changes easier and less damaging. File away thick top coat layers before soaking in acetone. Wrap each nail in acetone-soaked cotton and aluminum foil for 10-15 minutes. Gently push off softened glitter rather than scraping aggressively.
Professional Sparkly Nail Inspiration

We’re elevating our sparkly nail game by exploring techniques and trends that deliver professional-quality results worthy of any high-end salon or red carpet event.
Salon-Quality Finishing Tips
Professional base preparation starts with meticulous cuticle care and surface smoothing using a high-grit buffer. We apply a dehydrating agent before our base coat to ensure maximum adhesion and prevent lifting around the nail edges.
Glitter application precision requires steady hands and the right tools, including fine-tipped brushes for detailed placement and flat brushes for even distribution. We work in thin layers, building up intensity gradually rather than applying thick coats that create bumps and texture issues.
Top coat mastery involves using professional-grade sealers that encapsulate glitter particles completely without dulling their sparkle. We apply two thin coats, allowing each to cure properly under LED lights for chip-resistant wear that lasts up to three weeks.
Edge sealing techniques prevent premature chipping by wrapping the top coat around nail tips and carefully painting along the cuticle line. We use cleanup brushes dipped in acetone for crisp, salon-perfect lines that frame each nail beautifully.
Celebrity Sparkle Nail Trends
Hollywood A-listers currently favor subtle holographic accents that shift colors under different lighting conditions, creating ever-changing looks perfect for camera flashes. Stars like Zendaya and Emma Stone showcase these iridescent designs at major premieres and award shows.
Social media influencers drive trends toward mixed-metal combinations, pairing rose gold with silver glitter for dimensional effects that photograph beautifully under ring lights. We’re seeing chrome powder overlays combined with chunky glitter pieces for maximum visual impact on platforms like Instagram and TikTok.
Music industry icons embrace bold statement nails featuring oversized glitter pieces and 3D embellishments that complement their performance outfits. Artists like Dua Lipa and Billie Eilish popularize geometric glitter patterns and negative space designs that balance edginess with elegance.
Fashion week models sport minimalist sparkle designs that complement haute couture collections without overwhelming the overall aesthetic. We notice clean glitter gradients and single accent nails becoming signature looks for runway presentations worldwide.
Red Carpet Glitter Manicures
Award show elegance demands sophisticated glitter placements that photograph flawlessly under intense camera lighting and complement designer gowns. We create custom color matches using fine glitter powders that enhance jewelry tones and dress fabrics seamlessly.
Premiere night glamour showcases dramatic full-coverage designs using premium holographic glitters that create rainbow effects under spotlights. These manicures feature precise application techniques that ensure every nail catches light perfectly from multiple angles.
Gala event sophistication calls for understated sparkle that adds luxury without competing with statement accessories or bold makeup looks. We apply delicate glitter fades concentrated near cuticles or tips, creating subtle dimension that enhances overall styling choices.
Festival circuit style embraces playful glitter combinations that reflect the celebratory atmosphere while maintaining photo-ready perfection throughout long events. These designs incorporate multiple glitter sizes and complementary color palettes that remain vibrant under various lighting conditions.
Conclusion
Sparkly nails offer endless possibilities for transforming your manicure from basic to breathtaking. Whether you’re drawn to subtle shimmer for everyday elegance or bold glitter statements for special occasions we’ve covered techniques that’ll help you achieve stunning results at home.
From classic French tips with a glittery twist to geometric patterns and textured designs there’s a sparkly style for every personality and skill level. The key lies in choosing quality materials using proper application techniques and taking time with preparation and sealing.
We encourage you to experiment with different glitter sizes colors and placement techniques to discover your signature sparkly look. With practice and the right tools you’ll create professional-quality manicures that rival any salon visit while expressing your unique style through dazzling nail art.
Frequently Asked Questions
What are the best glitter types for sparkly nail designs?
Fine glitter works best for subtle shimmer and smooth application, while chunky glitter creates bold statement effects. Holographic glitter offers stunning color shifts and rainbow effects. For professional results, choose high-quality cosmetic-grade glitters that won’t fade or bleed. Mix different sizes for added depth and dimension.
How do I apply glitter nails without making a mess?
Use a makeup sponge or small brush for controlled application. Apply glitter over tacky base coat for better adhesion. Work over a paper towel to catch excess glitter, and use tape around nails to protect skin. Apply thin layers and build up gradually for even coverage.
How long do sparkly nail designs typically last?
With proper application and quality products, sparkly nails can last 7-14 days. Use a strong base coat, apply glitter in thin layers, and seal with 2-3 coats of top coat. Avoid water exposure for 24 hours after application and wear gloves during household tasks to extend wear time.
Can I create sparkly nails at home or do I need a salon?
You can absolutely create stunning sparkly nails at home with the right tools and techniques. Essential supplies include quality base coat, various glitters, application tools, and good top coat. Follow proper preparation steps, take your time with application, and practice different techniques for salon-quality results.
What’s the easiest sparkly nail design for beginners?
Accent nail designs are perfect for beginners – apply glitter to just one nail per hand while keeping others neutral. Glitter French tips are also beginner-friendly, requiring only precise application at nail tips. Start with fine glitter for easier handling and smoother results before progressing to chunkier textures.
How do I remove glitter nail polish effectively?
Soak cotton balls in acetone nail polish remover and place on each nail. Wrap fingertips in foil and let sit for 10-15 minutes to soften the glitter. Gently push off loosened polish with a cuticle pusher. Follow with nail oil and moisturizer to restore nail health after removal.
What colors work best with different glitter shades?
Silver glitter complements cool tones like blues, purples, and classic whites. Gold glitter pairs beautifully with warm colors like reds, oranges, and nude shades. Rose gold works with pinks and neutral tones. For versatility, clear or holographic glitter works with any base color.
Are sparkly nails appropriate for professional settings?
Subtle sparkly designs can work in professional environments. Choose fine glitter in neutral shades, accent nail designs, or delicate glitter French tips. Avoid chunky glitter or overly bold designs. Nude bases with light shimmer or single accent nails strike the perfect balance between professional and stylish.


