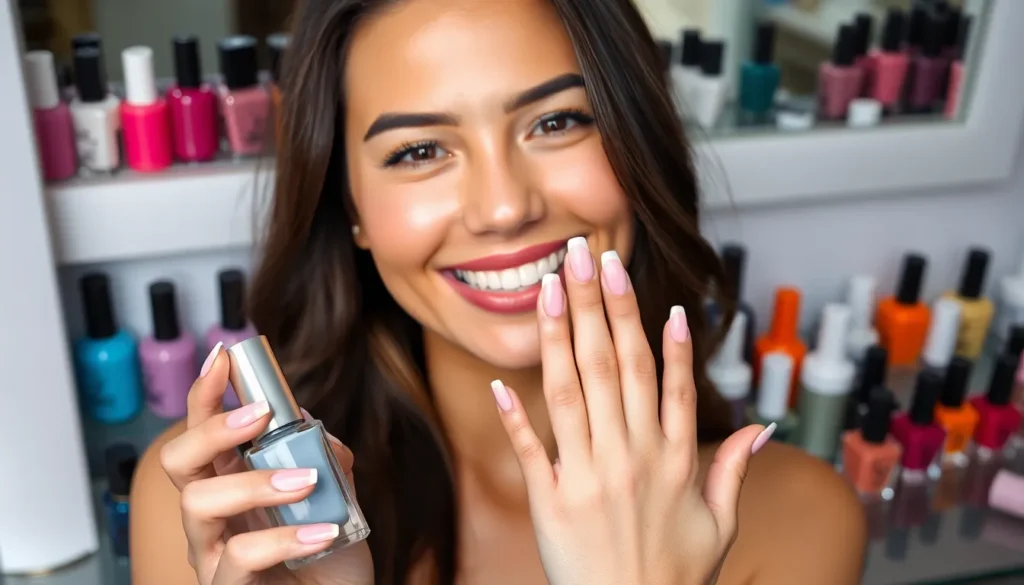
Looking for stunning nail designs that won’t expensive or require professional expertise? We’ve all been there – scrolling through Instagram admiring gorgeous manicures while thinking they’re way too complicated to recreate at home. The truth is, you don’t need years of experience or expensive tools to achieve salon-worthy nails.
Simple nail art can be just as eye-catching as elaborate designs. From classic French tips with modern twists to minimalist geometric patterns, there are countless ways to elevate your nails without the stress. We’re here to prove that beautiful nails are achievable for everyone, regardless of skill level or budget.
Classic French Manicure With a Modern Twist
The timeless French manicure gets an exciting makeover with these contemporary approaches that maintain elegance while adding personality.
Colored Tips Instead of White
Swap traditional white tips for vibrant colors that complement your outfit or mood. Bold reds create a striking contrast against nude bases, while soft pastels like lavender or mint green offer a feminine touch. Neon shades work exceptionally well for summer events, and deep jewel tones provide sophisticated options for evening occasions.
Apply your chosen color using thin nail art brushes for precise lines, or use nail guides for perfectly straight edges. Metallic shades like rose gold or silver add luxurious appeal to any look. Consider seasonal colors such as coral for spring or burgundy for fall to keep your manicure fresh and current.
Geometric French Lines
Replace curved smile lines with angular geometric shapes for an edgy modern update. Diagonal lines create ever-changing movement across each nail, while zigzag patterns add playful energy to the classic design. V-shaped tips offer a contemporary twist that elongates fingers beautifully.
Create these shapes using striping tape as your guide, ensuring clean lines every time. Triangle formations work particularly well on shorter nails, while diamond shapes suit longer nail beds perfectly. Experiment with negative space by leaving portions of your natural nail visible between geometric sections.
Glitter Accent French Tips
Transform ordinary French tips into dazzling focal points with strategic glitter placement. Fine glitter mixed into clear polish creates subtle sparkle that catches light beautifully, while chunky glitter pieces make bold statement nails. Apply glitter only to the tip area for classic French proportions, or extend it halfway down each nail for dramatic impact.
Layer different glitter sizes for dimensional effects that photograph beautifully under various lighting conditions. Holographic glitters shift colors as you move your hands, creating mesmerizing visual interest. Seal glitter applications with high-quality top coat to prevent chipping and maintain smooth texture throughout wear.
Minimalist Nail Art Designs
 1")
Minimalist nail art proves that less is truly more when it comes to creating elegant manicures. These understated designs require minimal tools while delivering maximum impact for your everyday look.
Single Accent Nail
Creating a single accent nail transforms your entire manicure with just one decorated finger. We recommend choosing your ring finger as the focal point since it naturally draws attention without overwhelming the overall design.
Paint four nails in a neutral base color like nude, soft pink, or classic white. Select a contrasting shade for your accent nail such as metallic gold, deep burgundy, or navy blue to make it pop against the subtle background.
Apply the accent color using steady strokes and allow it to dry completely. Add simple embellishments like a single rhinestone, thin metallic stripe, or small geometric shape to enhance the design without creating visual clutter.
Thin Line Art
Mastering thin line art requires nothing more than a fine detail brush or striping pen to create sophisticated patterns. We suggest starting with simple vertical or horizontal lines before progressing to more complex geometric designs.
Draw clean lines by resting your hand on a flat surface and moving the brush in one smooth motion. Create modern looks using parallel lines, intersecting angles, or abstract shapes across one or two nails for subtle visual interest.
Experiment with different line thicknesses by varying the pressure on your brush or using multiple tools. Combine thin metallic lines with matte base colors for a contemporary contrast that elevates any basic manicure.
Dot Patterns and Polka Dots
Making perfect dots requires only a dotting tool or the end of a bobby pin for consistently sized circles. We find that varying dot sizes creates more ever-changing patterns than using uniform circles throughout the design.
Space dots evenly across the nail surface or cluster them near the cuticle area for a gradient effect. Choose contrasting colors like white dots on black polish or soft pastels on clear base coats for subtle elegance.
Layer different sized dots to create depth and texture in your design. Position larger dots as focal points with smaller dots filling negative space for balanced composition that feels intentional rather than random.
Easy Gradient and Ombre Effects
 2")
Gradient and ombre effects create stunning color transitions that elevate any manicure from ordinary to extraordinary. These techniques work perfectly as accent nails or full manicure statements.
Two-Color Gradient Technique
Apply your lighter base color across the entire nail and let it dry completely. Choose two complementary shades like soft pink and coral or navy blue and sky blue for the most seamless blending. Paint both colors onto a makeup sponge side by side, ensuring they slightly overlap where you want the transition to occur.
Press the sponge gently onto your nail, starting from the cuticle and rolling toward the tip in a smooth motion. Repeat this process 2-3 times, allowing each layer to partially dry between applications. Clean up the excess polish around your nail using a small brush dipped in acetone.
Finish with a high-quality top coat to smooth out any texture from the sponge application. This technique works beautifully with seasonal color combinations like burgundy to gold for fall or mint green to white for spring.
Sponge Gradient Method
Start with a white or nude base coat to make your gradient colors appear more vibrant and true to tone. Cut a small piece of makeup sponge, ensuring it’s slightly wider than your nail for easier application. Apply your chosen colors directly onto the sponge in horizontal stripes, working quickly before the polish begins to dry.
Dab the sponge onto your nail using a bouncing motion rather than dragging, which prevents streaking. Build up the color intensity with multiple light layers instead of trying to achieve full opacity in one application. Use a fan brush or small detail brush to blend any harsh lines between colors while the polish is still slightly wet.
Seal the design with two thin coats of clear top coat for a professional finish. Popular color combinations include purple to pink gradients, ocean blues transitioning to seafoam green, or classic black to silver for an edgy look.
Sunset Ombre Nails
Create this Instagram worthy design by selecting three to four warm tones that mimic a natural sunset progression. Apply yellow as your base color, followed by orange in the middle section, and finish with deep coral or red at the tips. Use the sponge technique but work with smaller sections to achieve distinct color bands.
Blend each color while it’s still wet using gentle dabbing motions with a clean sponge. Add a touch of gold glitter polish over the yellow section to create that sun kissed glow effect. Consider using peach, orange, magenta, and deep purple for a more dramatic sunset interpretation.
Perfect this look by applying cuticle oil after your manicure is complete to enhance the overall health and appearance of your nails. The sunset ombre effect pairs beautifully with summer outfits and vacation photos, making it a versatile choice for special occasions.
Simple Geometric Patterns
 3")
Geometric nail designs offer endless possibilities for creating striking looks with basic shapes and clean lines. These patterns work perfectly as standalone designs or combined with the gradient techniques we’ve explored.
Triangle Accent Designs
Triangle patterns create modern focal points that transform ordinary manicures into contemporary statements. We recommend starting with a neutral base like beige or soft pink, then adding triangular shapes using contrasting colors such as black, navy, or metallic gold.
Creating precise triangular shapes requires steady hands and the right tools. Use striping tape to mask off triangular sections, ensuring clean edges when you remove the tape after painting. Apply thin coats of polish within the taped area, allowing each layer to dry completely before adding the next.
Placement strategies make triangle designs versatile for any occasion. Position single triangles at the base of each nail for a subtle accent, or create multiple triangular segments across the nail surface for bold geometric impact. Corner triangles work beautifully on shorter nails, while longer nails accommodate larger triangular patterns.
Color combinations enhance the visual appeal of triangle accent nails. Pair soft pastels with crisp white triangles for spring looks, or combine deep jewel tones with silver triangular accents for evening elegance. Matte topcoats over glossy triangular sections create interesting texture contrasts.
Striped Nail Art
Striped patterns bring classic sophistication to any manicure while remaining surprisingly simple to execute. We’ve found that vertical stripes elongate the appearance of nails, while horizontal stripes create width and visual interest.
Vertical stripe techniques start with applying your base color and allowing it to dry completely. Use striping brushes or nail art pens to draw parallel lines from cuticle to tip, maintaining consistent spacing between each stripe. Metallic stripes over dark bases create elegant evening looks, while pastel stripes on white bases offer fresh daytime appeal.
Horizontal striping methods involve creating bands across the nail surface using tape guides for precision. Apply your base coat, place thin strips of tape horizontally across the nail, then paint over with your accent color. Remove the tape while the polish is still slightly wet to prevent peeling.
Mixed stripe patterns combine different stripe widths and directions for ever-changing results. Alternate thick and thin stripes, or create plaid effects by layering horizontal stripes over vertical ones using sheer polishes. Rainbow stripes using multiple bright colors make playful summer statements.
Half-Moon Manicures
Half-moon designs recreate vintage glamour with contemporary twists that suit modern tastes perfectly. We love how these crescents frame the cuticle area while allowing creative color play across the nail surface.
Classic half-moon application begins with creating the curved shape at the nail base. Use round reinforcement stickers or nail guides to mask the half-moon area, then apply your main color over the exposed portion. Remove the guides while polish remains tacky for clean curved lines.
Reverse half-moon variations flip the traditional design by painting the crescent shape instead of leaving it bare. Apply your base color first, then use guides to create the half-moon accent in contrasting shades. This technique works beautifully with glitter polishes or holographic finishes in the crescent area.
Color pairing ideas elevate half-moon manicures from simple to stunning. Try nude bases with gold half-moons for understated luxury, or black bases with silver crescents for dramatic evening looks. Seasonal combinations like coral bases with white half-moons capture summer freshness, while burgundy bases with cream crescents embody autumn elegance.
Advanced half-moon techniques include double crescents using two different accent colors, or negative space designs where the natural nail shows through the crescent area. These variations add complexity while maintaining the clean geometric aesthetic that makes half-moon manicures timelessly appealing.
Quick and Easy Nail Stickers
 4")
Nail stickers offer an instant way to achieve professional-looking designs without any artistic skills required. We’ll show you how different sticker types can transform your manicure in minutes.
Floral Sticker Applications
Floral stickers create romantic and feminine nail designs that work perfectly for spring and summer occasions. We recommend applying these delicate designs over a light base color like nude, pink, or white to make the flowers pop. Small rose stickers look stunning when placed on the ring finger as an accent nail, while larger botanical designs work best across all nails for a cohesive garden-inspired look.
Position floral stickers slightly off-center for a more natural and organic appearance. We suggest pressing each sticker firmly from the center outward to eliminate air bubbles and ensure smooth application. Top coat application is crucial for floral stickers since it prevents the edges from lifting and extends the life of your manicure by up to five days.
Metallic Accent Stickers
Metallic stickers add instant glamour and sophistication to any nail color combination. We love using gold geometric shapes over deep burgundy or navy bases for an elegant evening look. Silver striping tape creates clean lines that transform basic manicures into modern art pieces, while copper accents complement warm-toned nail polishes beautifully.
Apply metallic stickers after your base color has completely dried to prevent smudging or color bleeding. We recommend using tweezers for precise placement of small metallic elements like studs or tiny geometric shapes. Holographic stickers catch light differently throughout the day, creating a ever-changing rainbow effect that works especially well over black or dark purple bases.
Seasonal Themed Stickers
Seasonal stickers keep your manicures fresh and relevant throughout the year while requiring minimal effort to apply. We switch to snowflake and winter-themed stickers during colder months, applying them over icy blue or silver bases for a frosty effect. Halloween designs like tiny pumpkins or bats create playful October manicures when paired with orange, black, or deep purple polish.
Summer fruit stickers bring tropical vibes to your nails when placed over bright coral or yellow backgrounds. We recommend mixing different seasonal elements on each nail for variety, such as combining palm trees with flamingo stickers for a vacation-inspired look. Spring butterfly and flower combinations work beautifully over pastel green or lavender bases, creating fresh seasonal transitions that celebrate new beginnings.
Monochrome Color Schemes
 5")
Monochrome nail designs prove that sophistication comes from simplicity. We’ve discovered that single-color schemes create timeless elegance while remaining effortlessly chic.
All-Black Minimalist Look
Black nails deliver bold sophistication with minimal effort required. We recommend using a high-quality black polish like OPI’s “Black Onyx” or Essie’s “Licorice” for full opacity in two coats. Matte top coats transform glossy black into modern velvet finishes that feel contemporary and edgy.
Accent techniques elevate basic black manicures beyond simple solid colors. We suggest adding a single rhinestone to ring finger nails for subtle sparkle. Thin silver striping tape creates geometric lines that break up the darkness while maintaining the minimalist aesthetic. Negative space designs work beautifully with black polish, leaving strategic areas unpainted for striking contrast.
Different black finishes create varied moods within the same color family. We’ve found that glossy black appears formal and dramatic, perfect for evening events. Matte black feels more casual and artistic, ideal for everyday wear. Chrome black polish adds futuristic elements that catch light beautifully under different lighting conditions.
Pure White Elegance
White manicures embody fresh, clean sophistication that complements every outfit and occasion. We prefer creamy white polishes like Essie’s “Blanc” or Sally Hansen’s “White On” for smooth, streak-free application. Two thin coats provide better coverage than one thick application, preventing brush marks and bubbles.
Texture variations transform simple white nails into interesting focal points. We love adding subtle shimmer with white pearl polishes that catch light softly. Matte white creates modern, editorial looks that photograph beautifully on social media. Glossy white appears classic and timeless, perfect for weddings and formal events.
Strategic accent additions enhance white base colors without overwhelming the clean aesthetic. We suggest tiny gold dots placed randomly across nails for delicate detail. Thin nude or clear stripes create subtle dimension while maintaining the monochromatic theme. Single crystal placements on accent nails add just enough sparkle for special occasions.
Neutral Beige Tones
Beige nail colors offer versatility that works with every skin tone and wardrobe choice. We recommend shades like OPI’s “Bubble Bath,” Essie’s “Sand Tropez,” or Sally Hansen’s “Nude Now” for universally flattering options. These neutral tones elongate fingers while providing subtle polish that enhances natural nail beauty.
Different beige undertones create distinct looks within the neutral family. We’ve discovered that pink-based beiges appear warmer and more romantic, perfect for spring and summer seasons. Gray-based beiges feel cooler and more modern, ideal for professional settings. Yellow-based beiges complement warm skin tones beautifully while appearing naturally healthy.
Layering techniques add depth to beige manicures without breaking the monochromatic scheme. We suggest applying a slightly darker beige shade to nail tips for subtle gradient effects. Thin champagne stripes create elegant detail that catches light softly. Matte top coats over glossy beige create interesting texture contrasts that feel contemporary and sophisticated.
Textured Nail Finishes
 6")
Texture transforms ordinary manicures into dimensional works of art that catch light and attention in unique ways.
Matte Top Coat Effects
Matte finishes create sophisticated looks that instantly modernize any nail color. We recommend applying your base color as usual, then sealing it with a high-quality matte top coat for an elegant velvety appearance.
Bold colors become more wearable when given a matte finish, making vibrant reds and deep purples appear refined rather than flashy. We’ve found that neon shades particularly benefit from this technique, as the matte coating tones down their intensity while maintaining visual impact.
Contrast techniques amplify the matte effect by combining glossy and matte finishes on the same nail. We suggest painting your entire nail with regular polish, then using striping tape to section off areas before applying matte top coat to create striking geometric patterns.
Glitter Accent Nails
Glitter placement strategies maximize impact without overwhelming your overall look. We focus glitter application on one or two accent nails, typically the ring fingers, to create balanced visual interest across both hands.
Layering different glitter sizes creates depth and dimension that catches light beautifully. We start with fine glitter as a base layer, then add medium-sized pieces for texture, finishing with a few large glitter flakes as focal points.
Application techniques ensure smooth results and prevent chunky, uneven coverage. We use a small brush to place glitter precisely where we want it, then seal everything with two thin coats of clear top coat to create a smooth surface.
Velvet Powder Techniques
Velvet powder creates luxurious texture that feels as good as it looks when applied correctly. We apply a base coat, followed by colored polish, then immediately sprinkle velvet powder over the wet polish using a small spoon or shaker.
Color coordination enhances the velvet effect by matching or complementing the powder with your base polish. We’ve discovered that using slightly darker powder than your base color creates subtle depth, while contrasting colors make bold statements.
Finishing touches preserve the texture while ensuring longevity of your velvet manicure. We gently tap off excess powder with a clean brush, then avoid using top coat on the velvet areas to maintain the distinctive fuzzy texture that makes this technique so appealing.
Nature-Inspired Simple Designs
 7")
Nature provides endless inspiration for elegant nail art that connects us to the beauty of the outdoors. These organic designs bring tranquility and sophistication to our manicures without requiring advanced artistic skills.
Leaf Pattern Accents
Creating delicate leaf patterns transforms our nails into miniature botanical gardens. We can achieve these elegant accents using a thin detail brush dipped in green or gold polish, starting with simple oval shapes and adding a central vein line. Drawing inspiration from real leaves like eucalyptus or fern fronds gives us natural templates to follow.
Different leaf shapes offer varied aesthetic appeals for our designs. Oak leaves work beautifully with autumn color palettes of burnt orange and deep reds, while palm fronds create tropical vibes with bright greens and corals. We’ll find that alternating leaf directions across our nails creates organic movement that mimics how leaves naturally fall.
Layering multiple leaf sizes adds depth to our botanical manicures. Start with larger leaves as base elements, then overlay smaller ones in complementary shades. This technique works especially well when we use translucent polishes that allow underlying colors to show through, creating realistic leaf transparency effects.
Simple Floral Motifs
Five petal flowers represent the easiest floral designs for beginners to master. We create these charming blooms using a dotting tool or bobby pin, placing five small dots in a circular pattern and connecting them with gentle curves. Cherry blossoms work perfectly with this technique using soft pink or white polish on nude bases.
Tiny daisy chains transform single accent nails into delightful garden scenes. We paint small white petals radiating from yellow centers, linking multiple flowers with thin green stems. This design pairs beautifully with spring color palettes and creates focal points on ring fingers or thumbs.
Abstract petal shapes offer modern interpretations of classic floral themes. We brush curved strokes in watercolor styles using sheer polishes layered over white bases. Roses, peonies, and tulips translate beautifully into these simplified forms that capture floral essence without precise botanical accuracy.
Marble Effect Nails
Water marbling creates stunning stone like patterns that mirror natural marble formations. We drop different colored polishes into room temperature water, swirl them gently with a toothpick, then dip our nails through the design. Gray and white combinations produce classic Carrara marble effects, while adding gold veining elevates the luxury factor.
Dry brush marbling offers more control over our marble patterns than water techniques. We load a fan brush with minimal polish and lightly sweep it across our base color in irregular patterns. This method works exceptionally well for creating granite effects using multiple earth tone shades like beige, brown, and charcoal.
Saran wrap marbling provides unique texture variations that resemble natural stone surfaces. We apply our base color, then while it’s slightly tacky, press crumpled plastic wrap onto the surface and lift to reveal organic patterns. This technique excels with neutral combinations like cream and taupe or dramatic contrasts using black and silver.
Everyday Wearable Colors
 8")
We believe the foundation of any great nail collection starts with versatile colors that complement every outfit and occasion.
Nude and Natural Shades
Nude polishes create the perfect canvas for both professional and casual settings. We recommend choosing shades that are one to two tones lighter than your natural skin color for the most flattering effect. Beige undertones work beautifully on warm skin tones while pink based nudes complement cooler complexions.
Sheer formulas offer buildable coverage that lets your natural nail show through subtly. We suggest applying two thin coats rather than one thick application to achieve an even finish. Popular options include peachy nudes like OPI’s “Bubble Bath” and rosy beiges such as Essie’s “Mademoiselle.”
Natural nail enhancement techniques can elevate these simple shades without adding complexity. We love buffing nails to a gentle shine before applying nude polish for extra luminosity. Adding a ridge filling base coat creates the smoothest possible surface for professional looking results.
Soft Pastel Options
Pastel shades bring a gentle pop of color that works seamlessly from office to weekend plans. We find that dusty rose, lavender, and mint green offer the most versatile options for everyday wear. These colors pair beautifully with both neutral and colorful wardrobes.
Spring inspired pastels like baby pink and powder blue create fresh looks that brighten any complexion. We recommend choosing pastels with gray undertones rather than bright white bases for more sophisticated results. Creamy formulas typically provide better coverage than sheer alternatives in these delicate shades.
Layering techniques can customize pastel intensity to match your personal style. We suggest starting with one thin coat for a whisper of color or building to two coats for more noticeable coverage. Adding a glossy top coat enhances the creamy finish while a matte overlay creates modern minimalist appeal.
Classic Red Variations
Red nails never go out of style but choosing the right shade makes all the difference for daily wear. We recommend blue based reds like cherry and berry tones for cooler skin tones while orange based corals and true reds flatter warmer complexions. Deeper burgundy and wine shades offer sophisticated alternatives to bright crimson.
Application techniques ensure classic red polish looks polished and professional. We always use a quality base coat to prevent staining and extend wear time. Applying thin layers in three strokes down the nail center followed by side cleanup creates the cleanest finish.
Seasonal red adaptations keep this timeless color fresh throughout the year. We love bright cherry reds for summer occasions and deeper cranberry shades for fall and winter months. Adding subtle shimmer or switching between cream and creme finishes provides variety without straying from the classic red family.
Quick Touch-Up Techniques
 9")
Life happens, and our nails need quick fixes to maintain their polished appearance throughout busy days.
Base Coat and Top Coat Essentials
Base coats create the foundation for long lasting manicures by protecting natural nails from staining and providing better polish adhesion. We recommend applying one thin layer and allowing it to dry completely before adding color. Ridge filling base coats work particularly well for smoothing uneven nail surfaces.
Top coats seal your manicure while adding shine and extending wear time by up to five days. Quick dry formulas like Seche Vite or Sally Hansen Insta-Dri save precious time during touch ups. Apply top coat every two to three days to refresh the shine and prevent chipping.
Fast drying drops accelerate the curing process when you’re pressed for time. Place one drop on each freshly painted nail and wait sixty seconds for a completely dry finish. These products contain oils that penetrate through polish layers to speed up drying.
Cuticle Care Tips
Cuticle oil applications transform the overall appearance of your manicure instantly by softening dry skin around nail beds. We suggest keeping a cuticle pen in your purse for quick touch ups throughout the day. Jojoba and vitamin E oils provide the best nourishment for healthy cuticle growth.
Gentle pushing techniques help maintain clean nail lines without causing damage or irritation. Use a rubber tipped cuticle pusher after showering when cuticles are naturally softened. Push back in small circular motions rather than aggressive straight lines.
Quick cuticle trimming should only address loose hangnails or excess dead skin to avoid infection. Sanitize your cuticle nippers with rubbing alcohol before each use. Trim sparingly and always cut at an angle following the natural curve of your nail.
Long-Lasting Nail Maintenance
Daily protection habits preserve your manicure from common damage like chipping and peeling. Wear rubber gloves while cleaning or doing dishes to prevent polish from lifting. Apply hand cream regularly to keep nails flexible and prevent brittleness.
Strategic touch up timing extends your manicure lifespan significantly when done correctly. Address small chips within 24 hours by dabbing a tiny amount of matching polish over the damaged area. Smooth the edges with a fine buffer after the touch up dries completely.
Emergency repair techniques save your manicure when more serious damage occurs. Tea bags make excellent temporary fixes for torn nails when cut to size and secured with clear polish. Keep a nail file handy to smooth rough edges immediately before they catch and worsen.
Conclusion
We’ve shown you that stunning nails don’t require expensive salon visits or years of practice. From geometric patterns to nature-inspired designs these techniques prove that anyone can create beautiful manicures at home.
The key is starting with simple techniques and building your confidence. Whether you prefer minimalist elegance or bold textured finishes there’s a style that matches your personality and skill level.
Remember that proper preparation and quality products make all the difference. With the right tools and a little practice you’ll be creating salon-worthy designs that reflect your unique style and creativity.
Frequently Asked Questions
Can I really create professional-looking nail art at home without expensive tools?
Absolutely! You can achieve stunning nail designs using basic items like makeup sponges, bobby pins, striping tape, and thin brushes. Simple techniques like gradient effects, dot patterns, and geometric shapes can create impressive results without professional equipment or extensive artistic skills.
What’s the easiest way to modernize a classic French manicure?
Try using vibrant colored tips instead of traditional white, or incorporate geometric shapes for an edgy twist. You can also add glitter accents for glamour or use striping tape to create clean, precise lines that give your French manicure a contemporary update.
How do I create gradient or ombre effects on my nails?
Use a makeup sponge to blend two colors seamlessly. Apply both colors to the sponge, then dab it onto your nail while the polish is slightly tacky. For best results, use a white or nude base coat to make colors more vibrant and finish with a quality top coat.
What are some simple geometric patterns I can try as a beginner?
Start with triangle accents using striping tape, vertical or horizontal stripes, or classic half-moon designs. These patterns require minimal tools but create modern, sophisticated looks. Use contrasting colors for visual impact and remove tape while polish is slightly wet for clean lines.
Are nail stickers a good option for quick designs?
Yes! Nail stickers offer instant professional-looking results without artistic skills. Choose floral stickers for romantic looks, metallic ones for glamour, or seasonal themes to keep your manicures fresh. Apply them on completely dry base color and seal with top coat for longevity.
What’s the best way to choose nude nail polish for everyday wear?
Select a shade that’s one to two tones lighter than your natural skin color for the most flattering effect. Test colors in natural light and consider your undertones. Nude polishes are versatile and complement various outfits, making them perfect for daily wear.
How can I make my manicure last longer?
Always use a base coat to protect your nails and a quality top coat for shine and protection. Choose quick-dry formulas to prevent smudging, maintain your cuticles with oil, and do quick touch-ups as needed. Avoid using your nails as tools to prevent chipping.
What are some easy textured nail finishes I can try?
Experiment with matte top coats over any color for instant sophistication, add glitter accents for dimension, or try velvet powder techniques. These finishes transform ordinary manicures into dimensional art and can make bold colors more wearable for everyday situations.
Can monochrome nail designs still look interesting?
Definitely! Single-color schemes can be incredibly sophisticated. Try all-black minimalist looks with rhinestone accents, pure white elegance with texture variations, or versatile beige tones. Use different finishes or subtle accent techniques to add depth while maintaining the monochromatic theme.
What are some nature-inspired designs that are easy to create?
Simple leaf patterns, delicate floral motifs, and marble effects are perfect for beginners. Use natural colors and organic shapes, or try techniques like water marbling, dry brush marbling, or saran wrap marbling to achieve beautiful stone-like patterns that bring tranquility to your manicure.


