Gel nails don’t have to expensive or require hours at the salon. We’ve discovered that creating stunning nail art at home is easier than most people think – and the results rival professional manicures. With just a few basic supplies and simple techniques you can master gorgeous gel designs that’ll have everyone asking where you got your nails done.
From minimalist French tips to trendy ombré effects we’re sharing foolproof gel nail ideas that work for beginners and busy lifestyles. These designs require no special artistic skills or expensive equipment – just creativity and a steady hand. Whether you’re preparing for a special occasion or simply want to elevate your everyday look these accessible techniques will transform your nails into eye-catching masterpieces.
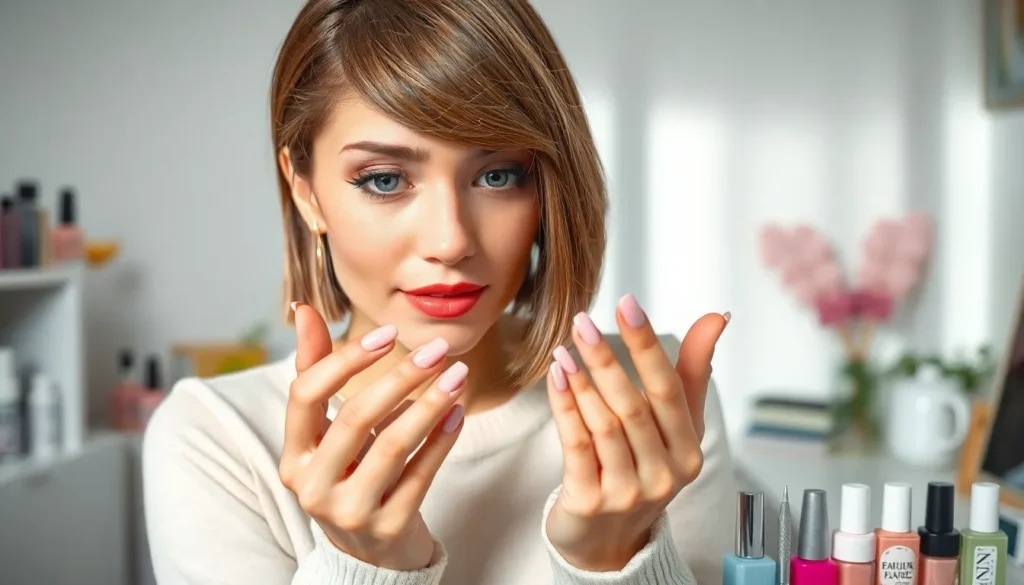
Ready to ditch expensive salon visits while achieving that perfect glossy finish? Let’s jump into our favorite simple gel nail designs that deliver maximum impact with minimal effort.
Classic French Manicure With a Modern Twist
We’re taking the timeless French manicure and giving it contemporary flair that’s perfect for today’s gel nail enthusiasts.
Clean White Tips on Natural Base
Start with a clear base coat to create the perfect foundation for your modern French look. Apply gel base coat and cure under LED light for 30 seconds to ensure proper adhesion.
Choose a natural nude or soft pink gel polish that complements your skin tone. We recommend applying thin layers rather than one thick coat for even coverage.
Create crisp white tips using a striping brush or nail guides for precision. Position the guides just below your natural nail line and paint the tips with white gel polish.
Perfect the curve by following your natural nail shape rather than creating harsh straight lines. This technique gives you a more organic and modern appearance.
Seal everything with a top coat and cure for 60 seconds to achieve that glossy salon finish that lasts up to three weeks.
Colored French Tips for Subtle Pop
Replace traditional white tips with soft pastels like lavender, mint green, or dusty rose for an understated twist. These colors work beautifully against natural nail beds without overwhelming your overall look.
Experiment with metallic shades such as champagne, rose gold, or soft silver tips for special occasions. Metallic gel polishes catch light beautifully and add elegant sophistication to your manicure.
Try gradient French tips by blending your chosen color from dark to light toward the nail bed. Use a makeup sponge to dab the color and create smooth transitions between shades.
Consider seasonal variations like coral tips for summer or deep burgundy for fall months. Matching your French tip colors to the season keeps your gel nails feeling fresh and current.
Maintain the classic French proportions while using these alternative colors to preserve the sophisticated essence of this iconic nail style.
Minimalist Single Color Applications
 1")
Single color gel applications deliver maximum impact with minimal effort. These streamlined looks complement any wardrobe while requiring fewer tools and techniques than complex nail art designs.
Nude and Neutral Tones
Nude gel polish creates an effortlessly chic foundation that works for every occasion. We recommend starting with shades that complement your natural skin tone, such as warm beiges for golden undertones or cool taupes for pink undertones. Classic nude shades like “Bubble Bath” or “Eternal Optimist” provide versatile options that pair seamlessly with both casual and professional attire.
Neutral tones extend beyond traditional nudes to include soft grays, mushroom browns, and creamy whites. These sophisticated colors offer subtle elegance without demanding attention, making them perfect for workplace environments or minimalist aesthetics. Apply two thin coats for even coverage, allowing each layer to cure completely under your LED or UV lamp.
Matte topcoats transform glossy neutrals into modern statement pieces with contemporary appeal. This finish adds texture and depth to simple colors while maintaining the understated elegance that makes neutral tones so versatile. We suggest experimenting with different matte formulations to find the perfect balance between durability and visual impact.
Bold Monochromatic Statements
Bold single colors make powerful statements without requiring complex application techniques. Deep jewel tones like emerald green, sapphire blue, and rich burgundy create striking looks that photograph beautifully and complement evening wear. These saturated shades typically require two to three thin coats for optimal opacity and color payoff.
Classic red remains the ultimate bold choice for gel manicures, offering timeless sophistication with modern staying power. We recommend true reds for fair skin tones, coral reds for medium complexions, and deep berry reds for darker skin tones. Professional application tips include using a high quality base coat to prevent staining and applying color in thin, even strokes from cuticle to tip.
Black gel polish delivers dramatic impact with unmatched versatility across seasons and styles. This bold choice pairs exceptionally well with metallic jewelry and creates stunning contrast against lighter clothing. Apply black gel in ultra thin layers to prevent bubbling and ensure smooth, professional looking results that maintain their glossy finish for weeks.
Easy Accent Nail Techniques
 2")
Adding a single accent nail transforms any simple gel manicure into an eye-catching design. We’ve found these two techniques create stunning results with minimal effort.
Glitter on Ring Finger Only
Glitter accent nails deliver maximum sparkle without overwhelming your overall look. We recommend applying your base color to all nails first, then adding a generous coat of glitter gel polish to just your ring finger. Fine holographic glitter creates subtle shimmer for daytime wear, while chunky multicolored pieces make bold evening statements.
Application technique matters for even glitter distribution across the nail surface. We suggest dabbing the brush gently rather than stroking it across the nail to prevent glitter from clumping. Two thin coats work better than one thick application, allowing each layer to cure completely under your LED lamp. Clear topcoat seals the glitter and creates a smooth finish that won’t snag on clothing.
Color combinations can enhance your accent nail’s impact significantly. We love pairing rose gold glitter with nude base colors for sophisticated elegance. Silver glitter complements cool toned polishes like blues and purples beautifully. Gold glitter pairs perfectly with warm shades including corals and peaches.
Metallic Foil Details
Metallic foil strips create professional looking nail art with surprisingly simple application methods. We apply these thin strips directly onto tacky gel polish before curing, pressing them firmly into place with a cuticle pusher. Geometric patterns work best for beginners, including single vertical lines or crisscross designs.
Foil placement options offer endless creative possibilities for your accent designs. We position single strips diagonally across the ring finger for modern asymmetrical looks. Multiple parallel lines create striking striped effects when spaced evenly. Curved strips following the nail’s natural shape produce elegant French tip alternatives.
Color coordination ensures your foil accents complement rather than clash with your base shade. We pair silver foil with cool undertones like navy blue or deep purple gel polish. Gold foil enhances warm colors including burgundy and forest green beautifully. Rose gold works universally well with both warm and cool base tones.
Simple Gradient and Ombre Effects
 3")
Gradient nail designs create stunning visual depth while remaining surprisingly achievable for beginners. We’ll explore techniques that transform basic gel colors into sophisticated fades that rival professional salon work.
Two-Color Fade Techniques
Sponge blending creates the smoothest transitions between complementary gel shades. Start by applying your lighter base color to all nails and cure completely. Paint both colors onto a makeup sponge in vertical stripes, then gently dab the sponge across each nail from cuticle to tip. The overlapping area creates a natural blend that eliminates harsh color lines.
Brush gradients offer more control over color placement and intensity. Apply your base shade and cure as normal. Using a clean flat brush, pick up a small amount of your second color and work it into the wet gel polish before curing. Gentle back and forth motions help colors meld together seamlessly.
Popular color combinations include:
- Navy blue fading to silver for elegant evening looks
- Coral transitioning to peach for warm summer vibes
- Purple blending into pink for romantic occasions
- Black melting into gray for sophisticated monochrome styles
Sunset Inspired Blends
Warm sunset gradients capture golden hour magic with strategic color layering. Begin with a yellow base coat and cure thoroughly. Apply orange gel polish to the middle portion of each nail, blending upward and downward while the polish remains workable. Add deep red or coral to the tips, creating that classic sunset horizon effect.
Tropical sunset variations incorporate multiple warm tones for dramatic impact. Layer pink, orange, and yellow in horizontal bands across the nail bed. Use a small detailing brush to softly blend where colors meet, mimicking natural sky transitions. These combinations work especially well on longer nail shapes that provide more canvas space.
Application timing proves crucial for successful sunset blends. Work on one nail at a time to prevent gel polish from curing before you complete the gradient. Keep your workspace well lit to accurately judge color transitions and blend intensity. Most sunset effects require 2-3 thin color layers to achieve proper depth and vibrancy.
Beginner-Friendly Nail Art Patterns
 4")
Creating intricate nail art doesn’t require advanced artistic skills when you master these simple pattern techniques. These approachable designs build on basic gel nail applications while adding visual interest that transforms any manicure.
Polka Dot Designs Using Dotting Tools
Dotting tools make creating perfect circles effortless for gel nail beginners. We recommend starting with a solid base color in nude or pastels, allowing it to cure completely before adding dots. Small dotting tools create delicate patterns, while larger tools produce bold statement dots that catch attention.
Classic dot placement options include:
- Single row along the cuticle line
- Scattered random placement across the nail
- Diagonal lines creating geometric patterns
- Clustered groups at nail tips
Color contrasts work beautifully with polka dot designs. White dots on navy blue create a timeless nautical look, while gold dots on burgundy gel polish add sophisticated glamour. Black dots on soft pink provide a playful retro vibe that suits any season.
Professional application tips ensure clean results:
- Dip the dotting tool in gel polish, not regular lacquer
- Apply gentle pressure for consistent dot sizes
- Clean the tool between colors to prevent muddy mixing
- Cure each color layer before adding the next design element
Stripe Patterns With Tape
Tape creates crisp, professional looking stripes without requiring steady hands. We suggest using striping tape specifically designed for nail art, as it removes cleanly without damaging the gel base. Regular painter’s tape works as an alternative but requires more careful removal.
Stripe design variations offer endless creativity:
- Vertical lines elongate shorter nails
- Horizontal bands create width on narrow nail beds
- Diagonal stripes add ever-changing movement
- Chevron patterns combine multiple angled lines
Application timing matters significantly with tape techniques. Press the tape onto completely cured gel polish to ensure clean edges. Apply the contrasting color in thin layers, avoiding thick buildup that can seep under tape edges. Remove the tape while the gel remains uncured for the sharpest lines.
Color combinations that work exceptionally well include:
- Black and white for classic contrast
- Rose gold on blush pink for subtle elegance
- Navy blue with silver for sophisticated appeal
- Multiple rainbow stripes for playful summer vibes
Spacing consistency creates the most polished appearance. We recommend measuring stripe width with a ruler initially until you develop an eye for even placement. Practice on nail wheels helps perfect your technique before applying designs to actual nails.
Quick Marble Effect Methods
 5")
We’ll show you two professional marble techniques that create stunning stone-like patterns without advanced artistic skills.
Water Marble Technique
Prepare your workspace with room temperature filtered water in a small bowl and choose 2-3 complementary gel polish colors. Drop one color into the center of the water surface and immediately add your second color on top. Create ripple patterns by gently dragging a toothpick from the center outward in straight lines. Dip your nail at a 45-degree angle into the design and hold for 3-5 seconds before lifting straight up.
Clean excess polish from your skin using a small brush dipped in acetone before curing under your LED lamp. Repeat this process for each nail while working quickly since the polish design changes on the water surface. Seal your marble design with a glossy topcoat to enhance the stone-like appearance and ensure long-lasting wear.
Dry Brush Marble Look
Load a flat brush with your lightest gel polish color and apply it as your base coat across all nails. Dip a clean dry brush into your second color and gently remove most of the polish by dabbing on a paper towel. Drag the barely loaded brush across your nail in sweeping motions to create natural marble veining patterns.
Layer a third darker color using the same dry brush technique but focus on creating thinner accent lines. Vary the pressure and direction of your brush strokes to mimic authentic marble stone patterns. Cure each color layer for 30 seconds under LED light before adding the next shade. Finish with a high-gloss topcoat to create depth and protect your marble masterpiece for up to three weeks of wear.
Seasonal Simple Gel Nail Ideas
 6")
Seasonal nail designs let us celebrate each time of year while maintaining the simplicity we love in our gel manicures. We can easily adapt our favorite techniques to match the mood and colors of any season.
Spring Pastels and Florals
Spring pastels transform our nails into fresh canvases that capture the season’s renewal energy. We recommend soft lavender, mint green, and baby pink as base colors that complement the blooming industry around us. These gentle hues work perfectly with our single color application technique from earlier sections.
Floral accent nails elevate spring manicures using simple dotting techniques we’ve already mastered. We create tiny flowers by placing five small dots in a circle using white or yellow gel polish on our ring finger. The remaining nails showcase our chosen pastel shade for a cohesive spring look.
Cherry blossom effects combine our gradient skills with spring’s signature bloom. We blend soft pink gel polish into white at the nail tips using the sponge technique mentioned earlier. Small white dots scattered across this gradient mimic falling petals perfectly.
Garden inspired combinations pair multiple pastels for a fresh meadow appearance:
| Base Color | Accent Color | Design Element |
|---|---|---|
| Mint Green | White | Dotted flowers |
| Lavender | Silver | Stripe details |
| Baby Pink | Gold | Glitter tips |
| Peach | Cream | Marble veining |
Winter Whites and Silvers
Winter white manicures create elegant sophistication using techniques we’ve practiced throughout this guide. We apply opaque white gel polish in thin layers for full coverage without streaking. This classic shade pairs beautifully with our French manicure skills from earlier sections.
Silver accent applications add winter sparkle using our established accent nail methods. We recommend applying silver glitter gel polish to the thumb and ring finger while keeping other nails in crisp white. The metallic contrast captures winter’s icy brilliance perfectly.
Snowflake patterns use our dotting and stripe techniques for intricate winter designs. We create simple snowflakes by drawing intersecting lines with thin silver gel polish using a striping brush. Each flake starts with a vertical line followed by diagonal crosses for authentic winter charm.
Frosted effects combine our marble techniques with winter’s crystalline beauty. We drag a thin brush loaded with silver gel polish across white base coats in random patterns. This creates the appearance of frost crystals forming naturally across our nails.
| Primary Shade | Metallic Accent | Application Method |
|---|---|---|
| Pearl White | Silver Foil | Strip placement |
| Icy Blue | Platinum Glitter | Ring finger only |
| Champagne | Gold Veining | Marble technique |
| Snow White | Crystal Dots | Scattered pattern |
Geometric Shapes for Clean Lines
 7")
We’ll explore geometric nail designs that create stunning visual impact through structured patterns and precise angles. These sophisticated looks prove that simple shapes can transform your manicure into modern art.
Triangle and Square Accents
Triangular corner designs offer the perfect starting point for geometric nail art. Apply your base color and cure completely before using tape to mask triangular sections at each corner. Position the tape diagonally from the cuticle area toward the nail tip, creating crisp lines that frame your nail beautifully. Remove the tape while the gel polish remains tacky to ensure clean edges.
Square accent placement creates bold focal points across your nails. Use thin nail art brushes to paint small squares along the nail bed or cluster them near the cuticle area. Start with contrasting colors like black squares on nude bases or white squares on deep jewel tones. Apply each square individually, curing between layers to prevent smudging.
Color blocking techniques elevate simple shapes into sophisticated designs. Divide each nail into geometric sections using tape, then fill each area with different complementary colors. Try navy blue and gold combinations or create monochromatic looks using various shades of the same color family.
Negative Space Designs
Cut out patterns use your natural nail as part of the design element. Apply tape in geometric shapes before painting your chosen gel color, then remove the tape to reveal negative space triangles, diamonds, or stripes. This technique works especially well with bold colors that contrast beautifully against natural nails.
Half moon geometrics modernize the classic half moon manicure with angular twists. Use curved tape to create traditional half moons, then add triangular or diamond shaped negative spaces within the colored portion. Apply thin coats to maintain precision and cure each layer thoroughly.
Stripe interruptions break up solid colors with strategic negative space lines. Place thin strips of tape vertically or horizontally across cured gel polish, apply a second coat, then remove the tape to reveal clean negative space stripes. Experiment with different stripe widths and placements to create unique patterns on each nail.
Textured Finishes That Look Professional
 8")
Adding texture to your gel nails instantly elevates any simple design into a sophisticated statement. These professional finishing techniques require minimal additional supplies while delivering maximum visual impact.
Matte Top Coat Applications
Matte finishes transform glossy gel polish into an expensive looking velvet surface that catches light differently than traditional high shine topcoats. We recommend applying your base color and curing as normal before adding the matte topcoat as your final layer.
Classic matte coverage creates uniform texture across all ten nails by applying one thin coat of matte topcoat over completely cured color. Popular color combinations include deep burgundy with matte finish for fall sophistication and sage green with matte texture for spring elegance.
Selective matte accenting involves applying matte topcoat to exact nails while leaving others glossy for dimensional contrast. Try matte finish on your ring finger and thumb while keeping remaining nails glossy for subtle variation that photographs beautifully.
Pattern matte techniques use tape or stencils to create matte sections within glossy designs. Apply your base color and cure completely then place thin tape strips before applying matte topcoat to create geometric matte stripes against glossy backgrounds.
Sugar Sand Effect
Sugar sand texture mimics the appearance of fine beach sand while maintaining durability that lasts up to two weeks. This technique works best over light to medium colored base coats that allow the texture to show through clearly.
Basic sugar sand application requires sprinkling fine textured powder over wet gel polish before curing. Apply your base color and while the gel is still uncured sprinkle sugar sand powder evenly across the nail surface then cure normally to lock in the texture.
Gradient sand effects create visual depth by applying heavier texture at the nail tip and lighter coverage toward the cuticle. Start with your base color then apply more powder at the free edge while gradually reducing coverage as you work toward the base for natural looking texture variation.
Accent sand nails focus the textured finish on one or two nails per hand for sophisticated contrast. We suggest applying sugar sand texture to your ring finger and thumb while keeping remaining nails smooth for balanced visual interest that works in professional settings.
Color coordination enhances the sugar sand effect when you match powder tones to your base color family. Champagne powder over nude base creates elegant neutral texture while rose gold powder over soft pink delivers romantic dimensional shine.
Time-Saving Simple Gel Combinations
 9")
We’ve discovered that combining two complementary techniques can create stunning results while cutting application time in half.
Two-Tone Color Blocking
Two-tone designs create striking contrasts that transform basic manicures into modern statements. We recommend pairing neutrals with bold accent colors for maximum visual impact.
Vertical splits divide each nail down the center using painter’s tape for crisp lines. Apply your base color to one half and let it cure completely. Position the tape along the natural nail curve and paint the second color on the exposed area. Remove tape immediately after application for clean edges.
Horizontal blocks separate nails into upper and lower sections for sophisticated geometric looks. Place tape across each nail at the two-thirds mark from the cuticle. Paint the larger bottom section first and cure before adding the contrasting top color.
Color combinations that work best include navy blue with gold, soft pink with white, and black with silver. We suggest using colors with similar opacity levels to ensure even coverage. Matte and glossy finishes within the same design create additional textural interest.
Application timing requires working on one hand at a time to prevent smudging. Cure each color section separately and finish with a high-gloss topcoat for professional results.
Half-Moon Manicures
Half-moon styles recreate vintage glamour with modern gel polish durability and precision. We love how these crescents frame the cuticle area for an elegant finishing touch.
Classic crescents use reinforcement stickers positioned at the cuticle base to create perfect curves. Apply your darker shade first and cure completely. Position the stickers following your natural nail shape and paint the exposed nail bed with a contrasting color.
Reverse applications flip the traditional design by painting the crescent area instead of the nail bed. Start with a light base color and cure thoroughly. Place stickers and apply darker polish to the exposed crescent section for dramatic contrast.
Metallic accents elevate basic half-moons using gold or silver foil strips along the crescent edge. Apply your base color and cure before positioning thin metallic strips over the tacky layer. This technique adds luxury without additional curing time.
Size variations let you customize the crescent width based on nail length and personal preference. Wider crescents work best on longer nails while narrow ones complement shorter nail beds. We recommend keeping proportions consistent across all fingers for balanced results.
Conclusion
These simple gel nail ideas prove that stunning manicures don’t require professional training or expensive salon visits. We’ve shown you how basic techniques like French tips accent nails gradients and geometric patterns can transform your nails into eye-catching masterpieces.
The beauty of these designs lies in their versatility and accessibility. Whether you’re drawn to minimalist single colors or bold seasonal themes there’s something here for every skill level and personal style. Each technique builds upon fundamental gel application principles making them perfect stepping stones for your nail art journey.
Start with one or two techniques that appeal to you most and gradually expand your repertoire. With practice these simple methods will become second nature allowing you to create salon-quality results from the comfort of your own home while saving both time and money.
Frequently Asked Questions
Can I really create professional-looking gel nails at home?
Yes, absolutely! With basic supplies and simple techniques, anyone can achieve salon-quality gel nails at home. You don’t need extensive artistic skills or expensive equipment. The key is starting with beginner-friendly designs like French manicures or single-color applications, then gradually building your skills with accent techniques and patterns.
What supplies do I need to get started with gel nails?
You’ll need gel polish in your chosen colors, a UV or LED lamp for curing, a clear base coat, topcoat, nail files, and basic tools like dotting tools or tape for designs. Optional items include glitter polish, metallic foil strips, and matte topcoats for different finishes.
How long do DIY gel nails last compared to salon treatments?
When properly applied and cured, DIY gel nails can last 2-3 weeks, just like professional salon treatments. The key is proper preparation, applying thin layers, and ensuring each layer is fully cured under the lamp. Using quality products and following proper application techniques ensures longevity.
Are gel nail designs difficult for beginners?
Not at all! Many stunning designs are beginner-friendly, including French manicures, single-color applications, simple accent nails with glitter, and basic patterns like polka dots or stripes using tape. These techniques require minimal skill but create maximum visual impact.
Can I create gradient and ombré effects without special tools?
Yes! You can achieve beautiful gradients using common household items like makeup sponges for blending colors or flat brushes for controlled application. Popular combinations like navy-to-silver or coral-to-peach create stunning sunset-inspired effects that are surprisingly easy to master.
What’s the best way to add texture to gel nails?
Matte topcoats instantly transform any design into a luxurious velvet finish. You can also create sugar sand effects for beachy textures, or use selective matte accenting for dimensional contrast. These finishing techniques add sophistication without requiring advanced skills.
How can I make my gel manicure look seasonal?
Adapt your color palette and simple techniques to match each season. Use pastels and floral dots for spring, bold jewel tones for fall, elegant whites and silvers for winter, and bright corals for summer. The same basic techniques work across all seasons.
Are geometric designs too advanced for beginners?
Geometric patterns are actually perfect for beginners! Using tape creates crisp lines for triangular accents, color blocking, and negative space designs. These structured patterns look sophisticated but rely on simple techniques like strategic tape placement and clean removal timing.
Can I combine multiple techniques in one manicure?
Absolutely! Combining two complementary techniques like two-tone color blocking or half-moon designs with metallic accents creates stunning results while actually saving time. The key is choosing techniques that work well together and enhance rather than compete with each other.
How do I prevent smudging and ensure professional results?
Apply thin layers and cure each one completely under your lamp. Work in good lighting, use quality gel polish, and don’t rush the process. For patterns using tape, remove it while the polish is still tacky, then cure. Always finish with a high-gloss topcoat for durability.


