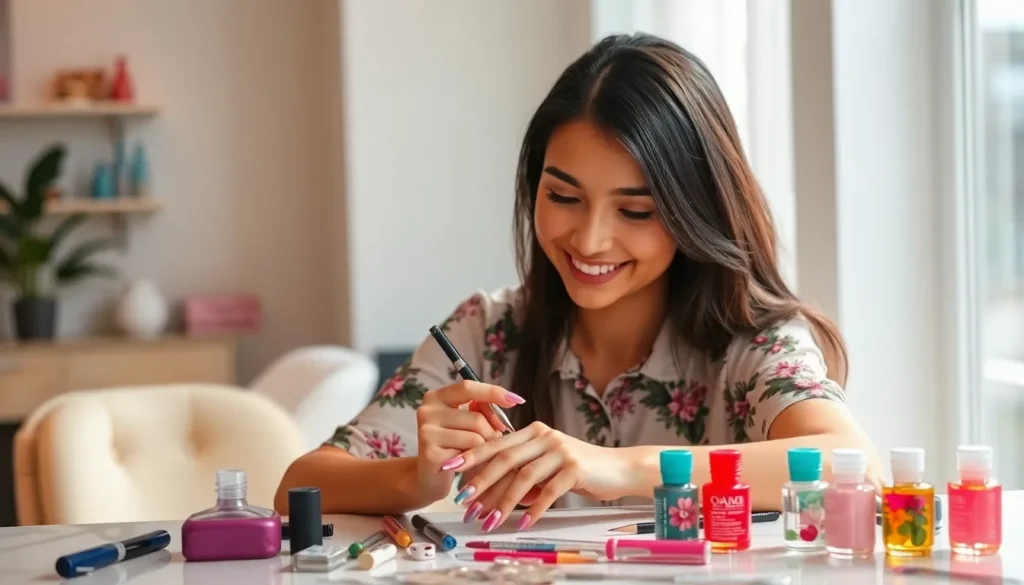
We’re about to transform your fingertips into tiny canvases of pure artistry! Nail painting has evolved from simple color application to intricate masterpieces that showcase personality and creativity. Whether you’re preparing for a special occasion or simply want to express your unique style, the right nail design can make all the difference.
From minimalist geometric patterns to bold floral motifs, we’ve curated an extensive collection of nail painting ideas that’ll inspire your next manicure adventure. These designs range from beginner-friendly techniques you can master at home to sophisticated patterns that’ll have everyone asking where you got your nails done.
Classic French Manicure with Modern Twists
French manicures continue to reign as timeless nail art staples, but we’re seeing exciting contemporary updates that breathe fresh life into this traditional design. These modern interpretations maintain the elegant sophistication of classic French tips while adding unexpected elements that reflect current nail painting trends.
Colored Tips Instead of White
Vibrant hues transform the traditional French manicure into a bold statement piece that catches attention instantly. We love experimenting with coral, mint green, or lavender tips that complement different skin tones beautifully. Metallic finishes like rose gold or champagne create luxurious looks perfect for evening events or special occasions.
Neon colors work exceptionally well for summer nail designs, with electric pink or lime green tips creating playful contrasts against nude bases. Pastel shades offer a softer alternative that maintains elegance while adding subtle color interest to your manicure.
Reverse French with Base Color Tips
Base color application creates the opposite effect of traditional French tips by placing color at the nail bed instead of the tips. We apply bold colors like deep burgundy or navy blue at the cuticle area while keeping natural or clear tips. Gradient transitions between the colored base and clear tips create smooth, professional looking results that appear salon quality.
Geometric shapes replace curved French lines with angular designs that feel contemporary and artistic. Triangular bases or straight lines across the nail bed offer modern alternatives that showcase precision and creativity in nail art execution.
Double French Line Designs
Dual tip lines feature two parallel French lines that create sophisticated layered effects on each nail. We typically use contrasting colors like black and white or gold and silver to maximize visual impact. Thin line spacing between the two French tips creates delicate designs perfect for professional settings or formal events.
Varying line thickness adds dimension to double French designs, with one thick line paired with one thin line creating interesting proportional relationships. Color combinations like nude with metallic accents or pastels with bold brights allow for endless customization options that match personal style preferences.
Geometric Patterns and Shapes
 1")
Geometric nail art transforms your manicures into modern masterpieces that showcase clean lines and bold visual impact. We’ve curated these trending geometric designs that range from simple accent patterns to intricate full nail artwork.
Triangle and Diamond Accents
Triangle accents create striking focal points when placed strategically on one or two accent nails. We recommend using nail tape to achieve perfectly sharp edges, applying your base color first and then masking off triangular sections for contrasting hues. Metallic gold or silver triangles against dark bases like navy or black deliver sophisticated results that work for both professional and evening settings.
Diamond shapes add luxury appeal to your geometric nail designs through their multifaceted appearance. We suggest creating diamond patterns using the tape method, starting with a neutral base and adding diamond outlines in contrasting colors. Negative space diamonds work particularly well, where you paint around the diamond shape to let your natural nail show through. Multiple small diamonds scattered across the nail create a constellation effect that catches light beautifully.
Striped Nail Art Designs
Horizontal stripes offer endless customization options through varying widths and color combinations. We achieve crisp horizontal lines by using striping tape or thin nail art brushes, alternating between two to three complementary colors. Ombre striped effects create depth when you blend similar tones from light to dark across each stripe.
Vertical stripes elongate the appearance of your nails while maintaining that clean geometric aesthetic. We recommend keeping vertical stripes uniform in width for the most polished look, using contrasting colors like black and white or pastels and metallics. Mixing thick and thin vertical stripes adds visual interest without overwhelming the design.
Diagonal stripes bring ever-changing energy to geometric nail art through their directional movement. We create these by applying tape at 45 degree angles across the nail, painting between the sections with alternating colors. Chevron patterns emerge when you mirror diagonal stripes to create arrow like shapes pointing toward the nail tip.
Checkerboard and Grid Patterns
Classic checkerboard patterns deliver retro charm through their alternating square arrangement. We achieve this look by sectioning nails into even squares using nail art tape, then painting alternating squares in contrasting colors like black and white or pink and purple. Miniature checkerboard patterns work best on longer nails where individual squares remain visible.
Grid designs create sophisticated geometric frameworks that can stand alone or serve as bases for additional patterns. We use thin nail art brushes or striping tape to create intersecting lines that form perfect grid squares across the nail surface. Metallic grids over colored bases add dimension, while colorful grids on clear or nude bases maintain elegance.
Pixel art patterns take grid concepts further by filling individual squares with different colors to create digital inspired designs. We recommend planning pixel patterns on graph paper first, then transferring the design square by square onto your nails. Heart shapes, flowers, or abstract patterns work particularly well in pixel format on accent nails.
Floral and Nature-Inspired Designs
 2")
Nature’s beauty translates perfectly onto our nails through delicate botanical designs that capture the essence of gardens and meadows. These organic patterns offer a refreshing contrast to geometric shapes and bring feminine elegance to any manicure.
Hand-Painted Flower Motifs
Delicate roses become stunning focal points when painted across accent nails using fine detail brushes. We recommend starting with simple five-petal designs in soft pinks or classic reds before advancing to more complex layered petals. Cherry blossoms work beautifully on light pink or nude bases, creating romantic spring-inspired looks that pair perfectly with pastel wardrobes.
Sunflower designs make bold statements on longer nails where there’s ample canvas space for detailed centers and radiating petals. Daisy chains connect multiple flowers across several nails, creating cohesive looks that flow seamlessly from finger to finger. Hibiscus flowers bring tropical vibes with their large, dramatic petals in vibrant oranges, pinks, and yellows.
Tiny wildflower clusters scattered across nails create whimsical, cottage-core aesthetics that complement bohemian styles. We suggest using dotting tools to create small centers before adding delicate brush strokes for petals around them.
Leaf and Botanical Patterns
Monstera leaves create trendy tropical vibes with their distinctive split patterns that work exceptionally well on almond and coffin nail shapes. Eucalyptus branches bring minimalist elegance through simple curved lines and small oval leaves in muted greens and silvers. Fern fronds offer intricate detailing opportunities with their delicate, feathery structures that create sophisticated nature-inspired looks.
Palm fronds capture vacation moods through bold, sweeping strokes in various green shades. Ivy vines wind gracefully around nails, connecting multiple fingers with continuous botanical patterns. Succulent rosettes provide geometric botanical options with their perfect spiral formations in dusty blues and greens.
Autumn leaves showcase seasonal beauty through warm oranges, deep reds, and golden yellows with realistic veining details. We find that layering different leaf shapes creates depth and visual interest across the entire hand.
Watercolor Flower Effects
Bleeding petal techniques create soft, dreamy floral designs by applying wet polish and allowing colors to naturally blend together. Gradient flower backgrounds use sponging methods to achieve seamless color transitions from light centers to darker edges. Splatter effects mimic natural watercolor paintings by flicking diluted polish across dried base designs.
Color bleeding roses start with light pink centers that gradually deepen to burgundy edges using wet-on-wet application techniques. Soft petal washes create ethereal backgrounds for more detailed flower elements painted on top. Watercolor poppies showcase vibrant reds and oranges with characteristic black centers and delicate tissue-paper-like petals.
Abstract floral washes focus more on color impressions than detailed flower shapes, creating artistic interpretations of garden scenes. We achieve these effects by working quickly while polish remains wet, allowing natural color flow to create organic, unpredictable patterns.
Gradient and Ombre Techniques
 3")
We’ve mastered geometric precision and floral artistry, but gradient and ombre techniques offer a different kind of nail art magic that creates stunning color transitions and depth.
Two-Color Gradient Blends
Two-color gradient blends create seamless transitions between complementary or contrasting shades that transform ordinary manicures into sophisticated statements. We recommend starting with colors from the same family like navy to sky blue or pink to coral for easier blending results.
Sponge application delivers the smoothest gradient effects when you dab colors onto a makeup sponge and press onto nails in gentle rolling motions. Start with your lighter shade as the base coat then work darker tones from the tip downward or cuticle area upward depending on your desired direction.
Vertical gradients stretch fingers visually while horizontal blends create wider nail bed appearances that suit different hand shapes. Popular combinations include sunset oranges blending into deep purples, ocean blues transitioning to seafoam greens, or classic black fading into silver metallics.
Professional techniques involve multiple thin layers rather than heavy application that creates muddy color mixing and uneven textures. We suggest applying base coats first then building gradients with 3-4 light applications followed by top coats for glossy finishes.
Rainbow Ombre Transitions
Rainbow ombre transitions showcase multiple colors flowing together like natural light spectrums that create eye-catching displays perfect for festivals or creative expression. These designs typically feature 3-6 colors arranged in ROYGBIV order or customized color wheels that reflect personal preferences.
Each nail can display complete rainbow sequences or you can spread colors across all ten fingers for full-hand rainbow effects that create cohesive looks. Popular arrangements include warm sunset palettes with reds, oranges, and yellows or cool ocean themes featuring blues, greens, and purples.
Blending techniques require patience and practice since multiple colors need seamless transitions without creating brown or muddy middle zones. We recommend using cosmetic wedges or fine-grade makeup sponges that allow precise color placement and smooth gradient development.
Summer rainbow designs pair perfectly with beach themes, pride celebrations, or music festivals where bold color statements shine brightest. Pastel rainbow versions offer softer alternatives suitable for spring occasions or everyday wear that still provides colorful impact.
Glitter Gradient Fades
Glitter gradient fades combine sparkle with smooth color transitions that create glamorous effects perfect for special occasions or evening events. These designs typically feature dense glitter concentration at tips or bases that gradually disperses across nail surfaces.
Fine glitter particles blend easier than chunky pieces when creating smooth gradient effects that maintain professional appearances. We suggest mixing loose glitter with clear polish or specialized glitter gels for better application control and even distribution patterns.
Reverse glitter gradients start with heavy sparkle coverage near cuticles then fade toward tips for unique twists on traditional French manicures. This technique works beautifully with gold glitter over nude bases or silver sparkles over deep jewel tones like emerald or sapphire.
Layering different glitter sizes creates depth when you apply fine particles first then add medium or large pieces strategically for dimensional effects. Popular combinations include holographic glitter over color gradients or metallic sparkles complementing sunset ombre backgrounds that catch light beautifully.
Seasonal and Holiday Themes
 4")
Seasonal nail designs let us celebrate nature’s changing beauty while keeping our manicures fresh and relevant. We can transform our nails into stunning seasonal showcases that capture each time of year’s unique charm and festive spirit.
Spring Pastel Combinations
Spring pastels bring soft elegance to our nail art with delicate hues that mirror blooming gardens. We love combining lavender and mint green for a dreamy two-tone effect that screams spring freshness. Baby pink paired with powder blue creates the perfect Easter-inspired manicure that’s both sophisticated and playful.
Peach and cream combinations offer warmth while maintaining that gentle spring aesthetic we’re after. We can enhance these pastel bases with subtle cherry blossom accents using dotting tools for tiny pink flowers. Gradient techniques work beautifully with spring colors, blending soft yellow into pale pink for sunset-inspired nails.
Mixed pastel designs on alternating fingers create variety without overwhelming the overall look. We suggest using white as an accent nail to make the pastels pop even more dramatically.
Summer Bright and Bold Colors
Summer calls for vibrant nail designs that match our adventurous warm-weather spirits. We embrace electric coral paired with turquoise blue for tropical vacation vibes that transport us straight to paradise. Hot pink and lime green combinations create eye-catching contrast that’s perfect for beach days and summer festivals.
Neon yellow accent nails against deep purple bases make powerful statements that demand attention. We love incorporating sunset gradients using orange, pink, and purple to capture those magical summer evening moments. Geometric patterns in bright colors work exceptionally well during summer months.
Tropical themes shine with palm leaf designs in emerald green against sunny yellow backgrounds. We can add metallic gold accents to summer brights for glamorous poolside looks that photograph beautifully.
Fall Autumn Leaf Designs
Autumn nail art celebrates the season’s rich tapestry with warm, earthy tones that mirror changing foliage. We create stunning leaf designs using burgundy, burnt orange, and golden yellow to capture fall’s natural beauty. Hand-painted maple leaves in deep red against nude backgrounds offer sophisticated seasonal elegance.
Gradient techniques work magnificently for autumn designs, blending orange into deep brown for realistic leaf effects. We love using nail stamps to create intricate leaf patterns that would be difficult to paint freehand. Acorn and pinecone motifs add whimsical touches to our fall nail collections.
Bronze and copper metallic accents enhance autumn colors beautifully, adding warmth and depth to our designs. We can create ombre effects using multiple fall shades on each nail for maximum seasonal impact. Matte top coats over autumn designs create cozy, sweater-weather vibes that perfectly complement the season.
Winter Snowflake and Holiday Motifs
Winter nail designs transform our fingertips into magical wonderlands with frosty themes and holiday cheer. We create delicate snowflakes using white nail pens against deep blue or black backgrounds for stunning contrast. Silver glitter gradients create icy effects that sparkle like fresh snow in sunlight.
Holiday motifs bring festive joy with candy cane stripes, Christmas trees, and holly leaf designs. We love creating elegant holiday looks using red and gold combinations with subtle pearl accents. Hanukkah-inspired designs in blue and silver offer beautiful alternatives to traditional Christmas colors.
Winter wonderland themes include frosted effects using white and pale blue gradients with iridescent topcoats. We can paint tiny reindeer silhouettes or Santa hat accents for playful holiday spirit. New Year’s Eve calls for glamorous designs featuring champagne colors, gold foil, and plenty of sparkle to ring in the new year stylishly.
Minimalist and Negative Space Designs
 5")
We’re embracing the art of restraint with minimalist nail painting ideas that prove less can truly be more. These designs celebrate the natural nail while adding thoughtful touches that create maximum impact.
Single Accent Nail Ideas
Single accent nails transform your manicure with one strategic focal point. We recommend painting four nails in a neutral base like nude or clear polish while dedicating the ring finger to a bold statement color such as emerald green or deep burgundy. Metallic accent nails create instant elegance when you apply gold or rose gold foil to just one nail per hand.
Textured accent nails add dimension without overwhelming the overall look. We suggest using matte topcoat on your accent nail while keeping others glossy, or applying a single coat of glitter polish to create subtle sparkle. Stone and crystal embellishments work beautifully on accent nails when placed strategically near the cuticle or nail tip.
Geometric accent nails offer modern sophistication through simple shapes. We love creating a single triangle in contrasting color on the ring finger or adding one thin diagonal line across the accent nail. Half-moon designs at the nail base provide classic elegance when executed in metallic shades like silver or copper.
Clean Line Negative Space
Clean line negative space designs showcase the natural nail as part of the artistic composition. We create these looks by applying nail tape to form precise geometric shapes before painting around them. Vertical negative space strips running down the center of each nail create an elongating effect that’s perfect for shorter nail beds.
Horizontal negative space bands divide the nail into distinct sections. We recommend leaving the middle third of each nail unpainted while coloring the base and tip sections in complementary shades like soft pink and cream. Diagonal negative space creates ever-changing movement when we angle the unpainted section from corner to corner.
Curved negative space follows the natural nail shape for organic appeal. We trace gentle arcs near the cuticle area or nail tip using thin brushes to maintain smooth, professional-looking lines. Crescent moon negative space at the nail base pairs beautifully with bold colors like royal blue or forest green on the remaining nail surface.
Dotted Minimalist Patterns
Dotted minimalist patterns create playful texture through strategic dot placement. We use dotting tools or bobby pins to create perfect circles in varying sizes across the nail surface. Single dots near the cuticle on otherwise bare nails provide subtle detail that works for any occasion.
Gradient dot patterns transition from dense to sparse across the nail. We start with closely spaced dots at the nail base and gradually increase spacing toward the tip, creating visual movement. Color-coordinated dots in two complementary shades like blush pink and coral add depth while maintaining simplicity.
Linear dot arrangements follow clean geometric principles. We place dots along the nail’s outer edge to create a delicate border effect or arrange them in straight lines down the center for modern symmetry. Three-dot triangles positioned at different areas of each nail create balanced asymmetry that feels intentionally artistic.
Textured and 3D Nail Art
 6")
Dimensional nail art transforms flat surfaces into tactile masterpieces that catch light and create visual depth. These techniques add luxury and sophistication to any manicure through creative texture combinations.
Matte and Glossy Combinations
Matte and glossy contrast techniques create striking visual effects by playing with light reflection across different nail surfaces. We recommend starting with a glossy base coat on all nails, then applying matte topcoat to selected areas for precise definition. Striped patterns work beautifully when alternating between matte and glossy sections, creating bold geometric designs that appear three dimensional.
Accent nail approaches showcase this technique effectively by keeping four nails completely matte while painting one nail with glossy polish in the same color. French tip variations gain modern appeal when we combine matte nail beds with glossy tips, reversing traditional expectations. Geometric shapes like triangles or circles become focal points when outlined in glossy polish against matte backgrounds.
Color coordination enhances these texture combinations through monochromatic schemes that rely purely on finish contrast for impact. Black and white designs particularly shine with this technique, as the stark color difference amplifies the textural elements. Nude and neutral palettes create sophisticated professional looks that work perfectly in office environments.
Raised Dots and Studs
Raised dot techniques involve building dimensional elements directly onto nail surfaces using various application methods. We achieve these effects through dotting tools dipped in thick polish, creating uniform raised circles that dry to perfect spheres. Multiple layers of polish build height gradually, allowing each coat to dry completely before adding the next level.
Stud application requires precision placement using tweezers and strong nail adhesive for lasting wear. Metal studs in gold, silver, and rose gold tones complement any color palette while adding glamorous sparkle. Pearl studs offer elegant alternatives that work especially well with pastel and neutral bases.
Pattern creation becomes endless with raised elements, from simple dot gradients that fade across the nail to complex mandala designs radiating from central points. We suggest starting with single accent nails to master placement techniques before attempting full hand designs. Rhinestone combinations elevate raised dots into luxury territory, perfect for special occasions and evening events.
Size variation adds visual interest through mixing small, medium, and large raised elements within single designs. Clustered arrangements create organic patterns that mimic natural formations like bubbles or dewdrops. Linear arrangements work well for modern geometric aesthetics that emphasize clean lines and structured placement.
Velvet and Sand Texture Effects
Velvet powder techniques create soft, luxurious surfaces that feel as amazing as they look when applied over tacky topcoat. We dust the powder evenly across wet polish using fluffy brushes, ensuring complete coverage for uniform texture. Multiple color powders can layer together for ombre effects that transition smoothly between shades.
Sand texture polishes contain fine particles that create gritty surfaces reminiscent of beach sand or desert dunes. These specialized formulas apply like regular polish but dry to completely different finishes that catch and scatter light uniquely. Sugar sand effects work particularly well with tropical color schemes in turquoise, coral, and sunset orange.
Application techniques vary depending on desired intensity, with light dusting creating subtle texture while heavy application produces dramatic tactile surfaces. We recommend sealing velvet effects with matte topcoat to preserve the powder and extend wear time. Sand textures typically don’t require additional sealing but benefit from cuticle oil application to prevent snagging.
Color combinations showcase these textures beautifully through contrasting smooth and textured sections within single manicures. Jewel tones like emerald and sapphire look particularly rich with velvet finishes, while earth tones complement sand textures naturally. Metallic bases under texture powders create sophisticated shimmer that peeks through the surface treatment.
Abstract and Artistic Expressions
 7")
Abstract nail art transforms your manicures into wearable canvases that showcase artistic creativity. These designs break away from traditional patterns to create unique visual statements.
Marble and Stone Effects
Marble nail designs capture the luxurious beauty of natural stone patterns through swirling veins and organic formations. We recommend using a water marbling technique with nail polish drops that naturally blend and create those signature marble veins. Neutral tones like white, gray, and beige work perfectly for classic marble looks, while adding gold or silver foil creates elegant accents that mimic real marble’s mineral deposits.
Stone texture effects bring earthy sophistication to your fingertips through matte finishes and subtle color variations. Try layering different shades of the same color family to build depth that resembles natural stone surfaces. Granite patterns work well with speckled dotting techniques using contrasting colors, while slate effects shine with deep grays and charcoal tones applied in irregular patches.
Advanced marble techniques include the plastic wrap method, where you press crumpled plastic against wet polish to create realistic stone textures. Mixing polish with a few drops of acetone helps achieve that fluid marble movement we see in high-end stone surfaces.
Paint Splatter Techniques
Paint splatter nail art channels Jackson Pollock’s abstract expressionism into miniature masterpieces that celebrate controlled chaos. We achieve these ever-changing patterns by loading a small brush with thinned nail polish and gently flicking it across the nail surface from various angles. Black base coats provide dramatic contrast for bright splatter colors like neon pink, electric blue, and vibrant yellow.
Controlled splatter methods help you direct the paint placement while maintaining that spontaneous artistic feel. Using a toothbrush creates fine, even splatters perfect for galaxy effects, while larger brushes produce bold drops that make striking focal points. Layering different colors builds complexity, with each splatter layer adding new dimensions to your abstract composition.
Protection techniques keep splatter designs contained by applying liquid latex or tape around your nails before creating the splatter effects. This method ensures clean edges and prevents polish from staining your skin during the artistic process.
Color Block Art Designs
Color blocking transforms nails into geometric art pieces through bold, contrasting sections that create visual impact. We divide each nail into distinct areas using tape or vinyl stencils, then fill each section with different colors that complement or dramatically contrast with each other. Primary colors like red, blue, and yellow create vibrant Pop Art effects, while monochromatic schemes using different shades of the same hue offer sophisticated elegance.
Asymmetrical color blocks break traditional design rules by creating uneven sections that feel modern and spontaneous. These irregular shapes add movement and energy to your manicure while maintaining the clean lines that define color blocking techniques. Mixing matte and glossy finishes within the same design adds textural contrast that enhances the visual separation between color sections.
Multi-nail compositions treat your entire hand as one cohesive art piece, with color blocks flowing from one nail to the next. This technique creates stunning visual continuity that makes your manicure feel like a curated gallery exhibition across all ten fingers.
Metallic and Chrome Finishes
 8")
We’re stepping into luxurious territory with metallic nail designs that catch light beautifully and add instant glamour to any look. These reflective finishes transform ordinary manicures into statement pieces that shimmer with every gesture.
Gold Foil Accents
Gold foil accents create dramatic focal points that instantly elevate your nail art game. We recommend applying foil pieces over tacky gel polish or using foil adhesive for maximum adherence and shine. Transfer foil works best when pressed firmly with a silicone tool or orange stick, creating seamless metallic patches that reflect light from every angle.
Geometric foil patterns offer modern sophistication through strategic placement across one or two accent nails. We love creating triangular sections, diagonal strips, or abstract shapes that complement your base color perfectly. Random foil placement creates organic textures that mimic expensive jewelry finishes.
Combining gold foil with dark base colors like deep burgundy, midnight blue, or classic black produces stunning contrast effects. We suggest layering thin foil strips over gradient backgrounds or incorporating foil details into existing floral designs for added luxury.
Silver Chrome Effects
Silver chrome effects deliver mirror-like finishes that reflect surroundings with stunning clarity. We achieve these looks using chrome powder applied over gel base coats, creating surfaces so reflective they appear liquid metal. Rubbing chrome powder with silicone applicators produces the smoothest, most even coverage.
Chrome accent nails paired with matte base colors create sophisticated contrast combinations that work for both casual and formal occasions. We recommend using chrome on ring fingers or creating chrome French tips that modernize traditional manicures instantly.
Holographic chrome powders add rainbow dimensions to silver bases, shifting between colors as light changes angles. These effects work beautifully over white or light gray base coats, creating prism-like surfaces that capture attention without overwhelming your overall look.
Rose Gold Highlighting
Rose gold highlighting brings warm metallic tones that complement most skin undertones beautifully. We create these effects using rose gold leaf, specialized polish formulations, or chrome powders with pink undertones that add subtle warmth to any design.
Strategic rose gold placement along cuticle lines or nail tips creates elegant border effects that frame your manicure perfectly. We love applying rose gold highlights over nude or blush pink bases for cohesive color stories that feel feminine and refined.
Rose gold gradient effects blend metallic tones with complementary colors like dusty rose, champagne, or soft coral. We achieve these transitions using makeup sponges to dab rose gold polish over wet base colors, creating seamless metallic fades that catch light beautifully throughout the day.
Easy DIY Techniques for Beginners
 9")
Starting your nail art journey doesn’t require expensive tools or years of practice. We’ll show you three fundamental techniques that create professional-looking designs using simple household items.
Tape and Stencil Methods
Striping tape transforms any manicure into geometric perfection. Apply your base color and let it dry completely before placing thin nail tape strips across your nails. Paint over the tape with contrasting colors, then carefully remove the strips while the polish is still slightly wet to reveal crisp lines.
Scotch tape creates clean geometric shapes with minimal effort. Cut triangles, squares, or diamond patterns from regular tape and press them firmly onto dried base polish. We recommend using a toothpick to smooth the edges and prevent polish bleeding underneath.
Reinforcement stickers produce perfect half-moon designs instantly. Place the circular stickers at your cuticle line after applying base coat, paint over them with your chosen color, and remove while wet for classic negative space looks.
French manicure guides ensure salon-quality tips at home. Position curved stencils at your nail tips, apply white or colored polish above the line, and peel away for flawless French manicure results every time.
Dotting Tool Creations
Bobby pins substitute perfectly for professional dotting tools. Dip the rounded end into polish and press gently onto your nails to create uniform dots of various sizes. The ball tip creates larger dots while the pointed end produces tiny accent details.
Toothpicks offer ultimate precision for intricate dot patterns. Create flower petals by making five dots in a circle, then drag the toothpick from each dot’s center outward. We love using this technique for simple daisy chains across accent nails.
Cotton swabs produce soft, diffused dot effects. Roll the cotton tip in polish for organic-looking spots that mimic watercolor paintings. Vary the pressure to create different opacity levels within the same design.
Pencil erasers make excellent large dotting tools. New erasers create perfect circles for polka dot patterns, while worn erasers produce interesting textured effects that add depth to your designs.
Sponge Gradient Techniques
Makeup sponges create flawless color transitions with minimal skill required. Paint two or three polish colors in stripes on a cosmetic wedge, then dab repeatedly onto your nail until the colors blend seamlessly together.
Kitchen sponges work equally well for gradient effects. Cut small pieces from clean dish sponges and apply colors in overlapping sections. The coarser texture creates subtle stippling that enhances the gradient appearance.
Blending colors while damp produces the smoothest transitions. Work quickly after applying polish to your sponge, as wet colors blend more easily than dried ones. We suggest practicing color combinations on paper first to perfect your technique.
Top coat application smooths any textured finish left by sponging. Apply a generous layer of clear top coat over your completed gradient to even out the surface and add professional shine to your DIY creation.
Conclusion
We’ve explored an incredible range of nail design possibilities that prove your fingertips can be a canvas for unlimited creativity. From timeless French manicures with modern twists to bold geometric patterns and dreamy watercolor effects each technique offers unique ways to express your personal style.
Whether you’re drawn to minimalist negative space designs or prefer the glamour of metallic chrome finishes there’s a perfect nail art approach waiting for you. The beauty of these techniques lies in their versatility – simple dotting tools can create stunning patterns while everyday items like tape and sponges help achieve professional-looking results at home.
Your nail art journey doesn’t need to be overwhelming. Start with basic techniques that match your skill level and gradually explore more complex designs as your confidence grows. Remember that practice makes perfect and each manicure is an opportunity to experiment with new colors patterns and textures.
Transform your nails into personalized masterpieces that reflect your mood season and style preferences. With these diverse techniques at your fingertips you’re ready to create stunning nail designs that turn heads and spark conversations wherever you go.
Frequently Asked Questions
What are the easiest nail art designs for beginners?
Start with simple techniques like dotting patterns using bobby pins or toothpicks, tape-assisted geometric designs, and sponge gradients. French manicures with colored tips, single accent nails, and basic striping are also beginner-friendly. These designs require minimal tools and practice while still creating impressive results.
How do I create a smooth gradient effect on my nails?
Use a makeup sponge or kitchen sponge to dab two complementary colors where they meet on the nail. Apply base colors first, then blend with gentle dabbing motions. Work quickly before polish dries, and finish with a top coat for smooth blending and shine.
What’s the difference between a French manicure and reverse French manicure?
Traditional French manicures feature white or colored tips at the nail’s free edge, while reverse French manicures apply color at the nail bed (cuticle area). The reverse style creates a modern twist on the classic look and offers more creative color combinations.
How can I make my nail art last longer?
Apply a quality base coat, use thin polish layers, seal with top coat, and avoid activities that stress nails immediately after application. Wear gloves during cleaning, moisturize cuticles regularly, and touch up chips promptly to extend your manicure’s lifespan.
What tools do I need for basic nail art?
Essential tools include base and top coats, nail polish in various colors, dotting tools (or bobby pins), striping tape, makeup sponges, and nail art brushes. Many designs can be created with household items like toothpicks, scotch tape, and cotton swabs.
How do I create clean geometric lines in my nail art?
Use striping tape or regular scotch tape as guides for straight lines. Apply tape after base color dries, paint over it, then remove tape while the top color is still slightly wet for crisp edges. Nail art brushes also help create precise geometric shapes.
What are the best color combinations for gradient nails?
Complementary colors work best, such as pink to purple, blue to teal, or coral to yellow. For subtle effects, try different shades of the same color family. Rainbow gradients use the full spectrum, while metallic combinations add glamorous sparkle to color transitions.
How do I achieve a professional-looking French manicure at home?
Use nail guides or reinforcement stickers for perfect curves. Apply sheer pink or nude base, then carefully paint white tips. For modern versions, try colored tips, double lines, or geometric shapes instead of traditional curves for contemporary appeal.
What’s the best way to create watercolor nail effects?
Use wet polish and blend colors while still damp for organic bleeding effects. Apply light base colors, then add darker shades with a damp brush for soft transitions. Work quickly and use top coat to seal the design while maintaining the dreamy, artistic appearance.
How do I incorporate seasonal themes into my nail designs?
Choose appropriate color palettes: pastels for spring, bright colors for summer, warm tones for autumn, and cool metallics for winter. Add seasonal motifs like flowers, leaves, or snowflakes. Adjust techniques to match the season’s mood and current fashion trends.


