When it comes to nail art, we believe that simple doesn’t mean boring. Simple nail designs offer the perfect solution for busy lifestyles while still making a stunning statement. Whether you’re heading to work, running errands, or enjoying a night out, effortless nail looks can elevate your entire appearance without the time commitment of complex designs.
We’ve discovered that the most elegant manicures often feature minimalist techniques that anyone can master at home. From classic French tips with modern twists to subtle geometric patterns, these easy nail ideas prove that sophistication lies in simplicity. The best part? Most of these designs require just basic tools and a few minutes of your time.
Ready to transform your nails without the fuss? We’re excited to share our favorite simple nail ideas that’ll keep your fingertips looking polished and professional every day of the week.
Classic French Manicure With a Modern Twist
The timeless French manicure remains one of our most beloved simple nail ideas, offering endless possibilities for creative updates. We’ve discovered that adding contemporary elements to this classic design creates fresh looks without requiring advanced techniques.
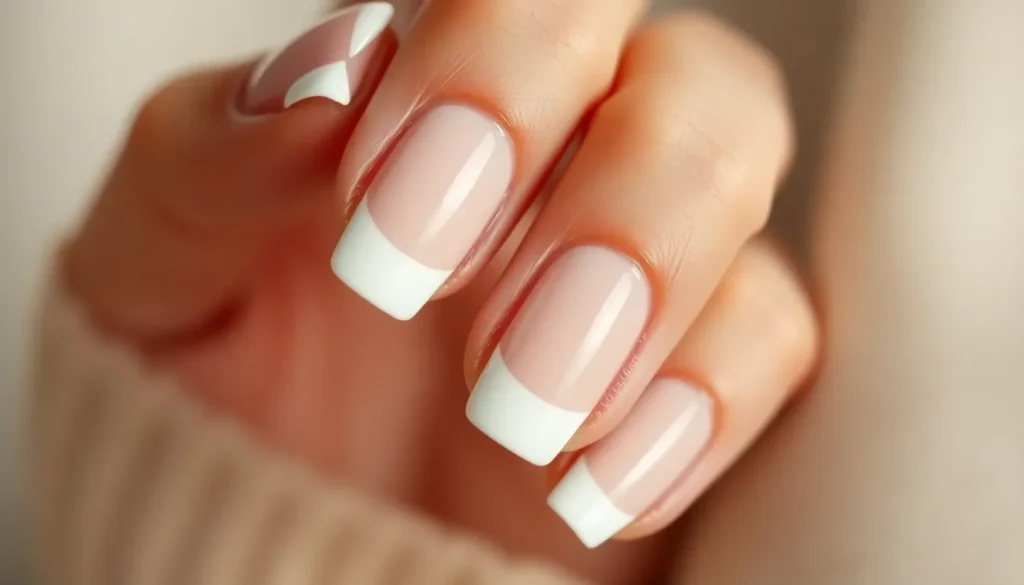
Traditional White Tips
Clean white tips paired with nude or pink bases create the most recognizable French manicure style. We recommend using a quality white nail polish and steady hand technique to achieve crisp lines that look professionally done. Oval and almond shaped nails showcase traditional French tips beautifully, while square shapes offer a more modern geometric appearance.
Start by applying a sheer pink or nude base coat to create that classic foundation. Paint thin white lines across the nail tips using a steady brush motion from one side to the other. Allow each coat to dry completely before adding a clear top coat for that glossy salon finish we all love.
Colored French Tips
Vibrant colored tips transform the classic French manicure into something uniquely yours. We’ve experimented with coral, mint green, lavender, and soft yellow tips that bring personality to this traditional design. Pastel shades work particularly well for spring and summer seasons, while deeper jewel tones create stunning fall and winter looks.
Choose colors that complement your skin tone and current wardrobe for maximum versatility. Apply the colored tips using the same technique as traditional white tips, ensuring the color is opaque enough to create good contrast against your base. Metallic shades like gold, silver, and rose gold add instant glamour to any outfit.
Reverse French Manicure
The reverse French technique places color at the base of your nails instead of the tips, creating an unexpected twist on the classic design. We love how this variation highlights the natural shape of your cuticle area while maintaining that elegant French manicure sophistication. This style works exceptionally well with both bold and subtle color choices.
Apply your base color first, then use a small brush or striping tape to create clean lines near the cuticle area. Fill in the crescent shaped space with your chosen accent color, whether it’s metallic gold for evening events or soft pastels for everyday wear. Finish with a clear top coat to blend the colors seamlessly and add professional shine.
Minimalist Solid Color Designs

Single color manicures offer the ultimate in sophisticated simplicity. These effortless designs prove that sometimes less truly is more when creating stunning nail looks.
Neutral Nude Shades
Nude polish creates the perfect foundation for any wardrobe or occasion. We recommend choosing shades that complement your skin tone, from warm peachy beiges for olive complexions to cool pink tones for fair skin types. Classic nude colors like taupe, mushroom, and champagne provide versatility that transitions seamlessly from office meetings to weekend brunches.
Application becomes foolproof with nude shades since they’re forgiving with minor imperfections. Two thin coats deliver optimal coverage while maintaining that natural, polished appearance we all desire. Popular nude options include essie’s “Ballet Slippers” and OPI’s “Put It in Neutral” for consistently beautiful results.
Pastel Color Palette
Soft pastel hues bring subtle color without overwhelming your overall look. Lavender, mint green, baby blue, and powder pink offer gentle pops of personality that work beautifully for spring and summer seasons. These shades pair exceptionally well with white clothing, denim, and floral patterns.
Pastels require careful application since lighter colors can appear streaky or uneven. We suggest using a white base coat to enhance opacity and ensure true color payoff. Three thin layers often work better than two thick coats for achieving that perfect pastel finish.
Sweet shades like coral pink and butter yellow add warmth to your hands while maintaining that understated elegance. These colors photograph beautifully and complement both gold and silver jewelry effortlessly.
Bold Single Colors
Deep, saturated colors make powerful statements with minimal effort required. Rich burgundy, navy blue, emerald green, and classic red create dramatic looks that command attention at any event. These sophisticated shades work particularly well during fall and winter months.
Bold colors demand precision during application since mistakes become more noticeable. We recommend using quality brushes and taking time between coats to prevent smudging or bubbling. A glossy top coat enhances the vibrancy and adds professional shine to these statement shades.
Jewel tones like sapphire and amethyst offer luxury appeal that elevates simple outfits instantly. These rich colors complement both casual and formal attire while requiring zero additional nail art techniques.
Easy Geometric Patterns

Geometric patterns offer endless possibilities for creating stunning nail art without requiring advanced skills or expensive tools.
Simple Stripes
Vertical stripes create an elongating effect that makes your nails appear longer and more elegant. We recommend using striping tape or nail guides to achieve perfectly straight lines, removing them while the polish is still slightly wet to prevent peeling. Horizontal stripes work beautifully on shorter nails, adding visual width and creating a balanced appearance.
Alternating colors produce ever-changing results when you use contrasting shades like black and white or navy and gold. Apply your base color first, let it dry completely, then add tape to create clean sections for your second color. Metallic accent stripes transform simple designs into sophisticated looks that catch light beautifully throughout the day.
Thin pinstripes deliver subtle elegance perfect for professional settings where bold nail art might be inappropriate. Use a fine brush or striping brush dipped in nail polish to create delicate lines across your nails. Multiple thin stripes in similar tones create depth while maintaining a refined appearance.
Dots and Polka Dots
Classic polka dots never go out of style and require only a dotting tool or bobby pin to create perfect circles. We suggest starting with larger dots on your ring finger as an accent nail, then adding smaller dots to remaining nails for visual balance. Varying dot sizes creates organic patterns that feel more natural than uniform spacing.
Gradient dot patterns transition beautifully from large dots at the cuticle to smaller ones toward the tip, creating movement and visual interest. Use three different sized dotting tools or household items like pencil erasers, bobby pins, and toothpicks to achieve various circle sizes. This technique works exceptionally well with ombre color schemes.
Negative space dotting showcases your natural nail while adding modern geometric appeal to your manicure. Apply dots of base coat or clear polish over colored nails, creating transparent circles that reveal the nail underneath. This approach feels fresh and contemporary while remaining simple enough for beginners.
Basic Triangles
Triangle accent nails serve as perfect focal points without overwhelming your entire manicure design. We recommend choosing one or two nails per hand to feature triangular patterns, keeping remaining nails in coordinating solid colors. Use striping tape to create sharp triangle edges, applying it in V shapes or angular patterns.
Chevron triangles add ever-changing movement to simple nail designs through their zigzag appearance and bold geometric appeal. Create these patterns by applying tape in alternating V shapes down your nail, then painting over with contrasting colors. Remove tape immediately after painting to maintain crisp, professional looking edges.
Corner triangles offer subtle geometric interest while remaining work appropriate and easy to maintain throughout busy weeks. Paint small triangles at the base corners of your nails using a fine brush or toothpick, choosing colors that complement your base shade. This technique works beautifully with neutral bases and metallic triangle accents.
Quick Accent Nail Ideas

Accent nails offer the perfect balance between simple and striking, allowing you to add personality to your manicure without overwhelming the overall look. We’ll explore three effortless accent techniques that transform basic manicures into eye-catching designs.
Single Statement Nail
Ring finger accents create instant focal points while keeping the remaining nails in coordinating neutral shades. Choose bold colors like deep burgundy or emerald green against nude bases for maximum impact. Painting just one nail per hand in a contrasting shade requires minimal time and skill while delivering professional results.
Index finger statements work beautifully for those who prefer subtle drama in their nail designs. We recommend pairing bright coral or electric blue accent nails with soft pink or beige bases. This placement catches attention during gestures and conversations without appearing too bold for conservative environments.
Thumb accents provide unique styling opportunities since these nails face different directions than your other fingers. Metallic shades like rose gold or champagne create elegant contrasts against matte base colors. The larger nail surface accommodates intricate details like small rhinestones or delicate nail stickers.
Glitter Accent Options
Gradient glitter transforms simple manicures into sparkling masterpieces with strategic placement at nail tips or bases. Start with fine glitter polish and blend it into your base color using a makeup sponge for seamless transitions. Silver glitter over navy bases creates sophisticated evening looks, while gold glitter elevates neutral tones for daytime wear.
Full coverage glitter makes powerful statements when applied to single accent nails against solid colored backgrounds. Choose chunky holographic glitters for party ready nails or fine shimmer polishes for subtle sparkle effects. Press glitter firmly during application and seal with quality top coat to prevent chipping and extend wear time.
Glitter tips offer modern updates to classic French manicures without requiring precise line work skills. Apply glitter polish to the top third of accent nails while keeping remaining fingertips clean and simple. This technique works especially well with seasonal colors like copper glitter for fall or silver sparkle for winter celebrations.
Metallic Foil Details
Foil strips create clean geometric lines that elevate basic manicures with minimal effort and artistic skill required. Position thin metallic strips vertically down nail centers or horizontally across middle sections for instant sophistication. Gold foil strips complement warm undertoned base colors while silver strips enhance cool toned nail polishes perfectly.
Abstract foil pieces add artistic flair through irregular shapes and organic placement patterns on accent nails. Tear metallic foil into small fragments and press them randomly onto tacky base coats for unique textures. Each nail becomes an individual masterpiece while maintaining cohesion through consistent base colors across all fingers.
Foil French tips modernize traditional manicures by replacing white tips with reflective metallic finishes on accent nails only. Apply base color to all nails, then add metallic foil tips to ring fingers using nail glue or special foil adhesive. This technique creates stunning contrasts that catch light beautifully throughout the day.
Simple Ombre and Gradient Effects

Ombre and gradient nail designs create stunning visual transitions that appear complex but require only basic tools and techniques. These effects work beautifully with any color combination and add depth to simple manicures without requiring artistic expertise.
Two-Color Gradient
Classic light to dark transitions offer the most straightforward approach to gradient nails. We recommend starting with colors from the same family, like pale pink to deep rose or light blue to navy, since they blend naturally together. Complementary color combinations create striking contrasts, such as purple blending into blue or orange fading into red.
Temperature-based gradients provide foolproof color pairings that always work harmoniously. Cool tones like mint green to teal or warm combinations like coral to orange create seamless transitions. Neutral gradients using beige to brown or gray to charcoal offer sophisticated options perfect for professional settings.
Application timing plays a crucial role in achieving smooth blends. We suggest working on one nail at a time while the polish remains wet, allowing approximately 30 seconds between color applications. Color placement should start with the lighter shade covering the entire nail, followed by the darker color applied to the tip area.
Sponge Technique Application
Makeup sponge preparation requires cutting a clean cosmetic sponge into small triangular pieces for precise control. We prefer dense sponges over fluffy ones since they create smoother gradients with less texture. Polish application on sponge involves painting both colors side by side on the sponge surface, ensuring they touch but don’t completely mix.
Dabbing motion technique creates the gradient effect through gentle pressing and rolling motions on the nail surface. We recommend starting with light pressure and building up coverage gradually through multiple applications. Cleanup process becomes essential since sponge techniques often create polish on surrounding skin areas.
Base coat application prevents staining and helps the gradient polish adhere properly to natural nails. We suggest using quick-dry base coats to speed up the overall process. Topcoat finishing smooths out any texture created by the sponge and provides a professional glossy finish.
Practice nail recommendations include using nail wheels or fake nails before attempting the technique on your natural nails. We find that practicing color combinations and pressure levels helps achieve consistent results.
Glitter Fade Design
Glitter concentration gradients create elegant sparkle effects that transition from dense coverage to scattered particles. We recommend starting with heavy glitter application at the nail tips and gradually decreasing density toward the base. Fine glitter particles work better than chunky pieces for smooth gradient transitions.
Application layering technique involves applying glitter polish in thin coats, building coverage slowly for better control. We suggest using a flat brush to pat glitter into place rather than brushing it on, which can create streaks. Base color selection affects the final gradient appearance, with darker bases making glitter more prominent and lighter bases creating subtle effects.
Removal considerations require acetone-based removers and extra soaking time compared to regular polish. We recommend using foil wrap removal methods for easier cleanup. Glitter topcoat options include matte finishes for modern looks or extra glossy coats for maximum sparkle enhancement.
Color coordination strategies involve matching glitter tones to your base gradient colors or choosing contrasting metallics for bold statements. We find that gold glitter complements warm base colors while silver works beautifully with cool tones.
Basic Nail Art Using Tape

Tape transforms ordinary manicures into professional-looking geometric masterpieces with minimal effort. We’ll show you three foolproof tape techniques that create crisp lines and bold patterns perfect for beginners.
Clean Line Designs
Vertical stripes elongate your nails while creating a sleek modern appearance. We recommend using washi tape or nail striping tape to section off your nails into equal portions. Apply your base color first and let it dry completely before placing tape strips vertically down each nail. Paint over the exposed sections with a contrasting color like black over white or gold over nude.
Horizontal bands add visual width to narrow nails and create balanced proportions. Position tape horizontally across the middle third of your nail after applying your base coat. We suggest using complementary colors such as navy blue over pale pink or burgundy over cream. Remove the tape immediately after applying the second color to prevent peeling.
Diagonal lines offer ever-changing angles that catch light beautifully throughout the day. Place tape diagonally from one corner to the opposite corner creating two triangular sections. Apply different colors to each section using shades like coral and mint green or purple and yellow for striking contrast.
Color Block Patterns
Half moon blocking creates sophisticated negative space designs that appear complex but remain simple to execute. We use reinforcement stickers or circular tape placed near the cuticle area after applying a base color. Paint the exposed nail tip with a contrasting shade like deep emerald over nude or bright orange over gray.
Corner blocks add geometric interest without overwhelming the entire nail surface. Position small square pieces of tape at one or two corners of each nail after your base color dries. We recommend metallic shades like rose gold or silver over matte base colors for elegant contrast.
Side panels create modern architectural looks that complement professional attire perfectly. Place tape along one side edge of your nail leaving a narrow strip exposed. Paint this section with a bold color such as electric blue over white or fuchsia over black for dramatic impact.
Chevron Shapes
Classic chevron points deliver trendy zigzag patterns that add movement to your manicure. We create these by placing tape in a V shape pointing toward the nail tip after applying your base color. Use two complementary shades like teal and coral or purple and gold to fill the chevron sections.
Double chevrons multiply the visual impact while maintaining clean geometric precision. Position two sets of tape in parallel V shapes creating three distinct sections on each nail. We suggest using a gradient approach with light to dark shades or monochromatic tones for sophisticated results.
Reverse chevrons point toward the cuticle creating an unexpected twist on traditional patterns. Apply tape in an inverted V shape near the nail base and fill with contrasting colors. This technique works particularly well with neutral bases and bright accent colors like hot pink or electric green.
Natural and Clear Base Looks

Natural base looks offer the perfect foundation for effortless elegance that works for any occasion. These understated styles let your natural nails shine while adding just enough polish to look intentionally styled.
Clear Coat With Minimal Details
Clear coat applications create the foundation for sophisticated nail art that doesn’t overwhelm your natural beauty. We recommend starting with a high-quality base coat that strengthens nails while providing the perfect canvas for minimal embellishments. Tiny rhinestones placed strategically on accent nails add sparkle without appearing overdone.
Single dot designs using metallic polish transform clear bases into modern masterpieces. Place one small gold or silver dot at the base of each ring finger for an elegant focal point. We’ve found that using a dotting tool or the end of a bobby pin creates perfectly round shapes every time.
Thin metallic lines drawn vertically down the center of clear nails create stunning vertical interest. Rose gold and champagne shades work beautifully against clear bases and complement all skin tones. These delicate lines elongate fingers while maintaining that barely there aesthetic we love.
Natural Pink Enhancement
Natural pink shades enhance your nail beds without masking their inherent beauty. We suggest choosing colors that closely match your natural nail tone but appear slightly more saturated. Sheer pink formulas allow your nail’s natural texture to show through while providing even color distribution.
Baby pink applications create that perfect “your nails but better” effect that looks professional in any setting. Apply two thin coats rather than one thick application to avoid streaking and ensure even coverage. We recommend letting each coat dry completely before adding the next layer.
Rose tinted clear polishes offer the ideal compromise between natural and polished appearances. These formulas provide subtle color enhancement while maintaining transparency that feels comfortable for nail art beginners. Brands like Essie and OPI offer excellent sheer pink options that complement various undertones.
Subtle Shimmer Addition
Subtle shimmer polishes add dimension to natural bases without creating overwhelming sparkle effects. We prefer formulas with fine pearl particles that catch light softly rather than chunky glitters that demand attention. These polishes work particularly well in office environments where understated elegance is preferred.
Champagne shimmer applications create warmth against natural nail beds while remaining workplace appropriate. Apply shimmer over a clear or nude base for the most natural looking results. We’ve discovered that two thin coats provide better coverage than one thick application and prevent bubbling.
Iridescent topcoats transform any natural base into something special with minimal effort required. These products shift between subtle colors depending on lighting conditions and viewing angles. Pearl white and soft pink iridescent formulas enhance natural nails without appearing artificial or overdone.
Seasonal Simple Nail Ideas

We love adapting our nail designs to celebrate each season while maintaining the simplicity that fits our busy lifestyles. Seasonal inspiration allows us to refresh our manicures throughout the year without requiring advanced techniques or expensive supplies.
Spring Floral Touches
Simple daisy patterns create fresh spring looks using just white and yellow polish on neutral bases. We apply small white dots with a dotting tool and add tiny yellow centers for instant charm. Small scattered flowers across accent nails provide delicate beauty without overwhelming the design.
Cherry blossom accents bring elegant spring vibes with soft pink bases and white petal details. We create these by applying three small white dots in a triangular pattern with a toothpick. Single branch designs across the ring finger add artistic flair while remaining achievable for beginners.
Pastel garden colors capture spring’s essence through soft lavender, mint green, and peachy pink combinations. We alternate these shades across our nails or use them as accent colors on nude bases. Light floral stickers complement these palettes perfectly for those wanting extra detail without painting skills.
Summer Bright Colors
Neon accent combinations energize our summer manicures with electric pink, lime green, and sunshine yellow highlights. We apply these bold shades to ring fingers while keeping other nails in coordinating pastels. Gradient effects using makeup sponges blend these vibrant colors seamlessly into white bases.
Ocean inspired blues capture summer’s coastal beauty through turquoise, navy, and seafoam green rotations. We create simple wave patterns using curved brush strokes in alternating blue shades. Metallic silver details mimic sunlight dancing on water when applied sparingly over dried blue polish.
Tropical coral shades provide warmth and vibrancy perfect for summer adventures and beach vacations. We layer these colors over nude bases for depth or wear them boldly as single color statements. Tiny gold dot accents enhance coral shades beautifully when placed strategically near cuticle areas.
Fall Earth Tones
Warm burgundy bases establish sophisticated autumn foundations that complement seasonal wardrobes perfectly. We enhance these deep reds with subtle gold shimmer topcoats or single rhinestone accents. Matte finishes transform burgundy polish into luxurious velvet appearances ideal for fall fashion.
Pumpkin spice oranges celebrate autumn’s signature color through burnt orange, copper, and terracotta combinations. We apply these warm tones individually or create simple ombre effects using makeup sponges. Bronze metallic stripes add elegant contrast when applied vertically down center nails.
Forest green accents bring nature’s autumn transformation to our fingertips through deep emerald and sage combinations. We pair these earthy greens with nude bases or alternate them with warm browns. Gold foil details create stunning leaf patterns when applied over dried green polish using tweezers.
Winter Sparkle Elements
Silver glitter gradients create sophisticated winter glamour without requiring precise application skills. We concentrate glitter at nail tips and blend downward using makeup sponges for smooth transitions. Clear bases allow silver particles to shine brilliantly while maintaining elegant simplicity.
Icy blue combinations capture winter’s crystalline beauty through pale blue, silver, and white color schemes. We alternate these cool tones across our nails or use them in simple geometric patterns. Iridescent topcoats transform these colors into magical winter wonderland effects.
Holiday red classics provide timeless winter elegance through deep crimson and burgundy applications. We enhance these traditional colors with subtle gold accents or single crystal placements. Matte red finishes create modern sophistication perfect for winter celebrations and formal events.
Tools and Supplies for Simple Nail Art

Creating beautiful simple nail art doesn’t require expensive salon equipment or professional training. We’ve compiled the essential tools that make achieving stunning manicures at home both accessible and enjoyable.
Essential Basic Tools
Nail files become your foundation for any successful manicure, with glass files offering the smoothest finish and longest durability compared to traditional emery boards. We recommend keeping both coarse and fine grit options available for initial shaping and final smoothing.
Base coats protect your natural nails while creating the perfect foundation for polish application, preventing staining and extending wear time significantly. Quality base coats like Orly Bonder or Essie First Base provide professional results without the salon price tag.
Cuticle pushers maintain clean nail beds and create more surface area for your designs, with metal options offering precision and rubber tipped tools providing gentler care for sensitive skin. Regular cuticle maintenance makes even the simplest solid colors appear more polished and professional.
Small detail brushes enable precise application for geometric patterns, French tips, and accent designs that would otherwise require steady hands and multiple attempts. Art brushes from create stores work perfectly for nail art and cost significantly less than specialized nail tools.
Dotting tools create perfect circles and can be easily substituted with bobby pins, toothpicks, or the tip of a ballpoint pen for budget conscious nail artists. Different sized dotting tools allow you to create varied patterns and textures within a single design.
Budget-Friendly Options
Household items replace expensive nail tools without sacrificing quality or precision in your simple nail art creations. We’ve discovered that scotch tape creates crisp lines for geometric patterns, while makeup sponges blend ombre effects beautifully.
Drugstore nail polish brands offer excellent quality at fraction of salon prices, with brands like Essie, Sally Hansen, and Revlon providing rich pigmentation and smooth application. Many drugstore formulas now include strengthening ingredients and long wear technology previously found only in premium brands.
DIY tool alternatives save money while delivering professional looking results that rival expensive nail art equipment. Toothpicks work perfectly for detailed designs, while plastic wrap creates unique texture effects when pressed into wet polish.
Multi purpose products maximize your investment by serving several functions within your nail art routine, such as clear topcoats that also work as base coats or glitter polishes that double as accent options. Investing in versatile products reduces the overall number of supplies needed.
Sample sizes allow experimentation without committing to full sized bottles of trendy colors you might only use occasionally. Many beauty stores offer mini polish collections that let you try multiple shades for the price of one full size bottle.
Time-Saving Products
Quick dry topcoats reduce waiting time between coats and prevent smudging accidents that can ruin perfectly applied designs. Products like Seche Vite and Sally Hansen Insta-Dri cut drying time from minutes to seconds.
Peel off base coats simplify removal of glitter polishes and dark colors that typically require harsh scrubbing or acetone soaking. These specialized base coats allow you to peel off even the most stubborn polishes in single pieces.
All in one polish formulas combine base coat, color, and topcoat in single bottles, reducing application time while maintaining professional results. These streamlined products work especially well for solid color manicures and simple designs.
Pre cut nail strips eliminate measuring and cutting time for geometric patterns, French tips, and negative space designs. Brands like Sally Hansen and Kiss offer various patterns that simply stick on and peel off after polish application.
Nail wraps provide instant designs that look hand painted but apply in minutes, offering complex looking patterns without requiring artistic skills or multiple polish colors. These adhesive designs work particularly well for accent nails and special occasions.
Application Tips for Perfect Results

We’ve covered stunning simple nail designs and essential tools, but proper application technique makes the difference between amateur attempts and professional looking results. Follow these proven methods to ensure your simple nail art looks flawless every time.
Preparation Steps
Cuticle care creates the foundation for clean simple nail art. Push back cuticles gently with a cuticle pusher after soaking nails in warm water for 2-3 minutes. Remove any excess skin around the nail bed to prevent polish from pooling in unwanted areas.
File nails in one direction to prevent splitting and create smooth edges. Choose your preferred shape whether square, round, or oval and maintain consistency across all ten nails. Avoid sawing back and forth motions that can weaken the nail structure.
Clean nail surfaces thoroughly with rubbing alcohol or nail dehydrator. This step removes oils and residue that can cause polish to chip within days. Wait 30 seconds for complete evaporation before applying base coat.
Apply a quality base coat to protect nails and improve polish adhesion. Extend the base coat slightly under the nail tip to create a seal that prevents water damage and extends manicure life to 7-10 days.
Application Techniques
Thin coats prevent streaking and ensure even coverage in simple designs. Apply polish in three strokes down the center and each side of the nail rather than trying to cover the entire surface in one pass. Wait 2 minutes between coats to avoid smudging.
Control your brush pressure for consistent color payoff. Light pressure allows the polish to flow naturally while heavy handed application creates ridges and uneven thickness. Practice on a nail wheel or practice tips to perfect your technique.
Clean up mistakes immediately with a small brush dipped in acetone. Keep a thin liner brush and small container of acetone nearby during application to fix any polish that touches the skin or cuticle area.
Work in good lighting to spot application errors before they set. Natural daylight or bright LED lamps reveal streaks, bubbles, and missed spots that fluorescent lighting often hides. Position your workspace near a window when possible.
Finishing Touches
Apply topcoat while the final color coat is slightly tacky for maximum adhesion. This timing creates a chemical bond between layers that prevents chipping and peeling. Wait exactly 1-2 minutes after your last color application.
Seal nail tips and edges with topcoat to prevent water infiltration. Run the brush along the free edge of each nail to create a protective barrier that extends manicure life significantly.
Use cuticle oil immediately after topcoat application to restore moisture. Massage a drop of jojoba or vitamin E oil into each cuticle and surrounding skin to prevent dryness and maintain healthy nail growth.
Allow 15-20 minutes for complete drying before resuming normal activities. Test dryness by gently tapping nails together they should make a clicking sound when fully set. Quick dry drops can reduce this time to 5-10 minutes for busy schedules.
Conclusion
We’ve shown you that stunning nail art doesn’t require expensive salon visits or years of practice. With the right techniques and basic tools you can create beautiful manicures that fit perfectly into your busy lifestyle.
The key to mastering simple nail designs lies in starting with proper preparation and choosing looks that match your skill level. Whether you prefer classic French tips minimalist solid colors or subtle geometric patterns there’s a perfect option waiting for you.
Remember that practice makes perfect and even small mistakes can be easily corrected with the right approach. We encourage you to experiment with different colors and techniques until you find your signature style that makes you feel confident and polished.
Frequently Asked Questions
What makes nail art designs “simple” and why should I choose them?
Simple nail art designs use basic techniques and minimal tools to create elegant, polished looks. They’re perfect for busy lifestyles because they can be achieved quickly at home without advanced skills or expensive equipment. These designs offer professional-looking results while being forgiving during application and suitable for both casual and formal occasions.
How can I update a classic French manicure to make it more modern?
You can modernize French manicures by using colored tips instead of white (try coral or mint green), creating a reverse French with color at the base, or adding glitter to the tips. These variations maintain the classic elegance while adding personal flair and contemporary style to your nails.
What are the best colors for minimalist single-color manicures?
Neutral nude shades are most versatile as they complement various skin tones and are forgiving during application. Pastels offer soft elegance, while bold jewel tones create powerful statements. Choose colors that match your lifestyle and wardrobe for maximum versatility and wearability.
How can I create geometric patterns without advanced nail art skills?
Start with simple stripes using tape as guides, create polka dots with dotting tools or bobby pins, and try basic triangles with striping tape. These patterns require only basic tools and steady hands. Practice on a nail wheel first to perfect your technique before applying to your nails.
What’s the easiest way to add accent nails to my manicure?
Choose one nail per hand (typically the ring finger) and apply a different color, glitter, or simple design while keeping other nails neutral. This creates visual interest without overwhelming the look. Start with contrasting colors or metallic accents for the most impact with minimal effort.
How do I create ombre and gradient effects on my nails?
Use a makeup sponge to blend two complementary colors while the polish is still wet. Apply both colors to the sponge, then dab onto the nail in a rolling motion. Work quickly and seal with topcoat. Practice the technique on paper first to perfect your blending motion.
What tools do I need to start creating simple nail art at home?
Essential tools include nail files, base and topcoats, cuticle pushers, small detail brushes, and dotting tools. Budget-friendly alternatives include toothpicks, bobby pins, and tape. You don’t need expensive equipment – many household items work perfectly for creating beautiful nail art designs.
How can I make my simple nail art last longer?
Start with proper nail preparation including cuticle care and filing. Apply thin coats, allow proper drying time between layers, and always finish with a quality topcoat. Reapply topcoat every few days and use cuticle oil to maintain nail health and extend your manicure’s lifespan.
What are some seasonal nail art ideas that are still simple to create?
Spring: simple daisy patterns and pastels; Summer: neon accents and ocean blues; Fall: warm burgundy and forest green; Winter: silver glitter gradients and classic holiday reds. These seasonal touches add variety while maintaining the simplicity and ease of application you want.
How do I fix mistakes when doing nail art at home?
Work in good lighting and keep a small brush dipped in acetone nearby for immediate cleanup. Fix smudges while polish is wet, and use a toothpick for precision corrections. If mistakes happen after drying, carefully remove with acetone and reapply that section rather than starting over completely.


