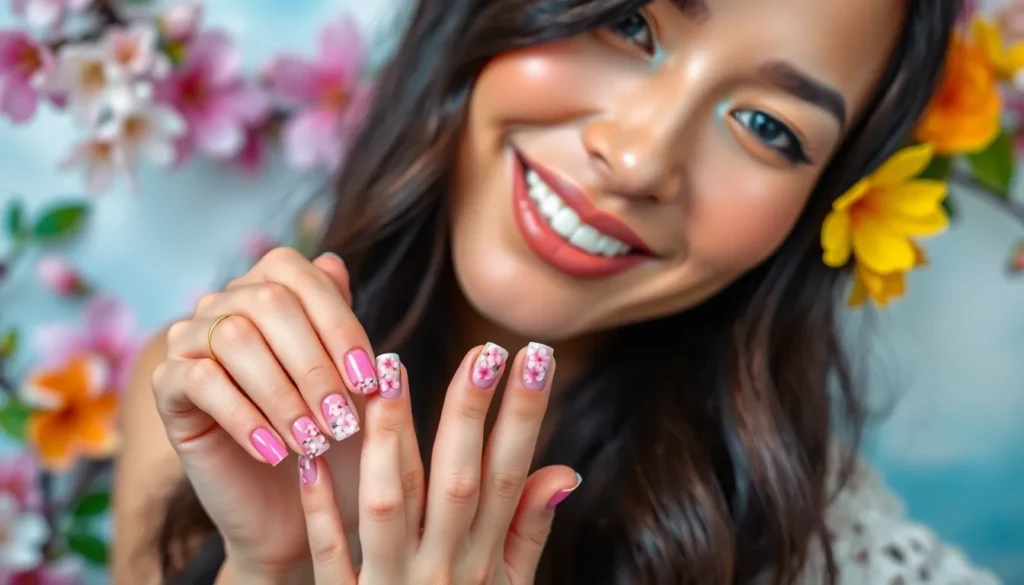
Spring’s arrival brings fresh energy and the perfect opportunity to refresh our nail game with vibrant colors and playful designs. As we shed winter’s dark tones we’re embracing lighter brighter shades that capture the season’s optimistic spirit. From soft pastels to bold florals there’s never been a better time to experiment with creative nail art.
We’ve curated the most stunning spring nail trends that’ll transform your fingertips into seasonal masterpieces. Whether you prefer minimalist elegance or eye-catching statement nails these ideas will keep you ahead of the style curve. Think blooming cherry blossoms delicate butterfly accents and those coveted rainbow gradients that scream spring sophistication.
Ready to welcome warmer weather with nails that turn heads and spark conversations? We’re diving into the season’s hottest trends that range from effortlessly chic to Instagram-worthy showstoppers. Your spring manicure journey starts here.
Fresh Floral Nail Designs That Capture Spring’s Beauty
Floral nail art transforms your fingertips into miniature gardens that celebrate spring’s natural beauty. These botanical designs offer endless creativity while maintaining the season’s fresh aesthetic.
Delicate Cherry Blossom Art
Cherry blossom nails bring the ethereal beauty of spring’s most iconic flower to your manicure. We recommend starting with a soft pink or nude base color to mimic the gentle petals against bare branches. Creating these delicate flowers requires a thin nail art brush or dotting tool to achieve the signature five petal shape.
The technique involves painting small white or pale pink flowers with darker pink centers using a toothpick for precision. Adding tiny brown branches with a striper brush connects the blossoms and creates a realistic tree branch effect. This design works beautifully on accent nails or can be scattered across all ten fingers for a dreamy garden party look.
Professional nail artists suggest applying a glossy top coat to make the cherry blossoms appear fresh and dewy. The finished result captures the fleeting beauty of spring’s first blooms right at your fingertips.
Bold Sunflower Accents
Sunflower nail designs inject vibrant energy into spring manicures with their cheerful yellow petals and rich brown centers. We love how these statement flowers instantly brighten any outfit and mood. The key to perfect sunflower art lies in mastering the petal technique using quick brush strokes that radiate from a central point.
Begin with a bright yellow base coat before painting individual petals using a fan brush or thin liner brush. Each petal should be slightly curved and pointed to mimic the natural sunflower shape. The center requires careful dotting with dark brown or black polish to create the textured seed pattern that makes sunflowers so recognizable.
These bold blooms work best as accent nails paired with solid yellow or green complementary colors. Adding tiny green leaves around the flower base enhances the realistic appearance and ties the design together beautifully.
Minimalist Daisy Patterns
Minimalist daisy nails offer understated elegance for those who prefer subtle floral touches. We create these simple yet striking designs using just white polish and a dotting tool on clear or nude base coats. The beauty lies in their simplicity and versatility.
Each daisy consists of five to seven small white dots arranged in a circle with a tiny yellow center dot. This technique requires steady hands but produces consistently beautiful results across all nail lengths. The spacing between daisies can vary from scattered single blooms to clustered garden patches depending on your preference.
These delicate flowers complement any spring wardrobe without overwhelming your overall look. We often recommend this design for professional settings where bold nail art might be inappropriate but you still want to embrace seasonal trends.
Pastel Color Palettes Perfect for the Season
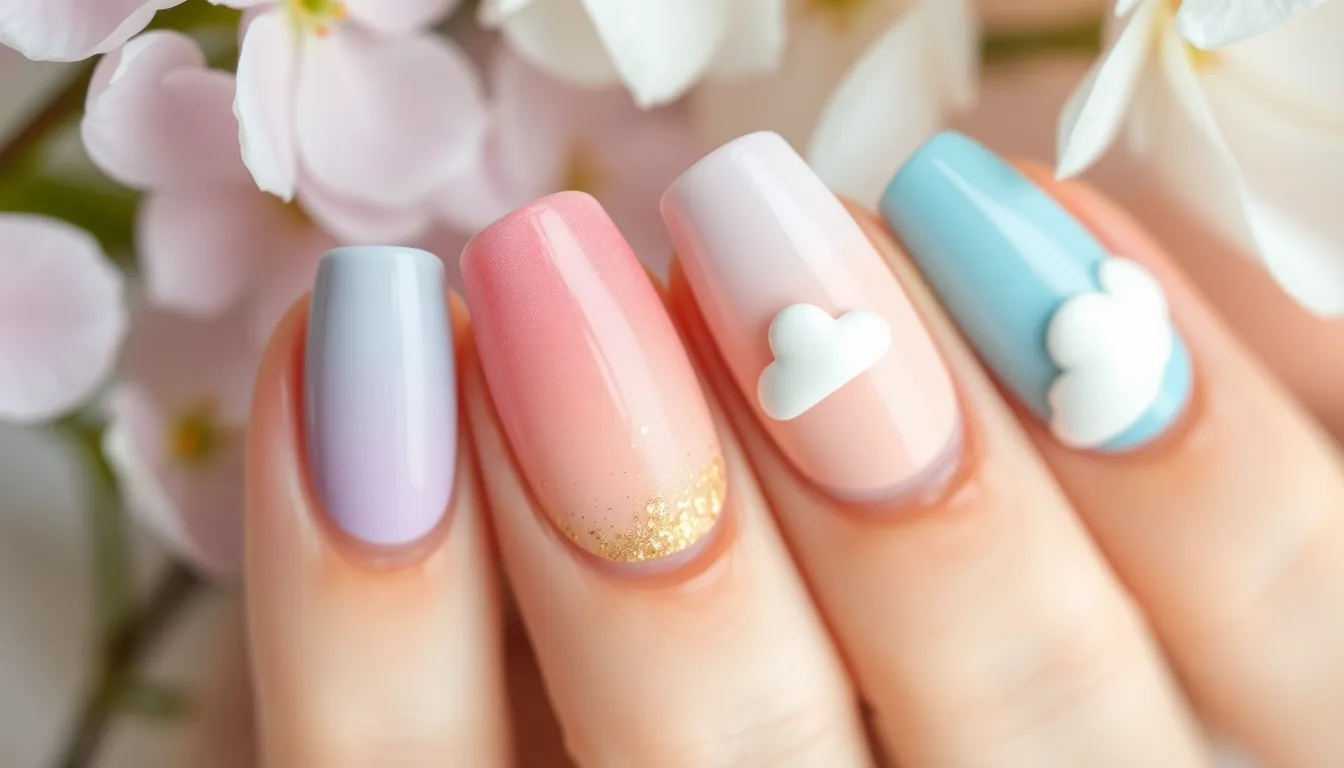
Pastel shades capture spring’s gentle awakening with their soft, dreamy qualities. These delicate hues transform our nails into canvases that reflect the season’s tender beauty.
Soft Lavender and Mint Combinations
Lavender and mint create the most enchanting spring nail combination that feels both sophisticated and playful. We love pairing these colors in alternating patterns where each nail showcases a different shade, creating visual interest without overwhelming the look. Try applying lavender as your base color on your ring and middle fingers while using mint on your thumb, pointer, and pinky for a balanced aesthetic.
Ombre techniques work beautifully with this palette, blending the two colors seamlessly from cuticle to tip. Start with a white base coat, then sponge lavender at the cuticle area and mint toward the nail tips. The resulting gradient mimics spring morning skies and adds depth to your manicure.
Consider adding tiny white dots or delicate silver accents to enhance this combination. These small details elevate the overall design while maintaining the soft, dreamy quality that makes this palette so appealing for spring.
Peachy Pink Gradient Effects
Peachy pink gradients embody spring’s warm embrace with their sun kissed glow that flatters every skin tone. We achieve this look by starting with a nude or light pink base, then building layers of peachy tones from the cuticle downward. The key lies in blending while the polish remains slightly wet, creating seamless transitions between shades.
Coral undertones in peachy pink add vibrancy without being too bold for everyday wear. Apply the lightest shade first, then use a makeup sponge to dab on deeper peach tones at the base of each nail. Work quickly to blend the colors before they dry completely.
Shimmer topcoats enhance peachy pink gradients by catching light and mimicking the golden hour glow. We recommend applying a subtle gold or rose gold shimmer over the finished gradient for an extra touch of spring elegance that photographs beautifully in natural sunlight.
Baby Blue with White Cloud Details
Baby blue serves as the perfect backdrop for whimsical cloud nail art that captures spring’s fresh, airy feeling. We create this look by painting nails in a soft sky blue shade, then adding fluffy white clouds using a small detail brush or dotting tool. The contrast between the pale blue and white creates dimension while maintaining the gentle aesthetic.
Cloud details work best when applied with a dabbing motion rather than precise brushstrokes. Use white acrylic paint or thick polish to create irregular, puffy shapes that resemble actual clouds. Vary the sizes and placements across your nails to create a natural, organic appearance.
Matte topcoat transforms this design into something truly special by eliminating shine and creating a soft, powdery finish. The matte effect makes the cloud details appear more realistic while giving your entire manicure a modern, Instagram worthy appearance that’s perfect for spring photos.
Nature-Inspired Nail Art Ideas for Spring
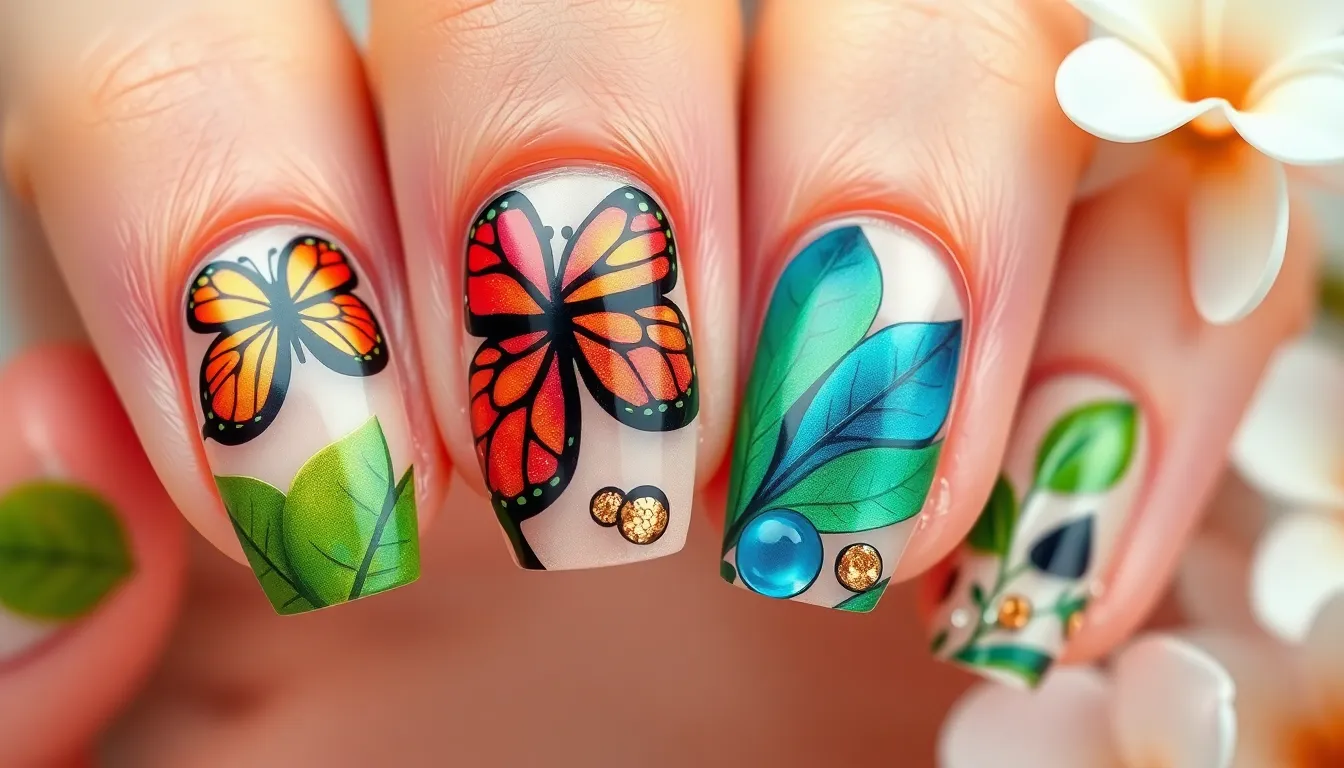
Spring awakens our creativity with endless natural inspiration. We’re drawing from nature’s most captivating elements to create nail art that celebrates the season’s renewal.
Butterfly Wing Designs
Butterfly wing patterns transform your nails into delicate works of art that capture spring’s graceful movement. We start with a sheer nude or white base to mimic the translucent quality of butterfly wings. Detailed wing patterns emerge using fine brushes or nail stamps featuring monarch orange with black veining, blue morpho shades with metallic accents, or soft purple patterns with silver details.
Gradient effects enhance the realistic appearance of butterfly wings on your nails. We blend colors from dark at the nail bed to light at the tips, creating depth and dimension. Tiny white dots scattered across the wings add authentic spotted patterns, while gold or silver foil creates that natural iridescent shimmer butterflies display in sunlight.
Garden Leaf Patterns
Garden leaf designs bring fresh botanical beauty directly to your fingertips with realistic textures and vibrant greens. We create intricate fern patterns using various shades of green from forest to sage, building layers that mimic natural leaf structures. Delicate vein details add authenticity using thin brushes or stamping techniques with darker green or gold accents.
Seasonal leaf variations offer endless creative possibilities for your spring manicure. We incorporate fresh spring green leaves with tiny budding details, eucalyptus patterns with their distinctive blue green tones, or tropical palm fronds for vacation inspired looks. Matte topcoats give leaves a natural appearance while glossy finishes create that fresh after rain effect.
Raindrop and Water Effects
Raindrop nail art captures spring’s refreshing showers with crystal clear effects and dimensional techniques. We create realistic water drops using clear gel polish built up in dome shapes over colored bases. These dimensional raindrops catch light beautifully, especially over deep blue, grey, or green backgrounds that mimic stormy spring skies.
Water ripple effects add movement and fluidity to your spring nail design. We achieve these patterns using a dry brush technique with white or silver polish over blue bases, creating concentric circles that resemble water ripples. Clear topcoat with tiny holographic glitter scattered throughout mimics sparkling raindrops in sunlight, while chrome powder creates that perfect mirror like water reflection effect.
Bold and Bright Spring Nail Color Trends
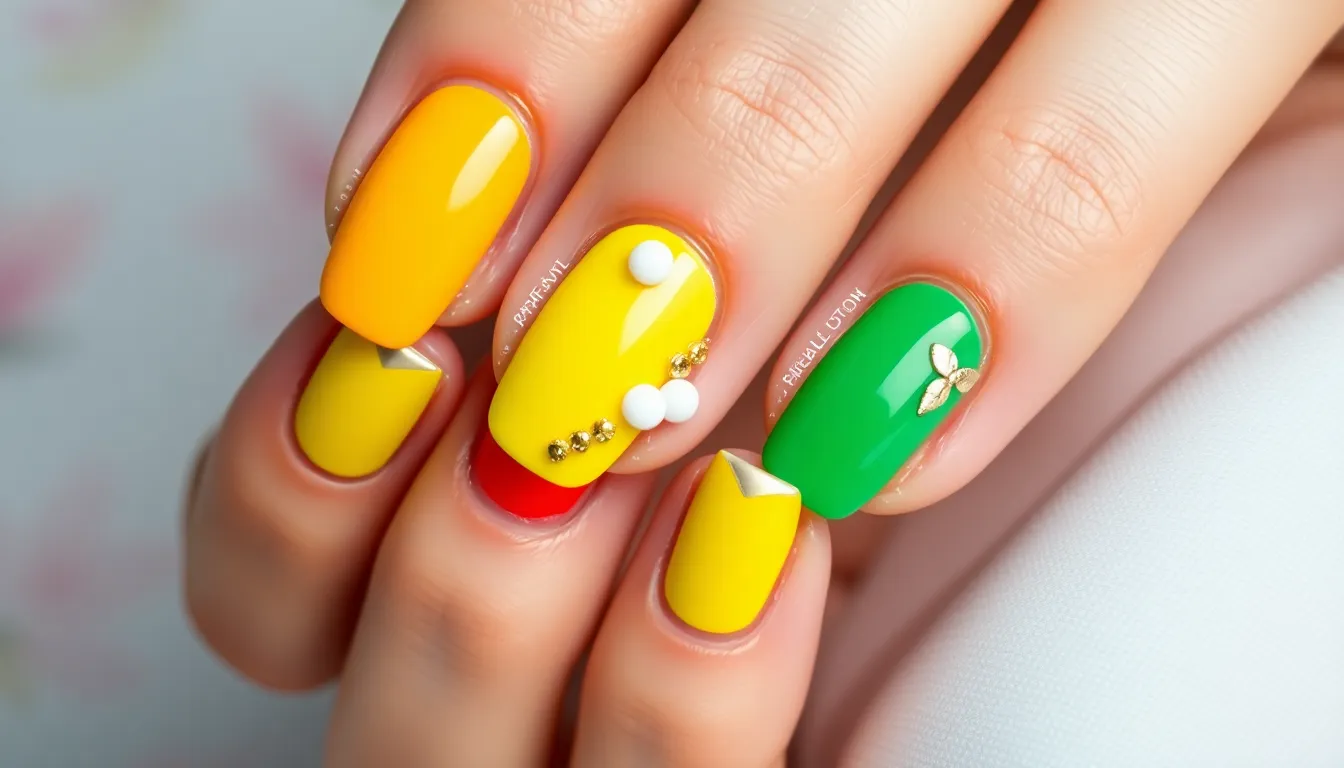
We’re embracing the season’s most electrifying shades that make a powerful statement. These vibrant colors capture spring’s energy and optimism through bold, confident choices.
Electric Coral Statements
Electric coral nails create stunning focal points that complement any spring wardrobe. This energetic shade combines the warmth of orange with pink’s playful nature, resulting in a color that’s both sophisticated and fun. We recommend pairing electric coral with minimalist white accents or delicate gold foil details to enhance the vibrancy without overwhelming the design.
Application techniques matter significantly when working with electric coral polish. Two thin coats provide better color saturation than one thick application, while a quality base coat prevents staining on natural nails. The shade looks particularly striking when paired with geometric patterns like diagonal stripes or modern negative space designs that showcase the coral’s intensity.
Vibrant Yellow Sunshine Shades
Vibrant yellow manicures bring instant joy and brightness to spring nail looks. This cheerful hue ranges from soft buttercup tones to bold lemon shades, each offering unique styling opportunities. We’ve found that yellow pairs beautifully with white daisies, creating nail art that perfectly captures spring’s optimistic spirit.
Professional application requires exact preparation steps for yellow polish success. A white base coat prevents streaking and ensures true color payoff, while quality yellow formulas typically need three thin coats for complete opacity. The shade works exceptionally well with matte topcoats that create a modern, sophisticated finish while maintaining the color’s sunny disposition.
Emerald Green Garden Hues
Emerald green nails embody spring’s lush garden beauty through rich, saturated color. This luxurious shade offers versatility that works equally well for casual daytime looks and elegant evening events. We love incorporating emerald green into botanical designs featuring delicate leaf patterns or abstract nature motifs that enhance the color’s organic appeal.
The application process benefits from exact techniques that maximize emerald’s depth and richness. High quality formulas provide better coverage and longevity, while a glossy topcoat amplifies the color’s jewel tone qualities. This shade pairs exceptionally well with gold accents, creating sophisticated combinations that reflect spring’s natural abundance and growth.
Minimalist Spring Nail Ideas for Everyday Wear

Simple spring nail designs offer effortless elegance that complements any outfit. We’ve curated these understated looks that bring seasonal freshness without overwhelming your daily style.
Clean French Tips with Colored Accents
Reimagine classic French manicures by swapping traditional white tips for soft spring hues. Blush pink tips create a feminine touch that’s perfect for professional settings, while mint green accents add unexpected freshness to the timeless design.
Apply colored tips using steady strokes with a thin brush for precision. We recommend starting with a nude or clear base coat, then carefully painting the tip in your chosen accent color. Light lavender tips work beautifully against fair skin tones, while peachy coral complements warmer complexions.
Enhance the design with tiny metallic dots along the smile line for subtle sparkle. This technique transforms basic colored tips into sophisticated nail art that’s appropriate for both work meetings and weekend brunches.
Simple Geometric Spring Shapes
Create modern minimalist looks using basic geometric forms that capture spring’s architectural beauty. Single triangles painted in soft yellow near the cuticle area make powerful yet understated statements on neutral bases.
Master simple line work by using striping tape for clean edges and precise shapes. We suggest painting thin vertical lines in sage green across one accent nail per hand, keeping the remaining nails in complementary nude shades.
Try scattered dot patterns using dotting tools to create constellation effects with spring colors. Three small dots in gradient sizes using mint, lavender, and white create dimension without complexity, perfect for those new to nail art techniques.
Nude Base with Single Flower Details
Paint delicate single blooms on nude or sheer pink bases for maximum impact with minimal effort. We focus on simple five petal flowers using white polish and thin brushes, adding tiny yellow centers with dotting tools.
Choose strategic placement by featuring one small flower on the ring finger nail only. This approach maintains elegance while incorporating seasonal florals, making it suitable for conservative workplace environments.
Add subtle dimension using sheer topcoats with light shimmer to make the flower details pop. Cherry blossom inspired designs work particularly well with this technique, creating depth without requiring advanced artistic skills.
Creative Texture and Finish Options

Moving beyond color choices, we’re exploring how different textures and finishes can transform your spring manicure into something truly extraordinary. These finishing techniques add depth and visual interest to complement the fresh energy of the season.
Matte Pastels for Subtle Elegance
Matte lavender nails create a sophisticated powder finish that feels both modern and timeless for spring wear. We recommend applying your favorite lavender shade in two thin coats, then sealing with a quality matte topcoat for that velvety texture. This finish works beautifully with minimalist white nail art or tiny silver dots placed strategically near the cuticle area.
Soft mint green mattes offer an understated elegance that pairs perfectly with spring wardrobes and neutral tones. The matte texture transforms this classic spring shade into something more editorial and refined. We suggest adding a single delicate white flower detail on your ring finger to maintain the subtle aesthetic while creating visual interest.
Peachy pink matte finishes provide warmth without the high shine, making them ideal for professional settings during spring months. These shades complement most skin tones and work exceptionally well when combined with barely there geometric shapes. The matte texture prevents the peachy tones from appearing too juvenile while maintaining their fresh spring appeal.
Glossy Chrome Spring Reflections
Mirror chrome effects in soft gold tones capture spring sunlight beautifully, creating nails that shimmer and change with every movement. We achieve this look by applying a black base coat, followed by chrome powder application using a makeup sponge for even distribution. The final glossy topcoat seals the effect and provides that liquid metal appearance that’s perfect for special spring occasions.
Rose gold chrome finishes blend warm metallic tones with feminine appeal, making them ideal for spring events and celebrations. This technique requires careful buffing of the chrome powder to achieve maximum reflectivity before applying the topcoat. We love how rose gold chrome complements both pastel and vibrant spring outfits effortlessly.
Holographic chrome variations create rainbow reflections that shift between colors as light hits the nails from different angles. These futuristic finishes work particularly well on shorter nail lengths where the chrome effect remains crisp and defined. We recommend pairing holographic chrome with simple nail shapes to let the finish be the star of your spring manicure.
Glitter Accents for Festival Season
Chunky rainbow glitter scattered across clear or nude bases captures the playful energy of spring music festivals and outdoor celebrations. We apply the glitter strategically using a small brush, concentrating heavier coverage near the cuticle and gradually decreasing toward the nail tip. This creates a modern gradient effect that’s both eye catching and wearable for festival environments.
Fine gold glitter ombré techniques blend seamlessly from heavy concentration at the nail tip to subtle sparkle near the base. This sophisticated approach to glitter application works beautifully over spring pastels like mint green or soft lavender. We recommend using a makeup sponge to dab and blend the glitter for the smoothest transition between dense and light coverage areas.
Accent nail glitter placement allows you to incorporate festival ready sparkle without overwhelming your entire manicure for spring events. We typically choose the ring finger for maximum glitter application while keeping the remaining nails in complementary solid colors. This balanced approach lets you embrace the glitter trend while maintaining versatility for different spring occasions and settings.
Easy DIY Spring Nail Ideas for Beginners

Perfect your spring manicure skills with these simple techniques that require minimal tools and create maximum impact.
Polka Dot Flower Centers
Dotting tools transform basic polka dots into charming floral masterpieces. Start with a light pink or cream base coat and allow it to dry completely for 10 minutes. Use a dotting tool or bobby pin to create five white dots in a circle formation for each flower center. Add a small yellow dot in the middle using nail art polish or acrylic paint for the perfect daisy effect.
Spacing your flowers strategically across three nails creates visual balance. Place one large flower on your ring finger and smaller versions on your thumb and middle finger. Fill empty spaces with tiny single dots using the same white polish for cohesion. Apply a glossy topcoat to seal your design and add professional shine that lasts up to seven days.
Striped Easter Egg Designs
Tape strips create perfectly straight lines for festive Easter egg patterns. Apply a pastel base color like mint green or soft lavender and let it cure for 15 minutes. Cut thin strips of painter’s tape and place them diagonally across each nail, leaving small gaps between strips. Paint over the exposed areas with contrasting spring colors like coral pink or sunny yellow.
Remove tape immediately while polish is still wet for crisp edges. Peel off each strip slowly and steadily to prevent smudging your design. Create different patterns on each nail using various stripe widths and angles for playful Easter variety. Finish with two coats of clear topcoat to smooth any slight texture differences and protect your artwork.
Simple Ombre Sunset Effects
Makeup sponges blend spring colors seamlessly for stunning gradient effects. Choose three coordinating shades like peach, coral, and soft yellow for your sunset palette. Paint all three colors in horizontal stripes on a makeup sponge, slightly overlapping where they meet. Press and roll the sponge gently across each nail from cuticle to tip.
Multiple light layers build better color saturation than one heavy application. Allow each layer to dry for 5 minutes before adding the next coat using the same sponge technique. Clean up excess polish around your cuticles with a small brush dipped in acetone for professional results. Apply base coat first and finish with two layers of clear topcoat for smooth texture and extended wear time of 10 days.
Professional Spring Nail Art Techniques

Elevating our spring nail game requires mastering sophisticated techniques that create salon-quality results. We’ll explore advanced methods that transform simple manicures into professional masterpieces.
Advanced Water Marble Methods
Water marble techniques create stunning fluid patterns that capture spring’s flowing energy. We start by filling a small cup with room temperature filtered water and dropping alternating colors like soft pink, mint green, and lavender onto the surface. Creating concentric circles with each drop allows the colors to spread naturally across the water.
Drawing designs through the floating polish requires a toothpick or needle tool moved in gentle swirling motions. We achieve butterfly wing patterns by dragging from the center outward in symmetrical movements. Floral marble effects emerge when we create petal shapes by pulling the tool in curved arcs around a central point.
Protecting the surrounding skin becomes crucial for clean results using liquid latex or petroleum jelly around each nail. We dip the nail straight down into the design and hold for 3-5 seconds before lifting vertically. Removing excess polish from the water surface with a toothpick prevents contamination between nails.
Setting the marble design requires immediate application of quick-dry topcoat while the base colors remain slightly tacky. Temperature control affects the marbling process significantly since warmer water creates faster spreading while cooler temperatures allow more detailed manipulation time.
Detailed Hand-Painted Illustrations
Hand-painted nail art showcases intricate spring scenes through precise brush control and layering techniques. We select high-quality acrylic paints in spring colors like cherry blossom pink, grass green, and sky blue for optimal coverage and blending capabilities. Thin brushes ranging from size 0 to 2 provide the control needed for delicate details.
Creating realistic cherry blossom branches starts with painting thin brown lines using a liner brush loaded with burnt umber paint. We add texture by dabbing the brush perpendicular to create bark-like effects along the branch. Small pink flowers emerge by dotting five petals around a central yellow point using a fine detail brush.
Butterfly illustrations require careful wing symmetry achieved by painting one wing completely before mirroring the design. We build depth through color layering starting with base wing shapes in light blue or yellow then adding darker edge details. Tiny white highlights applied with a dotting tool create the iridescent quality of real butterfly wings.
Garden scenes incorporate multiple spring elements like tulips, daisies, and grass blades painted in proper scale proportions. We establish backgrounds first using sponge-applied gradients then add foreground elements working from largest to smallest details. Final touches include dewdrop effects created with clear topcoat applied in small dots over completed flowers.
3D Embellishment Applications
Three-dimensional elements add sculptural interest to spring nail designs through strategic placement and secure attachment methods. We choose embellishments like tiny silk flowers, crystal butterflies, and miniature leaf charms that complement rather than overwhelm the base design. Quality nail adhesive or gel topcoat provides stronger hold than standard base coats.
Flower placement requires careful consideration of finger movement and daily activities to prevent snagging. We position larger 3D flowers on accent nails only while distributing smaller elements across multiple nails for balanced visual weight. Creating depth involves layering flat-backed crystals behind raised elements to simulate natural shadow effects.
Building textured gardens uses multiple embellishment types combined with painted backgrounds for realistic scenes. We apply tiny green beads to represent grass texture while small pearl accents mimic dewdrops on flower petals. Metal leaf flakes pressed into tacky topcoat create shimmering water effects for spring pond scenes.
Securing 3D elements properly prevents lifting during wear through proper surface preparation and curing techniques. We buff the nail surface lightly before application to increase adhesion then seal around embellishment edges with thin topcoat layers. UV lamp curing for 60-90 seconds ensures complete polymerization of gel adhesives for maximum durability.
Nail Shape Trends That Complement Spring Designs
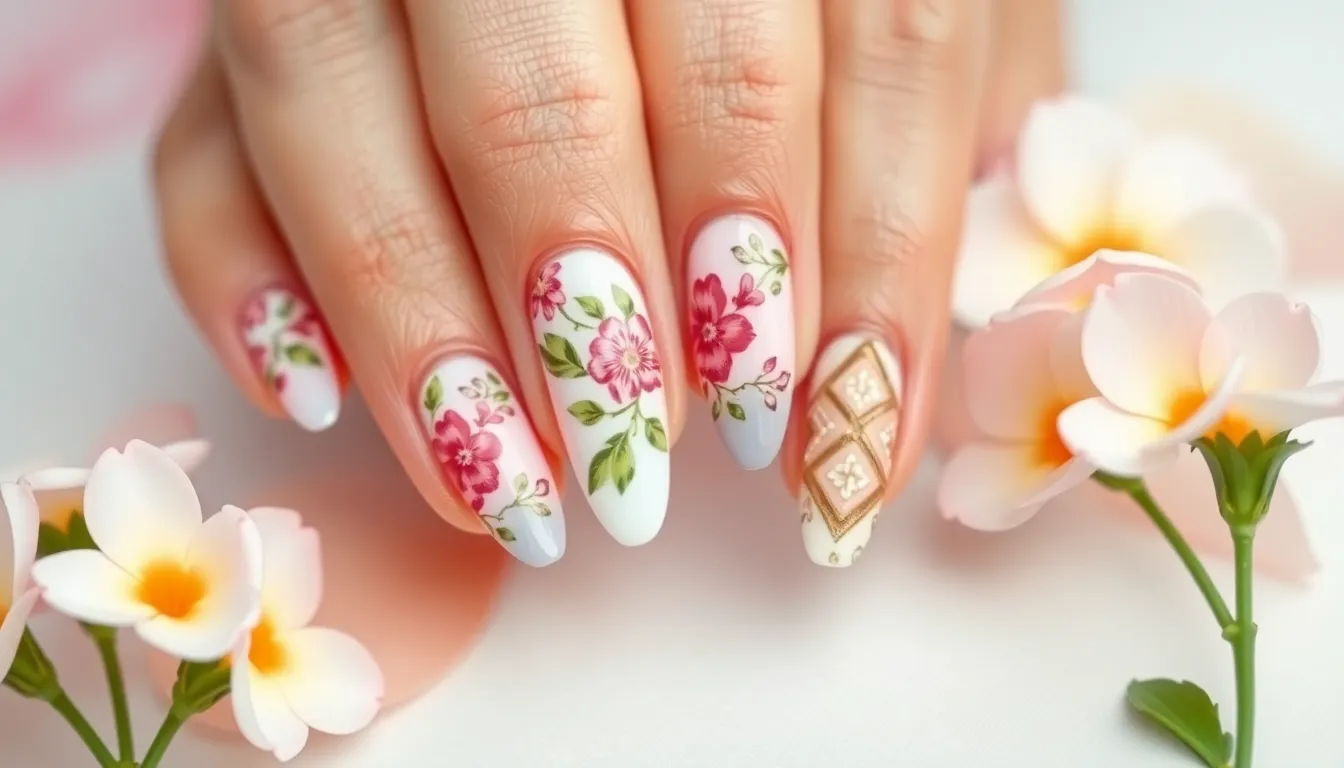
Choosing the right nail shape significantly impacts how your spring designs appear and feel. We’ll explore the most complementary shapes that enhance seasonal nail art while providing the perfect canvas for your creative expressions.
Almond Shapes for Floral Art
Almond nails create the ideal foundation for intricate floral designs with their naturally elegant silhouette. The tapered sides and rounded tip provide ample surface area for detailed cherry blossom branches and delicate petal work. Artists find this shape particularly suited for botanical illustrations because the curved edges mirror nature’s organic forms.
Creating stunning daisy chains becomes effortless on almond shaped nails due to their elongated canvas. We recommend filing from the sidewalls toward the center point while maintaining a gentle curve. Professional nail technicians often choose this shape for clients wanting sophisticated spring looks because it naturally elongates fingers and complements feminine designs.
Butterfly wing patterns look exceptionally striking on almond nails since the shape mimics actual wing proportions. The pointed tip allows for precise detail work in wing tips while the wider base accommodates intricate body designs. Spring garden themes flourish on this nail shape as artists can layer multiple floral elements without overcrowding the design space.
Square Tips for Geometric Patterns
Square nails offer clean lines that perfectly complement modern geometric spring designs. The flat tip and straight edges create natural boundaries for triangle patterns and linear arrangements. Contemporary nail artists prefer this shape for minimalist spring looks because it provides defined spaces for precise pattern placement.
Designing striped Easter egg patterns becomes remarkably simple on square shaped nails due to their uniform width. We’ve found that painter’s tape adheres better to flat surfaces, resulting in cleaner lines and professional appearing finishes. The angular edges also enhance metallic accent placement, making gold and silver details appear more structured.
Modern architectural inspired patterns shine on square tips because the shape naturally echoes building designs. Chevron patterns, scattered dots, and linear arrangements all benefit from the stable foundation that square nails provide. Spring color blocking techniques work exceptionally well with this shape as each section appears distinct and intentional.
Oval Nails for Classic Spring Looks
Oval shapes represent the perfect balance between elegance and practicality for everyday spring wear. This universally flattering shape works beautifully with traditional French manicures updated in soft spring hues. The rounded edges prevent snagging while maintaining a sophisticated appearance that suits professional and casual settings.
Classic pastel ombre effects appear most natural on oval nails because the shape mirrors the gentle transition of spring sunsets. We recommend this shape for clients wanting timeless spring looks that won’t appear dated as trends change. The moderate length and curved sides provide enough space for delicate single flower details without overwhelming smaller hands.
Simple polka dot flower centers look particularly charming on oval nails since the dots follow the natural curve of the nail bed. Beginner nail artists often find this shape most forgiving for practicing spring techniques because mistakes blend more naturally with the soft edges. Traditional spring motifs like tiny daisies and minimalist leaf patterns complement the classic beauty of oval shaped nails perfectly.
Conclusion
Spring’s arrival gives us the perfect opportunity to transform our nails into stunning canvases that celebrate the season’s vibrant energy. Whether we’re drawn to delicate florals that whisper of garden blooms or bold electric corals that demand attention our nail choices can instantly elevate our spring style.
The beauty of spring nail art lies in its versatility—from beginner-friendly dotted daisies to professional water marble techniques there’s something for every skill level and personal taste. We can embrace soft pastels for understated elegance or jump into holographic finishes that catch every ray of sunshine.
As we step into warmer days ahead let’s remember that our nails are more than just an accessory—they’re a reflection of our personality and the joy we find in seasonal renewal. It’s time to let our creativity bloom at our fingertips.
Frequently Asked Questions
What are the most popular spring nail color trends this year?
The most popular spring nail colors include electric coral, vibrant yellow, emerald green, soft lavender, mint combinations, and peachy pink gradients. These colors shift away from winter’s dark tones toward brighter, more optimistic shades that embody spring’s fresh energy and renewal.
What are some easy DIY spring nail designs for beginners?
Beginners can try polka dot flower centers using dotting tools, striped Easter egg patterns with painter’s tape for clean lines, and simple ombre sunset effects using makeup sponges. These techniques require minimal tools but create maximum impact for stunning spring manicures.
Which nail shapes work best for spring nail art designs?
Almond shapes are perfect for intricate floral designs, square tips provide clean lines ideal for geometric patterns, and oval nails offer a classic choice for everyday spring looks. The right shape enhances your chosen design and complements seasonal nail art beautifully.
How can I incorporate floral designs into my spring manicure?
Try delicate cherry blossom art on soft pink bases, bold sunflower accents with vibrant yellow petals, or minimalist daisy patterns for subtle elegance. Use precise painting techniques and consider botanical designs like garden leaf patterns or butterfly wing details for nature-inspired looks.
What textures and finishes are trending for spring nails?
Popular spring finishes include matte pastels for subtle elegance, glossy chrome in soft gold and rose gold for reflective qualities, holographic variations for rainbow effects, and glitter accents ranging from chunky rainbow glitter to fine gold ombré techniques.
Can I achieve professional-looking spring nail art at home?
Yes! Advanced DIY techniques include water marble methods for fluid patterns, detailed hand-painted spring scenes using layering techniques, and 3D embellishment applications with silk flowers and crystals. These professional methods can create salon-quality results with practice and patience.

