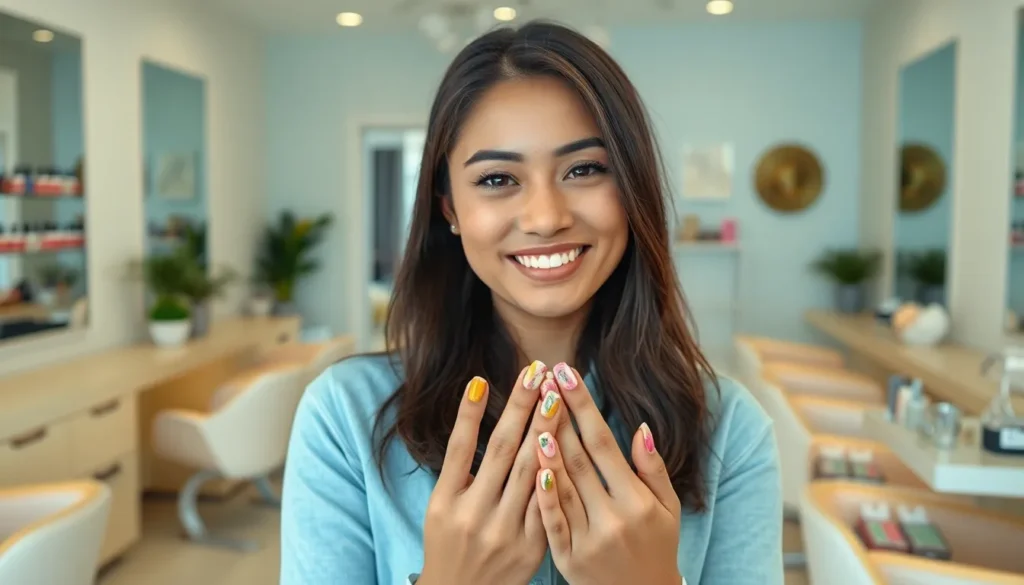
Looking for stunning nail designs that won’t take hours to master? We’ve got you covered with easy nail art ideas that’ll transform your fingertips from basic to brilliant in minutes.
Whether you’re a complete beginner or just short on time we’ll show you simple techniques that create maximum impact. From elegant minimalist looks to playful patterns you can achieve salon-worthy results right at home with basic tools you probably already own.
We’ve curated the most foolproof nail design ideas that require zero artistic experience yet deliver Instagram-worthy results every time. These easy nail art techniques will boost your confidence and save your wallet while keeping your nails on-trend all season long.
Simple Solid Color Nail Designs That Make a Statement
Solid colors offer the perfect foundation for creating striking nail art without complex techniques. These foolproof designs prove that single shades can be just as impactful as intricate patterns.
Classic French Manicure with a Twist
Modernize the traditional French tip by swapping white for unexpected colors like sage green, dusty rose, or metallic gold. Apply your chosen base color to the entire nail, then use a thin nail art brush to paint crisp tips in your accent shade.
Reverse French manicures create visual interest by placing the colored section at the cuticle instead of the tip. Paint a thin line of bright coral or deep navy along your cuticle area, leaving the rest of the nail in a complementary nude tone.
Colored tips in jewel tones like emerald or sapphire blue instantly elevate the classic look. Use nail guides or tape to achieve perfectly straight lines, then seal with a high gloss topcoat for professional results.
Bold Monochromatic Looks
Electric blues and vibrant oranges command attention while remaining surprisingly wearable for everyday occasions. Choose high quality gel polishes in these statement shades for chip resistant coverage that lasts up to two weeks.
Deep burgundies and rich forest greens offer sophisticated alternatives to traditional reds during fall and winter months. Apply two thin coats rather than one thick layer to prevent bubbling and ensure even color distribution.
Neon pinks and lime greens create playful summer vibes that pair perfectly with casual outfits. Balance these intense shades by keeping your nail shape short to medium length for optimal visual impact.
Nude and Neutral Elegance
Warm beiges and soft taupes complement every skin tone while providing a polished base for subtle accent details. These versatile shades work seamlessly with both professional attire and weekend casual looks.
Cool grays and mushroom tones offer modern sophistication that photographs beautifully on social media. Layer a subtle shimmer topcoat over these muted shades for dimension without overwhelming sparkle.
Peachy nudes and soft corals bring warmth to your hands while maintaining an understated elegance. These flattering shades elongate fingers and create the illusion of longer nail beds when applied with precision.
Easy Nail Art Using Tape and Stickers
 1")
Building on our foundation of simple nail designs, we can elevate our manicure game using basic crafting supplies that deliver professional-looking results.
Geometric Patterns with Tape
Triangular accent nails create striking focal points when we apply regular masking tape diagonally across painted base colors. We position the tape from one corner to the opposite side, paint over it with contrasting polish, and carefully remove the tape while the polish remains wet.
Chevron designs emerge effortlessly when we create V-shaped patterns using two strips of tape positioned at angles. Our base color shows through the exposed chevron shape after we paint over the taped area with a different shade.
Color blocking techniques transform simple manicures into modern art pieces through strategic tape placement. We divide each nail into sections using tape strips, paint different colors in alternating blocks, and reveal clean geometric divisions once we remove the tape.
Diagonal stripes add ever-changing movement to our nail design when we apply tape at various angles across the nail surface. Multiple strips create interesting negative space patterns that showcase our base color through carefully planned gaps.
Fun Sticker Applications
Character stickers bring playful elements to our nail art collection, especially cartoon figures, animals, and seasonal motifs that appeal to various age groups. We apply these decorative elements over dry base coats and seal them with clear topcoat for longevity.
Metallic accent stickers in gold, silver, and rose gold tones instantly upgrade basic manicures into glamorous statement nails. These reflective elements catch light beautifully when positioned strategically on ring fingers or as border accents.
Floral sticker combinations create garden-inspired nail art when we layer different botanical elements across multiple nails. We mix roses, leaves, and small flowers to build cohesive nature-themed designs without requiring freehand painting skills.
Letter and number stickers personalize our manicures with initials, meaningful dates, or inspiring words that reflect our individual style. These typography elements work particularly well on accent nails when paired with solid base colors.
Striping Tape Designs
Parallel line patterns produce clean, professional-looking nail art when we apply thin striping tape in evenly spaced horizontal or vertical arrangements. The tape remains on the nail as a permanent design element, creating precise metallic lines over our chosen base color.
Grid formations emerge when we layer perpendicular strips of striping tape to create window-like patterns across the nail surface. These intersecting lines add texture and visual interest while maintaining the sophisticated appearance of geometric design.
Curved tape applications soften geometric looks when we bend flexible striping tape into gentle arcs and waves. This technique creates organic flowing patterns that complement the natural shape of our nail beds.
Mixed metallic combinations using gold, silver, and copper striping tape together produce luxurious nail art with minimal effort. We alternate different metallic tones across our nails or combine multiple colors on individual nails for added visual complexity.
Quick Dotting Tool Nail Art Techniques
 2")
Dotting tools transform basic nail polish into stunning patterns with just a few simple movements. We’ll explore three versatile techniques that create professional looking results in minutes.
Polka Dot Patterns
Classic polka dots offer the perfect starting point for dotting tool mastery. We recommend using contrasting colors like white dots on navy blue or gold dots on deep burgundy for maximum impact. Start with your base color completely dry, then dip the dotting tool in your accent polish and gently press onto the nail surface.
Scattered dot placement creates a modern, asymmetrical look that feels fresh and contemporary. Place 3-5 dots randomly across each nail, varying the spacing to avoid rigid patterns. This technique works exceptionally well with nude bases and metallic accent dots.
Gradient dot sizes add visual interest by combining different dotting tool sizes on the same nail. Use the largest tool near the cuticle, medium dots in the center, and tiny dots toward the tip. This creates depth and movement that catches light beautifully.
Rainbow polka dots bring playful energy to your manicure by using multiple colors across all ten nails. Choose 4-5 coordinating shades and alternate them randomly for a cheerful, festival ready look.
Floral Dot Designs
Simple five dot flowers form the foundation of dotting tool floral art. Create each bloom by placing four dots in a square pattern, then add the fifth dot in the center using a contrasting color. We suggest starting with 2-3 flowers per nail to avoid overcrowding.
Daisy chain patterns connect multiple flowers using tiny dots as stems and leaves. Position flowers at varying heights and link them with curved lines of small dots in green polish. This technique transforms individual flowers into cohesive garden scenes.
Cherry blossom branches capture delicate spring beauty through strategic dot placement. Use light pink or white dots clustered along curved brown lines to mimic natural branch patterns. Add dimension by varying dot sizes within each cluster.
Sunflower centers combine yellow outer petals with dark brown dotted centers for bold, summery designs. Create 6-8 yellow dots in a circle, then fill the center with multiple small brown dots for realistic texture.
Ombre Dot Effects
Color gradient transitions blend seamlessly from light to dark using progressively deeper shades. Start with the lightest color near the cuticle and gradually transition to darker tones toward the tip. We recommend using 3-4 shades from the same color family for smooth blending.
Density fade patterns create ombre effects by varying dot concentration rather than color intensity. Place dots closely together near the cuticle, then gradually increase spacing as you move toward the tip. This technique works beautifully with monochromatic color schemes.
Metallic shimmer gradients incorporate glitter or metallic polishes for glamorous ombre effects. Begin with dense metallic dots at the nail tip and fade to sparse placement near the cuticle. Silver, gold, and rose gold create particularly stunning results over dark bases.
Sunset blend combinations capture the warm hues of golden hour through strategic color layering. Apply yellow dots first, then orange in the middle section, finishing with red or coral at the tips. Blend edges while polish remains slightly wet for seamless color transitions.
Simple Gradient and Ombre Nail Designs
 3")
Gradient and ombre techniques create seamless color transitions that look professionally crafted yet require minimal skill to master. These flowing designs build naturally upon basic solid colors and nail art techniques while adding sophisticated depth to your manicure.
Two-Color Gradient Technique
Start with complementary colors that blend beautifully together, such as pink to purple or blue to teal. Apply your darker shade as the base coat and let it dry completely for 2-3 minutes.
Paint your lighter color onto a makeup sponge in quick dabbing motions. Press the sponge onto the upper two-thirds of each nail, creating an overlapping zone where both colors meet.
Blend the transition area by gently bouncing the sponge up and down along the middle section of your nail. Work quickly while both polishes remain slightly wet to achieve the smoothest gradient effect.
Clean up edges using a small brush dipped in acetone or nail polish remover. Apply base coat first, then your gradient, and finish with two thin coats of top coat for a glossy, professional appearance.
Glitter Ombre Nails
Choose a glitter polish that coordinates with your base color, such as silver glitter over navy blue or gold glitter over burgundy. Apply your solid base color and allow it to dry for at least 5 minutes.
Concentrate glitter application at the nail tips using light dabbing motions with the polish brush. Build up density gradually by applying multiple thin coats rather than one thick layer.
Fade the glitter downward by using less product with each stroke as you move toward the cuticle area. Create a natural sparkle gradient by stopping the glitter application about halfway down each nail.
Seal the design with a quality top coat to smooth out any texture from the glitter particles. Apply two coats of top coat for maximum shine and longevity, waiting 1-2 minutes between applications.
Sunset Gradient Effects
Select three warm colors that mimic natural sunset hues, such as yellow, orange, and deep pink or coral. Apply the lightest color as your base and let it dry completely before proceeding.
Layer the middle shade using a damp makeup sponge, focusing on the center portion of each nail. Blend upward and downward to create smooth transitions between the light base and medium tone.
Add the darkest color to the nail tips using the same sponge technique, overlapping with the middle shade to create depth. Work in thin layers, building up intensity gradually for the most realistic sunset effect.
Enhance with shimmer by adding a light dusting of gold or copper glitter polish over the entire design. This final touch mimics the natural sparkle of sunlight and elevates your sunset gradient to salon quality results.
Easy Stamping Nail Art Ideas
 4")
Stamping transforms ordinary manicures into intricate designs with just a few simple tools. We’ll explore foolproof stamping techniques that create stunning nail art without requiring advanced skills.
Basic Stamping Patterns
Floral stamping patterns offer the perfect starting point for beginners looking to master this technique. We recommend practicing with large rose designs or simple daisy patterns that cover most of the nail surface, making alignment mistakes less noticeable.
Geometric stamping designs create modern, sophisticated looks using basic shapes like triangles, hexagons, and linear patterns. These designs work exceptionally well on accent nails, allowing you to experiment with bold patterns while keeping the overall look balanced.
Lace stamping effects add elegant texture to any manicure with delicate, intricate patterns that mimic fabric textures. We suggest using nude or pastel base colors with white or gold stamping polish for the most striking contrast.
Animal print stamps bring wild personality to your nails through leopard spots, zebra stripes, and snake scales. These patterns work beautifully over dark base colors, creating dramatic statements that photograph well for social media.
Layered Stamping Techniques
Double stamping methods involve applying one pattern, then layering a second complementary design on top for added depth. We achieve the best results by using lighter colors for the base stamp and darker shades for the overlay pattern.
Color gradient stamping creates dimensional effects by using different shades of the same color family across multiple stamps. This technique works particularly well with blue to purple gradients or warm sunset color combinations.
Texture mixing approaches combine different stamping plate textures, such as pairing smooth geometric patterns with rough, organic designs. We recommend limiting yourself to two different textures per nail to maintain visual coherence.
Metallic accent layering adds glamorous highlights by stamping metallic designs over matte base patterns. Gold foil stamps over black lace patterns create particularly striking results for evening occasions.
Mix and Match Stamp Designs
Pattern combination strategies involve using different designs on each nail while maintaining a cohesive color palette throughout the manicure. We suggest choosing three to four complementary patterns and distributing them evenly across both hands.
Theme coordination techniques unite various stamp designs under a common concept, such as botanical themes using flowers, leaves, and vines across different nails. This approach creates visual interest while maintaining design harmony.
Accent nail integration incorporates stamped designs strategically on one or two nails per hand, allowing simpler techniques like solid colors or gradients to balance the overall look. We find ring finger and thumb placement most effective for accent stamping.
Seasonal mixing approaches combine weather appropriate patterns, such as pairing snowflake stamps with geometric designs for winter or mixing floral stamps with polka dots for spring celebrations.
No-Tool Nail Designs You Can Do at Home
 5")
Creating stunning nail art doesn’t require expensive equipment when you have common household items at your fingertips. We’ll show you how everyday objects become powerful nail art tools that rival professional equipment.
Toothpick Art Techniques
Toothpicks transform into precise drawing instruments for creating delicate nail designs with remarkable control. We recommend dipping the pointed end in nail polish to draw thin lines, swirls, and intricate patterns that mimic fine brush work. Creating marble effects becomes effortless when you drag a toothpick through wet polish colors on your nails, producing organic swirling patterns. Water marble techniques work exceptionally well with toothpicks, allowing you to manipulate polish drops on water surfaces before transferring to nails.
Drawing feather designs requires gentle dragging motions from the base toward the tip, creating realistic texture with multiple polish colors. Floral details emerge beautifully when you use toothpicks to add centers to stamped flowers or create small petals around dotted bases. Heart shapes form easily by creating two dots with polish and connecting them with a downward drag using the toothpick tip.
Bobby Pin Nail Art
Bobby pins deliver dual functionality as both dotting tools and line creators for versatile nail art applications. We use the rounded end to create perfect circles in various sizes, while the open end produces elongated ovals and unique teardrop shapes. Dragging the bobby pin through wet polish creates beautiful striped effects and can blend colors for gradient appearances.
Textured patterns emerge when you press the corrugated side of a bobby pin into semi wet polish, creating interesting ridged designs. Geometric shapes become achievable by using the straight edges to create clean lines and angular patterns across your nails. Creating plaid designs involves crossing horizontal and vertical lines made with the bobby pin’s edge, then filling in alternating squares with different colors.
Household Item Stamping
Common household objects serve as excellent stamping tools for creating repetitive patterns and textures on your nails. We discover that bubble wrap creates fascinating honeycomb textures when pressed into wet polish, producing dimensional effects that catch light beautifully. Mesh produce bags from onions or oranges generate crosshatch patterns when laid over wet base colors and dabbed with contrasting polish.
Rubber bands stretched across your nail create perfect parallel lines when you paint over them and remove carefully. Kitchen sponges cut into small pieces become excellent tools for creating gradient effects and textured backgrounds. Credit cards work wonderfully as straight edge guides for creating clean geometric divisions and color blocking effects.
Plastic wrap pressed into wet polish creates organic, cellular patterns that resemble natural stone or marble textures. Paper doilies serve as intricate stencils for lace patterns, creating elegant vintage inspired designs when used as stamps over base colors.
Quick Glitter and Accent Nail Ideas
 6")
Glitter transforms ordinary manicures into eye-catching statement pieces that require minimal effort yet deliver maximum impact.
Single Accent Nail Designs
Ring finger glitter accents create the perfect balance between subtle elegance and glamorous sparkle. We recommend applying a base color to all nails, then coating just the ring finger with chunky gold glitter for a classic bridal look. Silver holographic glitter on the thumb creates an unexpected focal point that catches light beautifully during daily activities.
Geometric glitter placement elevates simple manicures with strategic sparkle positioning. Create triangular glitter sections on accent nails using tape as a guide, leaving the rest of the nail in your chosen base color. Half-moon glitter applications at the nail base offer a modern twist on traditional French manicures.
Color coordinated accents ensure your glitter choices complement rather than clash with your overall look. Match rose gold glitter with warm nude bases for sophisticated everyday wear. Pair emerald green glitter with deep forest bases during fall months for seasonally appropriate elegance.
Glitter Gradient Tips
Sponge application technique creates seamless glitter fades that look professionally crafted. Start by applying glitter polish to a makeup sponge, then dab it onto the nail tip while the base coat remains slightly tacky. Build the density gradually by repeating this process three to four times for optimal coverage.
Density control methods prevent overwhelming your nails with too much sparkle at once. Begin with light pressure during the first application layer, then increase intensity toward the nail tips. Allow each layer to dry for 30 seconds before adding the next to maintain proper adhesion.
Color transition effects blend multiple glitter shades for dimensional gradient looks. Combine silver glitter at the base with gold at the tips for a sunset inspired transition. Layer fine glitter over chunky pieces to create depth and texture variation throughout the gradient.
Sparkle Top Coat Techniques
Strategic sparkle placement maximizes impact while maintaining wearable elegance for daily activities. Apply glitter top coat only to the upper third of each nail to create subtle sparkle that won’t interfere with typing or texting. Focus application on accent nails while using clear top coat on remaining fingers.
Layering different textures creates complex looks using simple application methods. Start with fine shimmer base coats, then add chunky holographic pieces using a small brush for precise placement. Seal everything with clear top coat to smooth the surface and extend wear time.
Seasonal glitter combinations keep your manicures current throughout the year without requiring advanced techniques. Winter calls for silver and blue combinations that mirror ice crystals and holiday themes. Spring benefits from pastel glitters in pink and lavender that complement the season’s fresh energy.
Easy Water Marble Nail Art Methods
 7")
We’re exploring water marble techniques that create stunning psychedelic patterns with just a few drops of polish and water. These methods build perfectly on the glitter and accent techniques we’ve covered, offering another accessible way to achieve professional-looking results.
Basic Water Marble Technique
Drop your base polish into room temperature filtered water, creating a circle about the size of a quarter. Add contrasting colors one drop at a time into the center of each previous circle, allowing each color to spread naturally before adding the next. Use a toothpick to drag from the center outward in straight lines, then drag perpendicular lines from the outer edge toward the center to create the classic marble pattern.
Dip your prepped nail (with tape protecting the surrounding skin) straight down into the water at a 45-degree angle. Hold the nail in position for 3-5 seconds before lifting straight up to avoid smudging the design. Clean the water surface immediately with a cotton swab to remove excess polish before lifting your finger completely out of the water.
Apply base coat first and let it dry completely to ensure the marble design adheres properly to your nail. Use polishes of similar consistency for the best blending results, and work quickly since nail polish forms a skin on water within 30-60 seconds.
Simplified Marble Patterns
Create bullseye patterns by dropping alternating colors into the center without dragging the design, resulting in perfect concentric circles. This simplified approach works especially well with two contrasting colors like black and white or navy and gold. Make half marble designs by taping off half your nail before dipping, creating an elegant accent that’s easier to control than full coverage.
Try the heart pattern by using a toothpick to drag from the center point toward opposite edges, creating a romantic design perfect for special occasions. Experiment with feather effects by dragging the toothpick in one direction only, from outer edge to center, creating flowing lines that resemble delicate feathers.
Use metallic polishes sparingly as accent colors rather than base colors, since they tend to spread differently in water. Silver and gold work beautifully as thin accent lines between bolder colors like deep purple or emerald green.
Troubleshooting Water Marble Issues
Polish sinking problems usually occur when the water is too warm or the polish is too old and thick. Use room temperature water (68-72°F) and thin older polishes with a few drops of nail polish thinner rather than acetone. Replace the water every few nails to maintain the right temperature and prevent polish buildup.
Smudging issues happen when you move your finger too quickly or at the wrong angle during removal. Keep your nail parallel to the water surface and lift straight up in one smooth motion. Practice the timing with cheap polishes first, since some brands spread faster than others in water.
Color separation problems occur when polishes have different formulations or densities. Stick to the same brand when possible, and avoid mixing cream polishes with shimmers or glitters in the same design. Test color combinations on a practice surface first, since some colors naturally repel each other in water due to their chemical composition.
Cleanup becomes easier when you apply liquid latex or white school glue around your cuticles before starting, creating a barrier that peels off after the design is complete. Use a small brush dipped in acetone for precise cleanup around the nail edges.
Simple Seasonal Nail Design Ideas
 8")
Seasonal nail designs let us celebrate each time of year with appropriate colors and themes that match our mood and wardrobe. We’ll explore easy techniques that capture the essence of spring, summer, fall, and winter without requiring advanced skills.
Spring Floral Patterns
Spring floral designs bring fresh energy to our manicures using simple dotting techniques and basic brush strokes. We create delicate cherry blossoms by dotting five small circles in pink or white polish around a central brown dot for the branch. Daisy chains work beautifully across accent nails when we dot white petals around yellow centers and connect them with thin green stems using a toothpick.
Simple rose buds emerge when we dot a small circle in pink or coral and use a toothpick to create spiral motions outward from the center. We enhance these floral designs by adding tiny green leaves using diagonal brush strokes or small dots elongated with a toothpick. Lavender fields create stunning effects when we dot purple polish in vertical lines and blend slightly upward for a natural flower spike appearance.
Easter themed florals incorporate pastel colors like baby blue, soft yellow, mint green, and blush pink for a cohesive spring palette. We mix different sized dots to create depth in our floral arrangements and add subtle shimmer top coats to mimic morning dew on petals.
Summer Beach Themes
Summer beach designs capture vacation vibes using ocean inspired colors and simple patterns that evoke sandy shores and tropical waters. We create wave patterns by painting curved horizontal lines in varying shades of blue and white, starting with navy at the base and lightening toward the tips. Palm tree silhouettes become easy accent pieces when we paint simple trunk shapes in brown and add angular fronds using quick brush strokes.
Sunset gradients work perfectly for beach themes by blending orange, pink, and purple polishes with a makeup sponge from cuticle to tip. We add simple seashell designs using small dots and curved lines in white or pearlescent polish to mimic conch shells and starfish shapes. Tropical fruit motifs like watermelon slices require only pink base color with black seeds dotted on and a thin green rind line at the tip.
Ocean bubble effects create depth when we dot various sizes of blue and white circles randomly across light blue base colors. We incorporate sand textures using fine glitter or matte top coats over nude and beige polishes. Coral reef inspirations come alive with orange, pink, and yellow dots clustered together and accented with small green details for underwater plant life.
Fall and Winter Holiday Looks
Fall and winter designs embrace rich, warm colors and festive elements that celebrate seasonal holidays and cozy weather themes. We create autumn leaves by painting simple oval shapes in burgundy, gold, orange, and deep red, then adding thin vein lines using a toothpick or fine brush. Pumpkin designs become achievable accent nails when we paint orange circles and add curved vertical lines with green stem dots at the top.
Holiday snowflakes require only white polish and steady hands to dot central points and extend six thin lines outward, adding small dots at each line’s end for crystalline effects. We achieve plaid patterns using tape to create clean lines in traditional red and green combinations or modern metallics for sophisticated winter looks. Christmas tree designs work beautifully as accent nails with simple green triangular shapes, small dot ornaments, and gold star toppers.
Winter icicle effects emerge when we paint clear or light blue vertical drips from the cuticle downward using varying thickness for natural frozen appearances. We incorporate cozy sweater textures using matte top coats over neutral colors and adding small raised dots in patterns to mimic knitted designs. New Year’s celebrations call for metallic accents, champagne glitters, and clock motifs using simple circle shapes with thin lines for hands pointing to midnight.
Thanksgiving themes blend warm browns, deep oranges, and gold accents with simple turkey feather patterns created using curved brush strokes in alternating colors.
Conclusion
Creating stunning nail art doesn’t have to be complicated or time-consuming. With these easy techniques and simple tools we’ve covered you’re now equipped to transform your nails from basic to beautiful in just minutes.
Whether you prefer the simplicity of solid colors and French tips or want to experiment with stamping and water marble effects there’s a technique that matches your skill level and available time. The beauty of these methods lies in their accessibility – most use items you already have at home.
Remember that practice makes perfect but these foolproof designs ensure gorgeous results from your very first attempt. We encourage you to start with the techniques that appeal to you most and gradually build your nail art confidence.
Your next salon-worthy manicure is just a few steps away. Pick your favorite technique grab your supplies and let your creativity shine through your fingertips.
Frequently Asked Questions
What tools do I need for easy nail art at home?
You don’t need expensive tools! Basic items like dotting tools, striping tape, nail stickers, and even household items work great. A makeup sponge helps create gradients, while toothpicks and bobby pins can create detailed designs. Most techniques use regular nail polish and simple tools you likely already own.
How long do these easy nail art designs take to complete?
Most designs can be completed in 15-30 minutes, including drying time. Simple techniques like solid colors or sticker applications take just 10-15 minutes, while slightly more complex designs like gradients or water marble may take up to 30 minutes. These are perfect for quick touch-ups or weekend manicures.
Can beginners really achieve professional-looking results?
Absolutely! These techniques are specifically designed for beginners and require minimal skill. The article focuses on foolproof methods that yield impressive results without extensive practice. Starting with simple solid colors or tape designs builds confidence before progressing to more advanced techniques like stamping or water marble.
What’s the best way to make nail art last longer?
Start with clean, prepped nails and use a quality base coat. Apply thin layers of polish and seal with a good top coat. Avoid water for the first hour after application, and reapply top coat every few days to maintain shine and prevent chipping.
How can I fix mistakes while doing nail art?
Keep a small brush dipped in nail polish remover handy for quick cleanups. For water marble techniques, use liquid latex around cuticles to prevent mess. Most mistakes can be corrected by removing the polish from that nail and starting over, or incorporating the “mistake” into your design creatively.
What colors work best for nail art beginners?
Start with high-contrast colors that make designs pop, like black and white, or navy and gold. Nude bases with colorful accents are forgiving and versatile. Avoid sheer polishes initially as they require more coats and can look streaky. Bold, opaque colors provide better coverage and cleaner lines.
Can I do nail art without buying special stamping plates?
Yes! Many household items create beautiful patterns. Bubble wrap creates texture, mesh bags make interesting prints, and rubber bands create stripes. Toothpicks work for detailed designs, and makeup sponges are perfect for gradients. These alternatives are often more accessible than specialized tools.
How do I choose seasonal nail designs?
Match colors and themes to the season. Spring calls for pastels and florals, summer embraces bright beach themes, fall features warm oranges and burgundies, and winter incorporates deep colors and sparkle. Consider your wardrobe and upcoming events when choosing seasonal designs for the most versatile looks.
What’s the easiest nail art technique for complete beginners?
Single accent nails are perfect for beginners. Simply apply a base color to all nails, then add glitter, stickers, or a different color to just the ring finger. This technique requires minimal skill but creates an instantly polished, intentional look that’s perfect for any occasion.
How can I make my nail art more unique and personal?
Mix and match techniques from different sections of the guide. Combine stamping with glitter accents, or add dots to gradient nails. Use colors that reflect your personality or match your outfit. Seasonal elements, personal symbols, or favorite color combinations make designs uniquely yours while keeping techniques simple.


