Short nails don’t mean you’re limited to boring manicures. We’ve all heard the myth that stunning nail art requires long talons, but that’s simply not true. Short nails are actually the perfect canvas for creative designs that are practical, professional, and absolutely gorgeous.
Whether you’re dealing with naturally short nails or prefer to keep them trimmed for everyday activities, we’re here to prove that size doesn’t matter when it comes to nail art. From minimalist geometric patterns to bold accent nails, there’s a industry of possibilities waiting at your fingertips.
We’ve curated the most stunning nail art ideas specifically designed for short nails that’ll have everyone asking where you got your manicure done. These designs aren’t just beautiful – they’re achievable, wearable, and perfect for showcasing your personal style without the hassle of lengthy maintenance routines.
Classic French Tips With a Modern Twist
French manicures remain timeless, but we can transform this elegant look with contemporary updates that perfectly complement short nails. These modernized versions maintain the sophistication of traditional French tips while adding personality and current style trends.
Colored French Tips
Swap white tips for vibrant colors like coral, lavender, or mint green to instantly modernize your classic French manicure. We recommend choosing shades that complement your skin tone and wardrobe preferences.
Experiment with seasonal palettes by selecting warm oranges and deep burgundies for fall or soft pastels for spring. These color variations work exceptionally well on shorter nail beds because they don’t overwhelm the nail space.
Try metallic finishes such as rose gold, silver, or copper for an elevated look that catches light beautifully. Metallic tips create visual interest without requiring extensive nail length to make an impact.
Consider gradient effects where the colored tip fades into your natural nail or base coat. This technique creates depth and dimension while maintaining the clean lines that make French manicures so appealing.
Geometric French Designs
Create angular tip lines using tape or nail guides to achieve sharp geometric shapes instead of curved edges. We find that triangular or diagonal tips add modern sophistication to short nails.
Design double French tips with two parallel lines at different heights for a contemporary twist. This technique works particularly well when using contrasting colors or alternating matte and glossy finishes.
Incorporate negative space patterns by leaving portions of your natural nail visible within geometric shapes. These designs create visual intrigue while keeping the overall look clean and structured.
Add chevron patterns at the tip using thin striping tape to create V shaped designs. Chevron French tips elongate the appearance of shorter nails while maintaining a polished aesthetic.
Reverse French Manicure
Paint the half moon area at your cuticle line instead of the nail tips to create this inverted classic. We suggest using a contrasting color against a nude or clear base for maximum impact.
Combine traditional and reverse techniques by painting both the tips and cuticle areas in complementary colors. This dual approach works especially well on short nails because it creates vertical visual lines.
Experiment with textured finishes like matte polish at the cuticle area while keeping tips glossy. These contrasting textures add dimension without requiring additional nail length to showcase the design.
Use metallic accents for the reverse French portion while maintaining neutral tips. This approach draws attention to the cuticle area and creates an unexpected focal point that flatters shorter nail shapes.
Minimalist Geometric Patterns

Clean geometric shapes create stunning nail art that perfectly complements short nail beds without overwhelming them. These designs prove that simplicity often delivers the most sophisticated results.
Simple Lines and Dots
Vertical stripes elongate short nails while maintaining an effortlessly chic appearance. We recommend using a thin nail art brush or striping tape to create perfectly straight lines down the center of each nail. Horizontal lines work beautifully across the nail bed, especially when you alternate between matte and glossy finishes.
Single accent dots placed strategically near the cuticle or tip add visual interest without cluttering the design. Try creating a row of three small dots along the nail’s center for a balanced look. Polka dot patterns using just two or three dots per nail maintain the minimalist aesthetic while adding playful charm.
Intersecting lines form simple crosshatch patterns that create depth on shorter nails. Place two thin lines perpendicular to each other, positioning them slightly off center for modern appeal.
Triangle Accents
Corner triangles transform ordinary manicures into geometric masterpieces with minimal effort. We suggest painting small triangles at the base of each nail using contrasting colors like black on nude or gold on pink. Tip triangles replace traditional French tips with angular geometric shapes that draw attention upward.
Half moon triangles at the cuticle area create striking negative space designs. Use nail tape to mask off the triangle shape, then paint around it for crisp, clean edges. Multiple mini triangles scattered across one or two accent nails add dimension without overwhelming the overall design.
Outline triangles using thin lines create sophisticated geometric patterns that work especially well with neutral color palettes. Draw triangle outlines in metallic shades over solid base colors for subtle sparkle.
Negative Space Designs
Cutout shapes use your natural nail color as part of the design, creating visually interesting patterns with less paint coverage. We love circular cutouts near the cuticle paired with solid color tips. Geometric windows feature small rectangular or diamond shaped openings that reveal the natural nail underneath.
Half painted nails with clean diagonal or curved lines showcase both your natural nail and chosen polish color. This technique works particularly well with bold colors like deep red or navy blue against natural pink nails. Stripe cutouts create the illusion of longer nails by leaving thin vertical sections unpainted.
Border designs frame the nail with thin painted edges while leaving the center natural. Try painting just the outer perimeter of each nail in metallic gold or silver for an elegant, minimalist approach that celebrates your natural nail bed.
Bold Solid Colors That Make a Statement

Sometimes the most impactful nail art for short nails comes from embracing the power of a single, striking color. Bold solid shades transform your manicure into a confident statement piece that complements any outfit.
Vibrant Neon Shades
Electric blues instantly energize your look and pair beautifully with summer wardrobes. We love how hot pink creates a playful contrast against neutral clothing while making your hands appear more elongated. Neon yellow brings sunshine to any season and works particularly well for beach vacations or festival outfits.
Coral shades offer a softer approach to the neon trend without sacrificing impact. Bright orange commands attention in professional settings when you want to add personality to conservative outfits. Lime green provides an unexpected pop of color that photographs beautifully for social media posts.
Rich Jewel Tones
Deep emerald green exudes luxury and sophistication while flattering all skin tones throughout the year. We recommend sapphire blue for evening events as it catches light beautifully under restaurant or party lighting. Ruby red remains timeless and creates an elegant backdrop for rings and jewelry.
Amethyst purple adds mystery to your manicure and transitions seamlessly from day to night looks. Rich burgundy works perfectly for fall and winter months when you want warmth without brightness. Topaz gold brings warmth to your hands and complements both silver and gold accessories effortlessly.
Matte Finish Options
Black matte polish creates an edgy, modern aesthetic that pairs with leather jackets and bold fashion choices. We find that matte navy blue offers sophistication without the starkness of traditional black shades. Deep plum in matte finish provides richness while maintaining an understated elegance.
Matte white makes a clean, minimalist statement that works beautifully with monochromatic outfits. Forest green in matte creates an earthy, grounded feeling perfect for casual weekend looks. Charcoal gray offers versatility as it complements both warm and cool color palettes in your wardrobe.
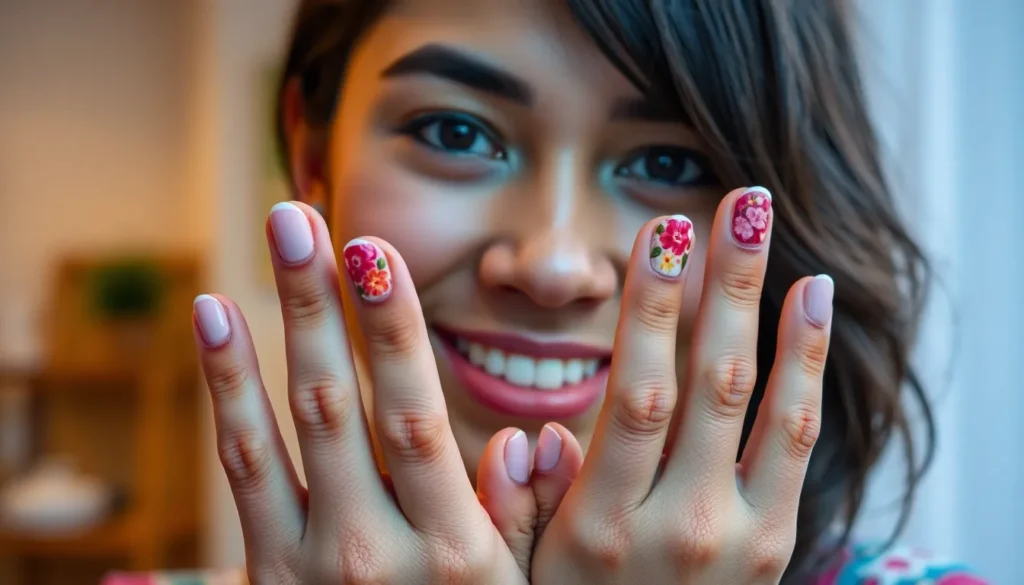
Delicate Floral Designs for Short Nails

Floral nail art brings natural beauty to short nails without overwhelming their compact canvas. We’ll explore three enchanting approaches that showcase how botanical elements can enhance your manicure with feminine elegance.
Tiny Rose Buds
Creating miniature rose buds transforms short nails into elegant garden displays. We recommend using a small dotting tool to place tiny pink or red dots as the rose centers. Building outward, we add curved strokes in deeper shades to form delicate petals around each center point.
Positioning these rose buds strategically maximizes their visual impact on shorter nail beds. We place single buds near the cuticle area or create diagonal arrangements across two or three nails. Using soft pink bases with coral rose details creates depth without cluttering the limited space.
Varying the rose sizes adds natural dimension to your floral design. We suggest making some buds larger on accent nails while keeping others petite on remaining fingers. This technique creates visual hierarchy that draws attention to exact nails while maintaining overall balance.
Simple Daisy Patterns
Simple daisy designs offer cheerful charm that perfectly suits short nail proportions. We start with white or pale yellow centers using a small brush tip or toothpick. Adding five to seven thin white petals around each center creates recognizable daisy shapes without overwhelming the nail.
Placing daisies strategically prevents overcrowding on compact nail surfaces. We recommend featuring one large daisy per nail or clustering smaller versions near the nail tips. Clear or nude base colors allow the white petals to pop while maintaining a fresh, natural appearance.
Combining daisies with green accent details enhances the botanical theme. We add tiny green dots or short lines near the flowers to represent leaves or stems. This approach connects the floral elements while keeping the overall design clean and manageable for everyday wear.
Abstract Botanical Art
Abstract botanical patterns offer artistic freedom while maintaining floral inspiration on short nails. We create flowing leaf shapes using curved brushstrokes in various green tones. These organic forms adapt naturally to shorter nail beds without requiring precise botanical accuracy.
Watercolor effects enhance abstract floral designs with dreamy, artistic appeal. We blend colors while they’re still wet, creating soft gradients that mimic natural flower petals. Using blues with purples or pinks with oranges produces beautiful color transitions that feel both modern and feminine.
Layering translucent colors builds depth in abstract botanical nail art. We apply sheer base coats in complementary colors, then add darker botanical shapes on top. This technique creates dimension that makes short nails appear longer while showcasing sophisticated artistic elements.
Glitter and Shimmer Accents

Transforming short nails with glitter and shimmer creates instant glamour without requiring length. These sparkling techniques catch light beautifully and add dimension to compact nail beds.
Gradient Glitter Fade
Creating a gradient glitter fade on short nails produces a stunning ombre effect that draws the eye upward. We start by applying a base color that complements our chosen glitter shade, then use a makeup sponge to dab glitter polish from the tip toward the cuticle with decreasing intensity.
Blending becomes easier when we work with wet polish, creating seamless transitions between glittery and solid areas. Popular combinations include rose gold glitter fading over nude pink, silver sparkles transitioning from navy blue, or champagne glitter melting into soft beige.
Positioning the heaviest glitter concentration at the tips makes short nails appear longer while maintaining elegance. We recommend using fine glitter particles rather than chunky pieces to avoid overwhelming the small canvas and ensure smooth application.
Single Accent Nail Sparkle
Choosing one nail per hand for full glitter coverage creates balance without overwhelming short nail designs. We typically select the ring finger or thumb as accent nails, covering them completely with dense glitter polish for maximum impact.
Coordinating the accent nail with complementary solid colors on remaining nails maintains cohesion across the manicure. Effective combinations include one gold glitter nail with soft pink on others, silver sparkle accenting deep purple nails, or rainbow glitter highlighting neutral beige polish.
Layering multiple glitter coats on the accent nail while keeping other nails simple ensures the sparkly element becomes the focal point. We apply thin coats to prevent bubbling and finish with extra topcoat for durability and shine enhancement.
Holographic Finishes
Applying holographic polish to short nails creates rainbow reflections that shift with movement and lighting changes. We use these prismatic polishes as full coverage colors or accent elements that transform simple manicures into eye catching displays.
Selecting quality holographic formulas ensures vibrant color shifts from purple to blue to green depending on viewing angles. Popular options include silver holographic base with rainbow effects, rose gold holographic for warm skin tones, and clear holographic topcoat over any base color.
Maximizing the holographic effect requires proper lighting and smooth application techniques without streaking. We apply thin even coats and allow complete drying between layers to prevent the special particles from clumping together and diminishing the prismatic beauty.
Animal Print Patterns Scaled Down

Animal prints bring wild sophistication to short nails when properly adapted for compact nail beds. We’ll explore three distinct approaches that deliver maximum impact through carefully scaled patterns.
Mini Leopard Spots
Creating leopard spots on short nails requires strategic placement and size adjustment for optimal visual balance. We start with a neutral base coat in beige or soft brown, then use a fine detail brush to create irregularly shaped spots across the nail surface.
Position spots asymmetrically rather than in uniform rows to achieve an authentic leopard pattern. Paint larger spots near the cuticle area and gradually decrease size toward the tip, which creates natural flow and prevents the design from appearing cramped.
Use three colors for depth: golden brown for the base spots, darker chocolate brown for outlining, and black for accent details. Apply spots in clusters of two to three rather than spacing them evenly, which mimics the natural leopard pattern more effectively.
Subtle Zebra Stripes
Zebra stripes work beautifully on short nails when we adapt the stripe width and spacing appropriately. Begin with a white or cream base coat, then use black nail polish with a thin striping brush to create diagonal lines across each nail.
Vary the stripe thickness from thin to medium width, avoiding thick stripes that can overwhelm shorter nail beds. Paint stripes at different angles on each nail, creating movement and preventing a rigid appearance that might look unnatural.
Leave strategic gaps between stripes to incorporate the base color into the design. Focus on creating two to four stripes per nail rather than attempting to fill the entire surface, which maintains elegance while ensuring the pattern remains clearly defined.
Snake Skin Textures
Snake skin texture translates exceptionally well to short nails through scaled mesh patterns and strategic color layering. We achieve this effect by applying a metallic base in silver, gold, or bronze, then overlaying with a fine mesh pattern using a contrasting shade.
Create the signature snake skin appearance using a makeup sponge dabbed in darker polish to add irregular texture spots. Focus the heaviest texture near the center of each nail, fading toward the edges to maintain proportion on shorter surfaces.
Enhance the reptilian effect with a glossy top coat that creates the characteristic sheen of snake skin. Add subtle shimmer particles in the base coat to catch light naturally, giving the texture dimension without requiring additional length to showcase the intricate details.
Ombre and Gradient Effects

Ombre and gradient techniques create stunning depth and dimension on short nails, proving that dramatic color transitions work beautifully on compact canvases. We’ll explore three sophisticated approaches that showcase how gradual color changes can transform your manicure into a work of art.
Two-Tone Color Blends
Two-tone color blends create seamless transitions between complementary shades, offering an elegant solution for short nail art enthusiasts. We recommend starting with colors from the same family, such as soft pink blending into deep rose or light blue melting into navy. Positioning the darker shade at the cuticle and gradually lightening toward the tip creates an elongating effect that flatters shorter nails.
Application becomes effortless when you use a makeup sponge to dab and blend the colors while the polish remains wet. Strategic color placement involves covering the bottom half of each nail with the darker hue and the top half with the lighter shade. Blending occurs in the middle section where colors meet, creating that coveted gradient effect.
Popular combinations include coral melting into peach, lavender transitioning to white, and mint green flowing into sage. These pairings work particularly well because they share undertones that naturally complement each other. Temperature contrast between warm and cool tones can also create striking results when executed with careful color selection.
Sunset Gradients
Sunset gradients capture the breathtaking beauty of evening skies, transforming short nails into miniature masterpieces that radiate warmth and vibrancy. We suggest layering three to four colors that mirror natural sunset progressions, starting with deep orange at the base and transitioning through coral and pink to pale yellow at the tips. This technique creates visual interest while maintaining sophistication.
Color sequencing follows nature’s pattern, beginning with the deepest hue near the cuticle and gradually lightening toward the free edge. Traditional sunset palettes feature orange, pink, and purple combinations, while tropical versions might include magenta, orange, and gold. Desert sunset variations showcase burnt orange, dusty rose, and cream tones.
Blending techniques require working quickly while polish remains workable, using gentle dabbing motions to merge colors seamlessly. Each color should occupy roughly equal space on the nail, with smooth transitions occurring between adjacent shades. Finishing with a high-gloss topcoat intensifies the colors and creates the luminous quality reminiscent of actual sunsets.
Monochromatic Fades
Monochromatic fades use varying intensities of a single color family, creating sophisticated depth without overwhelming short nail beds. We prefer this technique for its versatility and professional appearance, making it suitable for both casual and formal occasions. Starting with the palest version of your chosen color at the tip and deepening to the richest shade at the base creates elegant dimension.
Shade selection involves choosing three to four tones within the same color family, ensuring each variation is distinct enough to create visible gradation. Blue monochromatic fades might progress from powder blue to navy, while pink versions could transition from blush to burgundy. Gray variations offer particularly striking results, moving from pearl to charcoal.
Technique mastery involves applying the lightest shade as a base coat, then gradually building intensity using successive layers of deeper tones. Each application should cover slightly less of the nail than the previous layer, creating the stepped gradient effect. Blending boundaries with a clean brush while polish remains tacky ensures smooth color transitions that appear professionally executed.
Textured Nail Art Techniques

Texture transforms short nails into dimensional masterpieces that catch light and create visual interest beyond traditional flat polish applications. We can achieve sophisticated nail art by combining different finishes and textures that enhance the compact canvas of shorter nails.
Matte and Glossy Combinations
Matte and Glossy Combinations create striking contrasts that make short nails appear more ever-changing and visually appealing. We recommend applying a matte base color across the entire nail, then adding glossy accents in strategic patterns like geometric shapes or French tips.
Checkerboard patterns work exceptionally well on short nails when alternating between matte and glossy squares. Creating these patterns requires precise application using nail tape or stencils to achieve clean lines. The contrast between the two finishes makes each square pop without overwhelming the limited space.
Half moon designs offer another sophisticated approach where we apply glossy polish to the cuticle area while keeping the rest of the nail matte. This technique draws attention to the nail bed and creates an elegant focal point. Reversing this pattern with matte half moons over glossy bases provides equally stunning results.
Accent stripe details involve painting thin glossy lines over matte backgrounds or vice versa. These stripes can run vertically to elongate short nails or horizontally to create width. Using metallic glossy polish over matte colors adds extra dimension and catches light beautifully.
Sand Texture Effects
Sand Texture Effects add gritty sophistication to short nail designs while creating tactile interest that standard polishes cannot achieve. We apply specialized sand texture polishes or create DIY versions by mixing fine cosmetic sand into clear base coats.
Desert sunset combinations layer sand textures in warm tones like coral, gold, and bronze to mimic natural beach landscapes. Building these colors from light to dark creates depth even on short nails. The sandy finish diffuses light naturally, making colors appear richer and more complex.
Ocean wave patterns use sand textures in blues, teals, and seafoam greens to recreate coastal vibes. Applying these textures in wave like motions across the nail surface enhances the aquatic theme. Adding small shell or pearl accents over the sand texture completes the beachy aesthetic.
Neutral earth tones work exceptionally well with sand textures, creating sophisticated looks suitable for professional settings. Colors like taupe, mushroom, and sage green provide subtle texture without being overpowering. These finishes pair beautifully with simple gold jewelry and complement various skin tones.
Velvet Finish Designs
Velvet Finish Designs transform short nails into luxurious accessories that feel as amazing as they look. We achieve these plush textures using velvet powder applied over tacky base coats or specialized velvet polishes that create similar effects.
Jewel tone velvets in colors like emerald green, sapphire blue, and amethyst purple create rich, opulent looks perfect for evening events. These deep colors appear even more saturated with velvet finishes, making short nails look expensive and sophisticated. The texture catches ambient light differently than traditional polish, creating subtle color shifts throughout the day.
Pastel velvet combinations offer softer alternatives that work well for daytime wear and spring seasons. Colors like dusty rose, lavender, and mint green provide gentle sophistication when rendered in velvet textures. These finishes photograph beautifully and maintain their luxurious appearance even with daily activities.
Color blocking techniques use velvet finishes to create geometric patterns that stand out dramatically on short nails. Combining two complementary velvet colors in simple shapes like triangles or half moons maximizes visual impact. The texture difference between regular polish and velvet creates natural definition without requiring precise line work.
Holiday and Seasonal Themes

We can celebrate special occasions and seasonal moments with themed nail art that perfectly captures the spirit of each time of year. Short nails provide the ideal canvas for creating festive designs that feel intentional rather than overwhelming.
Winter Snowflake Patterns
Winter Snowflake Patterns transform short nails into delicate winter wonderlands using precise detailing techniques. We start with an icy blue or pearl white base color to create the perfect backdrop for snowflake designs. Delicate white dots form the center points, while thin lines extend outward to create classic six pointed snowflake shapes.
Scattered mini snowflakes work beautifully across all five nails, varying the sizes to create natural looking winter scenes. We recommend placing larger snowflakes on accent nails while distributing smaller ones across the remaining nails. Silver glitter adds sparkle between snowflake patterns, mimicking the way real snow catches light.
Negative space snowflakes offer another stunning approach, where we paint around snowflake shapes to let the natural nail show through. This technique creates elegant contrast against darker winter colors like navy blue or charcoal gray. White nail art pens provide the precision needed for crisp snowflake outlines on short nail beds.
Spring Pastel Designs
Spring Pastel Designs celebrate renewal and growth with soft color palettes that complement the season’s gentle energy. We blend baby pink, lavender, mint green, and butter yellow to create dreamy spring manicures. Watercolor effects work particularly well on short nails, allowing colors to flow together naturally without precise boundaries.
Cherry blossom branches capture spring’s essence with delicate pink flowers scattered across nude or pale pink bases. We paint thin brown lines for branches using nail art brushes, then add small pink dots clustered together to represent blossoms. White highlights on each flower create dimension and freshness.
Easter themed accents bring playful elements to spring manicures through pastel rainbow stripes, tiny bunny silhouettes, or egg shaped patterns. We alternate between different pastel shades on each nail, creating a cohesive rainbow effect. Small white dots can represent eggs, while triangle shapes in soft colors create modern geometric Easter designs.
Halloween Mini Motifs
Halloween Mini Motifs pack maximum spooky impact into short nail designs through clever use of scale and contrast. We focus on iconic symbols like tiny bats, miniature pumpkins, and delicate spider webs that fit perfectly on compact nail surfaces. Black bases provide dramatic backdrops for orange, purple, and metallic accent colors.
Micro pumpkin designs work beautifully as single accent elements, painted in classic orange with green stems on black or deep purple bases. We create dimension by adding darker orange shadows and lighter orange highlights to each pumpkin. Vertical ridges painted with thin brushes give pumpkins realistic texture without overwhelming short nails.
Spider web corners offer sophisticated Halloween elegance by utilizing negative space effectively. We paint thin white or silver lines radiating from one nail corner to create web patterns, leaving plenty of natural nail visible. Small rhinestones placed at web intersections catch light beautifully, while tiny black dots can represent spiders without being too literal or overwhelming the design.
Easy DIY Techniques for Beginners

Creating professional-looking nail art on short nails doesn’t require expensive salon visits or years of practice. These three beginner-friendly methods will help you achieve stunning results with minimal investment and simple tools.
Tape Method Designs
Tape transforms ordinary nail polish into geometric masterpieces with crisp, clean lines. We recommend using washi tape or nail striping tape because they remove easily without damaging your base color. Standard office tape works too but requires gentle removal to prevent chipping.
Start with a light base color and let it dry completely before applying tape. Place strips diagonally across each nail to create chevron patterns, or use parallel lines for classic stripes. Multiple tape pieces can form triangles, diamonds, and color-blocking designs that look incredibly professional.
Remove tape immediately after applying the top color while the polish is still wet. This prevents the polish from drying and cracking when you pull away the tape. Clean removal reveals sharp edges that make your short nails appear longer and more polished.
Experiment with different tape widths to create varying line thicknesses. Thin striping tape produces delicate accents, while wider washi tape creates bold color blocks. Curved tape can even form half-moon designs at your cuticle area.
Dotting Tool Patterns
Dotting tools create perfect circles every time, making them ideal for beginners who want consistent results. These inexpensive tools come in various sizes, or you can use household items like bobby pins, toothpicks, or the end of a makeup brush. Each size produces different dot dimensions for layered effects.
Dip your dotting tool in polish and gently press onto your nail surface. We suggest practicing pressure control on a piece of paper first because light touches create small dots while firm pressure produces larger circles. Don’t twist or drag the tool, as this creates smudged shapes instead of clean dots.
Create polka dot patterns by spacing dots evenly across your nail bed. Start with larger dots using a bigger tool, then add smaller dots in contrasting colors between them. This layering technique adds depth and visual interest to your short nail canvas.
Arrange dots in exact patterns like flowers, where five dots form petals around a center dot. Linear arrangements create borders along your cuticle or nail tip. Gradient effects emerge when you use progressively smaller dots from one side of your nail to the other.
Stamping Plate Ideas
Stamping plates transfer intricate designs onto nails in seconds, perfect for detailed patterns that would take hours to paint by hand. These metal plates contain etched designs that you fill with special stamping polish, then transfer using a silicone or rubber stamper. The entire process takes less than a minute per nail.
Choose designs scaled appropriately for short nails to avoid overwhelming your nail bed. Small floral motifs, delicate lace patterns, and fine geometric shapes work beautifully on compact canvases. We avoid large, bold designs that can make short nails appear even smaller.
Practice your stamping technique on practice wheels or old nail tips before working on your actual nails. Fill the etched design completely with polish, scrape excess away with a plastic card, then roll the stamper across the image to pick it up. Press the stamper onto your nail with a gentle rolling motion for complete transfer.
Layer stamped designs over different base colors to create unique effects. Light bases showcase dark stamping polish, while metallic bases add glamour to any design. Multiple stamps can be layered on the same nail, with smaller accents placed over larger background patterns for dimensional looks.
Conclusion
We’ve shown you that short nails are incredibly versatile canvases for stunning nail art. From elegant French manicures to bold animal prints and shimmering accents there’s no shortage of creative possibilities that work beautifully on shorter lengths.
The key lies in choosing designs that complement your nail size rather than fighting against it. Whether you prefer minimalist geometric patterns or textured dimensional effects short nails can accommodate virtually any style you envision.
With the DIY techniques we’ve shared you now have the tools to create professional-looking manicures at home. Remember that the most beautiful nail art isn’t about length – it’s about expressing your personal style with confidence and creativity.
Your short nails are ready to make a statement. It’s time to experiment with these ideas and discover which designs speak to you most.
Frequently Asked Questions
Can you really create beautiful nail art on short nails?
Absolutely! Short nails offer an excellent canvas for creative and stylish designs. From minimalist geometric patterns to bold colors and intricate details, short nails can showcase sophisticated nail art that’s both practical and visually appealing. The key is choosing designs that complement the compact nail bed rather than overwhelming it.
What are the best nail art styles for short nails?
The most flattering styles for short nails include modern French manicures, minimalist geometric patterns, bold solid colors, delicate florals, and subtle animal prints. These designs work well because they’re proportionate to the nail size and create visual interest without appearing cluttered or overwhelming the smaller canvas.
How do you adapt French manicures for short nails?
Modern French manicures on short nails can feature vibrant colors instead of traditional white tips, geometric angular tips, or reverse French styles where the cuticle area is painted. You can also experiment with metallic finishes, seasonal color palettes, and double French designs to add sophistication without overwhelming shorter nail beds.
Are glitter and shimmer effects suitable for short nails?
Yes! Glitter and shimmer can instantly glamorize short nails. Try gradient glitter fades for an ombre effect, single accent nail sparkles for balance, or holographic finishes for rainbow reflections. Use fine glitter particles and quality formulas to ensure smooth application and vibrant effects on the compact canvas.
What DIY techniques work best for beginners with short nails?
Beginners can achieve professional results using simple tools: the tape method for clean geometric lines, dotting tools for consistent patterns and florals, and stamping plates for intricate designs. These techniques require minimal investment and experience while delivering stunning results that complement short nails perfectly.
How do you create ombre effects on short nails?
Ombre and gradient effects work beautifully on short nails through two-tone color blends, sunset gradients, and monochromatic fades. Use a makeup sponge to blend colors seamlessly, work quickly while polish is wet, and apply a glossy top coat to smooth any texture and enhance the gradient effect.
Can animal print patterns work on short nails?
Definitely! Adapt animal prints by using mini leopard spots with strategic placement, subtle zebra stripes with varying widths, and snake skin textures with metallic bases. The key is adjusting pattern size and spacing to maintain visual balance and elegance on the smaller nail surface.
What seasonal nail art ideas suit short nails?
Short nails can celebrate any season with delicate snowflake patterns for winter, soft pastel watercolor effects for spring, bright tropical colors for summer, and mini Halloween motifs for fall. Focus on scaled-down designs that capture seasonal essence without overwhelming the compact nail canvas.


