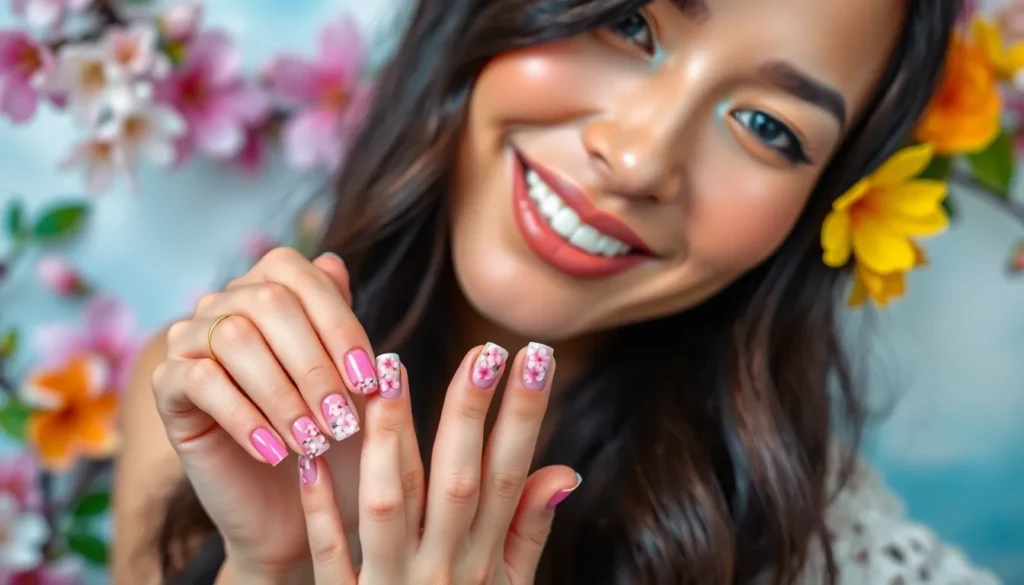
Christmas magic isn’t just about twinkling lights and festive decorations – it’s about bringing that holiday sparkle to every detail, including your fingertips. We’re diving into the most enchanting nail art ideas for Christmas that’ll transform your manicure into a winter wonderland masterpiece.
From elegant snowflake patterns to playful candy cane stripes, we’ve curated stunning designs that capture the essence of the season. Whether you’re attending holiday parties or simply want to spread Christmas cheer wherever you go, these festive nail art concepts will make your hands the perfect seasonal accessory.
We’ll explore everything from beginner-friendly designs you can create at home to show-stopping looks that’ll have everyone asking where you got your nails done. Get ready to discover Christmas nail art that’s as magical as the season itself – because your manicure deserves to be just as festive as your favorite holiday sweater.
Classic Christmas Colors That Never Go Out of Style
These traditional color palettes form the foundation of stunning Christmas nail art that remains beautiful year after year. We’ve curated the most elegant combinations that capture the holiday spirit effortlessly.
Traditional Red and Green Combinations
Red creates the perfect base for showing off your holiday spirit with bold, festive manicures. Apply deep crimson polish as your foundation, then add emerald green accents through holly leaf designs, geometric patterns, or simple stripe details. Candy cane inspired nails work beautifully when you alternate red and white stripes, finishing with tiny green bows on accent nails.
Green brings natural Christmas charm to your fingertips through various shades like forest, emerald, or sage. Pair forest green with bright red dots to create playful polka dot patterns, or use emerald as a base for gold glitter Christmas tree silhouettes. Ombre effects look stunning when you blend deep green at the cuticle into lighter mint green at the tips.
Elegant Gold and Silver Accents
Gold transforms any Christmas manicure into a luxurious statement piece perfect for holiday parties. Use gold foil to create delicate snowflake patterns over dark red or green bases, or apply gold glitter gradients that sparkle under party lights. Metallic gold stripes paired with deep burgundy create sophisticated designs that complement formal holiday attire.
Silver adds modern elegance to Christmas nail art through chrome finishes, glitter applications, and metallic details. Apply silver chrome powder over black base coats for mirror like effects, or use silver glitter to outline Christmas tree shapes on green backgrounds. Holographic silver polishes create rainbow reflections that catch light beautifully during holiday celebrations.
Timeless White and Silver Winter Themes
White serves as the perfect canvas for creating winter wonderland nail art that captures the season’s magic. Apply pure white base coats, then add silver snowflake decals, crystal rhinestones, or hand painted frost patterns using thin nail art brushes. French manicures get festive updates when you replace classic pink bases with white and add silver glitter tips.
Winter themes flourish when you combine white and silver through various techniques like sponging, stamping, and freehand painting. Create blizzard effects by dabbing white polish over silver bases using makeup sponges, or use nail stamping plates to apply intricate snowflake patterns. Matte white topcoats over silver glitter create frosted glass effects that look absolutely stunning against winter clothing.
Festive Holiday Symbols to Paint on Your Nails
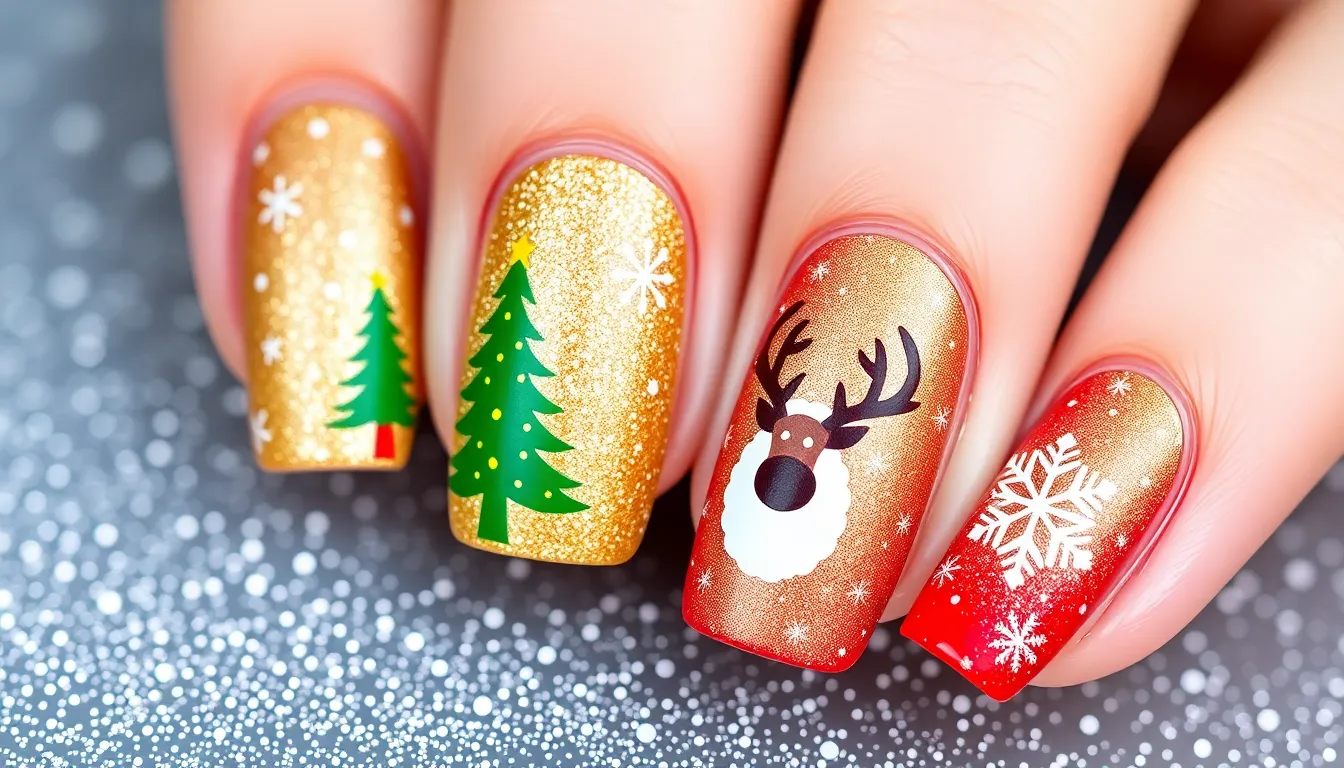
Transform your manicure into a canvas of holiday magic with these beloved Christmas symbols. We’ll show you how to bring the season’s most cherished icons to your fingertips.
Santa Claus and Reindeer Designs
Santa’s jolly face makes an adorable accent nail design. Paint a small flesh-toned circle for his face, then add tiny white dots for his eyes and a red triangle for his hat. Use white nail art brushes to create his fluffy beard and hat trim. For beginners, try painting just Santa’s hat on each nail using red polish with white tips.
Reindeer silhouettes create elegant Christmas nail art. Start with a brown or tan base coat, then use a thin brush to paint simple antler shapes in darker brown. Add tiny white dots for eyes and a small red dot for Rudolph’s nose. These designs work beautifully on neutral backgrounds like beige or cream polish.
Combine Santa and reindeer motifs for storytelling nails. Paint Santa on your thumb nail and different reindeer on your other fingers. Use gold polish to add sleigh details or small gift boxes. This technique creates a complete holiday scene across your entire hand.
Christmas Tree and Ornament Patterns
Christmas trees offer versatile nail art options for every skill level. Paint simple green triangles using various shades from forest to lime green, then top with tiny gold stars. Advanced artists can create detailed trees with individual branch lines and colorful ornament dots. Try painting different sized trees on each nail for a winter forest effect.
Ornament designs bring sparkle and dimension to holiday nails. Create circular ornament shapes using metallic polish in gold, silver, red, or blue. Add thin lines at the top to represent ornament caps and small decorative patterns like stripes or dots. Use glitter polish to make your ornaments truly shine under holiday lights.
Mix tree and ornament elements for cohesive Christmas nail art. Paint Christmas trees on your ring fingers and thumbs, then add small ornament accents to your remaining nails. Use matching color schemes like red ornaments with green trees, or go monochromatic with silver trees and white ornaments for elegant winter styling.
Snowflake and Winter Wonderland Motifs
Snowflakes create delicate and intricate nail art masterpieces. Start with white or light blue base coats, then use thin nail art brushes to paint six-pointed snowflake designs. Each snowflake should have unique patterns with dots, lines, and small crosses. Practice drawing snowflakes on paper first to perfect your technique.
Winter wonderland scenes transport your nails to magical landscapes. Paint gradient backgrounds from dark blue to white to mimic twilight snow scenes. Add small white dots for falling snow and bare tree branches using brown polish. These atmospheric designs work especially well on longer nails where you have more space for details.
Layer snowflake patterns with holographic topcoats for extra sparkle. Apply your snowflake designs over any base color, then seal with iridescent topcoat that catches light like real snow crystals. This technique makes your winter nail art shimmer and change colors as you move your hands, creating truly mesmerizing holiday manicures.
Glitter and Sparkle Techniques for Holiday Glamour
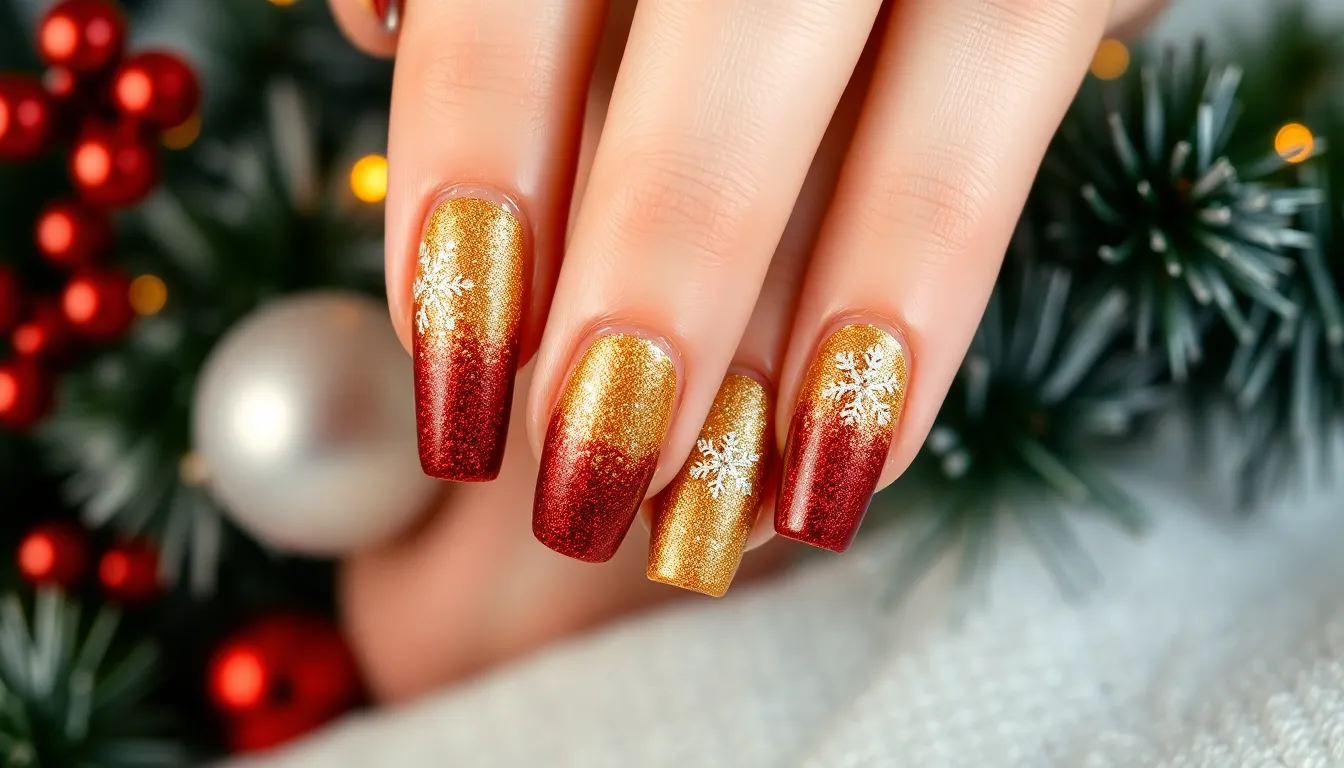
Transform your Christmas nail art into dazzling masterpieces with strategic glitter placement and sparkle application techniques. We’ll explore professional methods that create stunning holiday glamour effects.
Gradient Glitter Fade Effects
Start with a gradient glitter fade by applying your base color first, then concentrating glitter at the tips. Apply dense glitter coverage at the nail tips using a makeup sponge, gradually decreasing intensity toward the cuticle area. Build up multiple thin layers of glitter polish for seamless blending.
Create ombre sparkle effects using complementary holiday colors like deep red fading to gold or emerald green transitioning to silver. Use a fan brush to blend the glitter polish while it’s still wet, creating smooth color transitions. Apply topcoat between layers to prevent clumping and maintain glossy finish.
Blend different glitter sizes for dimensional fade effects, starting with fine glitter at the base and increasing to chunky pieces at tips. Mix holographic and traditional glitters for maximum light reflection during holiday parties.
Accent Nail Sparkle Combinations
Choose one or two accent nails per hand to showcase your most elaborate glitter designs while keeping other nails complementary. Apply solid metallic base colors on non-accent nails like champagne gold or pewter silver.
Layer contrasting glitter colors on accent nails using the “sandwich method” with clear polish between glitter layers. Combine red glitter over green base or silver sparkles over deep burgundy for striking visual impact.
Add strategic glitter placement using dotting tools to create precise sparkle patterns like glitter snowflakes, star shapes, or geometric designs. Apply individual large glitter pieces as focal points on accent nails.
Full Coverage Glitter Application Tips
Prepare nails with quality base coat to prevent staining and ensure smooth glitter adherence. Apply base color that complements your chosen glitter shade for enhanced depth and richness.
Use dabbing motions instead of brushing when applying glitter polish to prevent streaking and ensure even coverage. Press the brush flat against the nail surface and lift straight up to deposit maximum glitter particles.
Apply glitter in thin multiple coats rather than attempting full coverage in one application. Wait 2-3 minutes between coats to prevent smudging and allow proper drying time.
Seal with two topcoat layers to smooth the glitter texture and create salon-quality shine. Use a thick, high-quality topcoat specifically designed for glitter manicures to prevent chipping.
Simple DIY Christmas Nail Art for Beginners
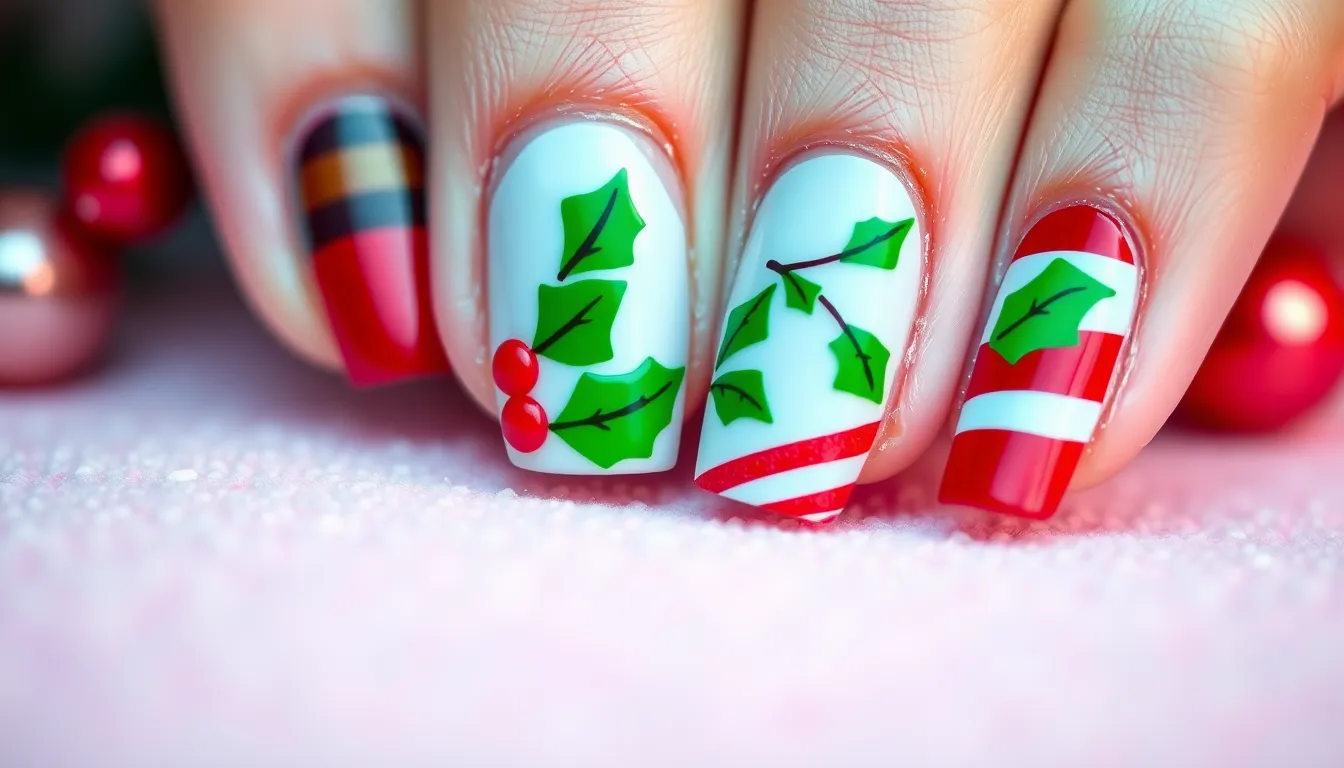
Beginner nail artists can create stunning holiday designs using basic tools and simple techniques. We’ll walk through three foolproof Christmas nail art styles that require minimal experience but deliver maximum festive impact.
Easy Polka Dot Holly Leaves
Create charming holly leaf designs using just a dotting tool and steady hands. Start with a nude or clear base coat to let your holly leaves stand out beautifully. Use a medium green polish to paint small oval shapes for the leaves, placing them at slight angles across each nail.
Add the signature holly berries using a small dotting tool dipped in bright red polish. Place two to three dots near each leaf cluster to mimic real holly berries. We recommend using a toothpick if you don’t have a dotting tool available.
Finish your holly nail art with tiny white dots to represent snow or dewdrops. Apply these sparingly around the leaves for a winter wonderland effect. Seal everything with a clear topcoat to protect your festive design and add extra shine.
Basic Candy Cane Stripe Patterns
Master the classic candy cane look by starting with a white base coat on all nails. Allow the white polish to dry completely before attempting to add stripes. This creates the perfect canvas for your peppermint inspired design.
Use striping tape or nail guides to create perfectly straight diagonal lines. Place the tape at 45 degree angles across your nails, leaving gaps between each strip. We suggest practicing the spacing on paper first to get consistent results.
Fill in the exposed areas with bright red polish for authentic candy cane stripes. Apply thin coats to prevent bleeding under the tape edges. Remove the tape immediately while the polish is still wet to achieve clean lines.
Experiment with different stripe widths and angles on accent nails for visual interest. Try vertical stripes on thumbs or ring fingers to break up the diagonal pattern. Add a glossy topcoat to make your candy cane nails look professionally done.
Minimalist Holiday French Tips
Transform traditional French tips into festive holiday statements with colored polish. Replace the classic white tips with deep red, emerald green, or metallic gold polish. This simple swap instantly makes your manicure Christmas ready.
Apply the colored tips using nail guides or steady freehand technique. Start with thin coats and build up the opacity gradually for even coverage. We find that using a flat brush makes creating smooth tip lines much easier.
Add subtle holiday accents like tiny gold dots or thin silver lines along the tip edge. These minimal details enhance the festive look without overwhelming the elegant French style. Use a fine brush or dotting tool for precise application.
Consider alternating colors between nails for a playful yet sophisticated approach. Try red tips on some nails and green on others, or mix in metallic accents on ring fingers. Finish with a high quality topcoat to ensure your minimalist holiday French tips last through all your celebrations.
Advanced Christmas Nail Art Techniques for Experts
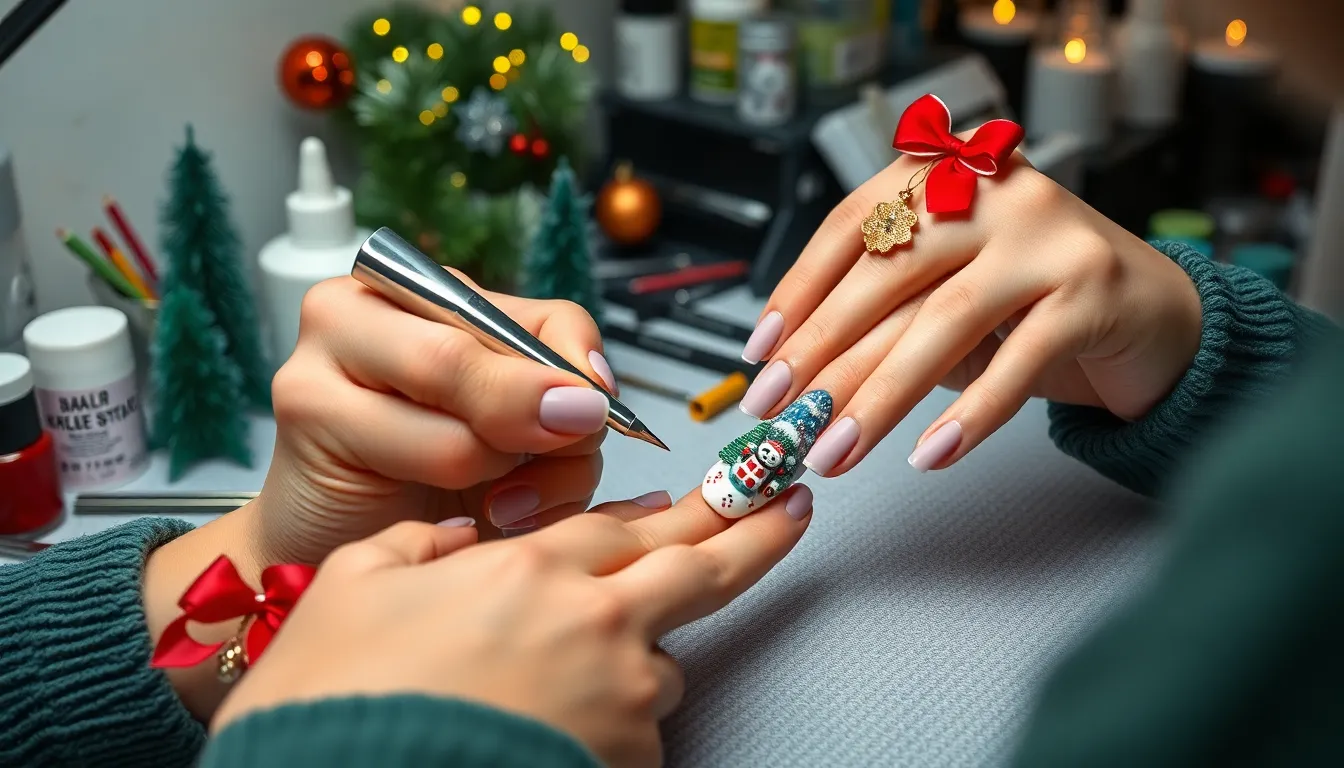
Professional nail artists who’ve mastered basic holiday designs are ready to elevate their Christmas creations with sophisticated techniques that transform fingertips into miniature works of art.
3D Christmas Charm Applications
Tiny sculptural elements create stunning dimensional effects that make our Christmas nail art pop off the surface. We apply small polymer clay ornaments using nail glue, securing miniature wreaths, bells, and gift boxes directly onto accent nails for maximum visual impact.
Acrylic sculpting techniques allow us to build raised Christmas trees and snowmen directly on the nail surface. Mix clear acrylic powder with green or red pigments to create custom colors, then shape the mixture using a small brush while it’s still workable.
Pearl and rhinestone clusters form elegant 3D snowflakes when we arrange them in symmetrical patterns. Place larger crystals at the center of each snowflake, then surround them with smaller pearls to create depth and sparkle.
Fabric appliques add texture and warmth to winter nail designs when we cut tiny pieces of felt or velvet into Christmas shapes. Secure these fabric elements with nail adhesive, then seal everything with a thick topcoat to ensure durability.
Hand-Painted Winter Scene Masterpieces
Detailed industry paintings require steady hands and fine brushes to create snowy village scenes across multiple nails. We start with a light blue base coat, then build layers using white acrylic paint to create rolling hills and snow covered rooftops.
Character portraits showcase Santa Claus faces, reindeer profiles, and snowmen with incredible detail using size 00 brushes. Paint facial features one at a time, allowing each layer to dry completely before adding shadows and highlights for realistic dimension.
Northern lights effects capture the magic of aurora borealis using gradient blending techniques with purple, green, and blue polishes. Apply vertical strokes with a fan brush to create the characteristic flowing patterns of this natural phenomenon.
Miniature Christmas markets span across all ten fingers when we paint tiny buildings, lamp posts, and market stalls. Use toothpicks to add fine architectural details like windows, doors, and decorative trim work.
Intricate Lace and Detailed Pattern Work
Victorian lace motifs require precise dotting tools and steady patience to recreate delicate doily patterns in white over deep burgundy bases. We work in small sections, building each lace element systematically to maintain consistency across the entire design.
Geometric snowflake patterns challenge our precision skills as we create mathematically perfect six pointed stars using thin striping brushes. Each line must be measured and placed exactly to achieve the symmetrical beauty that makes snowflakes so captivating.
Heirloom ornament designs replicate the intricate patterns found on vintage Christmas baubles using metallic paints and fine detail work. Paint scrollwork, filigree, and decorative borders that mirror the craftsmanship of antique holiday decorations.
Celtic knot Christmas wreaths combine traditional Irish artistry with holiday symbolism through interwoven ribbon patterns painted in gold and green. These complex designs require mapping out the crossing points before beginning the actual painting process.
Trendy Modern Christmas Nail Art Ideas
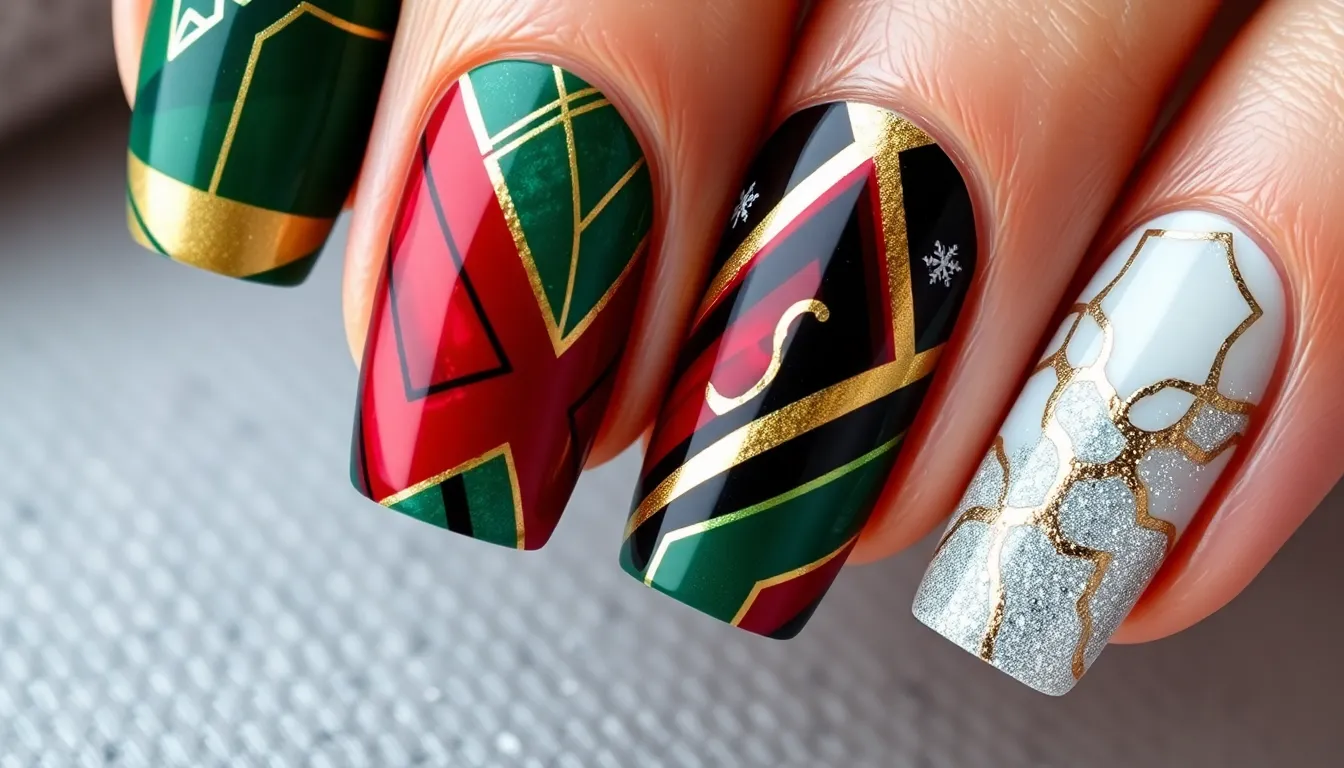
We’re embracing contemporary design trends that transform traditional holiday themes into sleek, sophisticated nail art. These modern approaches blend festive elements with current aesthetic preferences for truly stunning results.
Geometric Holiday Pattern Designs
Angular Christmas tree patterns create striking focal points using clean lines and precise shapes. We recommend starting with a nude or clear base coat before applying geometric triangles in deep forest green. Metallic gold tape helps achieve perfectly straight lines while creating layered triangle effects that mimic modern Christmas tree silhouettes.
Hexagonal snowflake designs offer a fresh take on traditional winter motifs through structured geometric forms. These patterns work beautifully when painted in white or silver against dark backgrounds like navy or burgundy. Each hexagon connects to create interconnected snowflake patterns that feel both festive and fashion forward.
Diamond pattern arrangements in Christmas colors provide sophisticated holiday glamour without overwhelming busy designs. We suggest alternating red and green diamond shapes across the nail surface, using thin brushes to maintain crisp edges. This technique works especially well on longer nail shapes where the geometric patterns have space to shine.
Triangular ornament graphics transform traditional baubles into modern abstract art through simplified geometric representation. These designs layer multiple triangles in gold, silver, and deep jewel tones to create depth and visual interest.
Marble Effect with Christmas Colors
Festive marble swirls blend traditional holiday colors into elegant, organic patterns that feel both luxurious and seasonally appropriate. We achieve this look by dropping red, green, and gold polish into clear top coat before swirling with a fine brush or toothpick. The resulting patterns resemble expensive marble stone with holiday color palettes.
Water marble techniques with Christmas shades create unique, unrepeatable designs that capture the fluid beauty of natural stone formations. This method requires patience as we drop polish colors into room temperature water, creating concentric circles before dragging through with a toothpick to form marbled patterns.
Ombre marble transitions combine gradient color techniques with marbled textures for sophisticated holiday nails. We start with darker shades at the cuticle area and blend into lighter tones toward the tip, then add subtle marble veining in metallic accents.
Alcohol ink effects using holiday colors produce stunning marble patterns with minimal effort and professional looking results. These inks blend naturally when applied to tacky base coats, creating organic marble patterns in rich Christmas color combinations.
Negative Space Holiday Motifs
Christmas tree silhouettes carved from negative space create elegant, minimalist holiday designs that feel modern and sophisticated. We outline tree shapes using thin nail art brushes, leaving the natural nail visible while painting around the motif in deep colors like burgundy or forest green.
Snowflake cutout patterns use negative space to create intricate winter designs without overwhelming the nail surface. These delicate patterns work best when combined with subtle shimmer or glitter accents that catch light through the transparent sections.
Star constellation arrangements use negative space to create celestial holiday themes that reference both Christmas stars and winter night skies. We paint around small star shapes, leaving clear nail visible while adding tiny dot details in metallic shades.
Holly leaf outlines in negative space provide subtle holiday references that work for both festive occasions and everyday wear during the season. These botanical motifs pair beautifully with single accent nails featuring traditional holly designs in full color.
Christmas Nail Art Using Special Tools and Accessories
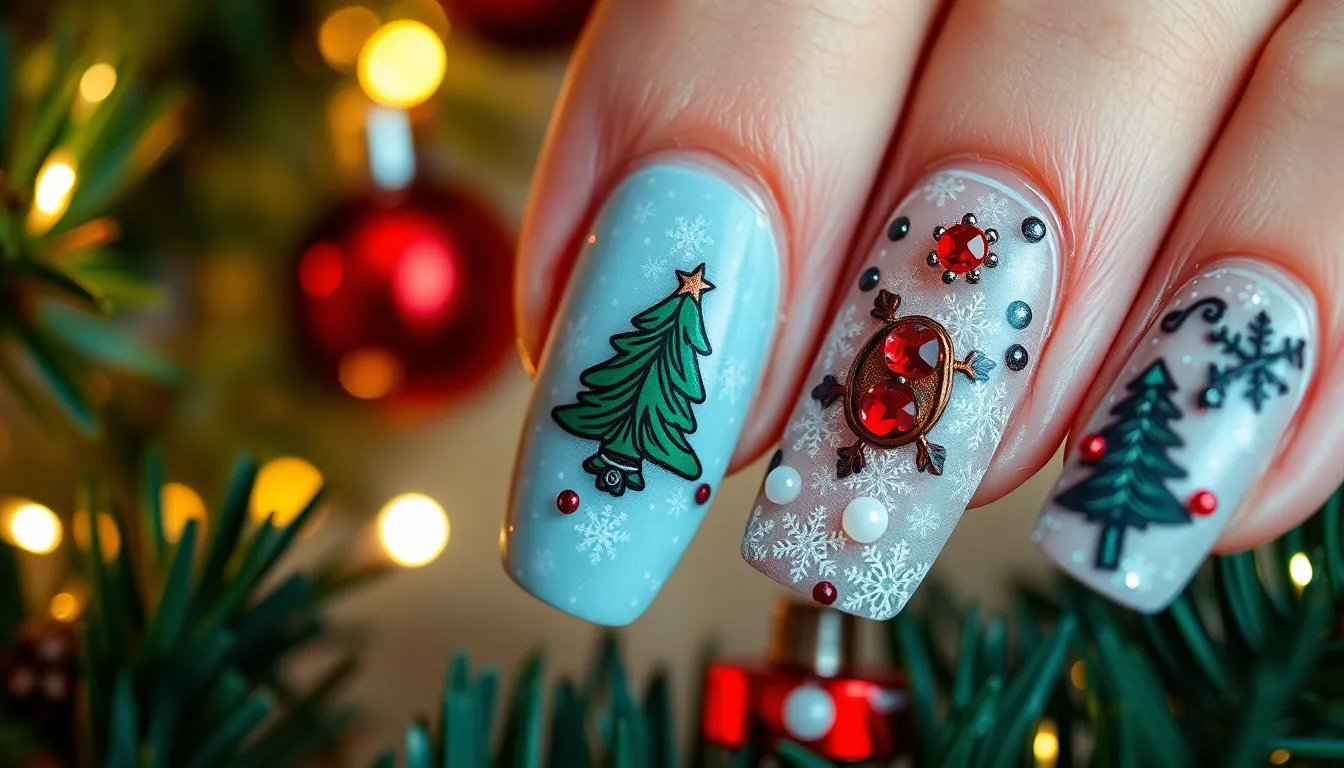
Specialized nail art tools open up endless possibilities for creating professional-looking Christmas designs with precision and ease. We’ll explore three essential accessory categories that transform simple manicures into stunning holiday masterpieces.
Stamping Plates for Perfect Holiday Patterns
Stamping plates deliver intricate Christmas designs with professional precision every time. We recommend starting with plates featuring classic holiday motifs like snowflakes, Christmas trees, and reindeer silhouettes. Popular stamping plate brands like Born Pretty and Pueen offer dedicated Christmas collections with dozens of festive patterns.
Christmas-exact stamping plates typically include 20-30 different designs per plate. We’ve found that plates with snowflake varieties work best for creating consistent winter patterns across all nails. Santa face designs and candy cane stripes transfer beautifully when using high-quality stamping polish.
Layering multiple stamped designs creates depth and visual interest. We suggest stamping a base pattern like falling snow then adding focused elements like Christmas trees or stars on accent nails. Clear stampers work better than silicone ones for detailed holiday patterns.
Nail Stickers and Decal Applications
Water decals provide the easiest method for achieving complex Christmas nail art. We prefer high-quality decals that feature realistic Christmas scenes, vintage holiday postcards, and detailed character illustrations. Application takes just minutes compared to hand-painting similar designs.
Christmas nail stickers come in various formats including full nail wraps and small accent decals. We recommend mixing different sticker types like holographic snowflakes with traditional red and green patterns. Full nail wraps work perfectly for creating cohesive Christmas story themes across multiple nails.
Proper application technique ensures decals last throughout holiday festivities. We always apply a base coat then position decals on slightly tacky polish for better adhesion. Sealing with two thin topcoat layers prevents lifting and extends wear time to match your holiday celebrations.
Rhinestone and Gem Placement Techniques
Strategic rhinestone placement transforms simple Christmas nail art into glamorous holiday statements. We use clear gems to mimic ice crystals on winter scenes and red gems as holly berries on Christmas tree designs. Gold rhinestones work beautifully as ornaments on painted Christmas trees.
Different gem sizes create visual hierarchy and realistic proportions. We typically use 2mm gems for snowflake centers, 3mm stones for ornament details, and 4mm gems as focal points on accent nails. Mixing matte and shiny rhinestones adds texture variation to Christmas designs.
Professional placement tools ensure precise gem positioning and secure attachment. We recommend using a dotting tool or tweezers for accurate placement rather than fingers. Applying gems to slightly wet topcoat creates stronger bonds than placing them on fully dry polish.
Long-Lasting Christmas Nail Art Tips and Tricks
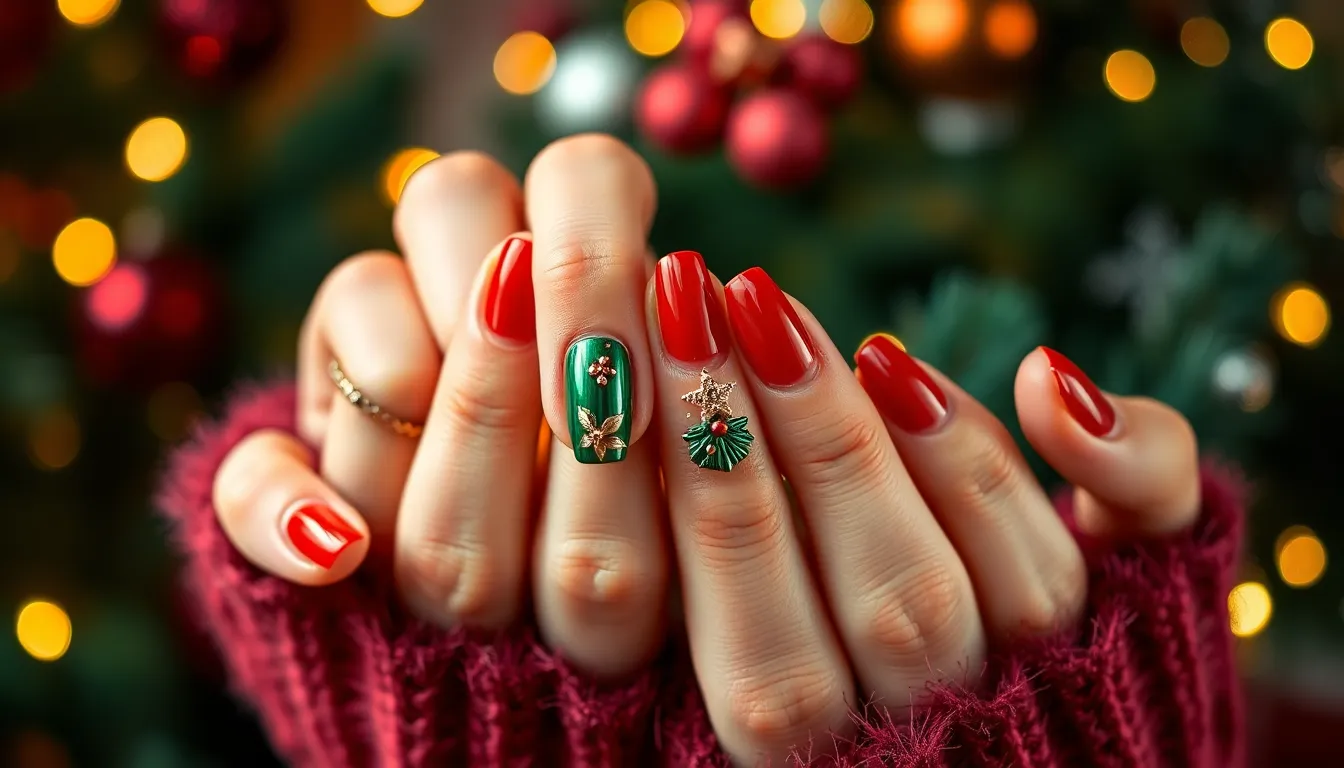
We’ve explored stunning Christmas nail designs, but creating art that survives holiday festivities requires strategic preparation and maintenance techniques.
Proper Base and Top Coat Application
Start with a quality base coat that creates an adhesive foundation for your Christmas nail art. We recommend applying thin, even layers rather than one thick coat to prevent bubbling and ensure smooth coverage. Dehydrate your nail beds with rubbing alcohol before application to remove oils that can compromise adhesion.
Choose a base coat formula that matches your design complexity—use ridge-filling bases for textured Christmas patterns and strengthening formulas for intricate 3D elements. We’ve found that letting each base coat layer cure completely under LED lights prevents peeling issues that plague holiday manicures.
Apply your top coat strategically by sealing around nail edges and cuticles where chipping typically begins. Use thin coats and build up protection gradually rather than flooding the nail with product. We recommend fast-dry formulas for busy holiday schedules, but ensure complete curing between layers to maximize durability.
Refresh your top coat every 3-4 days to maintain the glossy finish and protect underlying Christmas designs from daily wear.
Color Layering for Vibrant Results
Build your Christmas colors gradually using multiple thin layers instead of attempting full opacity in one application. We’ve discovered that three thin coats of red polish create more vibrant, chip-resistant coverage than two thick coats that remain tacky underneath.
Allow proper drying time between each color layer—we recommend 2-3 minutes for regular polishes and full LED curing cycles for gel formulas. Rush the process and your festive greens and golds will develop texture issues and premature wear patterns.
Use color-coordinated base colors that complement your Christmas design elements. We apply white bases under bright reds to enhance vibrancy and nude bases under metallic gold accents to prevent streaking. Strategic base selection reduces the number of color coats needed for full coverage.
Seal each design element with thin top coat layers as you build complex Christmas patterns. This technique prevents colors from bleeding together and creates depth in layered snowflake and ornament designs.
Maintenance Techniques for Extended Wear
Wear cotton-lined gloves during holiday cleaning and gift-wrapping sessions to protect your Christmas nail art from harsh detergents and rough textures. We’ve seen beautiful designs ruined by simple household tasks that could’ve been prevented with proper hand protection.
Apply cuticle oil daily to maintain nail flexibility and prevent the cracking that leads to design lifting. Focus the oil around your nail perimeter where Christmas patterns meet natural nail growth.
Touch up chips immediately using a small art brush and matching polish colors rather than letting damage spread. We keep emergency repair kits with base coat, your main Christmas colors, and top coat for quick fixes during holiday events.
Schedule removal properly by soaking acetone-soaked cotton pads on each nail for 10-15 minutes before gently pushing off softened polish. Never peel or pick at Christmas designs, as this damages your nail surface and affects future manicure longevity.
Conclusion
We’ve explored the magical industry of Christmas nail art from simple beginner designs to sophisticated professional techniques. Whether you’re drawn to classic red and green combinations or prefer modern geometric patterns the possibilities for festive manicures are truly endless.
Remember that practice makes perfect when it comes to nail art. Start with easier designs and gradually work your way up to more complex techniques as your skills develop. The key is to have fun while expressing your holiday spirit through your nails.
With the right tools techniques and a little creativity you can transform your nails into stunning holiday masterpieces that’ll complement any festive outfit. So grab your favorite polishes and start creating your own Christmas nail art magic this holiday season!
Frequently Asked Questions
What are the best Christmas nail art designs for beginners?
Beginners should start with simple designs like Santa hat patterns, basic snowflakes, and candy cane stripes. These designs require minimal tools and techniques while still delivering festive impact. Polka dots in Christmas colors, simple Christmas tree outlines, and gradient ombre effects are also beginner-friendly options that create beautiful holiday nail art.
What colors work best for Christmas nail art?
Classic Christmas color palettes include traditional red and green combinations, elegant gold and silver accents, and timeless white and silver winter themes. These colors never go out of style and can be mixed and matched to create cohesive holiday-themed designs that complement your festive attire.
How can I make my Christmas nail art last longer?
Apply proper base and top coats in thin layers, use multiple thin color coats for better coverage, and protect your nails with gloves during household tasks. Apply cuticle oil daily and perform immediate touch-ups for chips. Proper preparation and maintenance techniques ensure your designs withstand holiday festivities.
What tools do I need for professional-looking Christmas nail art?
Essential tools include stamping plates for intricate patterns, nail stickers and water decals for complex designs, rhinestones and gems for sparkle, and proper placement tools for precision. Quality brushes, dotting tools, and specialized nail art accessories help create professional results at home.
How do I create glitter effects on Christmas nails?
Achieve dazzling glitter effects through gradient fade techniques and accent nail sparkle combinations. Apply glitter polish in thin layers, building up intensity gradually. Use makeup sponges for gradient effects and focus glitter on accent nails for balanced sparkle that elevates your Christmas nail art.
What are the most popular advanced Christmas nail art techniques?
Advanced techniques include 3D Christmas charm applications with sculptural elements, hand-painted winter scene masterpieces featuring snowy villages, and intricate lace patterns. Modern approaches incorporate geometric holiday patterns, marble effects using Christmas colors, and negative space motifs for sophisticated, contemporary festive designs.

