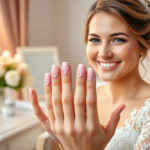
Prom night represents one of the most magical evenings in a teenager’s life and every detail matters – especially your nails. We’ve all experienced that moment of staring at our hands wondering how to make them prom-perfect. Your manicure can either complement your stunning dress or become the showstopping accessory that everyone remembers.
We understand the pressure of creating the ideal prom look while staying within budget and expressing your unique personality. From classic French tips with a twist to bold glitter gradients that catch every camera flash the options feel endless. The good news? You don’t need to expensive or spend hours at an expensive salon to achieve red-carpet worthy nails.
Whether you’re planning a DIY manicure session with friends or seeking inspiration for your next salon appointment we’ve gathered the most stunning prom nail ideas that’ll make your hands as picture-perfect as your dress. Let’s jump into these gorgeous designs that’ll have you feeling confident and glamorous all night long.
Classic Elegance: Timeless French Manicure Ideas for Prom Nails
French manicures remain the epitome of sophistication for prom night. These versatile designs offer endless possibilities while maintaining that polished elegance every prom attendee desires.
Traditional White Tips with Subtle Sparkle
Traditional French tips get a prom worthy upgrade with delicate sparkle accents. We recommend adding a thin line of clear glitter polish just above the white tip line for subtle glamour. Fine shimmer powder pressed into wet topcoat creates an ethereal glow that catches ballroom lighting perfectly.
Silver micro glitter scattered across the nail bed transforms classic French tips into prom perfection. Apply the glitter sparingly using a small brush or dotting tool to maintain that refined appearance. Clear base coats with holographic particles give traditional white tips a magical rainbow shimmer that photographs beautifully.
Pearl dust mixed with clear polish creates sophisticated luminosity without overwhelming the classic design. Brush this mixture over the entire nail after the white tips dry completely. Tiny rhinestones placed at the smile line intersection add just enough sparkle for special occasion elegance.
Colored French Tips to Match Your Dress
Colored French tips allow perfect coordination with your prom dress while maintaining sophisticated appeal. We suggest using your dress’s accent color for the tip portion instead of traditional white. Deep burgundy tips complement jewel tone gowns beautifully, while soft pink tips enhance romantic pastel dresses.
Metallic French tips in rose gold or champagne create luxury appeal that works with most dress colors. These finishes reflect light elegantly and photograph exceptionally well in prom lighting conditions. Navy blue tips offer striking contrast against white or silver gowns.
Ombre French tips blend your dress color from light to dark across the tip area. Start with a lighter shade at the smile line and deepen the color toward the nail edge. Purple ombre tips transition from lavender to deep plum for dramatic effect that still maintains classic French structure.
Reverse French Manicure with Metallic Accents
Reverse French manicures place the accent color at the base near your cuticle instead of the tip. We love this modern twist because it creates visual interest while keeping fingertips looking naturally elegant. The metallic accent draws attention to well manicured cuticle areas and nail beds.
Gold reverse French creates warm sophistication that complements most skin tones beautifully. Apply the metallic color in a thin crescent shape at the nail base, leaving the rest of the nail in nude or clear polish. Rose gold offers feminine warmth that pairs perfectly with blush and coral dress colors.
Silver reverse French delivers cool elegance that enhances blue and green gown selections. The metallic base creates a stunning foundation that makes the natural nail color appear more vibrant. Copper reverse French provides unique warmth that coordinates beautifully with earth tone and autumn colored formal wear.
Glamorous Glitter: Sparkly Ideas for Prom Nails That Shine

Glitter nails create the perfect sparkly statement for prom night, transforming your manicure into a dazzling accessory that catches light with every movement. We’ll explore three stunning glitter techniques that guarantee your nails will be the talk of the dance floor.
Full Glitter Coverage in Your School Colors
School spirit meets glamour when you cover your entire nail with glitter in your school’s signature colors. We recommend using fine glitter polish or loose glitter with a clear base coat to achieve complete coverage that won’t chip throughout the night. Apply two thin coats of glitter polish over your base color, allowing each layer to dry completely before adding the next.
Mix complementary school colors across different nails for a coordinated yet ever-changing look. Gold and navy combinations create sophisticated contrast, while silver and burgundy offer timeless elegance. Team colors like purple and white or green and gold showcase school pride while maintaining prom appropriate sophistication.
Seal your full glitter coverage with a high quality top coat to prevent glitter fallout during dancing. We suggest applying two layers of top coat for maximum durability and shine that lasts all night long.
Glitter Gradient Ombre Effect
Ombre glitter creates a stunning transition from subtle shimmer to full sparkle, perfect for those who want glamour without overwhelming boldness. We start this technique by applying your base color and allowing it to dry completely before beginning the gradient process.
Create the gradient using a makeup sponge to dab glitter polish from the nail tip toward the cuticle, concentrating the heaviest application at the tips. Build the effect gradually with three to four light applications, blending each layer while the polish remains tacky for seamless transitions.
Popular gradient combinations include clear to silver glitter, nude to rose gold shimmer, or deep plum to holographic sparkle. We find that starting with a color similar to your glitter base creates the most natural looking fade effect.
Finish with a generous top coat application, paying special attention to sealing the glitter particles that create texture on the nail surface.
Accent Nail Glitter with Solid Base Colors
Accent nails provide the perfect compromise between subtle elegance and eye catching sparkle, allowing you to incorporate glitter without overwhelming your overall look. We typically recommend applying full glitter coverage to your ring finger while keeping the remaining nails in a complementary solid color.
Choose accent nail colors that enhance your dress without competing for attention. Deep jewel tones like emerald or sapphire create striking contrast against neutral base colors, while metallic glitters complement both bold and pastel dress choices.
Create visual interest by alternating your accent nail placement across both hands rather than using the same finger on each hand. Some choose to glitter their thumb and ring finger, while others prefer ring finger and pinky combinations for asymmetrical appeal.
Balance is key when selecting your solid base color and glitter accent combination. We suggest testing color combinations on practice nails or nail wheels before your final application to ensure the perfect prom night coordination.
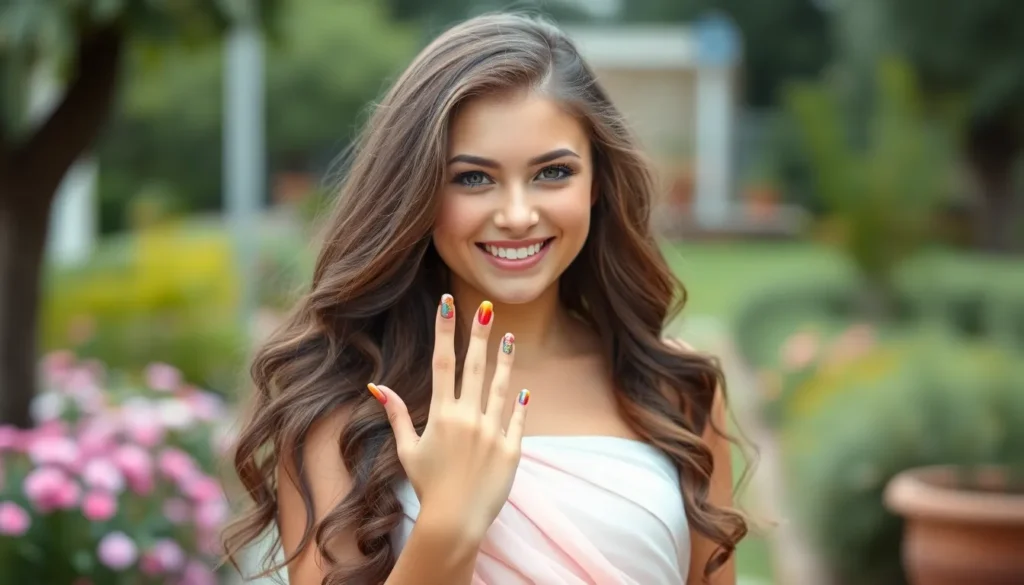
Bold and Beautiful: Statement Ideas for Prom Nails with Vibrant Colors

Ready to make a striking impression at prom? We’re moving beyond subtle elegance into the area of show stopping colors that command attention and perfectly express your vibrant personality.
Neon Brights for a Fun Prom Look
Electric pink creates an instantly eye catching manicure that pairs beautifully with black or white prom dresses. We recommend starting with a white base coat to make neon colors pop more vibrantly against your natural nail tone. Lime green offers another bold choice that works especially well with neutral colored gowns or metallic accessories.
Coral orange brings warmth and energy to your prom look while remaining surprisingly versatile with many dress colors. Apply two thin coats instead of one thick layer to achieve the most even coverage and prevent streaking. Bright purple makes a regal statement that complements both cool and warm skin tones beautifully.
Mix different neon shades on each nail for a playful rainbow effect that shows off your creative side. We suggest choosing three to four colors from the same neon family to maintain cohesion while still creating visual interest. Top everything with a high gloss finish to amplify the vibrant intensity of your chosen shades.
Deep Jewel Tones for Sophisticated Style
Emerald green delivers luxury and sophistication that rivals actual gemstones on your fingertips. We love how this rich shade complements gold jewelry and warm metallic accents in prom dresses. Sapphire blue creates a stunning contrast against silver accessories while maintaining an elegant royal appearance.
Ruby red commands attention with its classic glamour and works beautifully across all skin tones. Apply a base coat specifically designed for dark colors to prevent staining your natural nails underneath. Amethyst purple offers a unique alternative to traditional prom colors while still feeling formal and refined.
Layer a subtle shimmer topcoat over jewel tones to add depth and dimension without overwhelming the base color. We recommend testing these darker shades in different lighting conditions to ensure they photograph well for prom pictures. Choose one accent nail per hand in a complementary metallic shade to break up the intensity while maintaining sophistication.
Color-Blocked Geometric Designs
Triangular patterns using two contrasting colors create modern geometric art on your nails. We suggest using nail tape to achieve crisp clean lines between color sections for the most professional looking result. Hot pink paired with turquoise offers a bold combination that photographs beautifully under prom lighting.
Diagonal stripes alternate between your chosen colors to create ever-changing visual movement across each nail. Start with lighter shades as your base and add darker colors on top for the best coverage and color accuracy. Neon yellow combined with deep purple creates an unexpected yet striking contrast that stands out in group photos.
Square color blocks divide each nail into equal sections using three different vibrant shades. We recommend practicing this technique on fake nails first to perfect your brush control and timing. Finish geometric designs with a matte topcoat for a modern editorial look or high gloss for maximum color saturation and shine.
Floral Fantasy: Garden-Inspired Ideas for Prom Nails

We’ve explored classic elegance and bold statements, but floral nail art offers the perfect balance of romantic charm and sophisticated beauty for your special night.
Hand-Painted Rose Designs
Hand-painted roses create stunning focal points that complement formal gowns beautifully. We recommend starting with a neutral base color like soft pink or cream, then using a thin brush to paint delicate rose petals in deeper shades. Red roses on white backgrounds offer timeless elegance, while blush pink roses on nude bases provide subtle romance.
Creating layered petals adds dimensional beauty to your design. Begin with the center bud using darker colors, then paint lighter outer petals that gradually fade. Burgundy roses with gold accents match jewel-toned dresses perfectly, creating cohesion between your nails and formal wear.
Accent nails featuring single statement roses work wonderfully when paired with solid colors on remaining fingers. We suggest painting detailed roses on ring fingers while keeping other nails in complementary solid shades like dusty rose or champagne.
Delicate Cherry Blossom Nail Art
Cherry blossom designs bring spring’s gentle beauty to your prom manicure with soft, ethereal appeal. We love using light pink or white bases with delicate branch details painted in brown or dark gray. Small pink and white blossoms scattered along these branches create authentic garden aesthetics.
Watercolor techniques enhance cherry blossom designs with dreamy, artistic effects. Blend soft pinks and whites together while the polish is still wet, creating natural color gradations that mimic real petals. Adding tiny dots of yellow in blossom centers provides realistic finishing touches.
Minimalist cherry blossom branches across multiple nails create flowing designs that span your entire hand. Start the branch on your thumb, continue across index and middle fingers, then finish on your ring finger for seamless garden storytelling.
Pressed Flower Nail Decorations
Real pressed flowers offer authentic texture and organic beauty that artificial decorations can’t replicate. We recommend using small flowers like baby’s breath, violets, or tiny daisies that fit nail proportions perfectly. These natural elements create unique designs since no two flowers are identical.
Application requires careful technique for lasting results. Apply your base color first, then place dried flowers using tweezers while the polish is slightly tacky. Seal everything with multiple thin coats of clear topcoat, ensuring flowers stay flat and protected throughout your prom festivities.
Combining pressed flowers with subtle glitter accents creates magical garden effects. Sprinkle fine glitter around flower placement to mimic morning dew or add shimmer that catches ballroom lighting. Purple flowers with silver glitter or yellow blooms with gold sparkle create particularly stunning combinations for formal events.
Metallic Magic: Shimmery Ideas for Prom Nails with Luxe Appeal

Metallic nails transform your prom look with sophisticated shimmer that catches light from every angle. These luxurious finishes complement both bold and understated prom dresses while adding an expensive designer touch to your overall appearance.
Rose Gold Chrome Finish
Chrome powder creates the most stunning rose gold mirror effect for prom nails that rival professional salon work. Apply a black gel base coat first, then buff chrome powder over the tacky layer using a silicone tool or makeup sponge. Seal the finish with a no-wipe topcoat to preserve the reflective quality and prevent chipping during dancing.
Experiment with rose gold chrome on accent nails if you prefer a subtle metallic touch. Choose your ring finger and thumb for maximum impact when holding your corsage or clutch. Mix rose gold chrome with nude pink bases on remaining nails to create a cohesive look that won’t overpower delicate jewelry pieces.
Layer rose gold chrome over different base colors to customize your metallic intensity. Dark purple bases create deeper rose gold tones, while white bases produce brighter, more reflective finishes. Test combinations on practice nails to find the perfect shade that complements your prom dress fabric and undertones.
Silver Foil Accent Nails
Transfer foil creates dramatic silver accents that add texture and dimension to your prom manicure. Apply foil adhesive to clean, dry nails and wait until it becomes tacky before pressing silver foil sheets firmly across the surface. Remove the backing paper quickly to reveal stunning metallic patterns that catch ballroom lighting beautifully.
Combine silver foil with matte black bases for a high-contrast look that photographs exceptionally well. Paint your pointer and ring fingers with matte topcoat, then add silver foil to remaining nails for balanced visual interest. This technique works particularly well with black, navy, or deep purple prom dresses.
Create custom silver foil patterns using nail tape to section off geometric shapes before application. Triangle sections, diagonal stripes, and negative space designs showcase your artistic skills while maintaining sophisticated elegance. Remove tape immediately after foil application to achieve clean, professional-looking edges that rival expensive nail art services.
Holographic Rainbow Effects
Holographic polishes shift between rainbow colors as you move your hands, creating magical light displays perfect for prom photos. Choose fine holographic particles for subtle shimmer or chunky holo glitters for dramatic color changes that complement disco balls and party lighting. Apply thin coats to prevent bubbling and ensure smooth, even coverage.
Layer holographic topcoats over any base color to instantly transform ordinary polish into spectacular rainbow effects. Clear holographic topcoats work over pastels, while tinted versions enhance deeper shades like burgundy or forest green. This technique allows you to match your prom dress while adding unexpected prismatic beauty.
Combine holographic effects with simple nail art techniques like gradient sponging or geometric tape designs. Sponge holographic polish from cuticle to tip for stunning rainbow ombre effects, or use tape to create holographic French tips with regular polish bases. These combinations provide unique looks that stand out in group photos and social media posts.
Rhinestone Romance: Crystal-Embellished Ideas for Prom Nails

Rhinestones and crystals elevate prom nails from beautiful to breathtaking, creating sophisticated sparkle that catches light with every gesture. We’ve discovered three stunning crystal embellishment techniques that’ll make your manicure the star of prom night.
Swarovski Crystal Accent Placement
Strategic crystal placement creates maximum impact without overwhelming your overall look. We recommend positioning 3-5 Swarovski crystals along the cuticle line of your ring finger for an elegant accent that won’t interfere with dancing or photos.
Size matters when selecting crystals for accent placement. We suggest using SS12 or SS16 crystals (approximately 3-4mm) as they’re large enough to catch light but won’t snag on fabric or hair. Clear crystals work beautifully over any base color, while colored stones like light rose or crystal AB create stunning effects over nude or pale pink bases.
Application requires patience and precision for professional looking results. We apply a small dot of nail glue or gel top coat where each crystal will sit, then use tweezers or a dotting tool to position each stone. Sealing the crystals with two thin coats of clear top coat ensures they’ll stay secure through all your prom night activities.
Rhinestone French Tips
Transform classic French manicures into dazzling masterpieces by replacing traditional white tips with tiny rhinestones. We create this look by applying your base color first, then carefully placing small rhinestones along the tip line instead of painting white polish.
Size coordination is crucial for achieving clean rhinestone French tips. We use SS6 or SS8 rhinestones (approximately 2-2.5mm) arranged in a single row along each nail tip for the most refined appearance. Alternating clear and colored stones like light sapphire or rose creates beautiful gradient effects that complement various dress colors.
Spacing consistency makes or breaks this sophisticated design. We mark light guidelines with a thin brush before placing stones to ensure even distribution across all ten nails. Each rhinestone should touch its neighbors without overlapping, creating a seamless sparkly tip that rivals any salon creation.
Full Crystal Nail Coverage Techniques
Complete crystal coverage creates show stopping nails that’ll photograph beautifully under prom lighting. We start with a strong gel base coat to provide maximum adhesion for the many crystals we’ll be applying across the entire nail surface.
Pattern planning prevents chaos when covering full nails with crystals. We begin placing larger stones (SS12-SS16) first to establish anchor points, then fill in gaps with smaller SS6 and SS8 rhinestones. Working from cuticle to tip in rows helps maintain organization and ensures complete coverage without bare spots.
Color mixing adds depth and dimension to full crystal coverage designs. We combine clear crystals with one accent color like amethyst or emerald to create stunning monochromatic effects. Three color combinations using complementary shades create rainbow prism effects that shift beautifully as you move your hands during photos and dancing.
Ombre Dreams: Gradient Ideas for Prom Nails with Smooth Transitions

Creating smooth color transitions transforms basic manicures into stunning works of art. We’ll explore three captivating gradient techniques that’ll make your prom nails absolutely mesmerizing.
Sunset-Inspired Color Blending
Sunset inspired gradients capture the magic of golden hour on your fingertips. Start with a warm orange base at your cuticles, then blend seamlessly into coral at the center, finishing with deep pink at your nail tips. We recommend using makeup sponges to dab and blend each color while the polish remains slightly wet.
Layering multiple thin coats creates smoother transitions than applying thick polish all at once. Begin with your lightest shade first, then gradually build up the deeper tones using gentle patting motions. Professional nail artists often use acetone on a small brush to soften harsh lines between colors.
Complementary color combinations like peach to rose gold or amber to burgundy enhance the natural beauty of sunset themes. These warm tones photograph beautifully under prom lighting and pair perfectly with gold jewelry or metallic dress details.
Pastel Rainbow Ombre
Pastel rainbow ombre delivers dreamy, ethereal effects that complement spring prom themes perfectly. We suggest starting with soft lavender at the base, transitioning through baby pink, then peach, finishing with mint green at your tips. Each color should flow seamlessly into the next without visible lines or harsh breaks.
Creating this look requires patience and the right tools for blending. Use cosmetic wedges instead of regular sponges for smoother application, and work quickly while each polish layer stays workable. Blend each transition point with circular motions to achieve that coveted cloud like effect.
Color coordination becomes crucial when working with multiple hues simultaneously. Choose pastels from the same brand or color family to ensure they blend harmoniously without creating muddy patches. We recommend practicing this technique on nail wheels before attempting it for prom night.
Dark to Light Single-Color Gradients
Single color gradients offer sophisticated elegance while remaining surprisingly simple to achieve. Start with your chosen color at full intensity near your cuticles, then gradually dilute it with white polish or clear base coat toward your nail tips. This creates depth and dimension without overwhelming busy prom dress patterns.
Popular single color combinations include deep navy fading to sky blue, or rich burgundy transitioning to soft pink. These monochromatic looks photograph beautifully and coordinate effortlessly with any dress color or style choice.
Technique matters significantly when creating these gradients successfully. Apply your darkest shade first, then use a clean, damp brush to pull the color upward while adding tiny drops of white polish. Work in small sections and blend immediately to prevent streaking or uneven coverage patterns.
Theme-Based Designs: Creative Ideas for Prom Nails Matching Your Style

Now that we’ve explored various nail techniques and effects, let’s jump into theme-exact designs that perfectly complement your prom style and personality.
Vintage Hollywood Glamour Nails
Deep burgundy nails with gold leaf accents capture the essence of old Hollywood elegance. We recommend starting with a rich wine or oxblood base color and adding delicate gold foil pieces along the nail tips for a luxurious finish. Classic red lips inspired manicures work beautifully with cream or nude-toned dresses, creating a timeless look that photographs stunning under prom lights.
Pearl embellishments add sophisticated texture to vintage themed nails, especially when placed strategically at the base or corners of each nail. We suggest using small white or cream colored pearls with a clear topcoat to secure them properly. Art deco patterns featuring geometric lines in gold or silver create dramatic focal points that complement vintage inspired gowns with beading or sequin details.
Black and gold combinations deliver the ultimate retro glamour effect, particularly when we incorporate thin metallic stripes or small rhinestone accents. These colors work exceptionally well with both light and dark colored dresses, providing contrast and elegance that stands out in prom photos.
Boho Chic Nail Art Patterns
Feather inspired designs bring earthy elegance to bohemian themed proms, using soft browns, creams, and gold accents to create realistic feather textures. We achieve this look by layering different neutral tones and adding delicate brush strokes that mimic natural feather patterns. Mandala nail art featuring intricate circular patterns works beautifully as accent nails, using henna inspired browns and golds on a neutral base.
Natural stone effects like turquoise marble patterns complement boho styles perfectly, especially when we blend soft blues and greens with white veining. These designs pair wonderfully with flowy dresses in earth tones or pastels. Dream catcher motifs featuring small beads and delicate line work create unique focal points that capture the free spirited essence of bohemian fashion.
Sunset gradient backgrounds with silhouette designs offer another stunning boho option, combining warm oranges and pinks with black tree or mountain outlines. We recommend using these dramatic landscapes on accent nails while keeping other nails in complementary solid colors.
Minimalist Modern Geometric Shapes
Single accent lines create clean, sophisticated looks that complement contemporary prom styles without overwhelming the overall aesthetic. We achieve these designs using striping tape to create perfect straight lines in contrasting colors like black on nude or gold on white. Triangle patterns positioned at nail tips or corners add modern flair while maintaining elegance suitable for formal events.
Negative space designs featuring cut out geometric shapes offer contemporary appeal that photographs beautifully and complements sleek, modern gown silhouettes. We recommend using clear bases with strategic color placement to create these eye catching patterns. Circle and dot arrangements in metallic tones provide subtle texture and visual interest without competing with elaborate dress details.
Color blocking techniques using two contrasting shades create bold statements that work perfectly with minimalist prom aesthetics, especially when we choose colors that coordinate with dress hues or accessories. These designs offer maximum impact with clean execution that appeals to modern style preferences.
Long-Lasting Tips: Professional Ideas for Prom Nails That Stay Perfect

Creating stunning prom nails means nothing if they don’t last through the entire evening of dancing and celebration. We’ll share professional techniques that ensure your beautiful nail art maintains its flawless appearance from photos to after party.
Gel Polish Application Techniques
Gel polish provides the ultimate durability for prom night manicures, lasting up to two weeks without chipping or dulling. We recommend starting with a thorough nail prep that includes cuticle pushing, gentle buffing, and alcohol cleansing to remove all oils and debris.
Base coat application requires thin, even layers that extend slightly under the nail tip for maximum adhesion. Professional nail technicians suggest capping the free edge by running the brush along the nail tip to seal the polish completely. This technique prevents water damage and extends wear time significantly.
Color application works best in two thin coats rather than one thick layer, with each coat cured under UV or LED light for the recommended time. We always apply polish in three strokes: center, left side, then right side, maintaining consistent pressure throughout. Between coats, avoid touching the nail surface as oils from your skin can cause adhesion problems.
Top coat sealing creates an ultra glossy finish that protects your nail art from scratches and impacts during prom activities. Professional artists recommend applying top coat over the entire nail surface, including the free edge, then curing for the full recommended time. This final step ensures your rhinestones, glitter, and other embellishments stay securely in place.
Nail Strengthening Treatments
Strengthening treatments prepare your natural nails to support elaborate prom designs without breaking or splitting during the event. We suggest starting nail strengthening routines at least two weeks before prom to allow proper nail growth and recovery time.
Protein treatments work by filling microscopic gaps in the nail plate, creating a stronger foundation for polish application. Popular strengthening formulas contain keratin, calcium, and vitamins that penetrate the nail structure. Apply these treatments every other day, allowing each coat to dry completely before adding the next layer.
Ridge filling base coats smooth out natural nail imperfections while adding structural support for heavy embellishments like crystals and 3D elements. We recommend using ridge fillers specifically designed for nail art, as they provide better adhesion than regular base coats. These specialized products also prevent nail art supplies from creating pressure points that could cause cracking.
Cuticle oil application keeps the nail bed healthy and promotes strong nail growth during the preparation period. Professional nail artists suggest using oils containing jojoba, vitamin E, and tea tree oil for optimal nail health. Massage cuticle oil into the nail bed twice daily, focusing on the areas around rhinestones and other embellishments where lifting commonly occurs.
Quick Touch Up Answers for Prom Night
Emergency repair techniques can save your manicure when small chips or loose embellishments occur during prom festivities. We recommend creating a touch up kit with essential supplies: matching polish, clear top coat, small nail file, cuticle pusher, and nail glue.
Polish touch ups require careful color matching and blending to maintain a seamless appearance under prom lighting conditions. Professional artists suggest carrying a small brush for precise application, dabbing polish only on the damaged area rather than painting over the entire nail. Blend the edges while the polish is still wet, then seal with a thin top coat layer.
Rhinestone reattachment becomes simple with the right adhesive and placement technique. We use a small amount of nail glue applied with a toothpick, positioning the crystal with tweezers for precise placement. Allow the glue to set for thirty seconds before applying pressure, then seal the area with clear top coat for added security.
Glitter repair works best when you match the original application technique, whether gradient, accent, or full coverage. Professional nail technicians recommend dabbing loose glitter over clear polish while it’s still tacky, then sealing with top coat. For gradient repairs, blend the new glitter into the existing pattern using a makeup sponge with gentle patting motions.
Conclusion
Your prom nails are the perfect finishing touch that’ll tie your entire look together and make you feel absolutely stunning. We’ve shared dozens of creative ideas that range from timeless elegance to bold statement designs so you can find the perfect match for your personal style and dress.
Remember that achieving gorgeous prom nails doesn’t have to expensive. Whether you’re creating DIY masterpieces at home or splurging on a salon visit our techniques and tips will help you achieve professional-looking results that’ll photograph beautifully and last throughout your special night.
The most important thing is choosing a design that makes you feel confident and reflects who you are. Your prom night is all about celebrating this milestone so let your nails be another way to express your unique personality and shine bright on one of your most memorable nights.
Frequently Asked Questions
How far in advance should I get my prom nails done?
For salon appointments, schedule 1-2 days before prom to ensure your nails are fresh and any potential issues can be addressed. If doing DIY nails, complete them the night before or morning of prom. This timing allows for proper drying and prevents chipping while giving you time for touch-ups if needed.
What nail length is best for prom?
Medium length nails (about 1/4 inch beyond your fingertip) work best for prom. They’re long enough to showcase intricate designs like rhinestones or nail art, but practical enough to handle prom activities like dancing, eating, and taking photos without breaking or causing discomfort.
How can I make my prom nails last all night?
Use gel polish for durability, apply a quality base coat and top coat, and avoid using your nails as tools. Keep a small nail file and matching polish for quick touch-ups. Apply cuticle oil before the event and avoid excessive hand washing to maintain the manicure’s longevity.
Should my nails match my prom dress exactly?
Not necessarily. Your nails can complement your dress through coordinating colors, metallics, or neutrals rather than exact matches. Consider your dress’s undertones and choose nail colors that enhance your overall look. Classic options like nude, metallics, or French manicures work with any dress color.
What’s the most budget-friendly prom nail option?
DIY French manicures or simple glitter accents offer elegant looks without salon costs. Use drugstore polishes, nail art pens, and basic rhinestones for affordable glamour. Press-on nails with added embellishments can also create stunning results for under $15, making them perfect for budget-conscious students.
Can I wear bold nail colors to prom?
Absolutely! Bold colors like neon pinks, deep jewel tones, or metallic shades can make stunning prom statements. Consider your dress color, school dress code, and personal style when choosing. Bold nails work especially well with neutral or simple dress designs, creating a perfect balance.
How do I choose between gel and regular polish for prom?
Gel polish lasts longer (7-14 days) and resists chipping, making it ideal for prom night activities. However, regular polish is more budget-friendly and easier to remove. If your prom involves lots of dancing and activities, invest in gel polish for worry-free wear throughout the night.
What nail art is trending for prom this year?
Popular trends include holographic effects, pressed flower designs, geometric patterns, and rhinestone accents. Ombre gradients, metallic chrome finishes, and minimalist nail art are also trending. Choose designs that reflect your personality and complement your overall prom style rather than just following trends.