Halloween’s just around the corner and we’re already thinking about how to perfect our spooky look from head to toe. While you’ve probably got your costume sorted, there’s one detail that can make or break your entire Halloween aesthetic – your nails.
We’ve gathered the most creative and spine-tingling nail art ideas that’ll have everyone asking where you got your manicure done. From classic black cats and pumpkins to intricate spider webs and dripping blood effects, these designs range from beginner-friendly to salon-worthy masterpieces.
Whether you’re heading to a costume party, trick-or-treating with the kids, or just want to embrace the Halloween spirit, the right nail art can transform your hands into the perfect spooky accessory. Let’s jump into these hauntingly beautiful designs that’ll make your fingertips the star of any Halloween celebration.
Spooky Spider Halloween Nail Art Ideas
Spider themed nail art creates an instantly recognizable Halloween look that’s both creepy and stylish. These arachnid inspired designs range from subtle accents to dramatic statement nails that’ll have everyone talking.
Classic Black Widow Design
Black widow spider nail art starts with a deep black base coat that provides the perfect backdrop for intricate details. We recommend using a matte black polish to create that authentic spider aesthetic before adding the signature red hourglass marking.
Creating the spider body involves painting an oval shape near the nail bed using black nail art paint or a fine brush. Add eight delicate legs extending outward from the body using thin strokes that curve naturally like real spider appendages.
The red hourglass marking goes on the spider’s abdomen using bright red polish applied with a small dotting tool or toothpick. This iconic symbol instantly identifies your design as a black widow and adds that pop of color against the dark background.
Finishing touches include tiny white dots for eyes and a glossy top coat to make the red marking shine. The contrast between matte black and glossy red creates visual depth that makes your spider appear almost three dimensional.
3D Spider Web Effects
Three dimensional web effects transform ordinary nails into intricate spider habitats using specialized techniques and materials. Start by creating the web structure with white or silver nail art pens drawing intersecting lines that radiate from one corner of the nail.
Building up the web layers requires applying multiple coats of clear polish between each line to create actual height and texture. We suggest using a thick base coat first then drawing your initial web pattern before adding dimensional elements.
Adding plastic spider charms or small beads creates focal points that catch light and draw attention to your web design. These 3D elements stick best when pressed into wet top coat then sealed with an additional clear layer.
Texture techniques include using a fan brush to create wispy web strands or applying clear glitter polish in web patterns for sparkly effects. The key is building up layers gradually so your web appears to float above the nail surface.
Glittery Spider Accent Nails
Glittery spider accents combine sparkle with spookiness for Halloween nail art that catches every light. Begin with a dark base color like deep purple or midnight blue then add your spider silhouette using black glitter polish applied with precision.
Holographic glitters work exceptionally well for spider bodies because they shift colors as you move your hands creating an almost magical effect. Apply the glitter in thin coats building up opacity gradually rather than trying to achieve full coverage in one application.
Creating glitter gradients involves concentrating more sparkle at the spider’s center then fading it out toward the legs for a natural shadow effect. This technique makes your spider appear to glow from within while maintaining realistic proportions.
Accent nail placement typically works best on ring fingers or thumbs where the design gets maximum visibility. Pair glittery spider nails with solid colored base coats on remaining fingers to let your accent design truly shine without overwhelming the overall look.
Pumpkin-Themed Halloween Nail Art Ideas

Pumpkin nail art captures the essence of autumn festivities with warm orange hues and playful designs. These versatile designs offer endless creativity for Halloween nail enthusiasts looking to embrace the season’s most iconic symbol.
Traditional Jack-O’-Lantern Faces
Creating classic jack o’ lantern expressions brings nostalgic charm to your Halloween manicure. We recommend starting with a bright orange base coat as your foundation, then using black nail polish or fine tip brushes to draw triangular eyes and jagged smiling mouths. Different facial expressions like winking faces, surprised looks, or menacing grins add personality to each nail.
Detailing these miniature pumpkin faces requires steady hands and patience for the best results. Small dotting tools help create perfectly shaped triangular noses, while thin striping brushes work excellently for drawing curved smile lines. Adding tiny white highlights to the eyes makes the jack o’ lantern faces appear more dimensional and lively.
Gradient Orange Pumpkin Ombre
Blending multiple orange shades creates stunning pumpkin inspired ombre effects that mimic natural pumpkin coloring. We start with pale peach tones at the cuticle, gradually transitioning through coral and bright orange to deep burnt orange at the nail tips. Sponge application techniques help achieve seamless color transitions without harsh lines.
Layering translucent orange polishes over the gradient base adds depth and richness to the overall design. Matte top coats transform these ombre nails into realistic pumpkin textures, while glossy finishes provide elegant autumn sophistication. Adding subtle gold shimmer throughout the gradient creates beautiful light catching effects.
Minimalist Pumpkin Silhouettes
Simple pumpkin outlines offer elegant Halloween nail art for those preferring understated designs. We create these silhouettes using thin black lines to outline basic pumpkin shapes on neutral or clear base coats. Single accent nails featuring lone pumpkin silhouettes provide subtle seasonal touches without overwhelming the overall manicure.
Negative space techniques allow the natural nail to show through pumpkin shaped cutouts for modern artistic appeal. Metallic copper or gold outlines replace traditional black lines for sophisticated autumn elegance. These minimalist approaches work perfectly for professional settings while still celebrating Halloween spirit.
Ghostly Halloween Nail Art Ideas

Building on our spooky nail art journey, ghostly designs offer playful and ethereal options that capture Halloween’s supernatural charm perfectly.
Cute Cartoon Ghost Characters
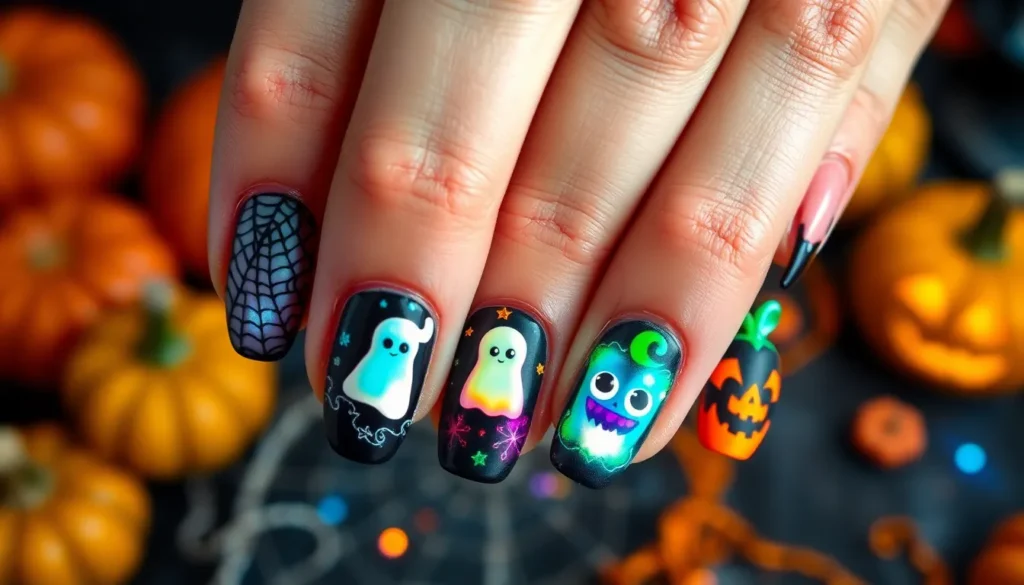
Cartoon ghost characters transform ordinary nails into adorable Halloween statements. We start with a white or pale blue base coat to create the perfect ghostly foundation. Simple black dots make expressive eyes while curved lines form friendly smiles or surprised expressions. Tiny blush circles on the cheeks add warmth to these supernatural beings.
Layering technique creates dimensional cartoon ghosts that appear to float above the nail surface. We apply a second coat of white polish in teardrop shapes, leaving small gaps between layers. This method gives our ghost characters a puffy, cloud-like appearance that catches light beautifully.
Character variations keep each nail unique and entertaining. We paint different facial expressions like winking ghosts, sleepy spirits, or mischievous phantoms with wiggling tongues. Adding small accessories such as tiny bow ties, hats, or stars around the ghosts creates personalized touches that showcase creativity.
Glow-in-the-Dark Ghost Effects
Glow-in-the-dark polishes create spectacular ghost effects that shine in darkness. We use phosphorescent white or green nail polish as the base, then paint ghost shapes with regular white polish on top. Under UV light or after charging with bright light, these spectral designs emit an otherworldly glow that’s perfect for nighttime Halloween events.
Layering different glow intensities produces ever-changing ghost appearances. We apply one coat of glow polish, followed by ghost outlines in brighter glow formulas. This technique creates ghosts that seem to pulse with supernatural energy, especially effective during trick-or-treating hours.
Strategic placement maximizes the glowing ghost impact. We concentrate the brightest glow elements on accent nails while using subtler glow effects on remaining fingers. This approach creates a balanced look that won’t overwhelm in regular lighting but becomes magical in darker environments.
Negative Space Ghost Designs
Negative space ghost designs use the natural nail as part of the artwork. We paint around ghost shapes rather than filling them in, leaving clear nail visible through transparent or translucent polish. This technique creates sophisticated, minimalist ghosts that appear carved from the nail itself.
Outline techniques define negative space ghosts with precision. We use thin brushes or nail art pens to draw ghost silhouettes in black, white, or metallic shades. The contrast between painted borders and exposed nail creates striking visual depth that works beautifully with any nail length.
Geometric negative space adds modern flair to traditional ghost motifs. We incorporate angular cuts, triangular sections, or curved patterns within the ghost shapes. These contemporary twists make negative space designs perfect for professional Halloween celebrations where subtle spookiness is preferred over bold statements.
Witchy Halloween Nail Art Ideas

Enchanting witch themed nail designs bring mystical charm to our Halloween celebrations. These spellbinding nail art concepts let us channel our inner sorceress with elegant gothic aesthetics.
Witch Hat and Broomstick Motifs
Classic pointed witch hats create striking focal points on accent nails using deep purple or black base coats. We paint triangular shapes with steady brush strokes, adding silver buckles or star details for authentic witchy appeal. Metallic gold accents enhance these designs by creating shimmer around hat brims and decorative elements.
Traditional broomstick designs work beautifully across multiple nails using thin brush techniques for wooden handles and bristle textures. Brown and tan polish combinations help us achieve realistic wood grain effects on the handles. Fanned brush strokes at nail tips create convincing straw bristle textures that complete our broomstick illusions.
Silhouette witch hats against moon backgrounds offer dramatic contrast using negative space techniques. We apply silver or white base coats, then mask areas before painting black hat shapes on top. Removing tape reveals crisp moon silhouettes behind our witch hat profiles.
Cauldron and Potion Bottle Art
Bubbling cauldron designs showcase our artistic skills using layered dotting techniques for magical brew effects. Dark green or black base coats serve as cauldron colors while we add metallic rim details with fine liner brushes. Small white and green dots create convincing bubble patterns rising from our painted cauldrons.
Miniature potion bottles transform nails into tiny apothecary collections using vertical rectangle shapes and cork details. We paint glass bottle outlines in clear or tinted colors, then add liquid layers in purple, green, or red. Cork toppers require steady hands but create authentic vintage potion bottle appearances.
Swirling smoke effects above cauldrons add movement and mystery to our witchy nail designs. Wispy gray and white paint creates ethereal smoke patterns using feathering techniques. These flowing elements connect multiple nails in cohesive cauldron themed sets.
Mystical Crystal and Moon Phases
Geometric crystal formations bring celestial energy to our Halloween nail art using angular shapes and holographic polishes. We create faceted crystal designs with triangle and diamond patterns in clear, purple, or silver tones. Iridescent topcoats enhance these crystal effects with rainbow light reflections.
Moon phase progressions across our nails tell astronomical stories using gradual circle painting techniques. We start with new moon black circles, progress through crescent shapes, and finish with full moon designs. Silver and white polishes against dark blue backgrounds create realistic lunar cycle representations.
Amethyst and obsidian crystal nail art combines deep purple and black polish combinations with glittery accents. We paint rough crystal textures using sponge dabbing methods and metallic highlights. These mystical stone effects pair perfectly with silver star details and constellation patterns scattered across our fingertips.
Blood and Gore Halloween Nail Art Ideas

Gothic horror enthusiasts can embrace the darker side of Halloween with dramatic blood and gore nail designs. These macabre masterpieces transform ordinary nails into spine-chilling works of art that perfectly complement vampire, zombie, or horror-themed costumes.
Dripping Blood Effect Techniques
Creating realistic dripping blood effects starts with applying a deep red base coat using burgundy or crimson polish. We recommend layering darker shades like oxblood or maroon to achieve authentic blood coloring that appears thick and coagulated. Strategic placement of blood drips requires starting at the cuticle area and allowing the polish to naturally flow downward using gravity.
Advanced blood dripping techniques involve mixing clear topcoat with red polish to create varying opacity levels. This method produces translucent blood drops that appear freshly spilled against the nail surface. We suggest using a thin striping brush to control drip direction and thickness, ensuring each nail displays unique blood patterns.
Textural blood effects become more convincing when we incorporate metallic red accents that simulate light reflection on wet surfaces. Adding small dots of black polish within red areas creates depth and shadows that enhance the three-dimensional appearance of blood pools.
Zombie Flesh and Decay Patterns
Zombie flesh nail art begins with creating a sickly pale base using mint green or grayish white polish as the foundation. We build realistic decay patterns by sponging darker colors like olive green, brown, and black randomly across the nail surface to simulate rotting flesh.
Peeling skin effects require careful layering techniques where we apply base colors in patches, leaving gaps that represent exposed areas underneath. Strategic use of purple and blue tones around these gaps creates bruising effects that appear authentically decomposed.
Advanced decay textures involve creating raised bumps using thick topcoat applications that dry with dimensional qualities. We enhance these textural elements by applying matte finishes that eliminate shine, making nails appear genuinely lifeless and corpse-like.
Cracked skin patterns work best when we use a dry brush technique with contrasting colors, dragging polish across the nail surface to create irregular lines that resemble damaged flesh.
Vampire Bite Mark Designs
Classic vampire bite marks feature two parallel puncture wounds created with deep red polish dots positioned strategically on accent nails. We surround these bite points with darker burgundy shading that gradually fades outward, mimicking bruising around fresh wounds.
Realistic bite mark designs incorporate subtle swelling effects by building up polish layers around puncture points to create raised areas. Adding tiny droplets of glossy red polish at wound sites simulates fresh blood seeping from vampire fangs.
Gothic elegance emerges when we combine bite marks with dramatic black backgrounds and silver accent details. These sophisticated designs work perfectly for formal Halloween events where subtle horror elements enhance overall costume aesthetics.
Multiple bite mark patterns across different nails tell compelling vampire encounter stories, with each nail representing different stages of healing or fresh attacks. We vary the intensity and coloring of each bite mark to create narrative progression across the entire manicure.
Bat-Inspired Halloween Nail Art Ideas

Bats bring an unmistakable gothic elegance to Halloween nail art that perfectly complements the mysterious atmosphere we’ve been building. These winged creatures offer endless creative possibilities for achieving sophisticated spooky designs.
Flying Bat Silhouettes
Flying bat silhouettes create stunning negative space effects that capture the essence of nighttime Halloween scenes. We start with a gradient background using deep purples, midnight blues, or classic blacks to mimic twilight skies. Small bat cutouts from tape or vinyl stencils help us achieve perfectly shaped silhouettes across each nail.
Layering multiple bat sizes creates depth and movement in our designs. We position larger bats on accent nails while scattering smaller ones across remaining fingers for ever-changing visual flow. Metallic silver or gold topcoats add shimmer that mimics moonlight catching bat wings mid flight.
Dotting tools work excellently for creating tiny bat formations when stencils aren’t available. We use quick dabbing motions to form bat body shapes, then add delicate wing extensions with thin nail art brushes. This technique lets us customize bat positioning for unique storytelling across our manicure.
Gothic Bat Wing Patterns
Gothic bat wing patterns transform individual nails into intricate architectural masterpieces reminiscent of cathedral windows. We begin with deep burgundy or charcoal base coats that provide rich contrast for metallic wing details. Silver and gold foiling techniques create ornate wing patterns that catch light beautifully.
Stamping plates offer precise gothic wing designs that we can replicate consistently across multiple nails. We focus on detailed vein patterns within each wing using contrasting colors like copper against black bases. These intricate details give our bat wings realistic texture and dimension.
Freehand wing painting requires steady hands but produces the most personalized results. We outline wing shapes first, then fill in membrane sections with slightly lighter shades than our base color. Adding tiny metallic dots along wing edges creates the illusion of delicate bone structure beneath translucent skin.
Full Moon and Bat Colony Scenes
Full moon and bat colony scenes tell complete Halloween stories across our entire manicure canvas. We create luminous moon effects using white or pale yellow polishes with subtle shimmer that glows against dark backgrounds. Sponging techniques help us achieve that perfect lunar surface texture with realistic crater shadows.
Bat colonies require strategic planning to avoid overcrowding while maintaining visual impact. We position our largest moon on the ring finger, then scatter bat silhouettes across remaining nails as if they’re flying toward or away from the lunar light. This creates narrative flow that guides the eye naturally across our design.
Glow in the dark elements make these scenes truly spectacular for nighttime Halloween events. We apply phosphorescent topcoats to our moon designs and select bat details for surprising reveals in dark settings. The contrast between illuminated moons and shadowy bat forms creates dramatic effects that perfectly capture Halloween’s mysterious essence.
Candy Corn Halloween Nail Art Ideas

Sweet inspiration meets spooky style with candy corn nail art that captures Halloween’s most iconic treat. We’ll explore vibrant designs that transform your nails into edible works of art.
Traditional Tri-Color Stripes
Traditional candy corn stripes create the perfect homage to Halloween’s beloved confection using white, orange, and yellow polish in precise horizontal bands. Start with a white base coat and allow it to dry completely before applying thin strips of painter’s tape to section off each color zone. Apply orange polish to the middle section using steady strokes and remove the tape while the polish remains slightly wet for clean lines.
Yellow tips complete the classic candy corn look and require careful application with a detail brush for professional results. We recommend using a dotting tool to perfect any uneven edges and ensure each stripe maintains uniform width across all nails. Matte topcoat transforms the glossy finish into an authentic candy texture that mimics real candy corn’s appearance.
Multiple nail variations allow you to experiment with different stripe orientations including vertical candy corn designs on accent nails. Diagonal stripes create ever-changing movement while maintaining the traditional color scheme that everyone recognizes instantly.
Textured Candy Corn Effects
Textured candy corn effects elevate simple stripes into dimensional masterpieces using specialized techniques and materials. Sugar sand polish creates an authentic candy texture when applied over traditional tri-color stripes and mimics the grainy surface of real candy corn. Sponge stippling techniques add realistic texture by dabbing slightly damp makeup sponges over wet polish to create natural candy grain patterns.
Velvet powder application transforms ordinary candy corn nails into luxurious textured surfaces that feel as authentic as they look. Apply a thick layer of clear topcoat and immediately dip each nail into fine velvet powder before the polish sets completely. 3D candy corn charms attached to accent nails create literal candy representations and serve as conversation starters at Halloween events.
Gradient blending methods soften harsh stripe lines while maintaining the iconic candy corn color progression from white to orange to yellow. Use a damp beauty sponge to blend color transitions and create smooth ombre effects that resemble melted candy corn.
Mixed Halloween Candy Themes
Mixed Halloween candy themes combine candy corn elements with other popular treats for comprehensive confection inspired manicures. Chocolate wrapper accents complement candy corn stripes using metallic brown polish and gold foiling techniques that resemble miniature candy bar wrappers. Gummy bear details add playful elements through translucent colored polishes applied over candy corn base designs.
Lollipop swirl patterns create ever-changing backgrounds for candy corn accent nails using circular brush techniques and contrasting color combinations. Purple and green swirls provide spooky undertones while maintaining the sweet candy theme throughout your Halloween manicure. Wrapped candy effects use cellophane inspired techniques with clear polish and holographic glitter to simulate candy wrapper shine.
Candy mixing bowl designs tell complete stories across multiple nails by depicting various Halloween treats including candy corn pieces scattered among chocolate bars and gummy shapes. These narrative manicures work especially well for Halloween parties where your nails become part of your costume’s overall aesthetic.
Skeleton and Skull Halloween Nail Art Ideas

Building on our exploration of Halloween nail art themes, skeleton and skull designs offer the perfect balance of spooky sophistication and macabre elegance for your Halloween manicure.
Day of the Dead Sugar Skulls
Day of the Dead Sugar Skulls transform your nails into vibrant celebrations of Mexican folk art tradition. We start with a clean white or cream base coat to create the perfect canvas for these intricate designs. Colorful floral patterns dance across each nail using bright pinks, blues, yellows, and greens in traditional Día de los Muertos style.
Detailed dot work forms the foundation of authentic sugar skull designs. We use fine dotting tools to create symmetrical patterns around the eye areas, starting with larger dots and gradually decreasing in size. Heart shaped designs replace traditional noses, while delicate swirls and geometric patterns fill the remaining space.
Metallic gold accents elevate these designs to professional levels. We apply thin lines using striping brushes to outline major features and add dimensional details. Tiny rhinestones or microbeads can replace painted dots for special occasions, creating stunning three dimensional effects that catch light beautifully.
Minimalist Bone Patterns
Minimalist Bone Patterns appeal to those preferring subtle Halloween elegance over dramatic designs. We create these sophisticated looks using neutral base colors like nude, light gray, or soft beige. Simple white lines form the basic bone structures, focusing on clean geometric shapes rather than complex anatomical details.
Finger bone segments work particularly well on accent nails. We paint thin white lines across each nail horizontally, spacing them evenly to mimic joint separation. Adding small oval shapes at the line intersections creates realistic bone joint effects without overwhelming the overall design.
Crossed bone motifs provide classic Halloween symbolism with modern minimalist appeal. We position two diagonal white lines across single accent nails, ensuring perfect symmetry through careful measurement. Adding small circular dots where the bones intersect completes the traditional crossbones look while maintaining elegant simplicity.
X-Ray Skeleton Hand Designs
X-Ray Skeleton Hand Designs create stunning optical illusions that transform your entire manicure into medical art. We begin with jet black base coats to simulate X-ray film backgrounds. Bright white or glow in the dark polish creates the bone structures, making each nail appear translucent.
Anatomically accurate finger bones require careful planning across all five nails. We map out the phalanges, metacarpals, and joint connections before painting, ensuring proper proportions and alignment. Using thin liner brushes, we create realistic bone shapes that connect seamlessly from nail to nail when fingers are positioned together.
Enhanced medical effects take these designs to professional levels. We add subtle gray shading around bone edges to create depth and dimension. Tiny white dots represent bone density variations, while darker areas simulate soft tissue shadows. Clear topcoat mixed with fine silver glitter creates the perfect X-ray film texture that catches light dramatically.
Dark and Gothic Halloween Nail Art Ideas

Gothic Halloween nail art transforms your manicure into a haunting masterpiece that embodies the darker side of the spooky season. These sophisticated designs channel vintage horror aesthetics while maintaining elegance and drama.
Black and Purple Color Schemes
Classic black and deep purple combinations create the foundation for truly gothic Halloween nails. Start with a rich black base coat like OPI’s Black Onyx or Essie’s Licorice for maximum depth and opacity. Layer deep amethyst or midnight purple shades over the black using gradient sponging techniques to achieve a mysterious ombre effect that transitions from pure darkness to royal purple.
Alternating black and purple nail designs offer versatility across your manicure. Paint your thumb and ring finger in glossy black while coating your index and pinkie in deep plum or eggplant purple. Apply a matte topcoat to half your nails for textural contrast that adds visual interest without overwhelming the color palette.
Marbled black and purple effects create sophisticated swirling patterns reminiscent of gothic architecture. Drop purple polish into wet black base coat and swirl with a toothpick or nail art brush to create organic marble patterns. Seal with glossy topcoat for a luxurious finish that catches light beautifully under dim Halloween party lighting.
Metallic Gothic Accents
Silver chrome details transform basic gothic manicures into high fashion statements. Apply metallic silver striping tape in geometric patterns over black base coats or use chrome powder over tacky gel polish for mirror like finishes. Create cross patterns or angular geometric shapes that echo gothic cathedral windows and medieval architecture.
Gunmetal gray accents provide subtle metallic elements without overwhelming darker color schemes. Use gunmetal polish for accent nails or apply it through nail stamping plates featuring ornate gothic patterns. Mix gunmetal with black polish to create custom shades that offer dimensional depth while maintaining the gothic aesthetic.
Antique gold details add warmth to cool toned gothic designs. Paint thin gold lines using striping brushes to outline purple sections or create delicate filigree patterns over black base coats. Apply gold leaf flakes sparingly over tacky topcoat for vintage luxury effects that complement vampire or witch themed costumes.
Victorian Gothic Lace Patterns
Intricate lace nail stamping recreates the delicate beauty of Victorian era textiles on your nails. Use lace pattern stamping plates with white or cream polish over black base coats to achieve authentic vintage lace effects. Layer multiple lace patterns at different opacities using sheer polishes for dimensional depth that mimics real fabric textures.
Hand painted lace details offer complete creative control over your gothic lace designs. Use thin nail art brushes with white or pale gray polish to paint delicate scalloped edges and floral motifs characteristic of Victorian lace. Start with simple repeated patterns and gradually build complexity as your technique improves.
Negative space lace effects use your natural nail color as part of the lace pattern design. Apply lace stamping over bare nails using black or dark purple polish to create sophisticated negative space effects. Seal with clear topcoat and add tiny rhinestones or pearls at pattern intersections for authentic Victorian jewelry inspiration.
Easy Beginner Halloween Nail Art Ideas

Creating stunning Halloween nail art doesn’t require professional skills or expensive tools. We’ll share accessible techniques that deliver impressive results perfect for first-time nail artists.
Simple Polka Dot Designs
Polka dots transform into spooky Halloween elements with the right color combinations and placement strategies. We recommend starting with a solid base coat in deep purple, black, or orange before adding contrasting dots using a dotting tool or bobby pin.
Orange dots on black nails create instant pumpkin vibes when arranged in clusters of three or five. Black dots scattered across white or pale gray bases instantly become spider eggs or creepy crawly patterns that catch attention at Halloween parties.
Green dots paired with purple bases evoke witch-inspired themes while maintaining simplicity. We suggest varying dot sizes by using different tools like toothpicks for tiny details or pencil erasers for larger focal points.
Silver or gold metallic dots add sophistication to any Halloween color scheme without requiring advanced techniques. Finishing with a clear topcoat ensures your polka dot Halloween designs stay chip-free throughout the festivities.
Basic Color Block Techniques
Color blocking creates bold Halloween statements using geometric shapes and contrasting hues that anyone can master. We start by mapping out simple patterns like triangles, squares, or diagonal stripes using tape or nail guides for clean lines.
Classic Halloween combinations like orange and black work beautifully when split diagonally across each nail. Purple and green blocks create witch-themed designs while red and black evoke vampire aesthetics that complement gothic costumes.
Vertical stripes using candy corn colors (white, orange, yellow) instantly reference the beloved Halloween treat. We recommend painting the lightest color first and working toward the darkest shade to prevent muddying between sections.
Triangular color blocks positioned at nail tips create modern French manicure alternatives with Halloween flair. Metallic accent blocks in silver or gold elevate basic color combinations into sophisticated designs suitable for adult Halloween events.
Stamping and Stencil Methods
Stamping plates offer professional-looking Halloween designs without requiring artistic skills or steady hands. We select plates featuring bats, spiders, pumpkins, or skull motifs that transfer cleanly onto various base colors.
Clear stamping polish works universally across different colored backgrounds while black stamping polish creates dramatic contrast on lighter bases. We recommend practicing the rolling motion on paper before attempting designs on nails to perfect the technique.
Nail stencils provide foolproof methods for creating consistent shapes like spider webs, cat silhouettes, or geometric patterns. Positioning stencils carefully and using makeup sponges to dab polish through openings prevents bleeding under edges.
Halloween-themed vinyl decals offer the easiest option for beginners wanting complex designs without any artistic ability. We apply base colors first, position decals while polish remains slightly tacky, then seal everything with topcoat for lasting results that rival salon quality.
Conclusion
We’ve explored an incredible range of Halloween nail art designs that cater to every skill level and style preference. From beginner-friendly polka dots to intricate Victorian lace patterns these creative options ensure everyone can participate in the spooky season fun.
The beauty of Halloween nail art lies in its versatility – whether you’re channeling gothic elegance with bat wings or embracing playful charm with candy corn designs there’s something perfect for your Halloween look. These techniques transform your nails into miniature canvases that tell haunting stories.
Remember that the best Halloween nail art is the one that makes you feel confident and festive. Mix and match these ideas create your own unique combinations and don’t be afraid to experiment with different textures and effects to make your Halloween manicure truly unforgettable.
Frequently Asked Questions
What are the best Halloween nail art themes for beginners?
For beginners, start with simple themes like polka dot ghosts, basic pumpkin designs, or color block techniques. These require minimal tools and skills while still creating impressive Halloween looks. Spider silhouettes and candy corn stripes are also beginner-friendly options that use basic painting techniques.
How long do Halloween nail art designs typically last?
Halloween nail art typically lasts 7-10 days with proper application and care. Using a quality base coat, thin polish layers, and a good topcoat helps extend wear time. Glow-in-the-dark and textured designs may have slightly shorter wear due to their specialized formulas.
What tools do I need for Halloween nail art?
Essential tools include dotting tools, thin brushes, nail art pens, and stamping plates. For advanced designs, consider sponges for gradients, stencils for precise shapes, and specialty polishes like glow-in-the-dark or textured formulas. Most basic Halloween designs can be created with household items like toothpicks.
Can I create Halloween nail art on short nails?
Absolutely! Short nails are perfect for Halloween nail art. Focus on simpler designs like single accent nails, small pumpkins, or ghost faces. Minimalist themes work exceptionally well on shorter nails and can look more elegant than complex designs on longer nails.
How do I make glow-in-the-dark nail art more vibrant?
To maximize glow-in-the-dark effects, apply the polish over a white base coat and use multiple thin layers. “Charge” the nails under bright light for several minutes before viewing in darkness. UV light works best for charging phosphorescent polishes.
What’s the easiest way to create realistic blood drip effects?
Start with a deep red base coat, then use a darker red or burgundy polish on a thin brush. Let gravity help by holding your nail vertically and allowing the polish to naturally drip downward. Layer different shades for depth and realism.
How do I prevent Halloween nail art from chipping quickly?
Proper prep is crucial – push back cuticles, buff nails lightly, and use a quality base coat. Apply thin layers of polish, seal edges, and finish with a strong topcoat. Avoid water and harsh chemicals for the first 24 hours after application.
Can I mix different Halloween themes on one manicure?
Yes! Mixing themes creates unique, personalized designs. Try combining elements like bats with moons, witches with pumpkins, or candy corn with ghosts. Keep a cohesive color palette to ensure the different themes work well together across all nails.


