Summer’s here and we’re ready to add some serious sparkle to our fingertips! There’s nothing quite like fresh nail art to complement those sunny days and warm evenings. Whether you’re heading to the beach or enjoying backyard barbecues we’ve got you covered with stunning designs that won’t expensive or require professional skills.
Gone are the days when nail art meant hours of complicated techniques and expensive salon visits. We’ve discovered that the most eye-catching summer nails often come from simple creative touches you can master at home. From vibrant tropical patterns to minimalist geometric designs these easy tutorials will transform your nails into the perfect summer accessory.
Tropical Fruit Nail Art Designs
These vibrant fruit inspired designs bring instant summer energy to your fingertips. We’ll show you how to create three popular tropical nail art patterns that capture the essence of sunny days and fresh flavors.
Watermelon Slice Nails
Start with a light pink or coral base coat across all nails and let it dry completely. Apply a thin strip of white polish about halfway down each nail to create the watermelon rind effect. Add a green tip at the very end of each nail using a small brush or nail art pen.
Create the signature watermelon seeds by dotting tiny black spots randomly across the pink section with a dotting tool or toothpick. We recommend using 2-3 seeds per nail to maintain a realistic look without overcrowding the design. Finish with a clear top coat to seal and add shine.
Make this design pop by alternating between different pink shades on each finger, from soft coral to vibrant magenta. The variation creates visual interest while maintaining the cohesive watermelon theme throughout your manicure.
Pineapple Print Patterns
Paint your nails with a sunny yellow base and allow them to cure properly before adding details. Use a thin nail art brush to create diagonal crossing lines in light brown or orange, forming the classic diamond pattern that mimics pineapple skin texture.
Add dimension to your pineapple nails by painting small brown dots at each intersection of the crossing lines. This technique gives the illusion of depth and makes the pineapple texture more realistic. We suggest keeping the lines slightly uneven for a natural, hand painted look.
Transform one accent nail into a full pineapple by adding green leafy tops using a small detail brush. Paint 3-4 spiky leaves extending upward from the cuticle area in varying shades of green to create movement and visual appeal.
Citrus Wedge Designs
Choose your favorite citrus colors like orange, yellow, lime green, or pink grapefruit as your base. Apply two coats of your selected shade and let each layer dry thoroughly before proceeding with the wedge pattern.
Create the citrus segments by painting thin white curved lines from the cuticle to the tip, dividing each nail into 4-6 sections like orange or lime wedges. Use a striping brush or steady hand with a regular polish brush to achieve clean, curved lines that radiate from the base.
Enhance the citrus effect by adding a small white semicircle at the base of each nail to represent the center of the fruit. We love mixing different citrus colors on each finger to create a fresh fruit salad effect that screams summer vibes.
Beach-Inspired Nail Art Themes
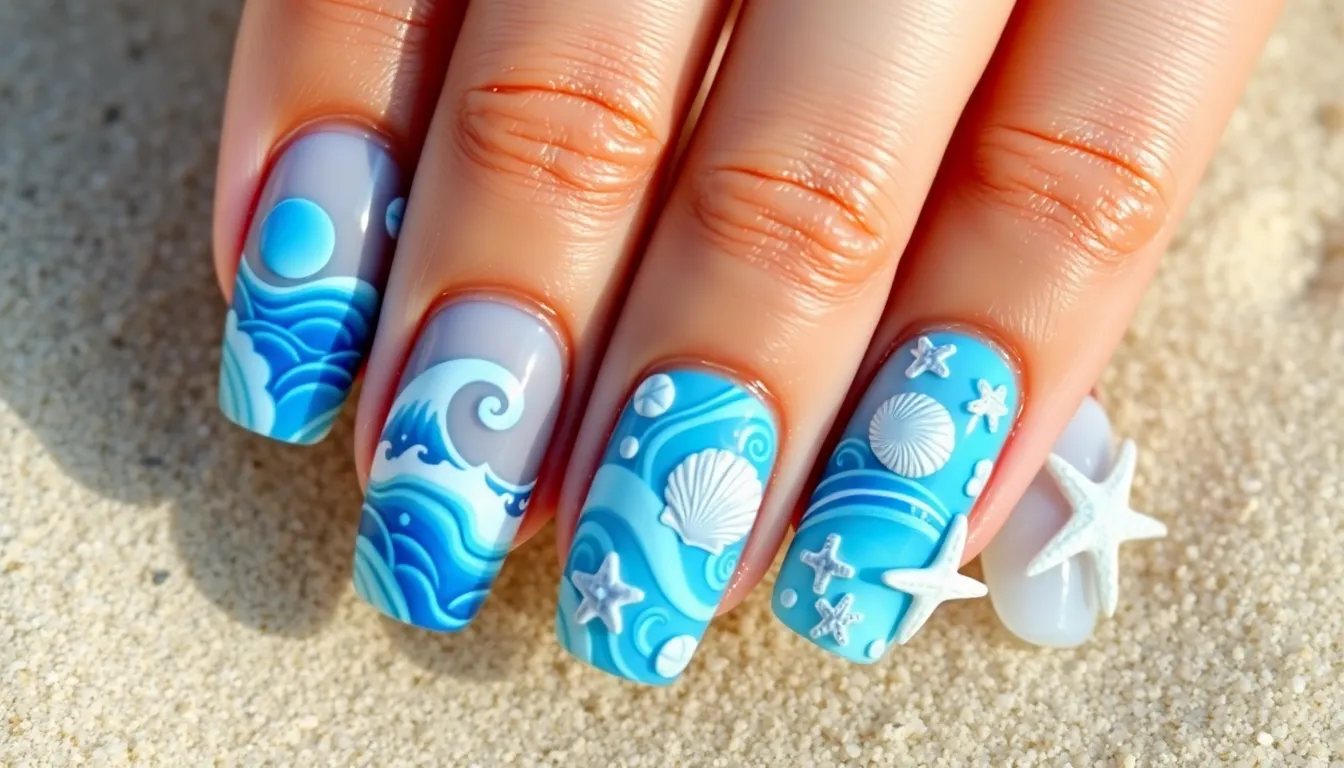
Transform your nails into a coastal paradise with these ocean-inspired designs. Beach themed nail art captures the serene beauty of shorelines while keeping your summer look effortlessly chic.
Ocean Wave Patterns
Ocean wave nail art brings the calming rhythm of the sea to your fingertips with flowing blue gradients and white foam accents. Start with a light blue base coat and blend deeper navy shades toward the tips using a makeup sponge. Create white wave crests by dragging a thin brush in curved motions across each nail, mimicking natural wave movements.
Marble techniques work beautifully for wave patterns by swirling different blue tones together before they dry completely. Add tiny white dots along the wave lines to represent sea spray and bubbles. Finish with a glossy top coat to create that wet, ocean-like shimmer that catches light beautifully throughout the day.
Seashell and Starfish Motifs
Seashell designs add elegant coastal charm to your summer manicure with their intricate natural patterns and soft pastel colors. Paint delicate scallop shells using peachy pink or cream bases, then add thin lines radiating from the bottom to create realistic shell ridges. Starfish motifs work perfectly as accent nails, painted in coral or sandy beige with subtle texture details.
Create dimensional shell effects by layering different shades and adding small pearl accents at the shell’s center. Combine multiple sea creatures on one nail for an underwater scene, including tiny seahorses or sand dollars. These motifs pair beautifully with neutral backgrounds that let the detailed artwork shine.
Sand and Pearl Textures
Sand textured nails capture the gritty, natural feel of beach shores using specialized nail powders or fine glitter in neutral tones. Apply a nude or beige base color, then while still wet, sprinkle fine sand-colored glitter or actual cosmetic sand powder across the surface. Press gently and seal with top coat for a realistic beach sand effect.
Pearl accents elevate any beach design with their lustrous, ocean-treasure appearance that catches light from every angle. Use small white or iridescent pearls as nail art gems, placing them strategically around shell motifs or wave patterns. Caviar beads in cream or champagne colors create subtle texture that mimics tiny shells scattered across sandy beaches.
Floral Summer Nail Art Styles
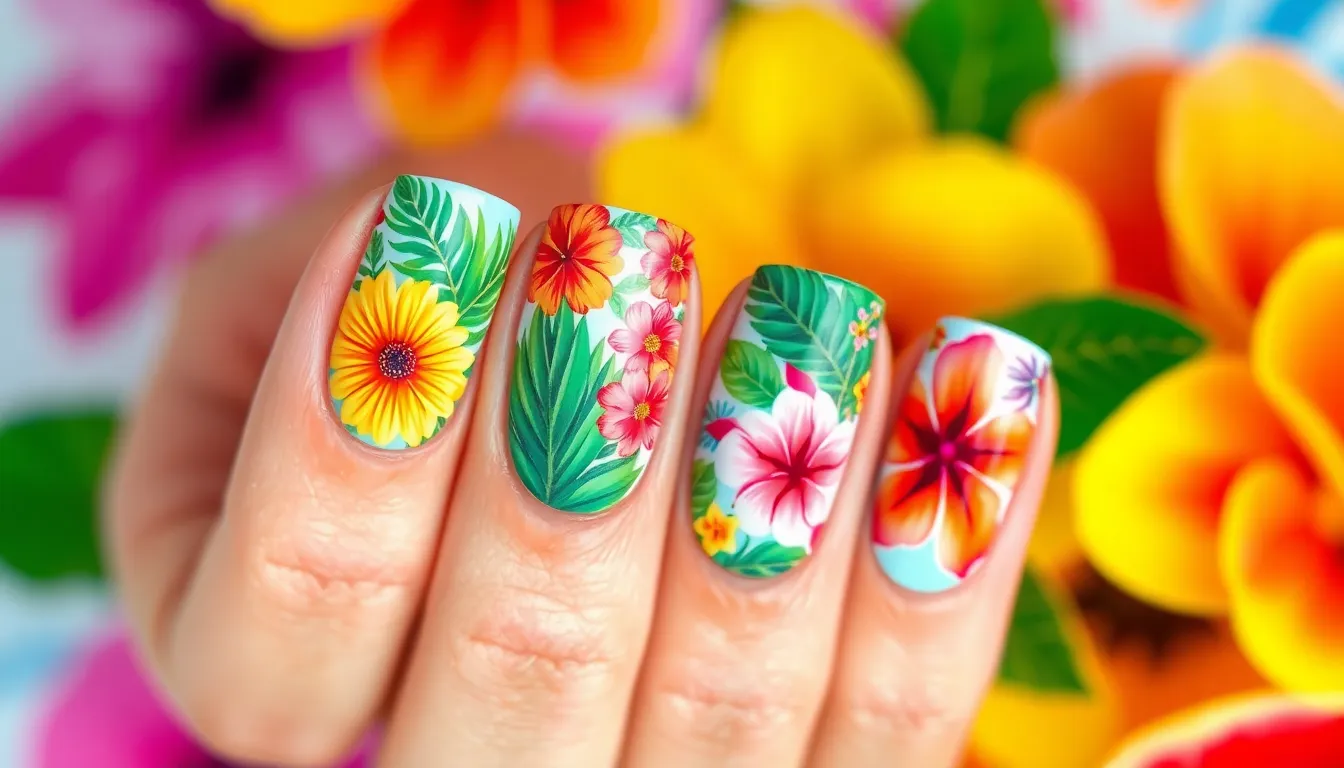
Flowers bring an effortless elegance to summer manicures that perfectly complements the season’s blooming gardens and warm sunshine. We’ve compiled three stunning floral designs that’ll transform your nails into miniature botanical masterpieces.
Simple Daisy Designs
Daisy patterns create charming nail art that captures the innocence and beauty of summer meadows. Start with a soft pastel base color like mint green, lavender, or baby pink. Using a small dotting tool, create five white oval petals around a central point. Add a tiny yellow dot in the center using a toothpick or fine brush. Complete the look by painting small green stems and leaves using a striper brush.
Scattered daisy arrangements work beautifully across all ten nails for maximum impact. Place 2-3 small daisies on each nail, varying their sizes and positions. Mix white daisies with pale yellow ones to add visual interest. Seal your design with a glossy top coat to make the flowers pop against the base color.
Palm Leaf Patterns
Palm leaves bring tropical sophistication to your summer nail art collection. Begin with a nude or clear base coat for a natural foundation. Use a flat brush to paint elongated leaf shapes in various shades of green like sage, forest, and emerald. Create depth by layering darker green shadows along one side of each leaf.
Textured palm fronds add dimension and movement to your manicure. Draw thin lines radiating from the center stem using a fine detail brush. Alternate between light and dark green shades to mimic natural leaf patterns. Position the leaves at different angles across your nails to create a lush, tropical canopy effect.
Hibiscus Flower Accents
Hibiscus blooms deliver bold, statement making nail art perfect for summer celebrations. Paint large flower shapes using vibrant colors like coral, magenta, or sunset orange. Create five rounded petals that slightly overlap for a realistic appearance. Add darker shades around the petal edges using a small brush for natural depth.
Detailed hibiscus centers showcase your artistic skills with elegant finishing touches. Paint a small circle in the flower’s center using a contrasting color like deep red or burgundy. Add tiny stamens by dotting yellow or white points around the center circle. Include small green leaves at the base of each flower to complete the tropical hibiscus look.
Geometric Summer Nail Patterns
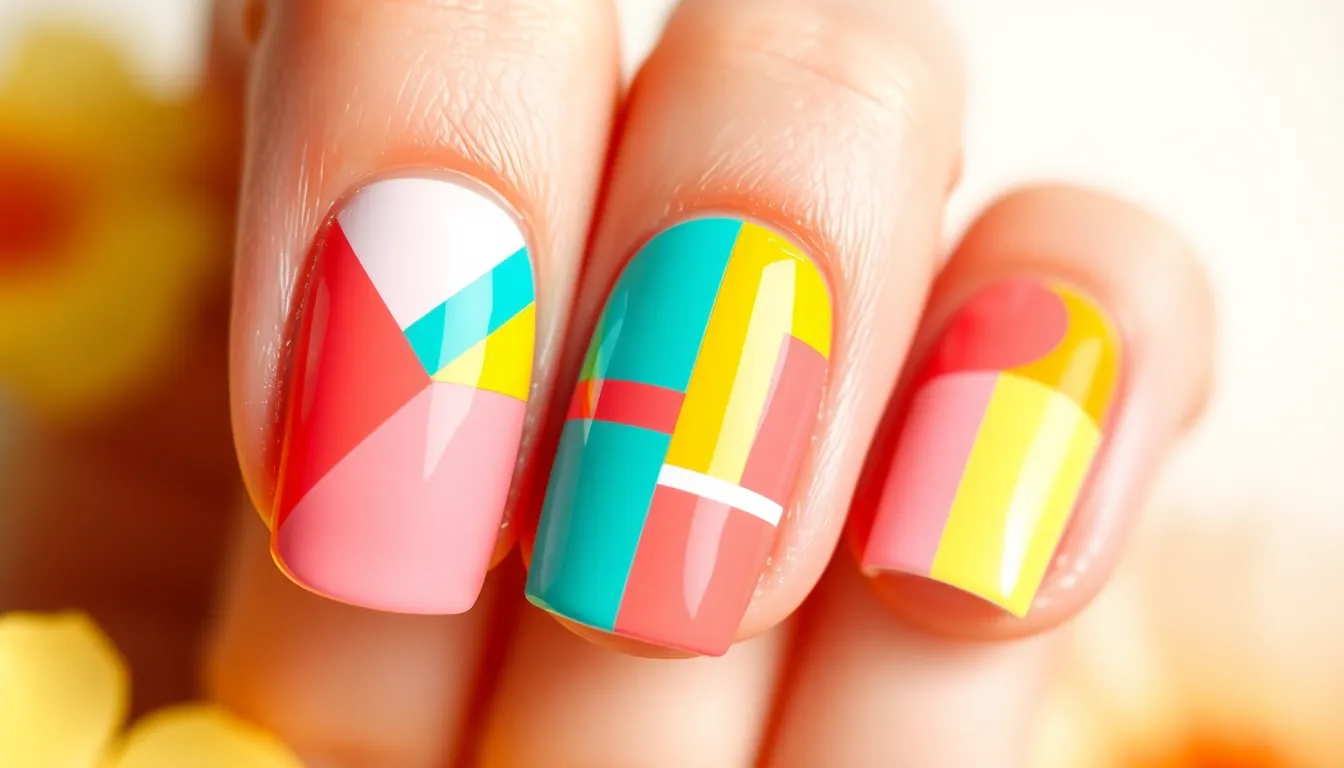
Clean lines and bold shapes define geometric nail art’s striking appeal. These structured designs offer a modern twist on traditional summer manicures.
Color Block Designs
Color blocking transforms your nails into vibrant geometric canvases. Start by applying a base coat and letting it dry completely. Choose three complementary summer colors like coral pink, turquoise blue, and sunny yellow. Apply tape strips to section off each nail into distinct blocks, ensuring the edges remain crisp and straight.
Remove the tape while the polish remains slightly wet. This technique prevents the paint from peeling off with the adhesive. Popular color combinations include mint green with white and gold accents, or navy blue paired with bright orange sections. Each nail can feature different blocking patterns, creating a playful asymmetrical look across all ten fingers.
Metallic accents elevate basic color blocks into sophisticated designs. Add thin gold or silver lines between color sections using a striping brush. These metallic borders create definition while maintaining the clean geometric aesthetic that defines summer’s hottest nail trends.
Triangle and Diamond Shapes
Triangular patterns bring ever-changing energy to geometric summer nail art. Use triangle nail stickers or create templates with tape to achieve perfectly sharp angles. Apply a base color like soft lavender or peachy pink, then add contrasting triangles in white, gold, or bright coral shades.
Diamond shapes offer elegant sophistication for special summer occasions. Position diamond stickers at the center of each nail, then paint around them with complementary colors. Negative space designs work particularly well, leaving the natural nail visible within diamond outlines while painting the surrounding areas in bold summer hues.
Layering multiple triangular shapes creates depth and visual interest. Overlap smaller triangles in different shades of the same color family, such as various blues ranging from powder to navy. This gradient triangle technique mimics summer’s changing sky colors while maintaining geometric precision.
Striped Summer Patterns
Vertical stripes elongate fingers while adding classic geometric appeal. Use striping tape to create evenly spaced lines, alternating between bright summer colors like yellow and white or pink and coral. Remove the tape immediately after applying polish to maintain clean edges and prevent smudging.
Diagonal stripes offer ever-changing movement across your nail canvas. Position tape at 45-degree angles, creating chevron-like patterns that catch light beautifully. Summer-appropriate color combinations include mint green with gold stripes or navy blue alternating with bright white lines.
Rainbow stripes celebrate summer’s vibrant energy. Apply thin strips of different colors across each nail, using the entire spectrum from red through violet. This technique works best on longer nails where each color stripe remains visible and distinct, creating a miniature rainbow effect on your fingertips.
Sunset and Sky-Inspired Nail Art
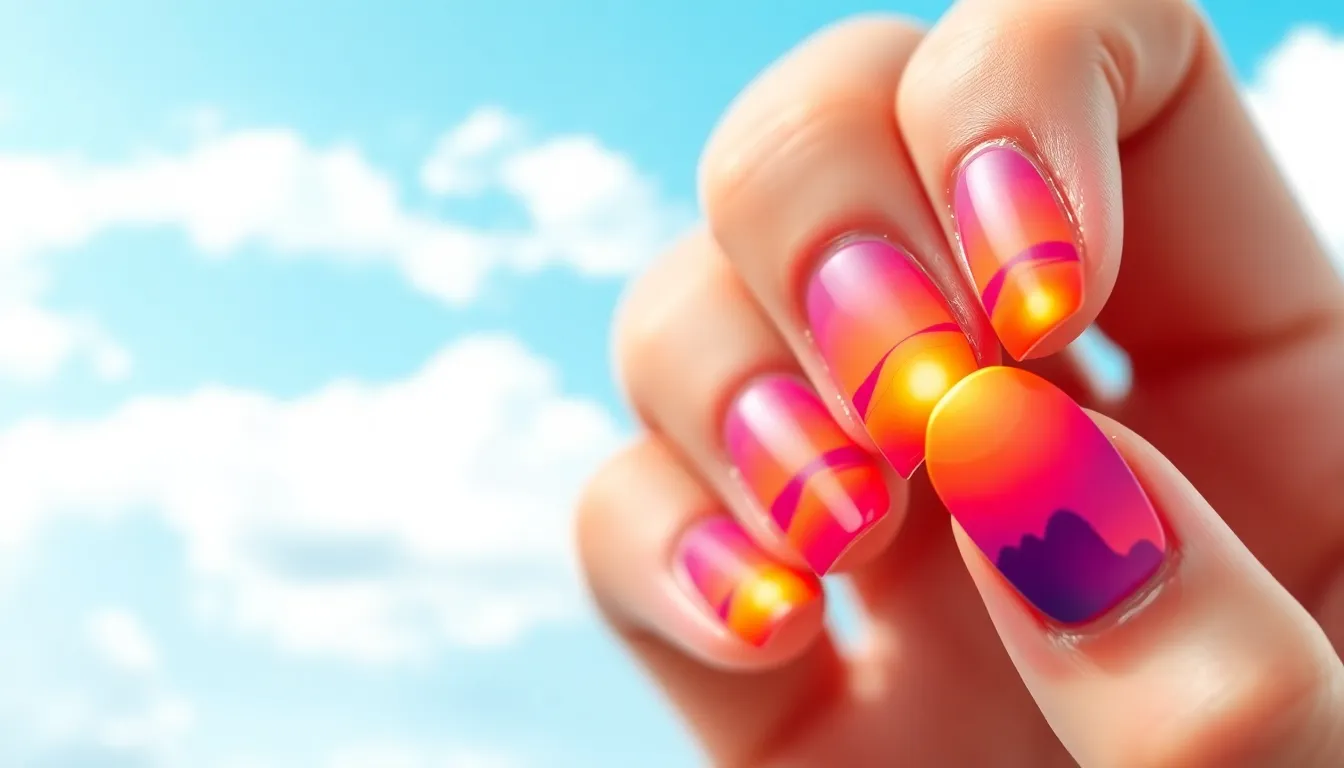
Sky inspired nail designs capture summer’s most breathtaking moments right on your fingertips. We’ll transform your nails into stunning canvases that mirror nature’s daily light show.
Gradient Sunset Effects
Gradient sunset nails create mesmerizing color transitions that mimic evening skies. Start with a light orange base coat on your entire nail, then blend deeper shades using a makeup sponge technique. Apply coral pink to the middle section of your nail, followed by deep purple or magenta at the tips.
Blending techniques make all the difference in achieving smooth color transitions. Dab the sponge gently rather than dragging it across your nail surface. Work quickly while the polish remains wet to prevent harsh lines from forming between colors.
Color combinations for sunset gradients include classic orange to purple fades, pink to blue transitions, and yellow to red blends. We recommend using 3-4 colors maximum to maintain that natural sunset appearance. Top with a glossy finish to enhance the color depth and create that dreamy evening sky effect.
Cloud and Sky Designs
Cloud nail art brings fluffy summer skies to life using simple dabbing techniques. Begin with a light blue base coat to represent clear summer skies. Use a small piece of natural sponge to dab white polish in irregular patterns across 2-3 nails per hand.
Layering creates realistic cloud texture and dimension. Apply the first layer of white clouds, let dry completely, then add a second layer with slightly different placement. This technique gives clouds that natural, billowy appearance we see in real summer skies.
Sky blue variations range from powder blue for morning skies to deeper azure for midday effects. We suggest painting different sky tones on alternating nails to create a ever-changing cloud story across your manicure. Finish with tiny silver dots using a dotting tool to represent distant stars or airplane trails.
Sun and Moon Motifs
Sun motifs add warmth and energy to summer nail designs using golden yellow polish and simple dot techniques. Paint a bright yellow circle on your accent nail using a small brush or dotting tool. Create sun rays by drawing thin lines extending outward from the central circle.
Moon phases offer elegant celestial options for nighttime inspired manicures. We paint crescent moons using white or silver polish on dark blue or black backgrounds. Add tiny stars around the moon using a thin brush dipped in metallic polish.
Metallic accents elevate sun and moon designs with shimmering gold, silver, or copper details. Apply metallic polish to sun rays for extra sparkle, or outline moon shapes with metallic liner. These celestial nail art ideas capture both day and night summer sky magic in one stunning manicure design.
Ice Cream and Treat-Themed Nails
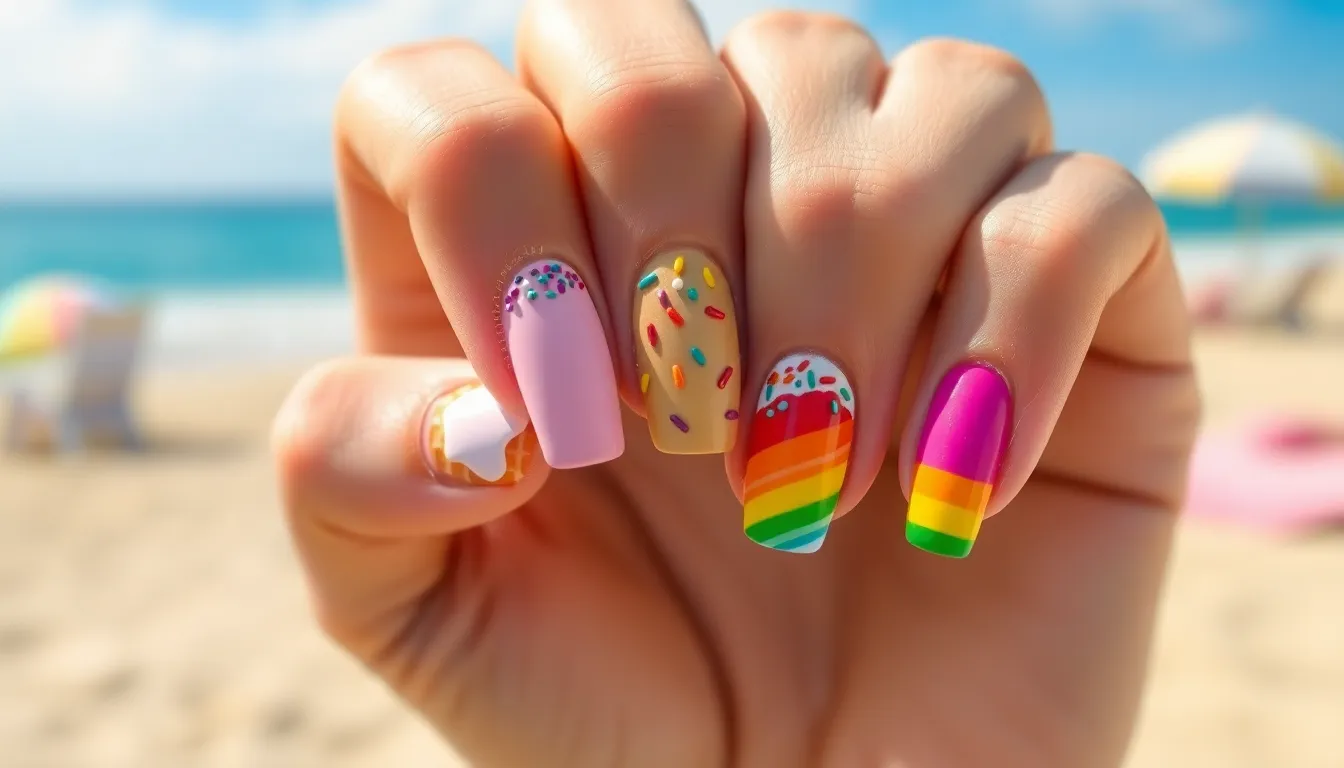
Sweet treat nail art brings out our playful side while celebrating summer’s most beloved desserts. These delightful designs transform our fingertips into miniature ice cream parlors that capture the joy of warm weather indulgences.
Popsicle Stick Designs
Popsicle nail art recreates our favorite frozen treats with vibrant colors and simple techniques. Start by applying a light pink or white base coat to represent the classic creamsicle foundation. Layer orange polish on the upper two-thirds of each nail, blending downward to create that signature creamsicle gradient effect.
Twin popsicle designs work beautifully when we paint alternating nails in different flavors like cherry red, lime green, or grape purple. Add wooden stick details using a thin brush and light brown polish at the base of each nail. Finish with a glossy topcoat that mimics the shiny surface of freshly unwrapped popsicles.
Ice Cream Cone Patterns
Ice cream cone nail art combines classic waffle cone textures with scooped ice cream colors on our fingertips. Begin with a nude or light brown base coat, then use a thin brush to create crosshatch patterns that resemble waffle cone texture on the lower half of each nail.
Strawberry, vanilla, and chocolate scoops can be painted on the upper portion using pink, cream, and brown polishes respectively. Blend colors slightly where they meet to create that melting ice cream effect we see on hot summer days. Small dots of white polish add the perfect cherry on top detail.
Multiple scoops look stunning when we stack different colored sections, creating towering ice cream masterpieces on our accent nails. Mint green, lavender, and peach create a beautiful pastel combination that screams summer sweetness.
Rainbow Sprinkle Effects
Rainbow sprinkle nail art captures the pure joy of birthday cake and ice cream sundaes with tiny colorful details. Apply a white or light pink base coat first, then use a dotting tool or toothpick to create small elongated sprinkles in various bright colors across each nail.
Red, yellow, blue, green, and orange sprinkles should be scattered randomly to mimic real cake decorations. Vary the angles and directions of each sprinkle to create that authentic scattered appearance we love on our favorite treats.
Matte topcoat gives sprinkle nails a realistic cake frosting texture, while glossy finish creates that glazed donut effect. Layer different sized dots and lines to add depth and dimension that makes our sprinkle designs pop against the base color.
Minimalist Summer Nail Ideas
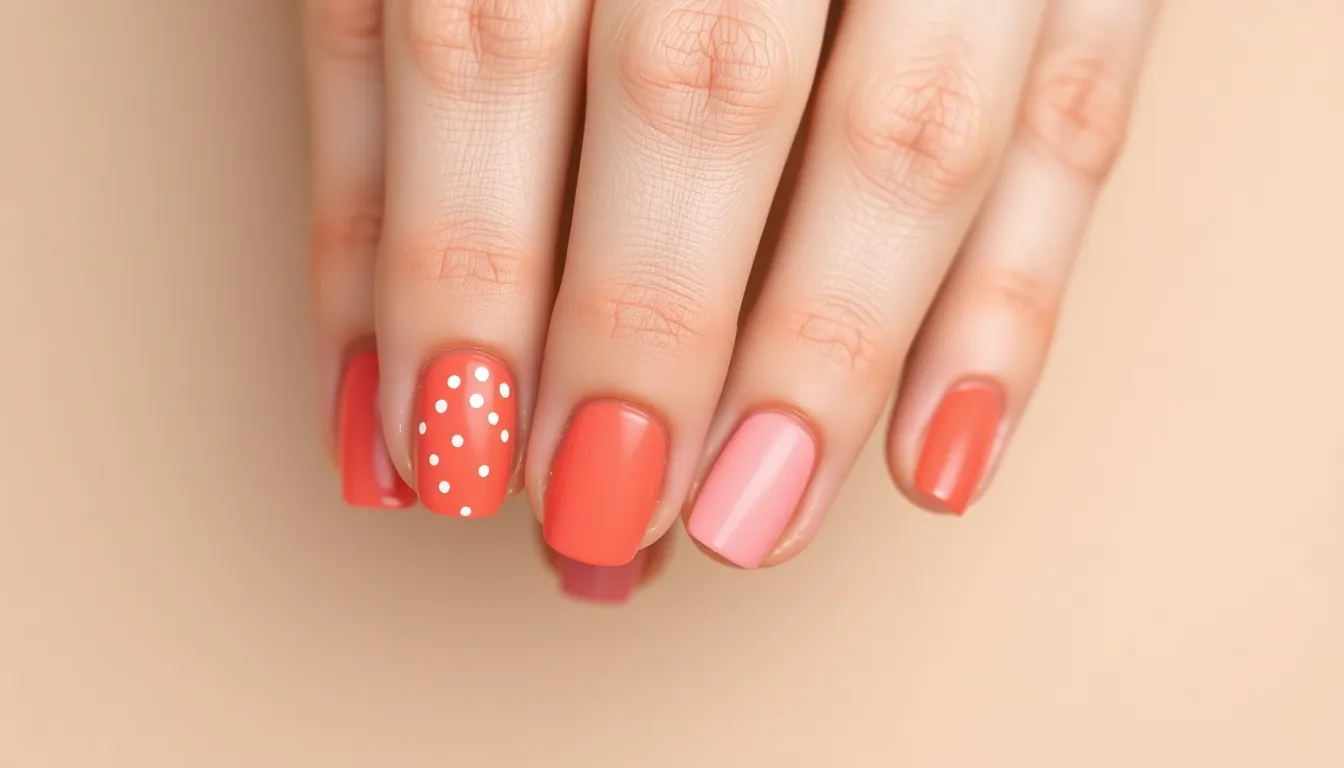
Sometimes the most elegant summer nails come from embracing simplicity rather than complexity. We’ll show you how clean, understated designs can create stunning manicures that perfectly capture the effortless beauty of summer.
Single Color Accent Nails
Transform your manicure instantly by painting just one nail per hand in a vibrant summer shade. Choose your ring finger as the accent nail and paint it coral while keeping the remaining nails nude or white. This technique creates visual interest without overwhelming your look.
Metallic accents work beautifully for evening summer events. Paint nine nails in soft pink and add gold foil to your thumbs for sophisticated shimmer. The contrast between matte and metallic finishes adds depth to your minimalist design.
Pastel accent nails bring subtle summer vibes to professional settings. Keep four nails painted in clear or nude polish and accent your pointer fingers with lavender or mint green. This approach maintains workplace appropriateness while adding personality to your manicure.
Simple Dot Patterns
Create charming polka dot designs using only a dotting tool or bobby pin. Start with a white base coat and add three evenly spaced coral dots across each nail. This pattern works especially well on shorter nails where intricate designs might feel cramped.
Graduated dot sizes add visual movement to minimalist nails. Paint your nails sage green and use a dotting tool to create large dots at the base that gradually decrease in size toward the tips. The ombré dot effect creates sophisticated dimension.
Single dots placed strategically can mimic dewdrops on petals. Apply a soft pink base and place one white dot near the cuticle of each nail. This design evokes morning dew and pairs beautifully with summer’s natural freshness.
Clean Line Designs
Vertical stripes elongate your nails while maintaining minimalist appeal. Use striping tape to create two thin white lines on each nail painted in ocean blue. Remove the tape while the polish is slightly wet for crisp, clean edges.
Geometric negative space designs showcase natural nail beauty. Paint triangular sections at the tip of each nail in bright yellow while leaving the rest clear. This modern approach celebrates both color and natural nail transparency.
French tips reimagined with colorful twists update classic elegance. Replace traditional white tips with thin lines of sunset orange or tropical turquoise. The familiar French manicure shape feels fresh and contemporary with unexpected summer hues.
Neon and Bright Summer Colors
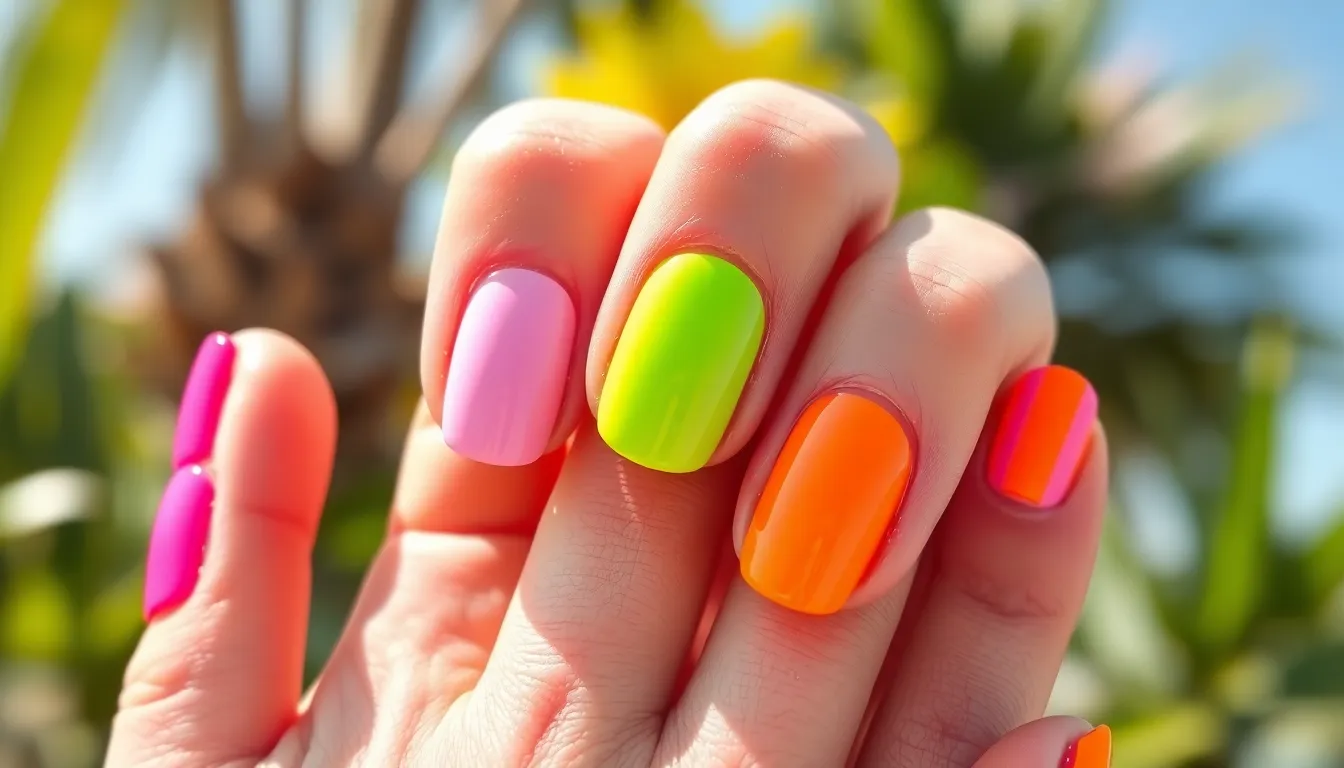
Neon and bright summer colors transform ordinary manicures into electric statements that perfectly capture the season’s high energy vibe. These vibrant shades make your hands pop against summer outfits and create instant visual impact wherever you go.
Electric Pink Combinations
Electric pink serves as our ultimate summer base color that demands attention and radiates confidence. We love pairing hot pink with crisp white accents to create zebra stripe patterns or geometric blocks that feel fresh and modern.
Gradient electric pink designs work beautifully when we blend magenta into lighter coral tones across each nail. Start with the boldest pink at your cuticle and fade to pale pink at the tips using a makeup sponge for seamless transitions.
Holographic topcoats over electric pink create stunning rainbow effects that catch sunlight perfectly. Apply your base pink color first, let it dry completely, then add holographic polish for that extra summer sparkle.
Mix electric pink with silver for edgy metallic combinations that photograph beautifully. We recommend painting alternating nails in each shade or creating half moon designs where silver meets pink at the nail bed.
Lime Green Accents
Lime green accents bring tropical energy to any summer nail design and pair surprisingly well with multiple color families. This bold shade works as both a statement base color and a vibrant accent that energizes neutral palettes.
Combine lime green with hot pink for the ultimate neon clash that screams summer festival vibes. Paint three nails in lime green and two in hot pink, or create diagonal color blocks that meet in the middle of each nail.
White base with lime green tips offers a fresh take on the classic French manicure that feels contemporary and fun. We suggest making the tips slightly thicker than traditional French tips for maximum impact.
Ombré lime green effects blend beautifully from bright lime at the base to pale mint at the tips. Use a small makeup sponge to dab on multiple green shades, working from darkest to lightest for smooth color transitions.
Glitter lime green accents on neutral backgrounds create perfect party nails that catch light from every angle. Apply glitter lime polish as accent stripes, dots, or geometric shapes over beige or white base colors.
Vibrant Orange Designs
Vibrant orange captures sunset energy and brings warmth to every gesture throughout your summer days. This bold shade complements tanned skin beautifully and creates stunning contrasts with cool color accents.
Coral orange gradients blend perfectly from bright tangerine to soft peach for sophisticated summer elegance. We achieve this look by applying the darkest orange at the cuticle and blending lighter shades toward the nail tips using gentle sponging motions.
Orange with turquoise accents creates striking color combinations that mirror tropical sunsets over ocean waters. Paint your ring and thumb nails in bright turquoise while keeping the remaining nails in vibrant orange for balanced contrast.
Matte orange finishes transform glossy orange polish into sophisticated summer statements that feel modern and editorial. Apply your favorite bright orange shade, let it dry completely, then seal with matte topcoat for velvety results.
Orange geometric patterns work exceptionally well with white or black line work that creates sharp, contemporary designs. We love creating triangular color blocks, diagonal stripes, or negative space patterns that highlight orange’s boldness against contrasting colors.
Essential Tools and Supplies
We’ll help you gather the right tools to bring these vibrant summer nail art designs to life. Having quality supplies makes creating stunning manicures much easier and more enjoyable.
Basic Nail Art Brushes
Detail brushes are essential for creating precise lines and intricate patterns like the geometric designs and floral accents we’ve covered. We recommend investing in a set that includes fine liner brushes (size 0 or 00), flat brushes for color blocking, and angled brushes for creating sharp triangular shapes.
Dotting tools transform simple polka dot patterns into professional looking designs. These double ended tools come in various sizes, allowing you to create everything from tiny sprinkle effects on ice cream themed nails to larger gradient dots for sunset backgrounds.
Fan brushes work perfectly for blending sunset gradients and creating the wispy cloud effects we discussed earlier. The splayed bristles help achieve smooth color transitions that make your sky inspired nail art look effortlessly dreamy.
Striping brushes enable you to paint clean lines for geometric patterns and palm leaf designs. Look for brushes with synthetic bristles that maintain their shape well, as these create the crispest lines for your minimalist summer looks.
Summer Color Palettes
Tropical fruit colors bring instant summer energy to your manicures. Stock up on coral pinks for watermelon designs, bright yellows for pineapple patterns, and vibrant oranges for citrus themed nails that capture the season’s fresh flavors.
Ocean inspired blues create stunning beach themed designs. We suggest having light sky blue, deep navy, and turquoise shades that blend beautifully for wave patterns and underwater scenes that transport you to coastal paradise.
Neon brights make your summer nail art pop with electric energy. Essential shades include hot pink, lime green, and electric orange that work perfectly for the bold geometric patterns and vibrant accent nails we’ve explored.
Sunset shades capture summer’s most magical moments. Collect warm purples, soft pinks, golden yellows, and peachy oranges that blend seamlessly for those gradient sky effects that look absolutely stunning.
Quick Dry Top Coats
Fast drying formulas protect your intricate summer nail art while saving precious time. Quality quick dry top coats set within 60 seconds, preventing smudges on detailed designs like floral patterns or geometric shapes.
High gloss finishes amplify the vibrancy of your summer colors, making neon brights appear even more electric and tropical shades look incredibly rich. These formulas also enhance the dimensional effect of dotting patterns and gradient techniques.
Long wearing protection keeps your summer nail art looking fresh for up to two weeks. Look for chip resistant formulas that maintain their shine through swimming, beach activities, and outdoor summer adventures.
UV protection prevents your bright summer colors from fading in harsh sunlight. Some premium top coats include UV filters that keep your vibrant pinks, oranges, and yellows looking as bold as the day you applied them.
Conclusion
Summer’s the perfect season to let our creativity shine through vibrant nail art. With these easy techniques and designs we’ve shared you’ll have endless options to express your personal style while capturing the season’s energy.
The best part? These designs don’t require expensive salon visits or years of practice. With basic tools and a little patience we can transform our nails into stunning summer statements from the comfort of home.
Whether you’re drawn to tropical fruits beach themes or minimalist elegance there’s a perfect summer design waiting for your fingertips. So grab your favorite colors and brushes – it’s time to create manicures that’ll make this summer unforgettable.
Frequently Asked Questions
Can I create summer nail art at home without professional tools?
Yes! Many stunning summer nail art designs can be easily created at home using basic tools like dotting tools, striping brushes, and fan brushes. The article provides step-by-step tutorials for various designs including tropical fruits, beach themes, and geometric patterns that don’t require expensive salon equipment or complicated techniques.
What colors work best for summer nail art?
The best summer nail art colors include vibrant tropical fruit shades (coral, yellow, green), ocean-inspired blues and teals, electric neons (pink, lime green, orange), and sunset gradients. These bright, energetic colors capture the high-energy vibe of summer and create eye-catching designs that complement the season’s aesthetic.
How long do summer nail art designs typically last?
With proper preparation and a quality quick-dry top coat, summer nail art designs can last 7-10 days. The longevity depends on your daily activities and nail care routine. Using a base coat, allowing each layer to dry completely, and applying a protective top coat helps maintain vibrant colors and intricate details longer.
What are the easiest summer nail art designs for beginners?
Beginners should start with simple designs like watermelon slice nails, basic dot patterns, single color accents, or clean geometric lines. These designs require minimal tools and techniques while still creating stunning results. Minimalist approaches with polka dots or color blocking are perfect entry points into summer nail art.
Which nail art brushes are essential for summer designs?
Essential brushes include dotting tools for creating circles and textures, striping brushes for clean lines and geometric patterns, fan brushes for gradient effects and textures, and detail brushes for intricate work like florals. These versatile tools enable you to create most summer nail art designs from tropical themes to sunset gradients.
How do I create realistic gradient effects for sunset nails?
To create sunset gradients, apply base colors in horizontal bands, then use a damp makeup sponge to blend the colors while they’re still wet. Work quickly and dab gently to achieve smooth color transitions. Layer multiple thin coats and finish with a quick-dry top coat to seal the gradient effect.
Can I mix different summer nail art themes on one hand?
Absolutely! Mixing themes like combining tropical fruit accents with ocean waves or adding geometric patterns to floral designs creates unique, personalized looks. The key is maintaining a cohesive color palette that ties the different themes together. This approach allows for creative expression while keeping the overall design balanced.
What’s the best way to make neon colors pop in nail art?
To make neon colors vibrant, start with a white base coat to enhance brightness. Apply neon polishes in thin, multiple layers rather than one thick coat. Finish with a high-gloss top coat to intensify the color and add depth. Avoid matte finishes as they can dull neon’s electric appearance.


