We’ve all been there – staring at our bare nails wondering how to achieve that perfect salon look without very costly or leaving the house. The good news? Creating stunning nail art at home is easier than you think, and we’re here to prove it.
With just a few basic tools and some creativity, you can transform your nails from plain to fabulous in minutes. Whether you’re a complete beginner or someone who’s tried nail art before with mixed results, we’ve gathered foolproof techniques that’ll have you showing off Instagram-worthy nails in no time.
From simple geometric patterns to elegant minimalist designs, these easy nail ideas require minimal skill but deliver maximum impact. We’ll walk you through step-by-step tutorials that use common household items and affordable supplies you can pick up at any drugstore. Get ready to discover your inner nail artist and never pay for expensive manicures again.
Essential Tools and Supplies You Need for DIY Nail Art
Building on the creative foundation we’ve established, having the right tools makes all the difference in achieving professional-looking results from your home nail studio.
Basic Nail Polish Collection
Base coats form the essential foundation of any lasting manicure, protecting your natural nails while helping color polish adhere better. We recommend starting with one clear base coat that works across all your nail art projects.
Core color selection should include classic shades like black, white, nude, and red since these versatile options work for countless design combinations. Black polish creates striking contrast for geometric patterns, while white serves as the perfect canvas for detailed artwork.
Top coats seal your artistic creations and add professional shine that extends wear time significantly. Investing in both matte and glossy top coat formulas gives you flexibility to create different finishes for various nail art styles.
Accent colors in metallics like gold, silver, and rose gold elevate simple designs into glamorous statements. These shades work beautifully for accent nails or adding sophisticated details to any base color.
Simple Tools for Home Manicures
Nail files in different grits handle various shaping needs, with coarse files for length reduction and fine files for smooth finishing touches. Glass files offer durability and create less nail damage compared to traditional emery boards.
Cuticle pushers made from wood or metal help create clean nail beds that showcase your artwork perfectly. Orange wood sticks serve double duty as both cuticle tools and precision applicators for small design details.
Small brushes enable intricate detailing work that regular polish brushes cannot achieve. Thin liner brushes, dotting tools, and flat detail brushes expand your creative possibilities dramatically.
Tweezers assist with placing small decorative elements like rhinestones, stickers, or nail gems with precise accuracy. Fine-tip tweezers work best for handling tiny embellishments without disturbing wet polish.
Budget-Friendly Alternatives to Professional Equipment
Household items can replace expensive nail art tools with impressive results. Toothpicks create perfect dots and lines, while bobby pins make excellent striping tools for geometric designs.
Tape alternatives like regular scotch tape, painter’s tape, or even band-aids help create clean lines and negative space designs without specialized striping tape costs. Remove tape while polish remains slightly wet for crisp edges.
Makeup tools already in your collection work wonderfully for nail art applications. Small eyeshadow brushes apply glitter perfectly, while makeup sponges create beautiful gradient effects between colors.
Kitchen supplies offer surprising nail art answers, with plastic wrap creating marbled effects and aluminum foil producing unique textures when pressed into wet polish. These everyday items cost nothing extra while delivering professional-looking results.
Classic French Manicure with a Modern Twist
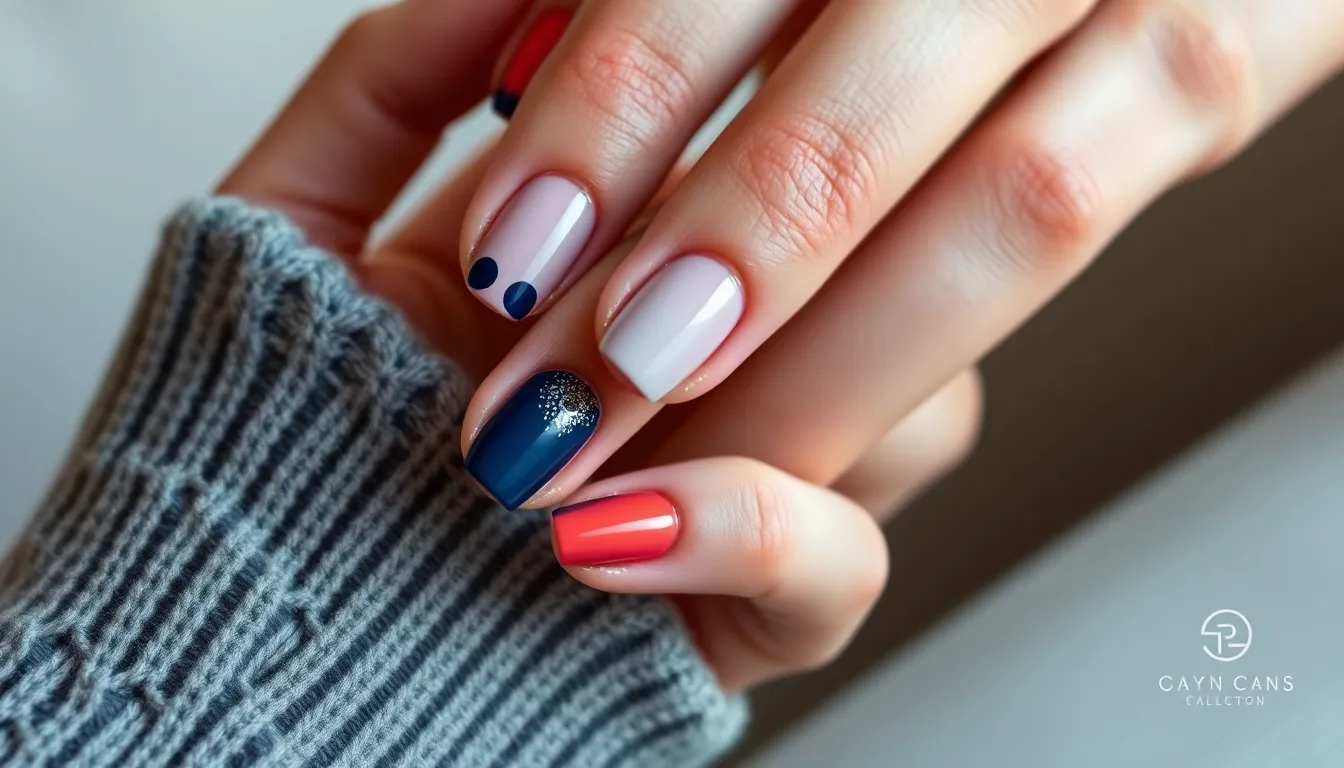
French manicures remain timeless yet we can easily transform this classic look with contemporary updates. These updated techniques maintain the elegant sophistication while adding personal flair to suit modern style preferences.
Traditional White Tip Technique
Start with a clean base by applying clear base coat to protect your natural nails. Allow each coat to dry completely before proceeding to the next step.
Create the perfect smile line using white nail polish and steady hand movements. Position the brush at a 45-degree angle and draw from one corner of your nail to the center.
Use nail guides or tape for cleaner edges if you’re still developing your freehand skills. French tip guides create consistent curves across all ten nails.
Apply thin layers of white polish rather than one thick coat for better coverage. Two thin applications provide smoother results than rushing with heavy polish.
Seal with clear topcoat to extend wear time and add professional shine. This final step prevents chipping and maintains that salon quality finish.
Colorful French Tip Variations
Replace traditional white with bold colors like coral, navy blue, or emerald green for seasonal updates. These vibrant alternatives work especially well during spring and summer months.
Mix multiple colors across different nails for rainbow French tips that showcase personality. Alternate between complementary shades or stick to one color family for cohesive looks.
Try ombré French tips by blending two similar shades from light to dark. Use a makeup sponge to dab the transition area while polish is still wet.
Experiment with metallic shades like rose gold, copper, or silver for evening occasions. These sophisticated alternatives catch light beautifully under restaurant or party lighting.
Create negative space designs by leaving portions of the natural nail exposed within colored tips. This modern minimalist approach works with any color palette.
Glitter French Manicure Options
Add glitter topcoat over traditional white tips for subtle sparkle that catches light. Apply one thin layer to avoid overwhelming the classic design.
Create full glitter tips using fine glitter polish instead of solid colors. Gold and silver glitter work universally while colored glitters match exact outfits.
Apply glitter gradients that fade from dense coverage at the tip to sparse sparkles toward the base. Use a fan brush to blend the glitter naturally.
Mix different glitter sizes for textural interest that photographs beautifully. Combine fine shimmer with larger hexagonal pieces for dimensional effects.
Use loose glitter over tacky topcoat for maximum sparkle control. Seal with another topcoat layer to prevent glitter from snagging on clothing or hair.
Simple Geometric Patterns Anyone Can Master
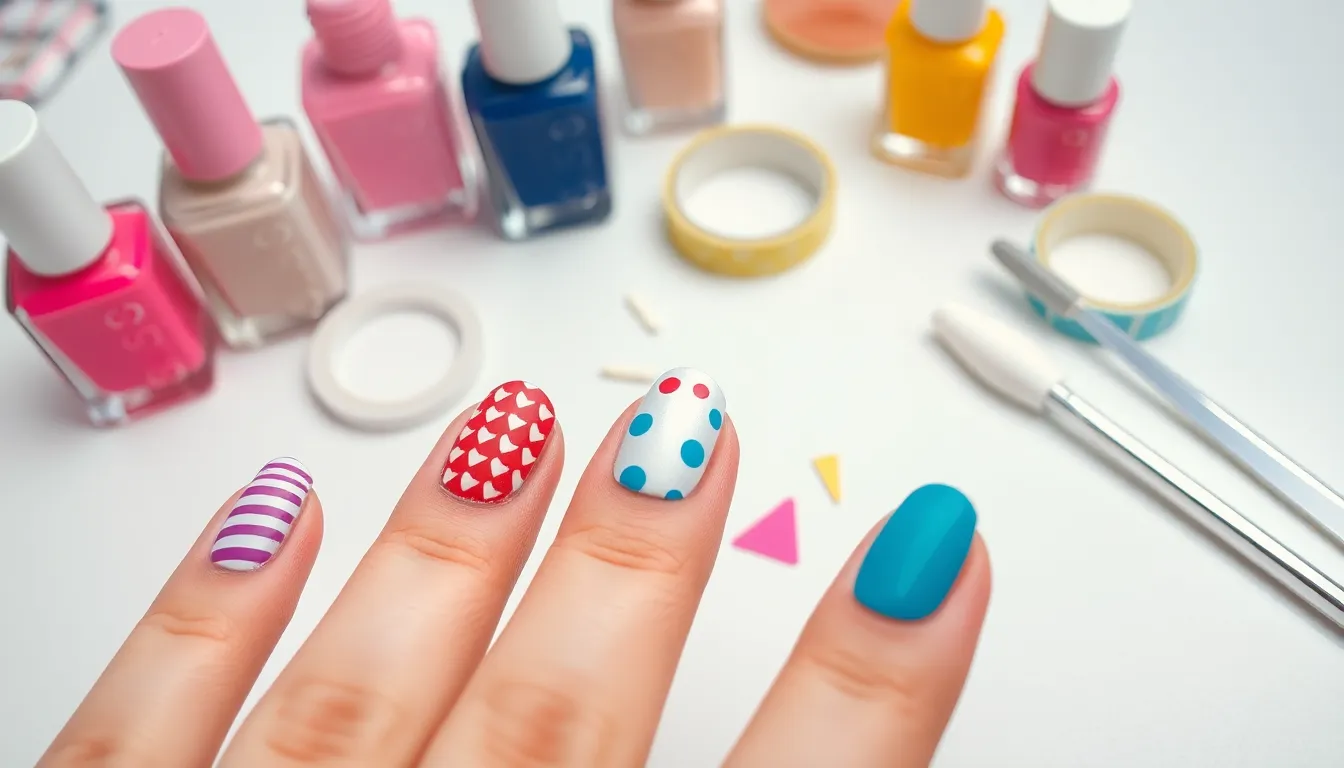
Geometric nail art transforms basic manicures into eye-catching designs using straight lines, circles, and angles that create striking visual impact. We’ll show you how to master these professional-looking patterns using items you already have at home.
Striped Nail Designs Using Tape
Create perfect straight lines by applying regular household tape as your guide after your base color dries completely. Press the tape firmly against your nail to prevent polish from bleeding underneath, then paint over it with your accent color.
Remove the tape immediately while the polish is still wet to achieve clean, crisp edges that look salon-quality. Wait 30 seconds after applying the top color, then gently peel away the tape at a 45-degree angle.
Experiment with different tape widths using washi tape for thicker stripes or thin electrical tape for delicate lines. Layer multiple strips to create chevron patterns, diagonal designs, or even plaid effects by applying tape in both horizontal and vertical directions.
Try these popular stripe variations:
- Vertical stripes down the center of each nail
- Diagonal lines creating a chevron pattern
- Horizontal stripes across the nail bed
- Mixed width combinations for texture contrast
Polka Dot Patterns with Household Items
Dip a cotton swab into your chosen polish color and gently press it onto your dried base coat to create perfectly round dots. The cotton tip naturally forms circular shapes without requiring steady hand precision.
Use bobby pins for smaller, more delicate dots by dipping the round end into polish and dotting across your nails. This technique works especially well for creating constellation patterns or scattered accent dots.
Create graduated dot sizes using different tools like pencil erasers for medium dots, toothpick ends for tiny details, or the back of a makeup brush for larger circles. Mix sizes randomly or arrange them in exact patterns for unique designs.
Master these dot placement techniques:
- Single accent dot on ring finger nails
- Diagonal lines of decreasing dot sizes
- Random scattered patterns across all nails
- Border dots along the nail edge
Triangle and Diamond Shapes
Cut small triangular pieces from regular scotch tape to use as stencils for sharp, angular designs. Apply the tape pieces to your dried base color, paint over them, then remove for instant geometric shapes.
Form diamond patterns by positioning two triangular tape pieces point-to-point, creating negative space diamonds when you paint around them. This technique works beautifully with metallic polishes over dark base colors.
Build complex geometric layouts by layering multiple triangular shapes at different angles across your nail surface. Start with larger shapes as your foundation, then add smaller triangular accents to fill spaces and create depth.
- Alternating triangles in two contrasting colors
- Diamond chains running vertically down each nail
- Triangular French tips instead of curved ones
- Mixed triangular and circular shapes for modern art effects
Gradient and Ombre Effects Made Easy
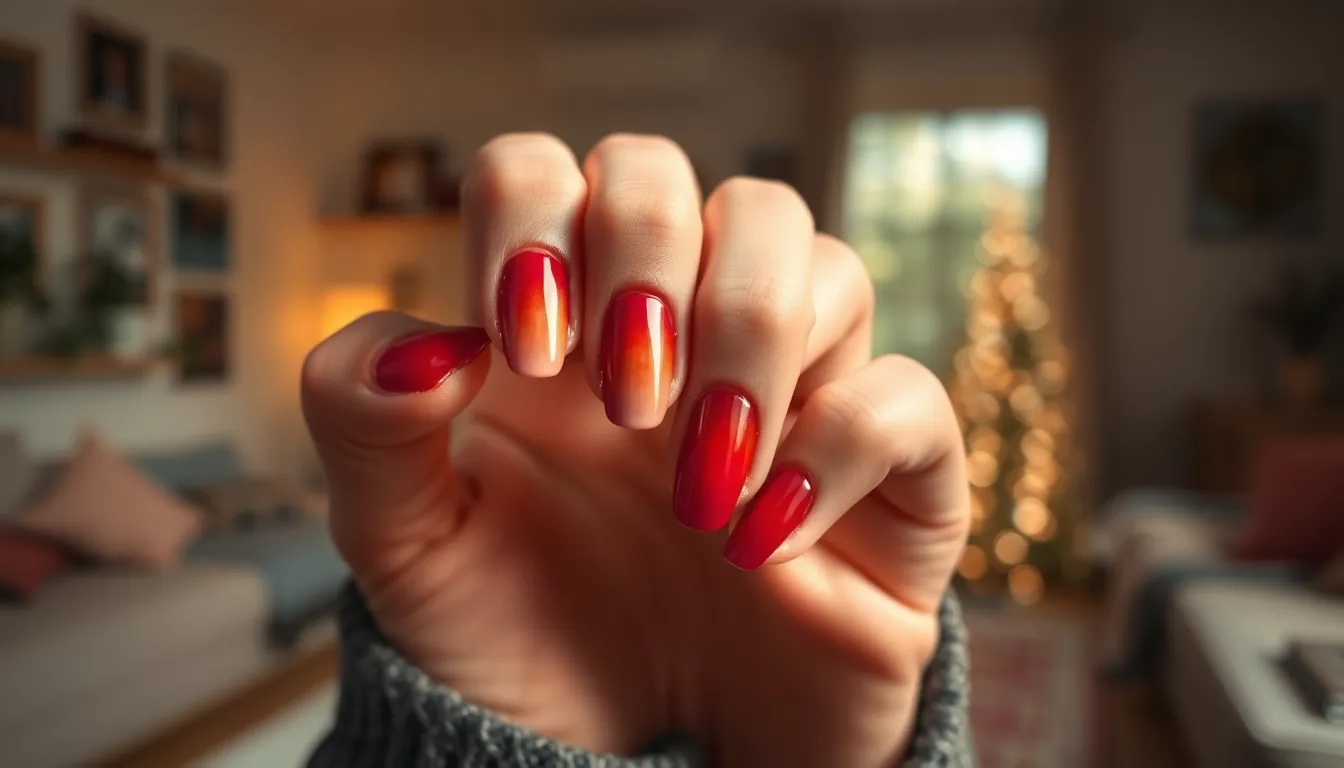
Creating stunning gradient effects transforms ordinary manicures into salon-quality masterpieces with minimal effort. We’ll show you three foolproof techniques that work perfectly for beginners and deliver professional-looking results every time.
Two-Color Sunset Gradients
Choose complementary colors like coral and pink or orange and yellow to create your perfect sunset blend. Apply your lighter shade as the base coat across all nails and let it dry completely for about 10 minutes.
Paint the darker color onto a makeup sponge in horizontal strokes, making sure you have enough polish for even coverage. Dab the sponge gently onto the nail tips, working your way down to the middle of each nail with light bouncing motions.
Blend the colors by patting the sponge repeatedly where the two shades meet, creating a smooth transition zone. Work quickly before the polish dries to maintain that seamless gradient effect we’re looking for.
Clean up edges using a small brush dipped in nail polish remover to remove any excess color from your skin. Finish with a clear top coat to seal your sunset gradient and add professional shine.
Sponge Technique for Smooth Blending
Select a dense makeup sponge or cosmetic wedge that’s slightly damp for the smoothest application. Avoid kitchen sponges as they create unwanted texture and uneven color distribution.
Apply both colors side by side on the sponge, overlapping them slightly in the middle section. Make sure you use enough polish to prevent the sponge from absorbing all your color.
Press gently onto your nail starting from one end and rolling toward the other, creating natural color flow. Repeat this motion 3-4 times while the polish remains wet to achieve seamless blending.
Build up layers gradually rather than trying to achieve full opacity in one application. Each layer should be thinner than the last, allowing you to control the gradient intensity perfectly.
Remove excess polish from your cuticles and skin using a cleanup brush before applying your protective top coat. This technique works beautifully with any color combination you choose to explore.
Glitter Fade Nail Art
Start with your base color in any shade you prefer, from classic nudes to bold jewel tones. Let this foundation dry completely before beginning your glitter application process.
Mix glitter polish with clear top coat on a palette or small plate to control the density of sparkle. This dilution technique helps create that perfect fading effect we want to achieve.
Apply concentrated glitter at your nail tips using a small detail brush, covering about one-third of each nail with full sparkle intensity. Work with steady strokes to maintain even coverage.
Fade the glitter gradually by diluting your mixture with more clear coat and applying it toward the middle of your nails. Each subsequent layer should contain less glitter than the previous one.
Seal everything with two coats of clear top coat to smooth out any texture and create that glossy finish. Your glitter fade will catch light beautifully and last for days without chipping.
Stamping Techniques for Professional-Looking Results
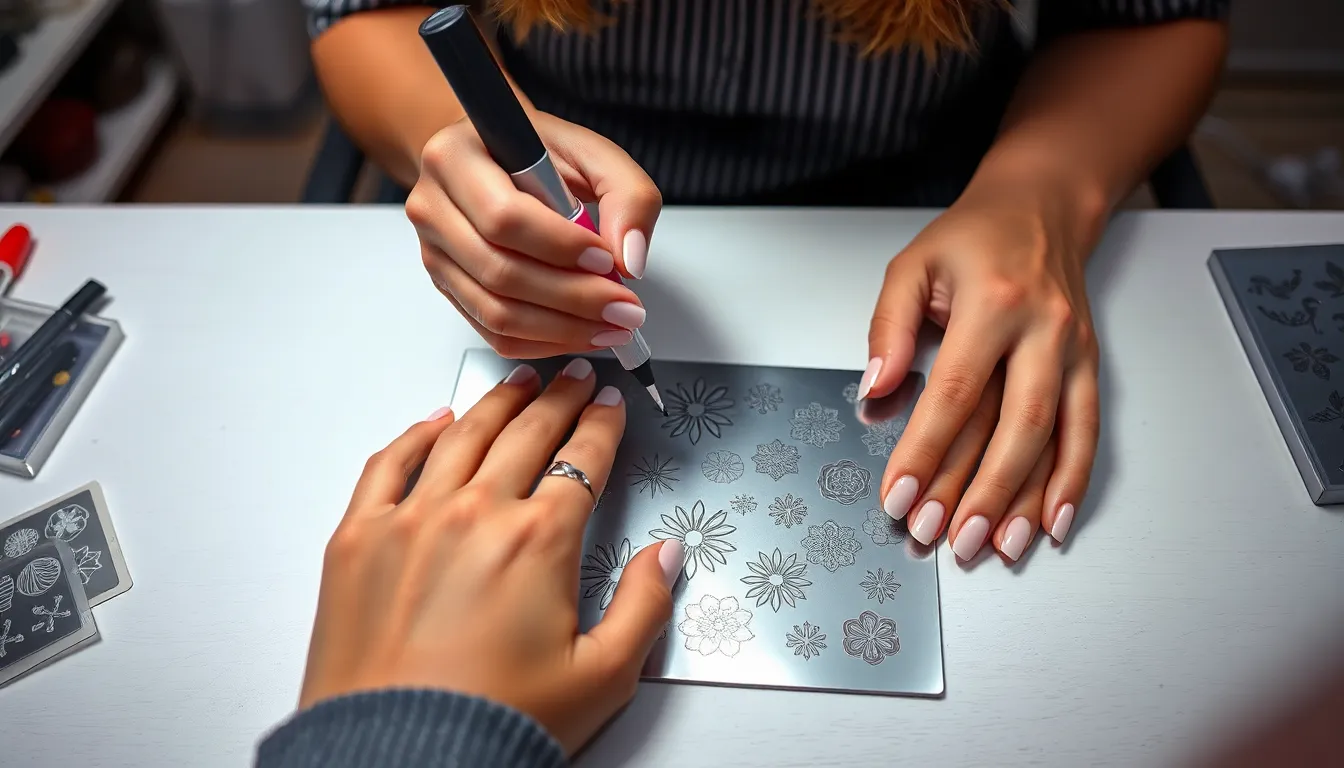
Nail stamping transforms simple manicures into intricate masterpieces using specialized plates and stampers. We’ll guide you through mastering this technique that delivers salon quality results from your own home.
Basic Stamping Plate Methods
Choose the right stamping plate for your desired design by examining the etched patterns closely. Metal plates work better than plastic ones because they hold polish more effectively in the grooves. We recommend starting with larger, simpler designs before attempting detailed patterns.
Apply polish to your selected design using a thick, pigmented nail polish that covers the entire pattern. Scrape excess polish away with a plastic card at a 45 degree angle in one smooth motion. Work quickly since stamping polish dries faster than regular formulas.
Press the stamper firmly onto the design to pick up the entire pattern without rolling or sliding. Silicone stampers grab polish better than rubber ones and create cleaner transfers. Clean your stamper between each use with tape or a lint roller to remove residue.
Transfer the design to your nail by rolling the stamper from one side to the other in a single fluid motion. Position the stamper carefully because you only get one chance for a clean transfer. Practice on a practice wheel or your non dominant hand first to perfect your technique.
Creating Custom Stamp Designs
Layer multiple stamping designs to create unique combinations by allowing the first layer to dry completely. Use different colored polishes for each layer to make patterns pop against each other. We suggest using lighter colors first and darker ones on top for better contrast.
Mix stamping with other techniques like gradients or geometric patterns for personalized nail art. Apply your base design first, then stamp complementary patterns over exact areas. Combine stamping with hand painted details using thin brushes for truly custom looks.
Create reverse stamping effects by applying polish to the stamper, adding different colors to exact sections, then transferring to your nail. This technique allows for multicolored designs from single stamping plates. Use a small brush to add colors directly onto the stamper before transferring.
Experiment with stamping placement by positioning designs off center or overlapping patterns for modern looks. Stamp only portions of designs by covering parts of your nail with tape before transferring. Try stamping at angles or rotating the stamper for ever-changing pattern placement.
Troubleshooting Common Stamping Issues
Fix incomplete pattern transfers by ensuring your stamping polish is thick enough and your plate is clean. Thin polishes won’t pick up properly from etched grooves, so use stamping exact formulas or add a drop of white polish to regular colors. Clean plates with acetone and a soft brush to remove buildup.
Solve blurry or smudged designs by working more quickly and using less pressure during transfer. Stamping polish starts drying immediately, so complete the entire process within 10 seconds. Press the stamper straight down rather than dragging it across the design plate.
Address stamper pickup problems by priming new stampers with a nail file to create better texture. Some stampers come with a protective film that prevents proper polish adhesion. Roll the stamper in one direction only when picking up designs to avoid distortion.
Prevent design distortion by ensuring your nails are completely dry before stamping and avoiding thick base coats. Wet or tacky surfaces cause stamps to slide or stretch during application. Use quick dry top coats under stamping layers to create the proper surface texture.
Nature-Inspired Nail Art Using Simple Tools
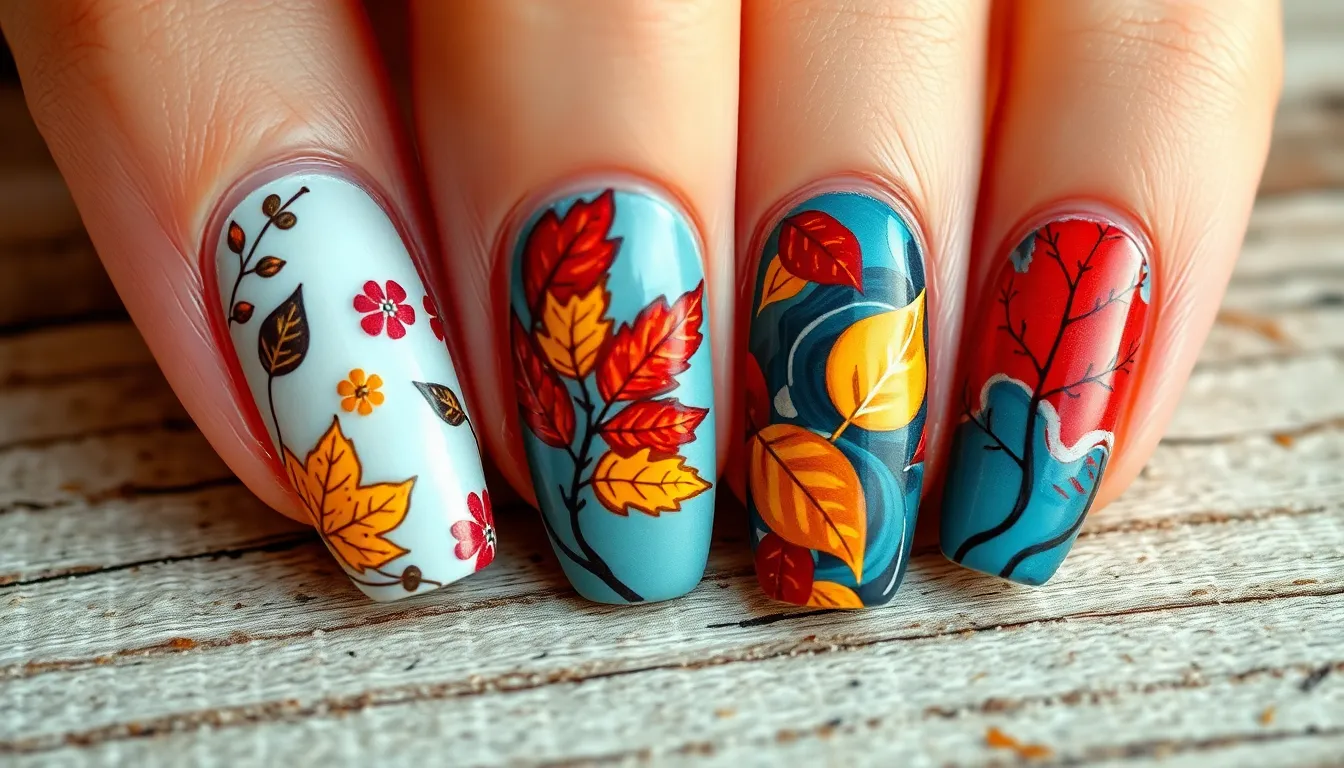
Creating beautiful nature designs transforms your nails into miniature canvases that celebrate the outdoors. We’ll explore three stunning techniques that bring natural elements to your fingertips using everyday items.
Floral Designs with Dotting Tools
Dotting tools make creating delicate flower patterns incredibly simple for beginners. We start by applying a base coat and letting it dry completely before adding our floral elements. Small dots become petals when placed in circular patterns around a central point.
Creating roses involves making larger center dots and surrounding them with smaller petal dots in complementary colors. We recommend using a light pink or white for the center and deeper shades for outer petals. Daisies work beautifully with white petals around yellow centers.
Leaves add realistic touches to floral designs using the same dotting technique. We create leaf shapes by making elongated dots and gently dragging the tool to form pointed ends. Green polish in various shades creates depth and dimension in our botanical artwork.
Marble Effect with Water Technique
Water marbling creates stunning organic patterns that mimic natural stone formations. We fill a small bowl with room temperature water and drop polish colors one by one into the center. Each drop spreads naturally to create concentric circles.
Dragging a toothpick through the polish creates beautiful swirled patterns that resemble marble veining. We work quickly since polish begins to form a skin on water’s surface within minutes. Different dragging techniques produce various marble effects from subtle waves to dramatic spirals.
Dipping prepared nails into the water transfers the marble pattern instantly onto each nail. We protect surrounding skin with tape or liquid latex before dipping to ensure clean results. Each nail emerges with a unique marble pattern that can’t be replicated.
Leaf Patterns Using Real Leaves
Real leaves serve as perfect natural stencils for creating authentic botanical nail art. We collect small leaves with interesting shapes and clean them thoroughly before use. Fresh leaves work better than dried ones since they lay flatter against nail surfaces.
Positioning leaves over base polish and painting over them with contrasting colors creates beautiful silhouettes. We hold leaves firmly while applying polish with small brushes or makeup sponges. Removing leaves while polish remains slightly wet reveals crisp leaf outlines.
Layering multiple leaf stencils produces complex forest scenes on individual nails. We vary leaf sizes and overlap patterns to create depth in our nature designs. Autumn colors like deep reds, oranges, and golden yellows enhance the natural leaf effect perfectly.
Seasonal Nail Designs for Every Occasion
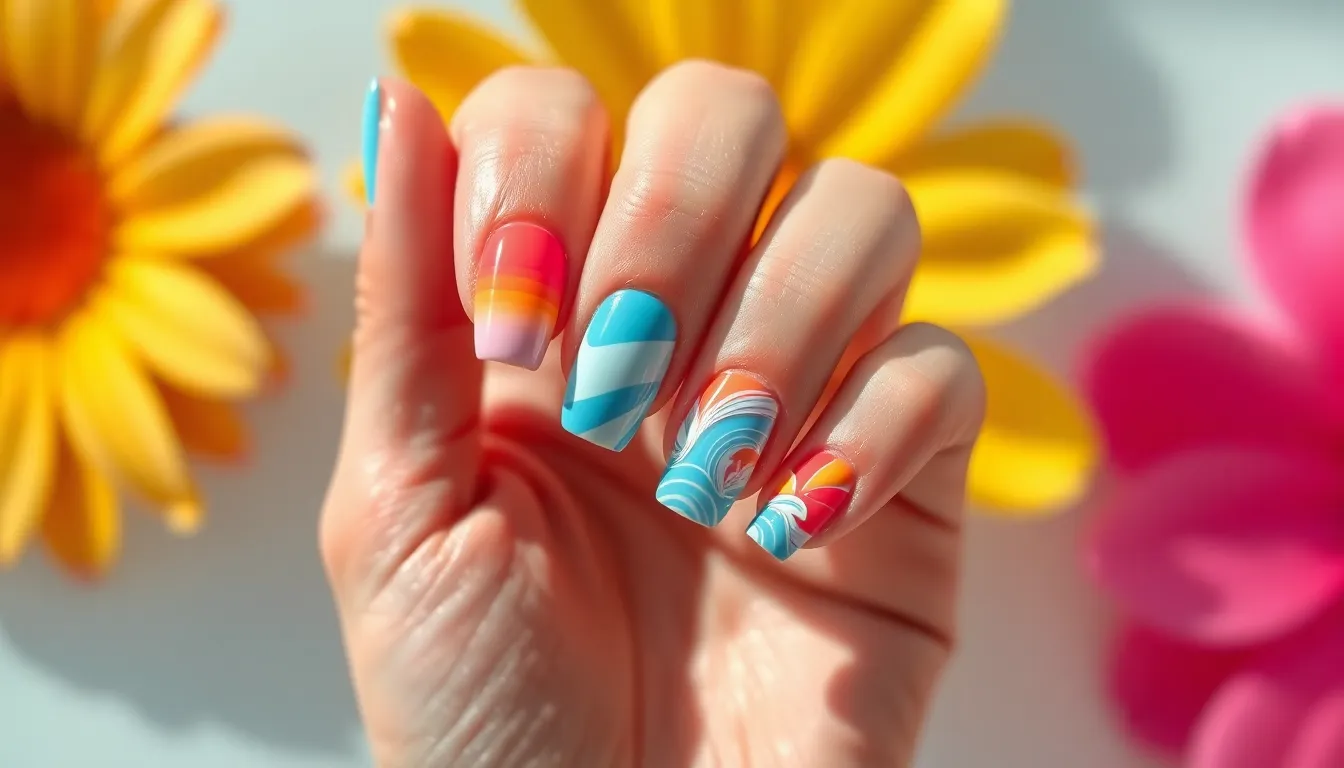
Seasonal nail designs help us celebrate different times of year while showcasing our creativity. We’ll explore vibrant options for warmer months and cozy themes for cooler seasons.
Spring and Summer Bright Colors
Coral sunset gradients capture the essence of summer evenings with warm orange and pink tones. We recommend starting with a peachy base coat, then sponging coral polish from the cuticle to mid-nail. Finish with a glossy top coat to enhance the gradient effect.
Neon accent nails add instant energy to any summer look. Paint four nails in nude or white, then choose one accent nail per hand for electric green, hot pink, or bright yellow. These vibrant shades work especially well on ring fingers or thumbs.
Tropical leaf patterns bring vacation vibes to our fingertips using simple brushwork. Create palm fronds with thin green strokes radiating from a central point. Layer different shades of green for depth, and add tiny white dots to represent sunlight filtering through leaves.
Ocean wave designs mimic seaside beauty through layered blue tones. Start with light blue as the base, then add darker blue waves using a small brush. White foam details along wave crests complete this refreshing summer look.
Fall and Winter Holiday Themes
Autumn ombré effects blend warm colors like burgundy, orange, and gold for cozy seasonal vibes. We suggest using a makeup sponge to transition from deep red at the cuticle to golden yellow at the tips. Matte top coat enhances the fall aesthetic.
Holiday glitter accents transform simple manicures into festive celebrations. Apply red or green base polish, then concentrate gold or silver glitter near the cuticle area. This technique works perfectly for Christmas parties and New Year events.
Snowflake stamp designs create delicate winter patterns using white polish on dark blue or black bases. Position snowflakes at different angles across each nail for natural variety. Seal with clear top coat to prevent chipping during winter activities.
Plaid nail art captures cozy winter fashion through intersecting lines. Paint vertical stripes in one color, let dry completely, then add horizontal stripes in a complementary shade. Red and green combinations evoke classic holiday spirit.
Quick Party and Event Nail Ideas
Metallic accent tips elevate any outfit with minimal effort and maximum impact. Paint nails in nude or clear base, then brush gold, silver, or rose gold across just the tips. This technique takes under 10 minutes but looks professionally done.
Glitter gradient party nails create instant glamour for evening events. Apply your base color, then use a makeup sponge to dab glitter polish from tips toward cuticles. Concentrate heaviest glitter at nail tips for dramatic effect.
Simple geometric party patterns work well for formal occasions using tape as guides. Create chevron designs with two contrasting colors, or try diagonal color blocks for modern sophistication. Remove tape while polish is slightly wet for clean lines.
Pearl accent details add elegance to wedding and formal events. Place small pearl beads along cuticle lines or create delicate patterns on accent nails. Secure pearls with clear top coat and allow extra drying time for lasting results.
Time-Saving Tips for Long-Lasting Home Manicures
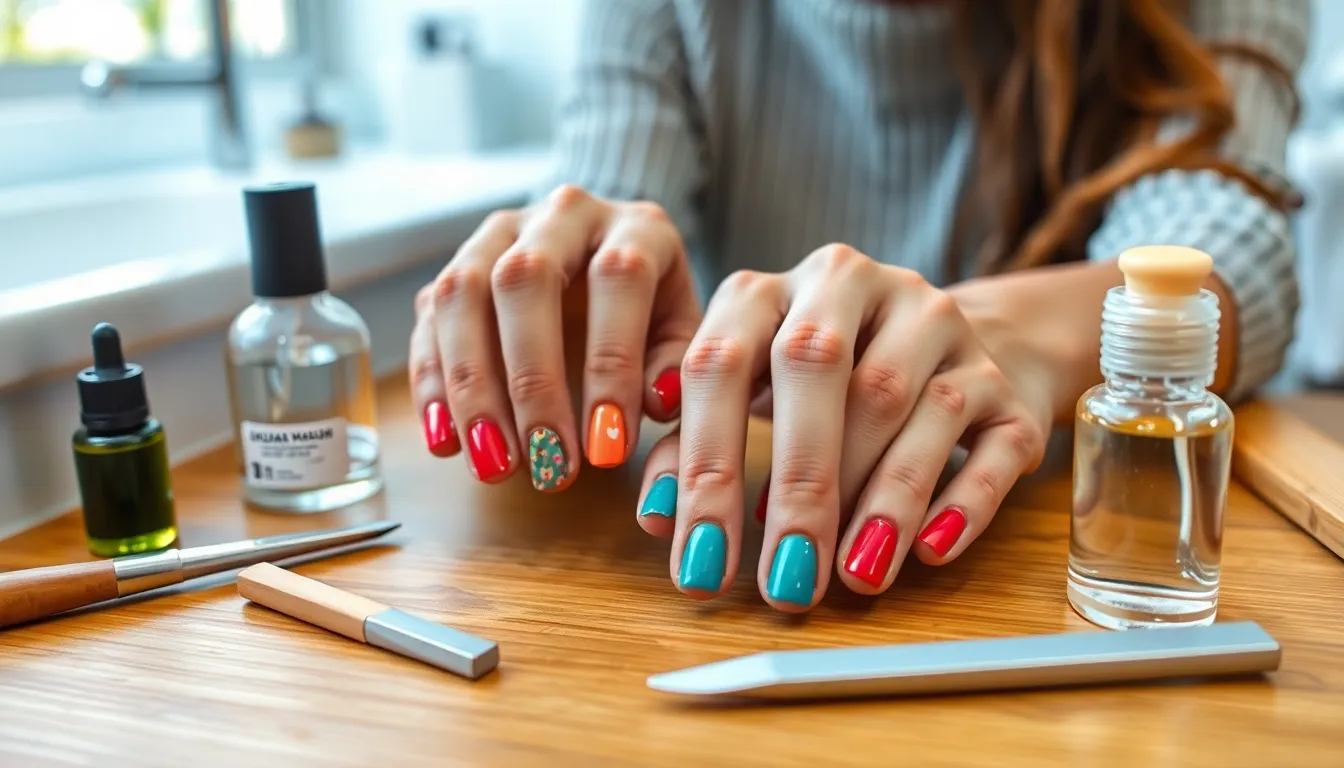
Getting your DIY nail art to last a full week doesn’t have to take hours. We’ll share our most effective shortcuts that protect your beautiful designs while cutting your manicure time in half.
Proper Nail Preparation Steps
Clean nails thoroughly with rubbing alcohol or nail dehydrator before applying any polish. This removes natural oils that cause chipping within 24 hours of application.
Push back cuticles using a wooden stick or metal pusher while they’re soft from soaking in warm water. We recommend doing this step right after showering when cuticles are naturally softened.
File nails in one direction using a 240-grit file to prevent splits and tears that ruin manicures early. Back and forth filing creates microscopic cracks that lead to breaks.
Buff away ridges with a gentle buffing block to create a smooth surface for polish adhesion. Uneven nails cause polish to pool and chip faster than properly prepped surfaces.
Apply thin base coat layers starting from the center of each nail and working outward. Two thin coats bond better than one thick application that takes forever to dry.
Application Techniques for Durability
Use three thin polish coats instead of two thick ones for professional results that last up to 10 days. Thin layers dry faster and create stronger bonds between each coat.
Paint nail tips separately by running the brush along the free edge before applying full coverage. This sealing technique prevents chips from starting at vulnerable nail edges.
Apply polish to nail sidewalls by gently pressing the brush against the skin barrier. Coverage that extends slightly under the nail prevents lifting and peeling.
Wait 2 minutes between coats to allow proper bonding without creating bubbles or streaks. Rushing this step causes the most common manicure failures we see.
Seal designs with quality top coat applied in thin layers from cuticle to tip. We prefer fast-drying formulas that cure in under 3 minutes with UV light.
Quick Drying and Setting Methods
Submerge nails in ice water for 2-3 minutes after your final coat to set polish quickly. Cold water hardens polish faster than any expensive quick-dry product.
Use compressed air spray held 6 inches from nails to speed surface drying. This technique works especially well for glitter and textured polishes.
Apply cuticle oil around nail beds while polish is still slightly tacky. Oil prevents smudging while moisturizing skin that painting process often dries out.
Run hands under cold tap water for 30 seconds as a final setting step. This temperature shock locks in your design and prevents accidental dents.
Avoid hot water activities for the first 4 hours after application. Washing dishes or hot showers can soften polish and cause premature chipping.
Conclusion
Creating stunning nail art at home has never been more accessible. We’ve shown you that with basic tools and a little practice you can achieve salon-quality results right from your own space.
From classic French manicures to trendy geometric patterns and nature-inspired designs there’s truly something for every style preference and skill level. The seasonal ideas we’ve shared ensure your nails stay fresh and festive year-round.
Remember that nail art is all about self-expression and creativity. Don’t be afraid to experiment with different techniques or combine multiple methods to create your own unique looks. With these time-saving tips and proper preparation techniques your beautiful manicures will last longer too.
Start with the simpler designs and gradually work your way up to more complex patterns. Before you know it you’ll be creating Instagram-worthy nail art that rivals any professional salon.
Frequently Asked Questions
What basic tools do I need to start doing nail art at home?
You’ll need a basic nail polish collection with clear base coat, classic colors (black, white, nude, red), and top coat. Essential tools include nail files, cuticle pushers, small brushes, and tweezers. Household items like toothpicks, bobby pins, and tape work great as budget-friendly alternatives to professional equipment.
How can I create a French manicure with a modern twist at home?
Start with a clean base coat and use nail guides for cleaner edges when creating the smile line. Try colorful variations instead of traditional white tips – use bold colors, ombré effects, or negative space designs. Add glitter topcoats or full glitter tips for extra sparkle and personality.
What’s the easiest geometric nail art pattern for beginners?
Striped designs using household tape are perfect for beginners. Apply base color, let dry, place tape for clean lines, apply second color, and remove tape immediately. You can create various stripe widths and patterns. Polka dots using cotton swabs or bobby pins are also simple and effective.
How do I create gradient and ombré nail effects?
Use a makeup sponge for smooth color blending. Apply two colors side by side on the sponge, then dab onto your nail with a bouncing motion. Work quickly while polish is wet. For glitter fades, mix glitter polish with clear top coat and apply from tip toward cuticle, gradually thinning the application.
What is nail stamping and how does it work?
Nail stamping uses specialized plates with etched designs and a stamper tool. Apply polish to the plate, scrape excess, press the stamper on the design, then transfer to your nail. It creates intricate patterns that would be difficult to paint freehand, giving professional-looking results at home.
How can I incorporate natural elements into my nail art?
Try floral designs using dotting tools to create petals and leaves with small dots. Use real leaves as stencils by placing them on wet polish and removing when dry. Water marbling technique creates natural stone patterns by dropping polish in water and creating swirls before dipping nails.
What are some quick seasonal nail art ideas?
For spring/summer: coral sunset gradients, neon accents, tropical leaf patterns, and ocean waves. Fall/winter options include autumn ombré, holiday glitter accents, snowflake stamps, and plaid patterns. These designs celebrate seasonal colors and themes while remaining achievable for home application.
How can I make my home manicure last longer?
Proper preparation is key – clean nails with rubbing alcohol, push back cuticles, and file in one direction. Apply thin polish layers and seal nail tips to prevent chipping. Use base and top coats for durability. Quick-dry with ice water or compressed air to set polish efficiently.
Can I create party-ready nails quickly at home?
Yes! Try metallic accent tips on neutral base colors, glitter gradient party nails, simple geometric patterns, or pearl accent details for formal events. These designs look sophisticated but can be completed in under 30 minutes with the right tools and techniques.
What household items can replace professional nail art tools?
Toothpicks work for detailed designs and cleanup, bobby pins create perfect dots and lines, tape ensures clean geometric shapes, and makeup sponges blend gradients beautifully. Cotton swabs are great for polka dots and cleanup. These alternatives make nail art accessible without expensive equipment investments.


