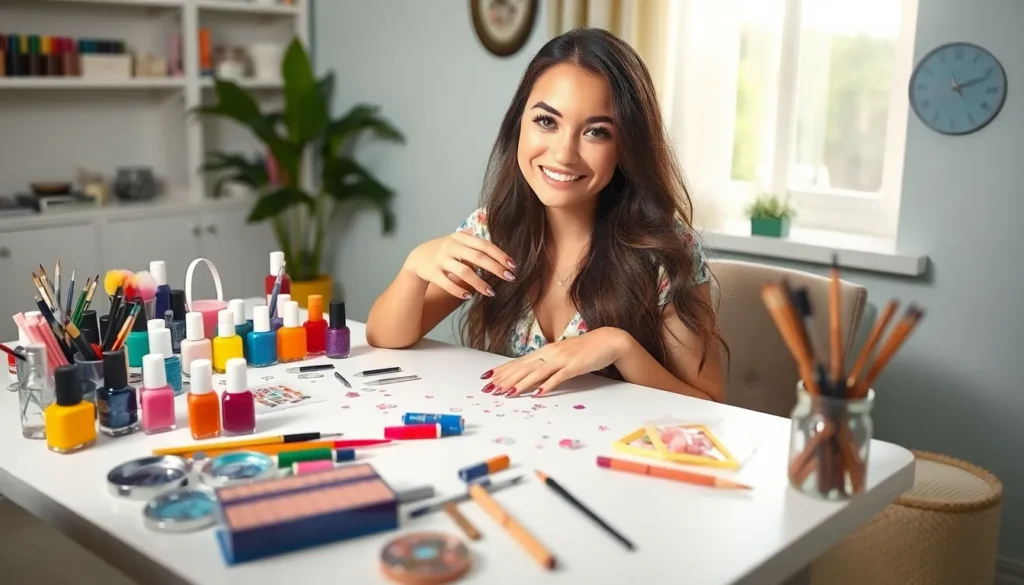
We’ve all been there – staring at our bare nails and craving a fresh manicure but not wanting to spend another fortune at the salon. The good news? Creating stunning nail art at home isn’t just possible – it’s become our favorite creative outlet and money-saving hack.
DIY nail designs have revolutionized how we approach self-care and personal style. From simple accent nails to intricate geometric patterns we can master these techniques with basic tools you probably already have at home. Whether you’re a complete beginner or looking to expand your nail art repertoire we’ve discovered that the most gorgeous designs often come from the simplest ideas.
The beauty of at-home manicures lies in the endless possibilities for customization. We can experiment with colors textures and patterns without worrying about time constraints or extra costs. Ready to transform your nails into miniature canvases? Let’s jump into some game-changing DIY techniques that’ll have your friends asking where you got your nails done.
Classic French Manicure With A Twist
French manicures don’t have to stay traditional anymore. We’ve discovered exciting ways to reinvent this timeless nail design while maintaining its elegant foundation.
Rainbow French Tips
Rainbow French tips transform the classic white tip into a vibrant spectrum of colors. We recommend using gel polishes in red, orange, yellow, green, blue, and purple to create smooth transitions between each hue. Start by applying your base coat and nude pink base color as you would for a traditional French manicure.
Create the rainbow effect by painting thin strips of each color across the nail tip using a fine detail brush. We suggest starting with red at one corner and blending into orange, then yellow, continuing through the spectrum. Allow each color to slightly overlap for seamless transitions.
Finish with a glossy top coat to seal the design and add professional shine. This technique works beautifully on both short and long nails, though longer nails provide more space for color blending.
Glitter French Accents
Glitter French accents add glamorous sparkle to the conventional white tip design. We love using fine holographic glitter mixed with clear polish for a subtle shimmer effect. Apply your base coat and nude pink base as usual, then paint the traditional white French tip line.
Before the white polish fully dries, gently press fine glitter along the tip edge using a small makeup sponge. We recommend gold, silver, or iridescent glitter for maximum impact. Create gradient effects by concentrating more glitter at the tip and feathering it down toward the nail bed.
Seal everything with two thin coats of top coat to prevent glitter from chipping. This design works exceptionally well for special occasions like weddings, parties, or holiday celebrations.
Negative Space French Design
Negative space French designs leave portions of the natural nail visible for a modern minimalist look. We create these by using striping tape or nail vinyls to mask off geometric shapes before applying the white tip. Remove the tape while the polish is slightly wet for clean lines.
Popular negative space patterns include triangular cutouts, diagonal stripes, or curved sections that follow the natural nail shape. We suggest practicing the tape placement on practice nails first to perfect your technique.
This design offers versatility since you can incorporate multiple colors or keep it monochromatic. The exposed natural nail creates visual interest while maintaining the sophisticated essence of traditional French manicures.
Marble Effect Nails Using Household Items
 1")
Creating stunning marble nail designs doesn’t require expensive tools or salon visits. We can achieve professional looking marble effects using items you already have at home.
Water Marble Technique
Prepare a cup of room temperature water and select 2-3 nail polish colors that complement each other. Drop one color into the center of the water, then immediately add the second color on top. The polish will spread across the surface creating natural rings.
Use a toothpick to drag through the polish from the center outward, creating marble patterns. Work quickly since the polish begins to dry within 30 seconds. Tape around your cuticles to protect your skin from excess polish.
Dip your nail straight down into the design at a 90 degree angle. Hold for 3-5 seconds, then use a toothpick to break the polish film around your finger before lifting out. Clean up any excess polish with a cotton swab dipped in acetone.
Plastic Wrap Marble Method
Apply a base coat and let it dry completely before starting this technique. Paint your entire nail with your lightest marble color and allow it to become tacky but not fully dry.
Crumple a small piece of plastic wrap into a loose ball shape. Dab the plastic wrap into your second polish color, then gently press it onto your nail in a bouncing motion. Rotate the plastic wrap slightly between each press to create varied patterns.
Layer additional colors using the same technique with fresh pieces of plastic wrap. The key is working while the base color remains slightly wet to allow the colors to blend naturally together.
Toothpick Swirl Patterns
Start with a dry base coat and paint your nails with your primary marble color. While the polish is still wet, add small dots of your accent colors randomly across the nail surface.
Drag a clean toothpick through the dots in curved motions to create swirl patterns. Move the toothpick in figure eight shapes, straight lines, or circular motions depending on your desired marble effect.
Clean your toothpick frequently on a paper towel to prevent color mixing. Work on one nail at a time since the polish needs to remain wet for the colors to blend smoothly together.
Geometric Patterns For Modern Nail Art
 2")
Sharp lines and precise shapes create stunning contemporary nail designs that rival professional salon work. We’ll explore three geometric techniques that transform ordinary manicures into eye-catching modern masterpieces.
Triangle Tape Designs
Triangular patterns offer endless possibilities for creating bold geometric nail art using simple striping tape. We start by applying a base color and allowing it to dry completely before positioning the tape in triangular formations.
Creating perfect triangle shapes becomes effortless when we use thin striping tape to outline our desired patterns. Position the tape to form triangles of varying sizes across each nail, ensuring the edges are pressed down firmly to prevent polish bleeding.
Layering colors strategically adds depth and visual interest to triangle designs. We apply our accent color over the taped areas, then carefully remove the tape while the polish is still slightly wet to reveal crisp, clean lines.
Mixing triangle sizes creates ever-changing visual movement across the nail surface. Large triangles on the thumb and ring finger paired with smaller geometric shapes on remaining nails establish perfect balance in our design.
Striped Accent Nails
Striped patterns deliver instant sophistication while remaining surprisingly simple to execute at home. We achieve professional-looking stripes using various tools like striping brushes, tape, or even thin nail art brushes.
Vertical stripes elongate the appearance of shorter nails while creating a sleek, modern aesthetic. We paint our base color first, then add contrasting vertical lines using steady downward brush strokes from cuticle to tip.
Horizontal stripe variations work exceptionally well as accent designs on one or two nails per hand. Position these stripes at different intervals to create rhythm and prevent the design from appearing too uniform.
Diagonal stripe applications add ever-changing energy to geometric nail art collections. We angle our stripes at approximately 45-degree angles, alternating directions between nails for maximum visual impact.
Polka Dot Perfection
Polka dots bring playful geometry to nail art through their perfect circular shapes and endless arrangement possibilities. We create flawless dots using various tools like dotting tools, bobby pins, or even the rounded end of makeup brushes.
Size variation techniques prevent polka dot designs from appearing flat or monotonous. We combine large dots with smaller ones, creating visual hierarchy and maintaining viewer interest across all ten nails.
Strategic dot placement follows geometric principles to achieve balanced, professional-looking results. Position larger dots near the nail base with progressively smaller dots toward the tips, or create clustered arrangements for modern appeal.
Color gradient dots elevate basic polka patterns into sophisticated geometric art. We start with our darkest shade for the largest dots, then gradually lighten the color as dot sizes decrease, creating beautiful dimensional effects.
Nature-Inspired DIY Nail Designs
 3")
Nature provides endless inspiration for stunning nail art designs that bring the outdoors to your fingertips. We’ll explore three beautiful techniques that capture the essence of flowers, leaves, and ocean waves.
Floral Stamping Techniques
Delicate Flower Patterns transform ordinary nails into blooming masterpieces using simple stamping plates and polish. We recommend starting with small floral designs like daisies or cherry blossoms for beginners. Apply your base color first and let it dry completely before stamping. Roll the stamper across the design plate to pick up the pattern then press firmly onto your nail surface.
Rose Garden Stamps create romantic nail art with intricate petal details that rival professional salon work. We suggest using contrasting colors like deep burgundy roses on nude bases or white blooms on black backgrounds. Clean your stamping plate with acetone between each design to maintain crisp lines. Layer different sized roses across your nails for a natural garden effect.
Botanical Mixing combines multiple flower types on individual nails for ever-changing nature inspired looks. We love pairing small forget me nots with larger sunflower stamps on the same hand. Use complementary colors within the same palette to maintain cohesion. Apply a glossy top coat to make the floral details pop and ensure long lasting wear.
Leaf Print Impressions
Real Leaf Techniques use actual leaves from your garden to create authentic botanical prints on your nails. We find that smaller leaves like ferns or herb sprigs work best for nail sized canvases. Press fresh leaves onto tacky nail polish then carefully remove to reveal natural vein patterns. Seal the design with clear top coat while the impression remains wet.
Gradient Leaf Effects blend autumn colors to recreate the seasonal transformation of foliage on your fingertips. We start with yellow at the cuticle and gradually blend through orange to deep red at the tips. Use a makeup sponge to dab colors together while they’re still wet. Add hand painted leaf shapes over the gradient using a thin brush and brown polish.
Tropical Palm Prints bring vacation vibes to your manicure with bold green palm frond designs. We recommend using nail art brushes to paint elongated leaf shapes in various shades of green. Start with darker green as your base then add lighter highlights along the center of each frond. Scatter the palm leaves at different angles across your nails for natural movement.
Ocean Wave Effects
Gradient Wave Patterns mimic ocean depths using blue tones that transition from light aqua to deep navy. We achieve this look by applying colors in horizontal bands then blending with a dry brush while polish remains workable. Start with the lightest shade at your cuticle and work toward darker blues at the tip. Add white foam details using a dotting tool for realistic wave crests.
Seafoam Texture recreates the bubbly appearance of ocean foam using white polish and strategic dabbing techniques. We apply a blue base coat then use a sea sponge dipped in white polish to create organic foam patterns. Vary the pressure and coverage to mimic how real sea foam appears and disappears along shorelines. Multiple light layers create more realistic depth than single heavy applications.
Tidal Pool Designs capture the magic of coastal rock pools with swirled blues and greens dotted with sea life details. We blend aqua and teal polishes using plastic wrap to create water movement effects. Add tiny shells using beige dots and small fish silhouettes with thin brush strokes. Include coral inspired designs in coral or pink tones to complete your underwater industry.
Glitter And Shimmer Application Methods
 4")
We’ll transform ordinary manicures into dazzling masterpieces using professional glitter and shimmer techniques. These sparkling application methods create dimensional effects that catch light beautifully.
Gradient Glitter Fade
Sponge Application Technique creates the most seamless glitter gradients we’ve seen in DIY nail art. Start by applying your base color and letting it dry completely. Dab glitter polish onto a makeup sponge and gently press it onto the nail tip, working your way down toward the cuticle with lighter pressure. Build the intensity gradually by repeating this process 2-3 times.
Brush Blending Method offers precise control over your gradient placement. Load a fan brush with glitter polish and sweep it across the nail tip in gentle motions. Feather the glitter upward using light strokes, creating a natural fade effect. Clean your brush between applications to maintain the gradient’s smoothness.
Layering Technique involves applying thin coats of glitter polish in decreasing intensity. Paint the entire nail with one coat, then apply a second coat covering only the bottom two-thirds, followed by a third coat on just the bottom third. This creates a stunning ombre effect that transitions from subtle sparkle to intense glitter.
Chunky Glitter Placement
Strategic Accent Placement transforms nails using large glitter pieces as focal points rather than overall coverage. Pick up individual glitter pieces with tweezers and place them deliberately on wet polish for maximum adhesion. Position chunky glitter near the cuticle area or nail tips for dramatic impact.
Embedding Technique ensures chunky glitter stays secure throughout wear. Apply a thick layer of clear top coat and immediately press large glitter pieces into the wet polish using an orange stick or dotting tool. Seal everything with another layer of top coat once the first layer becomes tacky.
Random Scatter Method creates an organic, effortless look with chunky glitter distribution. Sprinkle large glitter pieces over wet polish from about 6 inches above the nail. Gently press them down with a clean finger and finish with two coats of top coat for durability.
Holographic Top Coat Tricks
Multi-Angle Application maximizes holographic effects by applying thin layers in different directions. Paint the first coat vertically from cuticle to tip, then apply the second coat horizontally across the nail. This cross-hatching technique intensifies the rainbow prism effect under various lighting conditions.
Temperature Activation Method enhances holographic properties using gentle heat application. Apply your holographic top coat and immediately hold your nails under a warm lamp or blow dryer on low heat for 30 seconds. The warmth activates the holographic particles, creating more vivid color shifts.
Layering Strategy combines different holographic formulas for maximum dimension and sparkle. Start with a subtle holographic base coat, add your chosen color polish, then finish with an intense holographic top coat. Each layer contributes to the overall prismatic effect, creating depth that shifts beautifully in natural light.
Minimalist Nail Art For Beginners
 5")
Minimalist designs prove that less truly can be more when creating stunning nail art. These simple techniques require basic tools and create elegant results perfect for everyday wear.
Single Accent Nail Ideas
Ring Finger Gold Dot transforms your entire manicure with just one small metallic circle. Apply your base color to all nails, then use a dotting tool or bobby pin to create a single gold dot on your ring finger’s center. Wait for complete drying before applying top coat to prevent smudging.
Thumb Stripe Accent adds visual interest without overwhelming your look. Paint all nails in a neutral shade like nude or soft pink, then use striping tape to create one clean vertical line down your thumb nail’s center. Remove the tape immediately after applying the contrasting color for crisp edges.
Pinky Glitter Dip creates subtle sparkle that catches light beautifully. Complete your regular manicure, then dip only your pinky nail into fine glitter while the polish remains slightly tacky. Tap off excess glitter and seal with clear top coat for a polished finish.
Thin Line Designs
Vertical Center Lines elongate your nails while maintaining simplicity. Use a thin nail art brush or striping brush to paint one straight line down each nail’s center after your base color dries completely. Choose contrasting colors like white lines on black polish or black lines on nude shades for maximum impact.
Horizontal Tip Lines modernize the classic French manicure with contemporary flair. Apply your base color and let dry thoroughly, then paint one thin horizontal line about 2mm from your nail tip. This technique works especially well with metallic colors like silver or rose gold over neutral bases.
Curved Moon Lines frame your cuticle area with graceful arcs. Place small circular stickers or reinforcement stickers near your cuticle after applying base color. Paint over the exposed area with your accent color, then remove stickers while polish stays wet for clean curved lines.
Subtle Color Blocking
Two Tone Diagonal Split divides each nail into complementary color sections. Apply striping tape diagonally across each nail after your first color dries, then paint the exposed section with your second shade. Remove tape immediately for sharp, professional looking color boundaries.
Negative Space Triangles showcase your natural nail while adding geometric interest. Use triangle shaped stencils or tape to mask small triangular areas near your cuticle or nail tip. Paint over the stencil with your chosen color, then remove for clean negative space triangles.
Pastel Gradient Blocks blend soft colors for dreamy effects. Apply your lightest shade as the base color, then use a makeup sponge to dab slightly darker pastels onto the upper third of each nail. Blend gently for smooth color transitions that maintain the minimalist aesthetic.
Textured Nail Techniques At Home
 6")
Creating textured nails transforms your manicure from flat to fabulous with dimensional effects that catch light beautifully. We’ll explore three professional techniques that add tactile elements to your DIY nail art.
Sand Texture Finish
Sand texture polish creates a gritty, beach-inspired finish that mimics actual sand particles on your nails. Mix fine create sand with clear base coat in a 1:3 ratio for the perfect consistency. Apply this mixture over your chosen color while it’s still slightly tacky to ensure proper adhesion.
Rolling technique works best for even sand distribution across the nail surface. Pour mixed sand polish onto a small plate and gently roll your painted nail through it. Press lightly to embed particles without creating clumps or bare spots.
Setting spray helps lock sand particles in place for longer wear time. Spray nails from 6 inches away while particles are still settling. Wait 5 minutes before applying a thin protective top coat to seal the texture permanently.
Matte Top Coat Applications
Standard matte application requires two thin coats instead of one thick layer for optimal coverage. Wait 2 minutes between coats to prevent streaking or uneven texture. Work quickly in straight strokes from cuticle to tip without going back over areas.
Selective matte placement creates striking contrast when applied only to accent nails or exact design areas. Use striping tape to mask glossy sections before applying matte top coat. Remove tape immediately while the coat is still wet for clean lines.
Texture layering combines matte with other finishes for complex visual effects. Apply matte base then add glossy details using a thin brush for logos, lines, or small shapes. This technique works exceptionally well with geometric patterns and minimalist designs.
Velvet Powder Methods
Flocking powder application requires working with one nail at a time due to quick drying times. Apply base color then immediately dust velvet powder over wet polish using a fan brush. Press gently to ensure powder adheres completely without creating bare patches.
Color coordination matches velvet powder to your base polish or creates intentional contrast for dramatic effects. Purple base with silver velvet creates regal elegance while black base with red velvet adds gothic glamour. Test combinations on practice nails first.
Removal technique uses gentle buffing with a soft nail file to remove velvet texture when desired. Soak nails in warm soapy water for 3 minutes to soften the powder before buffing. Follow with cuticle oil to restore nail moisture after texture removal.
Holiday And Seasonal Nail Themes
 7")
Seasonal nail art captures the essence of each time of year through colors, patterns, and themes that celebrate nature’s changes. We’ll explore three stunning seasonal approaches that transform your manicure into a reflection of the industry around you.
Winter Snowflake Designs
Delicate Snowflake Stamping creates intricate winter patterns using specialized nail stamps and white or silver polish. We recommend starting with a deep blue or navy base coat to make the snowflakes pop against the dark background. Press the stamper firmly onto the design plate, then roll it across your nail from cuticle to tip for even coverage. Each snowflake pattern should be unique, just like real snow crystals.
Freehand Snowflake Dots offer complete creative control using a dotting tool and thin brush. We begin with three intersecting lines to form the basic snowflake structure, then add smaller dots and lines at each endpoint. The key is keeping your hand steady and working quickly before the polish becomes tacky. White polish over a pale blue base creates that perfect winter morning aesthetic.
Glitter Snowfall Effect mimics gently falling snow using fine white glitter and a makeup sponge. We dab the sponge lightly across the nail surface, concentrating more glitter near the cuticle area to simulate natural snowfall patterns. Layer the effect gradually to avoid overwhelming the base color, building up the intensity where snow would naturally accumulate.
Summer Beach Vibes
Ocean Wave Gradients capture the mesmerizing movement of water using blues, teals, and whites blended with a makeup sponge. We start with the darkest blue at the cuticle and gradually lighten toward the tip, mimicking ocean depth. The sponging technique creates natural texture that resembles wave movement when light hits the surface. Add tiny white dots with a toothpick to represent sea foam for extra authenticity.
Tropical Sunset Ombré brings warm summer evenings to your fingertips using coral, orange, pink, and yellow polishes. We blend these colors horizontally across the nail, starting with coral at the base and transitioning through orange and pink to yellow at the tip. The key is working quickly while the polish remains wet, using gentle dabbing motions to seamlessly merge the colors.
Beach Sand Texture recreates that distinctive gritty sand feeling using matte top coat and fine cosmetic glitter. We apply a beige or tan base color, then mix clear polish with fine gold glitter before dabbing it randomly across the surface. The matte top coat seals everything while maintaining that authentic sandy texture that catches light like real beach sand.
Fall Leaf Patterns
Real Leaf Imprints use actual autumn leaves to create authentic patterns by pressing fresh leaves onto wet nail polish. We apply a base coat in warm amber or rust tones, then gently press a small leaf onto the surface while the polish is still tacky. Remove the leaf carefully after 30 seconds to reveal the natural vein pattern, then seal with a clear top coat to preserve the delicate details.
Gradient Leaf Effects blend fall colors from deep burgundy at the cuticle to golden yellow at the tip, mimicking the natural color transition in autumn leaves. We use a makeup sponge to dab the colors together, creating smooth transitions that capture how leaves change throughout the season. The technique works best with three to four complementary fall shades applied in overlapping sections.
Maple Leaf Silhouettes feature bold leaf shapes painted over gradient backgrounds using a thin detail brush and dark polish. We create the background gradient first using warm oranges and reds, then paint simple maple leaf outlines in deep brown or black. The contrast between the bright background and dark silhouettes captures that dramatic fall lighting when leaves are backlit by autumn sun.
Tools And Supplies For DIY Success
 8")
Choosing the right tools transforms your nail art journey from frustrating attempts to stunning masterpieces. We’ve discovered that having quality supplies makes all the difference in achieving professional results at home.
Essential Nail Art Brushes
Detail brushes form the foundation of every nail artist’s toolkit, with sizes ranging from 000 to 2 for precise work. We recommend starting with a liner brush for thin strokes, a flat brush for filling larger areas, and a dotting tool for perfect circles. Angled brushes excel at creating sharp geometric lines and precise French tip curves.
Fan brushes create beautiful texture effects like marble patterns and gradient blends with minimal effort. These brushes work perfectly for applying glitter in natural scattered patterns or creating soft cloud effects. We find that synthetic bristles maintain their shape better than natural ones for nail art applications.
Cleanup brushes with firm angled tips remove excess polish around cuticles with precision. Dip these brushes in acetone or nail dehydrator to clean up mistakes without disturbing your base design. Small concealer brushes from makeup sets work exceptionally well for this purpose.
| Brush Type | Best Use | Price Range |
|---|---|---|
| Detail Liner | Fine lines, dots | $2-8 |
| Flat Shader | Color filling | $3-10 |
| Angled | Geometric shapes | $4-12 |
| Fan | Texture effects | $5-15 |
Budget Friendly Alternatives
Household items create stunning nail art effects without expensive specialty tools. We’ve achieved amazing results using toothpicks for marble swirls, bobby pins for perfect dots, and scotch tape for clean geometric lines. Plastic wrap pressed into wet polish creates instant marble textures.
Makeup brushes substitute perfectly for many nail art tools at a fraction of the cost. Old eyeliner brushes work as detail brushes, while lip brushes create smooth color application. We clean these thoroughly with acetone before switching between nail and makeup use.
Sponges from kitchen or makeup supplies create professional gradient effects when cut into small pieces. Natural sea sponges produce organic textures, while makeup wedges give controlled ombre blends. Dab excess polish on paper towel before applying to nails for best results.
Office supplies like hole punch reinforcements make perfect circle stencils for negative space designs. Paper clips bend into custom dotting tools, and rubber bands create unique stripe patterns when stretched across nails during application.
Storage And Organization Tips
Clear containers keep small supplies visible and easily accessible during nail art sessions. We organize our collection using fishing tackle boxes, pill organizers, and small mason jars for different categories. Label each container to speed up your creative process.
Magnetic strips mounted on walls hold metal tools like tweezers, cuticle pushers, and scissors within easy reach. This storage method prevents tools from getting lost in drawers while keeping your workspace clutter free. We attach these strips inside cabinet doors to save counter space.
Rolling carts provide mobile storage that moves with you between different lighting setups. Three tier carts accommodate polishes on top, tools in middle, and cleanup supplies on bottom. These carts fit perfectly beside most desks or vanity areas.
Temperature control matters for polish storage, so we keep our collection in cool, dry places away from direct sunlight. Storing polishes upright prevents separation, while refrigerating certain formulas extends their shelf life significantly.
Conclusion
We’ve shown you that creating stunning nail art at home doesn’t require professional training or expensive salon visits. With the right techniques and basic supplies you can achieve everything from elegant minimalist designs to bold textured masterpieces.
Your creativity is the only limit when it comes to DIY nail art. Whether you’re drawn to nature-inspired patterns seasonal themes or geometric shapes there’s a technique that’ll match your personal style and skill level.
Remember that practice makes perfect and even the simplest designs can make a powerful statement. Start with the techniques that excite you most and gradually build your skills as you gain confidence.
We encourage you to experiment with different methods mix techniques and make each design uniquely yours. Your nails are the perfect canvas for self-expression and with these DIY approaches you’ll never run out of ways to showcase your personality through beautiful nail art.
Frequently Asked Questions
What are the benefits of DIY nail art compared to salon manicures?
DIY nail art offers significant cost savings, creative freedom, and convenience. You can experiment with unlimited colors, patterns, and techniques at your own pace without salon appointments. It’s perfect for self-expression and allows you to create personalized designs that match your style and mood while developing valuable artistic skills.
What basic tools do I need to start creating nail art at home?
Essential tools include nail art brushes (detail and fan brushes), striping tape, dotting tools, and quality base and top coats. You can also use household items like toothpicks, plastic wrap, and sponges. Start with basic supplies and gradually expand your collection as you develop new techniques.
How can I create a marble effect on my nails without expensive equipment?
You can achieve marble effects using three simple methods: the water marble technique with nail polish dropped in water, the plastic wrap method for textured patterns, or toothpick swirl patterns on wet polish. These techniques use common household items and create professional-looking results.
What are some easy nail art designs for complete beginners?
Start with minimalist designs like single accent dots, thin lines, or simple color blocking. Try a ring finger gold dot, thumb stripe accent, or two-tone diagonal split. These designs require basic tools, minimal skill, and create elegant results while building your confidence.
How do I create geometric patterns on my nails?
Use striping tape for clean triangle designs, create stripes with thin brushes or tape for modern lines, and make polka dots with dotting tools or bobby pins. Layer colors for depth and vary dot sizes for visual interest. These patterns add sophistication to any manicure.
What techniques work best for nature-inspired nail designs?
Try floral stamping for delicate flower patterns, use real leaves as templates for authentic leaf prints, or create ocean wave effects with gradient techniques. These designs capture natural beauty and can be achieved using stamping plates, actual botanical elements, or simple brush work.
How can I properly apply glitter and shimmer to my nails?
Use a makeup sponge for gradient glitter fades, apply chunky glitter strategically for accent placement, and finish with holographic top coats for maximum sparkle. Layer different glitter sizes and apply at multiple angles to create depth and dimension in your design.
What are some seasonal nail art ideas I can try throughout the year?
Winter calls for snowflake designs and glitter effects, summer features ocean gradients and tropical themes, while fall showcases leaf imprints and warm autumn colors. Each season offers unique inspiration for colors, patterns, and textures that reflect the time of year.
How do I add texture to my nail art designs?
Create sand texture finishes for a beach-inspired look, use matte top coats selectively for contrast, or apply velvet powder for dramatic dimension. These techniques add professional-looking texture and can transform simple designs into sophisticated nail art.
What’s the best way to organize and store my nail art supplies?
Use clear containers for easy visibility, install magnetic strips for metal tools, and consider rolling carts for mobile storage. Keep frequently used items accessible and organize by category (brushes, polishes, tools) to maintain an efficient workspace for your nail art projects.


