Magic happens when Disney meets nail art. We’ve discovered that transforming your nails into miniature canvases featuring beloved Disney characters creates an enchanting way to showcase your love for the House of Mouse. From classic Mickey Mouse silhouettes to intricate princess designs Disney nail art lets you carry a touch of pixie dust wherever you go.
Whether you’re planning a Disney vacation preparing for a themed party or simply want to add some whimsy to your everyday look we’ve got you covered. These creative Disney nail art ideas range from beginner-friendly designs perfect for DIY enthusiasts to more elaborate artwork that’ll make fellow Disney fans stop and stare.
Ready to bring some Disney magic to your fingertips? We’ll walk you through stunning character-inspired designs seasonal Disney themes and pro tips that’ll help you create salon-worthy results at home. Your nails are about to become the most magical accessory in your collection.
Classic Disney Princess Nail Art Designs
Princess-inspired nail designs bring timeless elegance to your fingertips with iconic elements from Disney’s most beloved characters. We’ll explore three stunning princess themes that capture the essence of fairy tale magic.
Cinderella’s Glass Slipper Elegance
Create a shimmering base with light blue or clear polish that mimics Cinderella’s glass slipper transparency. Apply silver glitter over the entire nail for that sparkling ballroom effect, concentrating the glitter near the tips for maximum shimmer.
Add delicate details using a thin brush to paint tiny silver stars and sparkles across each nail. Draw small clock faces on accent nails to represent the midnight deadline, using black polish for the clock hands and Roman numerals.
Finish with rhinestones placed strategically at the base of each nail to represent diamonds from Cinderella’s tiara. Use a top coat with micro-glitter particles to seal the design and maintain that ethereal glass slipper shine throughout the week.
Belle’s Enchanted Rose Beauty
Start with a golden yellow base that matches Belle’s iconic ballgown, applying two thin coats for even coverage. Paint deep red roses on accent nails using a small detailing brush, creating layered petals that appear three-dimensional.
Incorporate book elements by painting tiny black lines to represent text pages on one or two nails. Add small brown rectangles with gold detailing to create miniature book spines, honoring Belle’s love for reading and knowledge.
Complete the look with green leaves around the roses using forest green polish and a steady hand. Apply gold foil flakes sparingly across all nails to capture the magical transformation scene’s golden sparkle effect.
Ariel’s Under the Sea Magic
Begin with ocean-inspired colors using teal, seafoam green, and deep blue as your base palette across different nails. Create an ombre effect by blending these shades from light to dark, mimicking ocean depths and underwater lighting.
Paint seashells and starfish on accent nails using white and coral pink polishes, adding small dots in purple and gold for realistic shell textures. Draw flowing seaweed designs with dark green polish, creating curved lines that move naturally across the nail surface.
Add mermaid tail scales using a fishnet stocking pressed gently over wet polish to create the perfect scale pattern. Finish with iridescent top coat and small blue rhinestones to represent bubbles floating through Ariel’s underwater kingdom.
Mickey and Minnie Mouse Inspired Creations
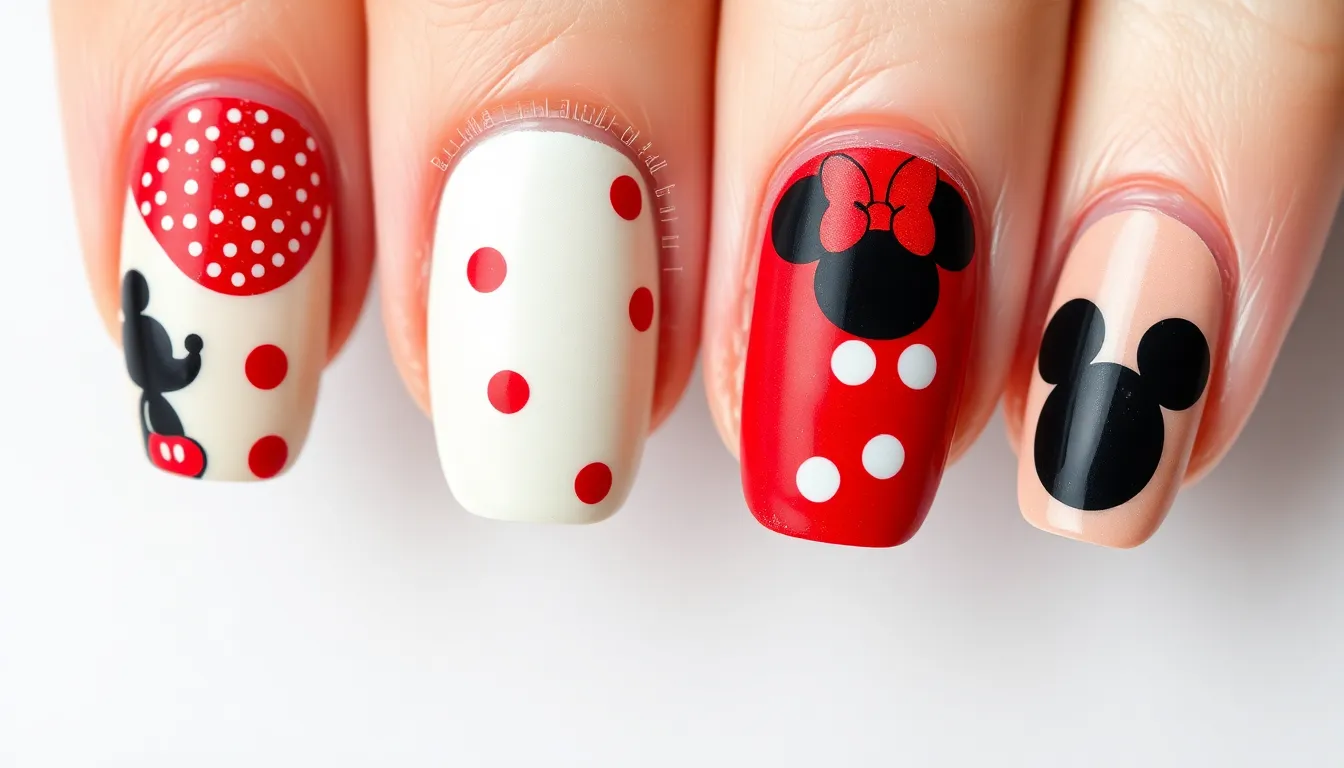
Mickey and Minnie Mouse nail designs offer timeless Disney charm that works for any occasion. These iconic characters provide endless creative possibilities for both beginners and advanced nail artists.
Traditional Mickey Head Silhouettes
Classic black Mickey silhouettes transform your nails into instant Disney magic with minimal effort required. We recommend starting with a white or nude base coat to make the black Mickey heads pop against the background. Paint large circles on your ring fingers using black polish, then add two smaller circles positioned above and slightly overlapping the main circle.
Negative space Mickey designs create sophisticated looks by leaving the Mickey shape unpainted while filling the surrounding area. Apply base coat, then use Mickey head stencils or nail vinyls to block out the character shape. Fill the remaining nail space with bold colors like red, yellow, or classic Disney blue.
Glittery Mickey accents add sparkle to traditional silhouettes without overwhelming the design. Mix fine gold or silver glitter into black polish before creating the Mickey shapes. This technique works especially well on accent nails paired with solid colored companion nails.
French tip Mickey variations combine classic manicure styles with Disney flair for professional appropriate nail art. Paint traditional white French tips, then add tiny black Mickey heads along the tip line. Space them evenly across each nail for the most polished appearance.
Polka Dot Minnie Mouse Bows
Red polka dot base designs capture Minnie’s signature style with playful white dots scattered across bright red nails. We suggest using a dotting tool or bobby pin to create uniform white circles of varying sizes. Focus the largest dots near the cuticle area and gradually decrease dot size toward the nail tips.
Bow accent nail artwork transforms one finger into Minnie’s iconic headband bow for maximum visual impact. Paint your ring finger with red base color, then create a large white polka dot pattern. Add a yellow bow shape at the nail base using either hand painting techniques or bow shaped nail decals.
Pink and white Minnie combinations offer softer alternatives to traditional red schemes while maintaining character recognition. Apply pale pink base coats, then add white polka dots using the same dotting technique. Create small black bows near the cuticle area to complete the Minnie Mouse aesthetic.
Matte finish polka dots provide modern twists on classic Minnie designs that photograph beautifully for social media. Apply your polka dot design as usual, then seal with matte top coat instead of glossy finish. The texture contrast between base color and dots creates striking visual dimension.
Vintage Disney Character Colors
Classic Mickey color palette features the timeless combination of red, black, and yellow that defined early Disney animation. We recommend dedicating each nail to one primary color, then adding small accents in the remaining two shades. Paint your thumb and ring finger red, index and pinky black, and middle finger bright yellow.
Sepia toned vintage effects recreate the nostalgic feel of early Disney cartoons through warm brown and cream color schemes. Start with cream colored base coats, then add light brown Mickey silhouettes or character outlines. Finish with brown nail art pens to draw vintage style cartoon details like stitching lines or shading.
Steamboat Willie inspired designs pay homage to Mickey’s debut appearance with black and white artistic interpretations. Create alternating black and white nails, then add simple line art depicting steamboat elements like wheels, smoke puffs, or musical notes. Use fine tip nail brushes for the most precise line work.
Golden age animation hues incorporate the rich, saturated colors that defined Disney’s classic film period from the 1930s through 1950s. Choose deep forest greens, royal blues, warm oranges, and burgundy reds as your primary palette. Add small white highlights and black outlines to mimic traditional animation cel techniques.
Frozen-Themed Winter Wonderland Nails
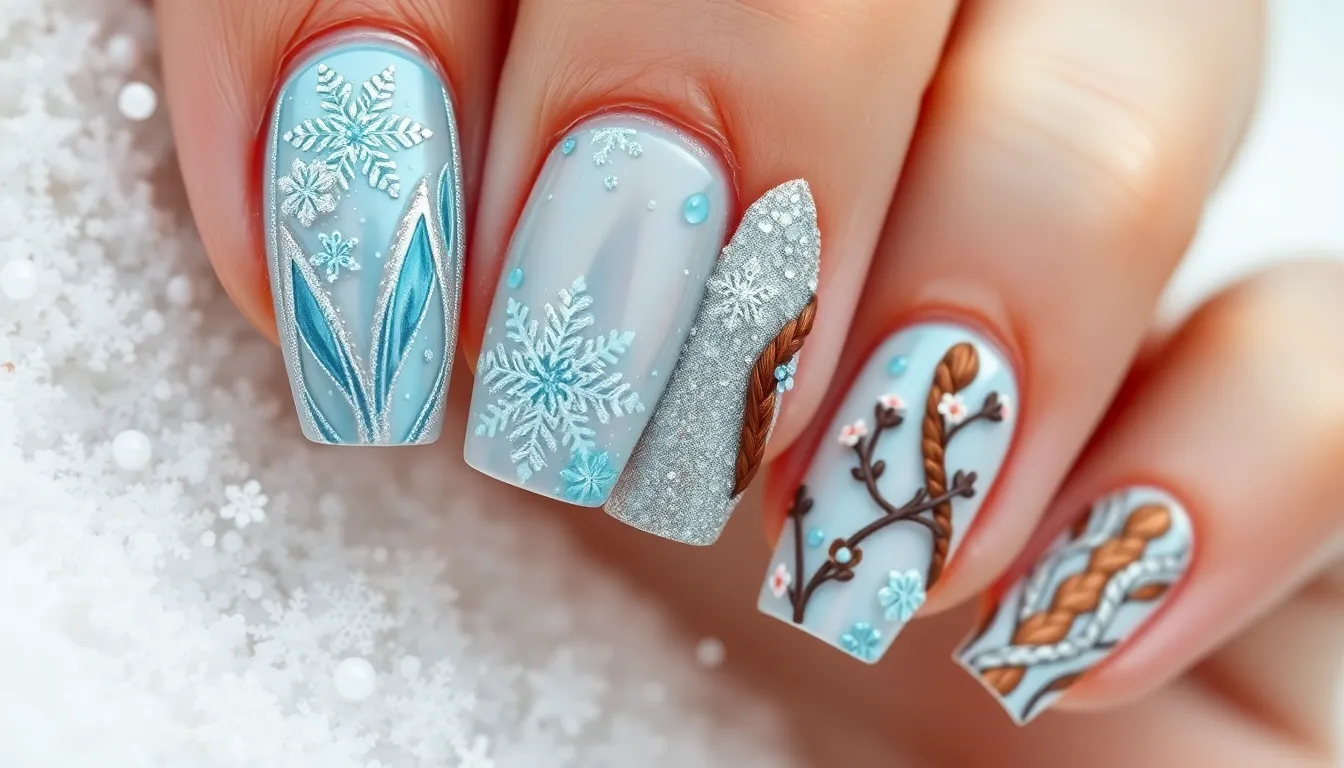
We’re stepping into Arendelle’s magical industry with nail designs that capture the essence of Disney’s beloved Frozen characters. These winter wonderland creations bring icy elegance and warm sisterly love to your fingertips.
Elsa’s Ice Crystal Patterns
Elsa’s signature ice magic translates beautifully into stunning crystal nail patterns that shimmer like fresh snow. We start with a pale blue or silver base coat to create that frozen foundation. Crystal designs work best when we use white nail polish mixed with fine silver glitter to paint delicate ice formations across each nail.
Creating authentic ice crystal patterns requires steady hands and thin brushes for detailed work. We recommend drawing elongated diamond shapes, branching frost patterns, and geometric snowflake motifs that mirror Elsa’s ice palace architecture. Silver holographic flakes add dimension to the design while clear topcoat with blue micro glitter creates that magical frozen glow.
Temperature changes make these designs even more special when we incorporate thermochromic polish that shifts from pale blue to white. We finish each nail with tiny rhinestones placed strategically at crystal intersections to catch light like real ice formations.
Anna’s Braided Hair Designs
Anna’s distinctive braided hairstyle becomes a charming nail art motif that celebrates her spirited personality. We paint auburn base colors ranging from copper to deep brown to match her beautiful hair tones. Braided patterns require creating interwoven lines that crisscross diagonally across each nail surface.
Building realistic braid textures involves using different shades of brown and orange polish to create depth and dimension. We start by painting three parallel lines down each nail, then carefully weave crossing strokes to simulate actual hair braiding techniques. Golden highlights add warmth while darker brown shadows create realistic texture.
Accent nails featuring Anna’s coronation braids work particularly well when we incorporate tiny painted flowers or ribbon details. We use toothpicks or dotting tools to add small daisies and leaves that reference her connection to nature and summer warmth.
Snowflake and Blue Ombre Effects
Snowflake nail art combined with gradient blue effects creates breathtaking winter wonderland designs worthy of Frozen’s magical atmosphere. We begin with white base coats that gradually blend into deeper blue tones using makeup sponges for smooth color transitions. This ombre technique mimics the way snow falls against twilight skies.
Individual snowflakes require precision painting using white polish and thin detail brushes to create unique six pointed patterns. We ensure each snowflake differs slightly since no two real snowflakes share identical structures. Adding silver glitter to wet polish creates sparkling effects that catch light beautifully.
Layering techniques enhance these designs when we apply sheer blue polish over completed snowflakes for added depth. We seal everything with glossy topcoat mixed with fine blue and silver glitter particles that shift and sparkle with hand movement, perfectly capturing Frozen’s enchanting winter magic.
Pixar Character Nail Art Masterpieces
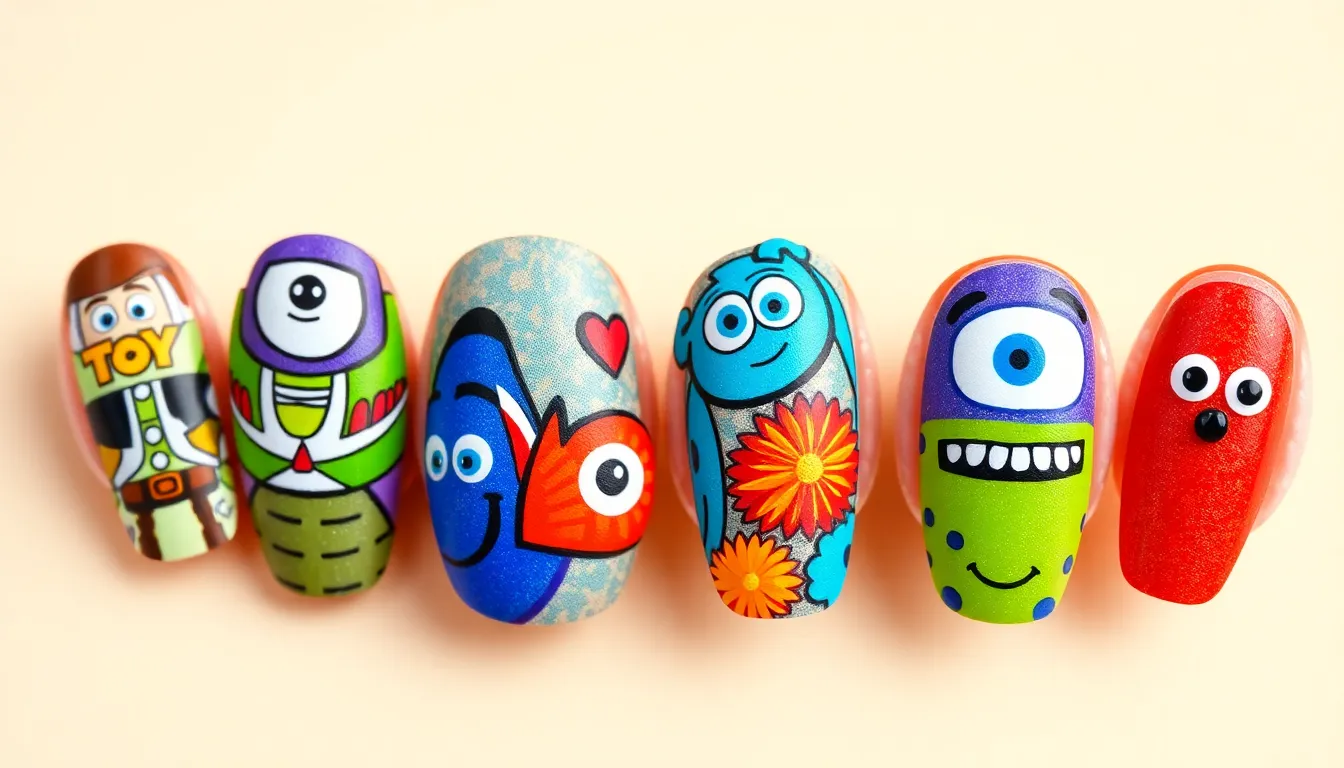
Moving beyond traditional Disney characters, we discover endless creativity with Pixar’s beloved animated personalities. These vibrant designs capture the essence of childhood wonder and adventure.
Toy Story Cowboy and Space Ranger Themes
Woody’s western charm transforms your nails into a frontier adventure. We create his signature look using a sunny yellow base coat paired with bold red and blue checkered patterns on accent nails. Brown polish works perfectly for painting tiny cowboy boots and his iconic vest design. Adding small white stars and sheriff badges with nail art pens completes the authentic cowboy aesthetic.
Buzz Lightyear’s space ranger style brings futuristic flair to your fingertips. Start with a crisp white base coat and add vibrant purple and green geometric patterns inspired by his suit design. Silver foil creates the perfect metallic accents for his chest panel details. We recommend using glow-in-the-dark polish for the green elements to capture his laser beam effects.
Combining both characters on different nails creates a ever-changing Toy Story tribute. Paint “Andy” in child-like lettering on your thumb nail using black polish over a beige base. Rainbow stripes on pinky nails represent the colorful toy box atmosphere. Finishing with a matte top coat on Woody’s nails and glossy finish on Buzz’s creates an authentic texture contrast.
Finding Nemo Ocean Adventure Nails
Nemo’s vibrant orange and white stripes make for instantly recognizable nail art. We paint alternating bright orange and white horizontal bands across each nail using thin striping brushes. Black polish creates his distinctive markings and tiny dot eyes. Adding a glossy top coat mimics the wet appearance of fish scales underwater.
Dory’s cheerful blue personality shines through gradient techniques. Create an ombre effect using royal blue at the base fading to lighter sky blue at the tips. Yellow accents represent her fins and tail details. We suggest adding tiny black dots for her expressive eyes and white highlights to capture her optimistic spirit.
Coral reef backgrounds transform your nails into underwater scenes. Paint various coral shapes using pink, orange, and purple polishes in organic, wavy patterns. Green seaweed elements add depth and movement to the design. Tiny white bubbles created with dotting tools complete the ocean floor atmosphere that surrounds our favorite fish characters.
Monsters Inc. Colorful Character Faces
Sulley’s fluffy blue texture requires special sponging techniques for authentic results. We dab various shades of blue and teal polish with a makeup sponge to create his signature fur pattern. Purple spots scattered randomly across the blue base capture his distinctive markings. White fangs painted with fine detail brushes and black dot eyes complete his gentle giant appearance.
Mike Wazowski’s bright green personality dominates an entire nail canvas. Paint the entire nail with vibrant lime green polish as your base color. His single large eye takes up most of the nail space, created with white polish and a black center. Tiny black lines represent his stick-thin arms and legs extending from his round body shape.
Boo’s colorful door designs add whimsical elements to accent nails. We paint miniature door shapes using various bright colors like pink, yellow, and blue. Silver door handles and number details make each door unique and special. Adding tiny monster silhouettes peeking out from behind the doors creates an interactive storytelling element across your manicure.
Disney Villain Dark and Dramatic Looks
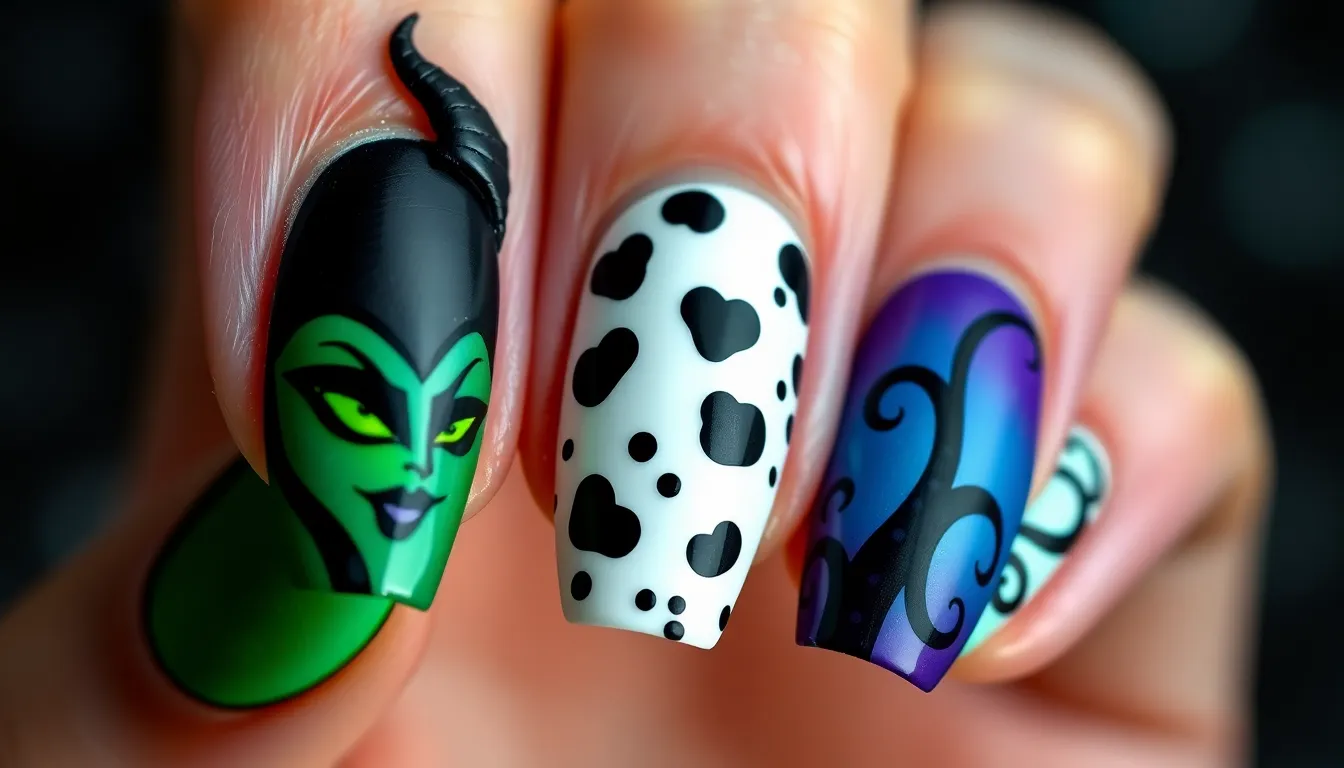
We’re embracing the dark side of Disney magic with these striking villain-inspired nail designs that command attention and showcase your bold personality.
Maleficent’s Gothic Green and Black
Emerald elegance defines Maleficent’s signature aesthetic with deep forest green bases and matte black accents. We create dramatic horned silhouettes using black polish on accent nails, adding metallic gold details to represent her staff’s magical glow. Gradient techniques work beautifully here, blending dark green into black for an ominous fade effect across each nail.
Gothic elements elevate this design through tiny painted thorns, ravens, or flame motifs that capture her menacing presence. We recommend using green chrome powder over black base coats to achieve that supernatural shimmer she’s known for. Textured finishes add depth, combining matte topcoats on some nails with glossy accents on others for visual contrast.
Cruella De Vil’s Spotted Sophistication
Dalmatian spots take center stage in this chic villain design, featuring crisp white bases with perfectly placed black dots of varying sizes. We create asymmetrical spot patterns that mirror her iconic coat, ensuring no two nails look identical for authentic randomness. Negative space techniques work wonderfully, leaving natural nail visible between black spots for a modern twist.
Monochrome elegance extends beyond basic spots through half-moon designs in contrasting colors and geometric patterns that reference her fashion-forward style. We incorporate silver accent lines and rhinestones to represent her love of luxury and glamour. French tip variations using black tips on white bases offer a subtle nod to her dual-toned hair while maintaining sophisticated appeal.
Ursula’s Deep Sea Purple Power
Ocean depths come alive through rich purple gradients that transition from deep plum to midnight black, capturing her underwater lair’s mysterious atmosphere. We layer holographic topcoats over purple bases to create that otherworldly tentacle shimmer she possesses. Tentacle designs flow across multiple nails, painted in darker purples with suction cup details in metallic silver.
Seashell accents complement the underwater theme with tiny painted shells, pearls, and trident symbols that reference her magical artifacts. We use iridescent powders and color-shifting polishes to mimic the way light moves through water around her tentacles. Dark glamour shines through purple chrome finishes and black pearl embellishments that represent her powerful, commanding presence in the ocean’s depths.
Seasonal Disney Holiday Nail Designs
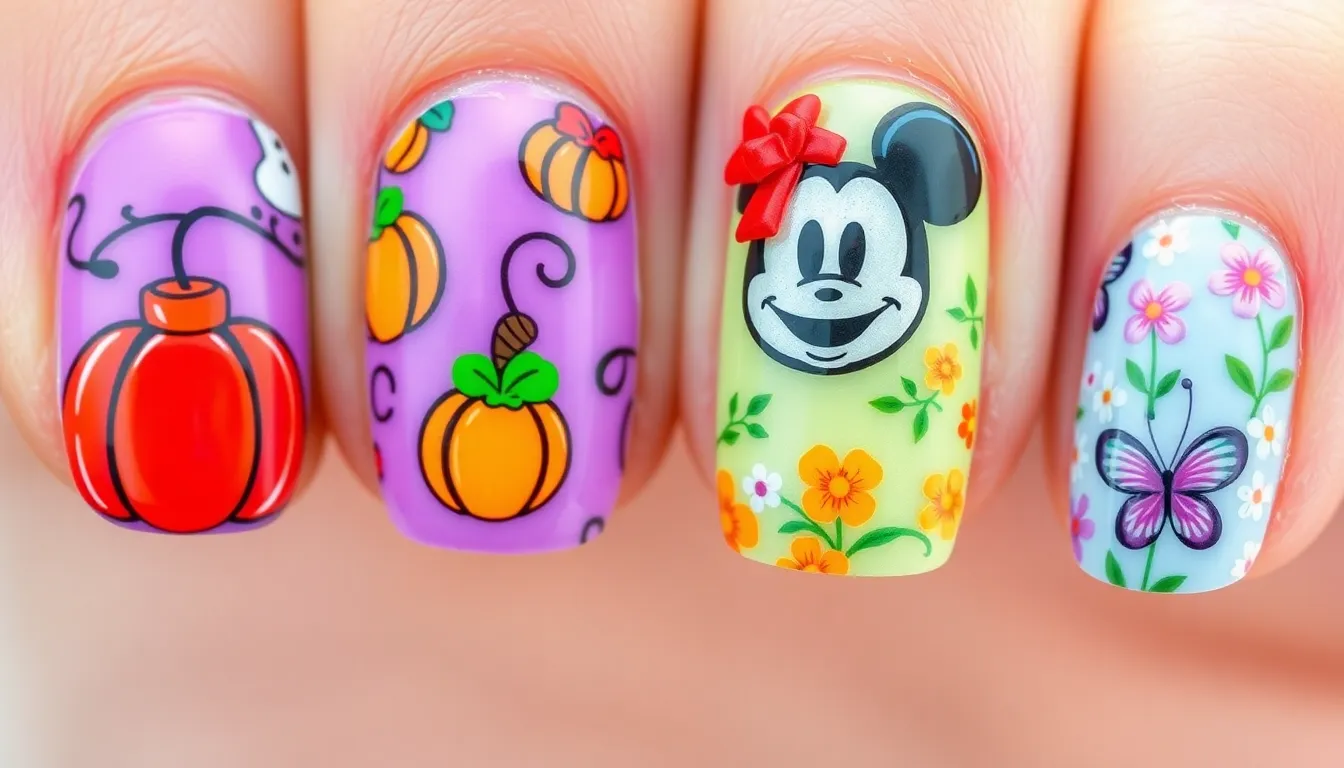
Transform your Disney nail art throughout the year with enchanting seasonal designs that celebrate holidays while honoring beloved characters. We’ve crafted festive looks that blend Disney magic with seasonal celebrations for every occasion.
Halloween Disney Character Spooks
Villainous Halloween transformations bring out the darker side of Disney characters with spooky seasonal twists. We recommend starting with Maleficent’s horned silhouette on a deep purple base, adding black gradient tips and tiny silver thorns. Create the Evil Queen’s poison apple design using glossy red polish with a single black drip effect and gold crown details.
Jack Skellington nail art captures the Nightmare Before Christmas spirit with stark black and white contrasts. Paint alternating nails with Jack’s iconic pinstripe suit pattern, skull face designs, and Sally’s patchwork stitching details. Add glow in the dark topcoat to create an eerie nighttime effect that brings these characters to life.
Disney princess Halloween makeovers reimagine classic characters with gothic flair. Transform Snow White’s design with deep burgundy apples, black lace patterns, and silver mirror fragments. Create a haunted Belle look using burnt orange roses, aged book pages, and antique gold accents that evoke autumn’s mysterious atmosphere.
Christmas Mickey Ornament Nails
Classic red and green Mickey designs embody traditional Christmas colors while maintaining Disney charm. We suggest painting Mickey head silhouettes in deep emerald green with gold glitter outlines and tiny red holly berries. Create candy cane stripes using alternating red and white polish, finishing each nail with small Mickey ornament decals.
Festive Disney castle winter scenes showcase Cinderella’s castle adorned with holiday decorations. Paint a soft winter blue base with white snow effects, adding tiny painted castle silhouettes and golden window lights. Include miniature Christmas trees, falling snowflakes, and warm yellow lights to create a magical holiday village atmosphere.
Mickey ornament accent nails feature actual ornament designs inspired by Disney’s classic characters. Create metallic gold or silver base coats with hand painted Mickey heads in various Christmas colors like burgundy, forest green, and royal blue. Add tiny rhinestones to mimic ornament caps and finish with high gloss topcoat for authentic ornament shine.
Spring Disney Floral Fantasies
Bambi woodland spring themes celebrate new life and blooming flowers with forest inspired designs. We create soft lavender and mint green ombres topped with tiny painted wildflowers, butterflies, and Bambi’s footprints. Include delicate cherry blossoms, baby deer silhouettes, and fresh spring grass details using fine art brushes.
Alice in Wonderland garden party nails feature whimsical tea party elements surrounded by spring blooms. Paint alternating nails with tiny teacups, playing card suits, and the Cheshire Cat’s grin among painted roses and daisies. Create the Mad Hatter’s hat design using pastels with small “10/6” price tags and colorful ribbon details.
Disney princess spring awakening designs showcase characters embracing seasonal renewal and growth. Transform Rapunzel’s look with braided nail art intertwined with painted spring flowers, using soft yellows and purples. Create Pocahontas inspired designs featuring painted cherry blossoms, flowing leaves, and nature symbols in earthy spring tones like sage green and warm terracotta.
Advanced Disney Nail Art Techniques
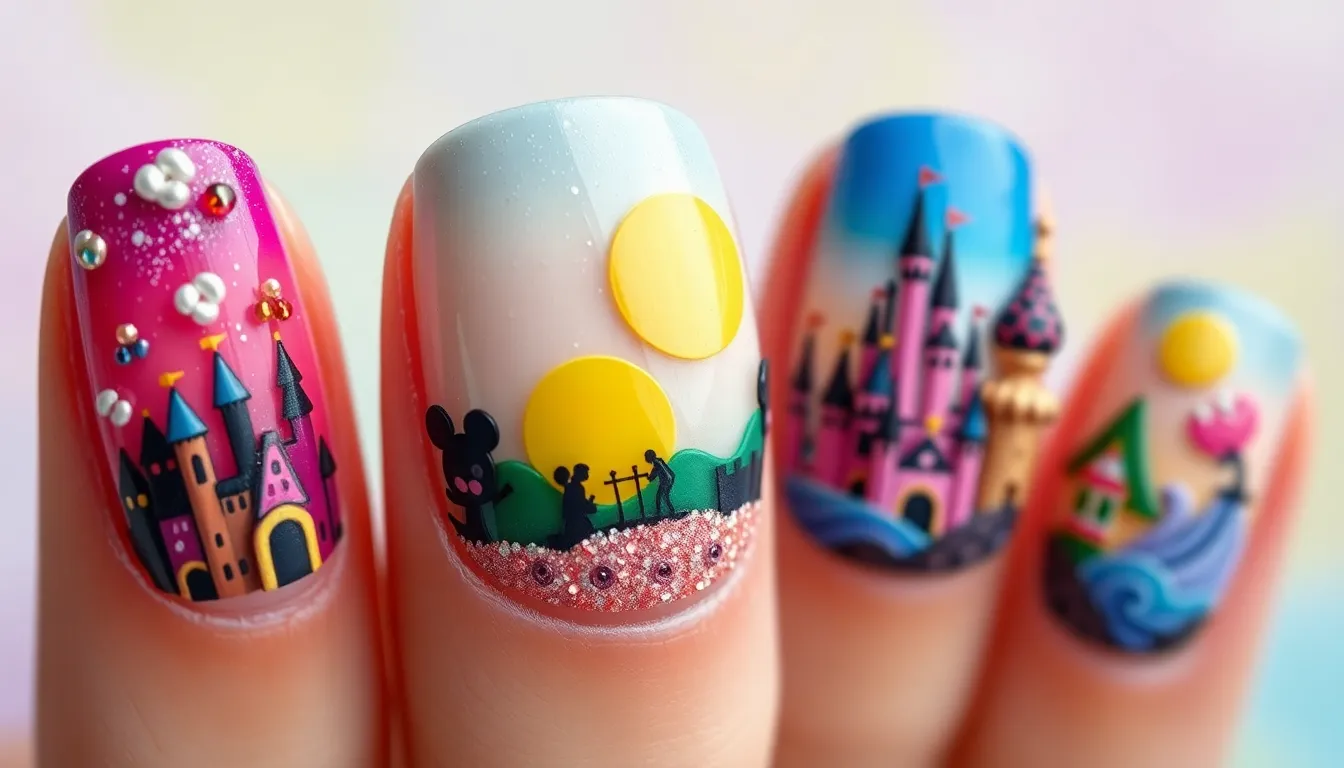
Mastering sophisticated Disney nail art requires specialized techniques that elevate simple character designs into professional-quality masterpieces. We’ll explore three advanced methods that transform your nails into dimensional works of Disney art.
3D Character Embellishments
Creating three-dimensional Disney characters brings magical depth to your nail art designs. We recommend starting with small acrylic beads to form Mickey Mouse ears, positioning them strategically on accent nails for maximum impact. Sculpting gel allows you to build Belle’s rose petals directly on your nail surface, creating realistic texture and dimension.
Rhinestones become Elsa’s ice crystals when layered at varying heights across multiple nails. We’ve found that combining different sizes creates the most authentic frozen effect. Tiny polymer clay charms work perfectly for Tinker Bell’s fairy dust, while small pearls transform into Ariel’s treasured seashells.
Building character faces requires steady hands and quality acrylic paints. We suggest practicing Minnie Mouse’s bow shape on practice wheels before attempting the final design. Small silicone tools help shape Olaf’s carrot nose and Stitch’s alien features with precision.
Hand-Painted Detailed Scenes
Recreating Disney movie scenes demands advanced brush control and color blending techniques. We begin castle landscapes with gradient backgrounds, using makeup sponges to achieve seamless sky-to-ground transitions. Detailed brushwork brings Cinderella’s castle to life with tiny windows, flags, and architectural elements.
Forest scenes from Bambi require multiple green shades and careful layering techniques. We create depth by painting background trees with lighter colors and foreground elements with darker, more saturated tones. Adding small wildlife silhouettes completes the enchanted woodland atmosphere.
Underwater Ariel scenes challenge artists with complex color relationships and flowing movements. We recommend starting with deep blue backgrounds and gradually building coral formations using oranges, pinks, and purples. Swimming fish require quick, confident brush strokes to capture their fluid motion.
Character portraits demand exceptional detail work and color matching. We’ve perfected Belle’s facial features by studying animation stills and practicing skin tone mixing. Creating Jasmine’s jewelry requires metallic gold paints and steady dotting techniques.
Stamping and Decal Applications
Professional stamping plates offer precise Disney character outlines that ensure consistent results across multiple nails. We recommend investing in high-quality silicone stampers that pick up intricate details from Mickey Mouse heads to Anna’s braided patterns. Clear stamping allows you to position designs exactly where desired.
Layering stamped images creates complex Disney scenes without hand-painting skills. We start with background elements like clouds or waves, then add character stamps on top. Multiple stamping sessions build depth and visual interest across your complete manicure.
Water decals provide photorealistic Disney imagery that rivals professional salon work. We’ve discovered that applying them over slightly tacky base colors improves adhesion and longevity. Trimming decals to fit nail shapes requires sharp scissors and patience for perfect application.
Custom decal creation using Disney-inspired artwork opens unlimited design possibilities. We recommend printing on high-quality decal paper and sealing with multiple topcoat layers. Combining stamped elements with custom decals creates unique Disney nail art that reflects your personal style and favorite characters.
Heat activation decals change colors when exposed to temperature variations, creating magical transformations reminiscent of Disney movie effects. We apply these over solid base colors to maximize their visual impact and durability.
Conclusion
Disney nail art opens up a magical industry where your fingertips become tiny canvases for storytelling. We’ve shown you how to transform simple manicures into enchanting masterpieces that celebrate your favorite characters and moments.
Whether you’re drawn to princess elegance or villain drama the possibilities are endless. From beginner-friendly Mickey silhouettes to advanced 3D techniques there’s a Disney design perfect for every skill level and occasion.
Your nails can now carry the magic of Disney wherever you go. With these creative ideas and professional techniques you’re ready to bring fairy tale dreams to life right at your fingertips.
Frequently Asked Questions
What skill level is required for Disney nail art?
Disney nail art caters to all skill levels. Beginners can start with simple designs like Mickey Mouse silhouettes or basic color blocking, while advanced artists can create intricate hand-painted scenes and 3D embellishments. The key is starting with easier techniques and gradually building your skills.
How long do Disney-themed nail designs typically last?
With proper application and top coat sealing, Disney nail art can last 7-14 days on natural nails and up to 3-4 weeks on gel or acrylic extensions. Longevity depends on your daily activities, nail care routine, and the complexity of the design used.
What basic supplies do I need to start Disney nail art?
Essential supplies include base coat, colored nail polishes in Disney character colors, fine detail brushes, dotting tools, nail art pens, rhinestones, glitter, and top coat. Advanced designs may require stamping plates, decals, or 3D sculpting materials for more elaborate effects.
Can I create Disney nail art without artistic skills?
Absolutely! You can use nail stamping plates, decals, stickers, and stencils to achieve professional-looking Disney designs without hand-painting skills. These tools make it easy to create Mickey heads, character silhouettes, and intricate patterns with minimal artistic experience required.
Which Disney characters are easiest for beginners?
Mickey and Minnie Mouse are ideal for beginners due to their simple geometric shapes. Basic designs include black circles for Mickey’s head, red polka dots for Minnie, and classic color combinations. These characters require minimal detail work while still creating recognizable Disney magic.
How do I make my Disney nail art look more professional?
Focus on clean lines, proper base coat application, thin polish layers, and quality top coat sealing. Use appropriate brush sizes for details, allow proper drying time between layers, and consider investing in professional stamping tools or decals for intricate designs.
Are there Disney nail designs suitable for special occasions?
Yes! Disney nail art adapts perfectly to holidays and events. Halloween features villain themes like Maleficent and Cruella, Christmas incorporates Mickey ornaments and castle scenes, while weddings can feature elegant princess-inspired designs with sophisticated color palettes and subtle character elements.
How do I remove intricate Disney nail art safely?
Soak cotton balls in acetone-free nail polish remover, place on each nail, and wrap with foil for 10-15 minutes. Gently push off softened polish with a cuticle pusher. For gel or heavily embellished designs, professional removal is recommended to prevent nail damage.


