We all know that perfectly painted nails can instantly elevate any look from ordinary to extraordinary. Whether you’re getting ready for a special occasion or just want to add some sparkle to your everyday routine cute nail art has become the ultimate form of self-expression.
From delicate floral patterns to playful geometric designs there’s a industry of adorable nail painting ideas waiting to transform your fingertips into tiny canvases. We’ve discovered that the best part about cute nail art isn’t just how it looks – it’s how it makes you feel confident creative and utterly fabulous.
Ready to ditch those boring solid colors? We’re about to share some of the most charming and achievable nail painting ideas that’ll have everyone asking where you got your nails done. These designs prove that you don’t need to be a professional artist to create stunning results right at home.
Classic French Tips With a Cute Twist
French manicures have evolved far beyond the traditional white tips, offering endless possibilities for creative expression. We’ve discovered that adding playful elements to this timeless style creates stunning results that work for any occasion.
Colorful French Tips
Swap white polish for vibrant rainbow hues to create an eye-catching French manicure that stands out. We love using pastels like lavender, mint green, and baby pink for a soft spring look that complements any outfit. Choose bold colors such as coral, turquoise, or sunny yellow for summer vibes that make your nails the perfect accessory.
Paint each nail tip with a different color to create a rainbow effect that’s both playful and sophisticated. We recommend using gel polish for these colorful French tips since it provides better coverage and lasts up to two weeks without chipping. Try ombre French tips by blending two complementary colors together for a gradient effect that looks professionally done.
Heart-Shaped Tips
Create romantic nail art by painting heart shapes instead of traditional straight lines across your nail tips. We suggest starting with a light pink base color and using a deeper rose or red shade for the heart designs. Use a small dotting tool or toothpick to form perfect heart shapes by making two dots side by side and drawing them down to a point.
Make tiny hearts in white, gold, or silver for an elegant look that works perfectly for date nights or special occasions. We find that placing three small hearts across each nail tip creates the most balanced and visually appealing design. Consider alternating between solid hearts and outline hearts to add texture and visual interest to your manicure.
Glitter French Manicure
Add sparkle to your French tips using fine glitter polish or loose glitter mixed with clear topcoat for maximum shine. We recommend applying a thin layer of glitter over traditional white French tips for a subtle shimmer that catches the light beautifully. Choose holographic glitter for a rainbow effect that shifts colors as you move your hands.
Apply chunky glitter sparingly along the tip line for a more dramatic look that’s perfect for parties or special events. We’ve found that using a makeup sponge to dab glitter polish creates better coverage than brushing it on directly. Seal your glitter French manicure with two coats of clear topcoat to prevent the glitter from catching on clothing or hair.
Adorable Animal Nail Art Designs
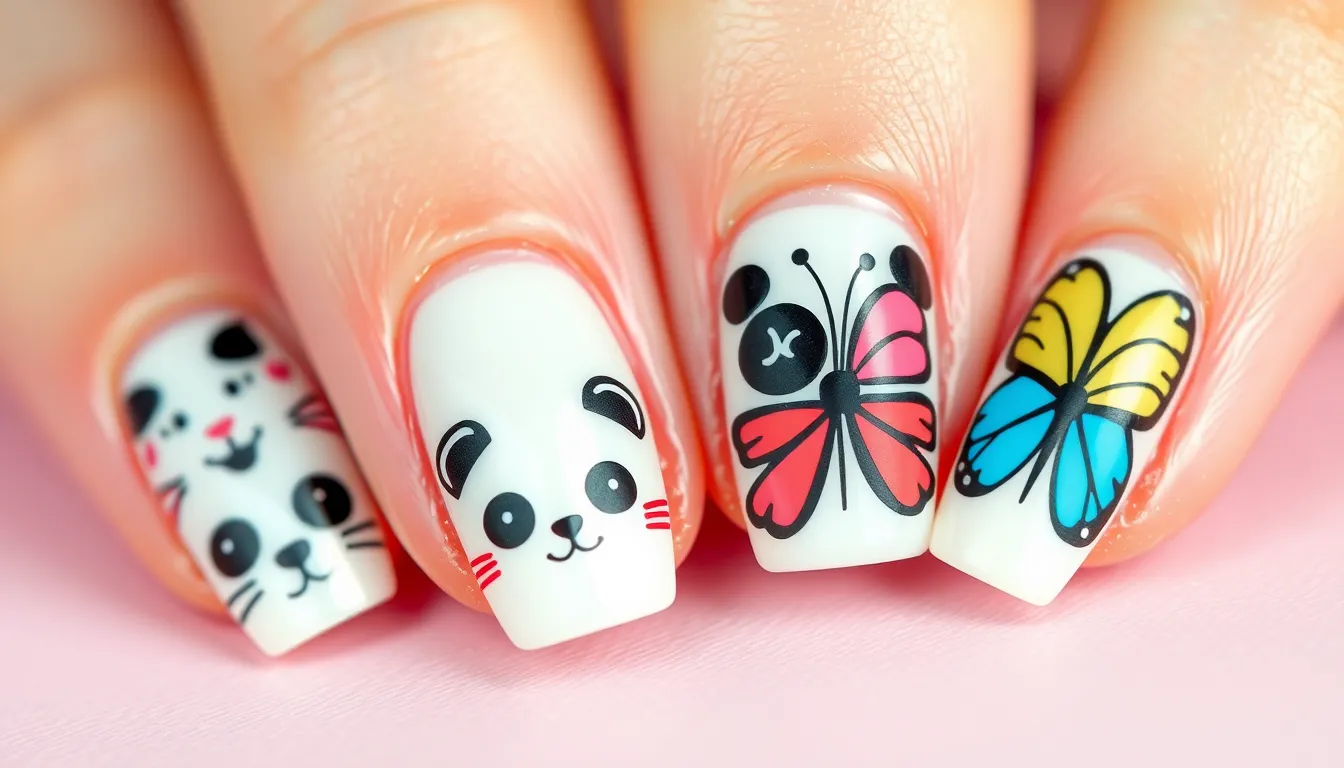
Animal designs bring playful charm to nail art while allowing endless creativity. These cute creatures transform ordinary manicures into conversation starters that showcase personality.
Cat Face Nails
Cat face nail designs capture feline charm with simple yet adorable details. We love creating these by painting a base coat in soft pink or nude, then adding tiny black dots for eyes and a small triangle for the nose. Whiskers drawn with a thin brush or striping tape complete the look perfectly.
Different cat expressions add variety to this design approach. Sleepy cats work beautifully with curved lines for closed eyes, while alert cats feature wide open circles. We recommend practicing the basic face shape on a piece of paper first to master the proportions.
Black cats on white backgrounds create striking contrast for dramatic effect. White cats on pastel backgrounds offer a softer, more delicate appearance. Orange tabby patterns using thin stripes add complexity for those wanting detailed designs.
Panda Bear Designs
Panda nail art combines black and white elements for instantly recognizable cuteness. We start with a white base coat, then create the signature black eye patches using a small brush or dotting tool. The key lies in making the patches symmetrical and properly sized for the nail.
Round black ears positioned at the top corners complete the classic panda look. We suggest using a steady hand or nail art stamps for consistent ear placement across multiple nails. Small white dots inside the black eye patches create highlights that bring the design to life.
Bamboo accents on surrounding nails enhance the panda theme beautifully. Green stems with small leaves painted on accent nails create a cohesive set. We find that alternating panda faces with bamboo designs prevents overwhelming the overall look.
Butterfly Wings
Butterfly wing patterns showcase intricate beauty through colorful designs and delicate details. We begin with gradient backgrounds using sponges to blend complementary colors like purple to pink or blue to teal. This creates the perfect canvas for wing patterns.
Symmetrical wing shapes require careful planning and steady application techniques. We recommend sketching the basic wing outline first, then filling in with colors and patterns. Metallic accents along wing edges add dimension and catch light beautifully.
Multiple butterfly styles offer diverse design possibilities for creative expression. Monarch butterflies feature orange and black patterns, while blue morpho designs use brilliant blues with black borders. We love mixing different butterfly species across nails for a nature inspired collection that feels cohesive yet varied.
Sweet Floral Nail Painting Ideas
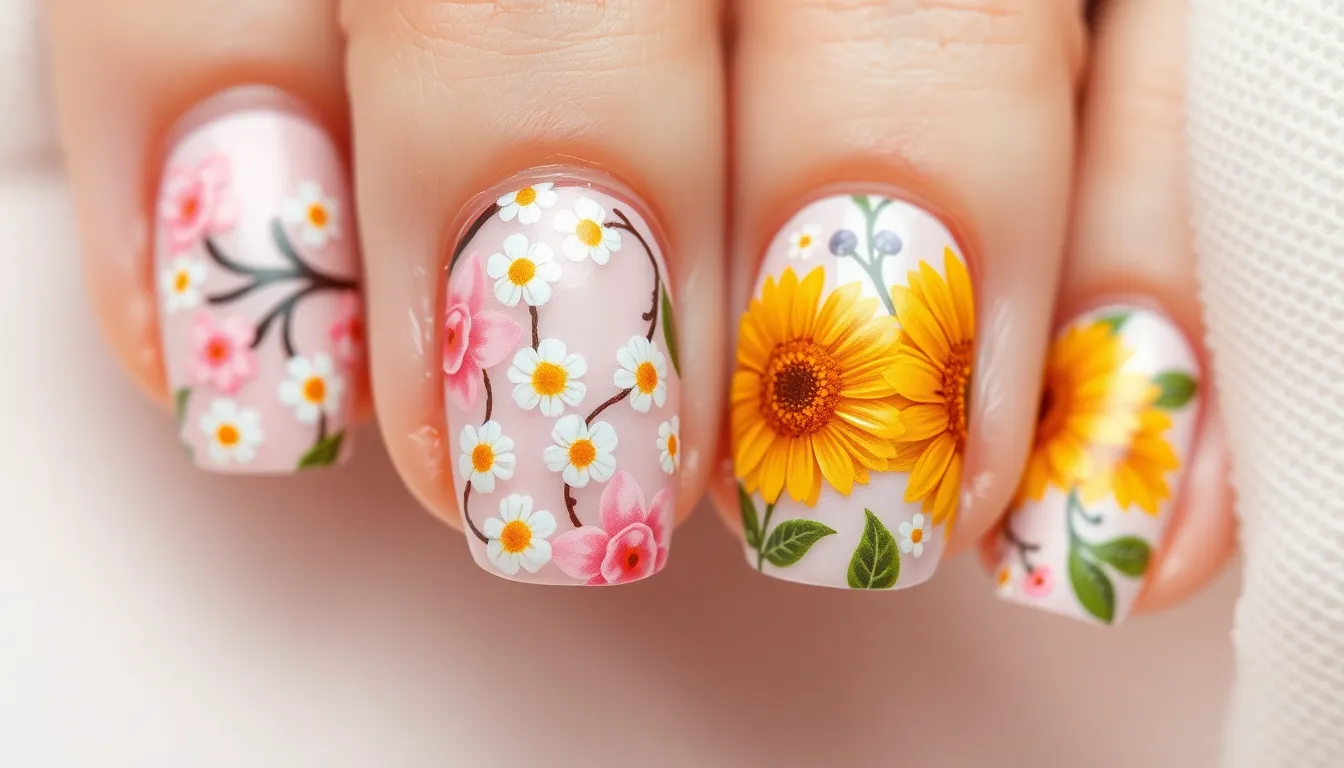
Floral nail art brings natural beauty to our fingertips while creating designs that work for any season. We’ll explore three charming flower motifs that transform our nails into miniature gardens.
Daisy Chain Designs
Daisy chain nail art creates a delicate, interconnected pattern across our nails that captures the essence of spring meadows. We start with a soft pastel base color like mint green or baby blue to make the white daisies pop. Small white dots serve as the flower centers, while thin white petals extend outward using a detail brush or dotting tool.
Creating the chain effect involves connecting multiple daisies with tiny green stems that flow from nail to nail. We can paint 2-3 daisies per nail on longer nails, or focus on one statement daisy on shorter nails. Adding small green leaves between the flowers enhances the natural garden feel.
The beauty of daisy chains lies in their imperfect charm – slightly irregular petals and varying flower sizes make the design more authentic. We recommend using yellow centers on some daisies and white centers on others for visual interest.
Cherry Blossom Art
Cherry blossom nail art brings delicate Japanese elegance to our manicure with soft pink petals and graceful branch designs. We begin with a nude or light pink base that mimics natural nail tones, allowing the blossoms to appear as if they’re floating on our nails.
Branch creation involves using a thin nail art brush to paint curved brown lines across our nails, representing the iconic cherry tree limbs. We add small pink flowers along these branches using a dotting tool, creating five-petaled blossoms with darker pink centers. Gradient techniques work beautifully here – lighter pink at the petal edges fading to deeper pink at the center.
Scattered petals around the branches simulate the natural falling effect of cherry blossoms. We can paint individual petals drifting down our nails using light, feathery brushstrokes. Adding tiny white highlights to each petal creates dimension and catches light beautifully.
Sunflower Accents
Sunflower nail art brings bold, cheerful energy to our manicure with vibrant yellow petals and rich brown centers. We choose a warm base color like cream or light yellow to complement the sunflower’s natural tones. Large sunflowers work best as statement pieces on our ring fingers or thumbs, while smaller blooms accent the other nails.
Creating realistic sunflower centers involves using a dark brown or black base with small dots of lighter brown and gold to mimic the seed pattern. We paint pointed oval petals radiating outward from the center using various shades of yellow – bright yellow, golden yellow, and pale yellow for depth.
Layering techniques enhance our sunflower designs by adding multiple petal layers with slightly different angles. We can paint longer petals in the back layer and shorter ones in front, creating a three dimensional effect. Green stems and leaves complete the design, extending from the base of our nails upward toward the flower heads.
Fun Polka Dot Patterns
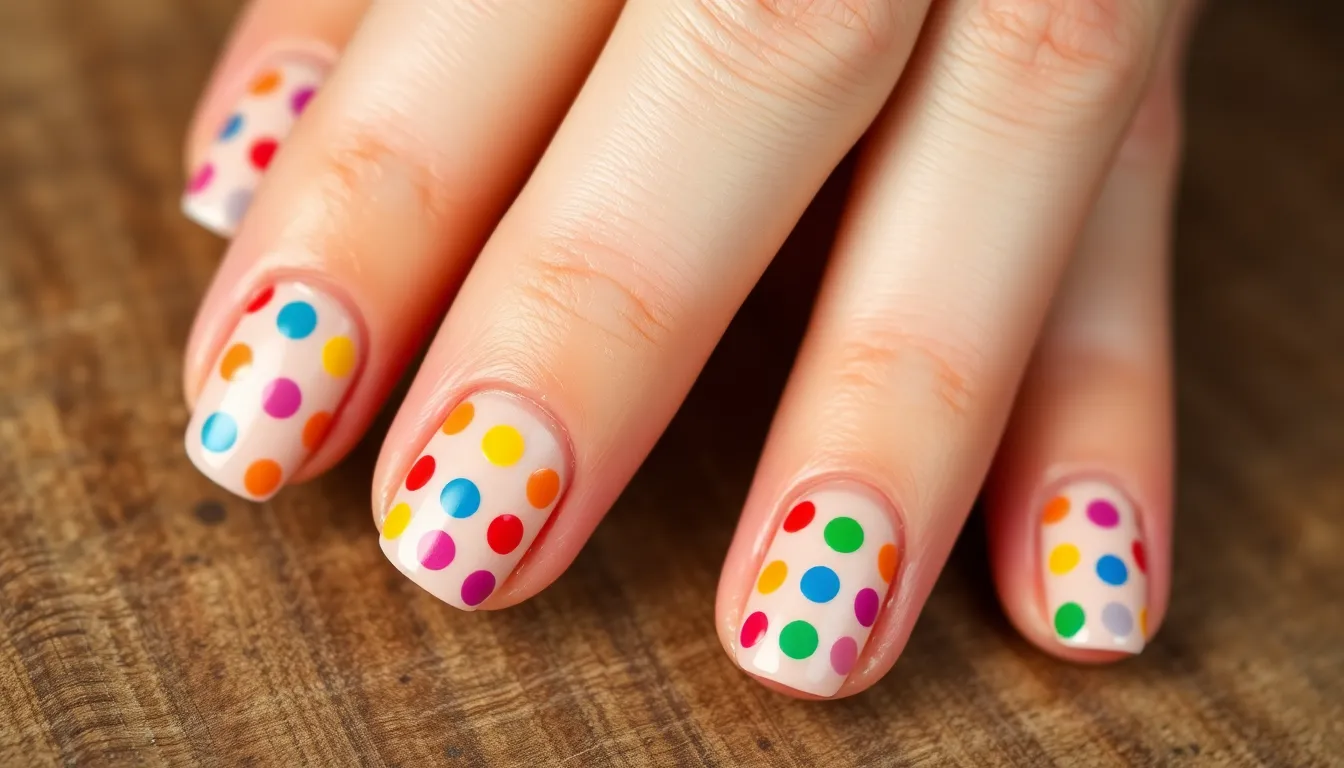
Polka dots bring timeless charm to our nail designs while offering endless creative possibilities. These playful patterns transform simple manicures into eye-catching statement pieces that work for any occasion.
Rainbow Polka Dots
Rainbow polka dots create vibrant nail art that celebrates every color of the spectrum. We start with a white or nude base to make the colors pop against the neutral background. Using a dotting tool or bobby pin, we apply dots in red, orange, yellow, green, blue, indigo, and violet sequence across each nail.
Spacing the colors evenly ensures a balanced rainbow effect that flows naturally from thumb to pinky. We can create uniform dot sizes for a clean geometric look or vary the sizes for a more organic appearance. This design works beautifully on all nail lengths and adds instant joy to our everyday style.
Alternative arrangements include creating rainbow stripes with dots or focusing each nail on a single rainbow color for a coordinated gradient effect.
Ombre Dot Designs
Ombre dot designs blend colors seamlessly from light to dark across our nails. We choose two complementary colors like pink to purple or blue to teal for the most striking gradient effects. Starting with the lightest shade near the cuticle, we gradually transition to the darkest color at the nail tips.
Each row of dots uses a slightly different shade created by mixing the base colors in varying proportions. We apply five to seven rows depending on nail length to achieve a smooth color transition. The dots overlap slightly to create the blended ombre appearance that makes colors flow into each other.
This technique works exceptionally well with warm sunset colors like orange to red or cool ocean tones from mint to navy blue.
Mixed Size Dot Art
Mixed size dot art adds ever-changing visual interest through varying circle dimensions across our nails. We use different tools to create dots in multiple sizes: toothpicks for tiny dots, bobby pins for medium circles, and pencil erasers for larger focal points. The largest dots serve as anchor points while smaller dots fill the remaining space.
Random placement creates an organic polka dot pattern that feels natural and effortless. We maintain visual balance by distributing larger dots evenly across all nails rather than clustering them on exact fingers. Color coordination ties the design together whether we use monochromatic schemes or complementary color pairs.
This versatile approach allows us to customize density and spacing based on personal preference while creating unique patterns that never look identical.
Charming Seasonal Nail Themes
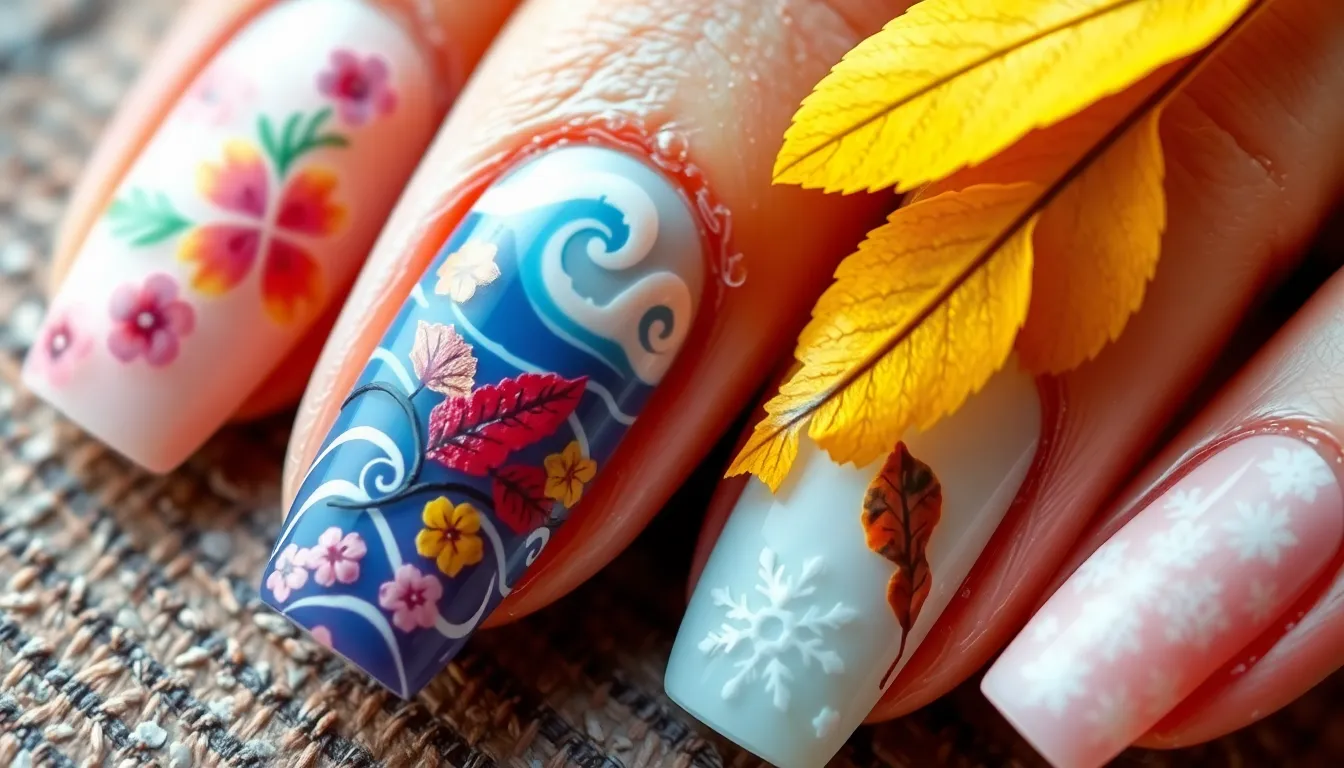
Seasonal nail themes let us celebrate each time of year with perfectly timed manicures that capture nature’s changing moods. We’ll explore four delightful seasonal approaches that transform our nails into miniature canvases celebrating spring’s renewal, summer’s energy, autumn’s warmth, and winter’s magic.
Spring Pastel Designs
Spring pastel designs welcome the season’s fresh energy with soft, dreamy colors that mirror blooming gardens and clear skies. We love creating gradient manicures using baby pink, lavender, mint green, and butter yellow that blend seamlessly across our nails. Combine these gentle hues with tiny white dots or delicate floral accents for extra springtime charm.
Cherry blossom branches look stunning when painted over a pale pink base, while small daisies add whimsical touches to mint green backgrounds. We recommend using a makeup sponge to dab multiple pastel shades together, creating that perfect spring sunset effect. Easter themes work beautifully too, with tiny painted eggs, bunnies, or chicks adorning our accent nails.
Summer Beach Vibes
Summer beach vibes bring tropical paradise to our fingertips with bold blues, coral oranges, and sandy neutrals that capture coastal magic. We create stunning ocean waves using different shades of blue and white, starting with navy at the cuticle and blending to sky blue at the tips. Palm tree silhouettes against sunset backgrounds make perfect accent nail designs.
Seashell patterns add elegant beachy touches when painted in pearl white or soft pink over ocean blue bases. We love incorporating gold foil accents that mimic sun reflections on water, plus tiny starfish or seahorse details for underwater themes. Tropical fruits like pineapples, watermelons, and coconuts create fun, vibrant summer nail art that celebrates vacation season.
Fall Leaf Patterns
Fall leaf patterns embrace autumn’s rich color palette with warm oranges, deep reds, golden yellows, and earthy browns that mirror changing foliage. We paint individual leaves using a thin brush, creating maple, oak, and birch designs that cascade across our nails like natural confetti. Gradient backgrounds from golden yellow to burnt orange provide stunning backdrops for darker leaf silhouettes.
Pumpkin spice themes work perfectly for October, featuring tiny pumpkins, acorns, and autumn flowers painted in seasonal hues. We recommend creating textured effects using a dry brush technique that mimics real leaf surfaces. Thanksgiving inspired designs with cornucopias, harvest wheat, or gratitude quotes add meaningful touches to our fall manicures.
Winter Snowflake Art
Winter snowflake art transforms our nails into frozen wonderlands with icy blues, silver metallics, and pure whites that capture winter’s crystalline beauty. We create intricate snowflakes using white nail art pens or thin brushes, making each design unique just like real snow crystals. Deep navy or midnight blue bases make white snowflakes pop dramatically.
Holiday themes blend perfectly with winter nail art, incorporating Christmas trees, candy canes, or New Year’s sparkle into our designs. We love adding holographic glitter that mimics ice crystals, plus silver foil accents that catch light like fresh snow. Penguin families, polar bears, or winter mittens create adorable cold weather nail art that brings smiles during chilly months.
Playful Geometric Nail Designs
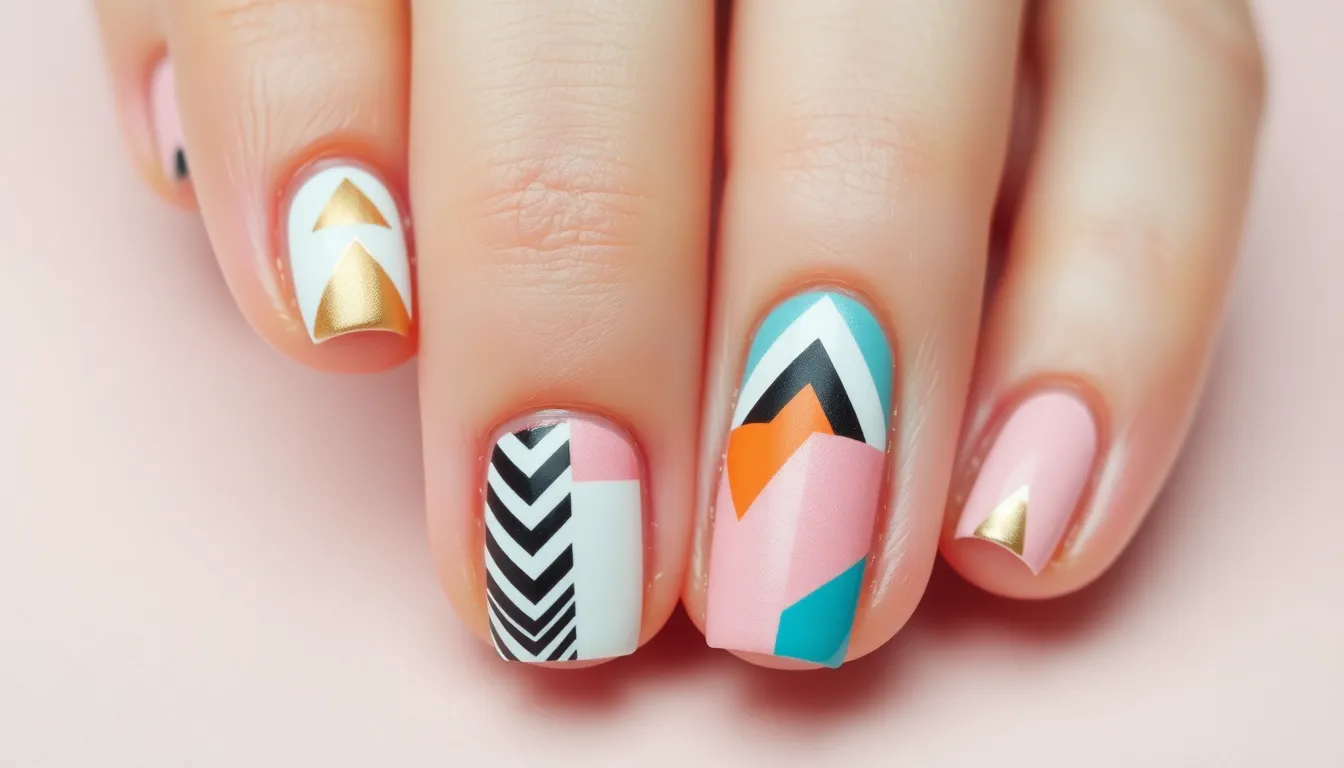
Geometric nail designs bring modern sophistication to our manicures with clean lines and structured patterns. We can create stunning visual effects using simple shapes that make bold artistic statements on our fingertips.
Triangle Patterns
Triangle patterns offer endless creative possibilities for our geometric nail art adventures. We love starting with a neutral base color like nude or white, then adding triangles in contrasting shades for maximum impact. Creating triangle designs becomes simple when we use striping tape to form perfect angular lines, removing the tape while polish is still wet for crisp edges.
Alternating triangle sizes across our nails creates ever-changing visual rhythm that catches the eye. We can arrange small triangles at the cuticle area and gradually increase their size toward the nail tip for an ombre effect. Metallic triangle accents add luxurious touches when placed strategically over matte base colors.
Color combinations like black triangles on white bases create classic contrast, while pastel triangles on clear backgrounds offer subtle elegance. We achieve professional looking results by working with one nail at a time and allowing each color to dry completely before adding the next layer.
Chevron Stripes
Chevron stripes transform our nails into modern geometric masterpieces with their distinctive zigzag patterns. We create these striking designs by mapping out the chevron angles using thin striping brushes or nail art pens for precision. Starting from the center of each nail ensures symmetrical chevron placement that looks professionally done.
Monochromatic chevron designs using different shades of the same color family create sophisticated depth and dimension. We can experiment with three tone chevrons using light, medium, and dark versions of colors like pink, blue, or green for gradient effects. Bold color combinations like black and white chevrons deliver high impact drama that works perfectly for special occasions.
Thin chevron lines create delicate patterns perfect for everyday wear, while thick chevron bands make bold fashion statements. We recommend practicing the zigzag motion on paper first to develop steady hand control before attempting the design on our nails.
Color Block Designs
Color block designs showcase our creativity through geometric sections of solid colors arranged in artistic compositions. We achieve stunning results by dividing each nail into distinct color zones using tape barriers for clean separations. These modern designs work beautifully with both complementary and contrasting color palettes.
Square and rectangular color blocks create structured looks that complement professional settings, while diagonal divisions add ever-changing energy to our manicures. We can experiment with different block sizes, using larger sections on accent nails and smaller geometric pieces on remaining fingers for balanced designs.
Three color combinations work exceptionally well for color blocking, allowing us to create sophisticated patterns without overwhelming the nail surface. Popular combinations include navy, white, and gold for nautical themes, or coral, mint, and cream for fresh spring vibes. We finish color block designs with a quality top coat to blend the color transitions seamlessly and extend wear time.
Cute Character-Inspired Nail Art
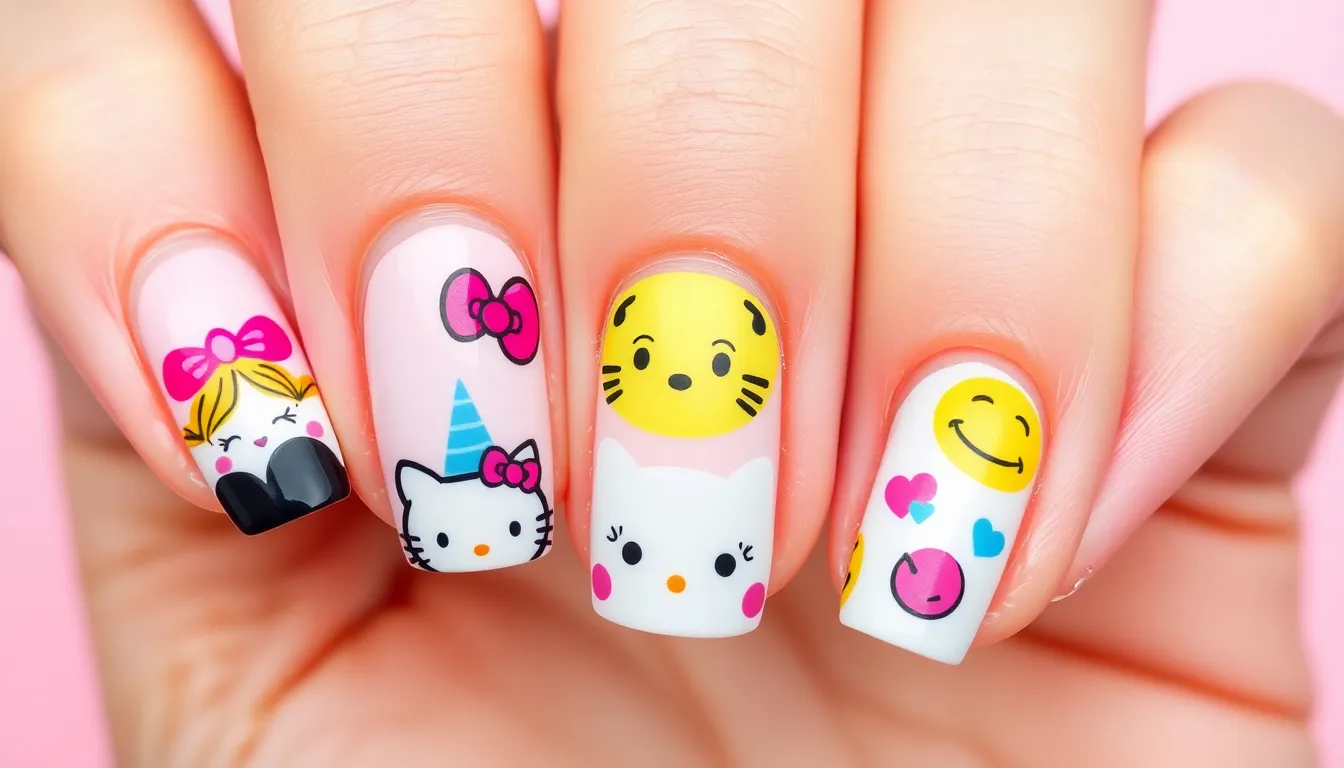
Character inspired nail art allows us to showcase our favorite personalities right on our fingertips. These whimsical designs bring beloved figures to life through creative nail painting techniques.
Disney Princess Nails
Disney princess nails transform our manicures into magical storytelling canvases. We can create Cinderella’s elegance using powder blue bases with silver glitter accents and tiny glass slipper decals. Belle’s enchanted look comes alive through golden yellow backgrounds paired with red rose details and book motifs. Ariel’s underwater theme shines with seafoam green bases, purple shells, and iridescent scales painted with fine brushes.
Each princess design requires exact color palettes that match their iconic appearances. We recommend starting with Elsa’s frozen beauty using icy blue gradients, white snowflakes, and crystal rhinestones for authentic sparkle. Snow White’s classic charm emerges through red apple accents on white bases with yellow ribbon details.
Creating princess crowns on accent nails adds royal flair to any Disney inspired manicure. We use gold nail polish pens to draw delicate tiara outlines, then fill them with corresponding princess colors for personalized touches.
Hello Kitty Designs
Hello Kitty designs bring kawaii culture directly to our nail art collections. We create the iconic white cat face using circular white bases, then add her signature features with black dots for eyes and a yellow triangle nose. Pink bow accents on ring fingers complete the classic Hello Kitty aesthetic perfectly.
Different Hello Kitty expressions add personality variations to our manicures. We can paint sleepy Hello Kitty with curved lines for closed eyes or surprised versions with larger circular eyes. Each nail becomes a tiny Hello Kitty portrait with unique facial expressions and colorful backgrounds.
Mixing Hello Kitty with her friends creates adorable character collections across all ten nails. We include Keroppi’s green frog face, My Melody’s pink bunny ears, and Badtz Maru’s penguin features for complete Sanrio themed manicures. Pastel rainbow backgrounds make these character designs pop with extra cuteness.
Emoji Face Art
Emoji face art captures our digital expressions through miniature nail paintings. We recreate the heart eyes emoji using yellow circular bases with red heart shapes positioned where eyes would naturally sit. The classic smiley face requires steady hands to paint perfect curved smiles using black nail art brushes.
Different emoji expressions tell stories across our fingertips through varied facial features. We paint the winking emoji with one closed eye and an open smile, while the crying laughing emoji needs tiny blue teardrops and wide grins. Each emoji face becomes a conversation starter that reflects our current moods.
Creating emoji nail art requires exact techniques for achieving recognizable features. We use dotting tools for perfect circular eyes and fine liner brushes for precise mouth curves. Yellow bases work best for traditional emoji designs, though we can experiment with different skin tone shades for personalized emoji representations.
Simple Yet Adorable Minimalist Styles
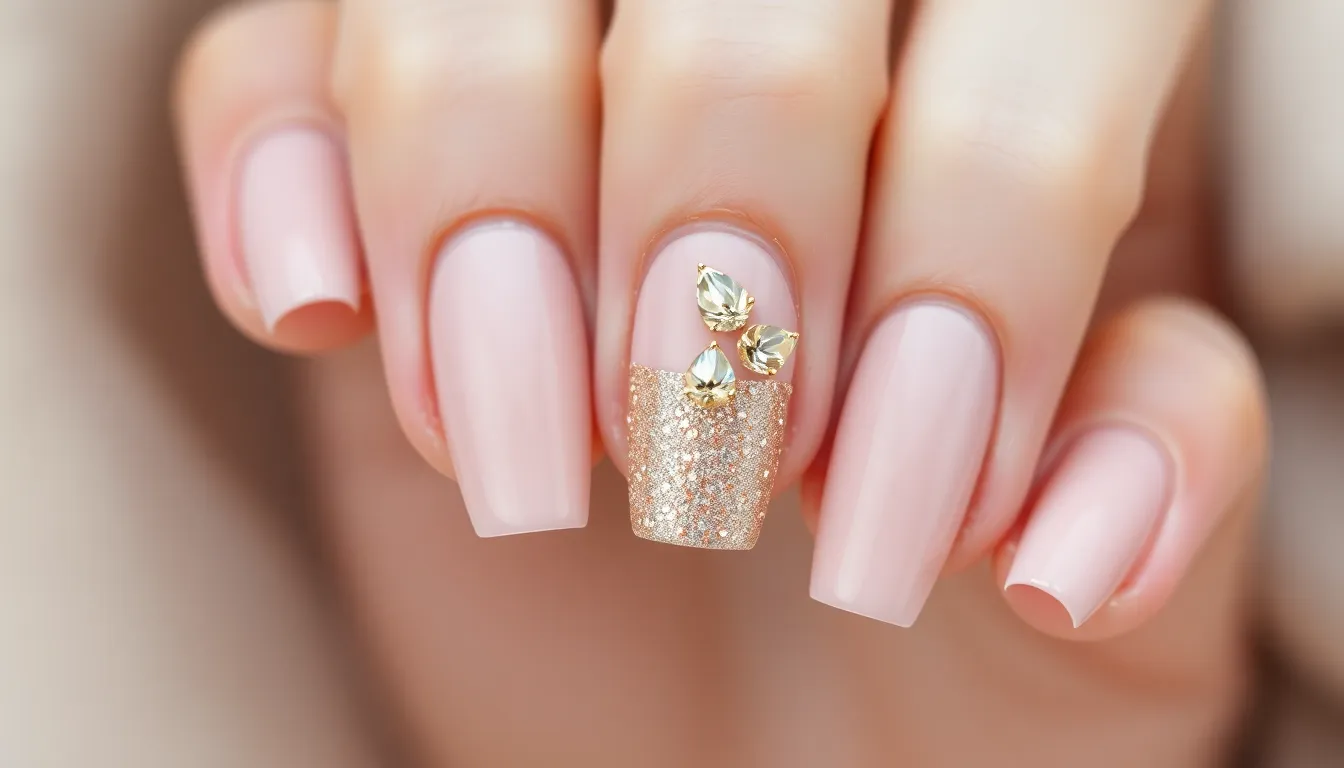
Minimalist nail art proves that less truly creates more impact when it comes to cute manicure designs. We’ll explore elegant approaches that deliver maximum charm with minimal effort and materials.
Single Accent Nail
Single accent nails transform ordinary manicures into eye-catching statements with just one decorated finger per hand. We recommend choosing your ring finger as the focal point since it naturally draws attention and creates visual balance. Start with a neutral base color like nude, soft pink, or classic white on all nails, then dedicate your creative energy to one special nail.
Gold foil accents add instant luxury to your accent nail without requiring artistic skills. Apply a thin layer of nail glue or foil adhesive, then gently press metallic foil onto the tacky surface for an effortless gilded effect. Rhinestone placement creates sparkly focal points that catch light beautifully throughout the day. Choose one statement stone for the center of your accent nail, or arrange three small crystals in a triangular pattern.
Glitter gradients blend seamlessly from your cuticle to the tip, creating a sophisticated ombre effect on your chosen accent finger. Use a makeup sponge to dab glitter polish starting heavily at the base and gradually lightening toward the tip for professional-looking results.
Tiny Symbol Designs
Tiny symbols pack personality into miniature masterpieces that speak volumes about your style preferences. We suggest practicing these designs on a nail wheel first to perfect your technique before applying them to your actual nails. Hearts remain the most beloved mini symbol, requiring only a steady hand and a thin detail brush to create perfect romantic accents.
Stars shine brilliantly when painted in metallic shades like gold, silver, or rose gold against dark base colors. Create five-pointed stars using intersecting lines, or opt for simple four-pointed sparkles for easier execution. Lightning bolts add edgy energy to minimalist manicures with their ever-changing zigzag shapes that command attention.
Tiny flowers bring natural sweetness to your fingertips through simple petal arrangements around central dots. Moon phases create mystical beauty when painted in white or silver against deep navy or black backgrounds, representing different lunar stages across multiple nails.
Negative Space Art
Negative Space Art transforms the absence of polish into stunning design elements that showcase your natural nail beauty. We love how these techniques create optical illusions that appear complex while remaining surprisingly simple to execute. Geometric cutouts use tape or vinyl stencils to block sections during base color application, revealing clean nail lines in striking patterns.
Half moon designs celebrate the classic French manicure concept with modern minimalist twists. Leave your cuticle area natural while painting bold colors on the remaining nail surface, or reverse the technique by painting only the half moon section. Striped negative space creates contemporary linear patterns through strategic tape placement during the painting process.
Triangle windows frame portions of your natural nail within bold color backgrounds, forming eye-catching geometric shapes. Curved negative space follows your nail’s natural shape to create elegant arcs that elongate your fingers while maintaining sophisticated simplicity.
Sparkly and Glittery Cute Options
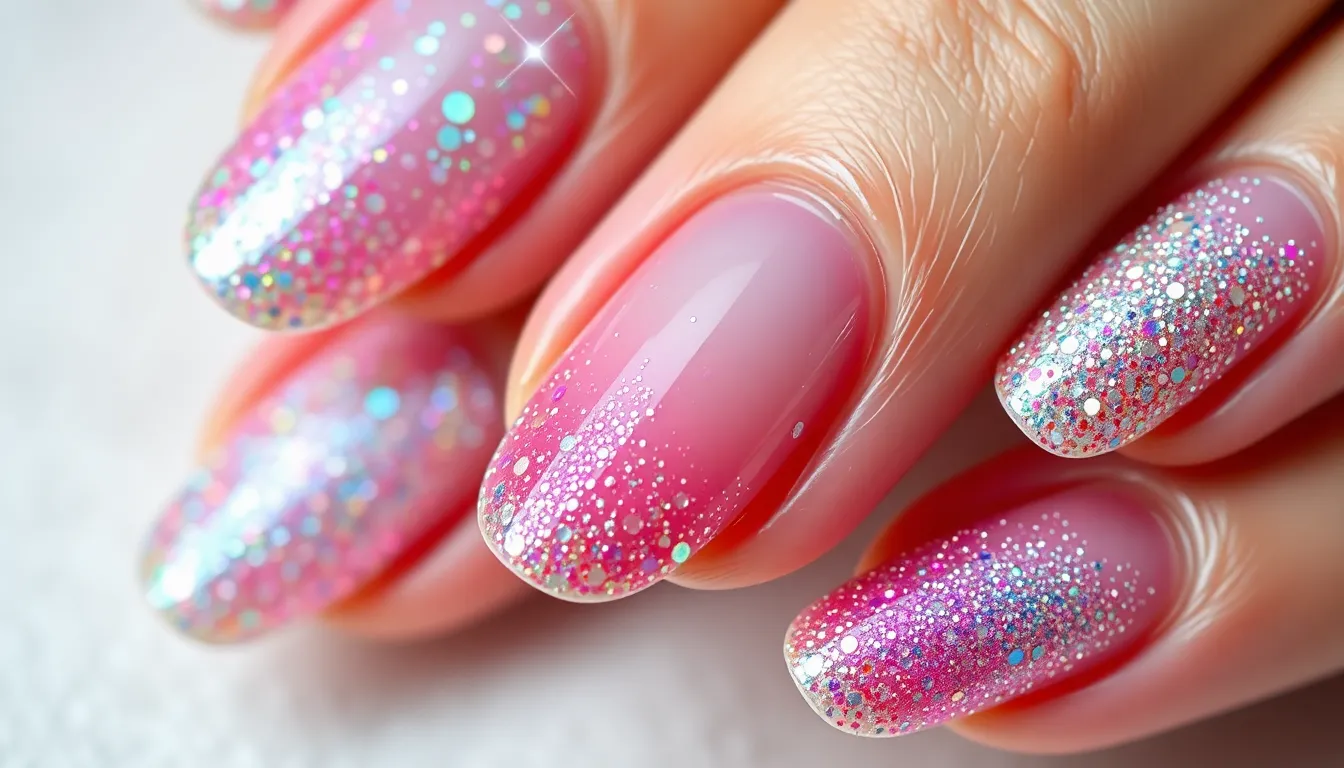
Shimmery finishes elevate nail art from ordinary to extraordinary. We’ll explore stunning glittery techniques that add glamour to any manicure.
Holographic Finishes
Holographic nail polishes create rainbow reflections that shift and dance with every movement of your hands. These mesmerizing finishes work beautifully as full coverage applications or as accent elements over other designs. We recommend applying holographic polish over a black or dark blue base to intensify the prismatic effect.
Chrome powder techniques deliver mirror-like holographic results that catch light from every angle. Buff the powder over gel polish for professional-looking holographic nails that rival salon manicures. Popular chrome shades include silver, rose gold, and rainbow versions that shift through multiple color spectrums.
Holographic vinyl wraps offer precise geometric patterns with iridescent appeal. Cut these adhesive films into triangles, stripes, or moon shapes for structured holographic accents. Layer them over solid colors to create dimensional designs that sparkle without overwhelming the overall look.
Chunky Glitter Accents
Large hexagonal glitter pieces create bold statement nails that demand attention. Apply these oversized sequins over wet base polish using tweezers for precise placement. We suggest using chunky glitter on accent nails only to maintain balance across your manicure.
Confetti glitter mixes combine different shapes and sizes for textured sparkle effects. These specialty glitters include stars, diamonds, circles, and irregular pieces that create carnival-like celebrations on your fingertips. Sandwich thick glitter between base and top coats to prevent rough textures that catch on clothing.
Biodegradable chunky glitters offer eco-friendly sparkle options made from plant-based materials. These sustainable alternatives provide the same visual impact as traditional plastic glitters while reducing environmental impact. Choose from colors like emerald green, sapphire blue, and rose gold for earth-conscious glamour.
Gradient Sparkle Effects
Glitter gradients blend sparkle intensity from cuticle to tip for sophisticated dimensional looks. Start with heavy glitter concentration at the nail base and gradually decrease density toward the tips using a makeup sponge. This technique works especially well with gold and silver glitter combinations.
Ombre sparkle designs transition between different glitter colors seamlessly. Apply pink glitter near the cuticles and blend into purple glitter at the tips for sunset-inspired gradients. We find that using similar glitter sizes ensures smooth color transitions without abrupt changes.
Reverse gradient techniques place the heaviest sparkle concentration at nail tips. This approach creates the illusion of light catching at fingertips while maintaining subtle glamour near cuticles. Apply glitter gradually using patting motions rather than brushing to achieve even distribution and prevent streaking.
Easy DIY Techniques for Beginners
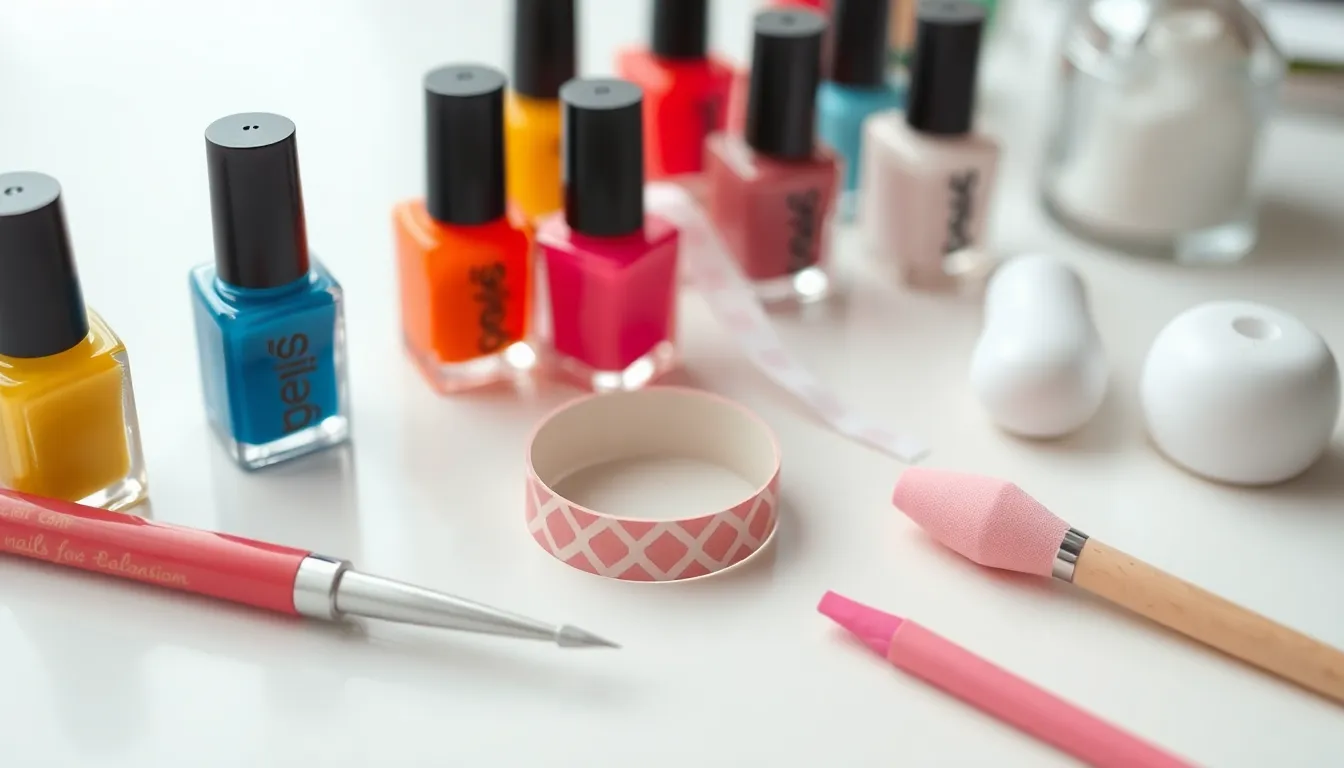
Starting your nail art journey doesn’t require expensive tools or years of practice. We’ve gathered simple techniques that create stunning results with basic supplies you likely have at home.
Tape Method Designs
Geometric patterns become effortless when we use regular household tape as our guide. Painter’s tape or washi tape works best because it removes cleanly without damaging your base polish. Apply your base color first and let it dry completely before placing tape strips across your nails in straight lines, diagonal patterns, or chevron shapes.
Creating crisp stripes requires patience with the drying process. Paint over the taped sections with your accent color, then carefully remove the tape while the polish is still slightly wet. This prevents peeling and ensures clean edges every time.
Color blocking becomes simple with tape sectioning techniques. Divide each nail into two or three sections using tape, then fill each area with different colors. Metallic shades paired with pastels create stunning contrast, while monochromatic schemes offer sophisticated elegance.
Dotting Tool Patterns
Polka dots transform into professional-looking designs with the right dotting technique. Dip a dotting tool (or bobby pin end) into polish and gently press it onto your nail surface. The key is consistent pressure and spacing between dots for uniform results.
Flower petals emerge naturally from strategic dot placement. Create five dots in a circle formation, then add a contrasting center dot to complete each bloom. Vary the sizes by using different ends of your dotting tool or household items like toothpicks for smaller details.
Mandala patterns start with a central dot and expand outward in concentric circles. Begin with your focal color in the center, then surround it with alternating colors in ring formations. Each ring should contain more dots than the previous one to maintain proportional balance.
Sponge Gradient Technique
Ombre effects become achievable through makeup sponge application methods. Paint two or three polish colors in horizontal stripes on a cosmetic sponge, ensuring they overlap slightly where you want blending to occur. Dab the sponge onto your nail with light bouncing motions rather than dragging movements.
Color transitions appear seamless when we work with similar tone families. Choose colors that naturally flow into each other, such as pink to purple or blue to green. Apply multiple light layers rather than one heavy application for smoother gradient results.
Cleanup becomes essential after sponge gradient application. Use a small brush dipped in acetone to remove excess polish from your cuticles and skin. Apply a quality top coat to seal the design and smooth any texture created by the sponging technique.
Conclusion
We’ve explored an incredible industry of nail art possibilities that prove beautiful manicures don’t have to be complicated or expensive. From classic French twists to adorable animal designs these creative options offer something special for every personality and skill level.
The beauty of nail art lies in its accessibility – whether you’re drawn to minimalist elegance or bold sparkly statements you can achieve stunning results with basic tools and techniques. Each design we’ve shared encourages personal expression while building confidence in your artistic abilities.
Your nails are tiny canvases waiting for creativity to flourish. We encourage you to experiment with these ideas mix different techniques and most importantly have fun with the process. Start with simple designs that appeal to you and gradually explore more adventurous styles as your skills develop.
Frequently Asked Questions
What are some beginner-friendly nail art techniques I can try at home?
Start with simple techniques like the tape method for geometric patterns, dotting tools for polka dots and flowers, and sponge gradients for ombre effects. These methods require minimal supplies and are perfect for building confidence before attempting more complex designs.
How can I make my French manicure more interesting?
Try colorful variations by replacing white tips with pastels, bold seasonal colors, or heart-shaped tips for romance. Adding glitter to French tips creates sparkle, while experimenting with different color combinations keeps this classic look fresh and modern.
What supplies do I need to start creating nail art at home?
Basic supplies include nail polish in various colors, dotting tools, striping tape, small brushes, and sponges. You don’t need expensive equipment to begin – many techniques can be achieved with household items like toothpicks or bobby pins.
How do I create animal-inspired nail designs?
Start with simple designs like cat faces using basic shapes and colors, panda bears with black and white elements, or butterfly wings with gradient backgrounds. Focus on key features like eyes, ears, or wing patterns to make animals recognizable.
What are some easy floral nail art ideas for beginners?
Try daisy chains with white flowers on pastel bases, cherry blossoms with soft pink petals, or sunflowers with yellow petals and brown centers. Start with simple flower shapes and gradually add details like stems or leaves.
How can I incorporate seasonal themes into my nail art?
Use spring pastels with floral accents, summer beach vibes with tropical motifs, fall leaf patterns in warm colors, and winter snowflakes in cool tones. Match your nail colors to nature’s seasonal palette for authentic-looking designs.
What are minimalist nail art options for a subtle look?
Try single accent nails with gold foil or rhinestones, tiny symbols like hearts or stars, or negative space designs with geometric cutouts. These styles create impact without being overwhelming, perfect for professional settings.
How do I add sparkle and glitter to my nail art?
Use holographic finishes for rainbow effects, chrome powder for mirror-like results, or chunky glitter accents. Apply glitter gradients from cuticle to tip or create ombre sparkle effects for sophisticated glamour.
Can I create character-inspired nail art without artistic skills?
Yes! Start with simple character features like Mickey Mouse ears, Hello Kitty bows, or basic emoji faces. Use stencils, stickers, or nail stamps to achieve recognizable characters without freehand painting skills.
How do I make geometric nail patterns look professional?
Use striping tape for clean lines, create triangle patterns with contrasting colors, and try chevron stripes or color blocking. Take your time removing tape while polish is slightly wet for crisp, salon-quality edges.


