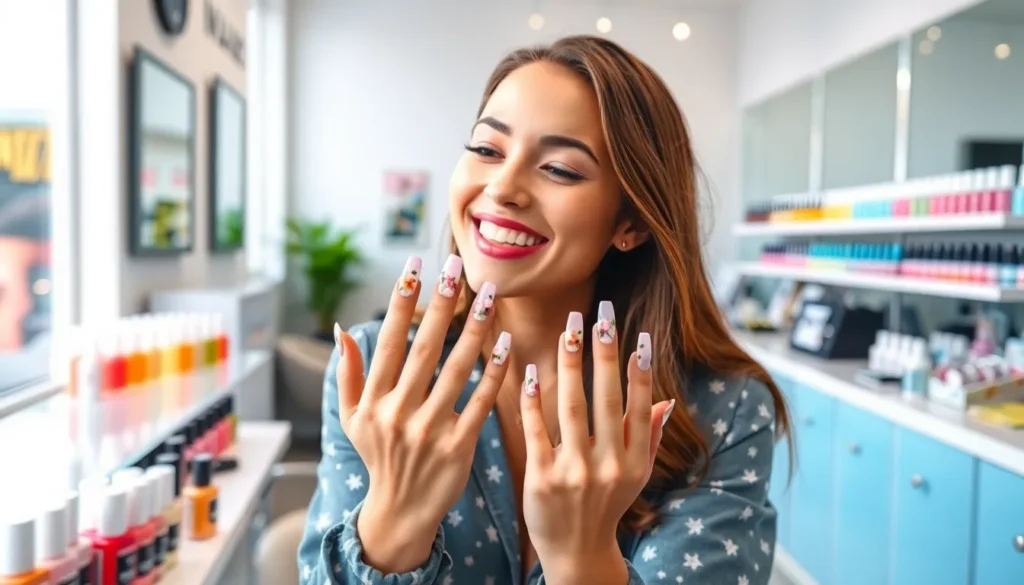
We’ve all been there – staring at our nails and craving something fresh and adorable that’ll make us feel fabulous. Gel nails have revolutionized the way we approach nail art, offering long-lasting color and endless creative possibilities that regular polish simply can’t match.
From delicate florals to playful pastels, cute gel nail designs are taking over social media feeds and inspiring nail enthusiasts everywhere. Whether you’re prepping for a special occasion or just want to treat yourself to something sweet, the right gel nail design can instantly elevate your mood and boost your confidence.
We’re excited to share our favorite cute gel nail ideas that’ll have you booking your next manicure appointment before you finish reading. These designs range from beginner-friendly options you can try at home to intricate patterns that’ll showcase your nail artist’s skills perfectly.
Floral Fantasy: Delicate Bloom Designs for Spring
Spring’s arrival brings fresh inspiration for our gel nail artistry. Floral designs transform ordinary manicures into delicate works of art that capture the season’s romantic essence.
Cherry Blossom Petals
Cherry blossom nails embody spring’s gentle beauty with soft pink and white color palettes. We love creating these designs using a light pink base coat followed by tiny white flower petals painted with a thin nail art brush. Each petal requires just a few precise strokes to achieve that authentic cherry blossom shape.
Popular techniques include adding subtle pearl accents to the center of each bloom for extra dimension. Many nail artists recommend using gel polish in shades like ballet pink, nude rose, and pure white for the most realistic effect. The key is layering the petals naturally rather than creating perfect symmetrical patterns.
Tiny Daisy Chains
Daisy chain designs bring playful innocence to spring gel manicures through miniature white flowers with sunny yellow centers. We create these charming patterns by starting with a clear or pale green base that mimics fresh grass. Simple white dots form the flower petals while tiny yellow centers complete each bloom.
Chain formations work beautifully along the nail’s curve or as scattered accents across multiple fingers. Artists often use dotting tools in various sizes to achieve consistent petal shapes and proportions. The beauty lies in the imperfect, hand drawn quality that makes each daisy unique and organic looking.
Rose Garden Elegance
Rose garden nails showcase sophisticated floral artistry through layered petal techniques and rich color combinations. We achieve this elegant look by building roses from the center outward using burgundy, dusty pink, and cream gel polishes. Each rose requires careful color blending to create natural depth and dimension.
Advanced techniques include adding tiny green leaves and delicate thorns for realistic garden appeal. Professional nail artists recommend practicing the rose technique on practice wheels before attempting full manicures. The finished result resembles miniature oil paintings that complement both casual and formal spring outfits perfectly.
Minimalist Magic: Simple Yet Stunning Styles
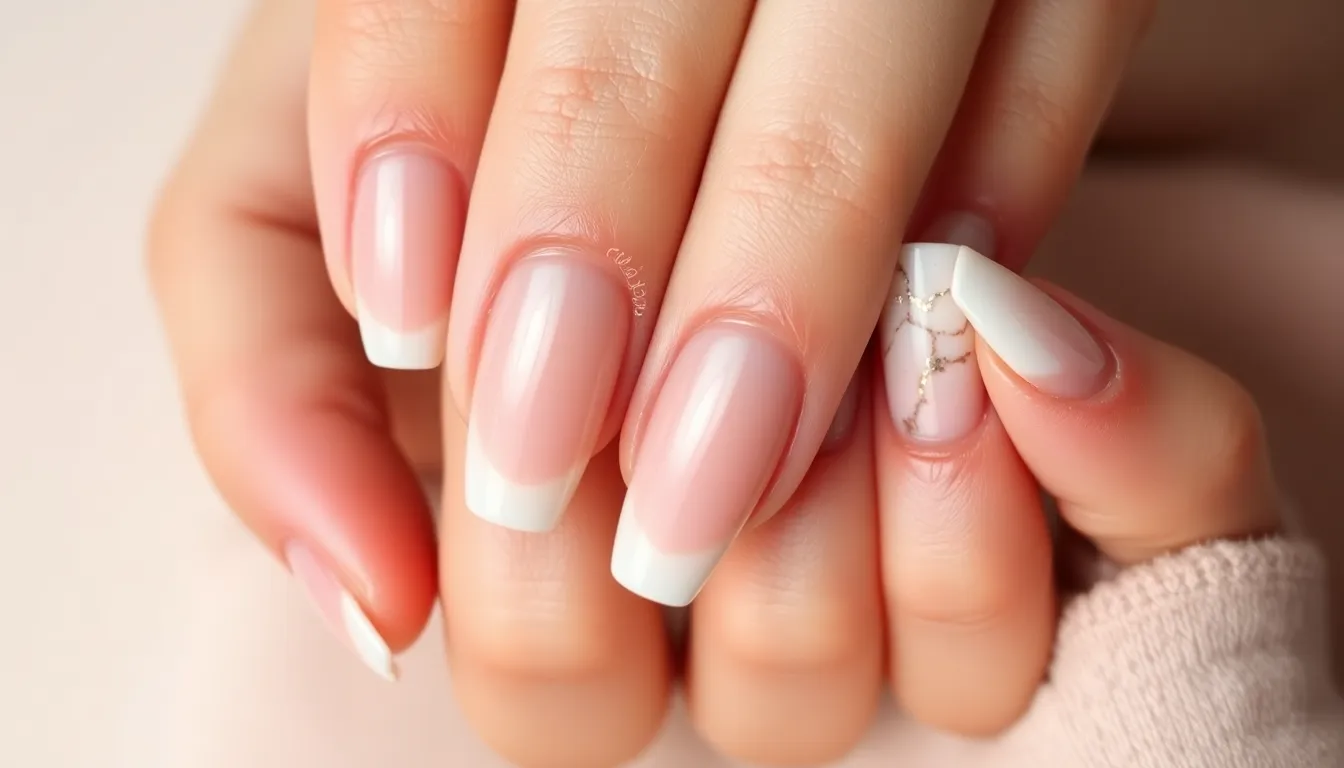
Sometimes the most beautiful gel nail ideas come from embracing simplicity. Clean lines and understated elegance create stunning manicures that work for any occasion.
Clean French Tips with a Twist
We love reinventing the classic French manicure with subtle modifications that feel fresh and modern. Try switching the traditional white tips to soft nude or blush pink shades for a romantic update. Colored French tips in sage green, dusty blue, or lavender create unexpected sophistication while maintaining that timeless appeal.
Geometric French tips offer another striking variation we recommend trying. Create angled or curved tip lines instead of the standard straight edge for an architectural feel. Thin metallic lines in gold or silver can outline your French tips, adding just enough sparkle without overwhelming the design. Double French tips using two complementary colors layer beautifully and create visual depth.
Single Accent Nail Designs
One statement nail paired with nude or clear gel creates maximum impact with minimal effort. We suggest choosing your ring finger as the accent nail since it naturally draws attention. Marble effects using white and gray swirls on a single nail look incredibly elegant against neutral base colors.
Glitter gradients work beautifully as accent nails, fading from full coverage at the tip to subtle sparkle near the cuticle. Metallic foil application on one nail creates luxurious contrast when paired with matte gel colors. Single rhinestone placement at the base or tip of your accent nail adds glamour without appearing overdone.
Negative Space Artistry
Leaving portions of your natural nail visible creates sophisticated designs that feel effortlessly chic. We recommend starting with simple geometric cutouts like triangles, half moons, or straight lines across the nail bed. Clear gel with strategic negative space windows showcases your natural nail while adding modern structure.
Curved negative space designs following your nail’s natural shape create flattering silhouettes that elongate fingers. Linear negative space patterns using thin strips of clear gel between colored sections offer striking visual balance. Combining negative space with minimal line art or dots creates dimension while maintaining that coveted understated look.
Glitter Goddess: Sparkly Statements That Shine
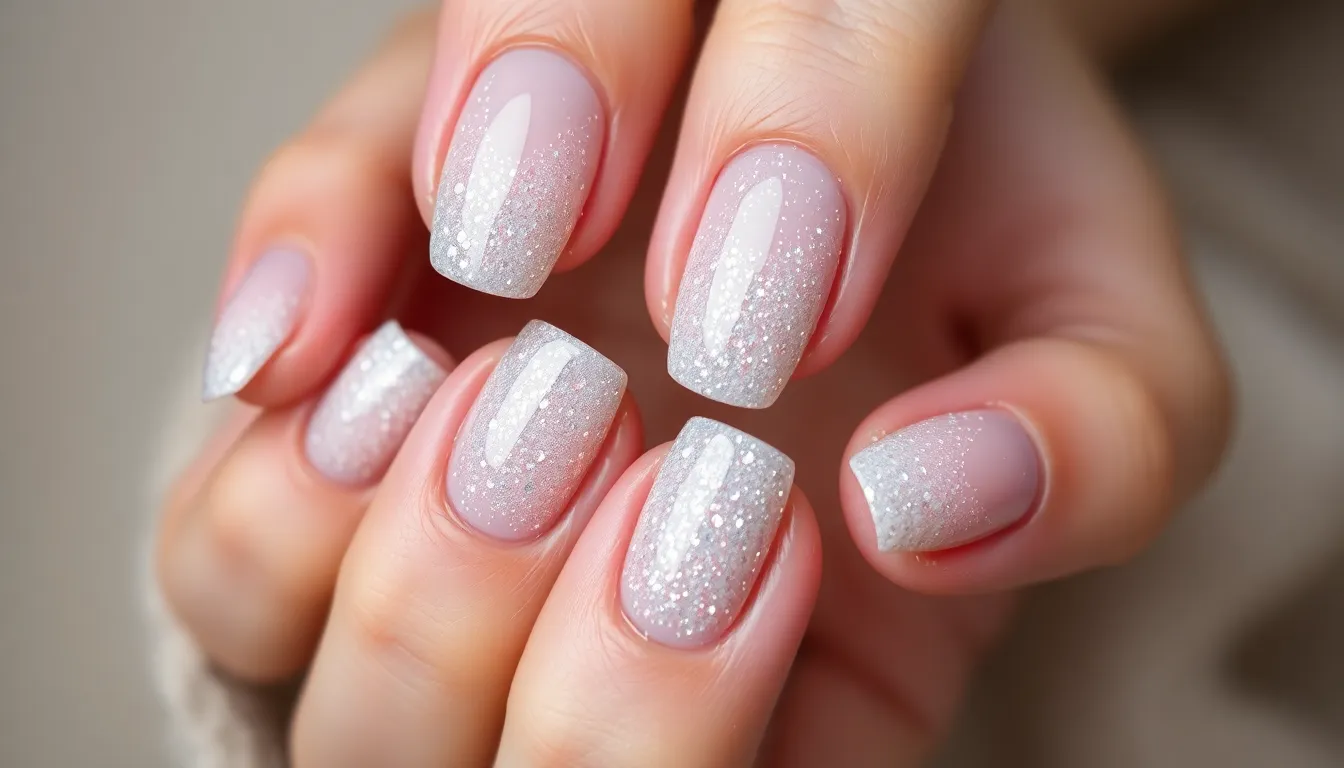
Glitter transforms ordinary gel nails into dazzling masterpieces that catch light from every angle. We’re diving into the most stunning sparkly techniques that’ll make your nails the center of attention.
Ombré Glitter Gradients
Start with a clear or nude base coat to create the perfect foundation for your gradient effect. Apply fine glitter polish at the nail tips using a makeup sponge to blend seamlessly toward the cuticle area. Gradually build up layers of sparkle by dabbing the sponge lighter as you move up the nail bed.
Mix different glitter sizes for added dimension and visual interest. Combine ultra fine glitter with medium flakes to create depth that mimics professional salon work. Seal everything with a high quality top coat to smooth out texture and lock in the sparkle.
Popular color combinations include silver to clear, rose gold to nude, and rainbow glitter fading to transparent. These gradients work beautifully on both short and long nail shapes.
Chunky Glitter Accent Nails
Choose one or two nails per hand to showcase bold chunky glitter for maximum impact. Apply a coordinating base color first, then press large glitter pieces into the wet polish using tweezers or a small brush. Focus the chunky pieces near the nail bed or create patterns like diagonal lines.
Layer different sized glitter flakes to fill gaps and create a cohesive sparkly surface. Start with the largest pieces first, then fill in with medium and fine glitter particles. This technique prevents the design from looking sparse or uneven.
Metallic chunky glitter in gold, silver, or copper creates luxurious statement nails perfect for special occasions. Iridescent hexagon glitter offers a modern geometric twist that photographs beautifully under different lighting conditions.
Holographic Rainbow Effects
Apply a black or dark base coat to make holographic colors appear more vibrant and intense. Use holographic nail powder or ultra fine rainbow glitter while the gel base is still tacky for better adhesion. Rub the powder gently with a silicone tool to achieve even coverage across the entire nail surface.
Create rainbow chrome effects by applying holographic top coat over different colored bases like purple, blue, or green. Each base color shifts the holographic spectrum and produces unique rainbow reflections. This technique works especially well on almond and coffin nail shapes.
Combine holographic elements with geometric shapes using nail tape for clean lines. Remove the tape while the polish is slightly wet to prevent peeling, then seal with top coat for a flawless finish that shifts colors in natural light.
Seasonal Sensations: Holiday-Inspired Nail Art
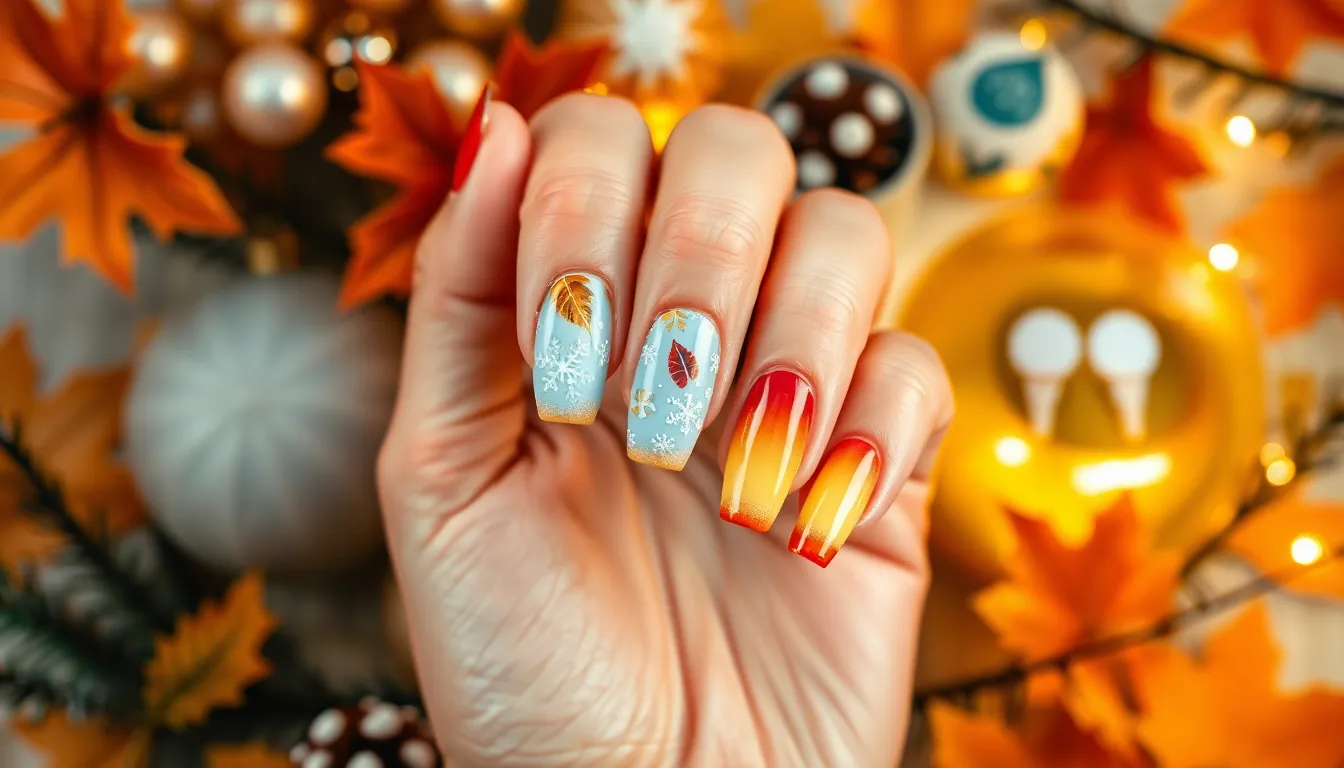
Seasonal gel nail designs let you celebrate every time of year with festive flair. We’ll explore how to capture the magic of each season through thoughtfully crafted nail art that perfectly complements your holiday spirit.
Cozy Fall Leaves and Pumpkins
Autumn leaf gradients transform your nails into miniature canvases showcasing nature’s palette. Start with a warm orange base and blend burgundy and golden yellow using a makeup sponge to create realistic leaf color transitions. Each nail can feature a different autumn shade from deep crimson to burnt amber.
Pumpkin spice accents bring seasonal charm to your manicure with hand painted mini pumpkins on one or two nails. Use a small detail brush to create tiny orange pumpkins with dark green stems and curly vines. The remaining nails can feature complementary colors like warm brown or rust orange to tie the look together.
Textured leaf patterns add dimension using actual pressed leaves as stencils. Apply a base coat then gently press small dried leaves onto wet gel polish before curing. Remove the leaves to reveal perfect silhouettes that capture autumn’s natural beauty.
Winter Wonderland Snowflakes
Delicate snowflake designs create an elegant winter manicure using white gel polish and a fine detail brush. Paint unique six pointed snowflakes on a soft blue or silver base with each nail featuring a different snowflake pattern. The key is varying the size and complexity to mimic real snowflakes.
Frosty ombré effects capture winter’s icy beauty by blending white and pale blue gel polish from the tips toward the cuticles. Add silver glitter sparingly near the tips to simulate fresh snow catching sunlight. This technique works beautifully on both short and long nails.
Crystal accent nails elevate your winter manicure with strategically placed rhinestones that resemble ice crystals. Apply clear crystals in geometric patterns on one accent nail per hand while keeping the other nails in coordinating cool tones like icy pink or pearl white.
Summer Beach Vibes
Ocean wave patterns bring beach energy to your nails using marbling techniques with blue and white gel polish. Create flowing wave designs by dragging a toothpick through wet polish to achieve natural water movement. Each nail can showcase different wave patterns for an organic ocean effect.
Tropical sunset gradients capture summer evenings with vibrant color blending from coral pink to bright orange and golden yellow. Apply these warm tones horizontally across the nail to mimic a beach sunset horizon. Add a small palm tree silhouette on one accent nail for extra tropical flair.
Seashell and starfish accents complete your beach themed manicure with tiny 3D elements. Use white and pink gel polish to hand paint small seashells and starfish on neutral sandy beige base colors. These delicate details transport you to your favorite coastal destination with every peek at your nails.
Geometric Glam: Modern Shapes and Patterns
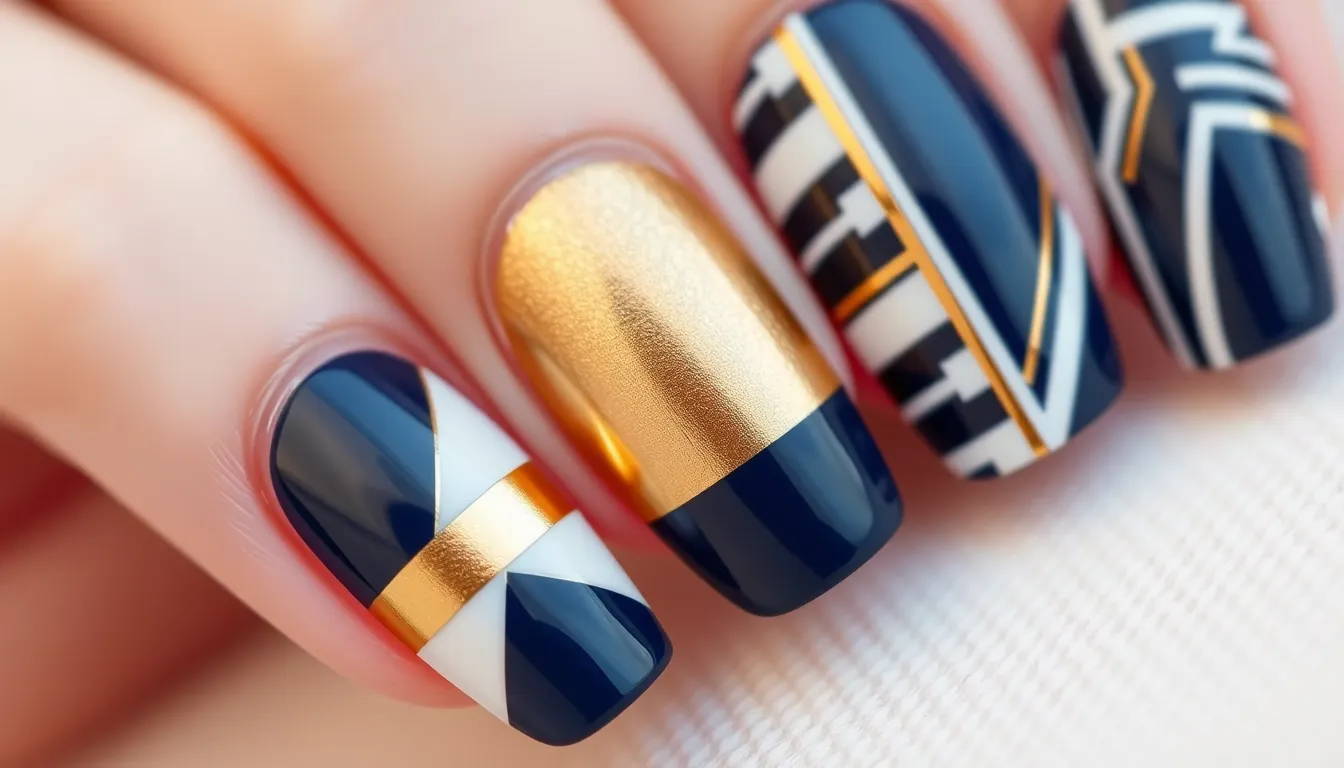
Sharp angles and clean lines transform your gel nails into stunning works of modern art. Contemporary geometric designs offer endless possibilities for creating sophisticated looks that perfectly complement today’s fashion-forward aesthetic.
Triangle Color Blocking
Bold triangular sections create dramatic contrast on your gel nails with striking visual impact. We recommend starting with two complementary colors like navy blue and gold, or classic black and white combinations. Position triangle shapes at diagonal angles across each nail, using striping tape to achieve perfectly crisp edges.
Create depth by layering multiple triangle sizes on accent nails. Start with a large triangle as your base shape, then add smaller triangular elements in contrasting colors. This technique works beautifully when you use three colors total, maintaining balance while adding visual interest.
Paint negative space triangles for an unexpected modern twist. Leave portions of your natural nail exposed within geometric triangle frames. Clear gel polish protects the exposed areas while colored triangles create stunning frames around the negative space.
Striped Perfection
Horizontal stripes offer endless creative possibilities for geometric gel nail designs. We suggest alternating between thin and thick stripe widths to create ever-changing visual rhythm. Use striping brushes or nail art tape to achieve perfectly parallel lines across each nail surface.
Vertical stripes elongate shorter nails while adding sophisticated elegance. Choose colors with similar tonal values for subtle effects, or select high contrast combinations for bold statements. Metallic gel polishes work exceptionally well for creating luxurious striped patterns.
Combine diagonal stripes with traditional horizontal patterns for complex geometric compositions. This technique requires precise planning but delivers stunning results when executed properly. Start with base stripes in one direction, then carefully add crossing stripes using different colors or finishes.
Abstract Line Art
Curved and angular lines merge to create unique geometric masterpieces on each nail. We recommend sketching your design concept first, then using fine detail brushes to paint flowing lines that connect and intersect. These designs allow for maximum creativity while maintaining geometric principles.
Layer transparent and opaque gel colors to build dimensional line compositions. Start with thin lines in lighter shades, then add bolder strokes using darker or more saturated colors. This layering technique creates depth and visual complexity in your abstract designs.
Incorporate metallic accents within line art patterns for elevated geometric glamour. Gold, silver, or rose gold gel polishes serve as perfect accent colors against neutral base shades. Use these metallic elements sparingly to highlight exact intersection points or create emphasis within your abstract compositions.
Animal Kingdom: Adorable Creature-Inspired Designs
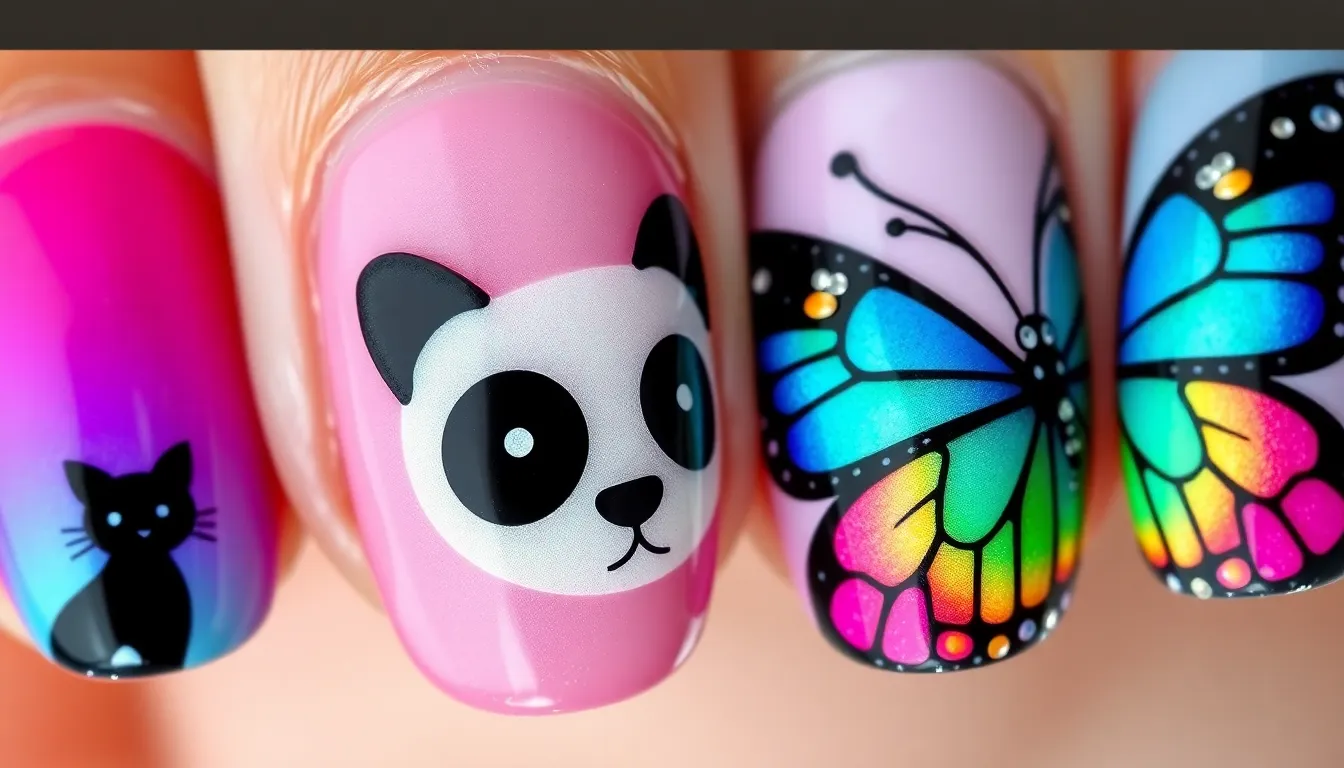
After exploring geometric patterns, we’re diving into the whimsical industry of animal-inspired gel nails that’ll make your fingertips absolutely irresistible. These creature-themed designs bring out your playful side while maintaining that sophisticated gel nail finish we all love.
Cute Cat Silhouettes
Cat silhouettes transform your nails into miniature works of art that capture feline elegance in sleek black designs. We recommend starting with a light pink or cream base coat to make the silhouettes pop against your nails. Paint thin cat profiles using a fine detail brush loaded with jet black gel polish for crisp, clean lines.
Position different cat poses across each nail to create a storytelling effect that spans your entire manicure. Try a stretching cat on your thumb, a sitting cat on your index finger, and a prowling silhouette on your middle nail. Add tiny white dots for eyes using a dotting tool to bring these feline friends to life without overwhelming the minimalist aesthetic.
Layer a glossy top coat to seal your cat artwork and ensure the silhouettes stay sharp for weeks. The contrast between the dark silhouettes and light background creates visual interest that works for both casual and professional settings.
Playful Panda Faces
Panda faces bring instant charm to gel nails with their distinctive black and white markings that are surprisingly easy to recreate. We suggest using a pure white gel base to create the perfect canvas for these adorable Asian bears. Start with small black circles positioned at the top corners of each nail to form the iconic panda ears.
Create the eye patches using a small rounded brush dipped in black gel polish, making sure to keep them symmetrical for that authentic panda look. Add tiny black dots in the center of white spaces to represent the eyes, then finish with a small triangular nose using the tip of your detail brush.
Vary the panda expressions across your nails by adjusting the eye positions and adding small curved lines for mouths. Some pandas can look sleepy with droopy eyes, while others appear alert with wide-open expressions. Apply each layer carefully to prevent smudging, and cure thoroughly between steps for professional-looking results.
Butterfly Wing Patterns
Butterfly wing patterns showcase nature’s most delicate artistry on your gel nails through intricate designs that capture the essence of these graceful creatures. We love starting with gradient backgrounds that mimic sunset colors like orange, pink, and purple to create depth behind the wing details. Use a fan brush to blend these colors seamlessly from cuticle to tip.
Paint symmetrical wing outlines using fine black gel polish to define the butterfly shape across your nail surface. Fill sections with complementary colors like deep blues, vibrant oranges, and soft yellows to replicate realistic butterfly species such as monarchs or blue morphos. Add delicate vein lines using a striper brush loaded with darker gel polish to create authentic wing texture.
Incorporate tiny rhinestones or microbeads along the wing edges to simulate the sparkling effect of butterfly scales catching sunlight. Create different butterfly species across each nail, from small cabbage whites to large swallowtails, ensuring each design maintains proper proportions. Seal everything with a high-gloss top coat to protect the intricate details and enhance the dimensional appearance of your butterfly wing masterpiece.
Pastel Paradise: Soft and Sweet Color Palettes
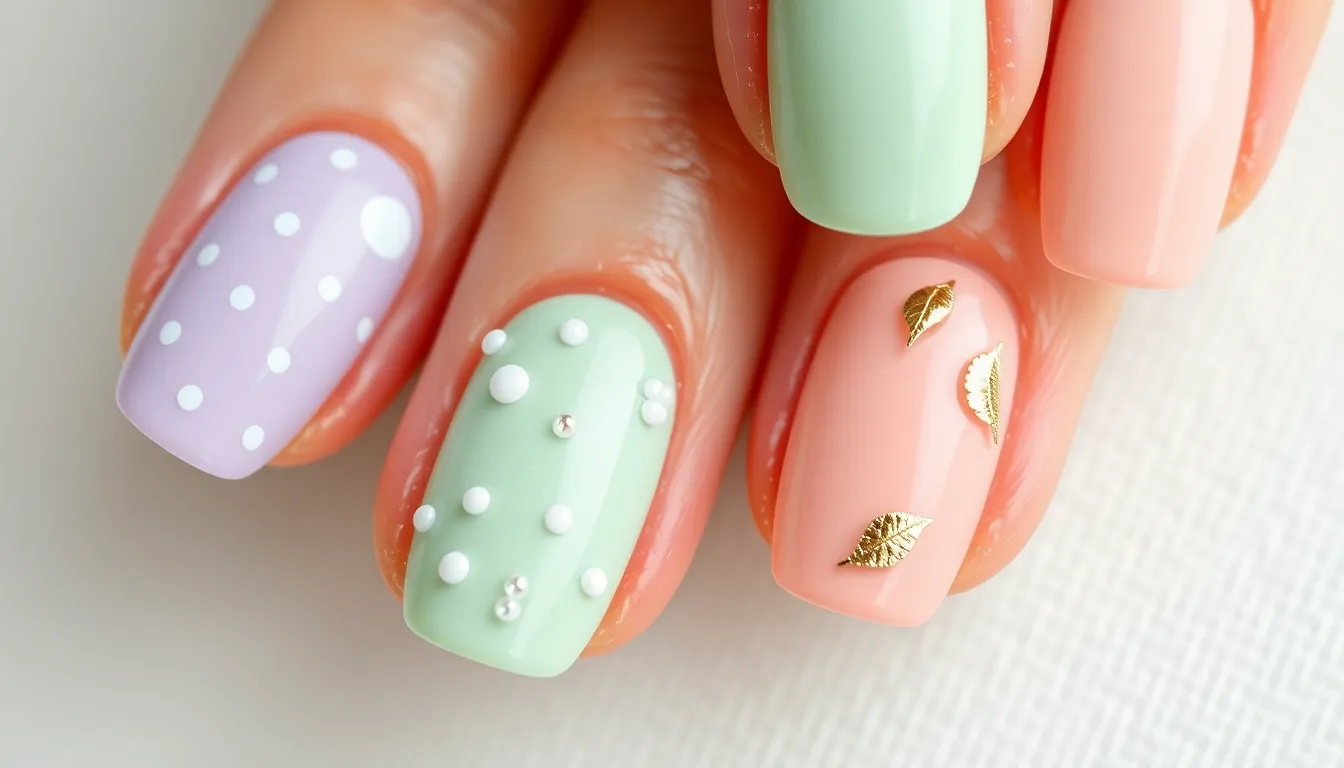
Soft pastel shades create the perfect canvas for cute gel nail designs that feel both dreamy and wearable. These gentle hues offer endless opportunities to express your feminine side while maintaining elegance.
Lavender Dreams
Lavender gel nails transport you to a serene garden filled with blooming flowers. This delicate purple shade works beautifully as a solid base color or can be elevated with subtle nail art techniques. We love adding tiny white dots using a dotting tool to create a polka dot pattern that mimics falling petals.
Create depth by layering different lavender tones from light to medium intensity. Start with a pale lavender base coat and gradually build darker shades toward the tips for an ombré effect. Finish with holographic top coat to add dimension and catch the light beautifully.
Incorporate silver foil accents on one or two accent nails for extra glamour. Press thin strips of foil onto tacky gel polish before curing to achieve professional looking results. This technique transforms simple lavender nails into statement pieces perfect for special occasions.
Mint Green Freshness
Mint green gel polish brings springtime energy to your fingertips with its fresh and invigorating appearance. This versatile shade complements all skin tones and pairs wonderfully with white or gold accent details. We recommend using mint as your base color and adding delicate leaf patterns using a fine brush dipped in darker green polish.
Layer different mint tones to create visual interest and depth. Apply a lighter mint shade near the cuticles and gradually transition to a slightly deeper mint toward the tips. This gradient technique makes your nails appear longer while maintaining the soft pastel aesthetic.
Add texture with matte top coat on select nails while keeping others glossy. This contrast creates a modern twist on traditional pastel manicures and adds sophisticated dimension. Complete the look with tiny rhinestones placed strategically at the base of each nail for subtle sparkle.
Peachy Keen Perfection
Peachy pink gel nails capture the warmth of summer sunsets in a wearable everyday shade. This flattering color enhances natural nail beds and creates a healthy, radiant appearance. We suggest building up the color in thin layers to achieve the perfect peachy tone that complements your skin undertones.
Enhance peachy nails with coral and pink gradient techniques that mimic natural color variations. Use makeup sponges to blend colors seamlessly from the cuticle area toward the tips. This method creates a natural flush effect that looks effortlessly beautiful and professionally applied.
Incorporate gold leaf accents strategically placed on ring fingers for an elegant touch. Press small pieces of gold leaf onto wet gel polish before final curing to ensure proper adhesion. Complete your peachy paradise with a high gloss top coat that amplifies the color’s natural warmth and luminosity.
Texture Play: Adding Dimension to Your Nails
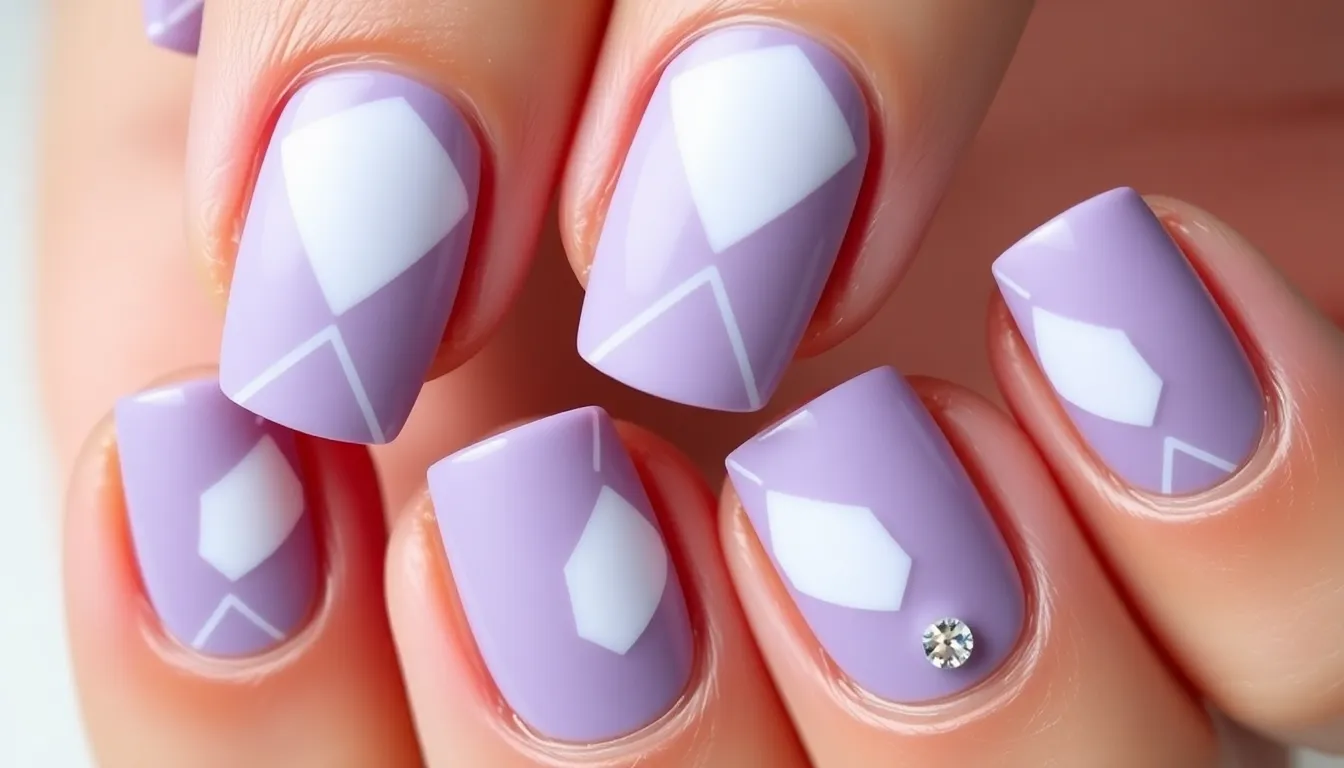
We’re moving beyond smooth surfaces to explore how texture transforms gel nails into tactile masterpieces. These dimensional techniques create stunning visual depth that catches light and attention in completely new ways.
Matte Finish Combinations
Matte topcoats create sophisticated contrasts when paired with glossy elements on your gel nails. Combining matte bases with glossy accent stripes produces a striking two tone effect that feels both modern and timeless. Try applying a matte lavender base with glossy white geometric shapes for an elevated minimalist look.
Matte French tips with glossy nail beds offer a fresh twist on the classic manicure style. Paint your tips in a matte nude or soft pink while keeping the rest of your nails glossy for beautiful contrast. This technique works especially well with longer nail shapes like almond or coffin.
Sectioned matte and gloss designs let you create custom patterns across each nail. Use tape or nail vinyls to create clean lines between matte and glossy sections. Consider checkerboard patterns or diagonal splits for geometric appeal that photographs beautifully.
3D Embellishments
3D nail art transforms your gel manicure into wearable sculptures that demand attention. Rhinestone placement creates instant glamour when strategically positioned near cuticles or nail tips. Choose crystals in complementary colors like rose gold stones on nude bases or clear crystals on pastels.
Sculpted flowers made from acrylic or gel bring botanical beauty to your fingertips. Build tiny roses or cherry blossoms directly on your cured gel base using small brushes and sculpting tools. These dimensional florals work perfectly for special occasions or spring celebrations.
Pearl and bead accents add elegant texture without overwhelming your design. Apply small pearls in curved lines or cluster them near one corner for asymmetrical beauty. Secure each embellishment with clear topcoat for long lasting wear.
Velvet Sand Effects
Velvet sand textures create a luxurious fuzzy finish that feels as amazing as it looks. Sugar sand application involves sprinkling fine textured powder over wet gel polish before curing. This technique works beautifully with deep jewel tones like emerald green or sapphire blue.
Gradient velvet effects blend smooth gel with textured areas for ever-changing visual interest. Apply your base color normally then use a makeup sponge to dab velvet powder only on nail tips or selected sections. Cure thoroughly to set the texture permanently.
Color layered sand finishes combine multiple velvet shades for rich dimensional effects. Start with a darker velvet base then lightly dust lighter coordinating colors over certain areas. This layering technique creates depth that shifts and changes as you move your hands.
Conclusion
We’ve explored an incredible variety of gel nail designs that’ll transform your manicure game. From delicate florals and minimalist French tips to bold geometric patterns and textured finishes there’s something here for every style preference.
The beauty of gel nails lies in their versatility and longevity. Whether you’re drawn to whimsical animal designs sparkly holographic effects or sophisticated pastel palettes these ideas give you endless creative possibilities.
Don’t be afraid to mix and match techniques we’ve covered. Combine seasonal themes with texture play or blend geometric elements with soft pastels. The key is experimenting until you find combinations that reflect your personality.
Ready to book that salon appointment? Your next stunning gel manicure awaits!
Frequently Asked Questions
What makes gel nails better than regular nail polish?
Gel nails offer superior longevity and durability compared to regular polish. They maintain vibrant color for weeks without chipping, provide a glossy finish that lasts, and allow for more intricate designs. The UV-cured formula creates a harder surface that resists everyday wear and tear, making them perfect for those seeking long-lasting manicures.
How long do gel nail designs typically last?
Gel nail designs typically last 2-3 weeks with proper application and care. Factors affecting longevity include nail growth rate, daily activities, and maintenance routine. With quality products and professional application, some designs can maintain their appearance for up to 4 weeks before requiring a fill or complete removal.
Can beginners create cute gel nail designs at home?
Yes, beginners can create beautiful gel nail designs at home with proper tools and practice. Start with simple designs like solid colors, basic French tips, or single accent nails. Invest in quality gel polish, UV/LED lamp, and basic nail art tools. Begin with easier techniques before progressing to complex patterns.
What are the most popular gel nail design trends?
Current popular trends include floral patterns, minimalist French manicures, glitter gradients, geometric shapes, and seasonal themes. Pastel ombré effects, negative space designs, animal-inspired art, and textured finishes are also trending. Social media platforms showcase new creative combinations that blend multiple techniques for unique looks.
Do I need special equipment for gel nail designs?
Yes, gel nails require specific equipment including UV or LED lamp for curing, gel base coat, color, and top coat, nail files, cuticle tools, and rubbing alcohol for cleansing. For designs, you’ll need nail art brushes, dotting tools, and decorative elements like glitter or rhinestones depending on your chosen style.
How do I remove gel nail designs safely?
Safe removal involves soaking nails in acetone for 10-15 minutes, gently pushing off softened gel with a cuticle pusher, and moisturizing afterward. Never peel or force off gel polish as this damages natural nails. Consider professional removal for complex designs with 3D elements or multiple layers.
What’s the difference between matte and glossy gel finishes?
Matte finishes create a velvety, non-reflective surface using special matte top coats, while glossy finishes provide high shine and depth. Matte designs appear more subtle and modern, whereas glossy finishes enhance color vibrancy and create classic elegance. Both can be combined for unique textural contrasts.
Are seasonal gel nail designs worth trying?
Seasonal designs are perfect for celebrating different times of year and expressing creativity. They allow you to coordinate with fashion trends, holidays, and weather changes. From autumn leaves to winter snowflakes and summer beach themes, seasonal designs keep your manicures fresh and relevant throughout the year.

