We’re obsessed with the latest nail trend that’s taking social media by storm – cow print nails! This bold and playful design brings together classic black and white patterns that instantly make any manicure stand out from the crowd. Whether you’re channeling your inner country girl or simply love making a statement with your nails, cow print designs offer endless creative possibilities.
From minimalist spotted accents to full-coverage barnyard chic, we’ve discovered countless ways to incorporate this trendy pattern into your nail art repertoire. The best part? Cow print nails work perfectly for any season and complement virtually every outfit in your wardrobe.
Ready to transform your fingertips into the ultimate conversation starter? We’ll show you exactly how to achieve stunning cow print nail designs that’ll have everyone asking where you got your manicure done.
Classic Black and White Cow Print Nail Designs
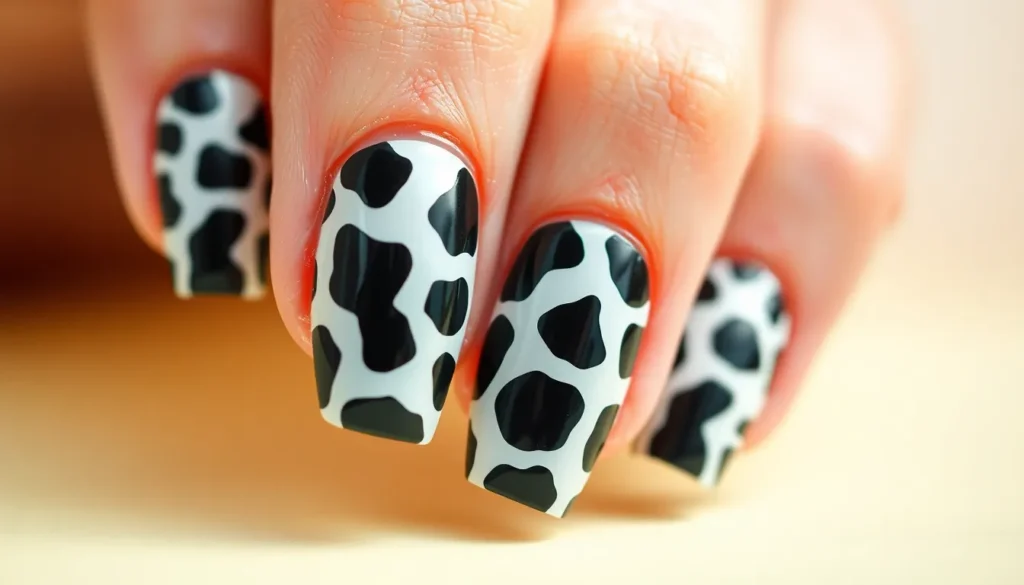
Traditional cow print nails showcase the timeless appeal of monochrome patterns that never go out of style. These versatile designs work perfectly for both casual and formal occasions.
Bold Statement Accent Nails
Accent nails create maximum impact with minimal effort when featuring cow print designs. We recommend choosing one or two nails per hand to showcase the pattern while keeping the remaining nails in solid black or white polish. Ring finger accent nails work particularly well for this approach, drawing attention to jewelry and creating a focal point.
Single nail designs allow you to experiment with different cow print variations. Try creating irregular black spots on a white base using a detail brush or dotting tool. The key lies in making spots asymmetrical and organic rather than perfectly round. Middle finger accents also provide excellent visibility for your cow print artistry.
Thumbs offer the largest canvas for detailed cow print accent work. These prominent nails can handle more complex patterns without looking overwhelming. Consider adding small details like tiny white dots within larger black spots to create depth and visual interest.
Full Set Cow Print Coverage
Complete cow print coverage transforms your entire manicure into a cohesive statement piece. Start with a white base coat on all ten nails, then create organic black spots using a small brush or sponge technique. Each nail should feature different spot placements to maintain the natural randomness of actual cow patterns.
Alternating patterns across your nails prevents the design from looking repetitive. We suggest varying spot sizes from small dots to larger irregular shapes. Some nails can feature densely packed spots while others showcase more spaced out patterns. This variation mimics authentic cow hide appearances.
Layering techniques enhance the authenticity of full coverage cow print designs. Apply spots in multiple stages, allowing each layer to dry completely. Start with larger spots, then add medium sized ones, finishing with tiny accent dots. This approach creates the natural overlap found in real cow patterns.
French Tip Cow Print Variations
French tip cow print designs offer a sophisticated twist on classic manicure styles. Replace traditional white tips with cow print patterns, keeping the nail bed in clear or nude polish. This approach provides elegance while incorporating trendy cow print elements.
Reverse French tips featuring cow print create unique modern looks. Apply the cow pattern at the base of each nail instead of the tips. Use thin brush strokes to create delicate spots that gradually fade toward the nail tips. This technique works beautifully with both short and long nail lengths.
Half moon cow print variations combine vintage charm with contemporary trends. Create cow patterns in the lunula area while maintaining solid colors on the remaining nail surface. Black tips paired with white cow print half moons create striking contrast that photographs beautifully for social media posts.
Creative Color Combinations for Cow Print Nails

We’re expanding beyond the traditional black and white cow print to explore stunning color variations that’ll make your manicure truly unique. These alternative color palettes offer fresh takes on the classic farmyard pattern while maintaining that distinctive spotted charm.
Brown and Cream Cow Print Styles
Brown cow print nails create a sophisticated earthy aesthetic that works beautifully for autumn and winter seasons. We love using rich chocolate brown spots against creamy white or beige bases to mimic the natural coloring of Jersey cows. This combination feels more subtle than stark black and white while still delivering that playful cow print vibe.
Caramel and vanilla shades work exceptionally well together for a softer approach to this trend. We recommend using warm taupe or mushroom brown for the spots with an ivory or champagne base color. These neutral tones complement fall wardrobes perfectly and pair beautifully with earth tone outfits.
Coffee colored spots against cream bases offer another stunning variation that’s perfect for everyday wear. We suggest varying the brown intensity from milk chocolate to espresso to create depth and visual interest. This palette looks gorgeous with gold jewelry and warm undertone makeup looks.
Pink and White Feminine Cow Patterns
Pink cow print transforms the traditionally bold pattern into something delicately feminine and romantically sweet. We adore using soft blush pink spots on white or pearl bases for a dreamy pastel effect. This combination works wonderfully for spring celebrations and date night manicures.
Hot pink spots create a more vibrant and playful interpretation that’s perfect for summer festivities. We love pairing bright fuchsia or magenta spots with crisp white bases for maximum impact. This bold color scheme photographs beautifully and adds a fun pop of color to any outfit.
Dusty rose and cream combinations offer a vintage inspired take on cow print that feels both nostalgic and modern. We recommend using muted pink tones like mauve or dusty pink against off white or cream bases. This sophisticated palette works beautifully for brunch dates and garden parties.
Rainbow Cow Print Nail Art
Rainbow cow print nails bring maximum fun and creativity to your manicure with multicolored spots that celebrate individuality. We love creating gradient effects using different colored spots on each nail, transitioning from red to orange to yellow across the hand. This technique creates a stunning ombré cow print effect that’s truly eye catching.
Neon rainbow spots against white bases deliver electric energy that’s perfect for music festivals and summer parties. We suggest using bright electric blue, lime green, hot pink, and orange spots scattered randomly across white nails. This bold approach guarantees compliments and creates an instant conversation starter.
Pastel rainbow variations offer a softer take on multicolored cow print that feels more wearable for everyday occasions. We recommend using lavender, mint green, peachy pink, and sky blue spots against cream or pearl white bases. This dreamy palette captures the whimsical nature of cow print while maintaining elegance.
Simple DIY Cow Print Nail Techniques for Beginners

Creating cow print nails at home becomes effortless when you master these three fundamental techniques. We’ve tested these methods extensively to ensure they work perfectly for nail art newcomers.
Dotting Tool Method
Start with a white or nude base coat and let it dry completely before beginning your cow print design. We recommend using a dotting tool or bobby pin to create irregular black spots across each nail surface.
Dip your dotting tool into black nail polish and press it onto the nail at random intervals. Create spots of varying sizes by using different amounts of pressure and polish on your tool.
Connect some spots together by dragging the dotting tool slightly between dots to form the characteristic cow print shapes. We suggest making 3 to 5 connected spots per nail for authentic looking patterns.
Vary the spot placement on each nail to avoid creating uniform patterns that look too artificial. Random spacing and organic shapes make your cow print design appear more natural and eye-catching.
Sponge Dabbing Technique
Cut a makeup sponge into small triangular pieces for better control over your cow print application. We find that dense sponges work better than fluffy ones for creating crisp spot edges.
Apply black polish directly onto the sponge piece and dab it onto your white base coat in irregular motions. Press and lift the sponge quickly to create the textured appearance of authentic cow spots.
Layer multiple dabs in overlapping patterns to build up the intensity of your cow print design. We recommend 2 to 3 layers of sponge dabbing for optimal coverage and depth.
Clean your sponge between applications to prevent polish buildup that could create muddy looking spots. Fresh polish on a clean sponge ensures each dab creates distinct black markings.
Nail Stamp Application
Choose a cow print stamping plate from your nail art collection and apply black polish over the entire design area. We suggest using stamping polish for the best transfer results and crisp pattern definition.
Scrape excess polish away using your stamping scraper at a 45-degree angle to ensure only the engraved pattern holds polish. Quick, firm movements prevent the design from smudging during this step.
Press your stamping tool firmly onto the plate to pick up the cow print pattern completely. We recommend rolling the stamper slightly to capture all design elements in one smooth motion.
Transfer the design onto your prepared white base coat by pressing the stamper straight down and lifting it quickly. Position the stamp carefully since you only get one chance for perfect placement per application.
Advanced Cow Print Nail Art Ideas

We’re taking cow print nails to the next level with sophisticated techniques that transform this playful pattern into stunning works of art. These elevated approaches combine traditional cow spots with premium nail art methods to create show-stopping manicures.
3D Textured Cow Print Designs
Sculpted acrylic spots create the most dramatic three-dimensional cow print effects we’ve seen. Professional nail artists use clear or black acrylic to build raised cow spots directly onto the nail surface, creating authentic texture that mimics real cowhide patterns. This technique requires steady hands and quality acrylic products like Morovan or Beetles gel systems.
Gel polish layering produces subtle 3D effects that catch light beautifully throughout the day. We recommend applying your base cow print design, then adding extra layers of clear gel polish over select spots to create varying heights. Each layer should be cured under UV light for 30-60 seconds to ensure proper adhesion.
Textured base coats provide an easier entry point into dimensional cow print art. Products like OPI’s Liquid Sand or Essie’s Sleek Stick create naturally bumpy surfaces that enhance the organic feel of cow patterns. Apply the textured base first, then paint your cow spots over the dried surface for instant depth.
Glitter and Rhinestone Accents
Strategic rhinestone placement transforms basic cow print into luxury nail art that rivals professional salon work. Place 2-3 small clear or black rhinestones within the largest cow spots on each accent nail, using nail glue for secure attachment. Swarovski crystals in sizes SS6 to SS10 work best for this application.
Glitter gradient spots add sparkle without overwhelming the classic cow print aesthetic we love. Mix fine black glitter with clear top coat, then apply this mixture to create some of your cow spots while leaving others matte. This creates beautiful contrast and visual interest across the entire manicure.
Holographic accent details catch light in mesmerizing ways when applied to cow print edges. Use a thin nail art brush to trace around 3-4 cow spots per nail with holographic polish, creating shimmering outlines that make the pattern pop. Chrome powders like Born Pretty or Beetles work exceptionally well for this technique.
Ombré Cow Print Effects
Fading spot intensity creates sophisticated gradients that flow seamlessly across your nails. Start with fully opaque black spots at the cuticle area, then gradually thin your polish with clear top coat as you work toward the nail tips. Each spot should be slightly lighter than the previous one, creating a beautiful fade effect.
Color transition cow prints blend multiple shades within the traditional pattern structure we recognize. Begin with classic black spots at the base, transition through gray in the middle section, then finish with white spots at the tips. This technique works beautifully with any color combination you choose.
Vertical gradient applications stretch the ombré effect along the length of each nail for maximum visual impact. Apply your lightest cow print shade at the base, gradually deepening the color intensity as you work upward toward the free edge. Use a makeup sponge to blend the transitions smoothly between each color section.
Seasonal Cow Print Nail Inspirations

Adapting cow print designs to match seasonal aesthetics keeps your manicures fresh year-round. We’ll explore how different color palettes and thematic elements transform classic cow spots into seasonal masterpieces.
Summer Bright Cow Print Styles
Tropical cow print designs incorporate vibrant colors like coral, turquoise, and sunshine yellow to replace traditional black spots. These beach inspired variations pair beautifully with summer outfits and vacation vibes. Creating these designs involves using a white or pale base coat followed by irregular spots in multiple bright colors rather than just black.
Neon cow print techniques feature electric pink, lime green, or hot orange spots on stark white bases for maximum impact. These bold combinations work especially well for music festivals or summer parties where you want your nails to stand out. Applying these colors requires high quality neon polishes that maintain their vibrancy under UV light.
Pastel cow print variations soften the traditional pattern using lavender, mint green, or baby blue spots on cream colored bases. These gentle interpretations perfect summer weddings or brunch dates where subtlety matters more than boldness. Blending techniques help create seamless transitions between the pastel spots and base colors.
Fall Harvest Cow Print Themes
Autumn cow print palettes embrace rich burgundy, burnt orange, and deep gold spots on warm beige or cream bases. These earthy combinations mirror fall foliage and complement seasonal fashion trends perfectly. Creating these designs involves layering translucent colors to achieve depth and dimension in each spot.
Harvest themed cow prints incorporate pumpkin orange and cinnamon brown spots with metallic copper accents for added warmth. These designs capture the essence of fall harvest seasons while maintaining the playful cow print aesthetic. Adding tiny leaf details or matte top coats enhances the autumn atmosphere.
Thanksgiving cow print styles feature deep chocolate brown and golden yellow spots on nude bases with subtle glitter accents. These sophisticated combinations work well for holiday gatherings where elegance meets fun. Using magnetic polishes creates unique textures within each cow spot for added visual interest.
Holiday Cow Print Variations
Christmas cow print designs transform traditional spots using festive red and green combinations on white or silver bases. These holiday adaptations bring seasonal joy to your fingertips while maintaining the beloved cow print pattern. Adding tiny gold stars or snowflake details elevates these designs for special occasions.
Winter wonderland cow prints feature icy blue and silver spots with holographic top coats that mimic fresh snow. These ethereal designs capture winter magic while keeping the cow print foundation intact. Creating these effects requires layering different textures and finishes for maximum impact.
Valentine’s Day cow prints showcase romantic pink and red spots on pearl white bases with heart shaped accents. These love themed variations perfect date nights or romantic celebrations throughout February. Using chrome powders on select spots creates mirror like finishes that catch light beautifully.
Cow Print Nail Ideas for Different Nail Shapes

Your nail shape dramatically influences how cow print patterns appear and flow across your manicure. We’ll explore how to adapt these playful designs to complement short nails, long coffin shapes, and elegant almond styles for maximum visual impact.
Short Nail Cow Print Designs
Short nails benefit from simplified cow print patterns that don’t overwhelm the limited canvas space. We recommend focusing on smaller, well-spaced spots that create visual balance without appearing cluttered or cramped.
Minimalist spot placement works exceptionally well on short nails, featuring 2-3 irregularly shaped black spots per nail against a crisp white base. Position these spots strategically near the center or slightly offset toward one corner to create natural movement. This approach prevents the design from looking too busy while maintaining the distinctive cow print aesthetic.
Single accent techniques allow you to showcase cow print on just your ring finger or thumb while keeping other nails in coordinating solid colors like nude pink or soft gray. This method draws attention to the pattern without overwhelming shorter nail beds. The contrast creates a sophisticated look that works perfectly for professional settings.
Border cow print designs place small spots along the nail edges, leaving the center area clean and open. This technique makes short nails appear longer while incorporating the trendy pattern. Use a thin nail art brush to create tiny spots that follow the natural curve of your nail shape for the most flattering effect.
Long Coffin Nail Cow Patterns
Long coffin nails provide an expansive canvas that allows for dramatic cow print expressions and intricate pattern variations. We can create stunning designs that take full advantage of the extended length and tapered shape.
Gradient spot sizing creates visual depth by placing larger spots near the base of the nail and gradually decreasing their size toward the tip. This technique emphasizes the coffin shape’s natural taper while creating ever-changing movement throughout the design. The varying spot sizes mimic authentic cow patterns more closely than uniform shapes.
Layered pattern effects involve creating multiple levels of cow spots using different opacity levels and colors. Start with a semi-transparent gray base layer, add medium-opacity brown spots, then finish with bold black accents. This creates a three-dimensional appearance that showcases the nail’s length beautifully.
Split design concepts divide the coffin nail into sections, featuring cow print on the upper two-thirds while leaving the tip area in a contrasting solid color or metallic finish. This approach creates visual interest and prevents the pattern from becoming monotonous across the extended nail length.
Negative space integration incorporates clear areas within the cow print pattern, allowing the natural nail or base color to show through in organic shapes. This modern technique adds sophistication to the playful pattern while highlighting the coffin shape’s elegant proportions.
Almond Shape Cow Print Art
Almond shaped nails offer the perfect balance between length and curve, creating ideal conditions for cow print designs that follow the nail’s natural contours. We can create patterns that enhance the shape’s feminine elegance while maintaining the fun cow print aesthetic.
Curved spot placement follows the almond nail’s natural arch, positioning spots to complement the tapered sides and rounded tip. This technique creates harmony between the nail shape and pattern, making the overall design appear more intentional and polished. The spots should flow with the nail’s curve rather than fighting against it.
Vertical pattern flow arranges cow spots in loose vertical columns that emphasize the almond shape’s length while creating visual elongation. This approach works particularly well for medium-length almond nails, making them appear longer and more elegant. Vary the spot sizes within each column to maintain organic authenticity.
Tip-focused designs concentrate the cow print pattern primarily around the nail tip area, leaving the base and sides in coordinating solid colors. This technique draws attention to the almond shape’s pointed tip while creating a modern, sophisticated interpretation of traditional cow print. The contrast between patterned and solid areas adds visual interest without overwhelming the nail’s graceful shape.
Asymmetrical spot arrangements place cow print elements more heavily on one side of the almond nail, creating ever-changing visual balance and movement. This contemporary approach prevents the pattern from appearing too predictable while working beautifully with the almond shape’s natural asymmetry.
Professional Cow Print Nail Salon Techniques

Professional salons offer specialized techniques that create long-lasting cow print designs with superior durability and precision. These advanced methods require professional-grade products and expert application skills.
Gel Polish Cow Print Application
We begin gel polish cow print applications with a thorough nail preparation using a 180/240 grit file and cuticle pusher. Professional salons apply a base coat layer that’s cured under LED lights for 30 seconds to ensure optimal adhesion. The white or nude base color requires two thin coats with 60-second curing intervals between each layer.
Creating authentic cow spots involves using a detail brush dipped in black gel polish to paint irregular shapes across the nail surface. We vary spot sizes from 2mm to 8mm diameter to mimic natural cow patterns. Professional artists avoid symmetrical placement by positioning spots at random angles and spacing them unevenly across each nail.
The sealing process includes a high-gloss top coat that’s applied in thin layers to prevent bubble formation. We cure the final layer for 90 seconds under LED lights and finish with alcohol solution to remove the sticky residue. This technique provides 3-4 weeks of chip-free wear with proper aftercare.
Acrylic Cow Print Extensions
Acrylic extensions allow for dramatic length while incorporating cow print designs into the structure itself. We begin by applying nail forms or tips using professional-grade adhesive and shaping them to the desired length. The acrylic mixture combines polymer powder with liquid monomer in a 2:1 ratio for optimal consistency.
Professional technicians create the white base using clear or pink acrylic mixed with white pigment powder. We apply this mixture in thin layers starting from the cuticle area and extending to the free edge. The cow spots are formed by dropping small amounts of black-tinted acrylic onto the wet white surface before it fully cures.
Blending techniques involve using a clean brush dipped in monomer liquid to soften spot edges and create organic shapes. We file and buff the extensions using 100/180 grit files to smooth any texture differences. The final polish application includes base coat, color layers, and protective top coat for a flawless finish that lasts 6-8 weeks.
Hand Painted Detail Work
Hand painted cow print details require steady brush control and artistic precision that only experienced nail technicians can achieve. We use fine liner brushes with synthetic bristles that hold their point throughout the painting process. Professional artists begin with a detailed sketch on practice wheels before applying designs to client nails.
Creating realistic cow patterns involves layering different shades of black and gray to add depth and dimension. We start with lighter gray outlines and gradually build darker black centers using circular motions. The spot edges receive gentle feathering strokes to create the soft, organic appearance found in natural cow hide.
Advanced shading techniques include highlighting certain areas with white polish mixed with iridescent powder for subtle shimmer effects. We add tiny white dots within larger black spots to create the mottled texture characteristic of authentic cow patterns. Professional artists complete each design with precision cleanup using a small angled brush dipped in acetone to perfect the spot edges and remove any smudges.
Conclusion
Cow print nails have proven they’re more than just a passing trend – they’re a versatile canvas for creativity that adapts to every style preference and skill level. Whether you’re drawn to classic black and white patterns or bold rainbow variations this playful design offers endless possibilities for self-expression.
From simple DIY techniques using dotting tools to professional salon applications with gel polish and acrylics we’ve covered every approach to help you achieve stunning results. The beauty of cow print lies in its flexibility – it works beautifully on short nails with minimalist spots and makes dramatic statements on long coffin shapes with textured 3D effects.
As you experiment with seasonal adaptations and advanced techniques remember that cow print nails are all about having fun with your manicure. This timeless pattern continues to evolve giving us fresh ways to showcase our personality through nail art that’s both eye-catching and surprisingly sophisticated.
Frequently Asked Questions
What are cow print nails?
Cow print nails are a trendy manicure design featuring black and white spotted patterns that mimic the distinctive markings of cow hide. This playful nail art has gained popularity on social media for its bold, statement-making appearance and versatility across different occasions and seasons.
How do I create cow print nails at home?
You can create cow print nails using three simple DIY methods: the dotting tool technique (using a dotting tool or bobby pin to create irregular black spots), sponge dabbing (using a makeup sponge for textured spots), or nail stamps for pre-designed patterns. Start with a white or nude base coat.
What colors work best for cow print nail designs?
While classic black and white is most popular, cow print nails work beautifully in various color combinations. Try brown and cream for an earthy look, pink and white for feminine appeal, or even rainbow multicolored spots for a vibrant, fun appearance that suits different seasons.
Can cow print nails work on short nails?
Yes, cow print designs work excellently on short nails. Use simplified patterns with well-spaced spots to avoid cluttering the limited nail space. Focus on one or two accent nails rather than full coverage to create a balanced, stylish look that doesn’t overwhelm shorter nail lengths.
How long do professional cow print nails last?
Professional cow print nails created with gel polish typically last 2-3 weeks with proper application and sealing. Acrylic extensions with cow print designs can last even longer, up to 4-6 weeks. Professional techniques include proper nail preparation, LED curing, and quality sealing for chip-free durability.
Are cow print nails suitable for formal occasions?
Absolutely! Cow print nails can be elegant and sophisticated when executed properly. Use accent nail techniques, French tip variations, or subtle half-moon designs. Classic black and white patterns are timeless enough for both casual outings and formal events when styled appropriately.
What nail shapes work best with cow print designs?
Cow print works on all nail shapes with proper technique adaptation. Short nails benefit from simplified patterns, long coffin nails allow dramatic gradient effects, and almond shapes look elegant with curved spot placements and asymmetrical arrangements that enhance their natural shape.
Can I incorporate seasonal themes into cow print nails?
Yes! Cow print designs are highly adaptable to seasons. Try bright tropical colors for summer, rich burgundy and burnt orange for fall, festive red and green for Christmas, or romantic pink variations for Valentine’s Day. This versatility makes cow print suitable year-round.


