The holiday season brings endless opportunities to express our festive spirit, and what better way than through stunning Christmas nail designs? We’ve all been there – scrolling through social media, mesmerized by those picture-perfect holiday manicures that seem impossible to recreate. The good news is that creating magical Christmas nail art doesn’t require professional training or expensive salon visits.
Whether you’re planning cozy family gatherings or glamorous holiday parties, the right nail design can be your perfect seasonal accessory. From classic red and green combinations to sparkling snowflake patterns, we’ll show you how to transform your nails into miniature winter wonderlands.
Classic Christmas Colors: Red and Green Nail Art Ideas
Nothing beats the timeless appeal of traditional Christmas colors when creating festive nail designs. These iconic hues instantly evoke holiday cheer and work beautifully on any nail length or shape.
Traditional Red and Green Stripes
Vertical stripes create an elegant and sophisticated look that elongates your nails naturally. Start with a red base coat and use nail tape to create clean green stripes down the length of each nail. Remove the tape while the polish is still slightly wet for crisp, professional lines.
Horizontal stripes offer a playful twist on the classic pattern and work especially well on shorter nails. Alternate thin red and green bands across each nail, or create varying stripe widths for added visual interest. We recommend using a striping brush for the most precise application.
Diagonal stripes bring ever-changing energy to your Christmas nail art design. Paint your base color first, then use nail tape positioned at a 45-degree angle to create bold diagonal patterns. This technique works beautifully when you alternate the stripe direction on different nails.
Holly Berry and Leaf Designs
Simple holly leaves transform any manicure into a festive masterpiece with just a few brushstrokes. Use a deep green polish and a thin nail art brush to paint pointed leaf shapes on a nude or white base. Add tiny red dots near the leaves to represent berries for authentic holly branch appeal.
Detailed holly patterns showcase your artistic skills through intricate leaf veining and realistic berry clusters. Create texture on your holly leaves by adding lighter green lines with a fine brush. Group three to five small red berries together for the most natural holly berry appearance.
Accent nail holly designs provide the perfect balance between festive and wearable for everyday holiday looks. Paint holly leaves and berries on just your ring finger or thumb while keeping other nails in solid Christmas colors. This approach lets you showcase detailed artwork without overwhelming your overall manicure.
Candy Cane Inspired Patterns
Classic candy cane stripes bring childhood Christmas memories to your fingertips through curved red and white diagonal bands. Start with a white base and use nail tape bent into gentle curves to create the characteristic candy cane shape. Paint red stripes between the tape sections for authentic candy cane appeal.
Miniature candy cane accents add subtle holiday charm without dominating your entire manicure design. Paint tiny candy canes on one or two accent nails using a fine detail brush. These small decorative elements work beautifully against solid red or green backgrounds.
French tip candy canes modernize the traditional French manicure with festive holiday flair. Replace the usual white tips with alternating red and white diagonal stripes that mimic candy cane patterns. This design offers sophistication while maintaining clear Christmas nail art inspiration.
Festive Holiday Characters: Bringing Christmas Icons to Life
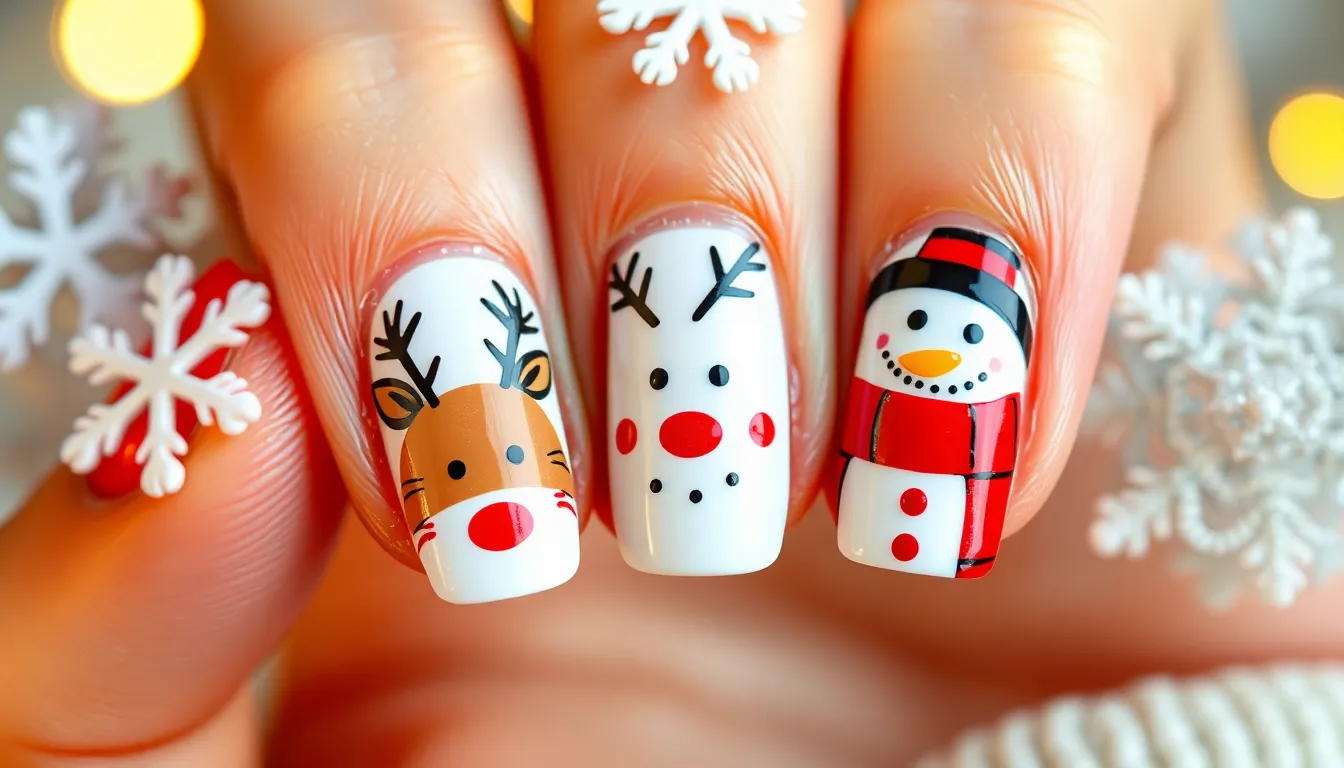
Character designs transform your nails into miniature canvases that capture the magic of beloved holiday figures. These playful manicures bring joy to any festive gathering while showcasing your artistic flair.
Santa Claus Face and Hat Designs
Creating Santa’s iconic look starts with a classic red and white color palette that instantly evokes holiday cheer. Begin with a bright red base coat on most nails, then add white details for Santa’s beard using a small dotting tool or thin brush. His rosy cheeks come to life with tiny pink dots, while black specks create his twinkling eyes.
Santa hat designs offer endless creative possibilities across your fingertips. Paint triangular red shapes starting from the cuticle area, leaving space at the tip for the white fluffy pom pom detail. Add a white band where the hat meets the “forehead” area for authentic dimension. Accent nails can feature just the hat tip peeking from the corner, creating a cohesive yet varied look.
Face details require steady hands but deliver impressive results when executed properly. Use white polish to create Santa’s mustache with curved strokes, then add his beard with textured dabbing motions. Black gel liner works perfectly for drawing his nose and mouth features with precision.
Reindeer and Rudolph Nail Art
Brown base colors provide the perfect foundation for adorable reindeer characters that capture woodland Christmas magic. Start with chocolate or tan shades, then use darker brown to create the reindeer’s facial features and body details. Antler shapes work best when painted with thin brushes, extending upward from the cuticle area in branching patterns.
Rudolph deserves special attention with his famous glowing red nose that makes him instantly recognizable. Position a bright red dot prominently on the nail tip or center, then surround it with brown face details. His antlers can span across multiple nails for a cohesive design that tells his story.
Eye details bring personality to your reindeer characters with simple black dots and white highlights. Add small curved lines for smiling mouths, and consider tiny white dots for snow effects around your woodland friends. Multiple reindeer across different nails create a festive herd that’s perfect for holiday parties.
Snowman and Winter Character Themes
White base coats serve as the perfect canvas for jolly snowman designs that embody winter wonder. Create three stacked circles using different nail positions, or design a single snowman face on accent nails for subtle charm. Orange carrot noses add authentic details, while black dots form classic coal button patterns.
Frosty accessories complete your snowman’s personality with scarves, hats, and mittens in festive colors. Red and green striped scarves wrap around the “neck” area, while black top hats can crown your winter friend. Tiny orange triangles positioned as noses bring immediate recognition to your snowman characters.
Winter character variations expand beyond traditional snowmen to include snow women, snow children, and even snow pets. Pink blush dots create rosy cheeks from cold weather, while different hat styles like beanies or earmuffs add modern touches. Snowflake backgrounds using white dotting techniques enhance the overall winter wonderland theme across your manicure.
Sparkling Winter Wonderland: Glitter and Metallic Christmas Designs
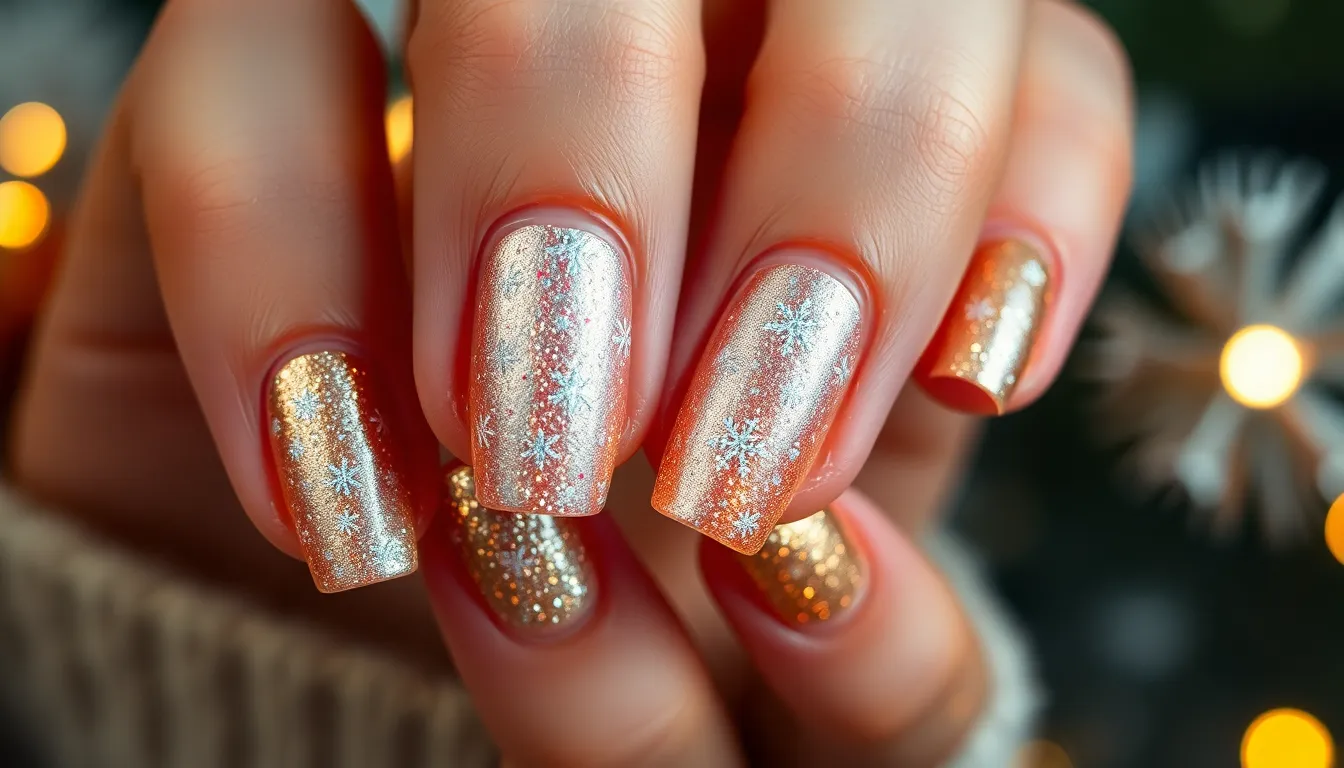
We’ll elevate our festive manicures with shimmering elements that capture the magical essence of winter celebrations. These glamorous designs add sophisticated sparkle to complement our holiday outfits and special occasions.
Gold and Silver Accent Nails
Gold accent nails create luxurious focal points by featuring metallic polish on ring fingers while keeping other nails in classic holiday colors. We can paint thin gold stripes across burgundy or emerald green bases for elegant contrast. Silver foil application transforms plain red nails into stunning statement pieces that reflect light beautifully.
Mixing both metals adds ever-changing visual interest through alternating gold and silver accent placement across different fingers. We’ll achieve professional results by using metallic nail tape to create geometric patterns like triangles and chevrons. Chrome powder application over black base coats produces mirror-like finishes that rival salon quality work.
Applying gold leaf pieces creates organic metallic details that complement winter themes perfectly. We can press small silver stars onto wet topcoat for celestial sparkle effects. Metallic French tips update classic manicures with contemporary holiday glamour.
Snowflake Glitter Patterns
Snowflake glitter patterns transform nails into miniature winter scenes using fine white and silver glitter particles. We’ll create delicate snowflake shapes by dotting white polish in six-pointed star formations across dark blue or black backgrounds. Clear glitter topcoats filled with white and silver flakes produce magical snow globe effects.
Using nail stamps with snowflake designs speeds up application while ensuring consistent pattern placement across all fingers. We can layer different sizes of white glitter to create depth and dimension in our snowflake motifs. Holographic glitter adds rainbow sparkle that mimics real snow crystals catching sunlight.
Drawing snowflakes with white gel pens over glitter bases creates defined patterns that stand out beautifully. We’ll apply glitter gradients from cuticle to tip for blizzard effects. Combining matte topcoat with strategic glitter placement produces sophisticated winter textures.
Ombre Sparkle Effects
Ombre sparkle effects blend multiple glitter concentrations from dense to sparse across nail surfaces for gradual shimmer transitions. We’ll start with heavy glitter application at nail tips and fade toward cuticles using makeup sponges. Silver to white ombre creates classic winter elegance while gold to copper produces warm holiday luxury.
Applying glitter in thin layers builds smooth gradients without chunky texture problems. We can create reverse ombre effects by concentrating sparkle near cuticles and fading toward tips. Multi-colored glitter blends produce stunning sunset effects using red, orange, and gold particles.
Using complementary colors like blue and silver creates sophisticated winter sky effects across our manicures. We’ll blend fine and chunky glitter sizes for varied texture interest. Sealing ombre designs with high-quality topcoat ensures lasting sparkle and prevents glitter fallout during wear.
Christmas Tree Nail Art: Creative Evergreen Designs
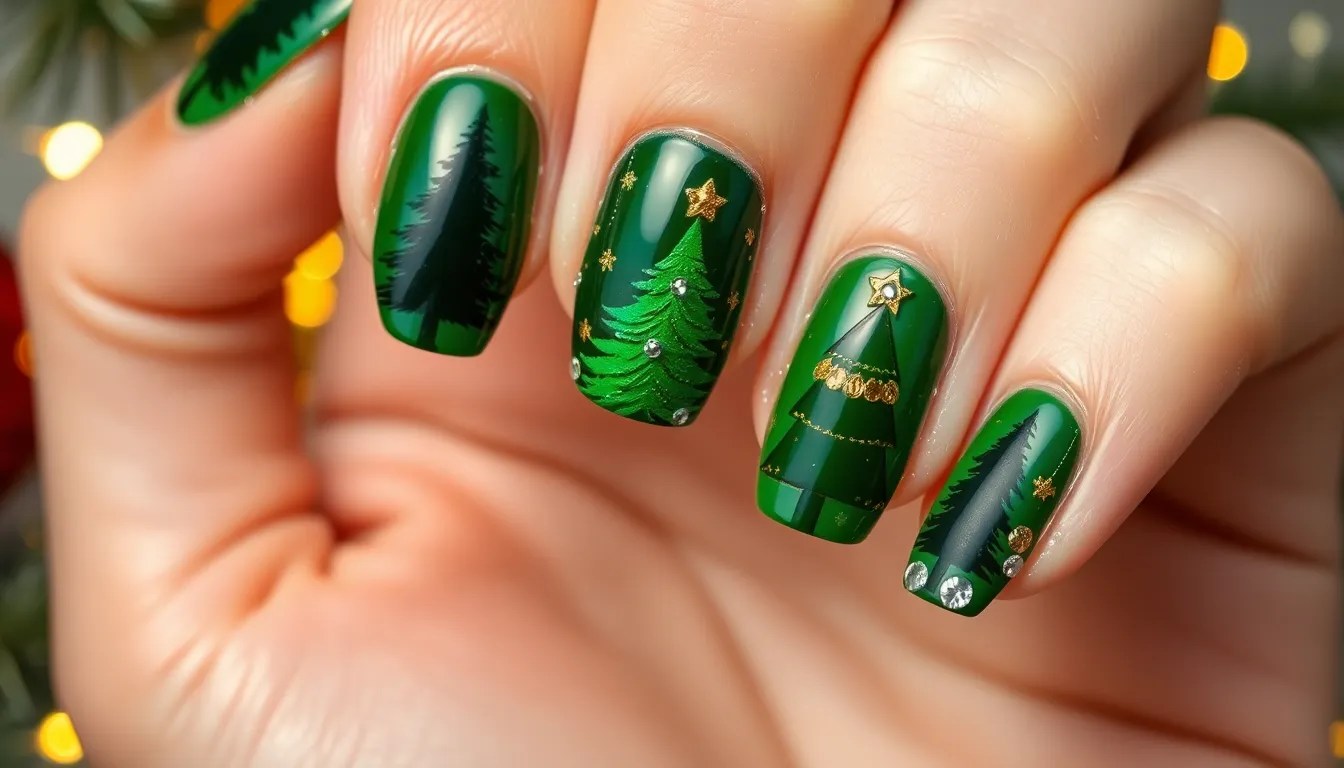
Christmas trees bring the ultimate festive symbol to your fingertips with endless artistic possibilities. These evergreen designs capture the essence of holiday tradition while showcasing your creativity.
Simple Christmas Tree Silhouettes
Basic triangle shapes form the foundation of effortless Christmas tree nail art that anyone can master. Start by painting your base color in deep green or classic forest green, then use a thin brush to create simple triangular tree outlines. We recommend using white or gold polish to draw clean triangle shapes from the cuticle toward the nail tip.
Layered triangle techniques add depth to your evergreen designs without requiring advanced skills. Paint three decreasing triangles stacked vertically, with the largest at the bottom and smallest at the top. This creates a natural tree silhouette that looks professional yet remains beginner friendly.
Color variation options transform basic silhouettes into personalized masterpieces. Try dark green trees on red backgrounds, white trees on blue bases, or gold trees on black nails. Each combination delivers a different mood while maintaining the classic Christmas tree aesthetic.
Trunk details complete your silhouette designs with small brown rectangles at the base. Use a fine brush or toothpick to add these finishing touches. The trunk adds authenticity and grounds your tree design on the nail surface.
3D Christmas Tree Decorations
Rhinestone ornaments elevate flat tree designs into dimensional holiday art. Apply small colorful rhinestones directly onto painted Christmas trees using nail glue or top coat. We suggest using red, gold, and silver rhinestones in various sizes to mimic traditional tree decorations.
Textured paint techniques create raised tree surfaces that catch light beautifully. Mix fine glitter into green polish before painting your trees, or use textured nail polish designed for 3D effects. This approach gives your evergreen designs tactile appeal and visual interest.
Pearl accents serve as elegant tree toppers and garland details. Place tiny pearl beads along painted tree branches to simulate strung lights or garland. The pearls add sophistication while maintaining the festive Christmas spirit.
Layered polish applications build tree dimension through strategic color placement. Apply darker green as the base tree color, then add lighter green highlights on select branches. This technique creates natural depth and makes your Christmas trees appear more realistic.
Minimalist Pine Tree Patterns
Single line trees offer sophisticated simplicity for modern holiday manicures. Draw thin vertical lines with small diagonal branches extending outward on each side. This stripped down approach captures the tree essence while maintaining clean, contemporary appeal.
Geometric tree shapes blend holiday tradition with modern design aesthetics. Create triangular trees using negative space techniques or sharp geometric lines. These designs work particularly well on neutral backgrounds like nude, white, or soft gray.
Tiny forest scenes maximize impact across all ten nails through coordinated minimalist designs. Paint different sized pine trees on each nail to create a cohesive forest theme. This approach tells a complete holiday story across your entire manicure.
Monochromatic schemes emphasize design over color for understated elegance. Use varying shades of the same color family to create depth while maintaining minimalist appeal. Forest green, sage, and mint combinations work especially well for these refined evergreen designs.
Holiday Symbols and Icons: Festive Nail Design Elements
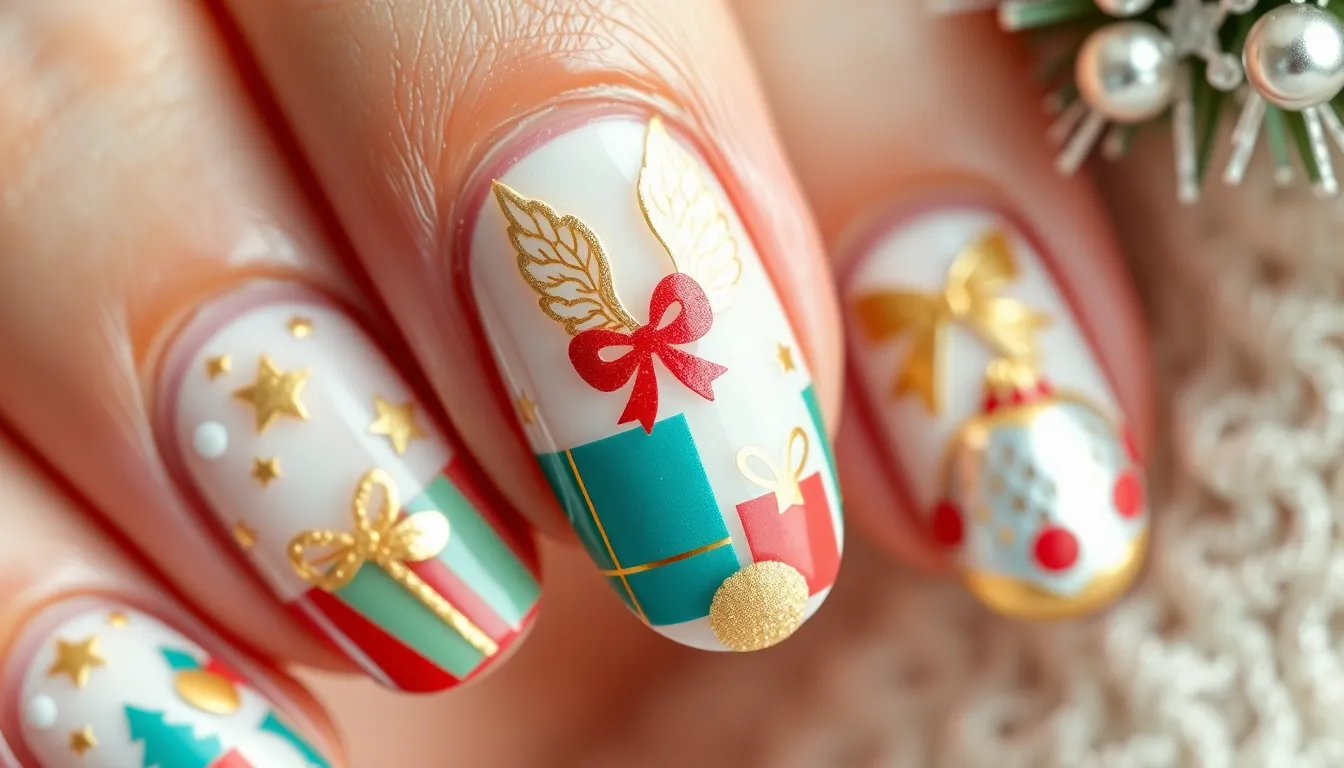
Classic Christmas symbols create stunning focal points that instantly transform your manicure into a festive masterpiece. These iconic holiday elements offer endless creative possibilities for nail art enthusiasts.
Christmas Star and Angel Wings
Stars bring celestial magic to your holiday nail designs. We love creating five pointed stars using gold metallic polish on deep navy or burgundy base colors. Place a single statement star on your ring finger nail for an elegant accent design. Multiple tiny stars scattered across your nails create a magical night sky effect.
Angel wings add divine elegance to Christmas nail art. Paint delicate white or pearl wings using a fine detail brush on nude or soft pink base colors. We recommend starting with the wing outline and filling in with light feathery strokes. Combine angel wings with small halos using gold glitter polish for complete heavenly designs.
Glittery star patterns elevate your festive manicure instantly. Apply star shaped nail stickers over wet glitter polish for dimensional effects. We suggest using holographic glitter to make your stars catch light from every angle. Remove the stickers while polish is still tacky to reveal perfect star shaped windows.
Present Box and Ribbon Designs
Gift box nail art captures the excitement of Christmas morning. Create square present shapes using bright wrapping paper colors like red, green, or gold. We paint the base box first and add contrasting ribbon lines using nail art brushes. Finish with tiny bow details at the intersection points.
Ribbon patterns add festive flair without complex techniques. Paint horizontal and vertical lines across your nail to mimic wrapped presents. We recommend using nail tape to achieve perfectly straight ribbon lines. Metallic gold or silver polish makes your ribbon designs look luxurious and professional.
Bow accents transform simple manicures into gift wrapped treasures. Focus on creating dimensional bows using layering techniques with different polish shades. We start with the bow loops and add the center knot detail last. Place bows strategically on accent nails for maximum visual impact.
Ornament Ball Patterns
Round ornament designs bring traditional Christmas charm to your nails. Paint perfect circles using dotting tools in classic ornament colors like red, gold, and silver. We add tiny cap details at the top of each ornament using contrasting metallic shades. Multiple ornaments on each nail create beautiful bauble collections.
Decorative ornament patterns showcase intricate holiday artistry. Create swirls, dots, and line patterns inside your ornament shapes using fine detail brushes. We suggest practicing these delicate designs on nail wheels before applying to your actual nails. Combine different ornament styles across your fingernails for varied visual interest.
Glittery ornament effects capture light beautifully throughout the holiday season. Apply chunky glitter over wet base color and seal with clear topcoat for dimensional ornament surfaces. We recommend pressing glitter gently into the polish for secure adhesion. Add small rhinestone accents to mimic ornament hangers and decorative elements.
Winter Weather Themes: Snow and Ice Inspired Nail Art
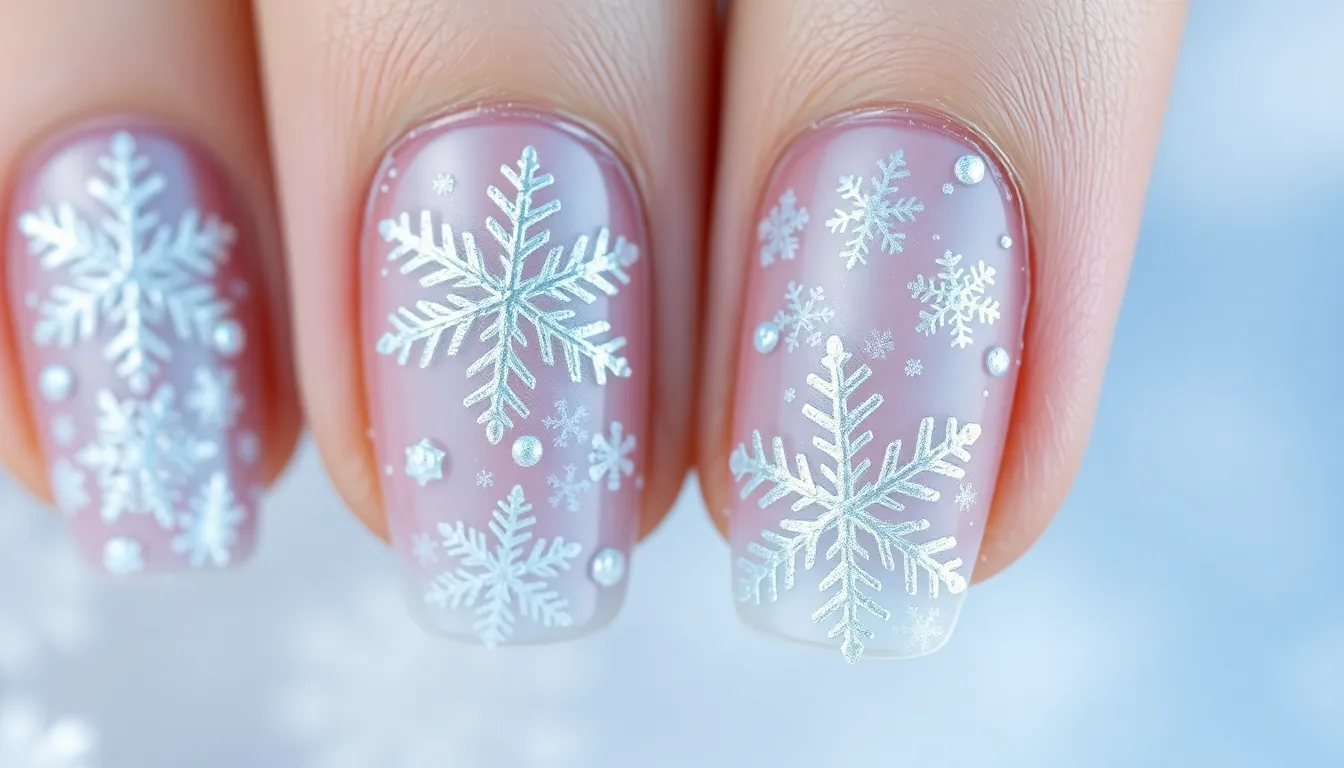
Winter’s natural beauty creates stunning inspiration for Christmas nail designs that capture the season’s crystalline magic. We’ll transform your nails into miniature winter wonderlands using snow and ice elements.
Snowflake Detailed Designs
Detailed snowflake patterns showcase winter’s intricate artistry through precise nail art techniques. We recommend using thin nail art brushes or dotting tools to create the delicate six pointed structures that make each snowflake unique.
Creating intricate snowflake centers starts with a small dot of white or silver polish at your nail’s focal point. Build outward with six evenly spaced lines radiating from the center point. Add smaller branches extending from each main line to capture authentic snowflake geometry.
Layering multiple snowflake sizes across your nail surface creates depth and visual interest. Place larger snowflakes as focal points on accent nails while scattering smaller versions across remaining fingers. Use varying opacity levels to achieve a realistic snow shower effect.
Combining metallic and matte finishes elevates snowflake designs beyond basic white patterns. Apply silver or holographic polish for the main snowflake structure then add matte white details for contrast. This technique mimics how real snowflakes catch and reflect light.
Icicle and Frost Effects
Icicle nail art captures winter’s sharp beauty through elongated crystalline shapes that flow down your nail surface. We create these stunning effects using gradient techniques and strategic color placement.
Painting realistic icicles begins with vertical lines of varying lengths using clear or light blue polish. Thicken the base of each icicle where it would naturally form while keeping the tips sharp and pointed. Add white highlights along one edge to simulate light reflection.
Creating frost patterns involves sponging techniques that mimic ice crystals forming on surfaces. Dab a makeup sponge lightly in white or light blue polish then gently press across your nail surface. Build up the effect gradually for realistic frost accumulation.
Using texture polish for ice effects adds dimensional quality to winter themed designs. Apply clear or translucent blue textured polish over your base color to simulate actual ice formation. The raised texture catches light naturally creating authentic frozen appearances.
Winter Industry Scenes
Winter industry nail art transforms your fingertips into tiny scenic masterpieces featuring snow covered terrain and seasonal elements. We’ll guide you through creating these miniature winter scenes across multiple nails.
Painting snow covered mountains requires steady brush work to achieve realistic peak silhouettes. Start with dark blue or purple base colors for distant mountains then layer lighter shades toward the foreground. Add white caps using a thin brush to represent fresh snow accumulation.
Adding winter trees and branches creates depth within your industry composition. Paint bare tree silhouettes using dark brown polish and thin brushes for realistic branch structures. Dab small amounts of white polish on branch tips to simulate snow laden limbs.
Creating sky gradients completes your winter scene with atmospheric depth and color transition. Blend pale pink sunset hues into deeper blue evening tones using makeup sponges. Add tiny white dots throughout the sky area to represent gently falling snow.
Including winter wildlife silhouettes brings life to your scenic nail art through small animal shapes. Paint simple deer, rabbit, or bird silhouettes against snowy backgrounds using dark polish colors. Keep shapes minimal and recognizable for the best visual impact on small nail surfaces.
Plaid and Tartan Patterns: Cozy Christmas Nail Designs
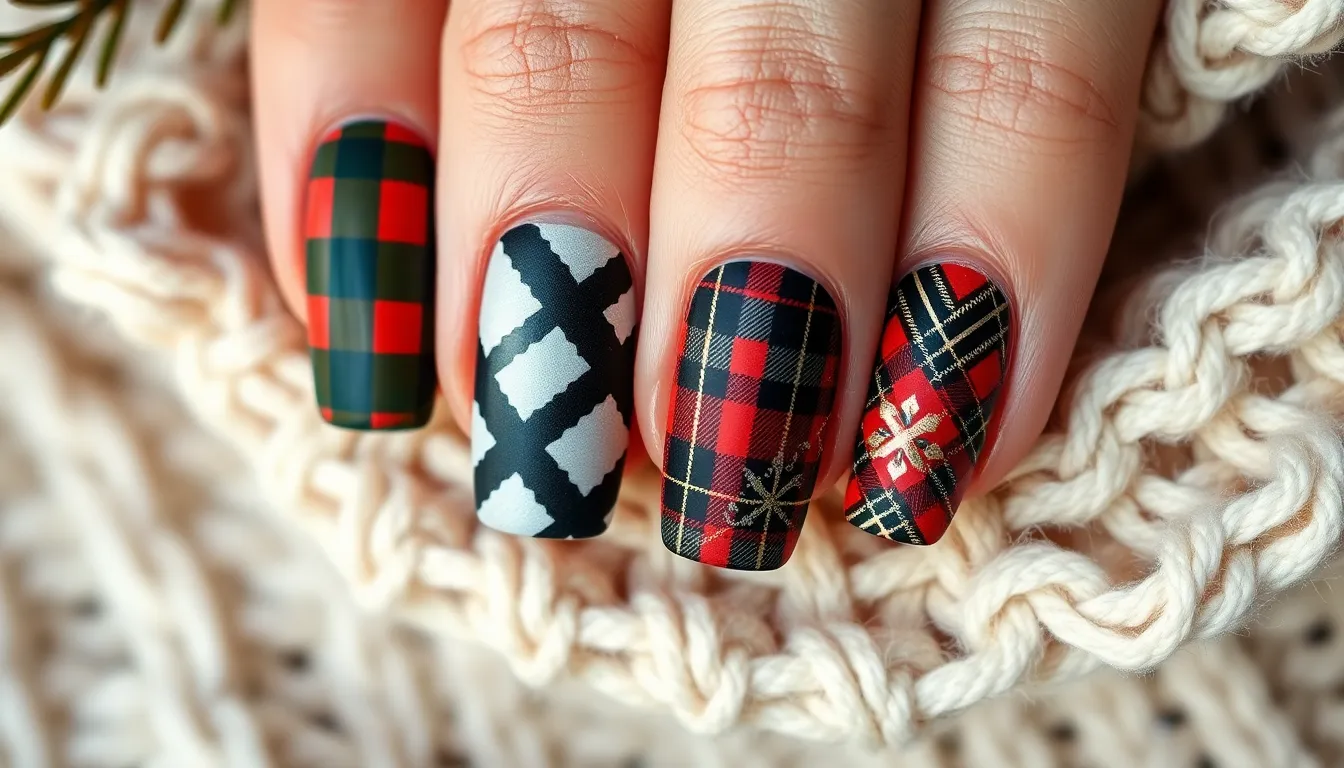
Plaid and tartan patterns bring warmth and texture to holiday manicures, creating designs that feel like cozy winter sweaters on your fingertips. These timeless patterns add sophisticated charm to any Christmas nail look while maintaining festive appeal.
Traditional Red and Green Plaid
Classic red and green plaid transforms nails into miniature holiday masterpieces using intersecting lines and grid patterns. We start with a white or cream base coat to make the plaid colors pop brilliantly.
Creating the vertical stripes comes first, using thin nail art brushes to paint evenly spaced red lines across each nail. Green vertical stripes follow, positioned between the red ones to establish the basic grid foundation.
Horizontal stripes complete the plaid pattern, with red lines crossing over the vertical green stripes and green lines intersecting the red verticals. This creates the classic woven appearance that defines traditional plaid designs.
Adding darker accent lines enhances the dimensional effect, using burgundy or forest green to outline some of the main stripes. Small squares where lines intersect can be filled with contrasting colors for authentic plaid depth.
Buffalo Check Nail Art
Buffalo check patterns offer a bold, rustic approach to holiday nail designs using large squares in contrasting colors. We begin with either a black or red base coat, depending on the desired color scheme.
Painting the alternating squares requires nail tape or striping tape to create clean, precise edges between color blocks. Each square should be roughly the same size, typically covering about one third of the nail width.
Classic red and black buffalo check creates the most recognizable pattern, perfect for Christmas celebrations and winter gatherings. White and black combinations offer a more neutral option that pairs beautifully with any holiday outfit.
Accent nails work wonderfully with buffalo check, allowing you to feature the pattern on one or two nails while keeping others solid colored. Ring fingers often showcase buffalo check patterns while other nails remain in complementary solid shades.
Scottish Tartan Holiday Themes
Scottish tartan patterns bring cultural richness to Christmas nail art using complex intersecting lines in multiple colors. We incorporate traditional tartan color combinations like Royal Stewart with red, green, blue, and yellow threads.
Creating authentic tartan requires patience and precision, starting with the lightest base color before adding progressively darker stripe patterns. Each color family gets its own set of vertical and horizontal lines at exact intervals.
MacLeod tartan offers stunning yellow and black combinations perfect for golden Christmas themes, while Black Watch tartan uses navy, green, and black for elegant holiday sophistication. These traditional patterns connect modern nail art to centuries old Scottish heritage.
Metallic accents enhance tartan patterns beautifully, using gold or silver striping tape to highlight certain intersections. This modern twist maintains the pattern’s authenticity while adding contemporary sparkle for holiday festivities.
Combining different tartan patterns across nails creates an eclectic yet cohesive look, with each nail featuring a different clan pattern in complementary color schemes.
Elegant Christmas: Sophisticated Holiday Nail Ideas
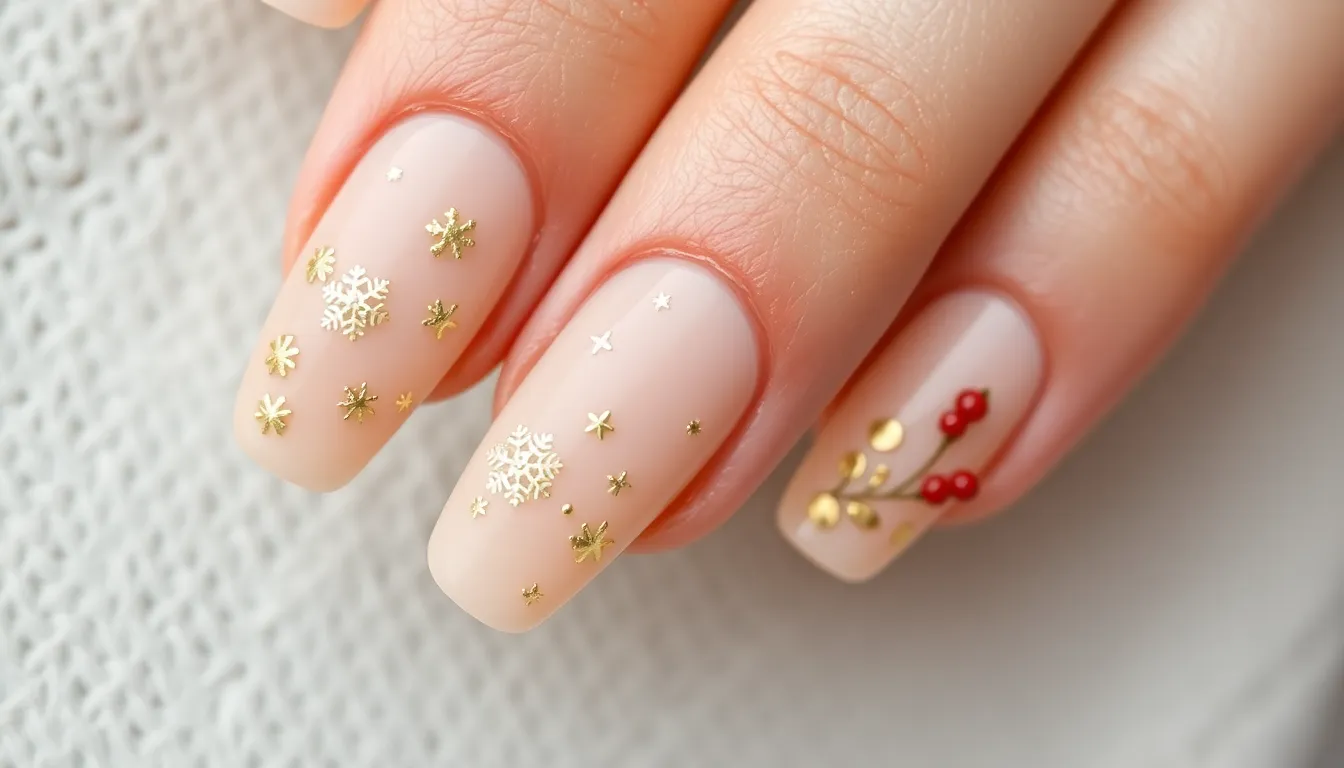
We’ve covered vibrant holiday designs and whimsical winter themes, but sometimes the most striking Christmas nail art embraces understated elegance.
Minimalist Gold Christmas Accents
Gold star accents create stunning focal points when applied to just one or two nails per hand. We recommend using a thin nail art brush to paint delicate five-pointed stars on a clear base coat. Metallic gold stripes offer another sophisticated approach, allowing us to create clean vertical or horizontal lines using striping tape for precision.
Tiny gold snowflakes work beautifully as scattered accents across neutral backgrounds. We can achieve this look by using a dotting tool to create the snowflake centers, then adding delicate lines with a fine brush. Single gold accent nails provide maximum impact with minimal effort, transforming an otherwise classic manicure into something special for holiday gatherings.
Gold leaf application creates an organic, luxurious texture that catches light beautifully. We apply a thin layer of nail glue to exact areas, then gently press gold leaf flakes for an artistic finish. Geometric gold patterns like triangles or diamonds maintain modern appeal while incorporating festive metallic elements.
Nude Base with Holiday Details
Nude pink bases provide the perfect canvas for subtle Christmas elements without overwhelming the overall look. We choose shades that complement our skin tone, then add small holiday details using fine brushes and quality nail art tools. Tiny red berries painted with dotting tools create charming holly inspired accents along the nail tips.
White snowflake details stand out beautifully against nude backgrounds, allowing us to create winter magic without bold colors. We use white nail art pens or thin brushes to draw delicate snowflake patterns on accent nails. Green leaf outlines add natural Christmas elements, painted as simple curved lines near the nail beds.
Pearl accent dots elevate nude manicures with dimensional texture and subtle holiday sparkle. We apply small pearl decorations using nail glue, focusing on creating balanced compositions. Minimalist tree silhouettes work wonderfully when painted in deep green or gold, creating sophisticated holiday references without overwhelming the nude base.
Rose gold details complement warm nude shades perfectly, offering a modern twist on traditional Christmas metallics. We create thin rose gold lines or small geometric shapes for contemporary holiday elegance.
Subtle Festive French Tips
Classic white tips get a holiday makeover when we add thin red or green accent lines just below the white edges. This technique maintains the French manicure’s timeless appeal while incorporating Christmas colors. Gold metallic tips replace traditional white completely, creating luxurious holiday French nails that work for both casual and formal occasions.
Glitter gradient tips blend clear base colors into subtle sparkle at the nail ends, capturing light beautifully during holiday celebrations. We achieve this effect by dabbing fine glitter with a makeup sponge, creating smooth transitions. Red and green alternating tips offer festive color combinations while maintaining the French manicure structure we love.
Snowflake tip details transform ordinary French tips into winter wonderlands by adding small white snowflakes over colored tip sections. We use nail art pens or thin brushes to create these delicate patterns. Pearl lined tips add dimensional elegance by applying tiny pearls along the tip edges using precision tweezers and nail glue.
Ombre holiday tips blend traditional Christmas colors from the tip toward the nail bed, creating sophisticated color transitions that feel both festive and refined. We use makeup sponges to achieve smooth color blending for professional looking results.
DIY Christmas Nail Design Tips: Easy At-Home Techniques

Creating professional-looking Christmas nail designs at home becomes simple with the right tools and techniques. We’ll guide you through everything needed to achieve salon-quality festive manicures in your own space.
Essential Tools and Supplies
Basic nail tools form the foundation of any successful Christmas nail art project. We recommend starting with a quality base coat, your chosen color polishes, and a durable top coat to protect your designs. Nail files in various grits help shape and smooth nail surfaces before application.
Brushes and application tools transform simple polish into intricate holiday artwork. Fine detail brushes create delicate snowflakes and thin holly stems, while dotting tools produce perfect berries and ornament details. Striping brushes make clean lines for candy cane patterns and plaid designs effortlessly.
Design enhancement supplies elevate basic manicures into festive masterpieces. Small rhinestones add sparkle to Christmas tree designs, while nail tape ensures crisp geometric patterns. Glitter in gold, silver, and holographic finishes creates stunning accent nails and ombre effects.
Color palette essentials capture the holiday spirit through traditional and modern shades. Classic reds like cherry and burgundy pair beautifully with forest and emerald greens. Metallic golds and silvers provide elegant accents, while crisp whites create perfect snow and winter themes.
Step-by-Step Application Methods
Preparation techniques ensure your Christmas designs last throughout the holiday season. Clean nails thoroughly with rubbing alcohol to remove oils and residue before starting. Push back cuticles gently and file nails into your preferred shape for the best canvas.
Base application methods create smooth foundations for intricate holiday artwork. Apply a thin base coat and allow it to dry completely before adding color. Use two thin coats of your chosen polish rather than one thick coat for even coverage and faster drying times.
Design layering strategies build complex Christmas patterns gradually for professional results. Start with your lightest colors and work toward darker shades to prevent muddying. Allow each layer to dry completely before adding the next element to maintain crisp lines and vibrant colors.
Finishing touches lock in your festive nail art and extend wear time significantly. Seal designs with a quality top coat, paying attention to nail tips where chipping commonly occurs. Clean up any mistakes around the cuticle area with a small brush dipped in nail polish remover.
Beginner-Friendly Design Ideas
Simple accent nail concepts let you experiment with Christmas themes without overwhelming complexity. Paint four nails in classic red and add a single gold snowflake to your ring finger using a dotting tool. Try alternating red and green nails with tiny white dots for a playful polka dot effect.
Easy pattern techniques create impressive results using basic tools and steady hands. Horizontal stripes in red, white, and green mimic candy cane colors when painted with striping tape. Diagonal lines in metallic gold over a dark green base instantly suggest elegant gift wrapping paper.
Character simplification methods make beloved holiday figures accessible to beginners. Create Santa hats using a red triangle topped with a white circle for his fluffy pom pom. Paint simple reindeer silhouettes in brown polish and add tiny red dots for Rudolph’s glowing nose.
Texture and sparkle additions transform basic colors into festive celebrations with minimal effort. Sponge silver glitter over navy blue polish to create a starry night sky effect. Apply chunky holographic glitter to accent nails for instant holiday glamour that catches every light.
Conclusion
We’ve explored countless ways to transform your nails into festive masterpieces this holiday season. From traditional red and green classics to shimmering winter wonderlands every design offers a unique opportunity to express your holiday spirit.
The beauty of Christmas nail art lies in its versatility. Whether you’re drawn to elegant minimalist touches or bold character designs there’s a perfect festive look waiting for you. With the right tools and techniques even beginners can create stunning results at home.
Remember that the best Christmas nail design is one that makes you feel confident and celebratory. These ideas are simply starting points for your creativity so don’t hesitate to mix patterns combine colors or add your personal flair to any design.
This holiday season let your nails become tiny canvases that spread joy and capture the magical spirit of Christmas wherever you go.
Frequently Asked Questions
What materials do I need to create Christmas nail art at home?
Essential tools include base and top coats, nail files, thin brushes, dotting tools, nail tape for clean lines, and various nail polishes in festive colors like red, green, gold, and silver. You’ll also want glitter, rhinestones, and pearl accents for dimensional effects. These basic supplies allow you to create professional-looking holiday manicures without expensive salon visits.
How can I create clean stripes for candy cane or plaid designs?
Use nail tape as your secret weapon for perfect lines. Apply your base color first and let it dry completely. Place nail tape in your desired pattern, paint over it with contrasting colors, then carefully remove the tape while the polish is still slightly wet. This technique works for vertical, horizontal, diagonal stripes, and complex plaid patterns.
What are some beginner-friendly Christmas nail designs?
Start with simple Santa hats using red triangles and white tips, basic Christmas trees with triangle shapes, or classic red and green color combinations. Holly berry designs with small red dots are also easy for beginners. These designs require minimal artistic skill while still achieving festive, holiday-appropriate results.
How do I make my Christmas nail art last longer?
Always start with a quality base coat to protect your nails and help polish adhere better. Apply thin, even layers of color, allowing each coat to dry completely before adding the next. Finish with a top coat to seal your design and add shine. Avoid activities that could chip your nails for the first few hours after application.
Can I create 3D effects on my Christmas nails?
Absolutely! Add rhinestones, pearl accents, or small beads while your top coat is still tacky for instant dimension. Create raised snowflake patterns using thick polish applied with a dotting tool. Layer different glitter concentrations for ombre sparkle effects, or use nail art pens to add textured details like tree branches or gift ribbons.
What’s the best way to create realistic snowflake designs?
Use thin brushes or nail art pens to draw delicate snowflake patterns. Start with a central point and create symmetrical lines extending outward. Layer multiple snowflake sizes for depth and visual interest. Fine glitter can add sparkle, while white polish on darker backgrounds creates stunning contrast for these winter-themed designs.
How do I achieve smooth color gradients for winter sky effects?
Use makeup sponges to blend colors seamlessly. Apply different polish shades to the sponge, then dab gently onto your nail, working from light to dark or creating sunset-to-night transitions. Blend while the polish is still wet, and finish with top coat to smooth any texture from the sponging technique.

