The holiday season brings magic to everything we touch – including our fingertips! Christmas nail art transforms ordinary manicures into festive masterpieces that capture the joy and sparkle of the season. Whether you’re attending holiday parties or simply want to embrace the Christmas spirit, stunning nail designs help you express your personality while celebrating this special time of year.
We’ve all experienced that moment when beautiful nails make us feel more confident and put-together. Christmas nail art takes this feeling to the next level by combining seasonal colors, glittery accents and creative designs that perfectly complement your holiday outfits. From elegant snowflake patterns to playful candy cane stripes, there’s a design for every style preference and skill level.
Ready to turn your nails into tiny canvases of Christmas cheer? We’ll explore dozens of inspiring ideas that’ll make your manicure the star of every holiday gathering this season.
Classic Christmas Colors for Festive Nail Art
Traditional Christmas color palettes form the foundation of stunning holiday nail designs that never go out of style.
Traditional Red and Green Combinations
Classic red and green nail art transforms your fingertips into miniature holiday celebrations. We love pairing deep crimson shades with forest green for timeless appeal that works with any holiday outfit. Alternating colors between fingers creates visual interest while maintaining festive elegance.
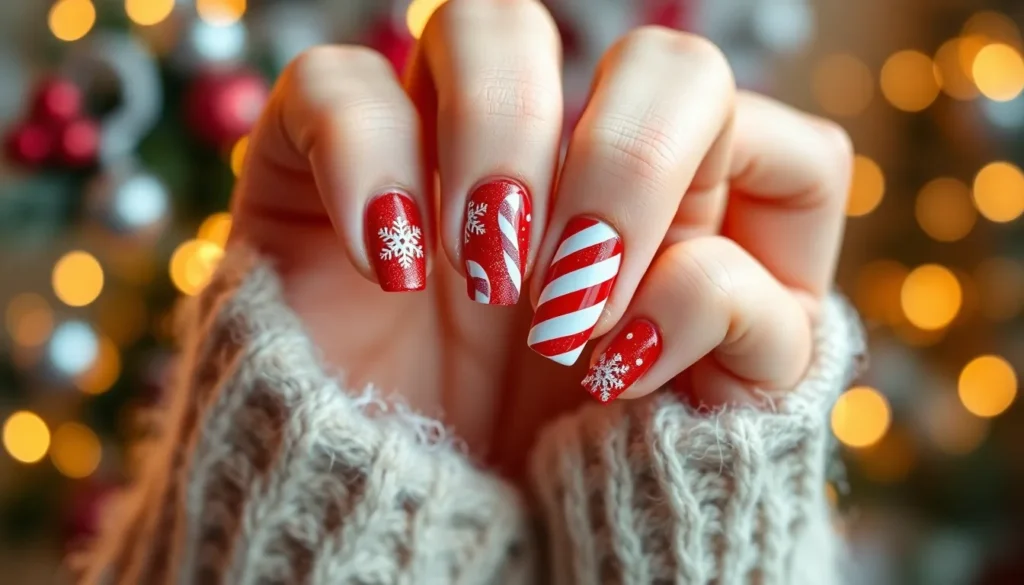
Candy cane stripes offer playful charm when you combine bright red with crisp white accents. Create diagonal lines across green base coats or design tiny holly leaves with red berry dots for sophisticated holiday flair. These combinations work beautifully with both matte and glossy finishes.
Gradient blending techniques allow smooth transitions between red and green tones. Start with darker shades at the cuticle and blend toward lighter tips for dimensional effects. This approach creates depth while showcasing both traditional Christmas colors on each nail.
Elegant Gold and Silver Accents
Metallic gold details elevate simple Christmas nail art into luxury statements. We recommend adding thin gold foil strips over red bases or creating delicate snowflake patterns with gold leaf application. These accents catch light beautifully during holiday parties and formal gatherings.
Silver chrome finishes provide modern sophistication to traditional holiday themes. Mirror-like silver bases pair perfectly with white snowflake designs or clear topcoats filled with silver glitter. This combination creates elegant winter wonderland effects on your nails.
Mixed metallic combinations offer versatility for complex holiday designs. Gold and silver together create rich, layered looks that complement both warm and cool skin tones. Try alternating metallic accent nails with solid Christmas colors for balanced festive appeal.
Winter White and Blue Themes
Pristine winter white serves as the perfect canvas for delicate holiday artwork. We use white as base colors for intricate blue snowflake patterns or silver glitter gradients that mimic fresh snowfall. This combination creates clean, sophisticated winter nail art.
Icy blue shades capture the essence of winter landscapes on your fingertips. Deep navy blues paired with white create stunning contrast for geometric patterns or abstract winter scenes. Light powder blues work beautifully with silver accents for subtle holiday elegance.
Frozen-inspired designs combine multiple blue tones with white and silver elements. Create ombre effects from dark winter blue to pure white, or design crystalline patterns that sparkle like ice formations. These color combinations work especially well with holographic topcoats.
Easy Christmas Nail Designs for Beginners

Starting your Christmas nail art journey doesn’t require professional skills or expensive tools. We’ll guide you through three beginner-friendly designs that create stunning festive looks with simple techniques.
Simple Candy Cane Stripes
Creating candy cane stripes transforms your nails into festive treats using just two colors. Start with a white base coat and let it dry completely before adding the stripes. Use red nail polish and a thin brush to paint diagonal lines across each nail.
Alternate the stripe spacing to achieve that classic candy cane pattern we all recognize. Begin at the cuticle and work toward the tip for smoother application. Keep your strokes steady and don’t worry about perfect precision on your first attempt.
Apply a clear topcoat once the red polish dries completely. This seals your design and adds shine that makes the candy cane effect pop. Practice on your non-dominant hand first to build confidence before tackling your dominant hand.
Basic Christmas Tree Triangles
Christmas tree triangles offer another approachable design that captures holiday magic with geometric shapes. Paint your base coat in a neutral shade like nude or light pink to make the trees stand out. Use a forest green polish and a small detail brush to create simple triangular shapes.
Position each triangle differently on every nail for a playful forest effect. Start with the tree outline and fill it in with solid color. Add a small brown rectangle at the base to represent the trunk.
Enhance your trees with tiny gold dots using a dotting tool or bobby pin. These represent ornaments and add sparkle to your miniature Christmas forest. Seal everything with a clear topcoat for durability and shine.
Minimalist Holly Leaf Patterns
Holly leaf patterns bring elegant simplicity to your Christmas nail art collection. Begin with a red base coat that serves as the perfect backdrop for green holly leaves. Use a thin brush to paint small leaf shapes with pointed edges and curved sides.
Create clusters of three leaves per nail for authentic holly groupings. Vary the leaf sizes and positions to achieve a natural scattered look. Add tiny white or pearl dots near the leaves to represent holly berries.
Focus on one or two accent nails if you’re feeling overwhelmed by doing all ten fingers. Ring finger and thumb combinations work beautifully for this minimalist approach. Complete your holly design with a glossy topcoat that protects your artwork and enhances the festive colors.
Advanced Christmas Nail Art Techniques

Now that you’ve mastered basic holiday designs, we’ll explore sophisticated techniques that create professional-quality Christmas nail art.
Detailed Snowflake Patterns
Detailed snowflake patterns require precision tools and steady hands to create intricate winter masterpieces. We recommend using a fine detail brush or nail art pen to draw delicate snowflake structures that showcase your artistic skills. Start with a base coat of winter white or pale blue to create the perfect snowy backdrop for your intricate designs.
Create symmetrical snowflake centers by drawing intersecting lines at 60-degree angles. Begin with three lines crossing through a central point, then add smaller branches extending from each main line. Use white or silver nail polish for the primary structure, ensuring each line maintains consistent thickness throughout the design.
Add dimensional details using dotting tools and metallic accents for realistic snowflake effects. Place tiny dots at the end of each branch using a small dotting tool dipped in glitter polish. Layer different sized dots to create depth and visual interest that mimics natural snowflake formations.
Finish detailed snowflakes with holographic topcoat to capture light like real ice crystals. This final step transforms your nail art from flat designs into sparkling winter wonderlands that catch and reflect light beautifully during holiday celebrations.
3D Christmas Ornament Designs
3D Christmas ornament designs elevate nail art through sculptural elements that create miniature holiday decorations. We use acrylic powder or gel polish to build raised ornament shapes directly on the nail surface. Begin with a strong base coat to ensure proper adhesion of dimensional elements.
Build ornament shapes using small beads of gel polish cured between applications. Apply gel polish in circular motions to create dome shaped ornaments on accent nails. Allow each layer to cure completely before adding the next dimension to prevent smudging or collapse.
Paint ornament caps using metallic gold or silver polish for authentic holiday charm. Use a fine brush to create the traditional ornament top, adding small details like hanging loops or decorative ridges. These metallic accents provide contrast against colorful ornament bodies.
Incorporate tiny rhinestones or microbeads as ornament decorations for extra sparkle. Press these embellishments into wet topcoat to ensure secure placement. Choose colors that complement your ornament base while adding festive glamour to your 3D nail art masterpiece.
Intricate Reindeer Silhouettes
Intricate reindeer silhouettes showcase advanced nail art skills through complex animal forms and antler details. We create these sophisticated designs using steady brush control and careful color layering. Start with a gradient background in deep winter blues or purples to frame your reindeer artwork effectively.
Draw reindeer body outlines using dark brown or black polish with consistent line weight. Begin with the head shape, then extend lines to create neck, body, and leg positions. Maintain proper proportions by keeping the head roughly one third the size of the entire body silhouette.
Add detailed antler branches using ultra thin brush strokes in precise formations. Reindeer antlers should branch naturally with multiple points extending upward and slightly forward. Each antler requires 4 to 6 individual branches to achieve realistic proportions and authentic appearance.
Enhance reindeer silhouettes with subtle shading and highlight placement for dimensional effects. Use slightly lighter brown polish to add depth along the reindeer’s back and legs. Place tiny white dots for eyes to bring personality to your intricate Christmas nail art creation.
Trending Christmas Nail Art Styles for 2025

We’re seeing exciting new approaches to Christmas nail art that blend traditional holiday elements with contemporary design techniques. These trending styles offer fresh takes on festive manicures that’ll make your nails the star of every holiday gathering.
Ombre Christmas Gradients
Sunset to midnight blends create stunning Christmas gradients using deep burgundy, forest green, and champagne gold transitions. We apply the darkest shade at the cuticle and gradually blend toward lighter tones at the tips using makeup sponges for seamless color flow.
Winter sky gradients incorporate icy blue, silver, and pearl white for ethereal Christmas looks. Start with pale blue at the base and blend upward to create depth that mimics winter twilight skies.
Warm to cool transitions combine traditional red and green in unexpected gradient patterns. We recommend starting with warm crimson at one corner and blending diagonally to cool emerald for ever-changing visual interest.
Metallic fade techniques use rose gold, copper, and bronze for sophisticated holiday gradients. Apply metallic polish over black base coats to create rich depth that catches light beautifully at festive events.
Geometric Holiday Patterns
Angular Christmas trees replace traditional curved designs with sharp, modern triangular shapes using negative space techniques. We create these patterns with striping tape to achieve clean geometric lines in classic green and gold combinations.
Hexagonal snowflakes offer contemporary takes on winter patterns using precise geometric shapes. Apply white gel polish in hexagonal formations over deep blue bases for striking modern snowflake designs.
Diamond holly patterns transform traditional holly leaves into sharp, angular shapes using emerald green and metallic silver. We position these geometric elements asymmetrically for ever-changing visual balance across all ten nails.
Square candy cane blocks modernize classic stripes with rectangular color blocking techniques. Alternate red and white squares in checkerboard patterns for playful geometric holiday designs.
Mixed Texture Christmas Designs
Matte and gloss combinations create striking contrast in single Christmas designs by alternating finish types within the same manicure. We apply matte topcoat to background elements while keeping accent details glossy for dimensional effects.
Velvet flocking powder adds luxurious texture to Christmas nail art when applied over sticky base coats. Sprinkle red or green flocking powder onto wet polish for soft, fabric like surfaces that feel as good as they look.
Caviar bead accents introduce tiny textural elements to Christmas designs using colored microbeads. We press these beads into wet polish around snowflake centers or along candy cane stripes for three dimensional holiday texture.
Foil and fabric combinations blend metallic elements with soft textures for unique Christmas nail art. Apply gold foil to tree trunk areas while using matte green polish for pine needle sections to create realistic textural contrast.
Christmas Character Nail Art Ideas

Bringing beloved Christmas characters to life on your nails creates delightful focal points that spark conversations at every holiday gathering.
Santa Claus Face Designs
Santa’s jolly face transforms any manicure into an instant holiday celebration that captures the magic of Christmas morning. We start with a peachy pink base coat for Santa’s skin tone, then add his iconic white beard using a small detail brush or dotting tool. His rosy cheeks come to life with a gentle dab of coral blush polish, while black dots create his twinkling eyes.
The red Santa hat requires steady brush strokes, beginning at the cuticle and sweeping upward to form the classic triangular shape. White trim along the hat’s edge uses the same technique as the beard, creating fluffy texture with small dabbing motions. Adding a tiny white pom pom at the hat’s tip completes Santa’s signature look using a small bead or dimensional nail art element.
Advanced Santa designs incorporate shading techniques that give depth to his facial features. We blend lighter and darker skin tones to create realistic contouring around his nose and cheeks. His mustache adds character when painted in delicate white strokes just above the beard line, while rosy lips peek through with a hint of pink polish.
Cute Penguin and Polar Bear Nails
Penguins waddle onto your nails with their distinctive black and white coloring that creates instant winter charm. We begin with an oval black shape for the penguin’s body, leaving space at the bottom for tiny orange feet. The white belly appears as a smaller oval inside the black body, creating that classic penguin silhouette we all recognize.
Orange beaks add personality with tiny triangular shapes positioned just above the white belly area. Black dot eyes bring these arctic characters to life, while a hint of orange on the feet completes their adorable appearance. Some nail artists add small Santa hats to their penguins for extra Christmas flair.
Polar bear designs start with white or off white base coats that serve as the bear’s fluffy fur. We create the bear’s round face using circular motions with a detail brush, then add small black dots for eyes and nose. Pink inner ears appear as tiny crescents at the top of the head, while a small pink tongue can peek out for playful expressions.
Textured effects enhance polar bear nails when we use matte topcoat over the white areas to mimic real fur. Adding subtle gray shadows beneath the bears creates depth and dimension. We position these characters on accent nails while keeping other fingers in coordinating solid colors like icy blue or winter white.
Festive Elf and Gingerbread Man Art
Elf designs capture the whimsical spirit of Santa’s helpers with their pointed ears and mischievous expressions. We paint the elf’s face using peachy or pink base tones, then add those distinctive pointed ears extending beyond the nail’s natural shape. Green elf hats require careful brush work, starting narrow at the ear tips and widening toward the base.
The elf’s outfit appears in traditional Christmas colors like red, green, or gold, with tiny white buttons dotting down the front. We create striped stockings using alternating red and white stripes that curve around the nail’s shape. Adding small jingle bells at the hat’s point brings authentic elf charm to the design.
Gingerbread man nails start with warm brown base coats that resemble freshly baked cookies. We outline the gingerbread figure using white polish applied with a thin detail brush, creating that classic iced decoration look. Small white dots form buttons down the center, while curved lines suggest arms and legs in traditional gingerbread poses.
Facial features on gingerbread designs use black dots for eyes and curved lines for smiling mouths. White icing details can include zigzag patterns along the arms and legs, mimicking real cookie decorations. Adding tiny red hearts or bows creates personalized gingerbread characters that look good enough to eat.
These character designs work beautifully as accent nails paired with solid holiday colors on remaining fingers. We recommend practicing each character on nail wheels before attempting them on natural nails to perfect brush control and proportions.
Sparkly and Glittery Christmas Nail Designs

Sparkle and shimmer take center stage in these dazzling Christmas nail designs that capture the magical essence of twinkling holiday lights and winter frost.
Glitter Gradient Christmas Trees
Creating stunning tree silhouettes becomes effortless when we layer fine emerald glitter from the cuticle upward in triangular patterns. We recommend starting with a black or deep navy base coat to make the green sparkles pop dramatically against the dark background.
Building dimensional depth requires three different glitter sizes: fine micro glitter for the base layer, medium hexagonal pieces for texture, and larger holographic flakes for the finishing touches. Apply each layer while the previous one remains slightly tacky to ensure proper adhesion.
Finishing these festive trees involves adding a tiny gold rhinestone at the top as a star and creating simple trunk details with brown nail art polish at the base. We suggest limiting this design to one or two accent nails paired with coordinating solid colors for the most elegant effect.
Metallic Snowball Effects
Achieving perfect spherical shapes starts with creating circular templates using reinforcement stickers or hole punch dots placed strategically on the nail surface. We fill these circles with silver chrome powder or metallic nail polish for that authentic snowball shine.
Layering multiple snowballs creates visual interest when we vary the sizes and overlap them slightly for a three dimensional appearance. Mix chrome powders in platinum, pearl, and iridescent white to achieve different metallic tones that catch light from various angles.
Blending edges seamlessly requires gentle buffing with a soft brush while the metallic finish remains workable. We recommend sealing each snowball with a glossy top coat applied in thin layers to prevent dulling the metallic effect while maintaining that mirror like finish.
Rhinestone Christmas Star Accents
Placing individual rhinestones demands precision tweezers and a steady hand to position each crystal exactly where we want maximum light reflection. We suggest starting with larger 3mm stones as focal points and surrounding them with smaller 1.5mm crystals for constellation effects.
Creating star patterns works best when we follow the natural curve of the nail and place five rhinestones in traditional star formation. Map out the design with a dotting tool before committing to permanent placement using nail glue or gel top coat as adhesive.
Securing rhinestone durability requires proper base preparation with dehydrator and primer before application. We apply a thin layer of builder gel around each stone’s edges and cure under LED light for 60 seconds to ensure the crystals stay firmly attached throughout the holiday season.
French Manicure Christmas Variations

Transform the timeless elegance of French manicures with festive holiday touches that maintain sophistication while celebrating the season. These Christmas inspired variations offer the perfect balance between classic refinement and seasonal joy.
Holiday-Themed French Tips
Red and green tips replace traditional white edges to create an instantly recognizable Christmas look. We recommend using deep emerald green on your ring finger and classic holiday red on remaining nails for visual interest. Apply the colored tips using nail tape or guides for crisp lines that rival salon quality results.
Gold and silver metallic tips add luxurious sparkle to your French manicure base. These metallic finishes catch light beautifully during holiday gatherings and complement both warm and cool undertones. Layer chrome powder over a tacky base coat for maximum reflectivity and durability.
Glittery French tips incorporate fine holiday glitter in champagne, rose gold, or silver tones. Mix loose glitter with clear topcoat before application to ensure even distribution across each tip. Seal with two coats of topcoat to prevent glitter from catching on clothing or hair.
Christmas Color French Fades
Traditional red to white gradients create a candy cane inspired ombre effect along the nail bed. Start with a sheer pink base and blend red polish from the cuticle area toward the tip using a makeup sponge. This technique requires practice but produces stunning results that photograph beautifully.
Green to gold transitions capture the essence of Christmas tree ornaments in manicure form. Apply forest green at the base and gradually blend toward champagne gold tips using dabbing motions. We find that working with three intermediate shades creates the smoothest gradient effect.
Winter blue to silver fades offer a sophisticated alternative to traditional Christmas colors. Begin with an icy blue base coat and blend toward silver chrome tips for an elegant frosty appearance. This color combination works particularly well on shorter nail lengths.
Festive Pattern French Overlays
Snowflake French overlays feature delicate winter patterns painted over classic nude bases with white tips. Use a fine detail brush to create intricate snowflake designs across the tip area, varying sizes for natural appeal. Apply these patterns over completely dry French tips to prevent smudging.
Holly leaf French accents incorporate tiny green leaves with red berry dots along the tip line. Paint small holly leaves using a liner brush and add dimensional red dots with a dotting tool. This design works beautifully on accent nails paired with solid red or green French tips.
Christmas tree French patterns transform tip areas into miniature evergreen forests. Create triangular tree shapes using green polish and add tiny gold star toppers with a detail brush. Space multiple small trees across wider nails or feature one larger tree on thumb nails for maximum impact.
Christmas Nail Art Tools and Supplies

Creating stunning Christmas nail art requires the right tools and supplies to bring your festive visions to life. We’ve compiled the essential items that’ll transform your holiday manicure experience from basic to brilliant.
Essential Brushes and Dotting Tools
Detail brushes work perfectly for creating intricate snowflake patterns and delicate holly leaves with precise strokes. We recommend using size 0 and 00 brushes for fine line work like candy cane stripes and reindeer silhouettes. Flat brushes excel at creating gradient backgrounds and blending Christmas colors seamlessly together.
Dotting tools come in various sizes to create everything from tiny snow dots to large ornament circles. Small dotting tools produce perfect berry clusters on holly designs, while medium sizes create ideal Christmas light bulbs along nail edges. Fan brushes scatter glitter evenly across nails and create realistic texture for Christmas tree needles.
Striping brushes make creating straight lines effortless for geometric holiday patterns and French tip variations. We find that synthetic bristles work best with gel polishes, while natural bristles perform better with traditional lacquers. Angled brushes help achieve clean edges on triangular Christmas trees and sharp corners on gift box designs.
Christmas-Themed Nail Stickers and Decals
Water slide decals feature intricate Christmas designs that would take hours to paint by hand. Popular options include detailed Santa faces, complex snowflake patterns, and realistic reindeer silhouettes that add professional quality to any manicure. 3D nail stickers create dimensional effects with raised elements like Christmas bows, holly berries, and miniature ornaments.
Foil transfer decals produce stunning metallic effects for Christmas stars, angel wings, and ornament details. We love how these catch light beautifully under holiday party lighting and photography. Clear background stickers blend seamlessly with any base color, making them versatile for layering over gradients and textured finishes.
Full nail wraps cover the entire nail surface with coordinated Christmas patterns, perfect for those wanting maximum impact with minimal effort. These work especially well for accent nails paired with solid holiday colors on remaining fingers. Mix and match sets allow creative combinations of different Christmas elements across all ten nails.
Specialty Polishes and Top Coats
Thermal polishes change colors with temperature variations, creating magical effects that shift from deep winter blues to bright snow whites. These work beautifully for ombre Christmas gradients and add interactive elements to holiday manicures. Magnetic polishes contain iron particles that create stunning patterns when held near magnets during the curing process.
Matte top coats transform glossy Christmas designs into sophisticated velvet finishes, particularly striking on red and green color combinations. Glitter top coats come in various Christmas themed collections featuring gold flakes, silver particles, and holographic elements that mimic ice crystals. Quick dry top coats seal designs rapidly, preventing smudging during busy holiday preparations.
Base coats with grip enhancers ensure Christmas nail art lasts through holiday cooking, gift wrapping, and party activities. Peel off base coats allow temporary Christmas designs that can be removed easily after the holidays without damaging natural nails. Ridge filling base coats create smooth canvases for detailed Christmas artwork, ensuring even color application across nail surfaces.
DIY Christmas Nail Art at Home

Creating stunning Christmas nail art doesn’t require professional salon visits or expensive equipment. We’ll guide you through everything needed to achieve beautiful holiday manicures in your own home.
Step-by-Step Tutorial Basics
Preparation forms the foundation of every successful Christmas nail art project. Start by removing old polish completely and pushing back cuticles gently. File nails into your desired shape, then buff the surface lightly to create better adhesion.
Base coat application protects your natural nails while extending the longevity of your festive design. Apply one thin, even layer and allow it to dry completely before proceeding. This step prevents staining and creates a smooth canvas for your Christmas colors.
Design execution requires patience and steady hands for best results. Begin with lighter colors first, then add darker shades and details. Work on one nail at a time to prevent smudging, keeping your non-dominant hand steady by resting your elbow on a table.
Layering techniques build dimension in your Christmas nail art creations. Allow each layer to dry for at least two minutes before adding the next element. Use a hair dryer on cool setting to speed up drying time between coats.
Final sealing locks your masterpiece in place with a quality top coat. Apply thin, even strokes from cuticle to tip, capping the nail edge to prevent chipping. Wait at least 10 minutes before touching anything to ensure complete curing.
Common Mistakes to Avoid
Rushing the drying process leads to smudged designs and wasted effort on your Christmas nail art. Each layer needs adequate time to set properly, typically 2-3 minutes for regular polish and 30-60 seconds under LED lights for gel polish.
Overloading brushes with polish creates thick, uneven applications that take longer to dry. Wipe excess product on the bottle neck, leaving just enough to cover the nail surface smoothly. This technique prevents streaking and ensures professional-looking results.
Ignoring cuticle cleanup makes even beautiful Christmas designs look messy and unprofessional. Use a small cleanup brush dipped in acetone to remove polish from skin around the nail bed. Clean lines dramatically improve the overall appearance of your manicure.
Skipping base coat might seem time-saving but actually shortens your manicure lifespan significantly. This essential step prevents staining, especially important with deep red and green Christmas colors that can permanently discolor nails.
Working with expired products compromises the quality and durability of your Christmas nail art. Check polish consistency before starting, and replace any that have become thick, stringy, or separated. Fresh products ensure smooth application and vibrant color payoff.
Budget-Friendly Supply Alternatives
Household items serve as excellent substitutes for expensive nail art tools in many Christmas designs. Toothpicks create perfect dots and fine lines, while bobby pins make ideal dotting tools for varying circle sizes. Makeup sponges work wonderfully for gradient effects and ombre backgrounds.
Regular tape replaces costly nail art guides for creating clean geometric patterns and French tip variations. Cut tape into thin strips for candy cane stripes or create stencils for Christmas tree shapes. Remove tape while polish is slightly tacky for crisp, professional edges.
Basic art supplies expand your Christmas nail art possibilities without breaking the budget. Acrylic paints mix with clear polish to create custom colors, while small paintbrushes from create stores cost significantly less than specialty nail art brushes. These alternatives perform just as well for detailed work.
Dollar store finds provide surprising value for Christmas nail art enthusiasts. Loose glitter, small rhinestones, and even children’s stickers work perfectly for festive designs. These affordable options let you experiment with different techniques without important financial investment.
Kitchen supplies double as nail art tools for creative Christmas designs. Plastic wrap creates textured effects, while small straws cut into points make excellent striping tools. Even aluminum foil can create interesting metallic transfer effects when pressed onto wet polish.
Professional Christmas Nail Art Inspiration

Professional nail artists bring exceptional creativity and technical skill to Christmas nail art, showcasing designs that push the boundaries of seasonal beauty. These expert level techniques offer endless inspiration for our own holiday manicure goals.
Salon-Quality Design Ideas
Hand-painted Christmas murals transform each nail into a miniature canvas featuring intricate holiday scenes. Professional artists create detailed winter landscapes, cozy Christmas villages, and ornate nativity scenes using specialized acrylic paints and precision brushes. These masterpieces require 2-3 hours of work and typically cost $150-300 at high-end salons.
Sculptured 3D Christmas elements elevate nail art to new dimensions through expertly crafted gel work. Artists build realistic Christmas trees with textured bark, delicate angel wings with feathered details, and miniature gift boxes complete with ribbon bows. Each element requires curing under UV lights and careful shaping with professional sculpting tools.
Complex layering techniques create depth through multiple polish applications and strategic color placement. Professional designs often feature 5-7 different polish layers, including base colors, gradient transitions, detailed patterns, metallic accents, and protective top coats. This meticulous process ensures designs last 3-4 weeks without chipping.
Intricate lace Christmas patterns showcase advanced brush work through delicate filigree designs inspired by vintage holiday decorations. Artists use ultra-fine detail brushes to create interconnected patterns resembling Christmas doilies, snowflake lace, and ornamental metalwork. These designs require steady hands and years of practice to master.
Celebrity Christmas Nail Trends
Red carpet holiday manicures set the standard for luxury Christmas nail art through celebrity appearances at winter events. Stars like Taylor Swift and Ariana Grande frequently sport custom designs featuring Swarovski crystals, 24-karat gold leaf, and hand-mixed polish colors created exclusively for their looks.
Social media celebrity collaborations drive trending Christmas nail styles through partnerships between A-list stars and top nail artists. Recent collaborations include Kylie Jenner’s chrome Christmas tree nails by Chaun Legend and Hailey Bieber’s minimalist snowflake design by Zola Ganzorigt.
Award show Christmas looks influence mainstream nail trends through highly photographed appearances during holiday season ceremonies. The Golden Globes, People’s Choice Awards, and holiday movie premieres showcase elaborate designs that generate thousands of copycat attempts on social media platforms.
Celebrity nail artist signatures create recognizable styles that fans eagerly replicate each Christmas season. Tom Bachik’s geometric holiday patterns, Mei Kawajiri’s avant-garde Christmas creatures, and Jenny Bui’s crystal-encrusted designs have become synonymous with high-fashion holiday nail art.
Social Media Christmas Nail Art Stars
Instagram nail art influencers showcase professional level Christmas designs that garner millions of views and inspire countless recreations. Top artists like @nailsbymei, @betina_goldstein, and @tombachik share detailed process videos and behind-the-scenes content from their celebrity client sessions.
TikTok Christmas nail tutorials make complex professional techniques accessible through step-by-step video content. Viral creators demonstrate advanced methods using everyday tools, breaking down intimidating salon processes into manageable home techniques that achieve surprisingly professional results.
YouTube nail art channels provide comprehensive Christmas design education through long-form tutorials and product reviews. Channels like Simply Nailogical, Nail Career Education, and The Nail Hub offer detailed explanations of professional techniques, tool recommendations, and troubleshooting tips.
Pinterest Christmas nail boards curate thousands of professional design ideas organized by color scheme, difficulty level, and design theme. These platforms serve as inspiration libraries where users save favorite looks and create mood boards for their next salon appointments or DIY attempts.
Conclusion
We’ve explored a magnificent industry of Christmas nail art that transforms your fingertips into festive masterpieces. From beginner-friendly candy cane stripes to professional-level 3D ornaments there’s truly something for every skill level and style preference.
The beauty of Christmas nail art lies in its versatility – whether you’re drawn to classic red and green palettes sparkling glitter gradients or modern geometric patterns you can create stunning designs that perfectly capture the holiday spirit.
Remember that practice makes perfect and even the most intricate designs become achievable with patience and the right techniques. Your Christmas manicure should reflect your personal style while celebrating the magic of the season.
This holiday season let your nails be a canvas for creativity and joy. With these ideas and techniques at your fingertips you’re ready to create memorable nail art that’ll spread festive cheer wherever you go.
Frequently Asked Questions
What are the most popular Christmas nail art colors for 2025?
The trending Christmas nail colors for 2025 include classic red and green combinations, elegant gold and silver metallics, and sophisticated winter white and blue themes. These colors can be used individually or combined to create stunning gradient effects and ombre designs that capture the festive holiday spirit.
Can beginners create beautiful Christmas nail art at home?
Absolutely! The article provides step-by-step guidance for three beginner-friendly designs: simple candy cane stripes, basic Christmas tree triangles, and minimalist holly leaf patterns. These designs require only basic tools and techniques, making them perfect for novice nail artists to achieve stunning holiday manicures.
What essential tools do I need for Christmas nail art?
Key tools include detail brushes for intricate work, dotting tools for creating perfect circles and snowflakes, and striping brushes for clean lines. You can also use household items like toothpicks and bobby pins as budget-friendly alternatives to expensive professional tools.
How can I make my Christmas nail art last longer?
Proper preparation is crucial – start with clean, shaped nails and apply a quality base coat. Allow each layer to dry completely before adding the next. Finish with a top coat to seal the design and prevent chipping. Avoid rushing the drying process for best results.
What are some trending Christmas nail art styles for this year?
Popular 2025 trends include ombre Christmas gradients with stunning color transitions, geometric holiday patterns that modernize classic designs, and mixed texture designs incorporating matte and gloss finishes, velvet flocking powder, and caviar bead accents for unique textural contrasts.
How do I create professional-looking Christmas character nail art?
Start with beloved characters like Santa Claus, penguins, or reindeer. Practice on nail wheels first to perfect your technique. Use these designs as accent nails paired with solid holiday colors on remaining fingers. Focus on simple details that capture each character’s essence without overwhelming the nail.
Can I create glittery Christmas nail designs without going to a salon?
Yes! Create glitter gradient Christmas trees using layered glitter in varying sizes for depth. Add metallic snowball effects with chrome powders and secure rhinestone Christmas star accents with proper nail glue. Practice precision placement for professional-looking sparkly designs.
What are Christmas French manicure variations?
Transform classic French tips with holiday colors like red and green, add metallic finishes and glittery accents. Try Christmas color French fades featuring gradients like red to white or green to gold. Include festive pattern overlays such as snowflakes, holly leaves, or Christmas trees.
How can I avoid common mistakes when doing Christmas nail art at home?
Don’t rush the drying process between layers, as this causes smudging and chipping. Always clean up cuticles for a polished look. Use thin coats rather than thick ones, and ensure proper preparation with base coats. Take your time with intricate details for the best results.
Are there budget-friendly alternatives for expensive nail art supplies?
Yes! Use household items like toothpicks for dotting, bobby pins for striping, and makeup sponges for gradient effects. Dollar stores often carry nail art supplies at fraction of professional prices. Water slide decals and nail wraps offer convenient alternatives to hand-painted designs.


