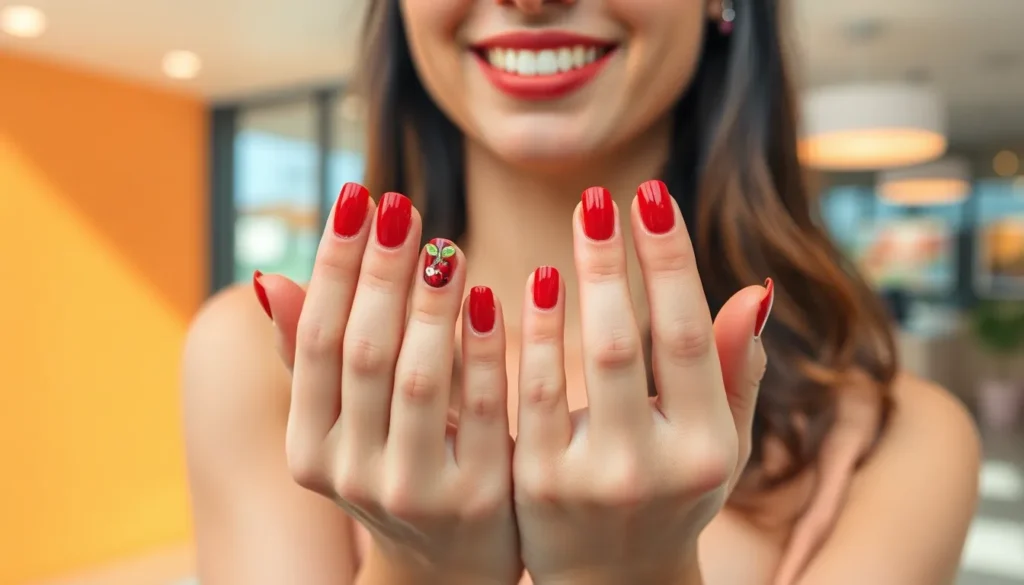
Cherry nail designs have taken the beauty industry by storm and we’re absolutely obsessed with this sweet trend! From deep burgundy hues that mirror ripe cherries to playful fruit-inspired art that’ll make your fingertips pop these designs offer endless possibilities for expressing your unique style. Whether you’re craving something subtle for the office or bold statement nails for your next night out cherry-themed manicures deliver that perfect balance of sophistication and fun.
We’ve discovered that cherry nail ideas work beautifully across all seasons making them a versatile choice that never goes out of style. The rich red tones complement every skin tone while the creative variations – from minimalist cherry accents to full-blown fruit gardens – ensure there’s a perfect design waiting for everyone.
Classic Red Cherry Nail Designs
The timeless appeal of cherry red makes it our favorite foundation for stunning nail art. These traditional approaches to cherry nail designs offer sophisticated elegance that works for any occasion.
Glossy Cherry Red French Tips
French manicures get a vibrant upgrade when we swap nude tips for glossy cherry red. The high shine finish creates depth and dimension that catches light beautifully throughout the day. We recommend using a quality base coat followed by two thin layers of cherry red polish on just the tips. Professional nail technicians often suggest keeping the cherry red portion slightly thinner than traditional white French tips to maintain the classic proportions. This design works exceptionally well on almond and oval nail shapes where the curved tip naturally complements the cherry’s rounded form.
Matte Cherry Red Full Coverage
Matte cherry red delivers sophisticated drama without the glossy shine. We love how this finish transforms bold cherry tones into something unexpectedly refined and modern. The velvety texture adds visual interest while maintaining the rich pigmentation that makes cherry red so captivating. Application requires steady hands since matte formulas show brush strokes more easily than glossy versions. We suggest using quick even strokes and avoiding going back over areas once they begin to set. The result creates striking contrast against jewelry and complements both casual and formal outfits.
Cherry Red Gradient Ombré
Gradient effects showcase cherry red’s versatility by blending it with complementary shades. We often pair deep cherry with lighter berry tones or even soft pinks to create smooth color transitions. The ombré technique works beautifully when we start with the darkest cherry shade at the base and gradually lighten toward the tips. Makeup sponges help achieve seamless blending between colors while keeping the cherry red as our dominant base tone. This design adds movement and visual flow that makes shorter nails appear longer while giving longer nails elegant sophistication.
3D Cherry Nail Art Ideas
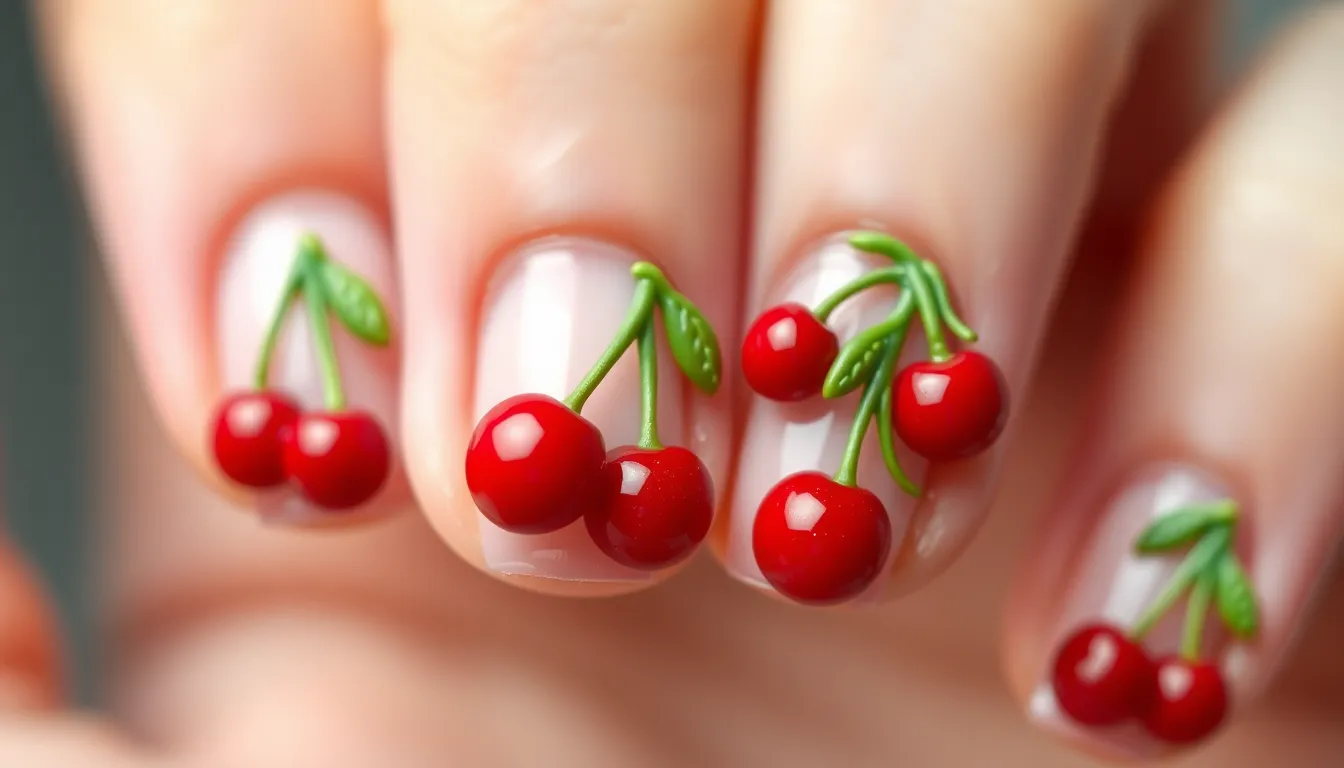
Elevating cherry nail art beyond traditional flat designs opens up exciting creative possibilities. Three dimensional techniques transform your manicure into miniature sculptures that catch light and attention from every angle.
Sculpted Cherry Decorations
Sculpted cherry designs create stunning focal points using acrylic powder or hard gel. We build tiny cherry shapes directly onto the nail surface using small sculpting brushes and red pigments. Professional nail artists often start with a base layer then gradually add volume to create realistic fruit textures.
Each sculpted cherry requires careful attention to proportion and placement for balanced composition. We recommend positioning larger cherries near the cuticle area and smaller ones toward the nail tips. The sculpting process typically takes 15 to 20 minutes per nail but delivers impressive dimensional results.
Adding green sculpted stems and leaves completes the realistic cherry appearance. These tiny botanical details require precision work with fine brushes and emerald gel paints. The finished sculptures need proper curing under LED lights for maximum durability.
Cherry Charm Embellishments
Cherry charm embellishments offer instant three dimensional appeal without extensive sculpting skills. We attach pre made metal or resin cherry charms using strong nail glue or gel adhesive. These decorative elements come in various sizes from delicate 2mm miniatures to bold 8mm statement pieces.
Placement strategy determines the overall visual impact of charm embellishments. We typically position one larger charm as an accent nail feature with smaller charms scattered across other nails. The weight distribution remains crucial for comfortable wear and long lasting adhesion.
Mixed material charms featuring crystals or pearls add luxury touches to cherry nail designs. Rhinestone studded cherry charms reflect light beautifully under different lighting conditions. These premium embellishments work exceptionally well for special occasion manicures.
Raised Cherry Gel Designs
Raised cherry gel designs use thick builder gels to create dimensional fruit shapes. We apply multiple layers of colored gel polish building up volume gradually for smooth rounded forms. This technique requires steady hands and patience as each layer needs complete curing.
The gel layering process creates natural looking cherry contours and shadows. We start with darker red bases then add lighter pink highlights to simulate natural fruit coloring. White gel dots represent characteristic cherry shine spots for added realism.
Temperature changes can affect raised gel durability so proper base preparation remains essential. We always apply dehydrator and primer before building dimensional designs. The final result delivers professional quality three dimensional cherries that maintain their shape for weeks.
Cherry Blossom Inspired Nail Art
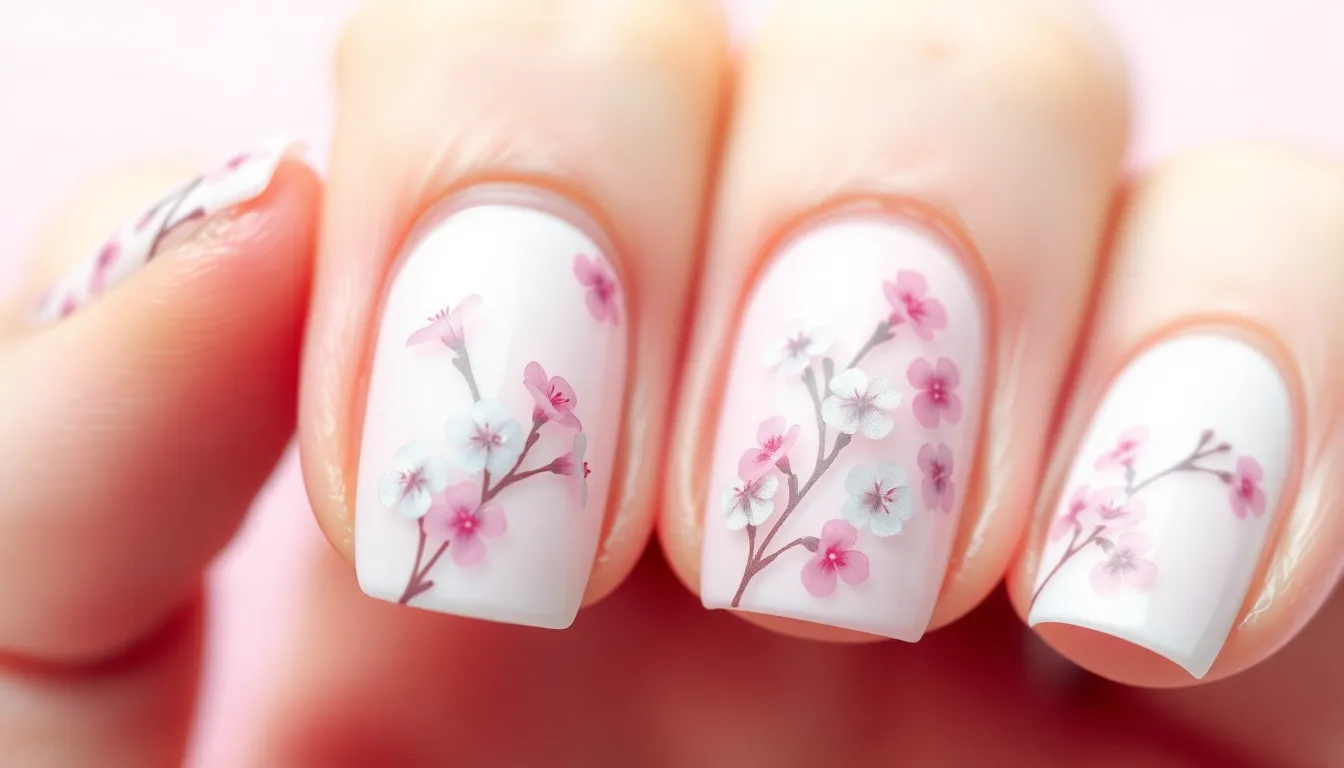
Cherry blossom nail art brings springtime elegance to your fingertips with delicate floral motifs. We’ll explore stunning techniques that capture the ethereal beauty of sakura blooms.
Pink Cherry Blossom Petals
Creating individual pink petals transforms your nails into delicate spring canvases. We recommend starting with a nude or clear base coat to let the petals shine. Soft blush pink shades work beautifully for this technique, mimicking the natural coloring of cherry blossoms.
Detailed petal work requires precision with nail art brushes or dotting tools. We suggest using acrylic paints for better control and opacity. Layer different shades of pink from pale rose to deeper salmon tones for realistic dimension. Each petal should vary slightly in size and shape for an authentic look.
Placement strategy makes the difference between amateur and professional results. We position larger petals as focal points on accent nails while scattering smaller ones across remaining fingers. This creates visual balance without overwhelming the design.
White and Pink Floral Patterns
Combining white and pink creates stunning contrast in cherry blossom designs. We blend these colors to achieve the classic sakura appearance that’s both feminine and sophisticated. White petals with pink centers offer a traditional approach to this nail art style.
Watercolor techniques work exceptionally well for floral patterns. We use a wet brush to blend colors seamlessly, creating soft transitions between white and pink. This method produces the dreamy, ethereal quality that defines cherry blossom aesthetics.
Pattern distribution across all ten nails requires careful planning. We alternate between full floral coverage and subtle accent placement to maintain visual interest. Some nails feature complete blossoms while others showcase scattered petals for a natural, wind blown effect.
Cherry Blossom Branch Designs
Branch elements add structural foundation to cherry blossom nail art. We paint thin brown or dark gray lines using fine liner brushes to create realistic tree branches. These branches serve as the base for attaching delicate pink and white blossoms.
Dimensional branch work elevates the overall design complexity. We layer branches at different angles to create depth and movement across the nail surface. Some branches extend from cuticle to tip while others create diagonal compositions that draw the eye.
Incorporating tiny buds and leaves completes the natural appearance. We add small green dots for unopened buds and miniature leaf shapes in sage green. This attention to botanical detail transforms simple floral art into sophisticated nature inspired manicures that celebrate the beauty of spring cherry trees.
Minimalist Cherry Nail Concepts
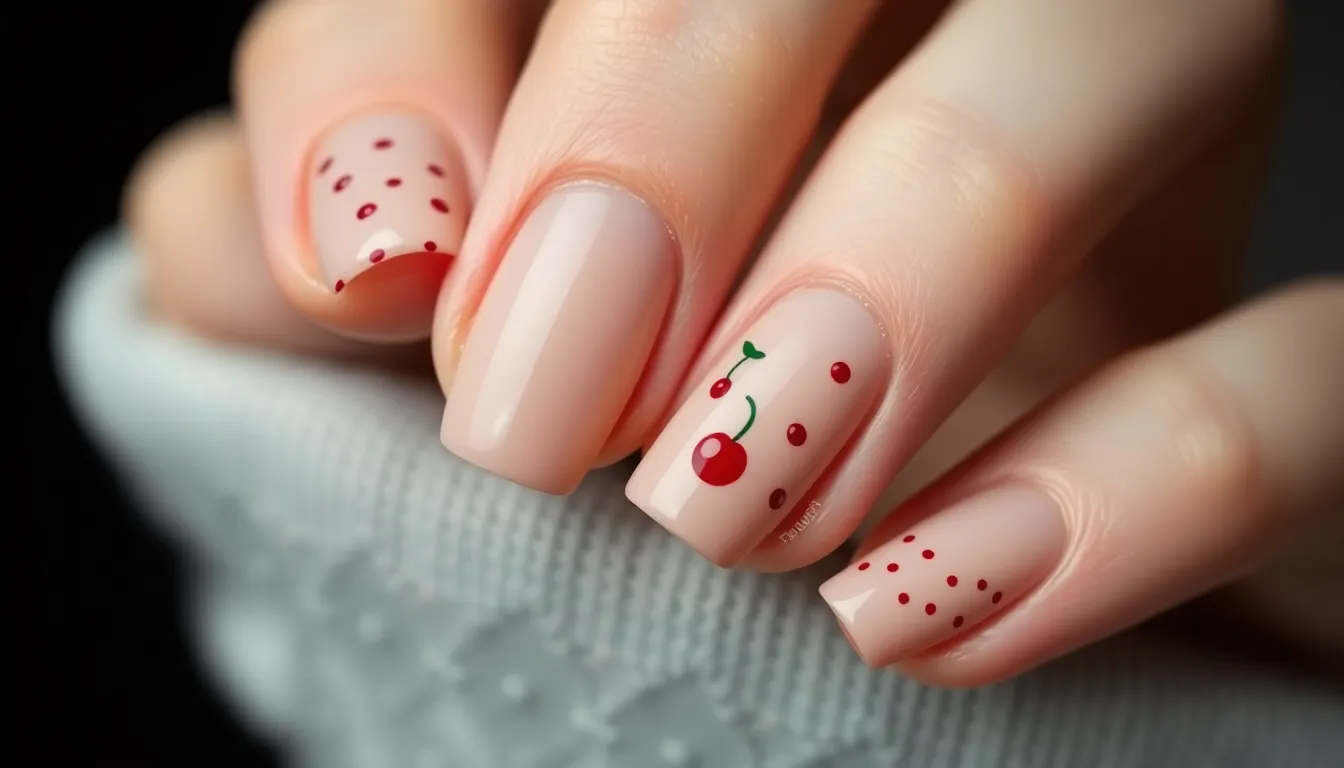
We’re embracing the beauty of simplicity with minimalist cherry nail designs that prove less is often more. These understated approaches to cherry nail art offer sophisticated elegance without overwhelming your overall look.
Single Cherry Accent Nails
Accent nails featuring a single cherry motif create stunning focal points while maintaining an overall clean aesthetic. We recommend placing one detailed cherry on the ring finger of each hand using a fine detail brush and cherry red polish. Position the cherry slightly off-center toward the cuticle area for a modern asymmetrical look that catches light beautifully.
Color combinations work best when we pair the cherry accent with neutral base tones like soft pink, nude, or clear polish on the remaining nails. The single cherry can be enhanced with a tiny green stem using a dotting tool dipped in forest green polish. This technique requires steady hands but creates professional results that complement both casual and formal attire.
Tiny Cherry Dot Patterns
Small cherry dots scattered across the nail bed offer playful sophistication without requiring advanced artistic skills. We create these miniature cherries using a small dotting tool or the tip of a bobby pin dipped in cherry red polish. Space the dots irregularly across 2-3 nails per hand for balanced visual interest.
Pairing techniques enhance the overall design impact when we add microscopic white highlight dots to each cherry using a toothpick. The key lies in keeping the dots small and maintaining consistent spacing between elements. We’ve found that limiting the pattern to accent nails prevents the design from appearing cluttered while still achieving that coveted cherry theme.
Simple Cherry Outline Art
Outline cherry designs deliver maximum impact with minimal color commitment using only thin lines to define the fruit shape. We draw these outlines using a fine liner brush or nail art pen in deep red or black polish against a nude or clear base. The technique involves creating two connected circles with a small curved stem extending upward.
Finishing touches elevate the simple outline aesthetic when we add a single highlight line inside each cherry outline using white or light pink polish. This creates dimension without requiring solid color fills or complex shading techniques. We position these outline cherries near the tip of the nail for an elegant French manicure alternative that works beautifully on shorter nail lengths.
Vintage Pin-Up Cherry Nail Styles
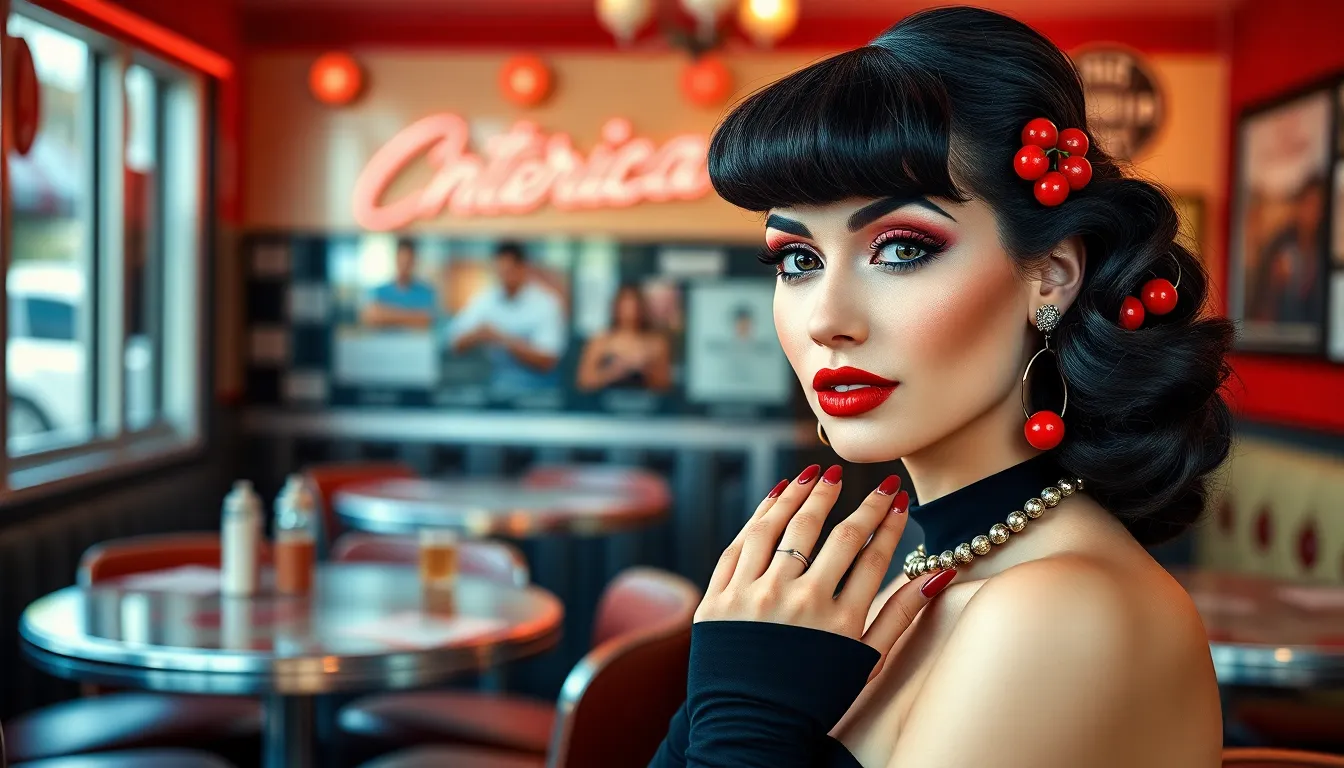
We’re diving into retro glamour with vintage pin-up cherry nail styles that capture the essence of classic Americana. These timeless designs blend nostalgic charm with modern nail art techniques.
Rockabilly Cherry Designs
Bold black bases create striking contrast for vibrant red cherries in rockabilly nail art. We recommend using deep ebony polish as your foundation, then applying glossy cherry red fruits with white highlights for dimension. Classic rockabilly elements include lightning bolts, flames, and checker patterns surrounding the cherry motifs.
Dramatic red and black color schemes define authentic rockabilly cherry manicures. Traditional designs feature alternating fingers with solid black and cherry red polish, while accent nails showcase detailed cherry illustrations with green stems. Silver studs and rhinestones add extra rock and roll flair to these vintage inspired looks.
Chrome accents enhance rockabilly cherry themes by incorporating metallic elements reminiscent of classic cars and jukeboxes. We suggest adding thin silver stripes or chrome dots around cherry designs to capture that authentic 1950s hot rod aesthetic.
Retro Cherry with Polka Dots
White polka dots on cherry red bases create quintessential vintage pin-up nail art that’s both playful and sophisticated. We use dotting tools in various sizes to achieve perfectly round spots, typically spacing them evenly across the nail surface for balanced visual appeal.
Coordinating polka dot patterns work beautifully when combined with detailed cherry illustrations on accent nails. Classic combinations include white dots on red backgrounds with one statement nail featuring a cluster of cherries and leaves. This approach maintains the retro aesthetic while adding focal interest.
Two tone polka dot designs elevate traditional patterns by incorporating cream or pale pink dots alongside white ones. We recommend using this technique on longer nail shapes where multiple dot sizes can create depth and vintage charm reminiscent of 1940s fashion prints.
1950s Inspired Cherry Motifs
Classic cherry pairs with vintage typography bring authentic 1950s diner culture to your manicures. We often incorporate small script words like “sweet” or “cherry” in delicate fonts alongside detailed fruit illustrations, creating narrative nail art that tells a story.
Pin-up girl silhouettes complement cherry themes by adding figurative elements that enhance the vintage aesthetic. Small silhouettes on accent nails pair perfectly with cherry clusters on remaining fingers, creating cohesive designs that celebrate classic American pin-up culture.
Vintage color palettes define authentic 1950s cherry motifs through careful shade selection that mirrors period appropriate hues. We use muted cherry reds, cream whites, and soft mint greens that reflect the pastel preferences of mid-century design while maintaining the playful spirit of cherry themed nail art.
Cherry and Gold Accent Combinations
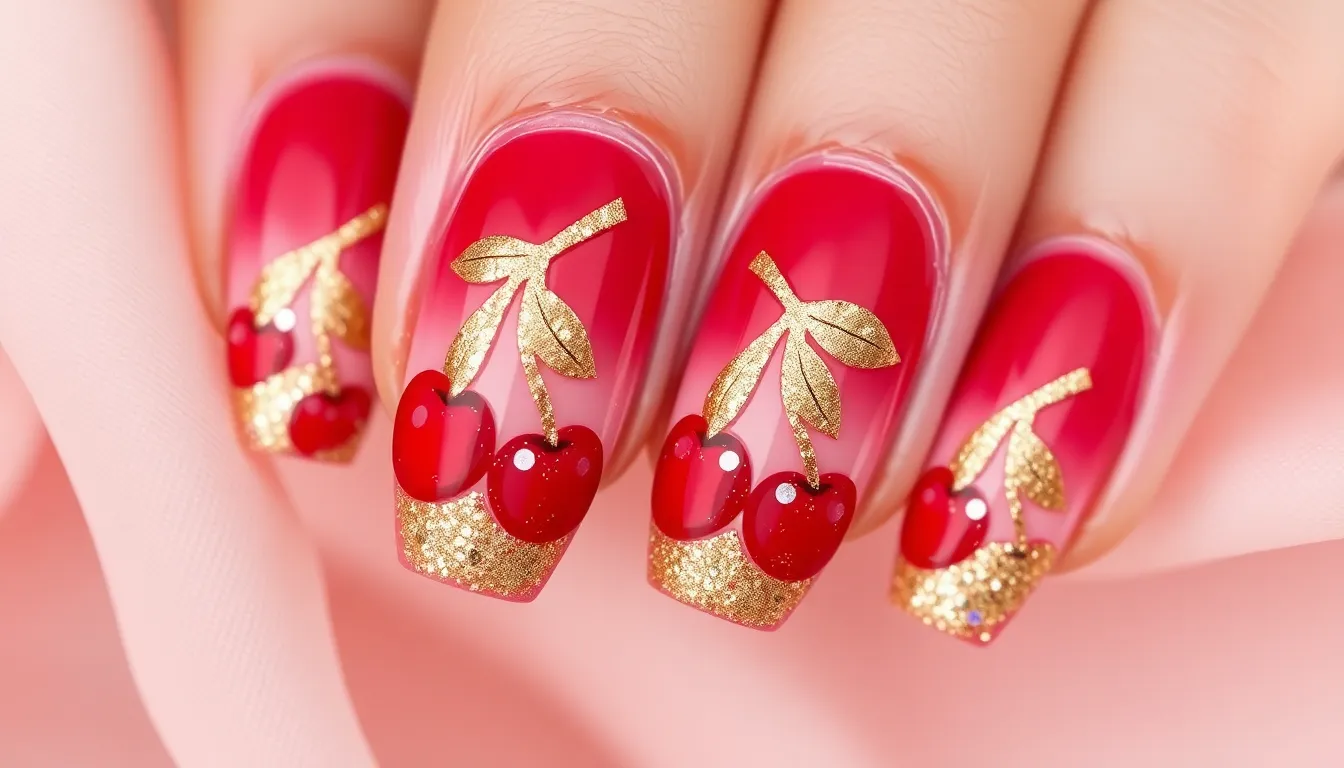
Gold elevates cherry nail designs with luxurious metallic elements that create stunning contrast against deep red tones. These sophisticated combinations transform simple cherry motifs into glamorous statement manicures.
Gold Leaf Cherry Details
Gold leaf applications bring luxury to cherry nail art through delicate metallic accents placed strategically around fruit designs. We recommend applying thin gold leaf sheets over slightly tacky base coats to achieve seamless adhesion. Position the leafing around cherry outlines or create partial coverage across individual cherries for an elegant effect.
Foil transfer techniques offer precise control when adding gold details to cherry designs. Apply specialized foil transfer glue in thin lines around cherry shapes, then press gold foil sheets firmly for 10-15 seconds. Remove the backing carefully to reveal crisp metallic borders that enhance the dimensional appearance of cherry motifs.
Mixed media applications combine gold leaf with other textures like rhinestones or glitter for enhanced visual impact. Layer small pieces of gold leaf beneath clear topcoat, then add tiny crystals or metallic studs for additional sparkle. This technique works particularly well on accent nails featuring single large cherry designs.
Metallic Cherry Stems
Chrome powder stems transform ordinary cherry designs with mirror-like metallic finishes that catch light beautifully. Apply a black gel base where stems will appear, then rub chrome powder over the tacky layer using a soft eyeshadow brush. Seal the chrome effect with a thin layer of topcoat to prevent dulling while maintaining the reflective quality.
Gold gel paint techniques create precise stem details using specialized nail art brushes and metallic gel paints. We suggest using a liner brush with gold gel polish to draw thin, curved stems that connect multiple cherries across the nail. Allow each stroke to cure under LED light before adding additional layers for opacity.
Striping tape applications provide perfectly straight metallic stems for geometric cherry arrangements. Place thin gold striping tape across the nail bed before applying cherry designs, then remove after the final topcoat application. This method ensures clean lines and prevents smudging that can occur with painted stem details.
Golden Cherry Glitter Effects
Holographic cherry sparkles combine traditional red cherry colors with gold holographic glitters that shift between warm tones. Mix fine holographic particles into clear topcoat and apply over completed cherry designs for an all-over shimmer effect. The multidimensional sparkle enhances the fruit’s natural curves while adding glamorous depth.
Gradient glitter fades create stunning transitions from solid cherry red to sparkling gold tips or borders. Use a makeup sponge to dab gold glitter polish from the cuticle area toward the nail tip, blending seamlessly with the cherry base color. This technique works especially well on longer nail shapes where there’s ample space for color transitions.
Textured gold accents incorporate larger glitter pieces and metallic flakes for dramatic three-dimensional effects. Apply these elements while the base cherry design remains slightly tacky, pressing larger pieces firmly into place. Encapsulate with thick builder gel to create smooth surfaces that won’t catch on clothing or hair.
Dark Cherry Gothic Nail Ideas
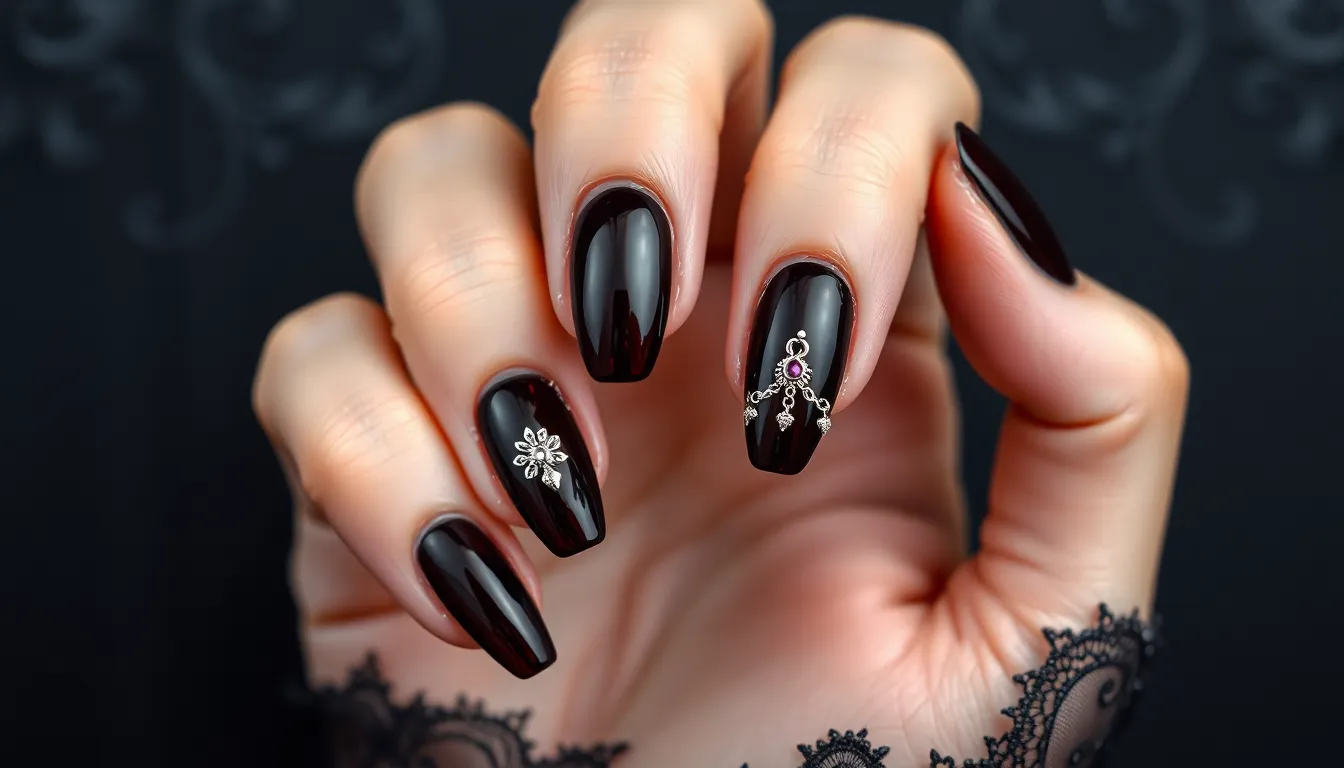
Gothic cherry nail designs transform traditional cherry motifs into dramatic masterpieces that embrace darkness while maintaining the fruit’s natural elegance. These sophisticated styles blend deep, moody tones with cherry elements to create striking manicures perfect for those who prefer edgier aesthetics.
Deep Burgundy Cherry Shades
Deep burgundy cherry shades create the perfect foundation for gothic nail designs by offering rich, wine-inspired tones that capture darkness and sophistication. We recommend starting with shades like OPI’s “Malaga Wine” or Essie’s “Bordeaux” as your base color to achieve that perfect vampiric cherry tone. These colors work exceptionally well on longer nail shapes like coffin or stiletto nails, where the depth of color creates maximum visual impact.
Layering burgundy shades adds complexity to your gothic cherry manicure through gradient techniques that blend from darkest burgundy at the cuticle to lighter cherry tones at the tips. Apply your darkest burgundy shade first, then use a makeup sponge to dab lighter burgundy colors toward the nail tips for seamless blending. This technique creates dimensional depth that makes your nails appear longer and more dramatic.
Matte burgundy finishes transform traditional cherry colors into modern gothic statements that eliminate shine for a velvety appearance. Top your burgundy base with a quality matte topcoat like Essie’s “Matte About You” to achieve this sophisticated look. The matte finish pairs beautifully with small metallic cherry accents or tiny rhinestone details placed strategically on accent nails.
Black Cherry Color Palettes
Black cherry color palettes combine the deepest possible cherry tones with true black elements to create the ultimate gothic nail aesthetic. These palettes work best when you alternate between pure black nails and dark cherry nails, creating contrast that makes both colors more striking. Consider using Chanel’s “Vamp” or MAC’s “Cyber” for authentic black cherry shades that maintain subtle red undertones.
Ombré transitions from black to dark cherry create seamless gradients that embody gothic elegance while maintaining cherry nail themes. Start with a black base at the cuticle area, then use a small makeup sponge to blend your darkest cherry shade toward the nail tips. This technique requires patience and multiple thin layers to achieve smooth color transitions without visible lines or patches.
Black cherry marble effects combine both colors in swirled patterns that create unique designs on each nail. Drop small amounts of black and dark cherry polish onto a palette, then use a thin nail art brush or toothpick to create marbled patterns directly on your nail surface. Work quickly before the polish dries, and seal with a glossy topcoat to enhance the marble effect’s depth and shine.
Dark Cherry with Silver Accents
Dark cherry with silver accents creates striking gothic combinations that balance warmth and coolness for sophisticated nail art. Silver chrome powder over dark cherry bases produces mirror-like finishes that reflect light beautifully while maintaining the gothic aesthetic. Apply your dark cherry base coat, then while the final coat remains slightly tacky, gently rub chrome powder with a silicone tool for seamless metallic coverage.
Silver foil transfer techniques add textural interest to dark cherry nails by creating irregular metallic patches that resemble natural oxidation. Cut silver transfer foil into small irregular pieces, then press them onto your tacky dark cherry base coat using a silicone tool or your finger. The random placement creates organic patterns that enhance the gothic mood while adding visual texture.
Delicate silver chain designs over dark cherry bases create intricate patterns reminiscent of gothic jewelry and architecture. Use silver gel paint or thin silver polish with a detail brush to paint connected chain links across one or two accent nails. These designs work particularly well on longer nails where you have space to create multiple chain links that flow naturally with your nail shape.
Cherry Nail Art for Different Seasons
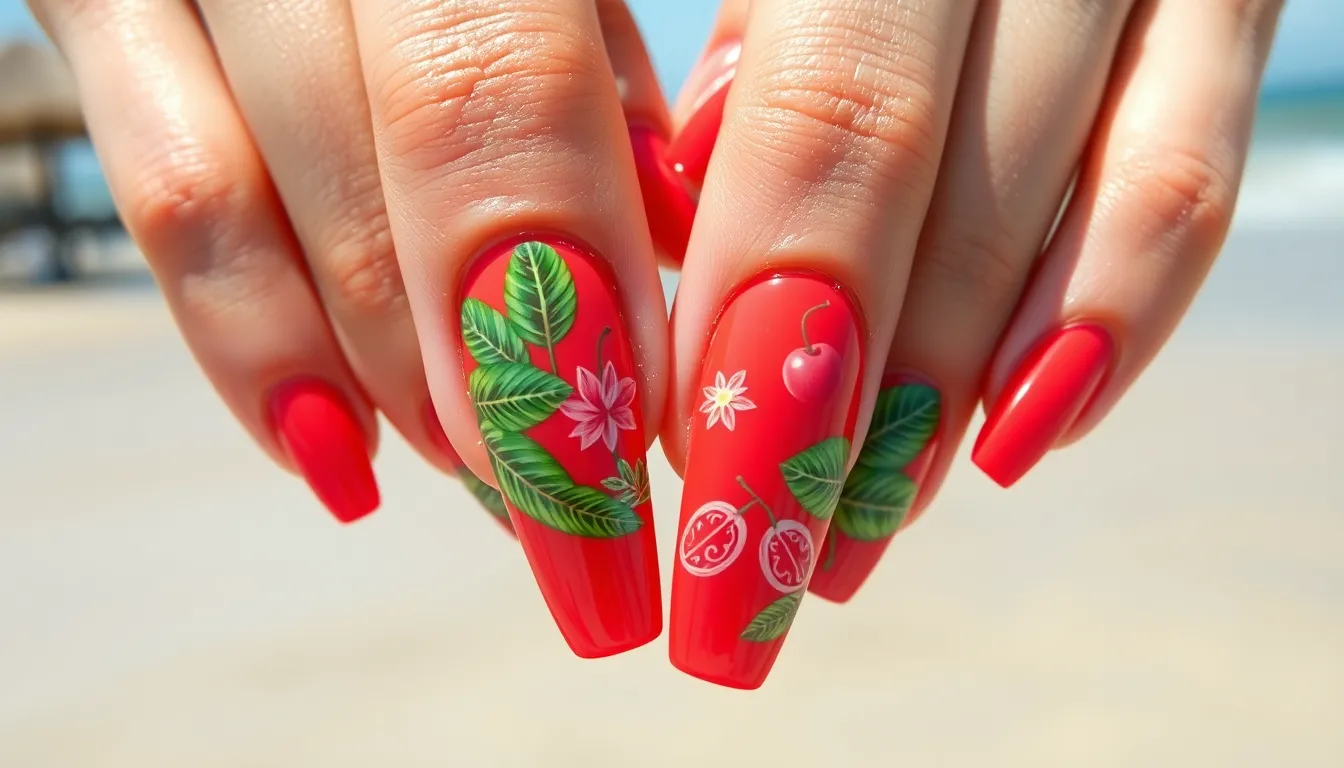
Cherry nail designs adapt beautifully throughout the year, offering endless possibilities for seasonal expression. Each season brings unique opportunities to reimagine cherry motifs with colors, textures, and elements that capture the spirit of the time.
Summer Bright Cherry Designs
Vibrant coral cherry hues dominate summer nail trends, replacing traditional deep reds with lighter, more energetic tones. We recommend mixing coral pink bases with bright red cherry accents to create a fresh, vacation ready look that complements sun kissed skin perfectly.
Tropical cherry combinations incorporate elements like palm leaves, pineapples, and coconuts alongside cherry motifs for playful summer vibes. These designs work exceptionally well on longer nail shapes like coffin or almond, where there’s ample space for detailed fruit arrangements and tropical patterns.
Neon cherry accent walls feature electric pink or bright orange cherry designs against white or nude bases for maximum summer impact. We suggest using gel polishes for these bold combinations since they maintain color intensity longer under UV exposure and pool activities.
Glossy summer finishes enhance bright cherry designs with mirror like reflections that catch sunlight beautifully. Apply two coats of high shine top coat over completed cherry art, allowing each layer to cure completely for professional durability that lasts through summer adventures.
Fall Deep Cherry Tones
Burgundy cherry gradients transition from deep wine shades at the cuticle to rich cherry red at the tips, capturing autumn’s dramatic color palette. We create these ombré effects using makeup sponges to blend colors seamlessly, building intensity through multiple thin applications rather than single heavy coats.
Copper accent cherries incorporate warm metallic elements that mirror fall foliage colors like burnt orange and golden brown. These designs pair beautifully with matte burgundy bases, where copper leaf details on cherry stems and highlights create sophisticated autumn elegance.
Plaid cherry combinations feature traditional tartan patterns in deep reds, greens, and golds with small cherry accents placed strategically at pattern intersections. We recommend using striping tape to achieve clean plaid lines before adding cherry details with fine tipped brushes for precision work.
Matte fall finishes transform glossy cherry designs into sophisticated autumn statements that complement cozy sweater weather perfectly. Apply matte top coat over completed designs, avoiding the cherry highlights to maintain subtle shine contrast that adds visual depth and interest.
Winter Cherry Holiday Themes
Festive red and gold cherries dominate holiday nail designs, incorporating metallic gold stems, leaves, and background elements for celebration ready manicures. We suggest using gold foil transfer sheets for consistent metallic coverage that won’t chip during holiday parties and gift wrapping activities.
Snow kissed cherry branches feature delicate white dots and lines that mimic frost patterns over deep cherry red bases. These winter wonderland designs work best on shorter nail lengths where intricate snow details remain visible and practical for cold weather glove wearing.
Holly berry cherry fusion combines traditional holly leaf patterns with cherry motifs for unique holiday nail art that stands out from typical seasonal designs. We recommend deep forest green bases with bright red cherry and holly berry combinations, finished with tiny white highlight dots for dimensional realism.
Glittery winter cherries incorporate holographic or silver glitter elements that catch light like fresh snow and holiday decorations. Apply glitter selectively to cherry highlights and background areas rather than full coverage, maintaining the elegance of the design while adding festive sparkle for winter celebrations.
Easy DIY Cherry Nail Tutorials
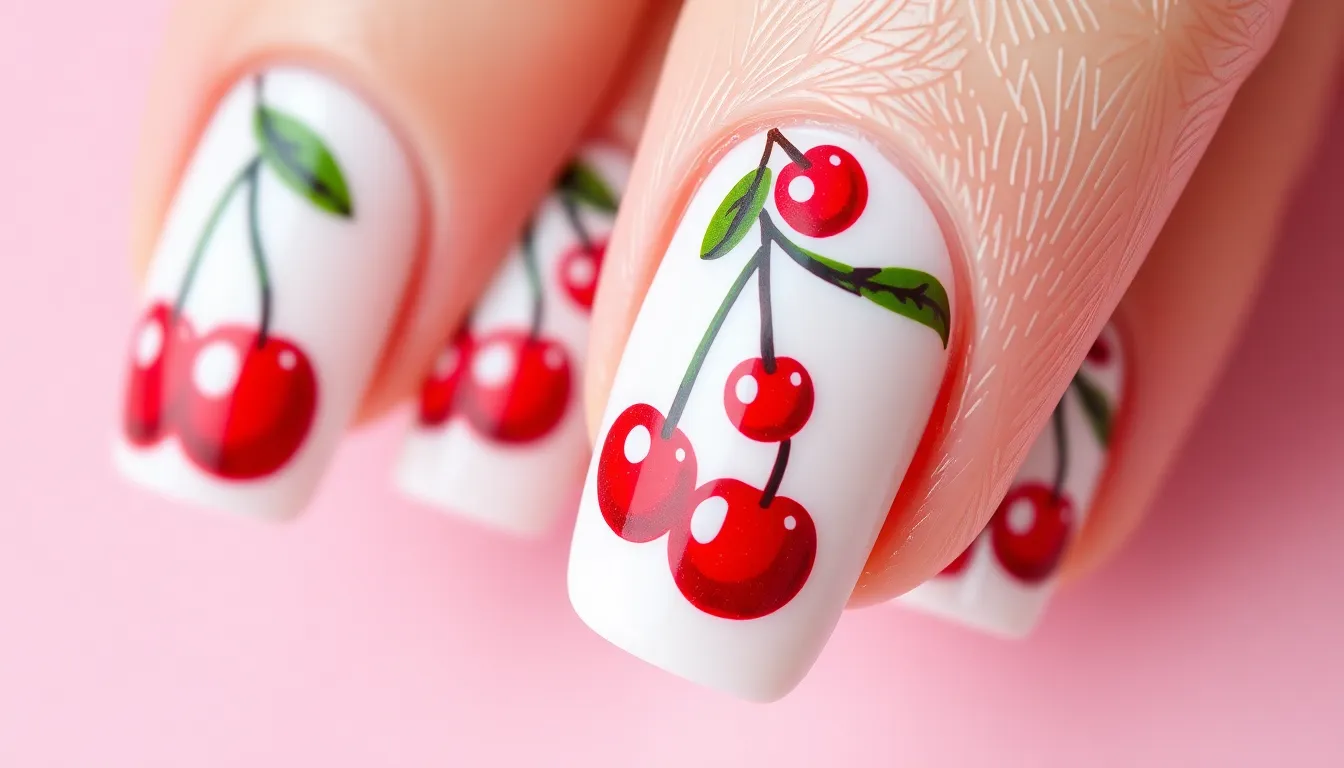
We’ll show you three foolproof methods that make creating cherry nail art accessible for beginners. These techniques require minimal tools and deliver professional looking results every time.
Beginner-Friendly Cherry Stamps
Stamping plates offer the fastest route to perfect cherry designs without artistic skills. We recommend investing in dedicated fruit themed stamping plates that feature various cherry sizes and arrangements. Clean your stamping plate thoroughly with acetone before each use to ensure crisp impressions.
Apply base coat and let it dry completely before beginning the stamping process. Choose high pigment stamping polish in cherry red shades like OPI’s “Big Apple Red” or Essie’s “Lollipop”. The consistency should be slightly thicker than regular nail polish for optimal transfer.
Press the stamper firmly onto the design and roll it across the nail surface in one smooth motion. Practice on a nail wheel first to perfect your technique before working on actual nails. Add small green dots with a dotting tool for stems once the cherry design dries completely.
Simple Cherry Nail Stickers
Nail stickers provide instant cherry art that looks hand painted but takes minutes to apply. We prefer water slide decals over vinyl stickers because they blend seamlessly with the nail surface. Trim stickers to fit your nail width before application for the cleanest look.
Prepare nails with base coat and your chosen background color before applying cherry stickers. Light pink nude shades or classic red bases work beautifully with cherry motifs. Wait for the base color to dry completely to prevent smudging during sticker application.
Position stickers carefully using tweezers for precise placement and avoid air bubbles. Start from one edge and smooth across the nail surface gradually. Seal everything with two coats of clear top coat to protect the stickers and create a glossy finish that matches salon quality manicures.
Basic Cherry Painting Techniques
Dotting tools make cherry painting achievable for anyone comfortable holding a brush. We use the larger end for cherry bodies and the smaller end for highlights and stems. Mix red polish with a tiny amount of white to create the perfect cherry shade that isn’t too dark or too bright.
Create cherry shapes by making two connected circles on the nail surface using steady pressure. Work quickly while the polish remains wet to blend the circles naturally. Add dimension by placing a smaller white dot on each cherry for realistic light reflection.
Paint thin green lines for stems using a fine detail brush or striping brush dipped in forest green polish. Connect stems between cherries and extend slightly beyond the fruit edges. Complete the look with tiny green leaves using short curved strokes that frame your painted cherries perfectly.
Conclusion
Cherry nail designs offer endless creative possibilities that we’ve explored throughout this comprehensive guide. From classic red manicures to intricate 3D sculptures and gothic interpretations we’ve covered techniques that suit every skill level and personal style.
The beauty of cherry-themed nails lies in their adaptability. Whether you’re drawn to minimalist accents vintage pin-up styles or luxurious gold combinations there’s a cherry design that perfectly matches your aesthetic preferences and the occasion.
We encourage you to experiment with these techniques and make them your own. Start with simple DIY methods like stamping or decals then gradually work your way up to more complex designs as your confidence grows. Your perfect cherry manicure is just a few steps away.
Frequently Asked Questions
What makes cherry nail designs so popular?
Cherry nail designs have gained popularity due to their incredible versatility and universal appeal. The rich red tones complement all skin types and can be adapted for any season or occasion. Whether you prefer subtle cherry accents for work or bold fruit-inspired art for special events, these designs offer endless creative possibilities while maintaining timeless elegance.
Can cherry nail designs work for all nail shapes?
Yes, cherry nail designs are highly adaptable to various nail shapes. From almond to square, coffin to round nails, cherry motifs can be scaled and positioned to enhance your natural nail shape. The key is adjusting the size and placement of cherry elements to create balanced, proportionate designs that flatter your specific nail geometry.
Are cherry nail designs suitable for professional settings?
Absolutely! Cherry nail designs can be perfectly appropriate for professional environments when executed with subtlety. Opt for minimalist approaches like single cherry accent nails, simple outline art, or matte cherry red coverage in deeper tones. These sophisticated variations maintain professionalism while adding a touch of personality to your appearance.
What’s the difference between cherry fruit and cherry blossom nail art?
Cherry fruit designs focus on the actual red cherries with stems and leaves, often featuring bold reds and three-dimensional elements. Cherry blossom nail art celebrates the delicate pink and white flowers of cherry trees, emphasizing springtime elegance with soft floral motifs, branch details, and watercolor techniques for a more romantic aesthetic.
How long do 3D cherry nail designs typically last?
Three-dimensional cherry nail designs using acrylic or hard gel typically last 2-3 weeks with proper application and care. However, raised elements may be more prone to catching and damage during daily activities. Using a quality top coat and being mindful of hand movements can help extend the lifespan of dimensional cherry designs.
Can beginners create cherry nail art at home?
Yes! Beginners can easily create cherry nail art using simple techniques like stamping plates, water slide decals, or basic dotting tools. These methods require minimal skill while producing professional-looking results. Start with simple designs like tiny cherry dots or outline art before progressing to more complex three-dimensional techniques.
What tools are essential for creating cherry nail designs?
Essential tools include fine detail brushes for stems and leaves, dotting tools for cherry shapes, striping tape for clean lines, and quality nail polishes in cherry red, green, and complementary colors. For advanced designs, consider acrylic paints, gel polishes, gold leaf, and dimensional embellishments like charms or rhinestones.
How do I choose the right cherry shade for my skin tone?
All skin tones can wear cherry designs successfully by selecting the right shade intensity. Fair skin looks beautiful with bright, true reds and coral cherry hues. Medium skin tones suit deep burgundy and classic cherry red. Darker skin tones are stunning in rich, wine-colored cherries and bold, vibrant reds with golden undertones.
What are the best base colors to pair with cherry designs?
Cherry designs pair beautifully with nude, clear, or cream base colors for subtle elegance. For bolder looks, try black bases for gothic styles, white for vintage pin-up aesthetics, or soft pink for romantic cherry blossom themes. Gold and silver bases add luxury, while navy or deep green create sophisticated contrasts.
How can I make my cherry nail designs last longer?
To extend the life of cherry nail designs, always use a quality base coat, apply thin layers of polish, and seal with a durable top coat. Avoid excessive water exposure, wear gloves during cleaning, and apply cuticle oil regularly. For dimensional designs, be extra careful with hand movements and reapply top coat weekly to maintain shine and protection.

