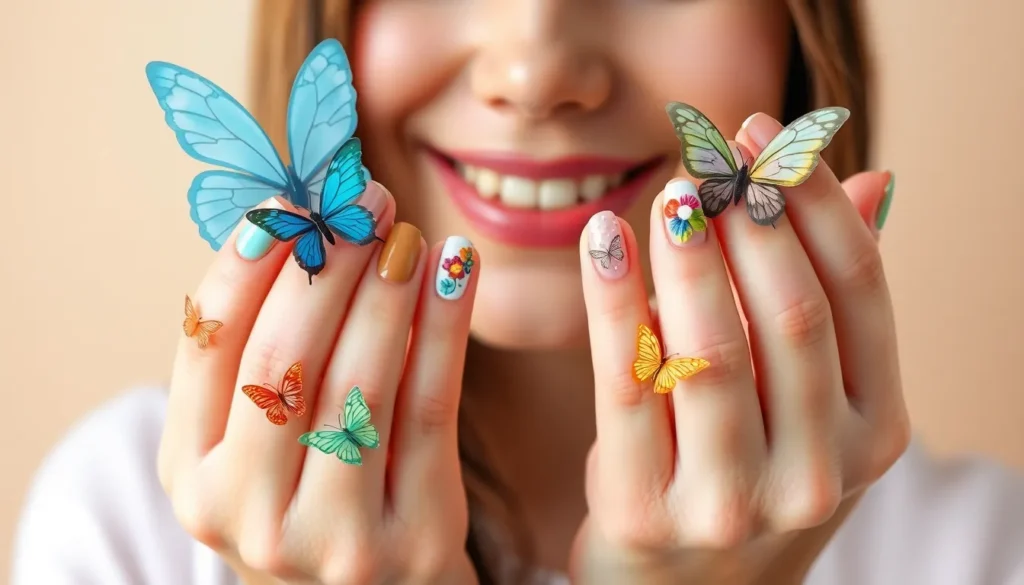
Butterfly nails have taken the beauty industry by storm and we’re absolutely obsessed with this whimsical trend that’s perfect for any season. These delicate winged designs transform ordinary manicures into stunning works of art that’ll have everyone asking where you got your nails done.
We’ve discovered that butterfly nail art isn’t just about pretty pictures – it’s a versatile trend that works with everything from subtle pastels to bold neon colors. Whether you’re heading to a spring wedding or want to add some magic to your everyday look these enchanting designs offer endless possibilities for creativity.
From 3D butterfly appliqués to hand-painted masterpieces we’ll show you exactly how to achieve salon-quality butterfly nails at home. Get ready to spread your wings and embrace this stunning nail trend that’s guaranteed to make your fingertips the center of attention.
Delicate Watercolor Butterfly Nail Ideas
Watercolor butterfly nails offer an ethereal and artistic approach to this trending manicure style. We’ll guide you through creating these dreamy designs that capture the delicate beauty of butterfly wings with fluid, translucent effects.
Soft Pastel Color Combinations
Lavender and coral creates a stunning foundation for watercolor butterfly wings that feels both romantic and fresh. We recommend starting with a sheer white base coat to help the pastel colors blend smoothly across your nails.
Mint green paired with peachy pink produces an unexpected yet harmonious combination that mimics spring garden butterflies. Apply these colors while they’re still wet to achieve natural bleeding effects.
Baby blue and soft yellow work beautifully together for creating monarch-inspired watercolor designs. Dab these shades onto a damp makeup sponge and gently press onto your nails for authentic watercolor texture.
Rose quartz and sage green offer a sophisticated color palette that looks elegant on any nail length. We suggest using gel polishes for these combinations as they stay workable longer during the blending process.
Blending Techniques for Wings
Wet-on-wet application creates the most authentic watercolor effect for butterfly wings on your nails. Apply a clear topcoat first, then drop small amounts of thinned polish directly onto the wet surface.
Sponge dabbing helps you achieve natural color transitions that mimic real butterfly wing patterns. Use a cosmetic wedge sponge to blend colors while they’re still tacky for seamless gradients.
Brush feathering involves using a fine detail brush to pull colors into each other creating organic wing shapes. We recommend cleaning your brush between colors to maintain crisp color separation.
Alcohol technique uses rubbing alcohol to create unique textures within your watercolor butterfly designs. Drop tiny amounts of alcohol onto wet polish to create natural-looking spots and patterns.
Adding Subtle Shimmer Effects
Iridescent top coat transforms basic watercolor butterflies into magical designs that shift colors in different lighting. Apply this sparingly over dried watercolor effects to maintain the delicate appearance.
Fine glitter dust sprinkled over wet polish creates a fairy-like shimmer that enhances butterfly wing details. We prefer cosmetic-grade glitter in white or clear for the most natural sparkle effect.
Holographic flakes placed strategically on wing tips add dimension without overwhelming the watercolor base. Use tweezers to position individual flakes exactly where you want maximum impact.
Pearl powder mixed into clear polish creates a subtle luminous effect that mimics the natural sheen of butterfly wings. This technique works especially well over lighter watercolor combinations like pastels and whites.
Bold 3D Butterfly Nail Designs

Moving beyond delicate watercolor effects, bold 3D butterfly designs transform your nails into dimensional works of art. These eye-catching creations use sculptural techniques that make butterflies appear to flutter right off your fingertips.
Sculpted Acrylic Butterfly Applications
Sculpted acrylic butterflies create the most dramatic dimensional effect for your nail art. We start by building a foundation of clear or colored acrylic, then shape individual butterfly wings using specialized sculpting tools. Professional nail artists recommend using a fine detail brush to carve wing patterns while the acrylic remains workable.
Wing positioning dramatically impacts the final look of your 3D butterfly nails. Placing butterflies at slight angles creates natural movement, while positioning them to “land” on the nail edge produces stunning visual depth. We suggest varying the heights of multiple butterflies across different nails for maximum impact.
Color gradients within sculpted wings add realistic beauty to your butterfly nail designs. Mixing two to three acrylic shades creates authentic wing patterns that mimic species like monarchs or swallowtails. Advanced techniques include embedding tiny rhinestones or metallic powders directly into the wet acrylic for added sparkle.
Layered Gel Polish Techniques
Layered gel applications build dimensional butterfly effects without traditional sculpting methods. We apply base colors first, then use dotting tools and fine brushes to create raised wing patterns with successive gel layers. Each layer requires proper curing under LED lights to maintain structure.
Textured gel mediums enhance the dimensional quality of your butterfly nail art. Mixing gel polish with texture paste creates raised surfaces that catch light beautifully. We recommend applying these mixtures in thin layers to prevent cracking or peeling during wear.
Gradient layering produces stunning depth in gel butterfly designs. Starting with darker shades at wing bases and gradually lightening toward tips creates natural butterfly coloration. Professional tip: use a makeup sponge to blend colors seamlessly between gel layers for smooth transitions.
Mixed Media Embellishments
Rhinestone butterfly bodies serve as stunning focal points for mixed media nail art. We position larger stones as butterfly bodies, then surround them with painted or applied wings using various materials. Crystal bodies paired with hand-painted wings create elegant contrast between sparkle and artistry.
Foil accent details add metallic shine to 3D butterfly nail designs. Applying transfer foils over tacky gel layers creates iridescent wing effects that shift color in different lighting. We suggest using rose gold, silver, or holographic foils to complement your chosen butterfly color palette.
Dried flower integration brings natural elements into your butterfly nail art. Real pressed flowers or high-quality artificial petals create authentic wing textures when sealed under top coat. Combining dried flowers with painted butterfly bodies produces unique mixed media effects that celebrate nature’s beauty on your nails.
Minimalist Butterfly Nail Art

Sometimes we find that less truly is more when it comes to butterfly nail designs. Clean lines and subtle details create an elegant sophistication that complements any style effortlessly.
Simple Line Work Designs
Outlining creates stunning butterfly effects with just basic nail art tools. We recommend using a fine detail brush or striping brush to draw delicate wing outlines in black or navy polish. Starting with the upper wings, draw curved teardrop shapes that taper toward the nail tips.
Drawing symmetrical lower wings requires steady hands and patience. Position these smaller wing sections directly below the upper wings, creating mirror images on each side of an imaginary center line. We suggest practicing the motion on paper before applying to your nails.
Adding minimal wing details elevates the simple outline design. Tiny dots along the wing edges or single curved lines through the center create authentic butterfly patterns without overwhelming the minimalist aesthetic. We often use contrasting colors like white dots on black outlines or metallic gold lines on navy designs.
Negative Space Butterfly Silhouettes
Creating butterfly shapes through negative space produces sophisticated nail art. We apply base color around the butterfly outline, leaving the natural nail visible where the wings would be. This technique works best with darker base colors like deep burgundy, forest green, or classic black.
Mastering the silhouette technique starts with proper stencil placement. We cut butterfly shapes from tape or purchase pre made nail stencils to ensure clean, professional looking results. Positioning the stencil slightly off center creates more ever-changing visual interest than perfectly centered designs.
Finishing negative space butterflies requires careful removal timing. We remove stencils while the polish remains slightly wet to prevent chipping along the edges. Adding a thin coat of clear top coat over the entire nail seals the design while maintaining the contrast between colored and natural areas.
Single Accent Nail Approaches
Focusing butterfly art on one nail per hand creates balanced minimalist manicures. We typically choose the ring finger as our accent nail, though the middle finger works equally well for this technique. The remaining nails receive coordinating solid colors or subtle nail art patterns.
Selecting which butterfly design for accent nails depends on your overall look. We pair simple line work butterflies with neutral base colors for professional settings, while negative space silhouettes complement bold accent shades for evening wear. The key lies in maintaining color harmony across all nails.
Balancing accent nails with complementary base colors requires thoughtful planning. We choose base colors that appear within the butterfly design or select neutral tones that won’t compete for attention. Popular combinations include white base nails with black butterfly accents, nude bases with metallic butterfly details, or soft pink foundations with delicate gray wing outlines.
Glitter and Holographic Butterfly Nail Ideas

Glitter and holographic elements elevate butterfly nail art to stunning new heights. These eye-catching effects create mesmerizing wings that shift and sparkle with every movement.
Iridescent Wing Effects
Duochrome polishes create the most authentic butterfly wing shimmer with their natural color-changing properties. Apply these specialized polishes in thin layers, allowing each coat to dry completely before adding the next. The key lies in building up the opacity gradually to maintain the color-shifting effect.
Holographic powder delivers maximum impact when applied over a black or dark base coat. Brush the powder gently onto tacky gel polish using a silicone tool, then seal with a quality top coat. This technique creates wings that reflect rainbow prisms just like real butterfly scales.
Pearl pigments offer a more subtle approach to iridescent effects. Mix these fine powders with clear polish or apply them over wet base colors. Lavender pearl over purple creates stunning monarch-inspired wings, while gold pearl transforms orange bases into realistic tiger swallowtail patterns.
Interference colors provide the most sophisticated wing effects by shifting between complementary hues. These unique polishes appear different colors depending on the viewing angle, perfectly mimicking the natural iridescence found on butterfly wings like those of blue morphos.
Chunky Glitter Placement Strategies
Strategic glitter placement focuses sparkle exactly where butterfly wings naturally catch light. Position larger hexagonal glitters along the upper wing edges and smaller pieces toward the wing tips. This creates authentic light reflection patterns that enhance the butterfly’s natural beauty.
Wing vein accents use fine line glitter to define butterfly wing structures. Apply thin strips of micro glitter along the natural vein patterns using a detail brush or toothpick. Silver works perfectly for light-colored butterflies, while gold complements warmer wing tones.
Gradient glitter application builds intensity from wing base to tip using varying glitter sizes. Start with fine glitter near the butterfly’s body, then transition to medium pieces, finishing with chunky accent glitter at wing tips. This technique creates natural depth and movement.
Body enhancement uses concentrated glitter to define the butterfly’s center structure. Apply dense glitter in a thin vertical line down the nail’s center, then add smaller accent pieces radiating outward. Black or brown chunky glitter works best for realistic body definition.
Color-Shifting Polish Applications
Temperature-activated polishes create ever-changing butterfly effects that change with body heat. These specialized formulas shift between complementary colors, with popular combinations including purple to pink, blue to green, and black to purple. Apply two thin coats for optimal color-changing performance.
Magnetic polishes offer controlled color-shifting effects through strategic magnet placement. Hold the magnet parallel to the nail surface for horizontal shifts, or angle it for diagonal patterns that mimic natural wing gradients. Work quickly while the polish remains wet for best results.
Multichrome applications provide the most dramatic color shifts with three or more visible hues. These advanced formulas require perfect application technique over black base coats to achieve full color visibility. Popular multichrome combinations include blue-green-purple and red-orange-gold transitions.
Layering techniques combine different color-shifting polishes for unique custom effects. Apply a base color-shifting polish, then add selective layers of contrasting shifters to exact wing sections. This approach creates one-of-a-kind butterfly designs with multiple shifting zones.
French Manicure Butterfly Variations

French manicures receive a whimsical upgrade when we incorporate delicate butterfly elements into this timeless nail art style. These designs blend classic elegance with nature inspired creativity to create sophisticated looks perfect for any occasion.
Classic White Tip Butterfly Accents
Traditional French tips transform into stunning canvases when we add miniature butterfly silhouettes along the smile line. White tips maintain their classic appeal while tiny butterfly outlines in sheer pink or soft gray create subtle visual interest without overwhelming the design.
Placement techniques focus on positioning one small butterfly per nail near the corner of each white tip. We recommend using a fine detail brush to create simple wing shapes that follow the natural curve of the smile line.
Color combinations work best when we stick to neutral tones like dusty rose, champagne, or pearl white for the butterfly accents. These shades complement the traditional white tips while adding just enough detail to catch the light.
Colored French with Butterfly Details
Colored French manicures provide vibrant backgrounds for butterfly nail art that makes a bolder statement. Coral French tips paired with golden butterfly accents create warm, summery vibes that photograph beautifully.
Popular color pairings include:
| French Tip Color | Butterfly Accent | Best For |
|---|---|---|
| Lavender | Silver foil | Spring events |
| Mint green | Rose gold | Summer occasions |
| Peachy pink | White pearl | Wedding celebrations |
| Soft blue | Iridescent | Daily wear |
Application methods involve painting the colored French tip first, allowing it to dry completely, then adding butterfly details using contrasting shades. We suggest using dotting tools to create perfect wing symmetry.
Reverse French Butterfly Designs
Reverse French techniques flip the traditional design by placing color at the cuticle area rather than the nail tip. Butterfly motifs work exceptionally well in this space, creating elegant crescents that follow the natural nail shape.
Cuticle area butterflies offer more room for detailed wing patterns and intricate color work. We paint the reverse French section in soft pastels, then add larger butterfly silhouettes that span the width of each nail.
Gradient effects enhance these designs when we blend the reverse French color into the clear nail area. Sponge application creates smooth transitions while butterfly details remain crisp and defined against the faded background.
Seasonal Butterfly Nail Inspirations

We love adapting butterfly nail art to match the changing seasons throughout the year.
Spring Garden Butterfly Themes
Pastel garden palettes create the perfect foundation for spring butterfly nail designs. Soft lavender, mint green, and blush pink combinations mirror the delicate flowers blooming in our gardens. We recommend starting with a light base coat in cream or pearl white to make these gentle hues pop against your natural nails.
Fresh floral elements enhance spring butterfly themes beautifully. Tiny hand-painted daisies, cherry blossoms, or tulips positioned around butterfly wings create cohesive garden scenes. Apply small dots of white polish with a dotting tool for daisy centers, then add yellow centers for authentic flower details.
Nature-inspired textures add dimension to spring designs. Matte top coats on wing sections create realistic butterfly appearances, while glossy accents on flower petals provide contrast. We suggest using sponge dabbing techniques with multiple pastel shades to achieve natural color blending that mimics real butterfly wings.
Summer Bright Color Combinations
Vibrant tropical hues define summer butterfly nail art perfectly. Electric blues paired with sunset oranges, hot pinks combined with lime greens, and coral tones mixed with turquoise create stunning contrast. These bold combinations reflect the energy and warmth we associate with summer months.
Neon accent techniques make summer butterfly designs truly stand out. Apply neon pink or electric yellow to wing tips only, keeping base colors in complementary but softer tones. We recommend using thin striping brushes to create precise neon outlines that define butterfly wing shapes without overwhelming the overall design.
Metallic summer finishes add glamour to warm weather butterfly art. Gold foil details on wing edges catch sunlight beautifully, while copper accents create warmth against bright background colors. Silver holographic flakes scattered across wings mimic the shimmer we see on real butterfly wings during sunny days.
Fall Monarch Butterfly Designs
Classic monarch coloring brings autumn elegance to butterfly nail art. Deep oranges, rich golds, and chocolate browns recreate the iconic monarch butterfly appearance. We start with gradient orange bases, then add black wing borders using fine detail brushes for authentic monarch wing patterns.
Autumn leaf integration connects monarch designs to fall themes seamlessly. Small maple leaves painted in burgundy or golden yellow positioned near butterfly wings create seasonal harmony. Apply these leaf details using flat brushes, then add fine black veining with striping brushes for realistic texture.
Harvest season accents complete fall monarch butterfly looks. Copper glitter applied to wing centers adds warmth, while matte bronze top coats on select wing sections create depth. We suggest incorporating tiny rhinestones in amber or topaz colors along wing edges to reflect the rich jewel tones of autumn.
Winter Crystalline Butterfly Effects
Icy blue foundations establish perfect winter butterfly backgrounds. Powder blue, silver, and pearl white combinations evoke snow and frost themes. Apply these cool tones in gradient patterns using makeup sponges, creating smooth color transitions that resemble winter sky colors.
Frosted wing techniques transform butterfly designs into winter wonderland art. White polish dabbed over colored wings using dry brush methods creates realistic frost effects. We recommend sealing these textured areas with matte top coat to maintain the frosted appearance throughout wear.
Crystal embellishment placement adds sparkle reminiscent of fresh snowfall. Clear rhinestones positioned at wing joints and along major wing lines catch light like ice crystals. Apply tiny silver microbeads using tweezers for precise placement, then seal with clear top coat to prevent loss during daily activities.
Nail Shape Considerations for Butterfly Designs

Choosing the right nail shape significantly impacts how stunning your butterfly designs will appear. We’ll guide you through optimal shapes that showcase delicate wing details and provide adequate space for artistic expression.
Best Shapes for Wing Placement
Almond-shaped nails offer the most versatile canvas for butterfly wing placement. The natural curve mimics wing contours perfectly while providing ample surface area for intricate details like color gradients and patterns.
Oval nails create an elegant foundation for symmetrical butterfly designs. We recommend this shape for beginners since it prevents sharp corners that might interfere with wing flow patterns.
Square nails with rounded edges work exceptionally well for geometric butterfly interpretations. This hybrid shape provides stability for 3D elements while maintaining enough curve for natural wing movement.
Coffin-shaped nails excel at showcasing large-scale butterfly motifs. The wider tip area accommodates detailed wing spans while the tapered sides create visual balance for statement designs.
Length Requirements for Detailed Art
Medium length nails (approximately 1/4 inch past fingertip) provide optimal space for butterfly wing details without compromising daily functionality. This length accommodates watercolor effects and subtle embellishments perfectly.
Long nails measuring 1/2 inch or more unlock unlimited creative possibilities for elaborate 3D butterfly sculptures. We suggest this length for special occasions when maximum artistic impact takes priority.
Short nails require strategic design placement to showcase butterfly elements effectively. Focus butterfly motifs near the cuticle area or create minimalist silhouettes that complement the compact canvas.
Extra-long nails beyond 3/4 inch suit dramatic sculptural butterflies with extended wing projections. Consider structural reinforcement techniques to prevent breakage during daily activities.
Structural Support Tips
Base coat application becomes crucial for butterfly nail longevity regardless of chosen shape or length. We recommend using strengthening base coats containing calcium or protein to fortify natural nails before adding decorative elements.
Builder gel reinforcement works wonders for longer nail shapes that support heavy 3D butterfly components. Apply thin layers between design elements to distribute weight evenly across the nail surface.
Strategic filing techniques maintain nail integrity while achieving desired shapes for butterfly placement. File in one direction using gentle strokes to prevent splitting that could compromise intricate wing details.
Cuticle maintenance ensures clean lines where butterfly designs meet natural nail growth. Push back cuticles gently before starting any butterfly art to create seamless design transitions.
DIY Butterfly Nail Art Techniques

Now that we’ve explored various butterfly nail art styles, let’s jump into the practical techniques you’ll need to create these stunning designs at home.
Essential Tools and Supplies
Detail brushes form the foundation of precise butterfly nail art creation. We recommend investing in sizes ranging from 000 to 2 for different wing details, body outlines, and antenna work. Liner brushes with synthetic bristles work best for smooth polish application and sharp lines.
Dotting tools create perfect circular elements like butterfly spots and wing patterns. Metal dotting tools in various sizes (from 1mm to 5mm) allow for consistent spacing and professional looking results. We often use the ball end for larger dots and the pointed end for tiny details.
Base and top coats provide essential protection for your butterfly designs. Quality base coats prevent staining and improve polish adhesion while top coats seal your artwork and extend wear time. We prefer quick dry formulas to prevent smudging during the design process.
Acrylic paints offer superior pigmentation and blendability compared to regular nail polish for detailed work. Water based acrylics in primary colors plus black and white give you unlimited mixing possibilities. We recommend keeping them on a palette during application to prevent drying.
Cleanup brushes dipped in acetone remove mistakes without damaging surrounding polish. Small flat brushes work perfectly for precise cleanup around cuticles and nail edges. We always keep cotton swabs nearby for quick touch ups during the design process.
Step-by-Step Application Methods
Start with proper nail preparation by pushing back cuticles and filing nails to your desired shape. We apply base coat first and let it dry completely before beginning any butterfly artwork. This creates a smooth canvas for detailed designs.
Create butterfly outlines using your finest detail brush and acrylic paint or gel polish. We begin with the body as a vertical center line then add upper wings followed by lower wings. Symmetry matters so we frequently step back to check proportions.
Fill wing sections using gentle dabbing motions rather than brush strokes to avoid streaking. We work from light to dark colors building layers gradually for depth and dimension. Blending colors while wet creates realistic gradient effects.
Add intricate details like wing patterns, spots, and antenna after base colors dry completely. We use dotting tools for circular patterns and liner brushes for delicate lines. Working slowly prevents mistakes and ensures clean results.
Seal your design with thin coats of top coat allowing each layer to dry before applying the next. We typically use two coats for maximum protection and shine. Capping the nail tips prevents chipping and extends wear time significantly.
Common Mistakes to Avoid
Rushing the drying process leads to smudged designs and frustrated results. We always allow each layer to dry completely before proceeding to the next step. Using a fan or nail dryer speeds up the process safely.
Using too much product creates thick, uneven layers that take forever to dry and often bubble or peel. We apply thin coats building up opacity gradually rather than trying to achieve full coverage in one application.
Neglecting symmetry results in lopsided butterflies that look unprofessional. We mark light guidelines with a toothpick before painting and frequently check both hands side by side during the design process.
Skipping cleanup steps leaves messy edges that detract from otherwise beautiful artwork. We clean up excess polish around cuticles and sidewalls immediately after each design step using our cleanup brush and acetone.
Forgetting protective base coat can stain natural nails and cause designs to chip prematurely. We never skip this crucial step even when creating simple butterfly accents or practicing new techniques.
Professional Butterfly Nail Services

Professional salons offer the expertise and precision tools needed to achieve the most intricate butterfly nail designs. Skilled technicians can execute complex 3D sculptures and detailed artwork that may be challenging to replicate at home.
Finding Skilled Nail Artists
Portfolio review serves as the most reliable method for identifying talented butterfly nail specialists. Instagram galleries and salon websites showcase previous work, allowing you to assess an artist’s skill level with intricate designs. Look for artists who display consistent wing symmetry, smooth color transitions, and clean detail work in their butterfly creations.
Certification credentials indicate proper training in advanced nail art techniques. Search for technicians with specialized certifications in 3D nail art, gel sculpture, or advanced design methods. Many top artists complete continuing education courses to stay current with butterfly nail trends and application techniques.
Client testimonials provide insight into both artistic ability and customer service quality. Read reviews specifically mentioning butterfly designs, dimensional work, and overall satisfaction with complex nail art. Ask friends and social media connections for recommendations from artists they’ve used for detailed nail designs.
Consultation appointments allow you to discuss your butterfly vision before committing to a full service. Most skilled artists offer brief consultations to assess nail condition, discuss design complexity, and explain the creation process. Use this time to evaluate their understanding of butterfly anatomy and color theory.
Cost Expectations and Budgeting
Basic butterfly designs typically range from $35 to $65 depending on your location and salon positioning. Simple painted butterflies with minimal detail work fall into this price category. Most salons charge within this range for two-dimensional artwork using standard gel polish techniques.
3D sculptural butterflies command premium pricing between $75 to $150 per session. These designs require additional time, specialized materials, and advanced technical skills. Acrylic sculptures, gel buildups, and mixed media embellishments increase both service time and material costs.
Geographic location significantly impacts butterfly nail art pricing across different markets. Urban areas and high-end neighborhoods typically charge 20-40% more than suburban locations. Research average pricing in your area before booking appointments to avoid budget surprises.
| Service Type | Price Range | Duration | Complexity Level |
|---|---|---|---|
| Basic painted butterflies | $35-$65 | 60-90 minutes | Beginner |
| Dimensional gel work | $65-$95 | 90-120 minutes | Intermediate |
| 3D acrylic sculptures | $95-$150 | 2-3 hours | Advanced |
| Mixed media designs | $120-$200 | 2.5-4 hours | Expert |
Package deals often provide better value for clients planning multiple butterfly sessions. Many salons offer discounts for booking multiple appointments or combining butterfly nails with other services. Ask about loyalty programs that reward repeat visits with percentage discounts or complimentary add-ons.
Maintenance and Touch-Up Schedules
Growth maintenance becomes necessary every 2-3 weeks as natural nails extend beyond the cuticle area. Dimensional butterfly elements may lift or shift as nail growth progresses, requiring professional adjustment. Schedule fill appointments to maintain the integrity of sculptural elements and preserve design proportions.
Wear patterns affect different butterfly design elements at varying rates throughout the wearing period. Raised 3D components experience more daily wear than painted details, potentially requiring touch-ups every 10-14 days. Monitor high-contact areas like fingertips and knuckles for early signs of wear or damage.
Seasonal transitions present opportunities to refresh butterfly designs while maintaining nail health. Many clients schedule quarterly appointments to update color schemes and design themes. Professional removal and nail conditioning between elaborate designs helps prevent damage and maintains optimal nail strength.
Emergency repairs may be needed if butterfly elements chip, lift, or break during daily activities. Most professional nail artists offer quick repair services for minor damage within the first week of application. Keep your artist’s contact information readily available for scheduling urgent touch-up appointments when needed.
Butterfly Nail Ideas for Special Occasions

Special occasions call for nail art that captures attention and creates lasting memories. We’ve curated butterfly designs that’ll make your nails the perfect accessory for life’s most important moments.
Wedding and Bridal Designs
Elegant white butterfly manicures transform traditional bridal nails into ethereal works of art. We recommend creating delicate white butterflies using pearl powder mixed with clear gel polish for subtle dimension. The wings can be outlined with fine silver or gold lines to add sophistication without overwhelming the bridal aesthetic.
French manicure butterfly accents offer a timeless approach that complements any wedding dress style. We suggest placing tiny butterfly silhouettes at the tip intersection of classic French nails using sheer pink or nude bases. Crystal rhinestones can serve as butterfly bodies, adding just enough sparkle to catch the light during ceremony photos.
Soft pastel butterfly gardens work beautifully for spring and summer weddings. We create these designs using barely there lavender, blush pink, and cream tones with watercolor blending techniques. Dried baby’s breath flowers pressed into the design add texture and reinforce the romantic garden theme that many brides love.
Pearl and lace inspired butterflies mirror traditional wedding dress details on your fingertips. We achieve this look by layering white gel polish with iridescent powder, then adding hand painted lace patterns that form butterfly wing shapes. Tiny pearl beads placed strategically create dimensional bodies that catch light beautifully in wedding photography.
Prom and Formal Event Styles
Glamorous metallic butterfly wings make a bold statement perfect for prom night dancing. We create these designs using chrome powders in rose gold, silver, or copper tones applied over black base colors. The contrast creates dramatic wing effects that shimmer under venue lighting and photograph beautifully in group shots.
Color matched butterfly themes coordinate perfectly with formal dress colors. We recommend choosing two complementary shades from your outfit’s color palette, then creating gradient butterfly wings that transition between both hues. This technique ensures your nails enhance rather than compete with your carefully chosen formal wear.
Rhinestone encrusted butterfly bodies add the perfect amount of sparkle for formal events. We place larger crystals along the butterfly’s body center, then surround them with smaller stones that gradually decrease in size toward the wing tips. This creates a cascading crystal effect that moves beautifully when gesturing during conversations.
Holographic butterfly transformations shift colors as you move, creating ever-changing visual interest throughout the evening. We apply specialized holographic polishes in purple, blue, and green combinations that change appearance under different lighting conditions. These designs work especially well for evening events where lighting varies from cocktail hour to dance floor.
Festival and Concert Looks
Neon butterfly rave designs capture the electric energy of music festivals with UV reactive polishes. We create bright pink, electric blue, and lime green butterfly wings that glow under blacklights commonly found at concert venues. Glitter placement along wing edges adds extra sparkle that catches stage lighting effects.
Bohemian butterfly mandalas blend nature inspired butterflies with festival fashion aesthetics. We incorporate earthy tones like burnt orange, deep purple, and forest green into intricate wing patterns that echo mandala designs. Fine line work creates geometric patterns within each wing section, reflecting the artistic vibe of many festival communities.
Glitter explosion butterfly wings maximize sparkle for outdoor festival environments where bold designs shine brightest. We layer different sizes of holographic glitter over bright base colors, creating textured butterfly wings that catch sunlight and stage lights equally well. This technique works particularly well for daytime festival performances.
Tribal pattern butterfly fusion combines cultural motifs with butterfly silhouettes for unique festival nail art. We use black gel polish to create bold geometric patterns within butterfly wing shapes, then accent with metallic gold or silver details. These designs photograph well against festival backdrops and complement boho fashion choices popular at outdoor events.
Conclusion
We’ve explored the captivating industry of butterfly nail art and its endless creative possibilities. From delicate watercolor techniques to bold 3D sculptures these designs offer something for every skill level and personal style.
Whether you’re drawn to minimalist elegance or eye-catching glitter effects butterfly nails provide the perfect canvas for self-expression. The seasonal variations and special occasion designs we’ve covered ensure you’ll never run out of inspiration throughout the year.
With the right tools techniques and a bit of practice you can transform your nails into stunning works of art. Remember that nail shape and proper preparation are key to achieving professional-looking results that last.
Butterfly nails aren’t just a trend—they’re a celebration of creativity and nature’s beauty right at your fingertips. It’s time to spread your wings and let your nails take flight with these enchanting designs.
Frequently Asked Questions
What are butterfly nails and why are they trending?
Butterfly nails are nail art designs featuring butterfly motifs that have gained popularity for their whimsical and artistic appeal. This trend offers incredible versatility, allowing adaptation to various color schemes from subtle pastels to bold neons, making them perfect for any occasion or personal style preference.
Can I create butterfly nail art at home?
Yes! With the right tools like detail brushes, dotting tools, base coats, and acrylic paints, you can achieve salon-quality butterfly designs at home. The key is proper nail preparation, following step-by-step application methods, and allowing adequate drying time between layers.
What nail shapes work best for butterfly designs?
Almond-shaped nails offer versatile wing placement, oval nails provide symmetrical designs, square nails work for geometric interpretations, and coffin-shaped nails accommodate large-scale motifs. Medium to long lengths are ideal for detailed art, while short nails suit minimalist butterfly designs.
How do I create watercolor butterfly effects?
Use wet-on-wet application and sponge dabbing techniques with soft pastel combinations like lavender and coral or mint green with peachy pink. Add subtle shimmer with iridescent top coats, fine glitter dust, or pearl powder to enhance the ethereal watercolor appearance.
What’s the difference between 2D and 3D butterfly nail art?
2D butterfly designs use painted techniques and layered gel polish for dimensional effects, while 3D designs involve sculptural acrylic elements that physically extend from the nail surface. 3D designs often incorporate mixed media embellishments like rhinestones, foil accents, and dried flowers.
How much do professional butterfly nail services cost?
Basic painted butterfly designs typically range from $30-50, while advanced 3D sculptural designs can cost $80-150. Prices vary based on complexity, location, and artist expertise. Sessions usually take 1-3 hours depending on the intricacy of the chosen design.
How long do butterfly nail designs last?
With proper application and care, butterfly nail art typically lasts 2-3 weeks. 3D designs may require touch-ups sooner due to their raised elements. Regular maintenance appointments and proper home care, including wearing gloves during cleaning, help extend their longevity.
Can butterfly nails work for special occasions?
Absolutely! Butterfly designs can be customized for any event. Wedding designs feature elegant whites and pastels, prom looks include glamorous metallics and rhinestones, while festival styles showcase neon colors and holographic effects. Each can be tailored to match your outfit and occasion.
What are some seasonal butterfly nail ideas?
Spring designs use pastel garden palettes with floral elements, summer features vibrant tropical hues, fall incorporates monarch-inspired oranges with autumn leaves, and winter utilizes icy blues with crystal embellishments and frosted wing techniques for seasonal appeal.
What common mistakes should I avoid when creating butterfly nails?
Avoid rushing the drying process, using excessive product, neglecting symmetry between nails, skipping cleanup steps, and forgetting protective base coats. Take time between layers, use thin coats, and ensure proper nail preparation for the best results and longevity.


