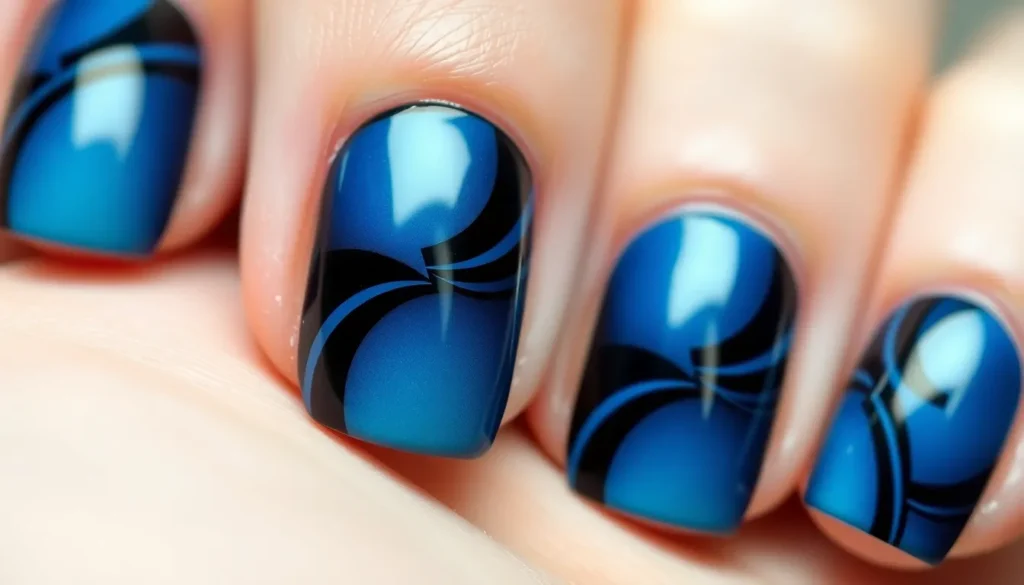
We’ve all been there – standing in front of our nail polish collection wondering which colors will create that perfect show-stopping look. The ever-changing duo of blue and black has become one of the hottest trends in nail art and for good reason. These complementary shades offer endless possibilities for creating everything from subtle everyday elegance to bold statement nails that’ll turn heads wherever you go.
Blue and black nail combinations aren’t just trendy – they’re timeless. Whether you’re drawn to deep midnight blues paired with jet black or prefer vibrant cobalt shades contrasted with matte black accents we’ll show you how to master this stunning color palette. From simple two-tone designs to intricate patterns and artistic details these versatile shades work beautifully for any season or occasion.
Ready to transform your nails into mini masterpieces? We’re diving into the most creative and achievable blue and black nail ideas that’ll have you booking your next manicure appointment before you finish reading.
Classic Blue and Black Gradient Nails
Classic blue and black gradient nails create stunning depth and dimension that never goes out of style. We’ll show you how to master the most popular gradient techniques that make your manicure look professionally done.
Ombre Fade Technique
Start with a dark base coat of midnight black on your entire nail surface. Apply royal blue polish halfway down the nail, blending upward with a damp makeup sponge. Create seamless transitions by dabbing the sponge in overlapping motions until the colors melt together. Finish with a glossy top coat to enhance the smooth color transition and add professional shine.
Vertical Gradient Designs
Begin by sectioning your nail into three vertical zones using thin strips of tape. Paint the left third in deep navy blue and the right third in jet black. Remove the tape while polish is slightly wet and use a small detail brush to blend the center meeting point. This technique works especially well on longer nail shapes like coffin or almond styles.
Horizontal Blend Styles
Apply black polish to the bottom half of each nail, starting from the cuticle area. Layer cerulean blue from the tip downward, covering approximately 60% of the nail surface. Use a clean flat brush to gently stroke horizontally where the colors meet, creating a soft blended effect. Add silver glitter at the transition line for extra glamour and visual interest.
Geometric Blue and Black Nail Art
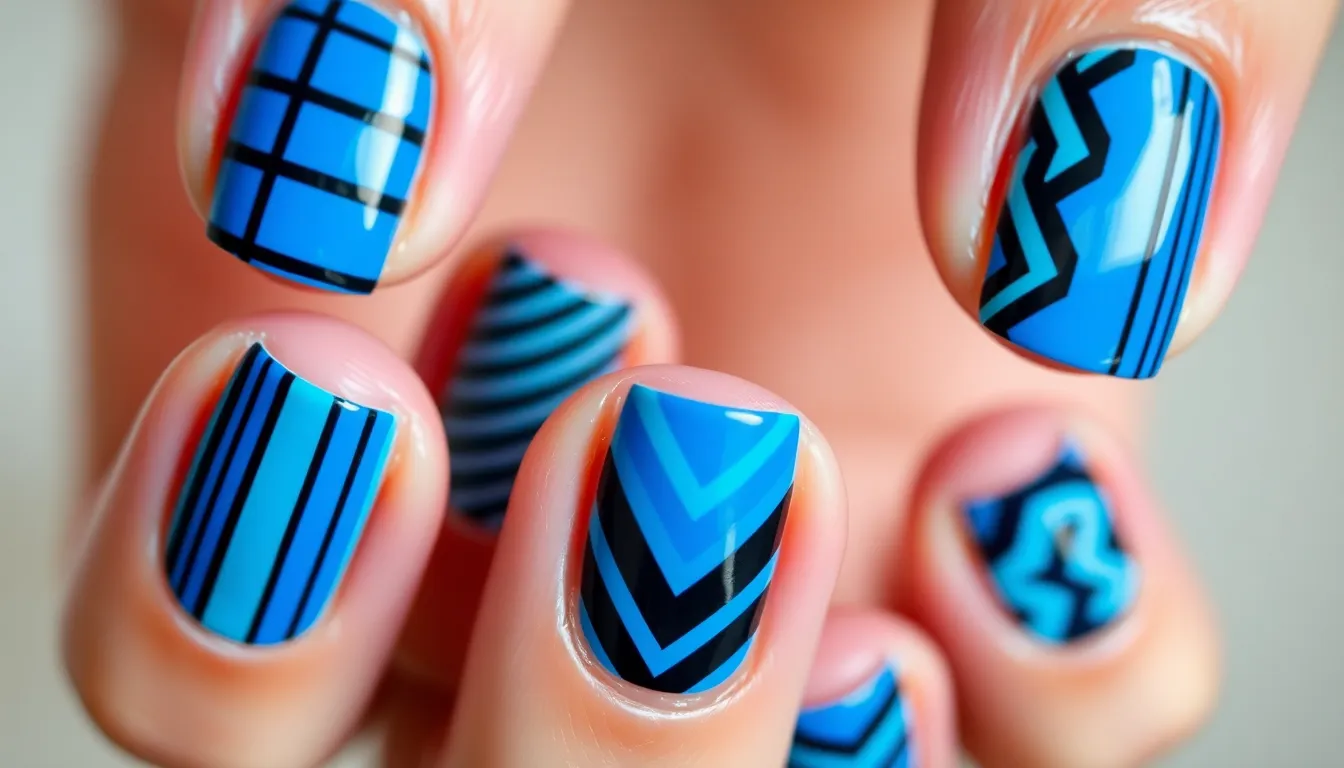
Geometric patterns bring structure and modern sophistication to blue and black nail designs. Sharp lines and bold shapes create striking visual impact while maintaining the elegant contrast between these complementary colors.
Striped Patterns
Vertical stripes transform nails into sleek fashion statements using alternating bands of navy blue and jet black. We recommend using striping tape to achieve perfectly straight lines, applying a base coat in your lighter shade before adding the contrasting color. Thin pinstripes create subtle elegance, while thick bands deliver bold dramatic effect.
Horizontal stripes offer a completely different aesthetic that makes nails appear wider and more balanced. Start with a midnight black base, then add two or three thin lines of electric blue across each nail using a detail brush. Diagonal stripe variations add ever-changing movement, creating optical illusions that draw attention to your hands.
Mixed width patterns combine thick and thin stripes for added visual interest. Apply three thin black lines over a cobalt blue base, then add one bold stripe in the center using tape for crisp edges. This technique works especially well on longer nails where you have more canvas space.
Chevron Designs
Classic chevron points create sharp angular designs that emphasize the geometric nail art trend. We use striping tape to form perfect V shapes, alternating between deep blue and black sections across each nail. Apply your base color first, position the tape to create the chevron pattern, then paint over with the contrasting shade.
Double chevron styles layer two sets of V shapes for increased complexity and visual depth. Paint the nail black, add the first chevron in royal blue, then create a smaller chevron inside using the original black color. This nested approach adds sophisticated dimension to your geometric blue black nail design.
Reverse chevron patterns flip the traditional design by pointing the V shapes toward the cuticle instead of the nail tip. This unexpected twist creates unique negative space effects, especially when you use a clear top coat over the alternating blue and black sections.
Color Block Combinations
Half moon designs divide each nail into distinct geometric sections using curved lines. Apply black polish to the lower half of the nail near the cuticle, leaving the upper portion in bright blue. Use round hole reinforcement stickers as guides to achieve perfectly curved divisions between colors.
Triangular sections create bold abstract art by dividing nails into three or four distinct areas. We recommend starting with a base coat of prussian blue, then using tape to mask off triangular shapes before applying black polish. Remove the tape while the polish is still slightly wet for clean, sharp edges.
Square grid patterns transform nails into miniature works of modern art using intersecting lines. Create a checkerboard effect by alternating blue and black squares, or use asymmetrical blocks for a more contemporary look. Apply the lighter color first, then use thin brushes to paint the darker sections for precise geometric shapes.
Marble Blue and Black Nail Designs
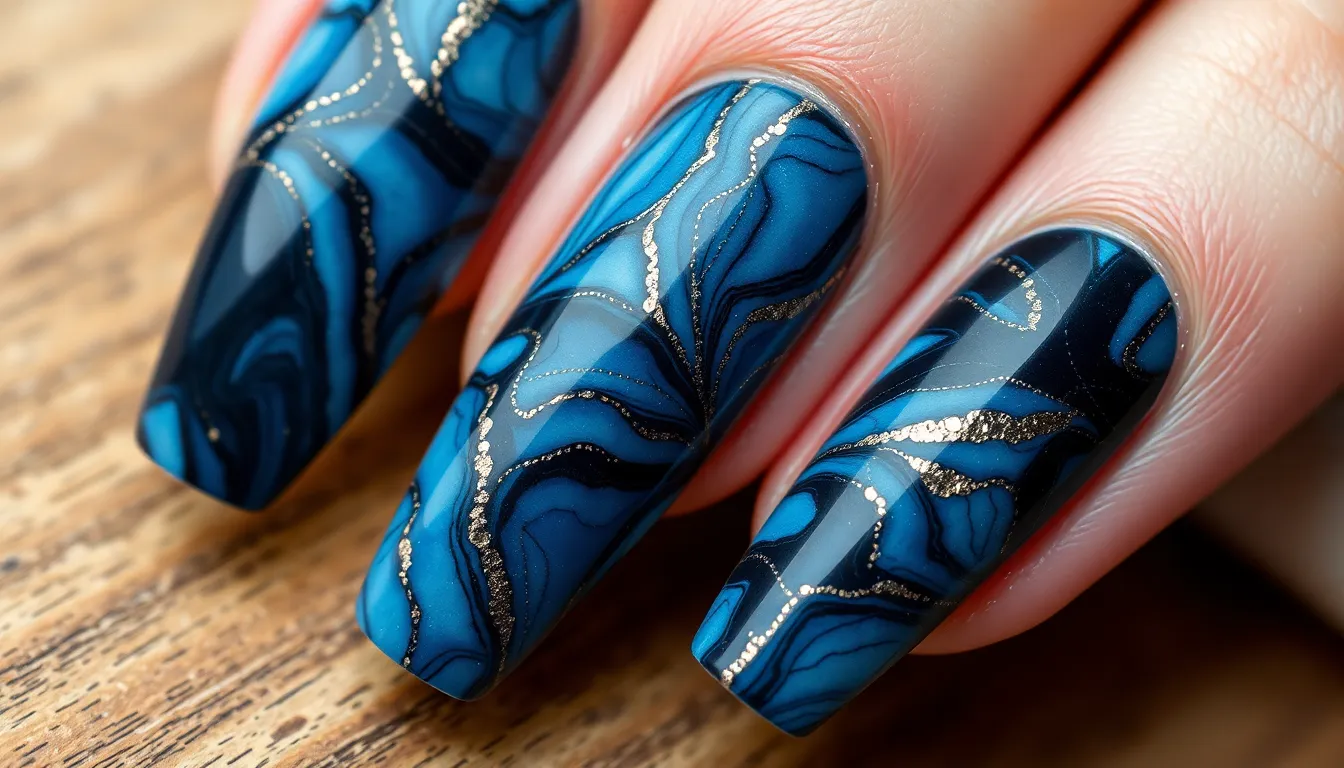
Marble nail art creates stunning organic patterns that mimic the luxurious appearance of natural stone. These techniques transform blue and black combinations into sophisticated masterpieces that flow naturally across your nails.
Water Marble Technique
Water marbling delivers the most authentic marble appearance by creating fluid, swirling patterns that dance across your nail surface. We start by filling a room temperature water cup and dropping alternating circles of midnight black and cobalt blue polish onto the surface. The colors naturally spread and create concentric rings that we manipulate with a toothpick or nail art tool.
Creating the perfect water marble pattern requires these essential steps:
- Drop your first color (black) into the center of the water
- Add blue polish immediately while the black is still wet
- Continue alternating colors to build 5-7 rings total
- Use a toothpick to drag from center outward creating web-like patterns
- Protect surrounding skin with tape before dipping your nail
- Dip the nail straight down and hold for 3 seconds
- Clean the water surface with a toothpick before lifting your finger
Temperature control makes the difference between success and frustration with this technique. Room temperature water around 70°F allows the polish to spread evenly without becoming too thick or thin.
Freehand Marble Effects
Freehand marbling gives you complete creative control over the final design while maintaining that organic marble appearance. We achieve this look by applying a base coat of slate blue and immediately adding drops of black polish while the base is still tacky. A thin brush or dotting tool helps us create the characteristic veining that runs through natural marble.
Master these freehand techniques for professional results:
- Apply your lighter base color (navy or steel blue) first
- Add 3-4 small drops of black polish randomly across the wet base
- Use a fine brush to drag the black in jagged, branching lines
- Create secondary veins by pulling smaller lines from the main branches
- Blend some areas with a dry brush for subtle color transitions
- Add white or silver accents to mimic natural marble minerals
Working quickly becomes crucial since you need the base coat to remain workable throughout the process. Practice on a nail wheel first to perfect your veining technique and timing.
Metallic Accent Marbling
Metallic accents elevate marble designs by adding dimension and luxury that catches light beautifully. We incorporate gold, silver, or bronze foils and polishes strategically within the marble pattern to create focal points that shimmer. These metallic elements work particularly well when applied over the primary marble design as highlight veins.
Transform basic marble into luxury designs with these metallic applications:
- Apply your blue and black marble base using either water or freehand technique
- Allow the base to dry completely before adding metallic accents
- Use gold leaf foil along major vein lines for dramatic contrast
- Apply silver polish with a thin brush to create subtle shimmer veins
- Add bronze glitter in small patches to mimic mineral deposits
- Finish with chrome powder brushed lightly over raised areas
Timing your metallic application correctly prevents the base design from smudging or losing its crisp marble appearance. We recommend waiting at least 10 minutes between the base marble and metallic accents to ensure proper adhesion and clean lines.
Blue and Black Glitter Nail Ideas
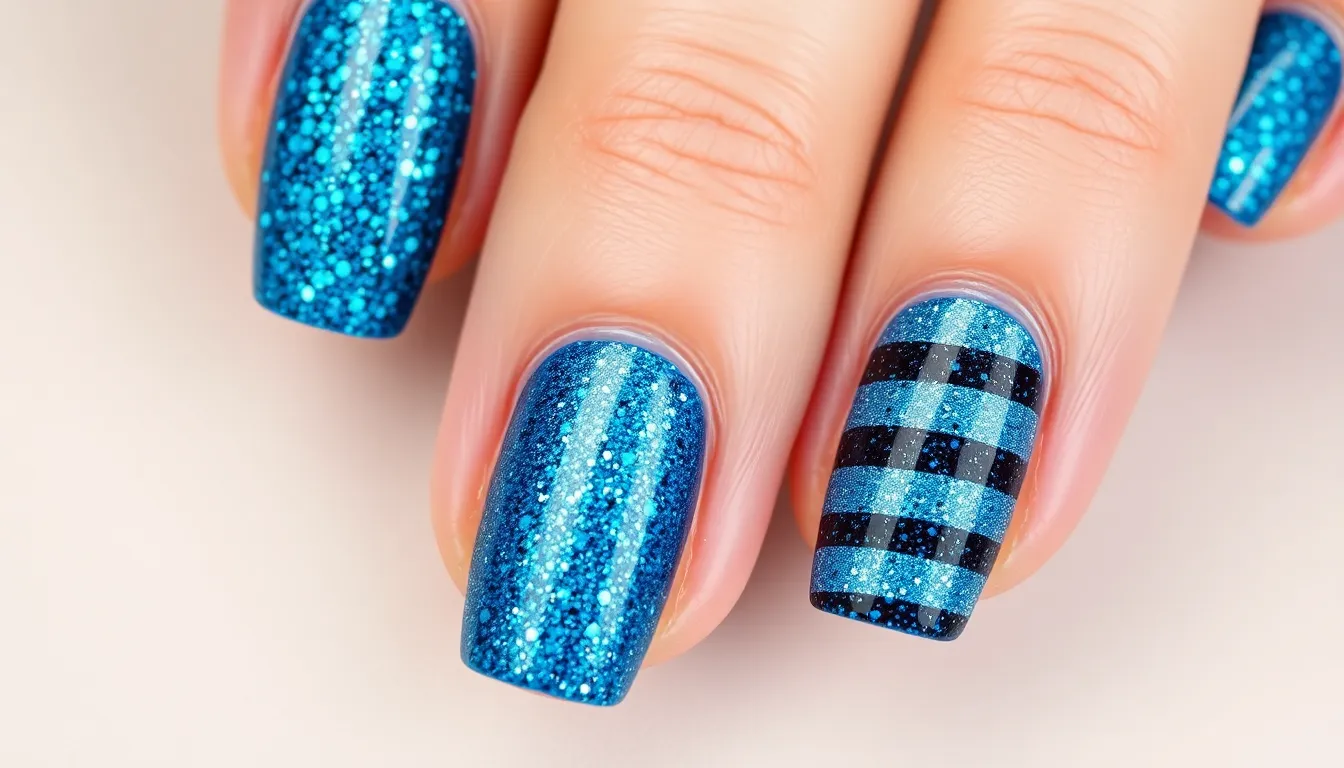
Glitter transforms ordinary blue and black manicures into dazzling showstoppers that catch the light beautifully. We’ll explore three distinctive approaches to incorporating sparkle into your dark color palette.
Full Glitter Coverage
Complete glitter coverage creates maximum impact by coating entire nails in sparkling blue and black particles. We recommend starting with a black base coat to intensify the glitter’s depth and richness. Apply two thin layers of chunky blue glitter polish, allowing each coat to dry completely before adding the next.
Dense glitter application works best when you dab the brush rather than stroke it across the nail surface. This technique prevents streaking and ensures even distribution of sparkle particles. Finish with two coats of high quality top coat to smooth the textured surface and lock in the glitter.
Mixed particle sizes add dimensional interest to full coverage designs. Combine fine blue micro glitter with larger black hex pieces for a galaxy inspired effect. Press larger glitter pieces into the wet base coat using tweezers for precise placement.
Glitter Gradient Tips
Concentrated sparkle at the tips creates an elegant fade effect that’s perfect for special occasions. Start by painting your nails with a solid blue base color and let it dry completely. Apply black glitter polish heavily at the tips, then blend it downward using a damp makeup sponge.
Reverse gradient technique places the heaviest glitter concentration at the cuticle area instead of the tips. This unexpected approach draws attention to your nail beds and creates a unique twist on traditional gradient designs. Use a small detail brush to blend the glitter smoothly into the blue base.
Double gradient application involves applying glitter in two separate phases for extra depth. First, create a light dusting of fine blue glitter across the entire nail. Then add concentrated black glitter at your chosen gradient point and blend outward for a layered sparkle effect.
Accent Nail Sparkles
Single accent nails let you experiment with bold glitter combinations without overwhelming your entire manicure. We suggest choosing your ring finger for maximum impact, covering it completely in alternating blue and black glitter stripes.
Strategic placement makes accent sparkles more effective than random application. Focus glitter on one nail per hand, keeping the remaining nails in solid blue or black polish. This creates visual balance while adding just enough glamour to your look.
Textural contrast enhances accent nail designs by combining matte and glitter finishes. Paint four nails with matte blue polish, then create your accent nail using chunky black glitter over a glossy base coat. The different textures create striking visual interest that draws the eye naturally.
Negative Space Blue and Black Nails
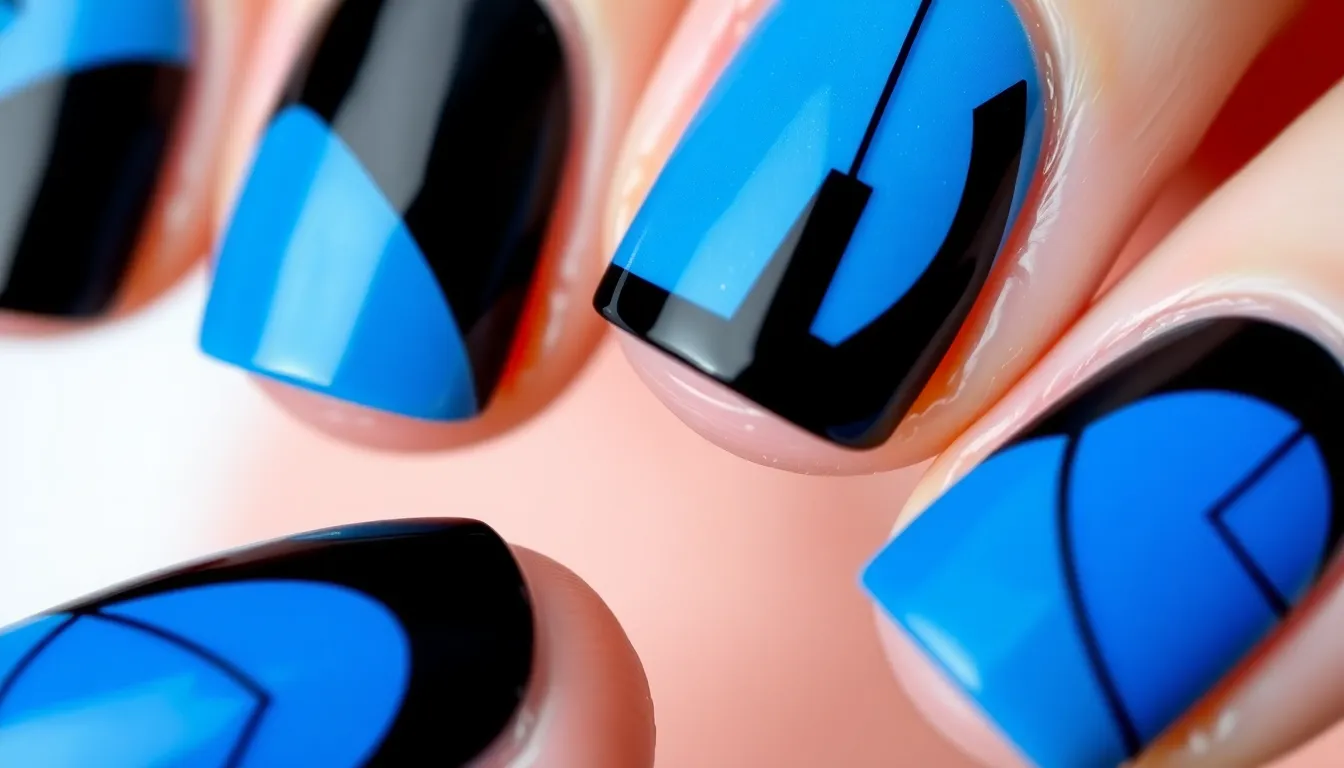
Negative space designs offer a sophisticated approach to blue and black manicures by strategically leaving portions of the natural nail exposed. This technique creates striking visual contrast while maintaining an elegant, modern aesthetic.
Cut-Out Designs
Geometric cutouts transform nails into contemporary art pieces using precise shapes and clean lines. We recommend starting with simple triangular cutouts at the base of each nail, painting the remaining surface in deep navy blue while leaving the triangular section clear.
Circular windows create playful focal points when positioned strategically across the nail bed. Apply midnight black polish around perfect circles near the cuticle area, allowing your natural nail to show through these deliberate gaps.
Abstract shapes offer creative freedom for unique designs that blend artistic expression with wearable style. Try painting irregular geometric forms in cobalt blue while leaving organic shaped spaces untouched, creating a balance between structured and flowing elements.
Minimalist Line Art
Single stroke patterns deliver maximum impact with minimal effort using thin brushes and steady hands. Draw delicate vertical lines in midnight black across a clear base, spacing them evenly to create a subtle striped effect that elongates the nail.
Intersecting lines form sophisticated grid patterns when applied with precision and planning. Create diamond shaped negative spaces by crossing diagonal lines in royal blue, leaving small clear sections where the lines intersect for added visual interest.
Curved line designs soften the geometric approach while maintaining the minimalist aesthetic. Paint gentle S curves in deep teal across clear nails, ensuring each curve flows naturally into the next for a seamless, organic appearance.
Half-Moon Patterns
Traditional crescents at the cuticle area create timeless elegance when executed with proper technique. Apply midnight black polish to the entire nail, then carefully remove a crescent shape at the base using a curved stencil or steady brush work.
Reverse half moons flip the classic design by placing the crescent at the nail tips instead. Paint the nail bed in deep sapphire blue while leaving a clear curved section at the tip, creating an unexpected twist on the traditional French manicure.
Double crescents add complexity through layered curved shapes at both the base and tip areas. Combine navy blue at the cuticle crescent with black at the tip crescent, leaving the center portion of the nail clear for a sophisticated three toned effect.
Blue and Black French Manicure Variations
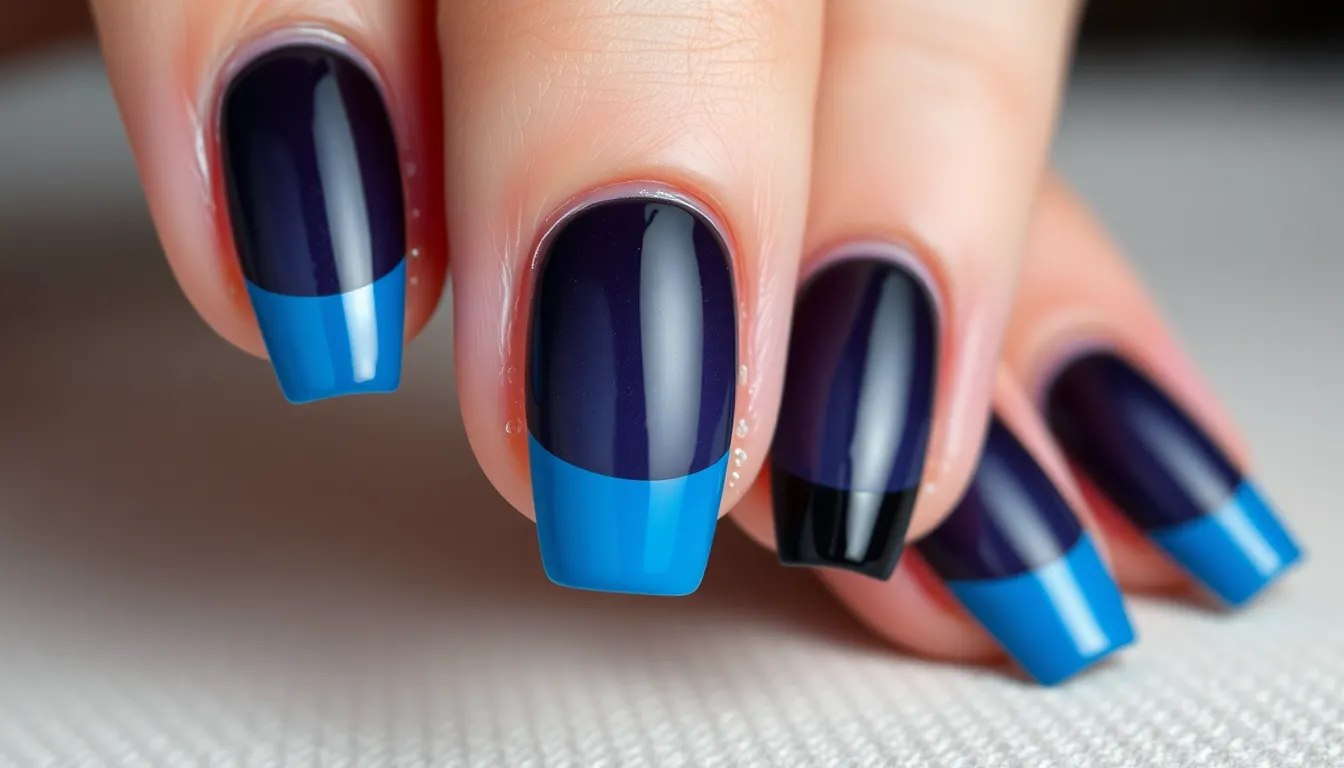
French manicures get an edgy upgrade with blue and black combinations. We’re transforming the classic white tip design into bold statements that maintain elegance while adding contemporary flair.
Reverse French Tips
Reverse French tips flip the traditional design by placing color at the base instead of the tip. We start with a midnight black base that covers the lower third of each nail, creating a dramatic foundation. The remaining nail surface receives a coat of electric blue or navy polish, establishing a striking contrast.
Application techniques require steady hands and quality brushes for clean lines. We recommend using striping tape to mark the division point before applying polish. The reverse style works particularly well on longer nails where the proportions create visual balance. Silver accent lines between the colors add sophistication and help define the transition area.
Curved reverse tips offer a softer alternative to straight lines. We create gentle arcs that follow the natural nail shape, using a small detail brush to achieve smooth curves. This variation mimics the crescent moon shape while maintaining the bold color combination.
Double French Lines
Double French lines incorporate two distinct borders for added complexity. We begin with a clear or nude base coat, then apply a thin black line approximately 2mm from the nail tip. The second line uses royal blue polish and sits 3-4mm below the black line, creating layered visual interest.
Spacing consistency across all nails ensures professional results. We use a nail art ruler or guide tape to maintain uniform distances between lines. The technique works best when both lines have identical thickness, typically achieved with a size 0 detail brush or striping brush.
Metallic double lines elevate the design further. We substitute one colored line with gold or silver foil polish, creating luxurious accents that catch light beautifully. The metallic element should be the thinner of the two lines to avoid overwhelming the overall design.
Diagonal French Styles
Diagonal French styles break away from horizontal traditions with angled tip designs. We position the color division at a 45-degree angle, typically running from the upper right corner to the lower left side of the nail. Black polish covers the diagonal tip area while blue fills the remaining space.
Asymmetrical diagonal patterns create modern artistic effects. We vary the angle on different nails, using 30-degree slopes on some fingers and steeper 60-degree angles on others. This technique transforms the manicure into a geometric art piece while maintaining French manicure elegance.
Curved diagonal transitions soften the angular approach. We replace straight diagonal lines with gentle S-curves that flow across the nail surface. This variation requires freehand application skills but produces organic results that feel both contemporary and timeless. The curved division creates movement and adds visual flow to the overall design.
Stamped Blue and Black Nail Designs
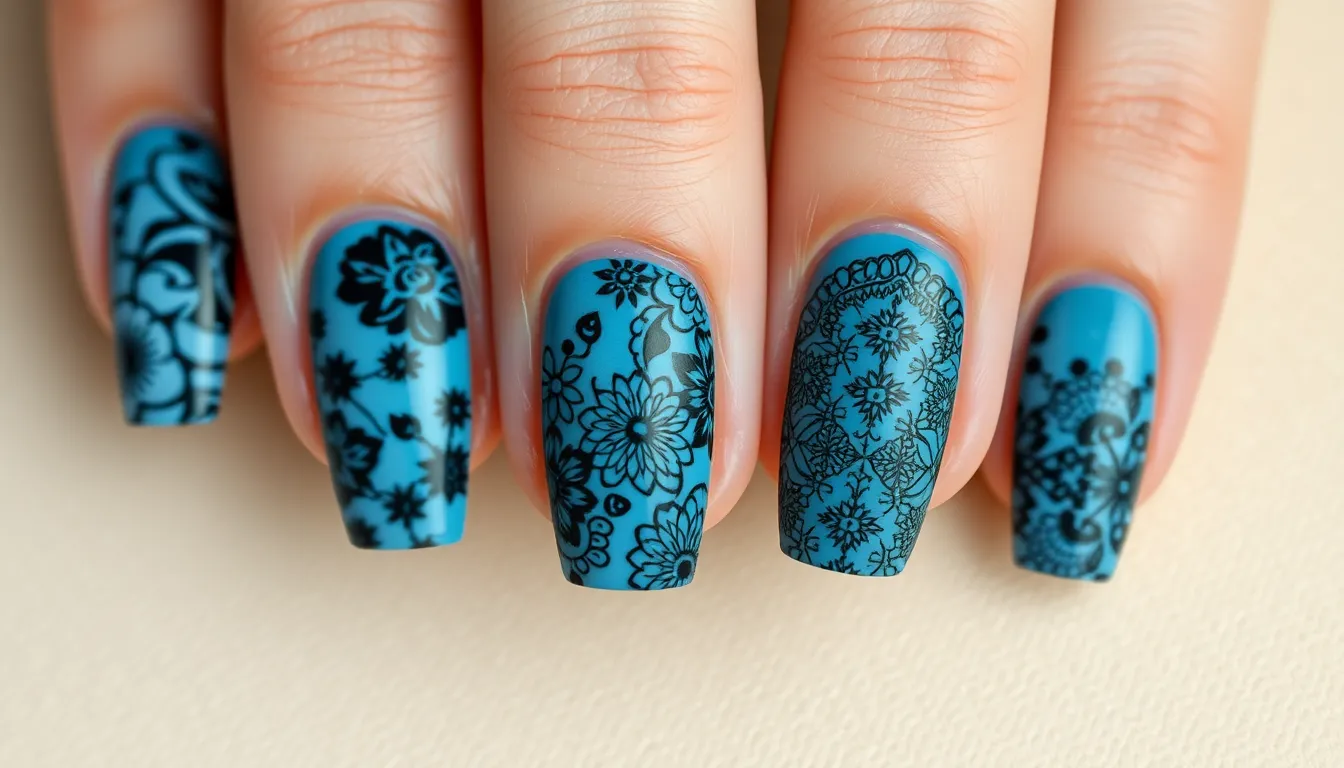
Stamping transforms blue and black nail combinations into intricate artwork with professional precision. We’ll explore how specialized stamping plates and techniques create detailed designs that would be impossible to achieve freehand.
Floral Stamp Patterns
Floral stamping brings delicate botanical elegance to blue and black manicures through detailed pressed designs. We recommend starting with midnight black as your base color and stamping intricate rose patterns using metallic blue polish for contrast. Large blooming designs work particularly well on accent nails, while smaller scattered florals create cohesive patterns across all ten fingers.
Peony and dahlia stamps offer bold focal points when pressed with navy blue over black backgrounds. Delicate vine patterns stamped in electric blue create flowing connections between larger floral elements. We’ve found that cherry blossom designs look stunning when alternating between black stems on blue bases and blue petals on black backgrounds.
Layered stamping techniques allow you to build complex floral compositions by overlapping different flower stamps. Start with background elements like leaves in one color, then add primary flowers in the contrasting shade. This creates dimensional depth that mimics hand painted botanical art.
Abstract Design Stamps
Abstract stamping opens creative possibilities with geometric shapes, swirls, and contemporary patterns. We love using mandala stamps that feature intricate circular designs, applying them with metallic blue over matte black bases for striking contrast. Tribal inspired patterns create bold statements when stamped across multiple nails in coordinated designs.
Splatter effect stamps mimic artistic paint techniques when pressed with contrasting colors over your base shade. Wave patterns work beautifully for creating fluid motion across the nail surface, especially when using gradual color transitions. Linear abstract designs offer modern sophistication through repeated geometric elements.
Mixed media approaches combine multiple abstract stamps on single nails for artistic complexity. We suggest using different pressure levels when stamping to create varied opacity effects. This technique allows lighter impressions to serve as background elements while bold, full coverage stamps become focal points.
Lace Inspired Stamping
Lace stamping recreates the delicate beauty of vintage textiles with intricate detailed patterns. We achieve elegant vintage looks by stamping ornate lace designs in navy blue over cream colored bases, then adding black accent details. Baroque inspired lace patterns offer dramatic sophistication when stamped in metallic finishes.
Doily patterns create romantic feminine touches through their circular lace motifs and detailed borders. Chantilly lace designs feature flowing organic patterns that work beautifully when stamped in translucent blue over black backgrounds. We recommend using these patterns on accent nails to avoid overwhelming the overall design.
Layering different lace patterns creates textile like depth and complexity on your nail surface. Start with larger background lace patterns in subtle colors, then add smaller detailed elements in contrasting shades. This technique mimics the layered construction of actual lace fabrics while maintaining visual balance across your manicure.
Matte Blue and Black Nail Combinations
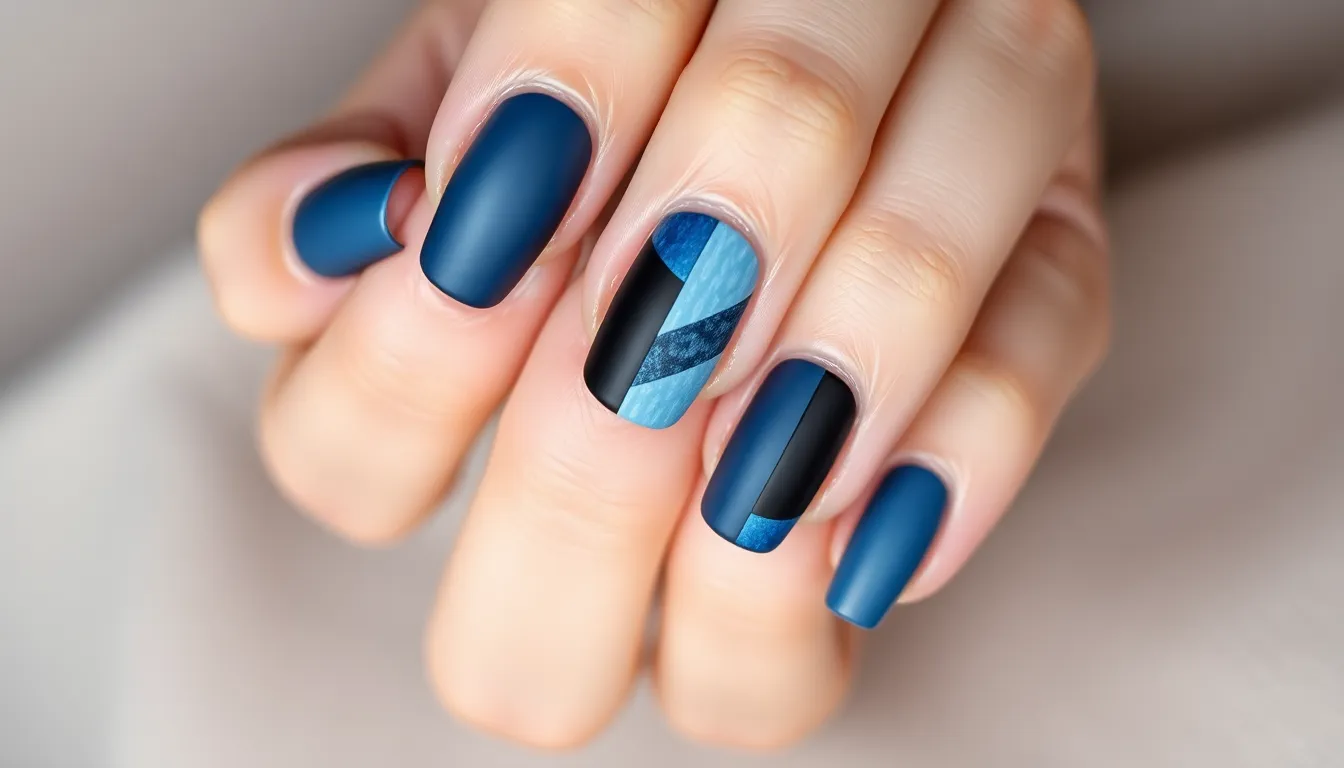
Matte finishes bring sophisticated elegance to blue and black nail designs, creating velvety textures that catch light differently than traditional glossy polishes. These combinations offer modern appeal while maintaining the timeless beauty of our favorite color pairing.
Full Matte Coverage
Full matte coverage transforms your entire manicure into a stunning display of velvety sophistication. We achieve this look by applying navy blue or midnight black matte polish across all ten nails, creating uniform elegance that works for any occasion.
Alternating colors between fingers creates visual interest without overwhelming the design. Try midnight black on your thumb and ring finger while using steel blue on the remaining nails for balanced contrast. Deep cobalt blue paired with charcoal black offers another striking combination that maintains professional polish.
Block color techniques work beautifully with matte finishes, allowing you to section each nail into distinct areas. Apply prussian blue to two thirds of the nail and matte black to the remaining section, creating clean geometric divisions. This approach transforms simple color blocking into modern art pieces.
Matte and Glossy Contrast
Matte and glossy contrast creates dimensional interest by playing with different light reflections across your manicure. We recommend using glossy midnight black as your base color and adding matte navy blue accents for striking visual depth.
Accent nail applications work perfectly with this technique, featuring one glossy nail among four matte ones for subtle sophistication. Choose your ring finger for a glossy royal blue finish while keeping remaining nails in matte black for elegant balance.
Stripe patterns showcase this contrast beautifully, alternating between matte and glossy finishes within single nail designs. Create vertical stripes using matte steel blue and glossy black polish, ensuring each stripe maintains clean edges for professional results.
Half moon designs benefit from this textural play, using glossy indigo blue for the crescent shape and matte black for the remaining nail surface. This combination creates vintage inspired elegance with contemporary appeal.
Textured Matte Effects
Textured matte effects add dimensional interest beyond traditional flat matte finishes, creating tactile experiences that elevate your blue and black combinations. We achieve these looks using specialized products and techniques that build surface texture.
Sand texture polishes in midnight black create stunning contrast when paired with smooth matte cobalt blue sections. Apply the textured polish to accent nails or exact design areas for maximum impact without overwhelming the overall look.
Velvet powder applications transform regular matte polishes into luxurious textured surfaces that feel as good as they look. Dust prussian blue polish with velvet powder while wet, then seal with matte topcoat for lasting texture.
Sugar effect techniques involve mixing fine granules into your polish before application, creating subtle texture that catches light beautifully. Combine this method with steel blue polish on accent nails while keeping remaining nails smooth matte black.
Caviar bead applications add three dimensional texture to matte designs, using tiny beads in matching or contrasting colors. Press black caviar beads into wet matte navy polish for sophisticated texture that maintains color harmony.
Blue and Black Holiday Nail Themes
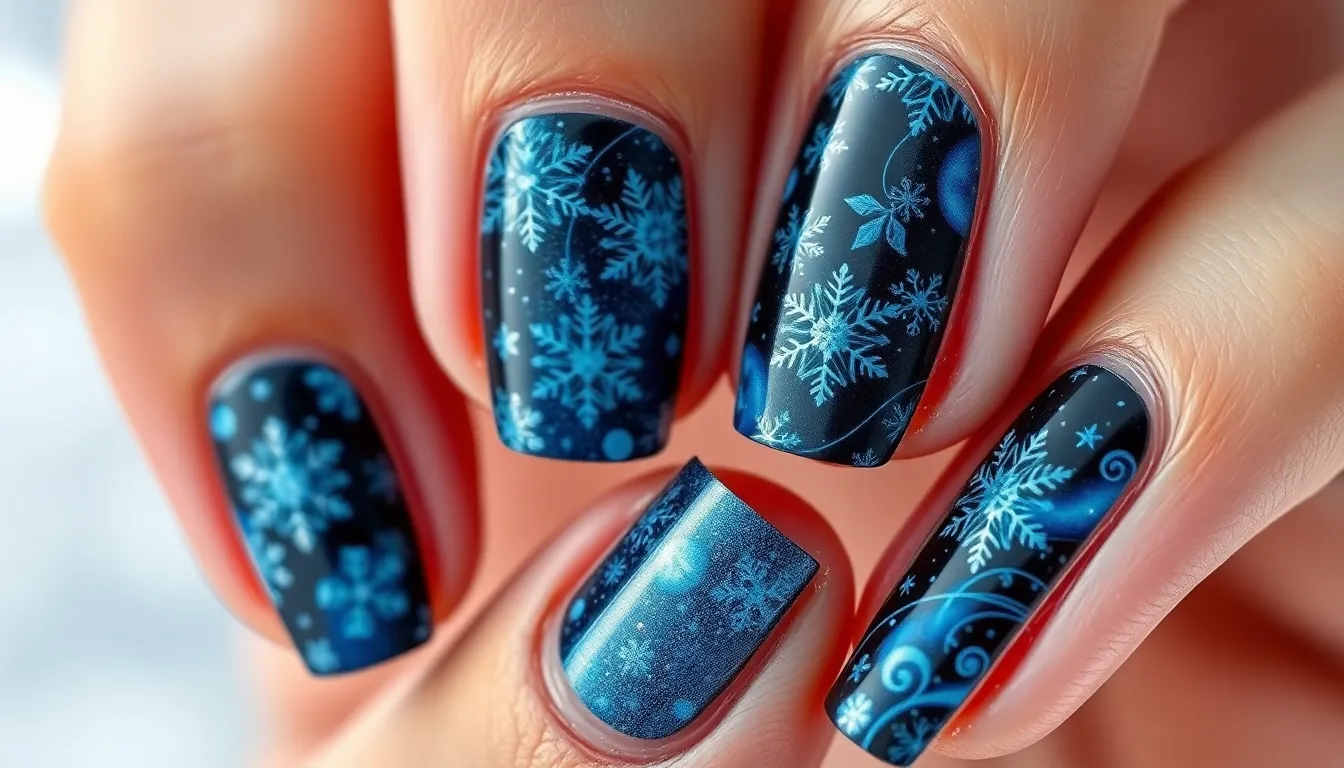
Holiday celebrations call for special nail designs that capture the season’s magic. We’ll explore how blue and black combinations create perfect festive manicures for winter gatherings and special occasions.
Winter-Inspired Designs
Snowflake patterns transform ordinary manicures into winter wonderlands using delicate white stamping over midnight black bases. We create intricate crystalline designs by layering different sized snowflake stamps with metallic blue accents for dimensional depth. Silver glitter adds sparkle between the patterns to mimic fresh snow catching moonlight.
Icicle effects bring frozen elegance to fingertips through vertical gradient techniques that blend sapphire blue into clear polish. We paint thin white lines over the gradient to represent dripping ice formations. Adding tiny rhinestones at the base of each icicle creates realistic water droplets for enhanced winter authenticity.
Frost gradient designs capture the beauty of winter mornings with subtle color transitions from deep navy to pale blue. We apply the darkest shade at the cuticle area and blend upward using a damp sponge for seamless coverage. White shimmer polish dabbed over the entire nail creates the appearance of delicate frost crystals.
Nighttime Sky Patterns
Constellation maps turn nails into miniature planetariums using black polish as the infinite space backdrop. We dot tiny silver or gold points to represent major star formations like the Big Dipper or Orion’s Belt. Fine detail brushes help connect the stars with thin lines to complete each constellation pattern.
Galaxy swirls recreate the cosmic beauty of spiral arms using water marble techniques with navy blue and black polish. We add drops of purple and silver polish to the water mixture for authentic galactic colors. Sponging additional glitter over the dried design enhances the stellar effect with twinkling stars.
Moon phase sequences showcase lunar cycles across multiple nails using white polish on black bases. We create crescents, half moons, and full circles to represent different phases throughout the month. Gradient shading around each moon shape adds realistic shadowing effects for astronomical accuracy.
Gothic Elegance Styles
Victorian lace patterns bring historical romance to modern manicures through intricate stamping designs over deep blue bases. We use black stamping polish to create delicate filigree patterns that mimic antique lace fabrics. Matte topcoat over the entire design adds vintage authenticity while glossy accent dots provide subtle contrast.
Cathedral window effects recreate stained glass beauty using geometric sectioning techniques with royal blue and black polish. We create pointed arch shapes using striping tape and fill alternating sections with different shades. Silver leaf accents between sections mimic the lead came found in traditional church windows.
Ornate filigree designs showcase elaborate decorative patterns using freehand painting techniques over black base coats. We paint swirling baroque inspired motifs with metallic blue polish using fine art brushes for precise detail work. Adding tiny pearls or crystals at pattern intersections creates luxurious dimensional accents perfect for formal holiday events.
Easy Blue and Black Nail Ideas for Beginners
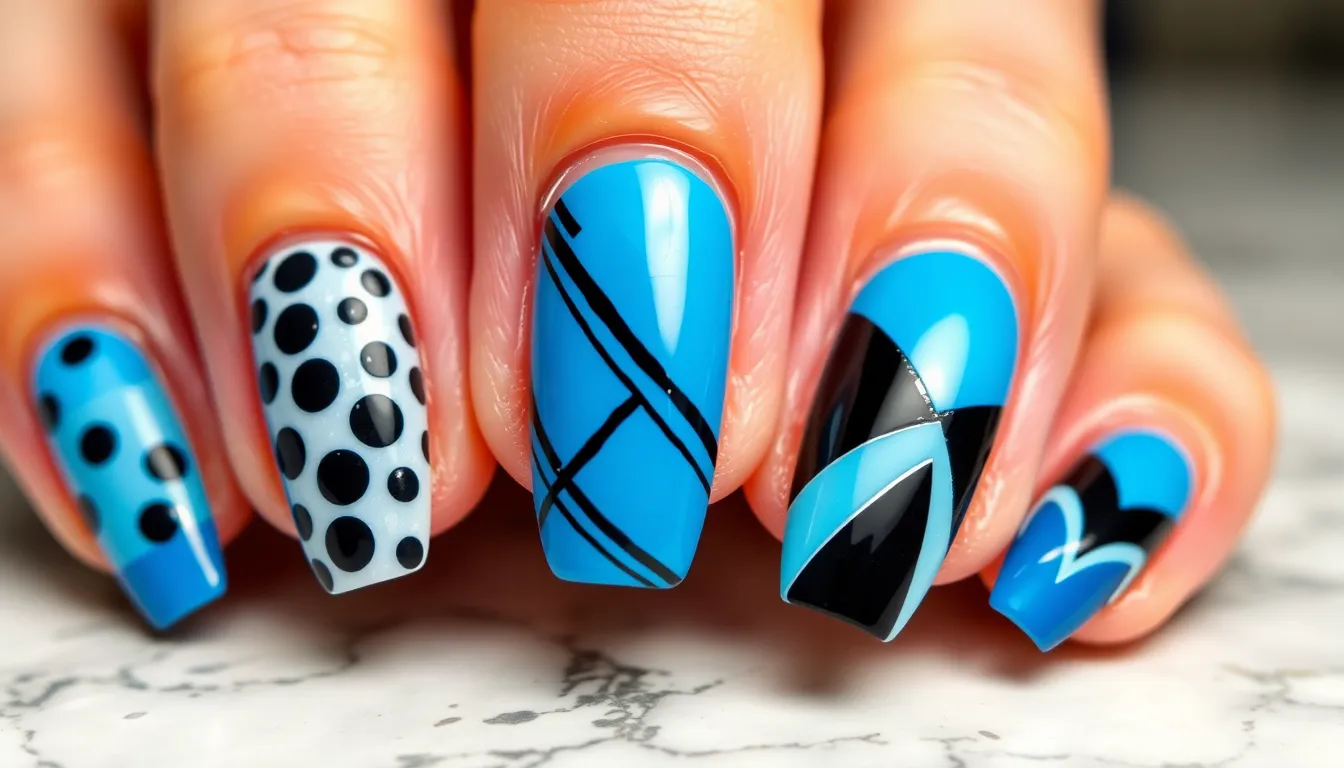
Starting your blue and black nail journey doesn’t require advanced artistic skills or professional tools. These beginner-friendly techniques create stunning results with simple materials you likely already have at home.
Simple Two-Tone Designs
Alternating color placement creates effortless elegance with minimal effort. Paint your thumb, middle, and pinky nails with midnight black polish while coating your index and ring fingers in royal blue. This classic pattern requires only steady brush control and basic polish application techniques.
Half-and-half vertical splits transform your nails into modern art pieces. Start by applying painter’s tape down the center of each nail from cuticle to tip. Paint one side with navy blue polish and the other with jet black, removing the tape while the polish is still slightly wet for clean lines.
Diagonal color blocking adds ever-changing visual interest to your manicure. Place tape diagonally across each nail from the bottom left corner to the upper right corner. Apply cobalt blue to the upper section and charcoal black to the lower section, creating an eye-catching geometric effect.
Base and tip combinations offer a fresh twist on traditional French manicures. Paint your entire nail with a deep blue base color, then use a small brush to apply black polish only to the tips in a curved or straight line across the nail.
Tape-Assisted Patterns
Straight line striping creates professional-looking results without artistic training. Apply a base coat of electric blue polish and let it dry completely. Place thin striping tape vertically across your nails, leaving even spaces between each strip, then paint over everything with black polish before removing the tape.
Chevron zigzag patterns bring trendy geometric flair to your fingertips. Start with a black base coat and allow it to cure fully. Create V-shaped patterns using painter’s tape positioned at 45-degree angles, then fill the exposed areas with sapphire blue polish for striking contrast.
Grid square designs transform your nails into miniature checker patterns. Apply a midnight blue base and let it set completely. Place intersecting strips of tape both horizontally and vertically across your nails, creating small squares, then paint alternating squares with black polish.
Curved accent lines soften harsh geometric patterns with organic shapes. Use flexible striping tape to create gentle curves across your navy blue base coat. Paint over the exposed areas with deep black polish, then carefully remove the tape to reveal flowing, wave-like patterns.
Basic Dotting Techniques
Simple polka dot placement creates playful designs using everyday tools. Apply a solid black base coat and allow it to dry thoroughly. Dip a bobby pin or toothpick into cerulean blue polish and create evenly spaced dots across each nail surface.
Gradient dot sizing adds dimensional interest to your design. Start with large dots using the eraser end of a pencil dipped in royal blue polish on your black base. Create medium-sized dots with a toothpick and finish with tiny dots using a bobby pin for a cascading effect.
Border dot patterns frame your nails with elegant detailing. Paint your nails with navy blue polish as the base color. Use a dotting tool or bobby pin dipped in black polish to create a neat row of dots along the cuticle line and nail tip edges.
Scattered constellation effects mimic starry night skies on your fingertips. Apply a deep blue base coat and let it cure completely. Use various tools like toothpicks, bobby pins, and pencil erasers dipped in black polish to create random dot patterns resembling constellations across each nail.
Conclusion
Blue and black nail combinations offer endless possibilities for expressing your personal style. Whether you’re drawn to sophisticated matte finishes or eye-catching glitter accents these colors work beautifully together to create stunning manicures.
We’ve shown you that achieving professional-looking results doesn’t require years of experience or expensive salon visits. From simple tape-assisted patterns to intricate stamped designs there’s a technique that matches your skill level and creativity.
The versatility of this color duo means you’ll never run out of inspiration. These shades transition seamlessly from everyday elegance to holiday glamour making them a perfect addition to your nail art repertoire. Start with the beginner-friendly techniques and gradually work your way up to more complex designs as your confidence grows.
Frequently Asked Questions
What makes blue and black nail combinations so popular?
Blue and black nail combinations are popular because they offer incredible versatility and timeless appeal. These complementary colors can create everything from subtle, elegant looks to bold statement designs. The contrast between deep black and various blue shades provides visual interest while remaining sophisticated enough for any occasion.
What are the best techniques for creating blue and black gradient nails?
The most effective gradient techniques include the ombre fade method using a damp makeup sponge to blend colors seamlessly, vertical gradients with detail brush blending, and horizontal blends that incorporate glitter accents. Start with a dark base coat and gradually blend lighter shades for professional-looking results.
How do I create geometric patterns with blue and black polish?
Geometric patterns can be achieved through striped designs (vertical, horizontal, or mixed widths), chevron patterns, and color block combinations. Use nail tape for clean lines, and experiment with half-moon designs, triangular sections, and square grid patterns to create striking geometric nail art.
What is the water marble technique for blue and black nails?
The water marble technique involves dropping alternating colors of midnight black and cobalt blue polish into room temperature water, then swirling the colors with a toothpick to create organic patterns. Dip your nail into the design and clean up excess polish around the cuticles for professional results.
How can beginners create professional-looking blue and black nail designs?
Beginners can start with simple two-tone designs like half-and-half splits, diagonal color blocking, or base and tip combinations. Use tape to create clean lines for geometric patterns, try basic dotting techniques for playful accents, and practice gradient effects with a makeup sponge for easy yet impressive results.
What are negative space nail designs?
Negative space designs leave portions of the natural nail exposed, creating striking visual contrast. Popular techniques include geometric cutouts, minimalist line art, half-moon patterns, and triangular sections. These contemporary designs blend artistic expression with wearable style while maintaining sophistication.
How do I incorporate glitter into blue and black nail designs?
Glitter can be applied through full coverage for maximum impact, gradient tips for elegant fade effects, or as accent nails for strategic sparkle placement. Use mixed particle sizes for dimensional interest, and apply glitter by dabbing rather than brushing for even distribution and professional results.
What are matte blue and black nail combinations?
Matte finishes create sophisticated elegance by removing the glossy shine from polish. You can achieve full matte coverage, alternate between matte and glossy finishes for contrast, or incorporate textured effects like sand texture, velvet powder, or caviar beads to enhance the tactile experience.
How do I create holiday-themed blue and black nails?
Holiday themes include winter-inspired designs with snowflake patterns and icicle effects, nighttime sky patterns featuring constellations and galaxy swirls, and gothic elegance styles with Victorian lace patterns. Use white stamping over black bases and incorporate metallic accents for festive appeal.
What tools do I need for blue and black nail art?
Essential tools include quality blue and black polishes, makeup sponges for gradients, nail tape for geometric designs, dotting tools, detail brushes, stamping plates and scrapers for intricate patterns, and topcoat for protection. Most techniques can be achieved with basic household items and creativity.

