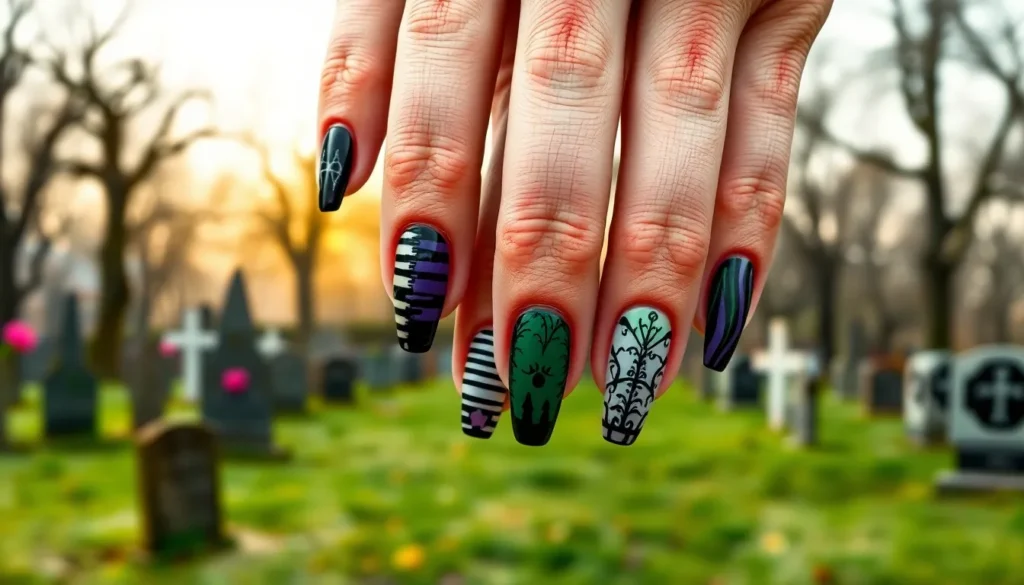
Tim Burton’s iconic Beetlejuice continues to captivate fans decades after its release and we can’t get enough of translating that gothic charm into stunning nail art. Whether you’re channeling Lydia’s dark aesthetic or embracing the film’s signature black and white stripes there’s something undeniably magnetic about Beetlejuice-inspired nails.
We’ve discovered that these spooky-chic designs aren’t just perfect for Halloween – they’re versatile enough to rock year-round for anyone who loves alternative beauty. From subtle nods to the afterlife to bold statement nails that scream “showtime” the possibilities are endless when you’re drawing inspiration from this beloved cult classic.
Ready to summon some seriously stunning nail art? We’ll walk you through the most creative Beetlejuice nail ideas that’ll have everyone asking about your manicurist. These designs range from beginner-friendly to advanced so there’s something for every skill level.
Classic Black and White Striped Beetlejuice Nail Ideas
These timeless striped designs capture the essence of Beetlejuice’s signature look while remaining surprisingly versatile for everyday wear.
Vertical Stripe Patterns
Thin vertical lines create an elegant elongating effect that makes your fingers appear longer and more slender. We recommend using a striping brush or nail tape to achieve perfectly straight lines that run from cuticle to tip. Start with a white base coat and add black stripes using steady vertical strokes for the most authentic Beetlejuice appearance.
Wide vertical bands offer a bold statement look that’s easier to create for beginners. Paint alternating thick black and white sections across each nail using a flat brush or small makeup sponge. This technique works exceptionally well on longer nails where you have more surface area to showcase the dramatic contrast.
Mixed width vertical stripes combine thin and thick lines for added visual interest and complexity. Create varying stripe widths by alternating between detail brushes and flat brushes during application. This approach mimics the irregular patterns often seen in Tim Burton’s artistic style.
Horizontal Stripe Designs
Classic horizontal bands deliver the most recognizable Beetlejuice aesthetic with their prison uniform inspiration. We suggest creating 3-4 horizontal stripes per nail for optimal visual impact without overwhelming the design. Use nail guides or tape to ensure each stripe maintains consistent thickness across all ten nails.
Gradient horizontal stripes transition from thick to thin bands as they move up the nail for a modern twist on the traditional pattern. Begin with wider stripes near the cuticle and gradually decrease the width toward the nail tip. This creates a sophisticated ombré effect while maintaining the iconic black and white color scheme.
Curved horizontal lines soften the harsh geometric look while preserving the striped theme’s essence. Use a curved nail guide or freehand technique to create gentle arcs instead of straight horizontal lines. This variation works particularly well for those who prefer subtle gothic elements in their manicure.
Diagonal Striped Accents
45-degree diagonal stripes create ever-changing movement and visual energy that draws attention to your hands. Position the stripes at a perfect diagonal angle using nail tape as a guide for consistent placement across all nails. This technique requires patience but delivers professional looking results that capture Beetlejuice’s chaotic energy.
Chevron diagonal patterns combine multiple diagonal lines to form zigzag shapes reminiscent of Beetlejuice’s wild personality. Create alternating diagonal stripes that meet at sharp angles to form distinctive V shapes down each nail. Use a thin detail brush for precise line work and clean intersections.
Asymmetrical diagonal designs embrace the unconventional spirit of Tim Burton’s aesthetic through irregular stripe placement. Vary the angle and spacing of diagonal lines across different nails for an intentionally mismatched look. This approach works well as an accent nail design paired with simpler striped patterns on remaining fingers.
Gothic Purple and Green Beetlejuice Nail Ideas
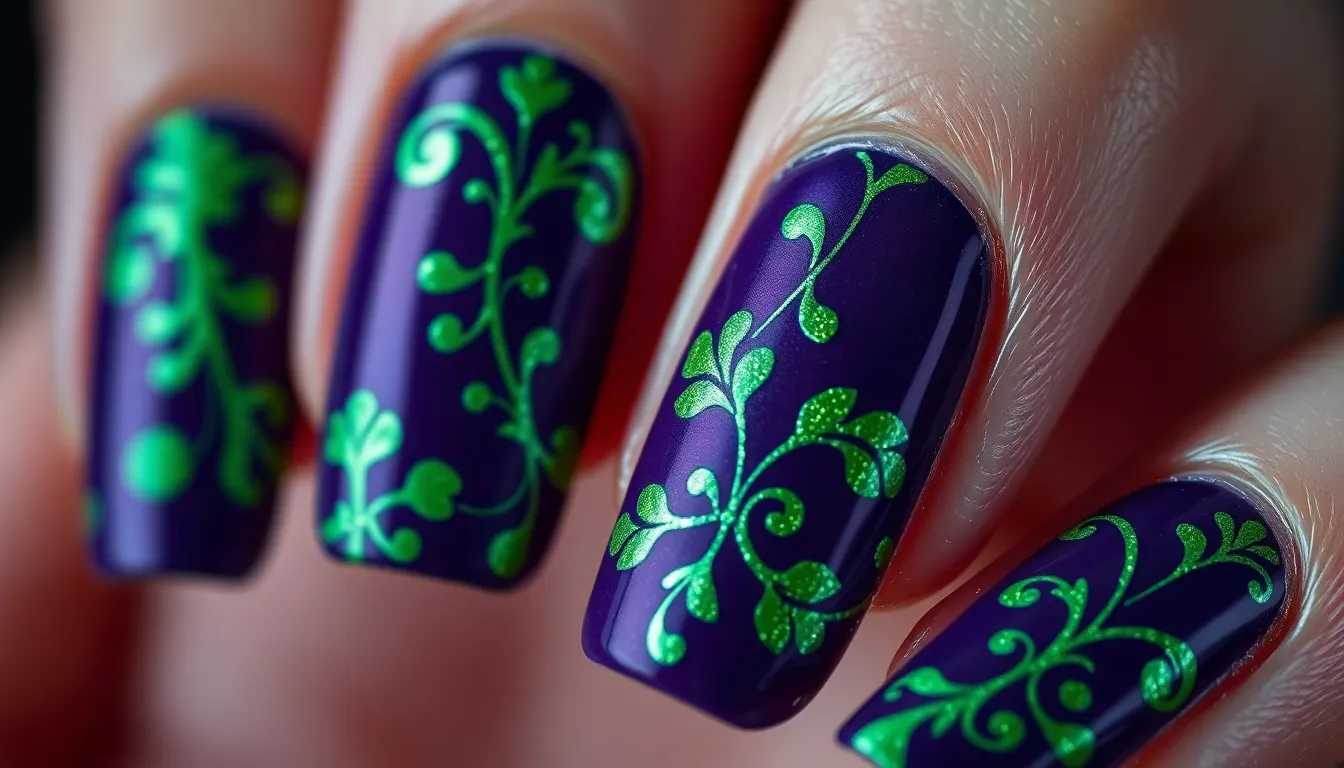
Purple and green combinations capture Beetlejuice’s supernatural essence while channeling gothic elegance. These color pairings create dramatic nail art that stands out year round.
Deep Purple Base with Green Details
Dark purple serves as the perfect foundation for intricate green accents. We recommend starting with a rich eggplant or plum base coat that mimics the film’s moody atmosphere. Green details can include thin striping tape designs, small geometric shapes, or delicate floral motifs painted over the purple.
Accent nails work beautifully with this color scheme. Try painting three nails in deep purple while featuring two statement nails with green patterns. Swirl designs, lightning bolts, or even tiny beetles create visual interest without overwhelming the overall look.
Glitter placement adds dimension to purple bases. Sprinkle green glitter near the cuticle area or create a gradient effect toward the tips. This technique catches light beautifully and gives nails an otherworldly shimmer that Beetlejuice fans will appreciate.
Ombre Purple to Green Effects
Gradient techniques blend these contrasting colors seamlessly. Start with deep purple at the base and transition to emerald or lime green at the tips using a makeup sponge. The blending creates a supernatural effect that captures the film’s mystical energy.
Reverse ombre offers a striking alternative. Begin with green at the cuticle and fade to purple at the tips for an unexpected twist. This approach works especially well on longer nails where the color transition has more space to develop.
Vertical ombre creates unique visual appeal. Instead of traditional horizontal gradients, try blending purple and green from side to side across each nail. This technique mimics the chaotic energy of Beetlejuice’s character while maintaining gothic sophistication.
Metallic Purple and Lime Green Combinations
Metallic finishes elevate the gothic purple and green palette. Chrome purple paired with bright lime green creates high contrast that demands attention. These finishes reflect light differently, adding depth and complexity to simple nail designs.
Foil accents bring luxury to Beetlejuice inspired nails. Apply purple foil over green base coats or vice versa using nail glue and foil transfer techniques. The reflective surfaces create an almost magical appearance that fits the supernatural theme perfectly.
Holographic topcoats transform metallic bases. Layer holographic polish over purple and green metallics to create rainbow effects that shift in different lighting. This combination captures Beetlejuice’s unpredictable nature while maintaining the gothic color story throughout your manicure.
Character-Inspired Beetlejuice Nail Ideas
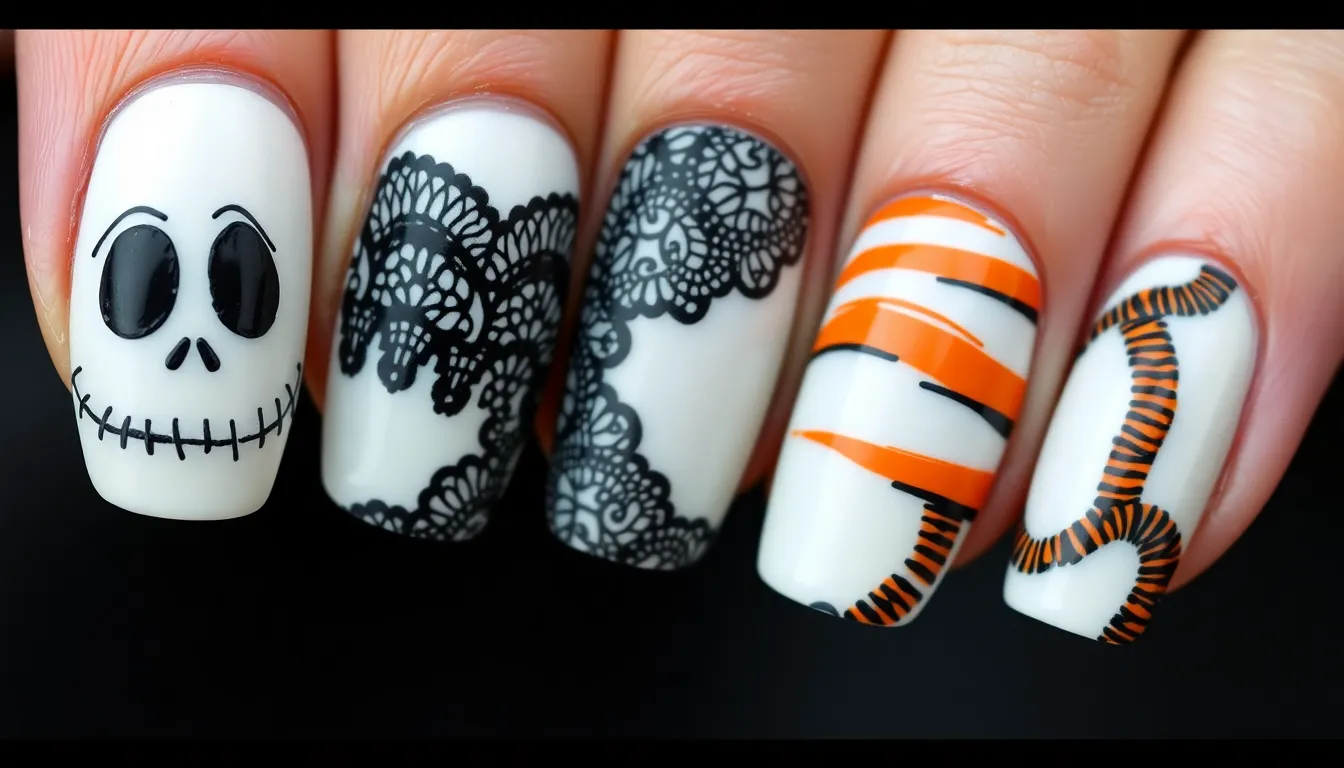
Moving beyond patterns and colors, we can bring the film’s iconic characters directly to life on our nails. Character inspired designs allow us to showcase exact elements that make each personality memorable.
Beetlejuice Face Art Designs
Creating Beetlejuice’s signature look starts with his pale complexion and wild green hair. We recommend using a white or pale yellow base to mimic his ghostly skin tone, then adding thin black lines for his distinctive facial features. His messy green hair becomes the focal point through strategic placement of forest or lime green polish at the nail tips.
Detailed face art requires steady hands and exact tools like thin brushes or nail art pens. Start by outlining his eyes with black polish, creating the sunken appearance he’s known for. Add small red dots for bloodshot effects, and don’t forget his crooked smile using a fine detail brush. Purple shadows under the eyes enhance the undead appearance we’re aiming for.
Minimalist approaches work well for those preferring subtle character references. Focus on just his green hair by creating textured spikes at the nail tips, or paint only his signature striped suit pattern as a background. These simplified versions still capture his essence without overwhelming the design.
Advanced nail artists can incorporate 3D elements for dramatic effect. Tiny rhinestones create texture for his wild hair, while matte topcoat gives the pale base an authentic ghostly finish. Consider adding small decals of his iconic striped suit or bow tie as accent details.
Lydia Deetz Gothic Nail Looks
Lydia’s aesthetic centers around deep blacks with romantic gothic elements. We start with a rich black base coat, then layer in burgundy or deep purple accents to reflect her dramatic style. Her signature red lipstick translates beautifully as accent nail color or French tip details.
Lace patterns capture her vintage gothic fashion sense perfectly. Using nail stamps or hand painting thin white lines, we can create delicate lace overlays on the black base. These intricate designs mirror the texture and elegance of her clothing choices throughout the film.
Dark florals represent her connection to both life and death themes. Paint small roses or thorny vines in deep red or purple, adding tiny silver studs as dewdrops. These botanical elements reflect her complex relationship with mortality while maintaining her romantic gothic aesthetic.
Textural elements elevate Lydia inspired designs significantly. Velvet powder over tacky topcoat creates a fabric like finish that mimics her clothing textures. Alternatively, use matte black as the base with glossy accents to create depth and visual interest similar to her layered outfits.
Sandworm Pattern Nails
Sandworms bring the Netherworld’s most memorable creatures to our fingertips. Their distinctive orange and black striped bodies translate into bold geometric patterns that capture their serpentine movement. We create these designs using alternating bands of bright orange and deep black polish.
Curved stripe techniques mimic their undulating motion through desert sand. Instead of straight lines, we paint wavy stripes that flow from cuticle to tip, suggesting the creatures’ fluid movement. This organic approach feels more ever-changing than rigid geometric patterns.
Textural elements enhance the sandworm aesthetic dramatically. Sandy texture polish in orange tones creates the gritty desert environment they inhabit. Layer this over the striped base, then add glossy black accents to represent their sleek, dangerous surfaces.
Three dimensional nail art brings sandworms to life completely. Build up curved ridges using thick gel polish to simulate their segmented bodies. Paint these raised areas in alternating orange and black, then add tiny white dots for their many eyes. This advanced technique creates truly show stopping character nails.
Spooky Cemetery Beetlejuice Nail Ideas
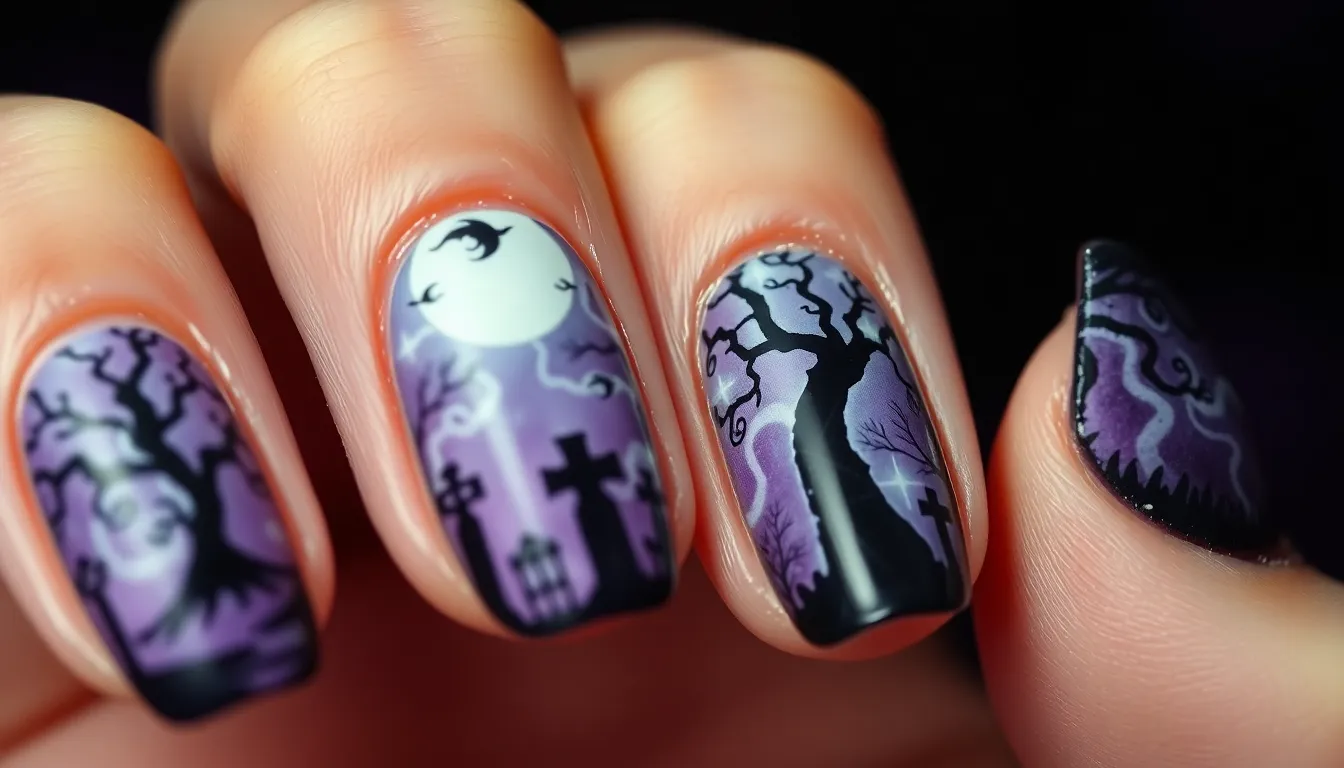
Cemetery scenes capture the haunting atmosphere of Beetlejuice’s supernatural industry. We’ll show you how to transform your nails into miniature graveyard masterpieces.
Graveyard Scene Nail Art
Full cemetery landscapes work beautifully across accent nails using a dark purple or midnight black base coat. Paint rolling hills with gray polish at the nail base to create a misty graveyard ground. Add tiny white or silver tombstone shapes using a dotting tool or thin brush for authentic cemetery details.
Layer multiple tombstone sizes to create depth in your graveyard scene nail art. Use darker shades for background stones and lighter colors for foreground elements. Include small crosses and weathered headstone shapes scattered throughout the design for authentic cemetery vibes.
Create atmospheric fog effects with light gray or white polish using a sponge technique. Dab the color lightly across the middle section of your nail to simulate rolling cemetery mist. This technique adds supernatural ambiance to your Beetlejuice inspired graveyard scenes.
Tombstone Design Details
Individual tombstone accent nails make striking statement pieces using a charcoal gray base with black detailing. Shape the tombstone outline with a curved top and straight sides using steady brush strokes. Add weathered cracks and aged textures with darker polish applied randomly across the surface.
Engrave spooky epitaphs like “RIP” or “Here Lies…” using ultra fine nail art brushes and black polish. Include small decorative elements such as carved roses skulls or gothic crosses for authentic cemetery monument details. These intricate touches elevate your tombstone nail design from simple to spectacular.
Apply matte top coat over your finished tombstone designs to achieve that weathered stone texture. This finishing technique creates realistic cemetery monument effects that perfectly complement the Beetlejuice aesthetic. The matte finish also helps other nail art elements stand out more dramatically.
Creepy Tree Silhouettes
Bare tree silhouettes create dramatic focal points using jet black polish against deep purple or gray base colors. Start with the main trunk using a thin brush then branch outward with increasingly smaller limbs. Create gnarled twisted branches that reach across the entire nail surface for maximum spooky impact.
Add texture to your tree silhouettes by varying line thickness and including small knots or bumps along the branches. Use quick flicking motions with your brush to create natural looking twigs and smaller branches. These detailed elements make your creepy trees look more realistic and haunting.
Position your tree silhouettes strategically across multiple nails to create a cohesive cemetery forest effect. Place larger trees on accent nails and smaller saplings on remaining fingers. This technique builds a complete graveyard industry that tells the supernatural story of Beetlejuice’s ghostly area.
Minimalist Beetlejuice Nail Ideas
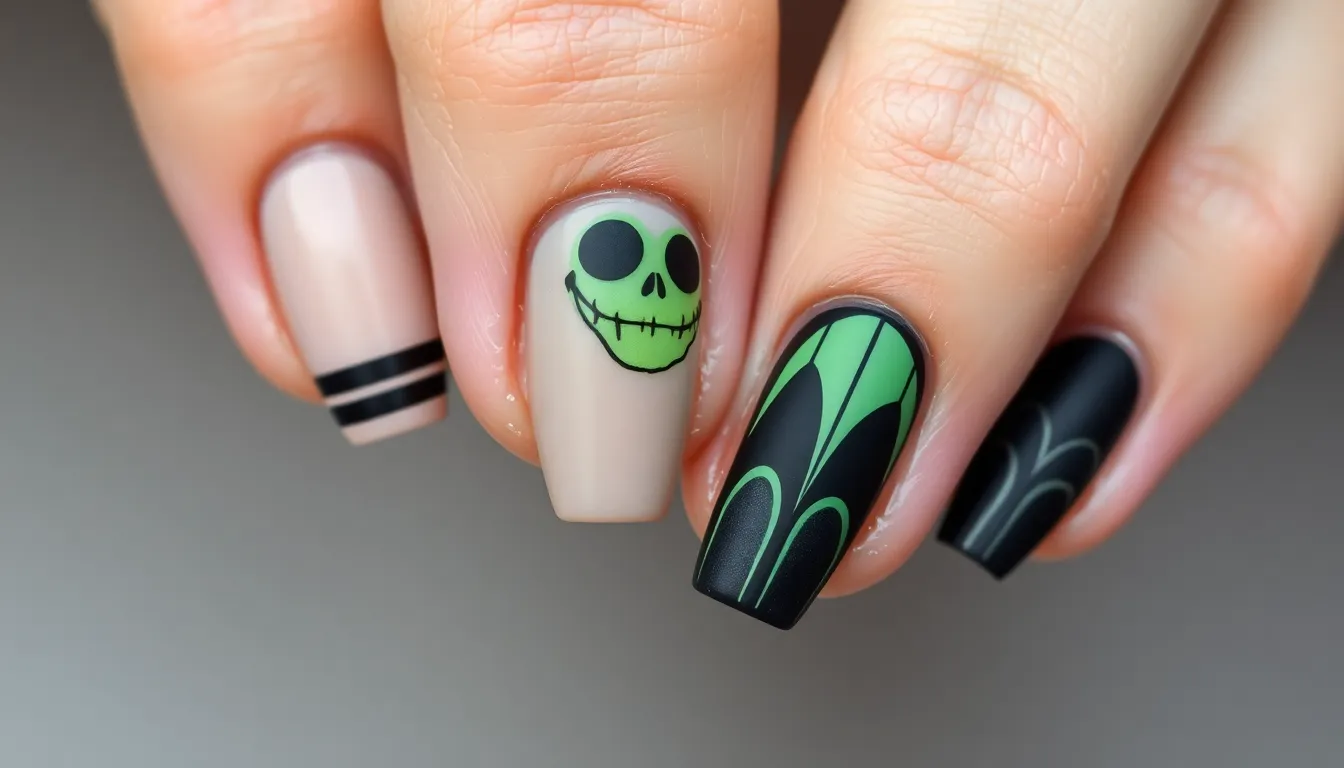
Sometimes less really is more when creating Beetlejuice nail art. We’ll show you how subtle nods to Burton’s masterpiece can make just as much impact as elaborate designs.
Simple Stripe Accent Nails
Start with a neutral base and add one thin black stripe down the center of your ring finger for an understated Beetlejuice reference. Paint your remaining nails in classic nude or clear polish to keep the focus on that single striped accent.
Create asymmetrical stripe placement by positioning black lines at different angles across just two nails per hand. Use a thin nail art brush to paint one vertical stripe on your thumb and one diagonal stripe on your pinky finger.
Apply double thin stripes instead of thick bands for a more refined look that still captures the iconic pattern. Space two narrow black lines about 2mm apart on your middle finger while keeping other nails in a complementary solid color.
Choose matte black stripes over glossy ones to achieve that gothic edge without overwhelming brightness. Seal regular nails with clear top coat but leave the striped accent nail with a matte finish for textural contrast.
Single Statement Nail Designs
Paint one Beetlejuice face on your ring finger using a pale green base and tiny black dots for eyes. Keep all other nails in solid black polish to frame this miniature character portrait perfectly.
Feature a small sandworm design on just your thumb nail with curved orange and black segments. Apply clear or nude polish to remaining nails so the sandworm becomes the focal point of your entire manicure.
Add a tiny tombstone silhouette to your middle finger using dark purple polish and a small black rectangle shape. Pair this spooky element with light gray polish on other nails for balanced contrast.
Create one gothic arch reminiscent of Beetlejuice’s architectural elements on your index finger. Use black polish to paint a simple pointed arch shape over a deep burgundy base while keeping other nails neutral.
Subtle Gothic Color Schemes
Choose deep plum and charcoal as your primary colors instead of stark black and white combinations. These darker tones reference the film’s palette while remaining sophisticated enough for professional settings.
Blend dark forest green with burgundy across alternating nails for a muted supernatural vibe. Apply forest green on your thumb and ring finger while painting burgundy on your index and pinky fingers.
Use dusty purple and slate gray to capture Beetlejuice’s otherworldly atmosphere without bright colors. Paint three nails in dusty purple and two in slate gray for an elegant gothic balance.
Select midnight blue and pewter for a sophisticated take on the film’s dark aesthetic. Apply midnight blue as your dominant color on four nails and add pewter to your ring finger for subtle metallic contrast.
3D Textured Beetlejuice Nail Ideas
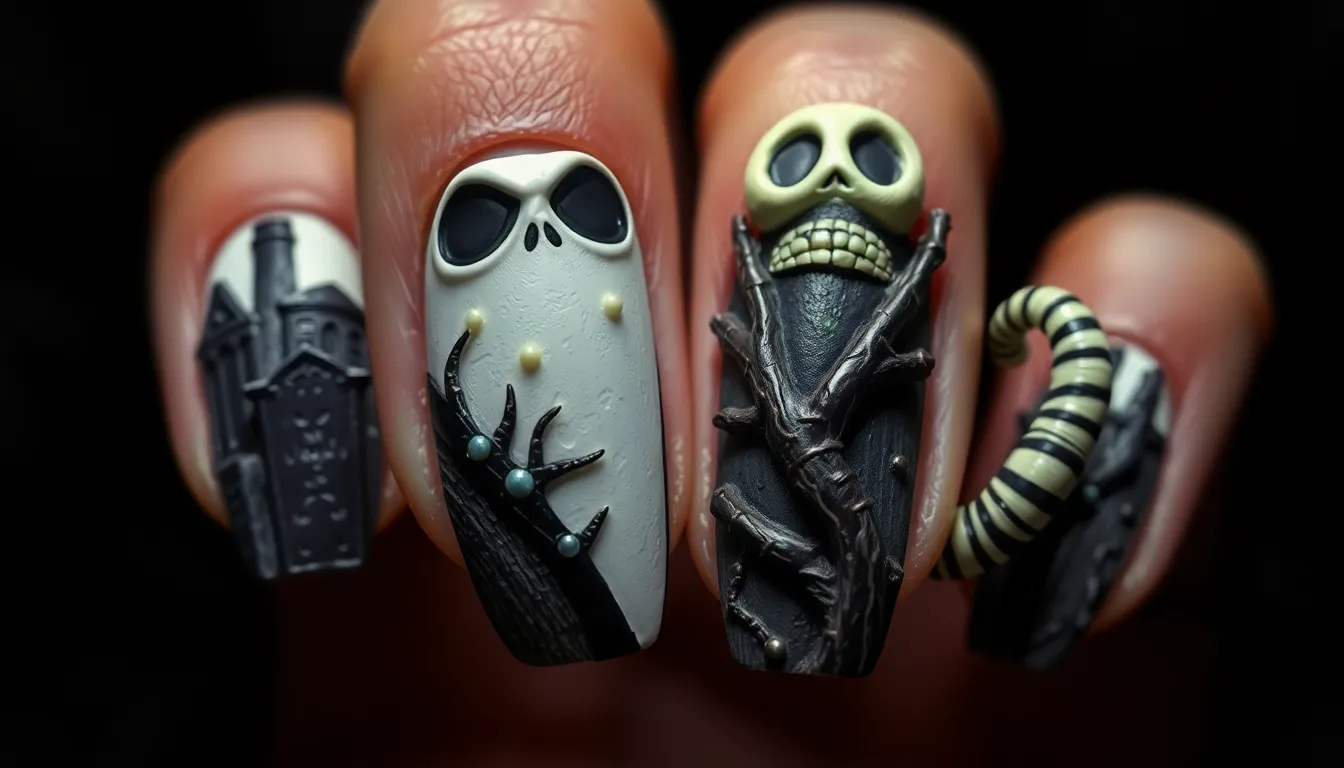
Taking Beetlejuice nail art to the next level means adding dimension that truly pops. We’ll explore techniques that make your manicure come alive with tactile elements that capture the film’s otherworldly essence.
Raised Stripe Effects
Building upon the classic black and white stripes creates stunning three-dimensional nail art. We recommend using thick gel polish to paint stripes, allowing each layer to cure completely before adding the next coat. Acrylic paint mixed with a texturing medium produces raised lines that feel authentic to the touch.
Creating alternating thick and thin raised stripes adds visual interest while maintaining the iconic Beetlejuice pattern. We suggest applying a base coat of white polish, then using a nail art brush to build up black gel polish in steady strokes. Multiple thin layers work better than one thick application for achieving even texture.
Adding metallic silver or iridescent white highlights to the raised black stripes gives them a supernatural shimmer. We’ve found that dotting tools help create consistent texture patterns along each stripe edge. Finishing with a matte top coat emphasizes the dimensional effect while protecting the raised elements.
Dimensional Character Elements
Sculpting miniature Beetlejuice faces using acrylic nail art gel creates impressive focal points. We start with a pale green base, then build up facial features using small amounts of black and white acrylic paint mixed with clear gel. His wild hair becomes textured spikes using a fan brush and dark green polish.
Creating Lydia’s lace collar details requires delicate work with fine brushes and raised white gel. We recommend practicing the intricate patterns on a nail wheel first, then applying them as accent details on ring fingers. Small rhinestones can represent buttons or brooches for added dimension.
Sandworm segments become three-dimensional when built up with layers of orange and black striped gel polish. We suggest creating a curved, tubular effect by applying thicker gel in the center and tapering toward the edges. Adding small white dots for teeth completes the creature’s menacing appearance.
Textured Gothic Patterns
Carved tombstone textures emerge from carefully layered gray and black polish applied with a sea sponge. We create realistic stone effects by dabbing different shades of gray gel polish while it’s still wet, then adding fine black lines to represent cracks and weathering. Matte finish enhances the authentic stone appearance.
Twisted tree bark patterns require building up dark brown gel polish in organic, irregular shapes. We use a fine detail brush to create vertical lines and knots that mimic real tree texture. Adding moss green accents in the bark crevices brings the spooky forest theme to life.
Cemetery fog effects become dimensional through layered application of translucent white and gray polish. We recommend using a makeup sponge to create wispy, cloud-like textures that seem to float above the nail surface. Strategic placement of these fog elements across multiple nails creates a cohesive graveyard atmosphere.
Glitter and Metallic Beetlejuice Nail Ideas
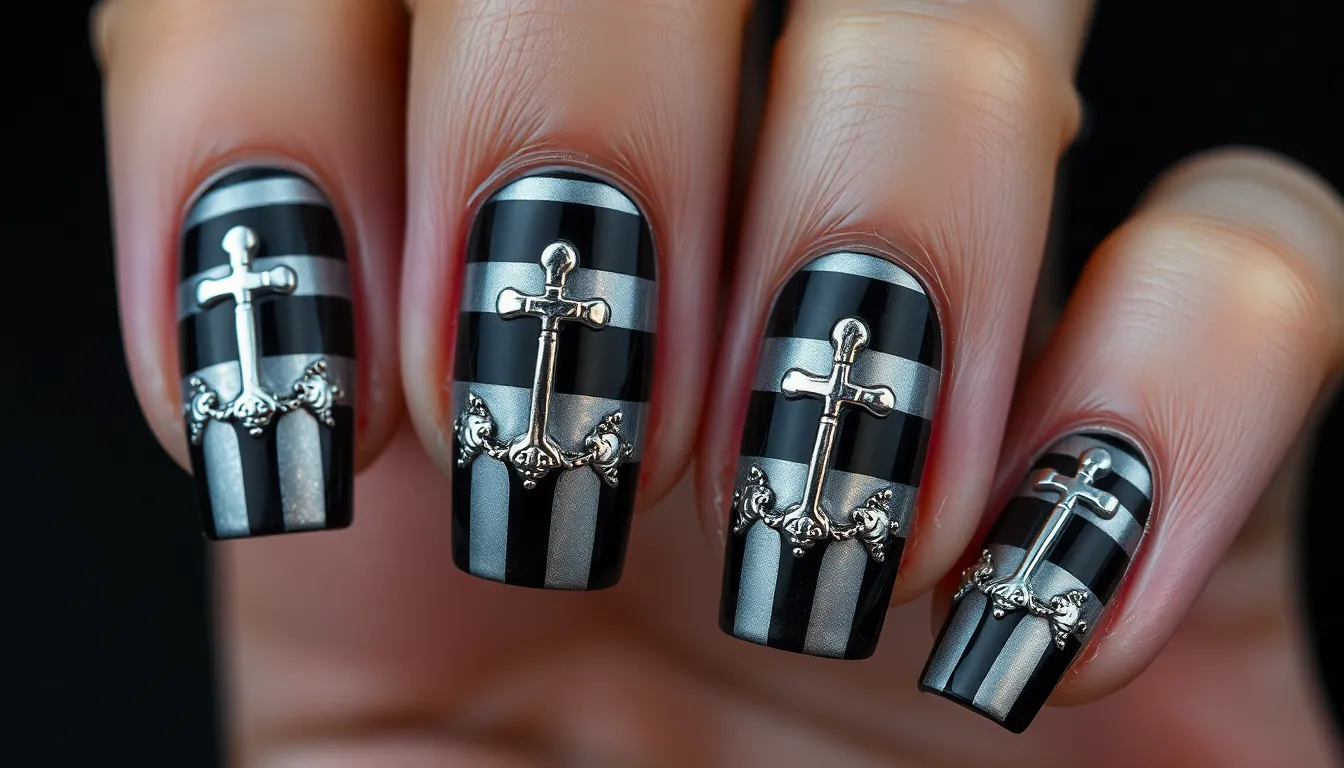
Metallic and glitter elements transform classic Beetlejuice nail art into dazzling masterpieces that catch light beautifully. We’re exploring shimmery techniques that add supernatural sparkle to your gothic manicure.
Holographic Stripe Designs
Holographic polish creates mesmerizing rainbow effects when applied over traditional black and white stripes. We recommend painting your base stripes with regular polish first, then applying holographic topcoat in thin layers for maximum dimensional impact.
Iridescent black polish works exceptionally well for this technique, shifting between deep charcoal and purple undertones. We suggest alternating holographic black stripes with matte white ones to create striking contrast that captures Beetlejuice’s signature pattern.
Chrome powder application over sticky base coat produces the most intense holographic effect. We dust the powder onto freshly painted stripes using a makeup sponge, then seal with glossy topcoat for mirror-like finish.
Vertical holographic stripes create elongating effects that make fingers appear longer and more elegant. We space these stripes evenly across each nail, ensuring consistent width for professional looking results.
Metallic Gothic Accents
Silver chrome details enhance cemetery themed designs with ethereal moonlight effects. We paint tombstone shapes using metallic silver polish, then add tiny crosses and gothic script with fine detail brushes.
Copper accents bring warmth to dark purple bases while maintaining the supernatural aesthetic. We dot copper polish around nail edges to simulate flickering candlelight, then blend outward for subtle gradient effects.
Gunmetal gray creates perfect shadowing effects for dimensional character designs. We use this shade to outline Beetlejuice faces and add depth to sandworm segments, building realistic shadows that make designs pop.
Rose gold elements add unexpected elegance to Lydia inspired manicures. We incorporate thin rose gold lines through lace patterns and use the metallic shade for delicate floral stem details.
Glitter Ombre Effects
Black to silver glitter gradients capture the essence of Beetlejuice’s supernatural transformation scenes. We start with deep black at the cuticle, gradually blending silver holographic glitter toward nail tips using makeup sponges.
Purple to green ombre effects mirror Beetlejuice’s otherworldly color palette perfectly. We layer fine glitter particles in graduated densities, creating smooth transitions that sparkle with supernatural energy.
Charcoal to white glitter fades offer subtle sophistication for workplace appropriate gothic manicures. We concentrate darker glitter near cuticles and fade to clear or white shimmer at tips for elegant gradient effects.
Multi-sized glitter particles create textural depth that mimics cemetery fog and supernatural mist. We mix fine and chunky glitter in complementary shades, applying with patting motions to avoid streaking or uneven distribution.
Halloween-Themed Beetlejuice Nail Ideas
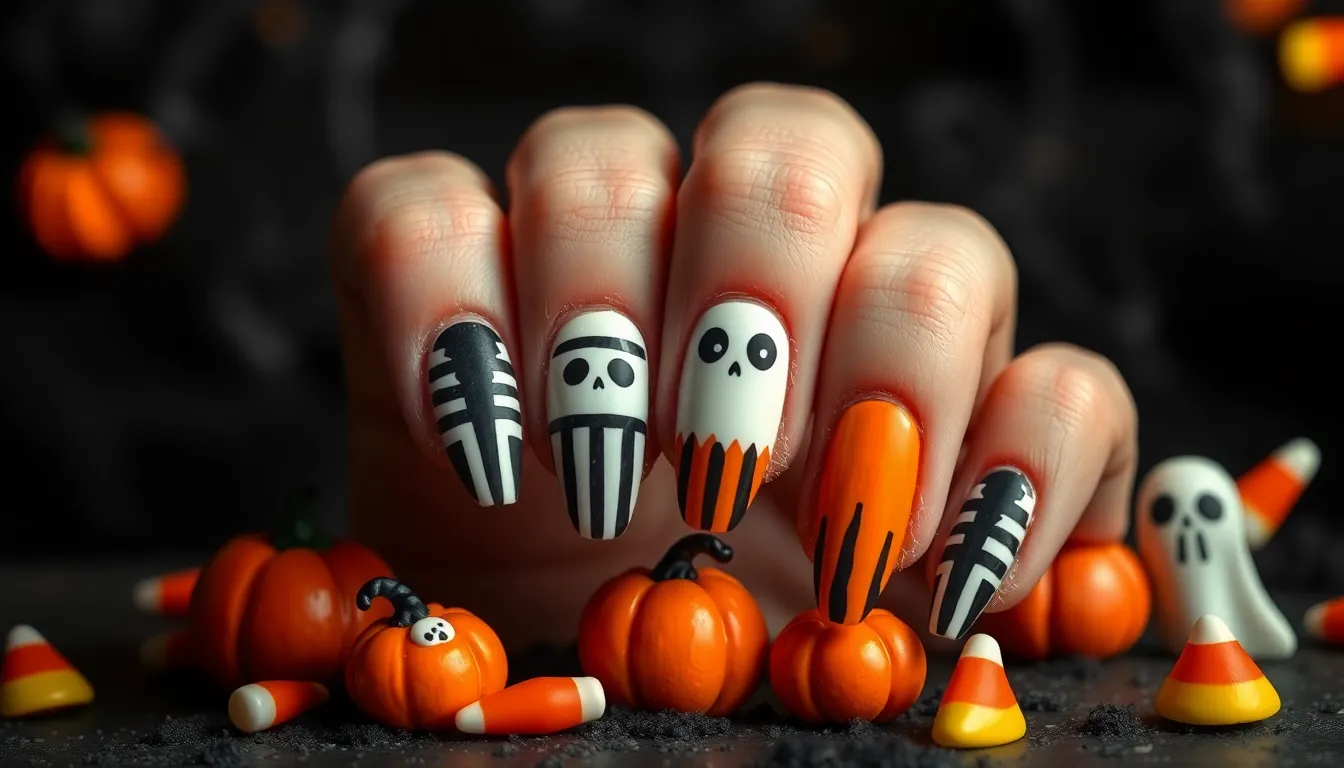
Halloween season brings the perfect opportunity to showcase your Beetlejuice obsession with seasonal twists on classic designs. We’ve curated spooky combinations that merge traditional Halloween elements with our favorite ghost’s signature style.
Pumpkin and Stripe Combinations
Orange pumpkin bases create stunning contrasts when paired with Beetlejuice’s iconic black and white stripes. We recommend starting with a bright orange base coat, then adding thin vertical stripes on accent nails using alternating black and white polish.
Carved pumpkin face designs work beautifully when incorporated into striped patterns. Paint traditional jack o’lantern features on your thumb while keeping the remaining nails in classic Beetlejuice stripes. The combination creates a cohesive Halloween look that honors both seasonal traditions and Burton’s aesthetic.
Gradient orange to black transitions offer another striking approach to this combination. Begin with orange at the cuticle and gradually blend into deep black at the tips. Add thin white stripes over the gradient for that unmistakable Beetlejuice touch.
Textured pumpkin elements elevate these designs beyond basic polish application. Use orange acrylic paint to create raised pumpkin shapes on a black and white striped base. The dimensional effect mimics actual pumpkin texture while maintaining the film’s signature pattern.
Spooky Season Color Palettes
Deep burgundy and forest green combinations capture Halloween’s darker side while staying true to Beetlejuice’s gothic atmosphere. We love pairing rich wine shades with emerald accents, creating sophisticated Halloween nails that work for both costume parties and professional settings.
Traditional Halloween orange gets a Beetlejuice makeover when combined with purple and lime green. These unexpected color pairings reference the film’s supernatural elements while embracing classic trick or treat hues. Apply orange as your base, then add purple cemetery silhouettes and lime green accents.
Midnight blue serves as an excellent alternative to traditional black in Halloween Beetlejuice designs. This deep navy creates stunning contrast with white stripes while adding depth to character faces and spooky motifs. The color works particularly well for depicting nighttime cemetery scenes.
Metallic copper and bronze tones bring warmth to autumn inspired Beetlejuice nails. These colors complement traditional Halloween palettes while adding sophistication to gothic elements like twisted trees and tombstone details. Apply copper chrome over black bases for striking dimensional effects.
Trick or Treat Inspired Designs
Candy inspired patterns merge perfectly with Beetlejuice motifs for playful Halloween nails. We suggest creating tiny candy corn designs on black and white striped bases, or painting chocolate bar squares in Beetlejuice’s signature colors. These sweet elements add whimsy to gothic designs.
Miniature trick or treat bags painted in black and white stripes reference both Halloween traditions and the film’s aesthetic. Add tiny ghost faces or “Beetlejuice” text to these bag designs for personalized touches. The small scale allows for intricate detail work while maintaining recognizable Halloween imagery.
Halloween mask motifs translate beautifully into Beetlejuice nail art. Paint classic monster masks like vampires or witches using the film’s color palette of black, white, and green. These designs work especially well as accent nails paired with simple striped patterns on remaining fingers.
Spider web patterns create perfect backdrops for Beetlejuice character elements. Start with thin white lines creating web structures, then add small Beetlejuice faces or sandworm segments within the web spaces. This combination brings together classic Halloween imagery with beloved film characters for truly unique seasonal nails.
French Tip Beetlejuice Nail Ideas
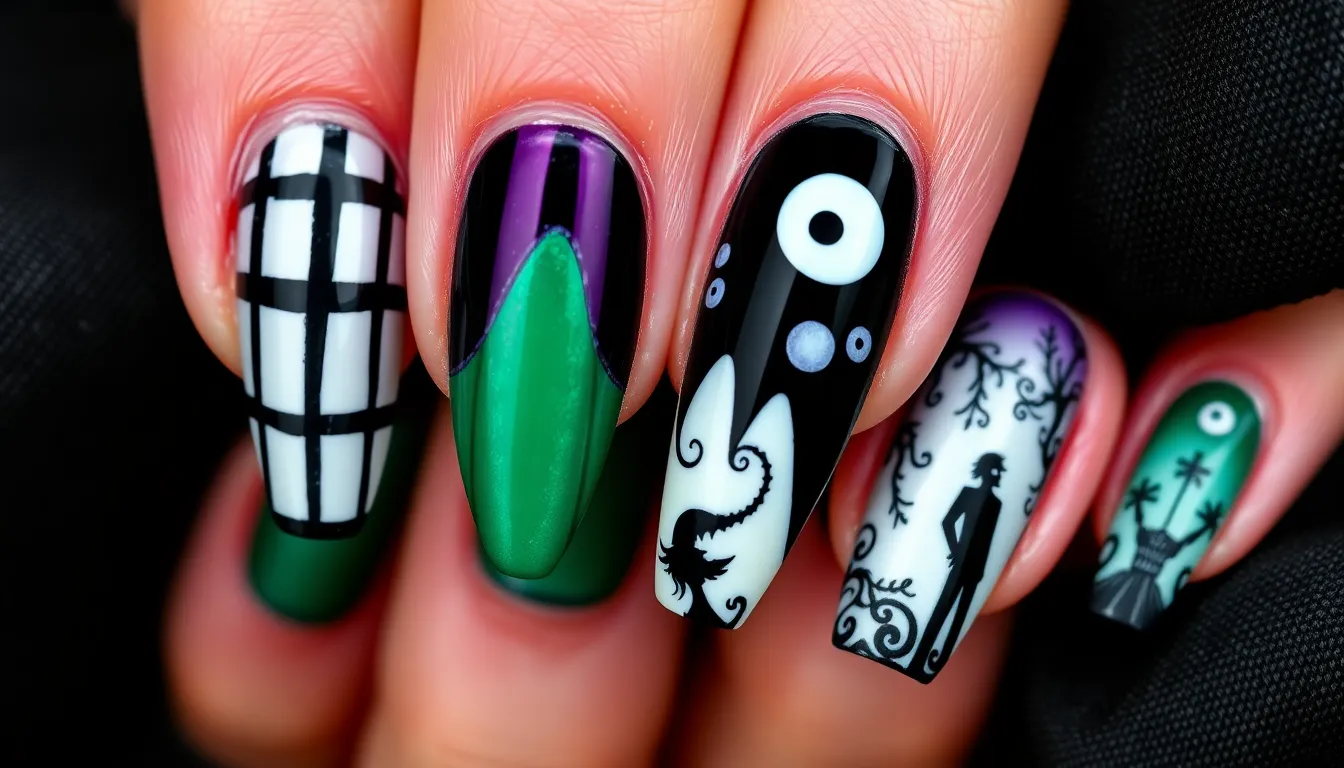
French manicures get a supernatural makeover when we blend classic elegance with Beetlejuice’s iconic gothic aesthetic. We’ll transform the traditional white tip into spooky masterpieces that channel the film’s distinctive style.
Striped French Manicure Variations
Black and white striped tips replace traditional French manicure whites with Beetlejuice’s signature pattern. We create thin alternating stripes across each nail tip using a fine detail brush and steady hand movements. The contrast between stark black lines and crisp white spaces captures the character’s iconic suit perfectly.
Vertical stripe French tips offer a modern twist on the classic horizontal approach. We paint the tips with vertical black and white stripes that elongate the nail bed and create visual height. This technique works especially well on longer nail shapes like coffin or almond styles.
Diagonal striped variations add ever-changing movement to traditional French tips. We angle the stripes at 45 degree slopes across each nail tip for an edgy geometric effect. The diagonal lines create optical illusions that make nails appear wider or narrower depending on the stripe direction.
Gradient stripe effects blend the classic French tip with fading black and white patterns. We start with bold stripes at the tip edge and gradually fade them toward the nail bed using a makeup sponge technique. This creates a softer transition while maintaining Beetlejuice’s distinctive striped motif.
Gothic Colored French Tips
Deep purple French tips channel Beetlejuice’s supernatural color palette with rich eggplant and violet shades. We apply the dark purple as traditional French tips over nude or clear base colors. Adding subtle shimmer or metallic undertones enhances the mystical gothic atmosphere.
Emerald green tip designs reflect the character’s otherworldly green hair and lighting effects. We use forest green or jade polish for the French tip application over black or dark gray base colors. The dramatic contrast creates an appropriately spooky and sophisticated look.
Burgundy and black combinations merge traditional gothic colors with French manicure elegance. We alternate between deep burgundy and black tips across different nails or create ombre transitions between the two colors. This color scheme perfectly captures Lydia Deetz’s romantic gothic aesthetic.
Metallic silver accents add otherworldly shimmer to dark French tip designs. We incorporate silver chrome polish as thin accent lines within darker French tips or use holographic silver for the entire tip area. The reflective quality mimics the film’s supernatural lighting effects.
Reverse French with Beetlejuice Themes
Black cuticle line designs flip the traditional French manicure by placing dark colors at the nail base instead of tips. We paint thin black lines along the cuticle area while keeping the rest of the nail in neutral or clear polish. This subtle approach works perfectly for professional settings.
Striped reverse French patterns combine Beetlejuice’s iconic stripes with inverted French manicure placement. We create black and white striped sections at the nail base while leaving tips clear or nude. The reverse placement offers a fresh take on both classic French and Beetlejuice aesthetics.
Character silhouette bases feature tiny Beetlejuice or sandworm shapes painted near the cuticle line. We use fine detail brushes to create minimalist character outlines in black polish against clear or nude nail backgrounds. These subtle nods to the film maintain professional appearance while showing fandom.
Gothic moon phases at the nail base create mystical reverse French designs. We paint crescent moons, full moons, and new moon phases in black or dark purple along the cuticle area. Adding tiny stars or constellation patterns enhances the supernatural gothic atmosphere.
Conclusion
We’ve explored an incredible range of Beetlejuice-inspired nail art that goes far beyond simple Halloween decorations. From classic striped patterns to intricate 3D cemetery scenes these designs offer endless creative possibilities for expressing your love of Tim Burton’s gothic masterpiece.
Whether you’re drawn to minimalist accents or elaborate character portraits there’s a perfect Beetlejuice nail design waiting for your next manicure. The beauty of these looks lies in their versatility – they can be as subtle or as bold as your personal style demands.
Remember that nail art is all about experimentation and fun. Don’t be afraid to mix techniques combine different elements from various designs or add your own creative twist to these Beetlejuice-inspired ideas. Your nails are the perfect canvas for celebrating this beloved film’s dark whimsical charm.
Frequently Asked Questions
Can I wear Beetlejuice nail art year-round or only for Halloween?
Beetlejuice-inspired nail art can absolutely be worn year-round! While these designs are perfect for Halloween, the gothic aesthetic and classic black and white stripes work beautifully for any season. Those who appreciate alternative beauty styles can incorporate subtle Beetlejuice elements into their regular manicure routine, making it a versatile choice for expressing your unique style.
What are the easiest Beetlejuice nail designs for beginners?
For beginners, start with simple black and white striped patterns using tape or striping brushes. Classic vertical or horizontal stripes are the most straightforward. You can also try minimalist designs like a neutral base with thin black accent stripes on one or two nails, or simple geometric patterns inspired by the film’s iconic aesthetic.
How do I create the perfect Beetlejuice stripes on my nails?
To create perfect stripes, use striping tape or nail art brushes with steady hands. Apply a base color first, let it dry completely, then add contrasting stripes. For clean lines, use tape as guides and remove while the polish is slightly wet. Practice vertical, horizontal, and diagonal stripe patterns to master the technique.
What colors work best for gothic Beetlejuice nail art?
Deep purples, emerald greens, rich blacks, and burgundy create the perfect gothic palette. These colors capture Beetlejuice’s supernatural essence while maintaining sophistication. You can also incorporate metallic accents like silver chrome or rose gold to add elegance and dimension to your gothic-inspired designs.
How can I add 3D effects to my Beetlejuice nail art?
Create 3D effects using thick gel polish or acrylic paint to build raised stripe patterns. Add dimensional character elements like sculpted faces or textured patterns. Use matte top coats for weathered stone effects on tombstone designs, and experiment with layering techniques to create depth and tactile elements in your nail art.
What’s the best way to create character-inspired nail art from the movie?
For Beetlejuice faces, use a pale base with black lines for facial features and green polish for wild hair. For Lydia Deetz, focus on rich black bases with burgundy accents and delicate lace patterns. Start with simple character silhouettes before attempting detailed portraits, and use fine detail brushes for precision work.
Can I combine Beetlejuice designs with French manicures?
Absolutely! French tip Beetlejuice designs blend classic elegance with gothic aesthetics. Try black and white striped tips, gothic colored French tips in deep purple or emerald green, or reverse French designs with black cuticle lines. These combinations create sophisticated looks perfect for both formal and casual occasions.
How do I make my Beetlejuice nail art last longer?
Use quality base and top coats to protect your design. Apply thin layers of polish and allow each to dry completely. For textured or 3D elements, seal with appropriate top coats. Avoid excessive water exposure in the first 24 hours, and consider using cuticle oil to maintain nail health and polish flexibility.

