We’ve all been there – staring at our nails and wondering how to transform them from ordinary to absolutely stunning. Whether you’re preparing for a special event or simply want to express your personality through nail art, finding the perfect design can feel overwhelming with endless options available.
Nail trends evolve constantly, and what’s considered cutting-edge today might be yesterday’s news tomorrow. That’s why we’ve curated a collection of awesome nail ideas that’ll keep your fingertips looking fresh and fashionable. From minimalist designs that work perfectly for professional settings to bold statement nails that command attention, there’s something for every style preference and skill level.
Our carefully selected nail inspirations combine current trends with timeless classics, ensuring you’ll discover designs that not only look incredible but also suit your lifestyle. Let’s jump into these creative possibilities that’ll have everyone asking where you got your nails done.
Classic French Manicure With Modern Twists
The timeless French manicure gets an exciting update with contemporary interpretations that maintain its elegant foundation while adding fresh personality. We’re reimagining this beloved nail art with innovative approaches that transform the traditional white tip into something extraordinary.
Colored Tips Instead of White
Vibrant hues replace the classic white tips to create stunning modern French manicures that suit every personality and season. We love experimenting with bold colors like electric blue, sunset orange, or emerald green for tips that make a statement. Pastel shades such as lavender, mint, or blush pink offer a softer alternative that’s perfect for spring and summer occasions.
Metallic tips bring glamour to the traditional French design with gold, silver, or rose gold creating an instantly luxurious finish. Chrome finishes add extra dimension and catch light beautifully throughout the day. Seasonal color combinations work wonderfully too—think deep burgundy tips for fall or coral shades for beach vacations.
Geometric French Lines
Angular shapes and straight lines transform the curved French tip into architectural nail art that feels thoroughly contemporary. We’re seeing triangular tips that create sharp, modern edges instead of the traditional curved smile line. Diamond shaped tips offer another geometric option that adds visual interest while maintaining the French manicure’s sophisticated appeal.
Diagonal lines create ever-changing movement across the nail, whether they’re thin accent lines or bold color blocking effects. Multiple geometric lines layered together produce complex patterns that still honor the French manicure concept. Square tipped French designs provide a minimalist geometric approach that works especially well on shorter nails.
Negative Space French Design
Transparent gaps within the design create striking visual effects that showcase the natural nail while maintaining French manicure elegance. We achieve this look by leaving strategic areas unpainted, allowing the natural nail to become part of the overall design. Half moon negative space at the base creates an inverse French effect that feels fresh and unexpected.
Cutout shapes within colored tips add modern artistic flair while keeping the design wearable for professional settings. Thin negative space lines running through colored tips create subtle geometric interest without overwhelming the classic French foundation. These designs work beautifully with both clear and colored base coats, offering versatility for different style preferences.
Bold Geometric Nail Art Patterns
 1")
Geometric nail art transforms your fingertips into miniature canvases of artistic precision and modern sophistication. We’ve curated these striking patterns to help you achieve gallery worthy nails that command attention.
Triangle and Diamond Shapes
Triangular designs create ever-changing visual interest through their sharp angles and versatile placement options. We recommend starting with tape to achieve perfectly crisp lines, positioning triangular shapes at the base of your nails or along the cuticle area. Metallic gold triangles against a matte black base create an edgy contrast that works beautifully for evening events.
Diamond patterns offer sophisticated geometry that elongates your nails while adding luxurious appeal. Create these shapes by connecting two triangles at their widest points, using contrasting colors like navy blue and rose gold for maximum impact. We’ve found that placing a single diamond at the center of each nail creates an elegant focal point that’s perfect for professional settings.
Cascading triangular arrangements work exceptionally well on longer nails where you have more space for creativity. Stack multiple triangles in graduating sizes from base to tip, using complementary colors from the same family like coral, salmon, and deep orange. This technique creates depth and movement that catches light beautifully.
Color Block Designs
Solid color blocking divides your nail into distinct sections using bold, contrasting hues that make a powerful statement. We suggest using painter’s tape to create clean divisions, placing blocks horizontally across the nail or diagonally for a more ever-changing look. Popular combinations include mint green with coral pink or electric blue with sunny yellow.
Vertical stripes elongate your nails while showcasing multiple colors in one cohesive design. Create these patterns by dividing each nail into 2-3 equal sections, alternating between your chosen colors like black, white, and metallic silver. This technique works particularly well on shorter nails where horizontal patterns might overwhelm the space.
Alternating block patterns across all five fingers create a cohesive set while allowing each nail to showcase different color combinations. We recommend choosing a base palette of 3-4 colors and varying their placement on each nail, ensuring that adjacent fingers complement rather than compete with each other. This approach gives you maximum color impact while maintaining visual harmony.
Abstract Line Art
Curved flowing lines bring organic movement to geometric nail art, creating designs that feel both modern and naturally inspired. We achieve these effects using thin nail art brushes or striping tape bent into gentle curves, layering different line weights for added complexity. Combine metallic copper lines over a nude base for an understated yet sophisticated look.
Intersecting straight lines form complex patterns through their crossing points and angular relationships. Create grid patterns by drawing perpendicular lines at regular intervals, then fill alternating sections with different colors or leave some spaces transparent for negative space effects. This technique works beautifully with monochromatic color schemes using different shades of the same hue.
Minimalist line placements prove that sometimes less truly is more, using single strategic lines to create maximum visual impact. We place thin lines at diagonal angles across the nail or use them to divide the nail into unequal sections, applying different finishes like matte and glossy to each area. This approach works perfectly for those who want geometric sophistication without overwhelming detail.
Stunning Ombre and Gradient Effects
 2")
Ombre and gradient nail techniques transform your fingertips into stunning canvases that seamlessly blend colors together. We’ll explore these mesmerizing effects that create depth and dimension while maintaining that artistic flair you’re seeking.
Two-Tone Color Blends
Contrasting combinations create the most dramatic visual impact when we pair opposite colors on the color wheel. Navy blue flowing into bright coral produces an unexpected sophistication that works beautifully for evening events. Soft pink merging with deep burgundy offers a romantic gradient that’s perfect for date nights or special occasions.
Complementary shades within the same color family deliver subtle elegance that’s ideal for professional settings. We love how dusty rose blends into mauve for a sophisticated daytime look. Sage green transitioning to forest green creates an earthy vibe that complements fall wardrobes perfectly.
Neutral gradients provide versatile options that match virtually any outfit in your closet. Cream flowing into taupe gives you that expensive salon finish without the hefty price tag. Champagne blending into soft gray delivers understated luxury that photographs beautifully under any lighting.
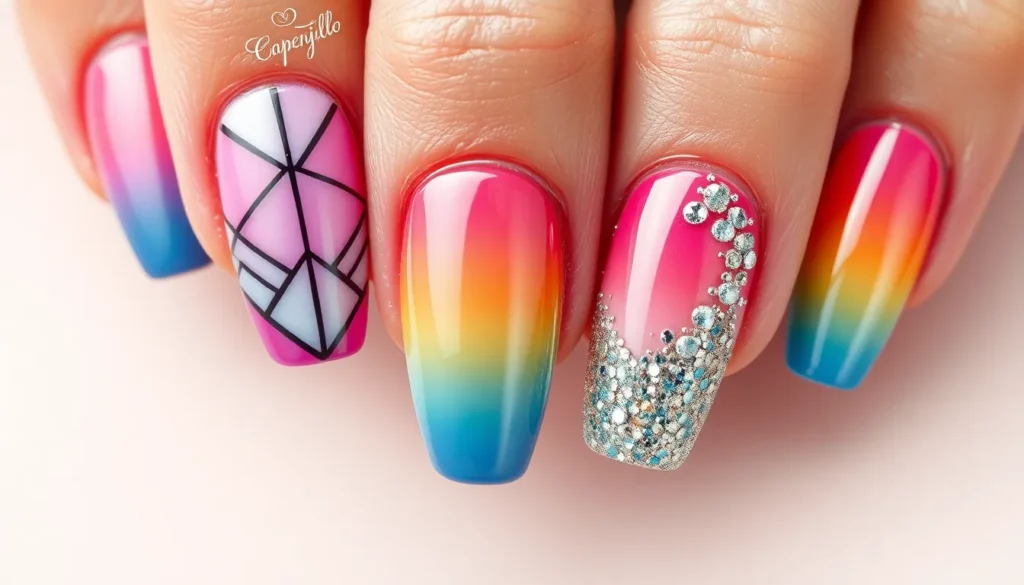
Rainbow Gradient Nails
Pastel rainbow effects create dreamy, whimsical designs that capture light beautifully throughout the day. We recommend starting with lavender at the cuticle and blending through baby pink, peach, and ending with mint green at the tips. This technique works especially well on longer nail shapes where you have more canvas space to showcase the full spectrum.
Vibrant spectrum designs make bold statements that command attention in any room. Electric blue transitioning through purple, magenta, and ending in bright orange creates that festival ready look. We suggest using high pigment polishes for these dramatic gradients to ensure each color maintains its intensity.
Sunset inspired palettes bring warmth and energy to your nail game with colors that mirror nature’s most beautiful displays. Golden yellow flowing into coral pink and finishing with deep purple recreates those magical twilight moments. These combinations photograph incredibly well for social media posts and special event photos.
Metallic Fade Techniques
Chrome to color transitions elevate any manicure with that high end designer aesthetic we all crave. Silver chrome at the base fading into deep emerald green creates an luxurious effect that catches light from every angle. Rose gold blending into burgundy offers warmth and sophistication that complements both gold and silver jewelry.
Glitter gradient applications add sparkle and dimension while maintaining elegance rather than appearing overwhelming. We apply fine glitter at the tips and blend it halfway down the nail for a subtle shimmer effect. Holographic glitters create rainbow reflections that change with movement and lighting conditions.
Metallic ombre patterns combine different metallic finishes for complex visual interest that photographs beautifully. Copper transitioning to bronze and finishing with gold creates depth that mimics expensive jewelry pieces. These techniques require thin layers and patience but deliver professional results that last for weeks.
Eye-Catching Glitter and Sparkle Designs
 3")
Glitter transforms ordinary nails into dazzling statement pieces that catch light from every angle. We’ve curated the most stunning sparkle techniques to add glamour to your next manicure.
Full Glitter Coverage
Complete glitter coverage creates maximum impact with dense sparkle that commands attention at every event. We recommend applying a base coat followed by two thin layers of glitter polish to achieve even distribution without clumping. Silver and gold remain timeless choices, while holographic formulas shift colors in different lighting conditions.
Layer different glitter sizes to create depth and texture that mimics expensive jewelry. Fine micro glitter serves as the foundation, while chunky hexagonal pieces add dimensional sparkle on top. Rose gold and champagne combinations work beautifully for wedding celebrations, while deep purple and emerald green glitters suit evening occasions.
Seal your glitter masterpiece with a high quality top coat to prevent chipping and maintain shine. Two coats of top coat ensure the surface feels smooth even though the textured glitter underneath. This technique lasts up to two weeks with proper application and care.
Accent Nail Sparkles
Single accent nails featuring glitter provide the perfect balance between subtle elegance and eye catching glamour. We suggest choosing your ring finger or thumb for maximum visibility while keeping other nails in complementary solid colors. Nude bases with gold glitter accents work for professional settings, while black bases with silver sparkles suit evening looks.
Strategic glitter placement creates focal points that draw attention without overwhelming the overall design. Apply glitter only to nail tips for a modern twist on traditional French manicures, or concentrate sparkles at the cuticle area for reverse accent effects. Geometric glitter sections using tape guides ensure clean lines and professional results.
Mix glitter shapes and colors on your accent nail to create unique artistic expressions. Combine star shaped glitter with traditional round pieces, or blend warm and cool toned sparkles for ever-changing contrast. These combinations photograph beautifully and adapt to various lighting conditions throughout the day.
Glitter Gradient Tips
Gradient glitter tips transition smoothly from dense sparkle at nail edges to subtle shimmer toward the cuticles. We achieve this effect using makeup sponges to dab glitter polish in decreasing intensity, creating natural fade patterns. Start with heavy application at tips and work backward with lighter touches for seamless blending.
Color coordination enhances gradient effects by choosing glitters that complement your base polish shade. Pink bases with rose gold glitter gradients suit romantic occasions, while navy foundations with silver sparkle tips work for professional events. Neutral beiges with champagne glitter offer versatility for any outfit choice.
Blend multiple glitter densities within the gradient for complex visual depth that changes with movement. Dense chunky glitter at tips transitions to fine shimmer particles toward the middle, finishing with barely there sparkle near cuticles. This technique requires patience but delivers stunning results that appear professionally crafted.
Nature-Inspired Nail Art Ideas
 4")
Nature’s endless beauty provides the perfect inspiration for creating stunning nail designs that capture organic textures and patterns.
Floral Patterns and Prints
Delicate flower motifs transform your nails into blooming gardens of artistic expression. Watercolor roses create soft romantic effects using blended pinks and reds, while we recommend dabbing polish with a makeup sponge for realistic petal textures. Cherry blossom designs offer seasonal elegance with pale pink bases and white dotted flowers, perfect for spring celebrations and everyday wear.
Tropical hibiscus patterns bring vacation vibes to your fingertips using vibrant oranges, fuchsias, and yellows against deep navy or black backgrounds. Bold sunflower designs command attention with their golden petals and dark centers, requiring thin detailing brushes for precise petal definition. Minimalist daisy accents provide subtle floral touches through simple white petals on nude bases, ideal for professional settings where understated beauty works best.
Hand painted wildflower meadows create intricate scenes across multiple nails using tiny brushes and patience for stunning results. Pressed flower techniques involve actual dried petals sealed under clear topcoat, offering authentic botanical elements that last throughout your manicure. Abstract floral watercolors blend multiple flower shapes with dreamy color transitions, mimicking artistic paintings on your nail canvas.
Marble Effect Designs
Marble patterns replicate the luxurious appearance of natural stone through strategic color blending techniques. Classic white marble achieves timeless elegance using gray veining over pristine white bases, requiring feathering brushes to create realistic stone patterns. Black marble designs offer dramatic sophistication with silver and gold veining, perfect for evening events and formal occasions.
Colorful marble combinations experiment with unconventional hues like emerald green with gold veins or dusty rose with copper accents. Turquoise marble effects capture ocean inspired beauty through blue and teal swirls with white veining, creating coastal vacation vibes. Matte marble finishes provide contemporary twists on traditional glossy versions, offering sophisticated textures that photograph beautifully.
Water marbling techniques achieve authentic stone patterns by dropping polish into water and swirling with toothpicks before dipping nails. Alcohol ink methods create organic marble veining through controlled ink dispersal over wet base coats, requiring practice for professional looking results. Stamped marble patterns offer consistent designs using specialized plates and stamping tools, ensuring uniform marble effects across all nails.
Wood Grain and Stone Textures
Wood inspired nail art captures the warm organic beauty of natural timber through careful layering and texture techniques. Realistic wood grain patterns require multiple brown shades applied in thin parallel lines using fine brushes, creating authentic lumber appearances. Distressed wood effects add vintage charm through strategic chipping and weathering techniques using makeup sponges and darker accent colors.
Bamboo inspired designs feature segmented vertical lines with horizontal joint markings, perfect for zen themed manicures and natural lifestyle aesthetics. Driftwood textures combine gray and brown tones with rough weathered appearances, mimicking beach found treasures. Birch bark patterns showcase distinctive white backgrounds with dark horizontal markings, creating striking monochromatic designs.
River stone textures achieve smooth polished appearances through careful color blending and high gloss finishes, resembling water worn pebbles. Granite effects combine multiple speckled colors using dotting tools and sponging techniques for realistic stone surfaces. Geode inspired patterns create crystalline structures with metallic accents and jewel tones, offering luxurious mineral appearances that catch light beautifully.
Concrete textures provide industrial chic aesthetics through matte gray finishes with subtle texture additives, perfect for modern minimalist styles. Natural slate effects use dark blues and grays with subtle shimmer, mimicking sophisticated building materials in miniature form.
Minimalist Nail Designs for Every Occasion
 5")
Clean lines and subtle details define the essence of minimalist nail art that works beautifully across professional and personal settings.
Single Accent Lines
Vertical accent lines create an elongating effect that makes fingers appear more slender and elegant. We recommend using a fine nail art brush to paint thin vertical stripes down the center of each nail using contrasting colors like white on nude or black on pale pink.
Horizontal accent lines offer a modern geometric approach that works particularly well for shorter nails. Position these lines at different heights across each nail to create visual interest, or align them uniformly for a more structured appearance.
Diagonal accent lines add ever-changing movement to your manicure while maintaining sophisticated simplicity. Create these lines using tape as a guide, then paint over with metallic shades like rose gold or silver for special occasions.
Double line combinations involve pairing two thin lines in complementary colors for added depth without overwhelming the design. Space these lines evenly apart, typically 2-3 millimeters, to achieve balanced proportions that enhance rather than dominate your nail shape.
Dot and Circle Patterns
Single dot placement transforms basic manicures into polished designs with minimal effort required. Position one small dot near the cuticle area using a dotting tool or bobby pin dipped in contrasting polish for instant sophistication.
Scattered dot patterns create playful designs that maintain professional appropriateness when executed with neutral tones. Apply 3-5 dots of varying sizes across each nail using colors like champagne, taupe, or soft gray for understated elegance.
Circle outline designs offer geometric precision that appeals to modern aesthetic preferences. Use a fine brush to create hollow circles in different sizes, overlapping slightly for artistic dimension while keeping the overall look clean.
Gradient dot sequences involve creating dots that fade from opaque to transparent across the nail surface. Start with full-coverage dots at one end and gradually reduce opacity by diluting the polish with clear topcoat as you progress.
Nude Base With Subtle Details
Micro French tips provide a contemporary twist on classic French manicures using barely-there white or clear polish. Apply these tips in ultra-thin lines, approximately 1 millimeter wide, to maintain the minimalist aesthetic while adding refined polish.
Negative space crescents incorporate small transparent sections near the cuticle area that showcase your natural nail. Create these crescents using reinforcement stickers as guides, then seal with clear topcoat to protect the exposed nail surface.
Subtle glitter accents involve adding just a hint of sparkle through strategic placement of fine glitter particles. Apply glitter only to the ring finger or create a thin glitter line along the nail’s edge for special occasions without overwhelming the minimalist approach.
Textured matte finishes transform basic nude shades into sophisticated statements through the application of matte topcoat. Choose nude shades that complement your skin tone, such as beige undertones for warm complexions or pink undertones for cool skin tones.
Seasonal and Holiday-Themed Nails
 6")
We’ll embrace the changing seasons with nail designs that capture each time of year’s unique beauty and festive spirit. These themed creations allow us to express our personality while celebrating special occasions throughout the calendar.
Winter Snowflake Designs
Delicate crystal patterns transform our nails into winter wonderlands with intricate snowflake motifs that sparkle like fresh snow. We recommend starting with an icy blue or silver base coat to create the perfect backdrop for detailed snowflake artwork. White gel polish works beautifully for hand painting individual snowflakes, while stamping plates offer precise geometric patterns for those seeking professional looking results.
Holographic accents add dimension to winter nail art by mimicking the way real snowflakes catch and reflect light. We layer holographic topcoat over white snowflake designs to create that magical shimmer effect. Fine glitter in silver and white tones scattered across accent nails provides additional sparkle without overwhelming the delicate snowflake details.
Ombre winter scenes blend cool blues and purples to create atmospheric backgrounds for our snowflake art. We start with the darkest shade at the cuticle and fade to white at the tips, then add snowflakes of varying sizes across the gradient. This technique creates depth and makes our snowflake designs appear to float naturally on the nail surface.
Spring Pastel Collections
Soft watercolor blooms celebrate spring’s arrival with gentle washes of pink, lavender, and mint green that blend seamlessly into one another. We use the dry brush technique to create these dreamy effects, applying thin layers of pastel polish and blending while still wet. Cherry blossom branches painted over soft pink bases capture spring’s most iconic imagery.
Easter themed combinations feature traditional pastels in fresh, modern arrangements that go beyond simple solid colors. We pair dusty rose with sage green, or combine buttery yellow with powder blue for sophisticated seasonal looks. Tiny painted eggs or bunny silhouettes on accent nails add playful holiday touches without appearing childish.
Garden inspired motifs bring spring flowers directly to our fingertips with hand painted tulips, daffodils, and hyacinths in their natural colors. We recommend using thin nail art brushes to create realistic petal shapes and adding tiny dots of white for flower centers. Green accent nails with painted stems and leaves complete these botanical masterpieces.
Halloween and Christmas Themes
Spooky Halloween art transforms our nails into miniature canvases for classic horror imagery using deep purples, blacks, and metallic oranges. We create spider web designs using thin black polish and a detail brush, starting from one corner and drawing connected lines across the nail. Tiny painted pumpkins, bats, or ghost silhouettes on accent nails complete our Halloween looks.
Festive Christmas designs capture holiday magic with traditional red and green combinations enhanced by gold and silver metallic details. We paint tiny holly leaves and berries, candy canes, or Christmas tree silhouettes for classic holiday imagery. Snowman nail art works particularly well on shorter nails, while Christmas ornament designs suit longer nail shapes.
Holiday glitter combinations elevate seasonal themes with strategically placed sparkle that enhances rather than overwhelms our designs. We apply fine red glitter over Christmas tree silhouettes or use orange and black glitter gradients for Halloween ombre effects. Metallic foil accents add luxury to both Halloween and Christmas nail art, creating professional looking results that photograph beautifully.
Creative Use of Nail Accessories and Embellishments
 7")
Nail accessories and embellishments transform ordinary manicures into extraordinary works of art. We’ll explore three essential categories that elevate any nail design from simple to spectacular.
Rhinestones and Crystals
Rhinestones create instant glamour when strategically placed on accent nails or cuticle areas. We recommend starting with clear Swarovski crystals in sizes 2mm to 4mm for beginners, as they complement any color palette and provide versatility for multiple looks. Placement matters significantly – position larger crystals at the nail’s center or base for maximum impact, while smaller stones work beautifully scattered along the cuticle line.
Crystal clusters add dimensional luxury to special occasion manicures. Create stunning focal points by grouping 3 to 5 crystals of varying sizes on ring finger accent nails, securing each piece with nail glue or gel topcoat. AB (aurora borealis) crystals reflect rainbow light and pair exceptionally well with nude or clear base colors, while colored crystals like emerald or sapphire complement seasonal themes.
Application techniques ensure longevity and professional results. Use a dotting tool or tweezers to place each rhinestone while the topcoat remains slightly tacky, then seal with additional clear coat around the edges. Press gently but firmly to create proper adhesion without cracking the crystal or disturbing surrounding polish.
Nail Stickers and Decals
Nail stickers offer precision that hand painting often can’t achieve, especially for intricate patterns like lace designs or geometric shapes. We find that water slide decals provide the most realistic results, requiring only water activation and careful positioning before sealing with topcoat. Popular options include butterfly motifs, tropical leaves, and mandala patterns that create instant accent nail designs.
Application timing affects durability significantly. Apply decals to completely dry base color, smooth out any air bubbles with a silicone tool, and allow proper drying time before adding topcoat. Metallic foil transfers work exceptionally well over dark base colors, creating high contrast designs that catch light beautifully.
Layering stickers creates custom designs beyond their intended use. Combine floral decals with small rhinestones, or use geometric stickers as guides for hand painted details. This technique allows unlimited creativity while maintaining clean, professional lines that would be difficult to achieve freehand.
3D Elements and Charms
3D nail charms add sculptural interest to manicures, with popular options including tiny bows, flowers, and metallic studs ranging from 3mm to 8mm in diameter. We recommend limiting 3D elements to one or two accent nails to maintain wearability and prevent snagging on clothing or hair. Rose gold and silver charms complement most color schemes, while seasonal options like snowflakes or seashells enhance themed designs.
Proper attachment methods ensure security without damaging natural nails. Use nail glue specifically designed for 3D elements, applying a small drop to both the charm and nail surface before positioning. Avoid using regular superglue, which can damage nail beds and create yellowing over time.
Placement strategies maximize visual impact while maintaining functionality. Position larger charms near the nail’s center or towards the cuticle area where they’re less likely to catch on objects. Create asymmetrical designs by varying charm sizes and positions across accent nails, or use matching elements on multiple nails for cohesive themed looks.
Maintenance considerations extend wear time significantly. Apply extra topcoat around 3D elements to create smooth transitions and prevent edges from lifting. Remove charms gently using nail dehydrator or acetone to dissolve adhesive without damaging the underlying polish or natural nail.
Mix and Match Color Combinations
 8")
Mastering the art of color mixing elevates our nail designs from simple to spectacular. Strategic color pairing creates visual harmony while expressing our unique personality through nail art.
Complementary Color Schemes
Orange and blue combinations create striking visual tension that commands attention on our fingertips. We recommend pairing coral orange with navy blue for autumn inspired designs or bright tangerine with sky blue for summer vibes. Classic pairings like purple and yellow work beautifully when we use lavender with golden yellow accents, while red and green combinations shine during holiday seasons.
Split nail designs showcase complementary colors by dividing each nail into distinct sections. We can create diagonal splits, vertical halves, or alternating finger patterns that display both colors equally. Advanced techniques include gradient blending where complementary colors meet in the middle, creating depth through color theory principles.
Accent nail techniques allow us to feature complementary colors without overwhelming our look. We suggest painting four nails in one color and the ring finger in its complement, or creating geometric patterns that incorporate both shades strategically across our manicure.
Monochromatic Palettes
Tonal variations within single color families create sophisticated depth without complexity. We can combine light pink, rose, and deep burgundy for romantic elegance, or layer powder blue, periwinkle, and navy for oceanic inspiration. Green palettes work exceptionally well, progressing from mint to emerald to forest green across different nails.
Gradient applications showcase monochromatic beauty through smooth color transitions. We recommend starting with the lightest shade at the cuticle and deepening toward the tip, or creating reverse gradients for unique effects. Sponge techniques help us achieve seamless blending between similar tones.
Textural contrasts add interest to monochromatic designs through finish variations. We can combine matte and glossy versions of the same color, incorporate metallic accents in matching tones, or add glitter elements that complement our chosen color family while maintaining cohesive appearance.
Bold Contrasting Hues
High impact pairings like neon pink with electric blue create statement nails that demand attention. We love combining lime green with magenta, bright yellow with purple, or hot orange with turquoise for maximum visual punch. These combinations work best for special events, creative expressions, or when we want to make bold fashion statements.
Color blocking techniques showcase contrasting hues through geometric precision. We can create triangular sections, diagonal divides, or checkerboard patterns that highlight the dramatic differences between bold colors. Clean lines and precise application ensure our contrasting designs look intentional rather than chaotic.
Strategic placement helps us balance bold contrasting colors across our manicure. We recommend using the 60-30-10 rule, where one color dominates, another supports, and the third provides accent details. This approach prevents overwhelming effects while still delivering the excitement that contrasting hues provide.
Professional Tips for Long-Lasting Results
 9")
Achieving stunning nail art requires more than just creative design skills. We’ll share proven techniques that ensure your beautiful manicures stay vibrant and chip-free for weeks.
Proper Base and Top Coat Application
Apply base coat in thin layers to create a smooth foundation that prevents staining and enhances polish adhesion. We recommend using a dehydrating base coat for oily nail beds or a strengthening formula for brittle nails. Start with clean, oil-free nails and paint from cuticle to tip in three strokes: center, left side, then right side.
Seal edges carefully by running your base coat brush along the nail tip to prevent water damage and lifting. This technique creates a protective barrier that extends wear time significantly. Allow each layer to dry completely before applying color, typically 2-3 minutes per coat.
Choose quality top coats that match your design needs, such as glossy finishes for classic looks or matte toppers for modern effects. Fast-drying formulas work best for intricate designs, while gel-effect top coats provide extra durability. Apply top coat every 2-3 days to maintain shine and prevent chipping.
Nail Care and Preparation
Push back cuticles gently using a cuticle pusher after soaking nails in warm water for 5 minutes. We avoid cutting cuticles to prevent infection and instead focus on removing excess dead skin around the nail bed. This creates a clean canvas for precise polish application.
File nails in one direction using a fine-grit file to prevent splitting and maintain strength. Square shapes work best for short nails, while oval and almond shapes complement longer lengths. Always file from outside edge toward center to avoid weakening the nail structure.
Buff nail surfaces lightly to remove ridges and create smooth application areas for polish. Use a 240-grit buffer and work in gentle circular motions, avoiding over-buffing which can thin the nail plate. Clean nails with rubbing alcohol or nail dehydrator to remove oils and debris before applying base coat.
Moisturize cuticles daily with cuticle oil or cream to maintain nail health and prevent hangnails. Well-hydrated cuticles create cleaner polish lines and reduce the risk of polish peeling. Apply moisturizer to hands and cuticles but avoid getting product on the nail plate before manicures.
Maintenance and Touch-Up Techniques
Perform daily inspections to catch small chips before they become major problems. We recommend carrying a small bottle of matching polish for quick touch-ups during the first week after application. Clean the chipped area with acetone before applying a thin layer of color and sealing with top coat.
Reapply top coat every 3-4 days to maintain glossy finish and prevent color fading. This simple step adds an extra week to your manicure’s lifespan while keeping nails looking freshly done. Focus on nail tips and high-wear areas that show dulling first.
Use cuticle oil nightly to keep the nail area hydrated and prevent polish from lifting at the base. Massage oil into cuticles and surrounding skin to maintain flexibility and health. This practice also helps new growth blend seamlessly with existing polish.
Store polish properly in cool, dark places away from direct sunlight to maintain consistency and color integrity. Roll bottles between your palms instead of shaking to mix polish without creating air bubbles. Replace base and top coats every 12-18 months for optimal performance and adhesion.
Conclusion
We’ve explored an incredible range of nail art possibilities that can transform your fingertips into stunning works of art. From timeless French manicures with modern twists to bold geometric patterns and nature-inspired designs there’s truly something for every style preference and skill level.
The key to achieving amazing results lies in understanding proper techniques and taking time with preparation. Whether you’re drawn to minimalist elegance or eye-catching sparkle the foundation remains the same: quality products proper application and attention to detail.
Remember that nail art is eventually about self-expression and creativity. Don’t be afraid to experiment with color combinations mix different techniques or add your own personal touches to these ideas. With practice and patience you’ll develop the skills to create professional-looking manicures that reflect your unique personality and style.
Frequently Asked Questions
What are some modern updates to the classic French manicure?
Modern French manicures feature vibrant colored tips instead of traditional white, metallic finishes like gold or silver, and geometric shapes replacing the classic curved line. You can also try negative space designs that incorporate transparent gaps, diagonal lines, or seasonal color combinations while maintaining the elegant foundation of the original French manicure.
How do I create perfect geometric nail art patterns?
Start with clean, well-prepared nails and use nail tape or striping brushes for crisp lines. Focus on simple shapes like triangles and diamonds first. Apply thin layers of contrasting colors and allow each layer to dry completely. Remove tape while polish is slightly wet to prevent peeling and achieve sharp, professional-looking edges.
What’s the best technique for ombre and gradient nail effects?
Use a makeup sponge to blend colors seamlessly from cuticle to tip. Apply your lightest color as a base, then dab the sponge with both colors and gently press onto the nail in a rolling motion. Build up layers gradually and finish with a top coat to smooth the texture and enhance the gradient effect.
How can I make glitter nail designs look professional?
Apply glitter in thin, even layers over a complementary base color. Use different glitter sizes for depth and texture. For accent nails, place glitter strategically on one or two nails rather than all ten. Create gradient effects by concentrating glitter at the tips and fading toward the cuticle for an elegant, balanced look.
What are some easy nature-inspired nail art ideas for beginners?
Start with simple floral patterns using dotting tools to create small flowers or leaves. Try marble effects using water marbling techniques or nail polish mixed on a palette. Wood grain patterns can be achieved with a thin brush and brown tones. These designs offer natural beauty without requiring advanced artistic skills.
How do I create minimalist nail designs that work for professional settings?
Focus on clean lines using nail tape, single accent stripes, or subtle dot patterns. Use nude or neutral base colors with minimal contrasting details. Try micro French tips, negative space crescents, or single vertical accent lines. These designs maintain sophistication while adding subtle visual interest appropriate for workplace environments.
What nail accessories should I use for special occasions?
Rhinestones and crystals add glamour when placed strategically near the cuticle or tip. Nail stickers offer precision for intricate patterns without artistic skill. 3D charms create sculptural interest but should be used sparingly. Choose accessories that complement your outfit and occasion while ensuring they’re properly sealed for durability.
How do I make my nail art last longer?
Start with proper nail preparation including cuticle care and light buffing. Apply thin layers of base coat, color, and top coat, allowing each to dry completely. Reapply top coat every 2-3 days and perform daily inspections for chips. Use gloves for cleaning and moisturize your hands regularly to maintain nail health.
What color combinations work best for statement nails?
Try complementary colors like orange and blue or purple and yellow for high contrast. Monochromatic palettes using different shades of the same color create sophisticated depth. Bold contrasting combinations like black and white or navy and coral make powerful statements. Consider your skin tone and personal style when selecting colors.
How do I choose nail designs for different seasons?
Winter calls for icy blues, silvers, and snowflake patterns. Spring features pastels, floral designs, and fresh green tones. Summer embraces bright colors, tropical themes, and beach-inspired patterns. Fall incorporates warm oranges, deep reds, and leaf motifs. Match your nail art to seasonal colors and themes for a cohesive, timely look.


