We’re obsessed with camouflage nail art – and once you see these stunning designs you’ll understand why. This military-inspired trend has evolved from simple green patterns into an explosive industry of colors textures and creative possibilities that’ll make your manicure the center of attention.
Camouflage nails aren’t just for outdoor enthusiasts anymore. We’ve discovered countless ways to rock this versatile pattern from subtle earth tones perfect for everyday wear to bold neon combinations that scream fashion-forward. Whether you’re heading to a music festival or want to add an edgy twist to your office look camo nails deliver that perfect balance of tough and chic.
Ready to master the art of camouflage nail design? We’ll show you everything from beginner-friendly techniques using simple tools to advanced methods that create gallery-worthy results. Get ready to transform your fingertips into tiny canvases of artistic expression that’ll have everyone asking where you got your nails done.
Classic Military Camouflage Nail Designs
Military inspired nail art brings authentic combat aesthetics to your fingertips with time tested patterns and earthy color combinations. These designs capture the essence of traditional army camouflage while adapting seamlessly to modern nail art techniques.
Traditional Green and Brown Patterns
Forest green and chocolate brown create the foundation for authentic military camouflage nail designs that mirror actual combat uniforms. We recommend starting with a tan or beige base coat before layering irregular patches of olive green using a small makeup sponge for natural blending. Add darker brown accents with a fine detail brush to create depth and shadow effects that mimic real woodland camouflage patterns.
Earthy tones work exceptionally well on medium to long nail lengths where you can showcase the complete camouflage pattern across multiple fingers. Paint each nail with slightly different pattern placement to avoid repetitive designs that look artificial. Professional nail artists often use three to four coordinating shades within the green and brown family to achieve realistic depth and dimension.
Digital Camo Print Variations
Pixelated camouflage patterns offer a modern twist on traditional military designs using small square shapes instead of organic blobs. This digital approach works particularly well on shorter nails where intricate detail might otherwise appear cluttered. We create these patterns using small square nail art stamps or carefully placed rectangular shapes with contrasting colors like sage green, khaki, and dark brown.
Gaming enthusiasts and tech lovers gravitate toward digital camo designs because they blend military aesthetics with contemporary digital culture. Layer different sized pixels across the nail surface, ensuring some squares overlap while others remain distinct for authentic digital camouflage appearance. Consider using metallic accents in copper or bronze to add modern flair to traditional military color schemes.
Matte Finish Army Inspired Looks
Matte topcoats transform glossy camouflage nail designs into authentic military grade appearances that perfectly replicate actual combat gear finishes. Apply your chosen camouflage pattern first, then seal with high quality matte topcoat for that distinctive non reflective surface that real military equipment displays. This technique works especially well with desert camouflage colors like sandy beige, dusty brown, and muted olive.
Combine matte finishes with subtle texture techniques using sea salt or sugar while the polish remains wet for added tactical appeal. Remove the texture material once dry, leaving behind realistic surface variations that enhance the military aesthetic. Matte army inspired nails pair beautifully with utility inspired fashion trends and outdoor adventure clothing styles.
Colorful Camouflage Nail Art Ideas
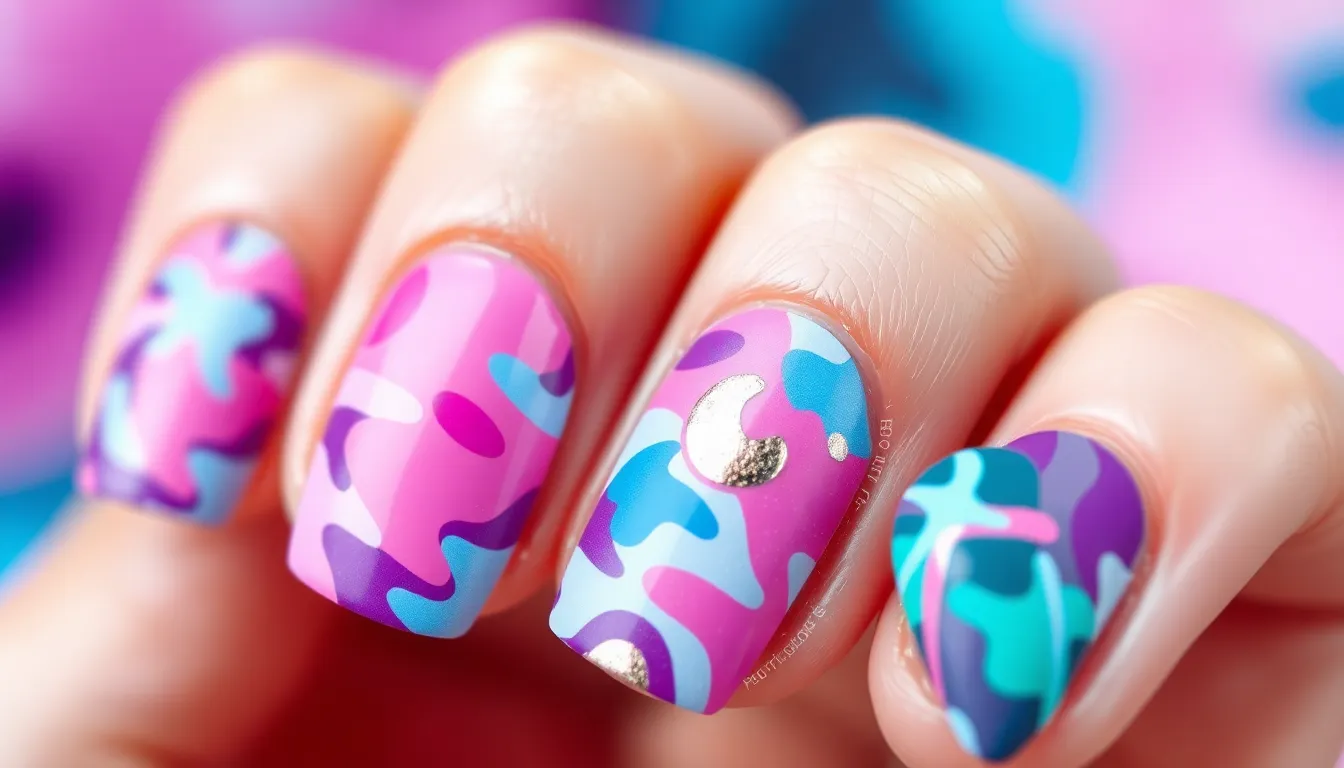
Moving beyond traditional military aesthetics, we’ll explore vibrant camouflage designs that transform classic patterns into stunning fashion statements. These colorful variations prove that camo nails can be both playful and sophisticated.
Pink and Purple Girly Camo
Pink and purple camouflage designs offer a feminine twist on traditional military patterns while maintaining the distinctive irregular shapes we love. We recommend starting with a soft baby pink base coat, then layering dusty rose and lavender patches using a makeup sponge for seamless blending. Magenta accents create depth and visual interest throughout the design.
Popular variations include cotton candy camo featuring pale pink, hot pink, and white combinations that create a dreamy, cloud like effect. Berry toned patterns work beautifully for autumn looks, incorporating deep plum, burgundy, and rose gold elements. Glitter topcoats in matching pink tones add sparkle without overwhelming the camouflage pattern.
Blue and Teal Ocean-Inspired Patterns
Blue and teal camouflage patterns capture the beauty of ocean depths while delivering sophisticated color combinations. We suggest beginning with a navy or midnight blue base, then adding turquoise, seafoam green, and white patches to mimic underwater shadows and light. Metallic silver accents enhance the aquatic theme beautifully.
Tropical variations feature bright aqua, coral blue, and pearl white combinations that evoke clear Caribbean waters. Mermaid inspired designs incorporate iridescent blue, teal, and purple shades with subtle shimmer finishes. Deep ocean patterns use darker blues, teals, and hints of black for dramatic evening looks that pair perfectly with formal attire.
Rainbow Multicolor Camouflage Designs
Rainbow multicolor camouflage designs combine multiple vibrant hues to create eye catching patterns that make bold fashion statements. We recommend using a white or cream base to ensure all colors pop vibrantly, then layering bright red, orange, yellow, green, blue, and purple patches in traditional camo shapes. Ombre transitions between colors create stunning gradient effects.
Festival inspired versions feature neon pink, electric blue, lime green, and sunshine yellow combinations perfect for music events and summer celebrations. Pastel rainbow patterns use soft lavender, mint green, peach, and baby blue for subtle yet playful looks. Pride themed designs incorporate rainbow flag colors in camouflage patterns, celebrating diversity while showcasing artistic nail skills.
Seasonal Camouflage Nail Concepts
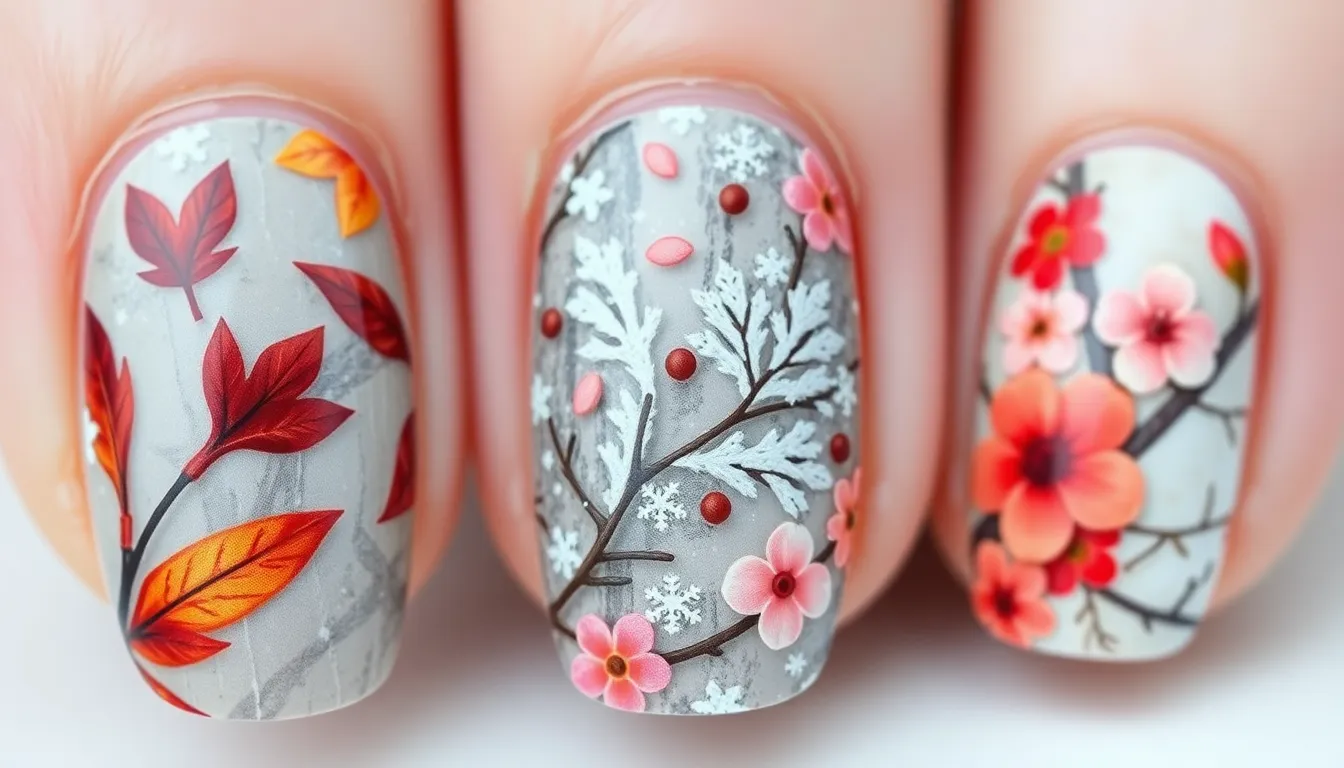
We’ll explore how camouflage patterns adapt beautifully to reflect nature’s changing seasons throughout the year.
Fall Autumn Leaf Camo Patterns
Autumn inspired camouflage nails capture the essence of fall foliage with rich burgundy, burnt orange, and deep amber tones. We recommend starting with a warm taupe base coat and layering patches of maroon, copper, and golden yellow using a makeup sponge for seamless blending. Dried leaf techniques work exceptionally well by pressing real maple leaves onto wet polish to create authentic texture patterns.
Gradient autumn camo designs use the natural color transitions found in changing leaves. We suggest blending rust orange into deep crimson, then adding touches of golden brown for dimensional depth. Metallic gold accents enhance the overall warmth and mimic sunlight filtering through autumn trees.
Textured fall patterns incorporate matte topcoats with glossy accent spots to replicate the varied surfaces of fallen leaves. We achieve this effect by applying matte finish first, then using a small brush to add glossy patches in strategic locations. Speckled techniques using a fan brush create the appearance of scattered leaf fragments across each nail.
Winter White and Gray Snow Camo
Snow camouflage nail art transforms traditional patterns using crisp whites, soft grays, and subtle silver tones. We create these designs by starting with an off white base and adding cloud like patches of pearl gray and dove gray using dabbing motions. Shimmer powders pressed into wet polish mimic the sparkle of fresh snow under winter sunlight.
Arctic inspired designs feature cool blue undertones mixed with traditional winter whites. We recommend using icy blue as an accent color within white and gray patterns to capture the essence of frozen landscapes. Frosted effects achieved through textured topcoats add realistic winter dimension to each nail.
Crystalline winter patterns incorporate fine glitter and holographic elements to represent ice formations. We apply these elements sparingly within the camouflage pattern to maintain the subtle nature while adding winter magic. Negative space techniques work beautifully for winter camo, leaving portions of the natural nail visible to represent snow patches.
Spring Floral Camouflage Designs
Floral camouflage patterns blend traditional camo shapes with soft pastel colors reminiscent of spring blooms. We create these designs using sage green as a base with patches of blush pink, lavender, and cream yellow applied in organic, flowing shapes. Watercolor techniques help achieve the soft, dreamy quality associated with spring gardens.
Cherry blossom inspired camo incorporates delicate pink tones with traditional green patterns. We suggest using a soft mint base with rose quartz and peachy pink accents to capture the essence of flowering trees. Small dot techniques using a dotting tool create tiny floral elements within the camouflage structure.
Fresh growth patterns use various shades of green to represent new spring vegetation. We blend lime green, forest green, and yellow green in organic shapes that mimic emerging leaves and grass. Ombre techniques help transition between colors naturally, creating depth that represents spring’s renewal and growth.
Trendy Camouflage Nail Techniques
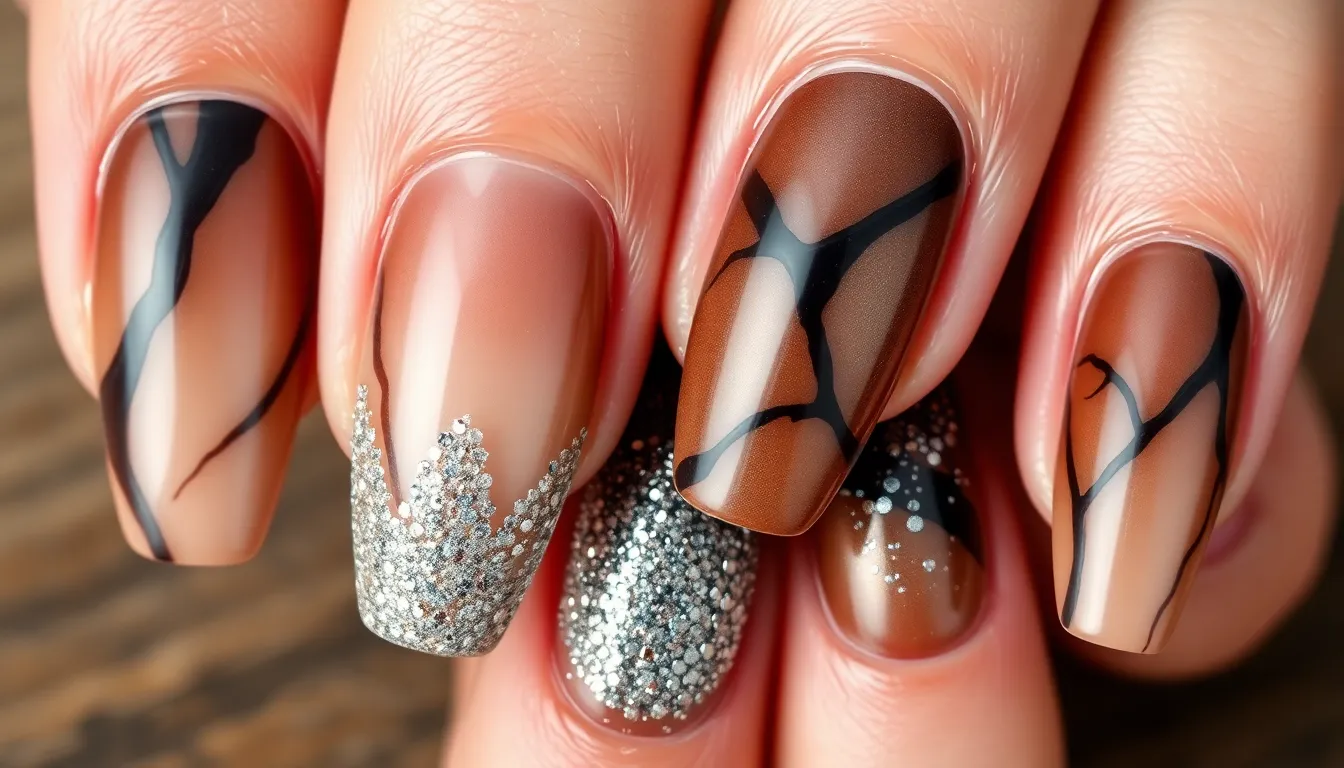
Modern camouflage nail art embraces innovative techniques that push creative boundaries. We’ll explore advanced methods that transform traditional camo patterns into contemporary masterpieces.
Ombre Camo Blend Effects
Blending traditional camouflage patterns with gradient transitions creates stunning dimensional effects. Start with your lightest base shade and gradually build darker tones using a damp makeup sponge to create seamless color transitions. Layer the camouflage shapes over the ombre foundation while the polish remains slightly tacky for optimal blending.
Create depth by using three to four coordinating shades within the same color family. Apply the darkest tone first in organic shapes, then blend progressively lighter shades toward the nail tips. Work quickly to maintain wet edges that allow colors to merge naturally without harsh lines.
Professional techniques include using a fine detail brush to soften edges between color transitions. Dabbing motions with the sponge create more realistic texture than dragging movements. Finish with a high gloss top coat to enhance the gradient effect and add professional polish to your ombre camouflage design.
Glitter Accent Camouflage Nails
Adding sparkle elements transforms basic camo patterns into glamorous statement nails. Apply your camouflage base design using traditional techniques, then strategically place glitter accents within select pattern areas. Focus glitter placement on one or two pattern shapes per nail to maintain visual balance.
Chunky holographic glitter works beautifully over darker camo sections like deep greens or browns. Fine glitter blends seamlessly into lighter areas such as tan or beige portions of the pattern. Use tweezers to precisely position larger glitter pieces for controlled sparkle placement.
Layer different glitter sizes for complex texture effects that catch light beautifully. Start with fine glitter as your base sparkle layer, then add medium and chunky pieces as accent points. Seal everything with two coats of clear top coat to ensure glitter pieces remain secure and create a smooth surface.
Negative Space Camo Art
Utilizing bare nail sections creates modern minimalist interpretations of classic camouflage. Map out your negative space areas using small pieces of tape or nail guides before applying any color. Leave strategic sections of natural nail visible to create breathing room within busy camo patterns.
Paint traditional camouflage shapes around the masked negative spaces using bold contrasting colors. Remove tape immediately after applying each color to prevent polish from pulling or creating uneven edges. Clean up any bleeding with a small angled brush dipped in acetone.
Geometric negative space works particularly well with digital camouflage patterns. Create pixelated designs where some squares remain clear while others feature classic camo colors. This technique requires precision but produces striking contemporary results that feel fresh and artistic rather than purely military inspired.
Easy DIY Camouflage Nail Tutorials
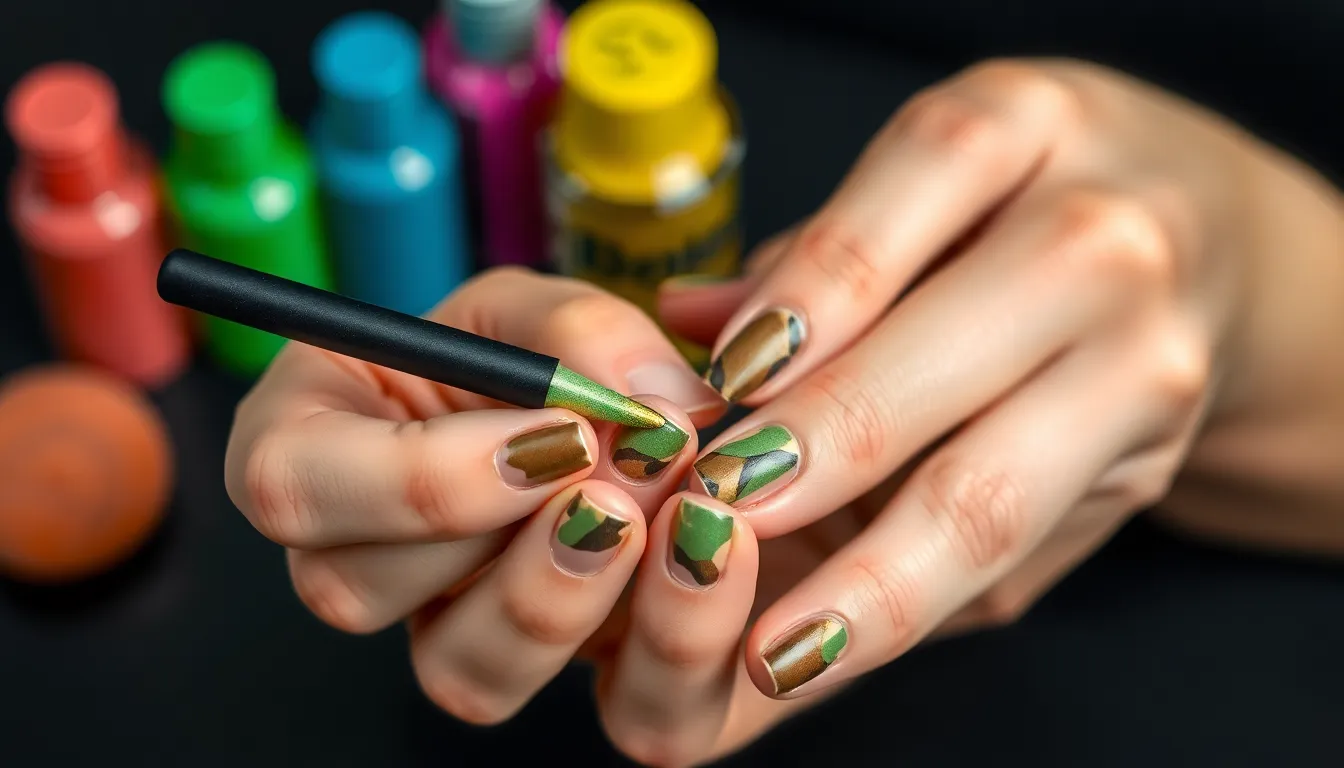
Now that we’ve explored various camouflage patterns and modern techniques, let’s jump into practical methods for creating these stunning designs at home. We’ll walk through three accessible approaches that work for every skill level.
Sponge Technique for Beginners
Sponge application creates the most authentic camouflage blending effects for newcomers to nail art. We start with a light base color like cream or tan, allowing it to dry completely before moving to the pattern layers.
Makeup sponges work perfectly for this technique because their texture creates natural, irregular shapes. We dab the sponge lightly into darker colors like olive green or brown, then gently press it onto the nail surface in random patterns.
Blending colors becomes effortless when we use the sponge’s natural texture to our advantage. We overlap different shades while they’re still slightly wet, creating seamless transitions that mimic real camouflage fabric.
Quick cleanup happens easily with this method since we can control the intensity by varying our pressure. We recommend practicing on a practice wheel first to get comfortable with the dabbing motion and color placement.
Brush Painting Camo Patterns
Detail brushes give us precise control over camouflage shapes and allow for more intricate pattern work. We use thin liner brushes to create organic, blob like shapes that flow naturally across the nail surface.
Color layering works best when we start with the lightest shade and build up to darker tones. We apply our base coat, then use a small brush to paint irregular patches of medium tones before adding the darkest accents last.
Shape variation keeps our camouflage patterns looking authentic and visually interesting. We create some elongated ovals, rounded blobs, and angular shapes to mimic the random nature of real camouflage prints.
Brush maintenance ensures clean lines and prevents muddy colors throughout our design process. We clean our brushes thoroughly between colors and keep a damp cloth nearby for quick wipe downs during painting.
Stamping Plate Camouflage Methods
Stamping plates offer the most consistent and professional looking camouflage patterns with minimal effort. We select plates specifically designed for camouflage motifs, which feature various sizes and styles of camo shapes.
Color application on stamping requires thicker polish formulations that transfer cleanly to our nails. We apply polish generously to the desired pattern area, scrape away excess with our plastic scraper, then quickly roll the stamper over the design.
Multiple impressions let us create layered camouflage effects by stamping different colors in offset positions. We start with lighter colors and gradually add darker impressions, allowing each layer to dry before applying the next.
Precision placement becomes easier with practice as we learn to position our stamper correctly. We recommend marking the nail center with a small dot to help align our stamps consistently across all ten nails.
Professional Camouflage Nail Inspiration
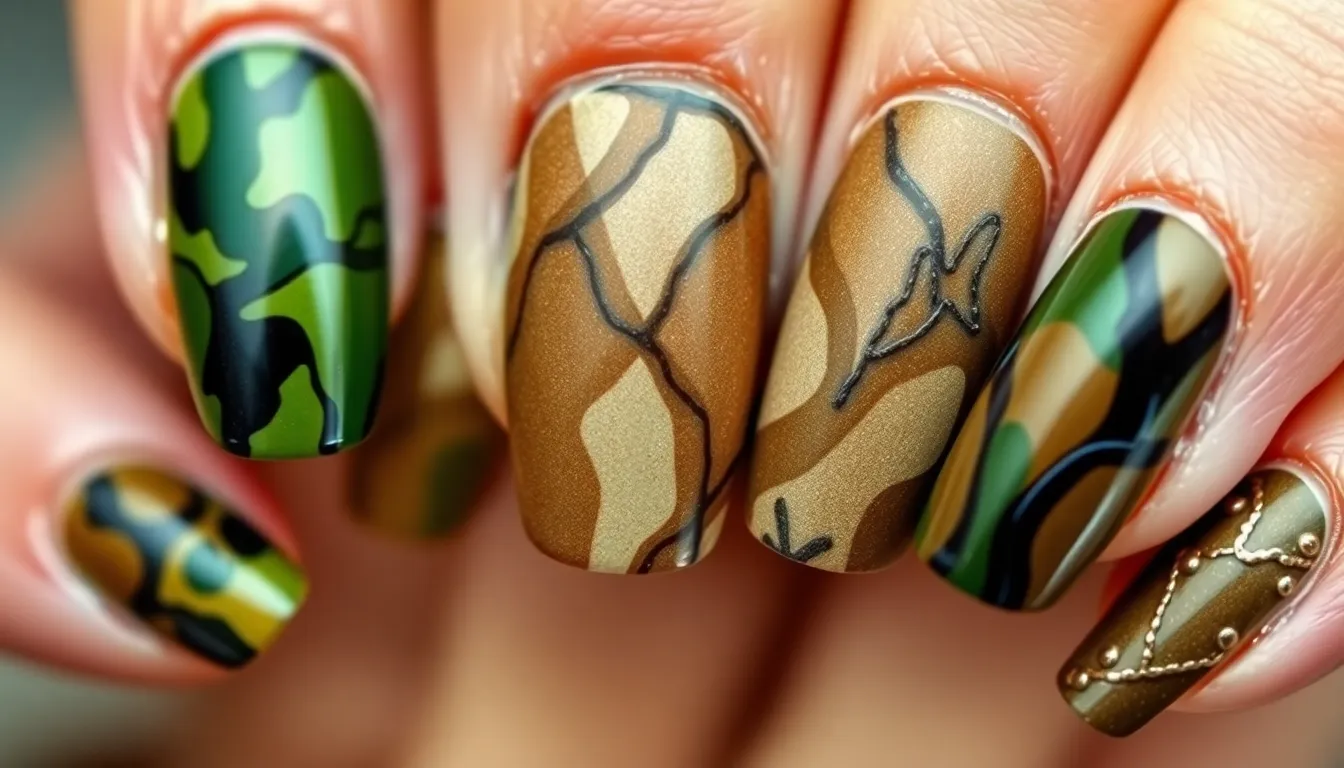
Professional camouflage nail art elevates basic patterns into sophisticated, long-lasting masterpieces that command attention. Our advanced techniques transform traditional camo into stunning works of art worthy of any salon portfolio.
Gel Polish Camo Designs
Gel polish creates the foundation for professional camouflage designs that last up to three weeks without chipping. We recommend using gel formulas for their superior opacity and extended wear time compared to regular polish.
Building layers becomes effortless when working with gel polish systems. Start with a neutral base coat in taupe or beige, then cure under LED light for 30 seconds. Apply your first camouflage color using a detail brush to create irregular organic shapes across the nail surface. Cure each layer individually to prevent smudging and ensure vibrant color payoff.
Professional results require strategic color placement and proper curing techniques. Layer darker shades like forest green or chocolate brown over lighter bases to create authentic depth. Use a small dotting tool to add tiny accent spots between larger shapes, mimicking real camouflage patterns found in nature. Finish with a high gloss top coat to seal the design and add professional shine.
Temperature control affects gel polish application and final results. Maintain your workspace at 70-75°F for optimal viscosity and smooth application. Avoid thick layers that can cause bubbling or uneven curing under the lamp.
3D Textured Camouflage Effects
Three dimensional elements transform flat camouflage patterns into tactile masterpieces that catch light and create visual interest. We achieve these effects using acrylic powder, gel extensions, and specialized sculpting techniques.
Acrylic powder mixed with polymer creates raised camouflage shapes that feel substantial under touch. Apply your base color first, then use a small brush to build up exact areas with colored acrylic. Work quickly before the mixture sets, shaping organic camouflage blobs that mirror natural patterns. Sand smooth once dry and apply your chosen topcoat for durability.
Textured paste offers another approach for creating dimensional camouflage effects. Mix the paste with your desired pigments to match your color scheme. Apply using a palette knife or spatula to create raised areas that resemble bark texture or rock surfaces. Allow 10-15 minutes drying time between layers for best results.
Embedding materials like micro beads or crushed shells adds authentic outdoor texture to camouflage designs. Press these elements into wet gel polish before curing to secure them permanently. Choose materials that complement your color story while adding realistic surface variation.
Chrome and Metallic Camo Finishes
Chrome powder transforms traditional camouflage into futuristic designs that reflect light like mirrors. We apply chrome over dark base colors to create maximum impact and dramatic contrast.
Application technique determines the final chrome effect quality. Start with a black gel base coat and cure completely. Apply a thin layer of no wipe gel polish and immediately dust chrome powder using a silicone tool. Buff gently to achieve mirror like finish, then seal with appropriate topcoat designed for chrome applications.
Metallic camouflage combines traditional patterns with luxurious finishes that suit evening events. Use gold, silver, or copper leaf to accent exact areas of your camouflage design. Apply sizing agent to selected spots, wait until tacky, then press metal leaf firmly into place. Brush away excess with a soft makeup brush.
Color shifting pigments create camouflage designs that change appearance under different lighting conditions. Mix these pigments with clear gel polish to create transparent layers that shift between complementary colors. Layer over darker camouflage bases to maintain pattern visibility while adding magical color transformation effects.
Heat activation reveals hidden chrome elements in specialized thermal polishes. Design your camouflage pattern normally, then add chrome accents that only appear when nails warm up from body heat or environmental temperature changes.
Camouflage Nail Ideas for Special Occasions
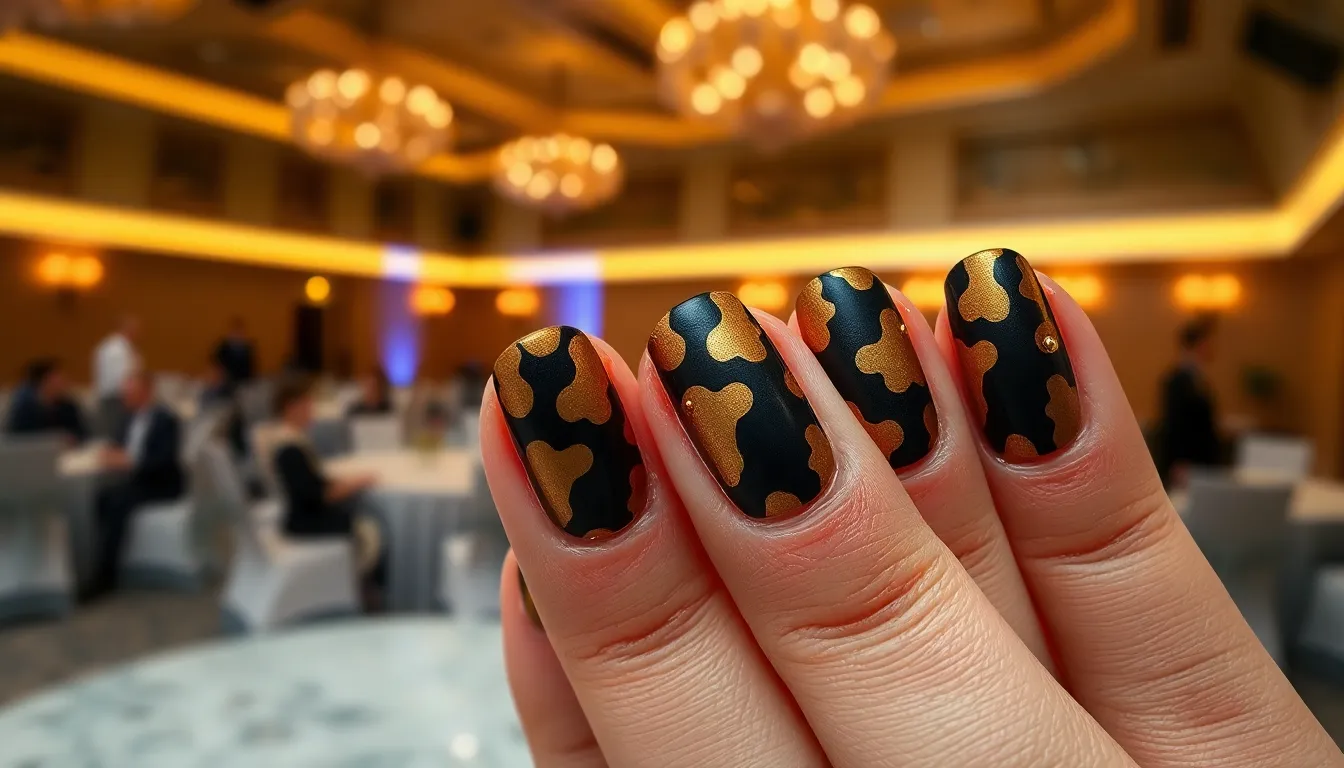
Special occasions call for distinctive camouflage nail designs that complement the event’s atmosphere while showcasing your unique style. We’ll explore three stunning approaches that transform traditional camo patterns into occasion appropriate masterpieces.
Military Ball Event Nails
Elegant gold and black camouflage creates sophisticated nail art perfect for formal military gatherings. Start with a deep black base coat and layer metallic gold patterns using thin detail brushes for precise application. Incorporate subtle bronze accents around the cuticle area to add warmth without overwhelming the design’s formal aesthetic.
Dress code appropriate finishes enhance the overall elegance of your military ball manicure. Apply a high gloss topcoat to create mirror like reflections that catch ballroom lighting beautifully. Consider adding tiny gold studs at strategic pattern intersections for extra sparkle that complements formal evening wear.
Traditional color combinations maintain respect for military heritage while achieving stunning visual impact. Deep navy blue serves as an excellent alternative base when paired with silver metallic accents and charcoal gray transitions. These colors coordinate perfectly with dress uniforms and formal military attire worn at ceremonial events.
Hunting Trip Themed Designs
Realistic tree bark patterns capture the authentic outdoor experience through detailed camouflage nail art. Create texture using a sea salt technique over brown base coats, then add darker wood grain lines with fine brushes for natural bark appearance. Layer matte topcoats to eliminate shine that might reflect sunlight during actual hunting activities.
Earth tone blending techniques produce seamless camouflage that matches natural hunting environments. Combine raw umber, burnt sienna, and forest green using sponge dabbing methods for organic pattern flow. Add dried moss pieces or small twigs pressed into wet polish for three dimensional texture that mimics forest floor elements.
Weather resistant formulations ensure your hunting themed nails withstand outdoor conditions throughout extended trips. Use gel polish systems that cure under UV lights for superior durability against moisture and temperature changes. Apply extra thick topcoats specifically designed for outdoor activities to prevent chipping from equipment handling.
Festival and Concert Camo Looks
Neon camouflage combinations create bold statement nails perfect for music festival environments. Electric pink, lime green, and bright orange form striking camo patterns that glow under blacklights commonly used at concerts. Use fluorescent polishes that charge during daylight hours and continue glowing throughout evening performances.
Holographic accent placements transform basic festival camo into mesmerizing light shows on your fingertips. Apply holographic topcoats over completed camouflage patterns to create rainbow reflections that dance with stage lighting. Strategic placement of holographic glitter at pattern edges amplifies the visual impact during crowd interactions.
Music genre inspired themes allow customization of camouflage patterns to match exact concert styles. Rock concerts call for black and red camo with metallic silver spikes, while electronic dance music events suit rainbow gradients with geometric camo shapes. Country music festivals pair beautifully with traditional hunter green and brown patterns accented with gold leaf details.
Conclusion
We’ve taken you on a comprehensive journey through the exciting industry of camouflage nail art, from classic military-inspired designs to vibrant fashion statements and seasonal adaptations. Whether you’re drawn to traditional earth tones or bold neon interpretations, there’s a camo style that’ll perfectly match your personality and occasion.
The techniques we’ve shared—from beginner-friendly sponge methods to advanced 3D texturing—ensure you can create professional-quality results at home. Remember that practice makes perfect, and don’t be afraid to experiment with different color combinations and finishing touches.
Camouflage nails offer endless creative possibilities, allowing you to blend artistic expression with personal style. Start with the basics and gradually work your way up to more complex designs as your confidence grows. Your nails are your canvas—now it’s time to create something truly stunning.
Frequently Asked Questions
What is camouflage nail art?
Camouflage nail art is a nail design technique that mimics military camouflage patterns on your nails. It has evolved from basic green patterns to include diverse colors and textures, ranging from traditional military aesthetics to vibrant fashion statements. These designs can be subtle for everyday wear or bold for special occasions.
Can beginners create camouflage nail designs at home?
Yes! Beginners can start with the sponge technique using makeup sponges to create natural, irregular shapes and authentic blending effects. This method is accessible and doesn’t require professional tools. As skills develop, you can progress to brush painting and stamping plate methods for more intricate designs.
What colors work best for camouflage nail art?
Traditional camouflage uses military colors like olive green, brown, and tan. However, modern designs embrace vibrant options including pink and purple for feminine twists, blue and teal for ocean themes, or rainbow multicolors for bold statements. Seasonal variations use autumn leaves colors, winter whites and grays, or spring pastels.
How long do camouflage nail designs last?
With proper application and quality products, camouflage nail designs can last 1-2 weeks with regular polish. Using gel polish extends wear time to 2-3 weeks with better chip resistance. Professional techniques like proper base coats, thin layers, and quality top coats significantly improve longevity and appearance.
What tools do I need for camouflage nail art?
Basic tools include nail polish in multiple colors, makeup sponges for blending, and detail brushes for precision work. Advanced techniques may require stamping plates, gel polishes, UV lamps, acrylic powder, textured paste, and specialty materials like glitter or chrome pigments for professional-quality results.
Are there camouflage nail designs for special occasions?
Yes! Military ball designs feature elegant gold and black patterns with high-gloss finishes. Hunting trip nails use realistic earthy tones with weather-resistant formulas. Festival looks incorporate neon colors and holographic accents. Each style can be customized to match specific events while maintaining the camouflage aesthetic.
What’s the difference between traditional and digital camouflage patterns?
Traditional camouflage features organic, flowing shapes in military colors, while digital camouflage uses pixelated, geometric patterns that appeal to gaming and tech enthusiasts. Digital patterns are more structured and angular, often incorporating modern color schemes beyond typical military hues for a contemporary twist.
Can I add texture to my camouflage nail designs?
Absolutely! You can create texture using sea salt or sugar while polish is wet, acrylic powder for 3D effects, or textured paste for raised patterns. These techniques add dimension and authenticity, especially for military-inspired designs that replicate the non-reflective surfaces of actual camouflage gear.


