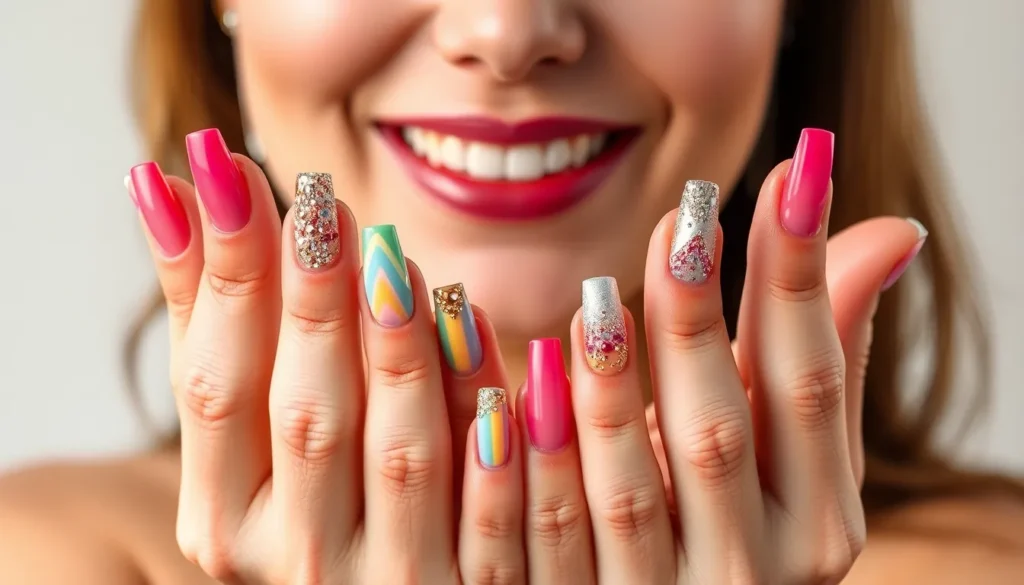
We’ve all been there – staring at our nails wondering how to transform them into stunning works of art that’ll turn heads and boost confidence. Acrylic nails offer the perfect canvas for endless creativity, allowing us to experiment with bold designs, vibrant colors, and eye-catching textures that natural nails simply can’t achieve.
From classic French tips with modern twists to intricate 3D embellishments and ombre gradients, the industry of acrylic nail art continues to evolve with fresh trends that suit every personality and occasion. Whether we’re preparing for a special event or simply want to elevate our everyday look, acrylics provide the durability and versatility we need to make a lasting impression.
The best part? We don’t need to be professional nail artists to create salon-worthy results. With the right inspiration and techniques, we can master stunning acrylic designs that reflect our unique style while staying on-trend with the latest nail art movements.
Classic French Tip Acrylic Nail Ideas
French tip acrylics remain the most timeless and elegant choice for those seeking sophisticated nail art. We’ll explore how these classic designs continue to dominate nail salons worldwide with their versatile appeal.
Traditional White Tips with Clear Base
White tip acrylic nails offer the perfect foundation for professional and formal occasions. We recommend opting for a crisp white polish applied to the nail tips with a sheer or clear base coat underneath. This combination creates that signature clean look that’s been popular for decades.
Maintenance becomes effortless with this classic style since imperfections are less noticeable on the neutral base. We suggest asking your nail technician to create a subtle curve along the tip line for the most flattering appearance. The width of the white tip should typically cover about one-third of your nail length for optimal proportions.
Application techniques matter when achieving that perfect white tip finish. We’ve found that using a steady hand and quality white acrylic polish ensures the smoothest results. Professional nail artists often use guides or tape to create perfectly straight lines across all ten nails.
Colored French Tips for Modern Twist
Colored French tips transform the traditional manicure into a contemporary statement piece. We love experimenting with pastels like soft pink, lavender, or mint green for spring and summer seasons. These hues maintain elegance while adding personality to your overall look.
Bold colors work exceptionally well for evening events or when you want to make a fashion statement. We recommend trying deep burgundy, navy blue, or emerald green tips against a nude or clear base. The contrast creates visual interest without overwhelming your hands.
Metallic finishes elevate the colored French tip concept to new heights. We suggest incorporating gold, silver, or rose gold polish for special occasions. These shimmery options catch light beautifully and complement both casual and formal outfits.
Reverse French Manicure Styles
Reverse French manicures flip the traditional design by placing color at the base of the nail instead of the tips. We position the colored section near the cuticle area while keeping the rest of the nail in a neutral or clear shade. This innovative approach creates a fresh take on the classic French manicure.
Color placement requires precision to achieve the perfect reverse French look. We recommend starting with a thin line of color at the base and gradually building up the coverage. The colored section should follow your natural nail shape for the most flattering result.
Creative variations include using multiple colors in the base section or adding subtle gradients. We’ve seen stunning results with ombre effects that transition from the colored base to clear tips. Glitter accents along the base line also add extra sparkle to this modern French manicure style.
Glitter and Sparkle Acrylic Nail Designs
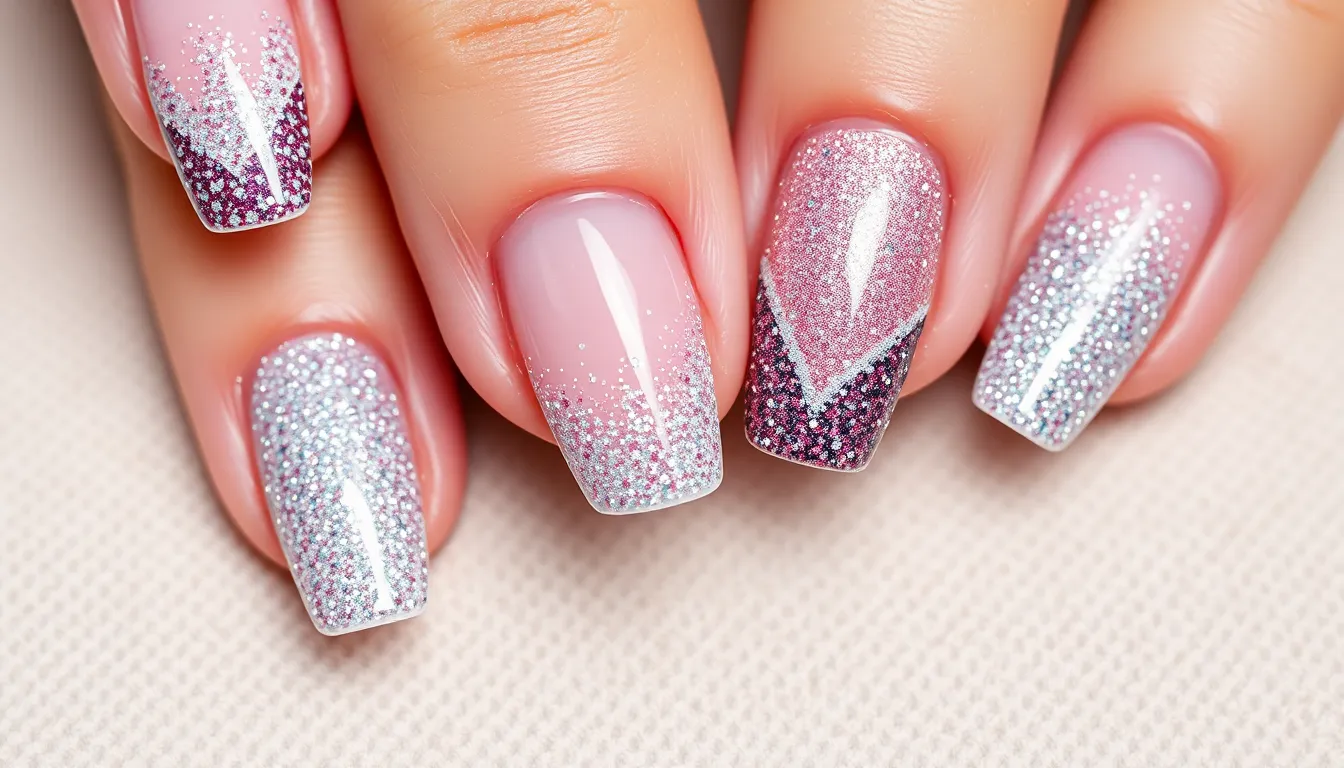
Glitter acrylic nails transform ordinary manicures into dazzling statements that catch light beautifully. We’ll explore three distinct approaches to incorporating sparkle into your acrylic nail designs.
Full Glitter Coverage Techniques
Mixing glitter directly into acrylic powder creates the most intense sparkle coverage for dramatic nail looks. Start by combining fine glitter particles with clear or colored acrylic powder using a 1:3 ratio for optimal consistency. Apply the mixture using standard acrylic application techniques, ensuring even distribution across the entire nail surface.
Layering chunky glitter over wet acrylic produces textured dimensional effects that reflect light from multiple angles. Press larger glitter pieces gently into the uncured acrylic surface, then seal with a clear topcoat for durability. Choose complementary glitter colors that enhance your base shade rather than competing with it.
Rolling wet nails in loose glitter offers complete coverage with varied particle sizes for maximum sparkle impact. Dip freshly applied acrylic nails into fine glitter powder immediately after shaping, rotating slowly to coat all surfaces evenly. Buff lightly once cured to smooth any rough edges while preserving the glitter’s reflective properties.
Accent Nail Glitter Applications
Single accent nails featuring heavy glitter concentration create focal points without overwhelming your entire manicure. We recommend applying glitter to your ring finger or thumb for balanced visual appeal. Use dense glitter application on just one or two nails per hand while keeping others in solid colors.
Glitter French tips modernize classic manicures with sparkling twist variations that suit both casual and formal occasions. Replace traditional white tips with glitter in gold, silver, or colored particles that complement your outfit choices. Apply glitter precisely along the nail tip using thin brushes for clean, professional looking lines.
Strategic glitter placement on cuticle areas or nail centers draws attention to exact design elements. Create half moon shapes at the base using fine glitter for subtle elegance. Position chunky glitter pieces as decorative accents rather than full coverage applications.
Ombre Glitter Fade Effects
Gradient glitter application creates smooth transitions from heavy sparkle to subtle shimmer across the nail length. Start with dense glitter at the tip, gradually decreasing concentration toward the cuticle area using dabbing motions. Work quickly while acrylic remains workable to achieve seamless blending.
Two tone glitter ombre combines different glitter colors for sophisticated color transitions. Begin with darker glitter at the base, blending into lighter sparkles toward the tips using overlapping application techniques. Choose colors within the same family for harmonious results or contrasting shades for bold statements.
Vertical glitter gradients offer unique alternatives to traditional horizontal ombre patterns. Apply glitter from one side of the nail to the other, creating sideways fade effects that elongate nail appearance. Use makeup sponges to blend glitter edges softly for professional looking transitions.
Ombre Acrylic Nail Art Concepts
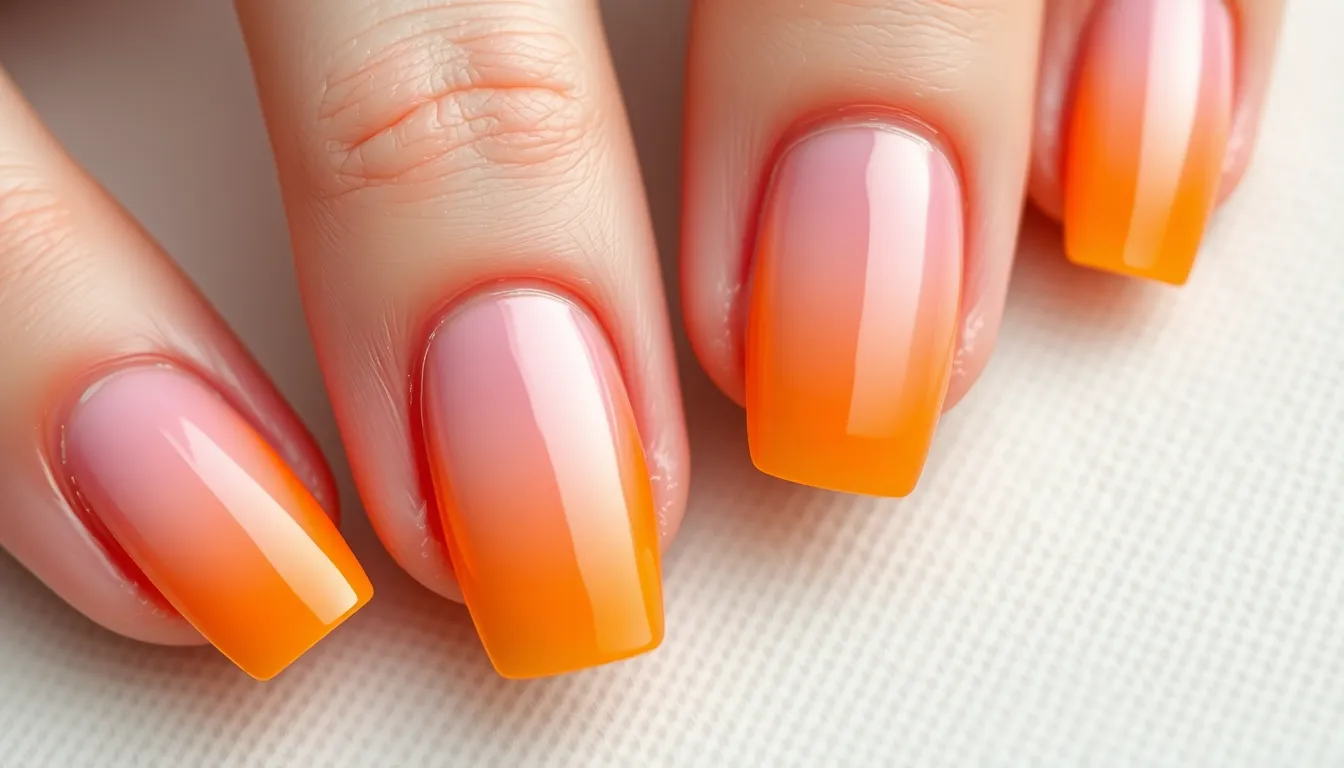
We love how ombre effects create smooth color transitions that make acrylic nails look professionally crafted. These gradient techniques transform basic manicures into stunning works of art that catch light beautifully.
Two-Tone Color Blending Methods
Start with complementary colors placed side by side on your nail palette for the most natural blending results. We recommend using a makeup sponge to dab colors onto the nail surface, creating seamless transitions between shades. Apply the lighter color first as your base coat, then gradually work the darker shade from the tip downward using gentle patting motions.
Choose contrasting colors like pink to white or blue to purple for dramatic effects that make your nails pop. The key lies in working quickly while the acrylic remains workable, blending colors with small circular motions. Perfect your technique by practicing color placement on nail tips before applying to your actual nails.
Create depth by adding a third transitional shade between your main colors for ultra smooth gradients. We find that metallic and matte combinations produce striking visual contrast in two tone designs. Finish with a high quality top coat to seal the ombre effect and enhance color vibrancy.
Multi-Color Gradient Techniques
Layer three to five colors in rainbow sequences for vibrant multi color ombre effects that showcase your creativity. We suggest starting with your lightest shade at the base and gradually transitioning to darker tones toward the tips. Use a small detail brush to blend each color boundary, working in thin layers to prevent muddying.
Plan your color sequence before beginning application, arranging shades from light to dark or warm to cool tones. The sponge technique works exceptionally well for multi color gradients, allowing you to control color placement precisely. Build intensity by applying multiple thin coats rather than one thick application for cleaner color separation.
Experiment with unexpected color combinations like sunset oranges flowing into deep purples for unique artistic effects. We recommend practicing color transitions on practice wheels to master the timing and pressure needed. Blend each transition point while colors remain wet to achieve that coveted seamless gradient look.
Sunset and Galaxy Ombre Styles
Create sunset inspired nails using warm orange, pink, and yellow tones that mimic natural sky colors at dusk. We love how these warm gradients complement skin tones and create an instant mood boost. Start with a peachy pink base and blend upward through coral and orange to reach golden yellow tips.
Design galaxy effects by combining deep purples, blues, and blacks with strategic glitter placement for stellar dimension. The key involves creating darker bases and gradually lightening toward accent areas where you’ll add metallic stars. Add tiny dots of white and silver polish over the gradient base to simulate distant stars and cosmic dust.
Enhance sunset designs with subtle glitter gradients that catch light like sun rays reflecting on water. We find that holographic glitters work perfectly for galaxy themes, creating that otherworldly shimmer effect. Finish galaxy nails with matte top coat over most of the design, leaving glitter accents glossy for maximum contrast and depth.
Bold and Bright Acrylic Nail Colors
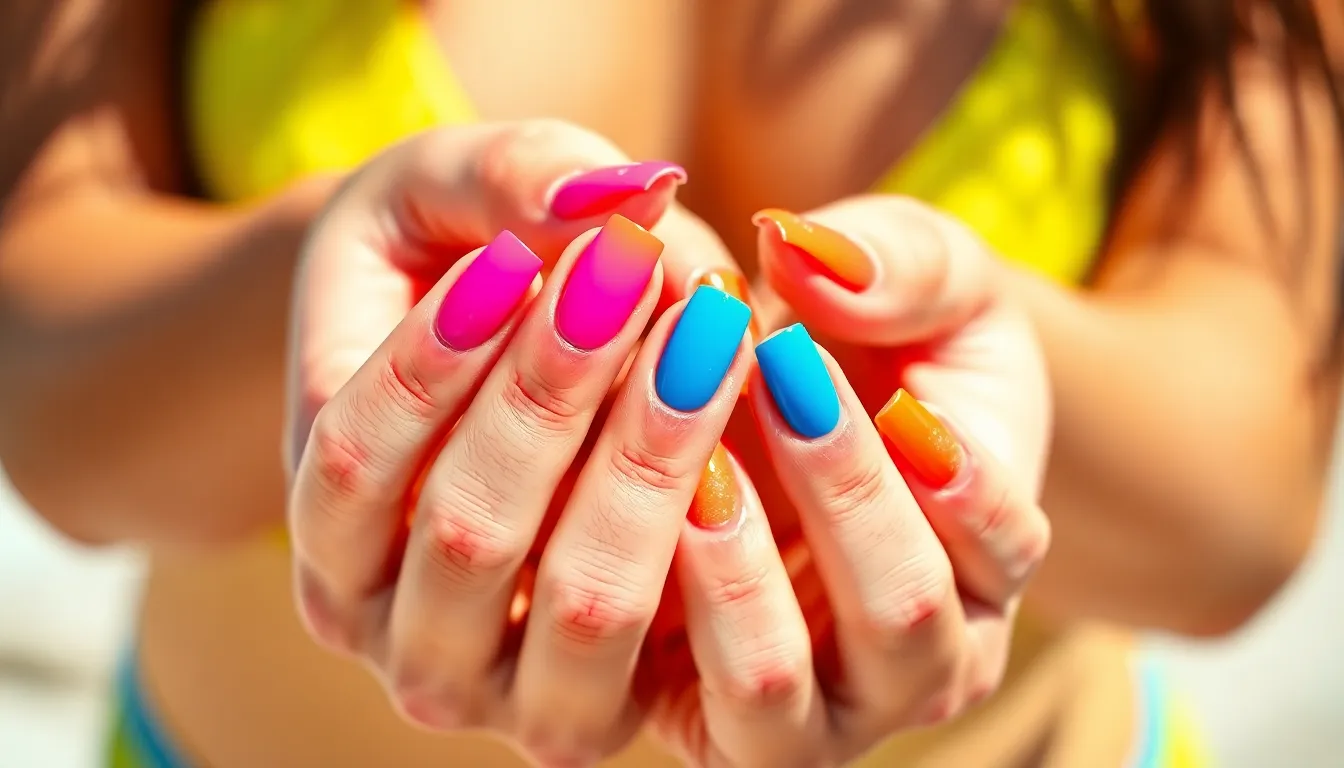
Bold colors transform acrylic nails into eye-catching statements that demand attention. Vibrant shades create endless possibilities for expressing your personality through nail art.
Neon Summer Shade Combinations
Neon colors bring instant energy to your acrylic nail designs with their ultra-bright pigmentation. Electric lime green paired with hot magenta creates a tropical vacation vibe that perfectly captures summer’s spirit. We recommend combining neon yellow with electric coral for a citrus-inspired look that brightens any outfit.
Alternating neon shades across your nails creates a playful rainbow effect that works beautifully for festivals or beach days. Neon orange with electric turquoise delivers maximum impact while maintaining a cohesive color story. Consider using neon pink as your base with electric green accent details for a watermelon-inspired design.
| Neon Combination | Best Occasions | Skin Tone Match |
|---|---|---|
| Lime + Magenta | Beach parties, festivals | Cool undertones |
| Yellow + Coral | Summer events, vacations | Warm undertones |
| Orange + Turquoise | Pool parties, concerts | Neutral undertones |
Electric Blue and Purple Palettes
Electric blue creates stunning depth when paired with metallic silver accents on acrylic extensions. Deep royal blue transitions beautifully into electric purple for an ombre effect that mimics twilight skies. We love combining cobalt blue with lavender purple for a sophisticated take on bold color combinations.
Navy blue serves as an excellent base for electric purple geometric patterns or lightning bolt designs. Teal blue mixed with violet purple creates an oceanic gradient that looks especially striking on longer acrylic shapes. Consider adding holographic topcoat to electric blue and purple combinations for extra dimension and shine.
Electric indigo paired with magenta purple delivers a cosmic effect that works perfectly for nighttime events. Powder blue contrasted with deep plum creates unexpected sophistication while maintaining the bold color impact you want.
Hot Pink and Orange Statement Looks
Hot pink dominates as the ultimate confidence color for acrylic nail art enthusiasts seeking maximum impact. Fuchsia pink combined with tangerine orange creates a sunset gradient that transitions seamlessly from day to night wear. We achieve the best results by applying hot pink as the base color and adding orange flame designs or geometric accents.
Coral pink mixed with burnt orange delivers a more wearable version of this bold combination while maintaining visual interest. Magenta pink paired with neon orange creates an 80s-inspired look that works beautifully for retro themed events or music festivals.
Rose pink serves as a softer starting point when you want to incorporate orange accents without overwhelming your overall look. Salmon pink combined with peach orange offers a tropical aesthetic that complements summer wardrobes perfectly. Consider using hot pink and orange in alternating nail patterns or as complementary accent colors for French tip variations.
Nude and Neutral Acrylic Nail Styles
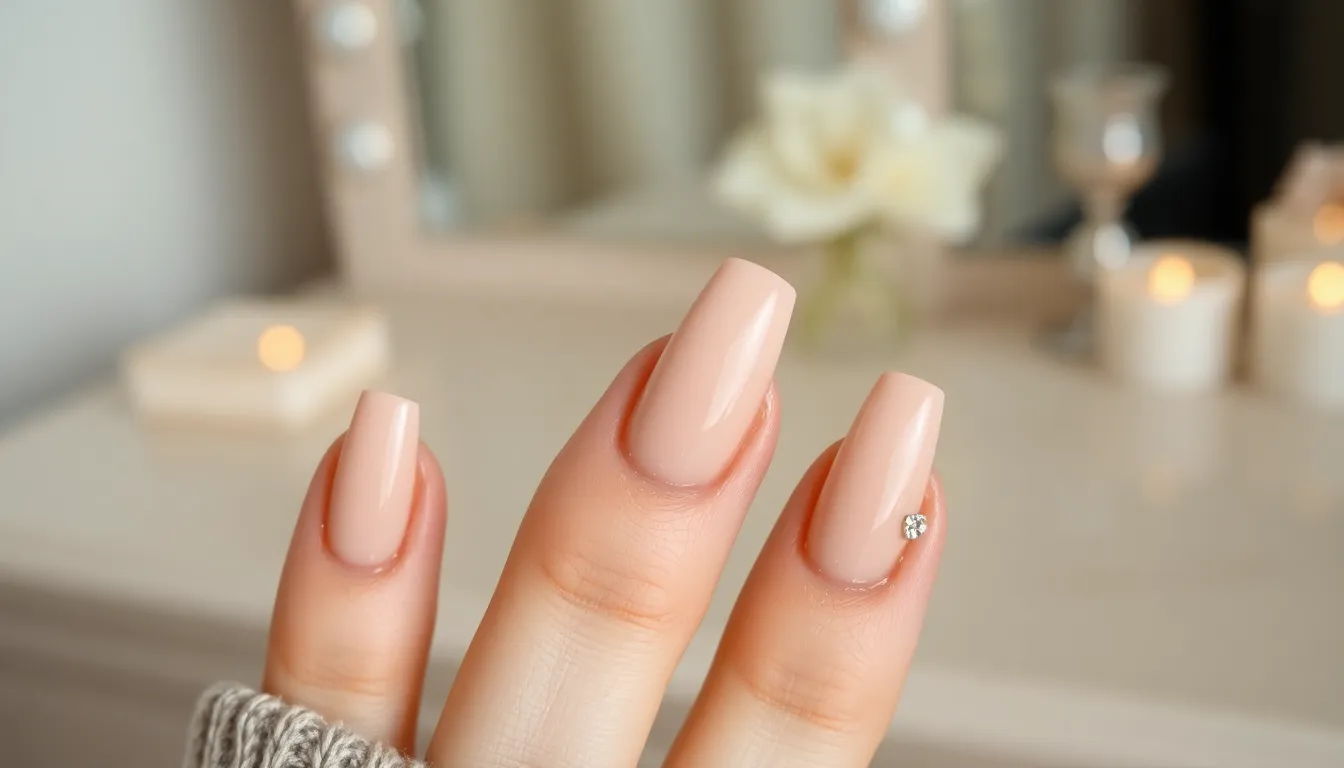
Nude and neutral acrylic nails offer sophisticated elegance that complements any outfit or occasion. These versatile shades create the perfect foundation for both professional settings and casual everyday wear.
Beige and Taupe Minimalist Designs
Beige acrylic nails provide a clean and polished look that works beautifully for office environments or formal events. We recommend selecting beige shades that complement your skin’s undertones, with cooler beiges for fair complexions and warmer tones for deeper skin tones. Taupe offers slightly more depth than traditional beige, creating subtle dimension without overwhelming the natural nail bed.
Minimalist designs using these colors focus on shape perfection and flawless application rather than elaborate decorations. Coffin and almond shapes work particularly well with beige and taupe shades, elongating the fingers while maintaining an understated appearance. Simple accent options include adding a single rhinestone to one nail per hand or creating thin white lines along the cuticle area.
We suggest applying a high quality base coat before layering the beige or taupe acrylic to prevent staining and ensure longevity. Professional application typically requires two thin coats rather than one thick application to achieve even coverage and avoid streaking.
Rose Gold and Champagne Finishes
Rose gold acrylic nails bring warmth and luxury to neutral nail designs while remaining workplace appropriate. This metallic finish catches light beautifully, creating subtle sparkle that elevates basic nude shades without appearing flashy. Champagne tones offer similar elegance with cooler undertones that pair exceptionally well with silver jewelry and accessories.
We recommend using rose gold and champagne finishes as full coverage colors or as accent details over nude base coats. Popular techniques include creating thin rose gold stripes, adding champagne tips in a modern French style, or applying these metallics to just the ring finger for a sophisticated accent nail.
Application of metallic finishes requires exact products designed for acrylic systems, as regular nail polish metallics don’t adhere properly to acrylic surfaces. Chrome powders can be applied over a sticky base coat for intense metallic shine, while metallic acrylic powders blend directly into the system for more subtle effects.
Matte Nude Application Techniques
Matte nude acrylic nails create modern sophistication by eliminating shine and focusing attention on shape and color depth. This finish works particularly well with slightly deeper nude shades like mushroom, greige, and dusty rose that provide enough contrast against the skin to define the nail shape clearly.
Achieving perfect matte finishes requires exact application methods that differ from traditional glossy acrylics. We apply a standard glossy top coat first, then follow with a dedicated matte top coat to prevent the color from appearing chalky or uneven. This double coating technique ensures the nude shade maintains its richness while eliminating unwanted shine.
Professional matte application involves buffing the surface lightly before applying the matte top coat to create better adhesion and prevent peeling. We recommend avoiding cuticle oil contact with matte surfaces, as oils can create glossy spots that compromise the uniform finish. Regular maintenance includes gentle cleaning with alcohol based products rather than oil based removers to preserve the matte appearance.
Geometric Pattern Acrylic Nail Ideas
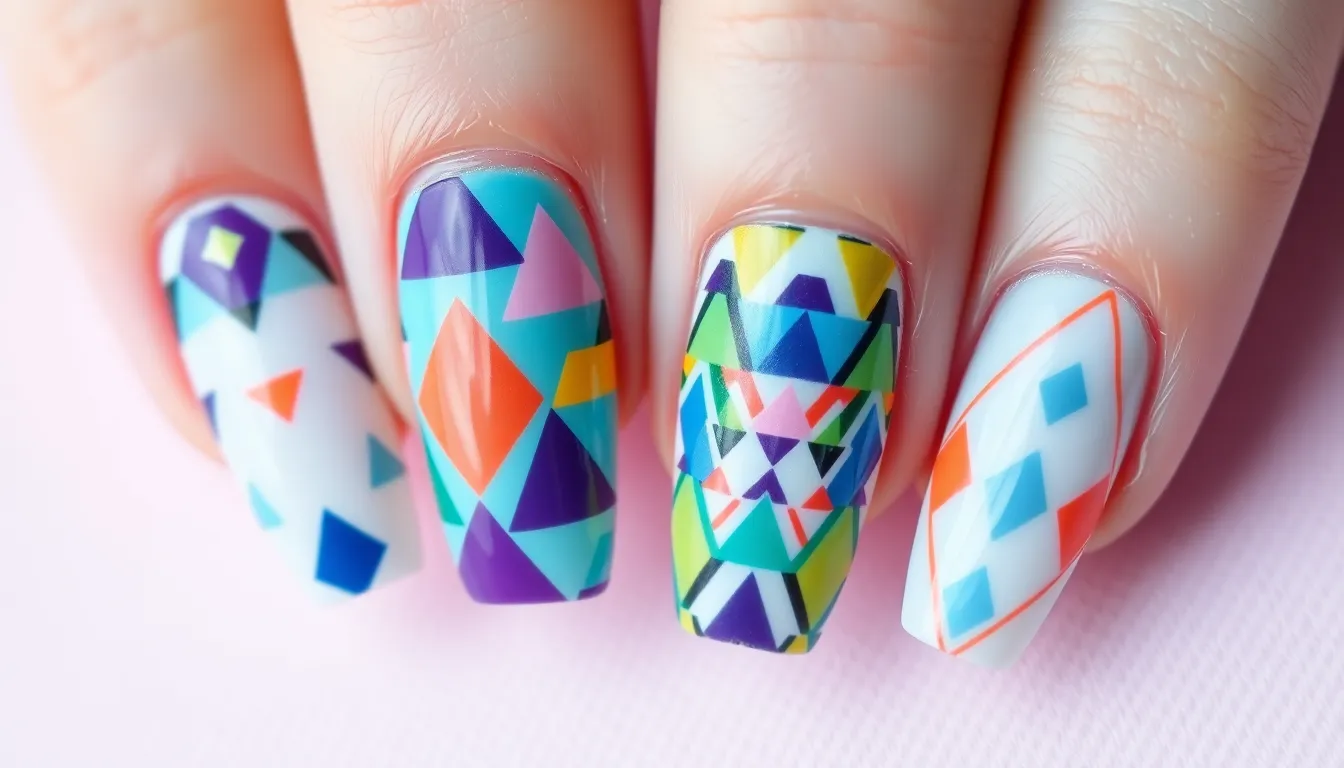
Geometric designs bring a modern and structured aesthetic to acrylic nails that perfectly complements contemporary fashion trends. These precise patterns offer endless creative possibilities while maintaining a sophisticated appearance that transitions seamlessly from casual to formal settings.
Triangle and Diamond Shape Designs
Triangle nail art creates striking visual impact through sharp angles and bold contrasts. We recommend starting with a neutral base color and adding triangular shapes using tape or nail vinyls for crisp, professional lines. Popular combinations include white triangles on a black base, gold triangles on nude backgrounds, or colorful triangular patterns using complementary shades like teal and coral.
Diamond patterns elevate the sophistication of geometric nail art with their multifaceted appearance. Create these designs by painting diamond shapes in alternating colors, such as silver and rose gold, or use negative space techniques where diamonds appear as clear sections against a colored background. Multiple small diamonds across each nail create an elegant tessellated effect that catches light beautifully.
Layered geometric shapes add depth and dimension to triangle and diamond designs. Build complexity by overlapping different sized triangles in varying opacities, or combine diamond outlines with solid triangular fills. These techniques work exceptionally well with metallics like chrome silver or holographic top coats that enhance the geometric structure.
Striped and Checkered Patterns
Vertical stripe designs create an elongating effect that makes nails appear longer and more elegant. Use striping tape or thin nail art brushes to achieve perfectly straight lines in contrasting colors like black and white, or experiment with rainbow stripes using bright acrylics. Varying stripe widths adds visual interest while maintaining the clean geometric aesthetic.
Horizontal stripe patterns offer a modern twist on traditional geometric nail art. Apply these designs using steady hand techniques or nail guides, alternating between two to three colors for maximum impact. Navy blue and white combinations create nautical themes, while metallic stripes on dark bases provide luxurious appeal.
Checkered nail art brings retro charm with contemporary execution to acrylic designs. Create classic checkerboard patterns using black and white, or modernize the look with pastel combinations like mint green and soft pink. Small checker squares require precision but deliver stunning results, while larger checkers work better for shorter nail lengths.
Mixed pattern combinations allow creative freedom by incorporating stripes and checks on different nails within the same manicure. Use accent nails with checkered patterns while keeping other nails in coordinating stripes, or create gradient effects where patterns transition from one finger to the next.
Abstract Geometric Art Concepts
Angular abstract designs push creative boundaries by combining various geometric elements into unique compositions. Layer triangles, rectangles, and irregular polygons in harmonious color schemes to create one of a kind nail art. These designs work particularly well with acrylic extensions that provide ample canvas space for complex patterns.
Negative space geometry uses the natural nail or clear acrylic as part of the design element. Cut out geometric shapes from the colored polish to reveal underlying layers, creating modern and minimalist effects. This technique reduces polish bulk while maintaining visual interest through strategic shape placement.
Color blocking techniques divide each nail into distinct geometric sections using bold, contrasting colors. Apply different shades to triangular or rectangular sections, ensuring clean lines where colors meet. Popular combinations include primary colors like red, blue, and yellow, or monochromatic schemes using different tones of the same color family.
3D geometric elements add texture and dimension to abstract nail designs through raised acrylic work. Build small geometric shapes directly onto the nail surface, then paint them in contrasting colors for dramatic effect. These elements catch light differently than flat designs, creating ever-changing visual appeal that changes with hand movement.
Floral Acrylic Nail Art Designs
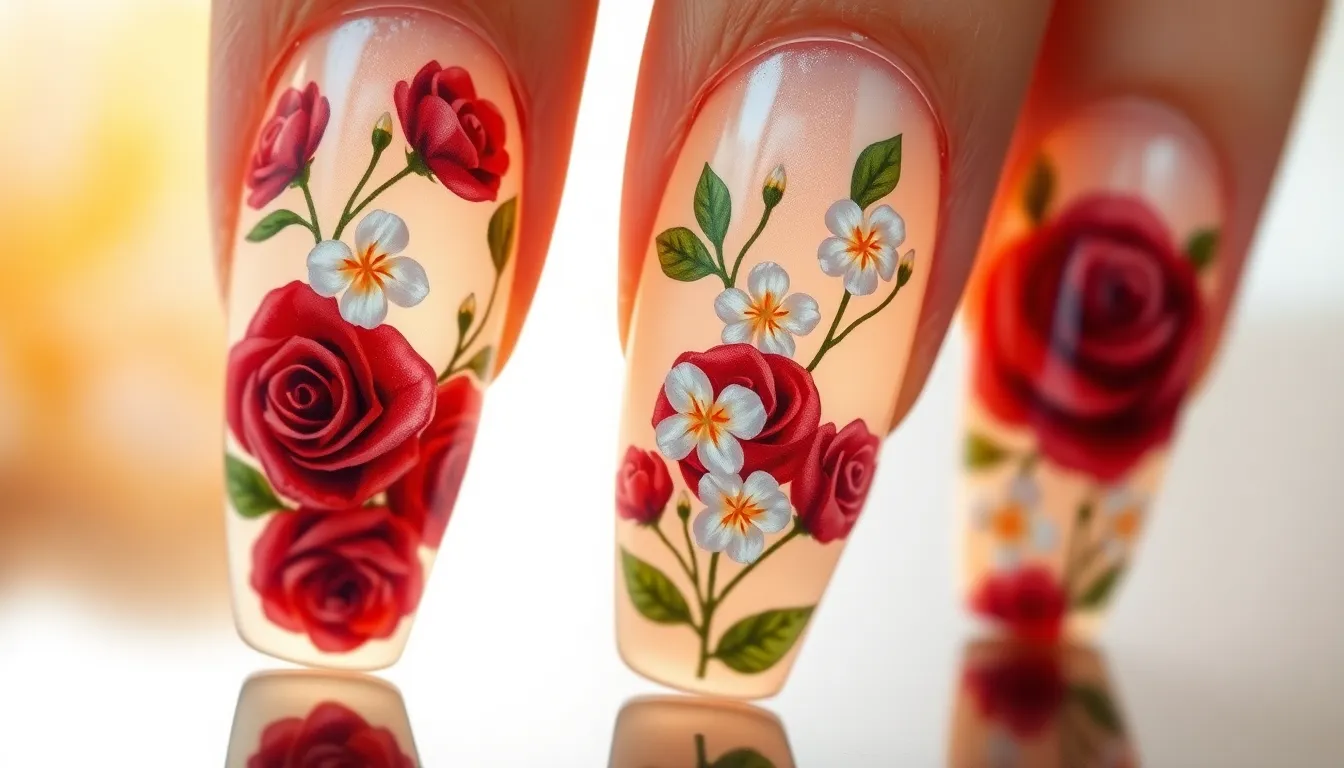
Delicate blooms and botanical elements transform acrylic nails into miniature gardens that capture nature’s beauty with stunning detail. These romantic designs offer endless creative possibilities while maintaining the durability that makes acrylics so popular.
Hand-Painted Rose Techniques
Classic red roses create timeless elegance when painted directly onto acrylic surfaces using fine detail brushes and high-quality acrylic paints. We recommend starting with a base coat in nude or pale pink before sketching rose outlines with a toothpick for precise placement. Layering technique involves painting darker red petals first, then gradually adding lighter shades and highlights to create dimensional depth that mimics real flower petals.
Miniature rose gardens work beautifully across multiple nails by varying rose sizes from tiny buds on pinky nails to full blooms on thumbs and ring fingers. Artists should use a steady hand and allow each layer to dry completely before adding details like thorns, leaves, or dewdrops with metallic accents. Color variations include soft pastels for spring looks, deep burgundy for autumn themes, or white roses with gold centers for bridal occasions.
Brush selection makes the difference between amateur and professional looking hand painted roses on acrylic nails. We suggest using a fine liner brush for stems and outlines, a flat shader for petal bases, and a detail brush for highlights and texture work. Sealing techniques require applying a quality top coat to preserve the painted design while maintaining the three dimensional appearance of the rose petals.
Pressed Flower Embedded Styles
Real dried flowers become permanently embedded within acrylic layers to create authentic botanical nail art that lasts for weeks without fading. We carefully select small flowers like baby’s breath, tiny daisies, or delicate ferns that fit proportionally on nail surfaces. Preparation process involves completely drying fresh flowers using silica gel or traditional pressing methods between books for at least two weeks before application.
Application method requires placing dried flowers onto the tacky layer of base gel before applying thin layers of clear acrylic to encapsulate the botanical elements completely. Technicians must work quickly to position flowers before the acrylic sets, using tweezers for precise placement and avoiding air bubbles that could compromise the final appearance. Color coordination works best when flower colors complement the base nail color or create intentional contrast for dramatic visual impact.
Popular flower choices include lavender sprigs for purple themed manicures, small yellow flowers for cheerful spring designs, and pressed leaves for autumn inspired nail art. We’ve found that delicate white flowers create elegant looks on darker base colors, while colorful petals pop against nude or clear backgrounds. Maintenance tips involve avoiding excessive water exposure and using cuticle oil regularly to keep the surrounding acrylic flexible and prevent cracking around embedded elements.
Watercolor Floral Effect Methods
Watercolor technique creates soft, dreamy floral designs on acrylics by diluting regular nail polish or using specialized watercolor nail paints for translucent effects. We achieve this ethereal look by applying thin washes of color that blend seamlessly into one another, mimicking traditional watercolor painting techniques on paper. Base preparation involves using a white or very pale base color to allow the watercolor effects to show their true vibrancy and transparency.
Blending methods include the wet on wet technique where artists apply diluted polish to slightly damp base coats, allowing colors to naturally flow and create organic flower shapes. Painters can also use the dry brush method for more controlled petal definition while maintaining the soft watercolor aesthetic. Color combinations work best with analogous colors like blues and purples for hydrangeas, or warm tones like peaches and corals for tropical hibiscus effects.
Tools and materials essential for watercolor floral nails include makeup sponges for color blending, fine brushes for detail work, and alcohol or nail polish thinner for creating the proper paint consistency. We recommend working one nail at a time to prevent premature drying and using quick drying top coats to seal the delicate watercolor layers. Advanced techniques involve creating negative space flowers where the base color shows through strategically placed watercolor washes, resulting in sophisticated botanical designs that appear to float on the nail surface.
Seasonal Acrylic Nail Themes
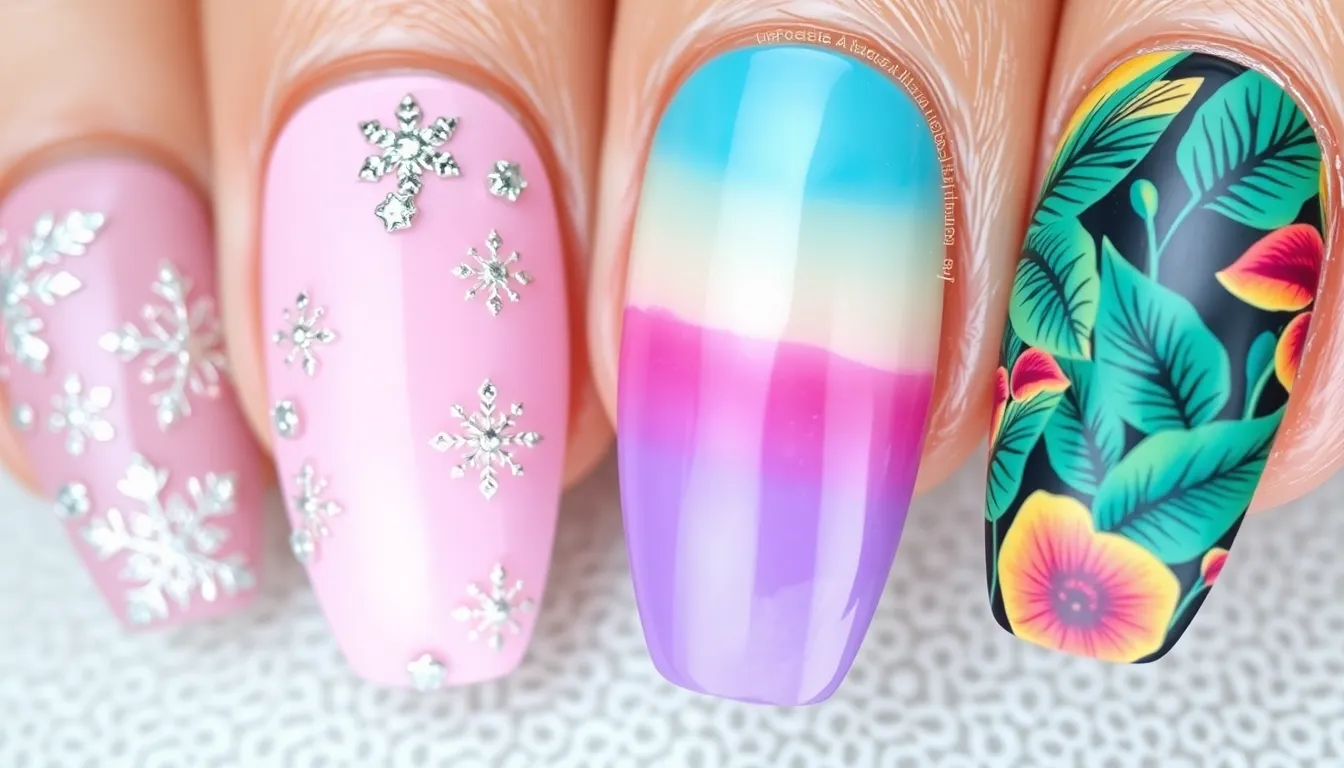
We can celebrate each season with specially designed acrylic nail themes that capture the essence of different times throughout the year.
Winter Snowflake and Holiday Designs
Winter acrylic nail themes bring festive magic to our fingertips through intricate snowflake patterns and holiday motifs. We start by creating delicate snowflake designs using white acrylic paint or gel with a fine detail brush, building each crystal with six symmetrical points radiating from a central dot. Silver glitter accents enhance the icy effect when we apply them to the tips or create subtle highlights within each snowflake design.
Holiday color palettes dominate winter acrylic themes with classic combinations like deep red with gold accents, emerald green with silver details, or sophisticated navy blue with pearl finishes. We achieve these looks by layering rich base colors and adding metallic foil or chrome powder for luxurious holiday shine. Candy cane striping creates playful winter designs when we alternate red and white diagonal stripes using striping tape for clean lines.
3D winter elements elevate holiday acrylic nails through tiny rhinestone placement that mimics falling snow or creates ornament effects. We secure these embellishments with clear topcoat and position them strategically to avoid snagging during daily activities. Matte topcoat applications over winter designs create a sophisticated frosted glass effect that perfectly complements the season’s aesthetic.
Spring Pastel Color Combinations
Spring pastel acrylic themes celebrate renewal and growth through soft, dreamy color palettes that mirror blooming gardens and fresh beginnings. We blend baby pink with lavender gradients using a damp makeup sponge to create seamless transitions that capture spring’s gentle awakening. Mint green and peach combinations offer refreshing contrasts when we alternate these colors on different nails or create subtle ombre effects.
Easter inspired designs incorporate traditional spring symbols through hand painted elements like tiny pastel eggs, baby chicks, or delicate bunny silhouettes using thin brushes and acrylic paints. We enhance these motifs with pearl accents or soft shimmer topcoats that catch light beautifully. Cherry blossom patterns represent spring perfectly when we paint delicate pink petals with white highlights against nude or soft pink base colors.
Gradient pastel techniques create stunning spring effects when we layer three to four complementary pastels from light to slightly deeper tones. We apply each color while the previous layer remains slightly tacky to achieve smooth blending without harsh lines. Butterfly accents complete spring themes through detailed wing patterns using pastel blues, purples, and yellows with black outlining for definition.
Summer Beach and Tropical Motifs
Summer acrylic nail themes transport us to paradise through vibrant tropical colors and beach inspired designs that celebrate warm weather adventures. We create ocean wave effects using blue and turquoise gradients with white foam accents painted along the natural curve of each nail. Palm tree silhouettes against sunset backgrounds combine coral, orange, and pink ombre bases with black tree details for classic tropical vibes.
Seashell and starfish motifs capture beach essence when we use neutral base colors and add detailed shell patterns with pearl accents or iridescent powders for realistic shine effects. We paint these elements using fine detail brushes and build layers gradually for dimensional appearance. Tropical fruit designs like pineapples, coconuts, or watermelon slices add playful summer energy through bright yellows, greens, and pinks with careful attention to realistic texturing.
Coral reef inspired patterns showcase summer’s underwater beauty through combinations of bright corals, aqua blues, and sea green shades with small fish or seahorse accents. We create these designs using dotting tools for coral texture and thin brushes for marine life details. Beach sunset gradients complete summer themes when we blend warm oranges, pinks, and purples horizontally across the nail surface, adding silhouette details like birds or boats for perfect vacation memories.
Textured Acrylic Nail Techniques
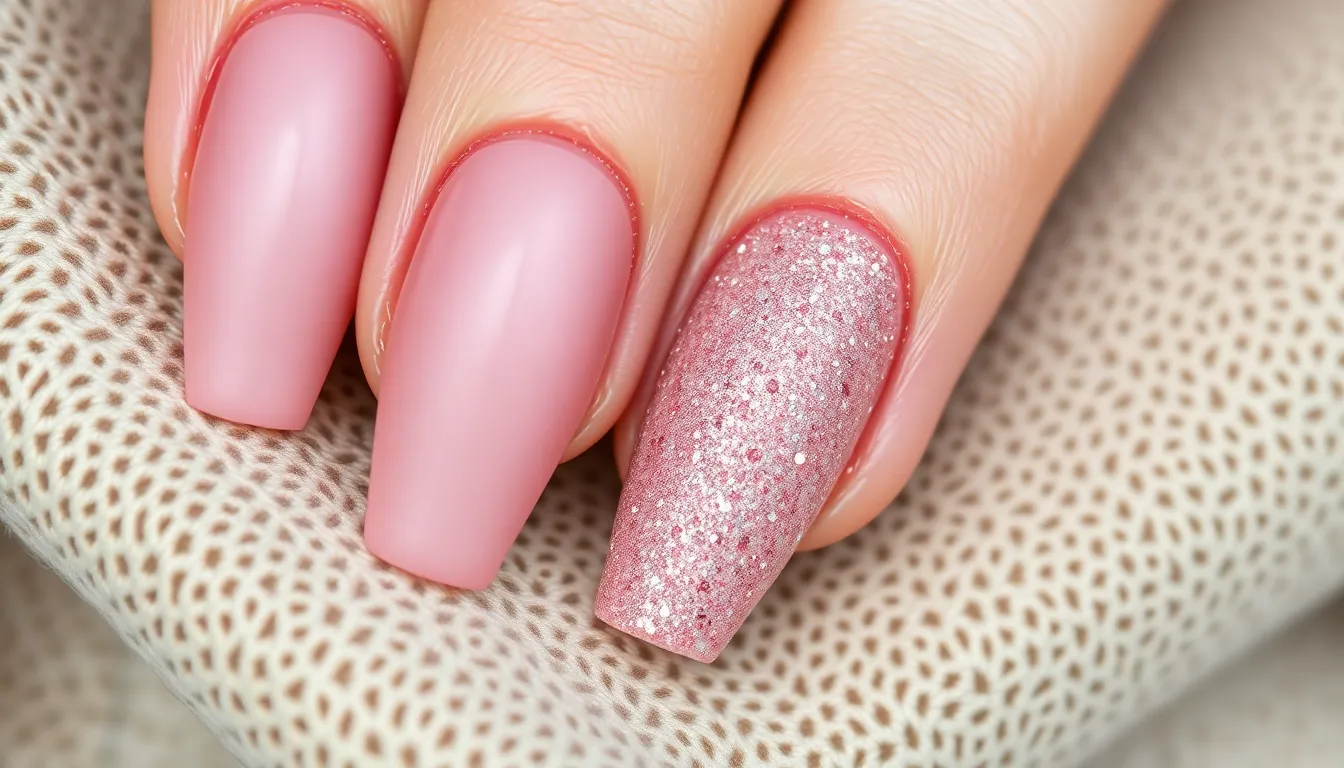
Textured acrylic techniques transform ordinary nail designs into tactile masterpieces that catch light and attention in unique ways. We’ll explore three distinct textural approaches that add dimension and visual interest to your acrylic nail art.
Matte Finish Application Methods
Matte finishes create sophisticated nail textures by eliminating surface shine and producing a velvety appearance. We achieve this effect by applying a specialized matte topcoat after your acrylic color has fully cured.
Application requires exact timing to prevent streaking or uneven coverage. We recommend waiting 2-3 minutes after your final color coat before applying the matte topcoat in thin, even strokes.
Temperature affects the matte finish quality significantly during application. We work in room temperature environments around 70-75°F to ensure proper product consistency and avoid bubbling.
Layering techniques enhance durability of matte acrylic nails. We apply one thin coat, allow it to dry for 60 seconds, then add a second layer for maximum longevity and texture uniformity.
Sand and Sugar Texture Effects
Sand texture effects create gritty, beach-inspired surfaces using specialized acrylic powders mixed with fine textural particles. We blend standard clear acrylic powder with sand-textured additives in a 3:1 ratio for optimal results.
Mixing consistency determines texture depth in your final application. We gradually add textural powder while monitoring the mixture’s thickness to achieve the desired granular feel without compromising nail strength.
Application pressure controls texture intensity during the sculpting process. We use gentle patting motions with our brush to preserve the textural elements while ensuring proper adhesion to the nail bed.
Sugar effects use crystalline additives that create sparkling, grainy surfaces reminiscent of sugar crystals. We incorporate fine glitter or micro-beads into clear acrylic for this sweet-inspired textural variation.
Velvet Powder Coating Styles
Velvet powder coatings produce luxurious, fabric-like textures using flocked powder applied over tacky acrylic surfaces. We dust the powder generously while the acrylic remains slightly wet for maximum adherence.
Color coordination enhances the velvet effect by matching powder shades to your base acrylic color. We select complementary or identical powder colors to create seamless velvet textures that appear professionally finished.
Removal of excess powder requires gentle techniques to preserve the desired texture. We use a soft brush to remove loose particles while maintaining the velvet coating’s integrity and uniform appearance.
Sealing velvet textures demands careful topcoat selection to preserve the fabric-like feel. We apply specialized matte topcoats that protect the velvet powder without flattening its distinctive textural properties.
Length and Shape Variations for Acrylics
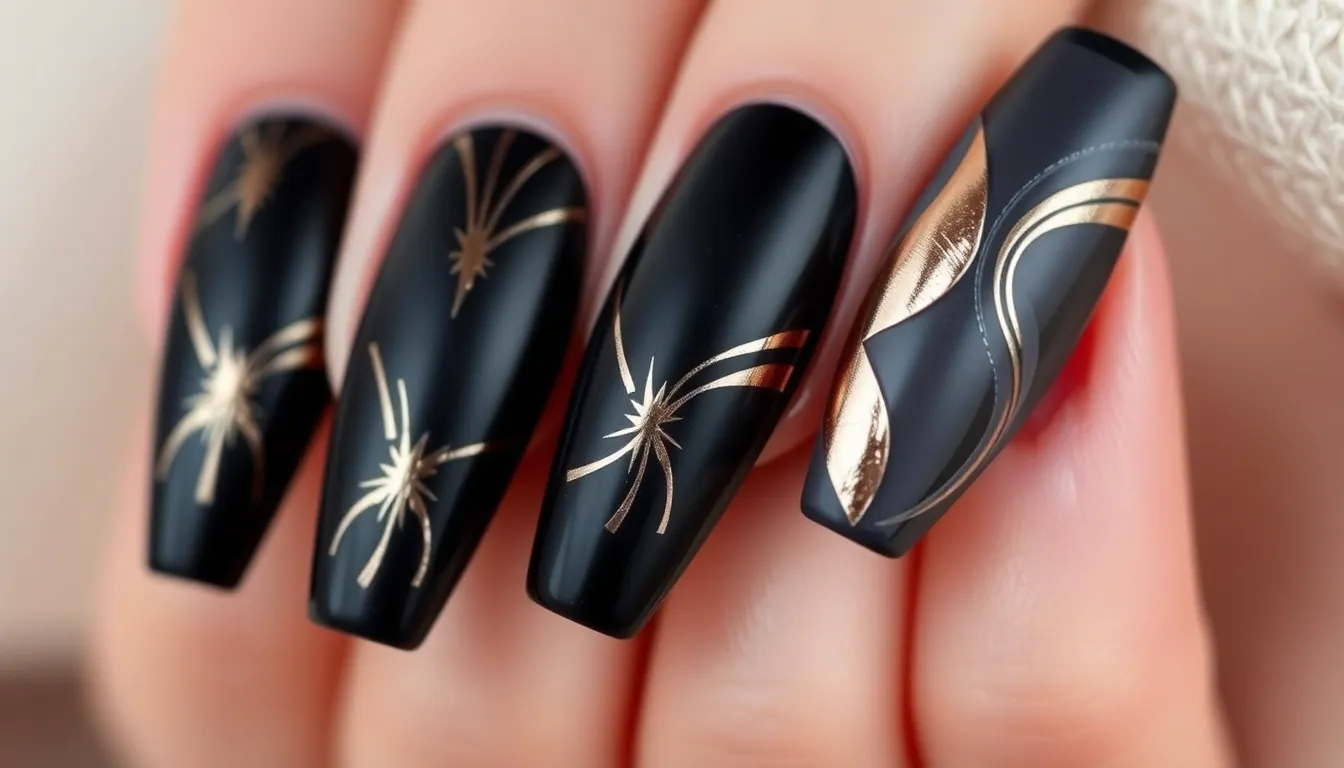
Shape selection significantly impacts the overall aesthetic of acrylic nail designs. Different lengths and shapes offer unique canvases for expressing personal style while accommodating various lifestyle needs.
Coffin Shape Styling Options
Coffin shape acrylic nails create a sophisticated silhouette that balances edginess with elegance. We love how this shape tapers from a wide base to a squared-off tip, resembling the shape of a coffin or ballerina slipper. Medium to long lengths work best for coffin shapes, typically ranging from 15-25mm beyond the fingertip.
Matte black coffin nails paired with metallic accent details deliver a striking gothic aesthetic. Rose gold foil strips applied vertically along the center of each nail create stunning contrast against the dark base. We recommend using gel top coat over selected areas to create mixed finish effects that add visual depth.
Nude coffin acrylics with subtle ombre transitions offer versatility for professional environments. Gradient blending from peachy pink at the cuticle to creamy beige at the tips creates natural-looking length enhancement. Adding thin white French tips to nude coffin bases provides a modern twist on classic manicures.
Glitter-embedded coffin designs showcase maximum sparkle potential due to the shape’s generous surface area. Holographic chunky glitter mixed into clear acrylic powder creates rainbow effects that shift with light movement. We suggest concentrating glitter density toward the tips for balanced visual weight distribution.
Stiletto Point Design Ideas
Stiletto acrylic nails command attention with their dramatic pointed tips and bold length statements. This shape requires precise filing techniques to achieve symmetrical points that extend 20-30mm from the natural nail bed. We find stiletto shapes work exceptionally well for special occasions and artistic expression.
Electric blue stiletto nails with silver chrome accents create futuristic appeal. Chrome powder applied over tacky gel base coats produces mirror-like finishes that reflect light dramatically. Geometric line work using striping tape helps create clean divisions between chrome and color sections.
Red stiletto acrylics embody classic glamour with modern edge appeal. Deep burgundy bases topped with ruby red gradients create rich color depth perfect for evening events. We recommend reinforcing stiletto points with additional acrylic layers to prevent breakage during daily activities.
Marble effect stiletto designs use the shape’s length for showcasing intricate veining patterns. White and gray acrylic powders swirled together with fine brushes mimic natural stone textures. Adding gold leaf fragments to marble patterns creates luxury effects that complement the stiletto’s dramatic silhouette.
Square and Round Shape Alternatives
Square acrylic nails offer practical elegance with their straight-across tips and clean geometric lines. Short to medium lengths between 5-15mm work best for square shapes, providing durability while maintaining sophisticated appearance. We appreciate how square shapes complement minimalist design approaches and professional settings.
Classic red square acrylics never go out of style, especially when paired with glossy top coats for maximum shine. French manicure variations using colored tips instead of white create modern updates to traditional square styling. Negative space designs incorporating geometric cutouts showcase the shape’s structural beauty.
Round acrylic nails provide the most natural appearance while offering enhanced strength and length. This shape follows the natural curve of fingertips, making it comfortable for typing and daily tasks. We find round shapes particularly flattering on shorter fingers as they create elongating optical effects.
Pastel round acrylics work beautifully for spring and summer seasons. Lavender and mint green combinations create soft, feminine aesthetics perfect for casual occasions. Watercolor techniques applied to round shapes allow colors to blend seamlessly across the curved surface area.
Oval variations bridge the gap between round and almond shapes, offering elegant curves without extreme points. Medium lengths between 10-20mm showcase oval proportions most effectively. We recommend oval shapes for clients seeking sophisticated length without the maintenance requirements of pointed styles.
Conclusion
We’ve explored the endless possibilities that acrylic nails offer for creative expression. From timeless French tips to bold geometric patterns there’s truly something for every style preference and skill level.
The beauty of acrylics lies in their versatility – whether you’re drawn to subtle nude elegance or eye-catching 3D textures you can achieve professional-looking results with the right techniques. Seasonal themes and textured finishes add even more dimension to your nail art journey.
Remember that practice makes perfect and experimenting with different shapes lengths and designs helps you discover what works best for your lifestyle. With these ideas as your foundation you’re ready to create stunning acrylic masterpieces that reflect your unique personality and keep your nails looking fabulous year-round.
Frequently Asked Questions
What are the benefits of choosing acrylic nails over natural nails for nail art?
Acrylic nails provide a versatile canvas that allows for creative experimentation with designs, colors, and textures that aren’t possible with natural nails. They offer better durability, longer length options, and can support heavier embellishments like 3D elements, glitter, and textured finishes. Acrylics also maintain their shape longer, making them ideal for intricate nail art designs.
How can beginners create beautiful acrylic nail designs without professional training?
Beginners can achieve stunning results by starting with simple techniques like French tips or single-color applications. Use quality brushes, practice color blending with makeup sponges, and follow step-by-step tutorials. Begin with basic designs before advancing to complex patterns, and don’t hesitate to experiment with different colors and textures to develop your personal style.
What’s the difference between traditional and reverse French manicures?
Traditional French manicures feature white tips with a clear or nude base, creating a classic, professional look. Reverse French manicures place the color at the base of the nail instead of the tip, offering a modern twist on the timeless design. Both styles can incorporate various colors and finishes beyond the traditional white and clear combination.
How do you achieve a perfect ombre effect on acrylic nails?
Create ombre effects using a damp makeup sponge to blend two or more colors seamlessly. Apply colors side by side on the sponge, then dab onto the nail in a rolling motion. Work quickly while the polish is wet, and use multiple thin layers for smooth transitions. Seal with a top coat for a professional finish.
Which acrylic nail shapes work best for different lifestyles?
Square and round shapes offer practical elegance for active lifestyles and professional settings. Coffin shapes provide sophisticated versatility suitable for most occasions. Stiletto designs make dramatic statements but may be less practical for daily tasks. Oval shapes offer elegant curves without extreme points, balancing style and functionality perfectly.
How do you properly apply matte finish to acrylic nails?
Apply matte topcoat over completely dry colored polish, working in thin, even strokes. Avoid over-brushing, which can cause streaking. Ensure room temperature isn’t too humid, as this affects the matte finish quality. Allow adequate drying time between coats, and avoid touching the surface until fully cured to maintain the velvety appearance.
What are the best color combinations for bold acrylic nail designs?
Electric lime green with hot magenta creates stunning neon combinations perfect for summer. Electric blue paired with deep purple offers sophisticated depth. Hot pink and orange work well for sunset gradients and retro-inspired looks. Consider your skin tone when choosing colors, and don’t be afraid to alternate bold shades for festival or beach occasions.
How can you incorporate real flowers into acrylic nail designs?
Use pressed, dried flowers by placing them on wet acrylic and sealing with clear polish. Prepare flowers by pressing them for several weeks until completely dry. Apply a base coat, position flowers carefully with tweezers, then cover with multiple thin layers of clear topcoat to prevent lifting and ensure durability.
What tools are essential for creating geometric patterns on acrylic nails?
Essential tools include striping brushes for clean lines, nail tape for precise edges, dotting tools for circles, and small detail brushes for intricate work. Use a steady hand and work with well-thinned polish for smooth application. Practice basic shapes before attempting complex geometric combinations, and always seal designs with quality topcoat.
How do you maintain textured acrylic nails like velvet or sand finishes?
Textured nails require gentle care to preserve their unique surface. Avoid harsh scrubbing and use oil-free nail products. Apply cuticle oil carefully around the nail bed without touching the textured surface. When removing, use acetone-based removers and allow extra soaking time due to the specialized powders and coatings used in textured designs.

