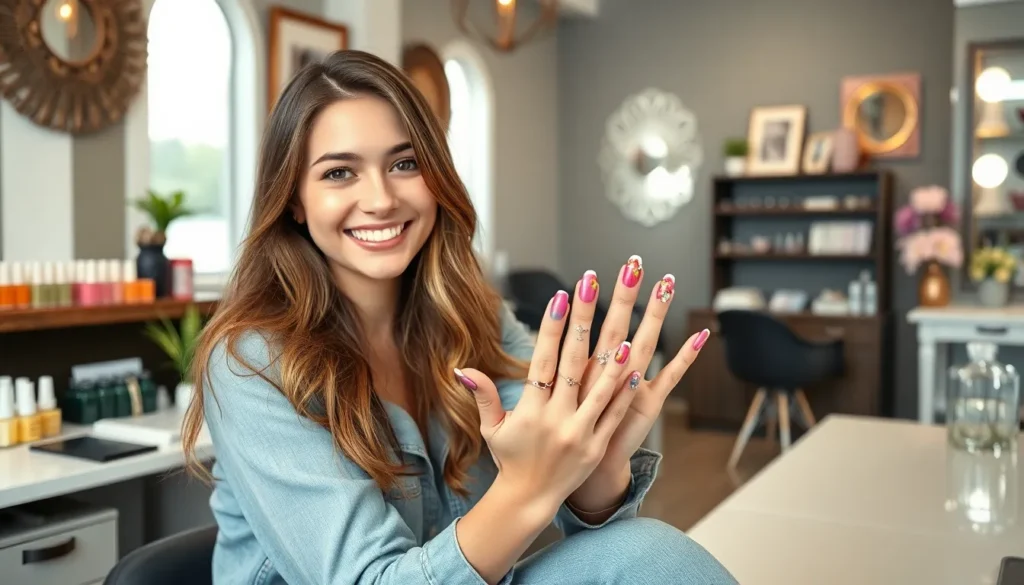
We’ve all been there – staring at our nails and craving something fresh and exciting. Whether you’re preparing for a special occasion or simply want to express your personal style, finding the perfect nail design can transform your entire look and boost your confidence instantly.
From minimalist elegance to bold statement art, today’s nail design trends offer endless possibilities for every personality and lifestyle. We’re seeing everything from delicate floral patterns and geometric shapes to vibrant ombre effects and stunning metallic accents taking center stage in the beauty industry.
The best part? You don’t need to be a professional nail artist to achieve salon-worthy results. With the right inspiration and techniques, we’ll show you how to create stunning nail designs that’ll have everyone asking where you got them done. Let’s jump into the most captivating nail ideas that are trending right now.
Classic French Manicure Variations
We’re transforming the timeless French manicure with contemporary twists that elevate this classic design. These sophisticated variations maintain the elegant simplicity that makes French manicures universally flattering while adding modern flair to your nail designs.
Modern Colored Tips
Vibrant colored tips replace traditional white for a bold statement that’s perfect for any season. We love experimenting with coral orange during summer months or deep burgundy for fall elegance. Electric blue tips create striking contrast against nude base colors while soft pastels like lavender or mint green offer subtle sophistication.
Rainbow tips bring playful energy to your manicure by using different colors on each nail. This technique works beautifully with bright neons or muted earth tones depending on your style preference. Ombre tips blend two complementary shades for seamless color transitions that catch light beautifully.
Metallic tips using gold or rose gold polish create luxury appeal for special occasions. Silver tips pair exceptionally well with cool toned base colors while copper tones complement warm skin undertones perfectly.
Reverse French Designs
Reverse French manicures flip the traditional concept by placing color at the nail base instead of tips. We create this look by applying colored polish to the cuticle area while keeping nail tips in nude or clear shades. This design elongates fingers visually and works with any nail length.
Double reverse French designs feature two colored bands near the cuticle for added dimension. Thin lines of contrasting colors create sophisticated geometric patterns that feel modern yet refined. Black reverse French looks particularly striking against nude bases for dramatic contrast.
Gradient reverse designs blend darker shades at the cuticle into lighter tones toward the tip. This technique creates beautiful depth while maintaining the classic French manicure elegance we all love.
Glitter French Accents
Glitter transforms traditional French tips into dazzling statement pieces perfect for celebrations or nights out. We apply fine glitter polish over white tips for subtle sparkle or use chunky glitter for maximum impact. Gold glitter adds warmth while silver creates cool elegance.
Glitter ombre tips start with heavy glitter concentration at the nail edge and fade toward the base. This creates beautiful light reflection patterns that change with hand movement. Holographic glitters produce rainbow effects that shift colors in different lighting conditions.
Accent nail glitter French combines traditional white tips on most nails with one dramatic glitter tip per hand. This balanced approach lets you enjoy sparkle without overwhelming your overall look. Clear glitter over colored tips creates subtle texture while maintaining color vibrancy underneath.
Seasonal Nail Art Inspirations
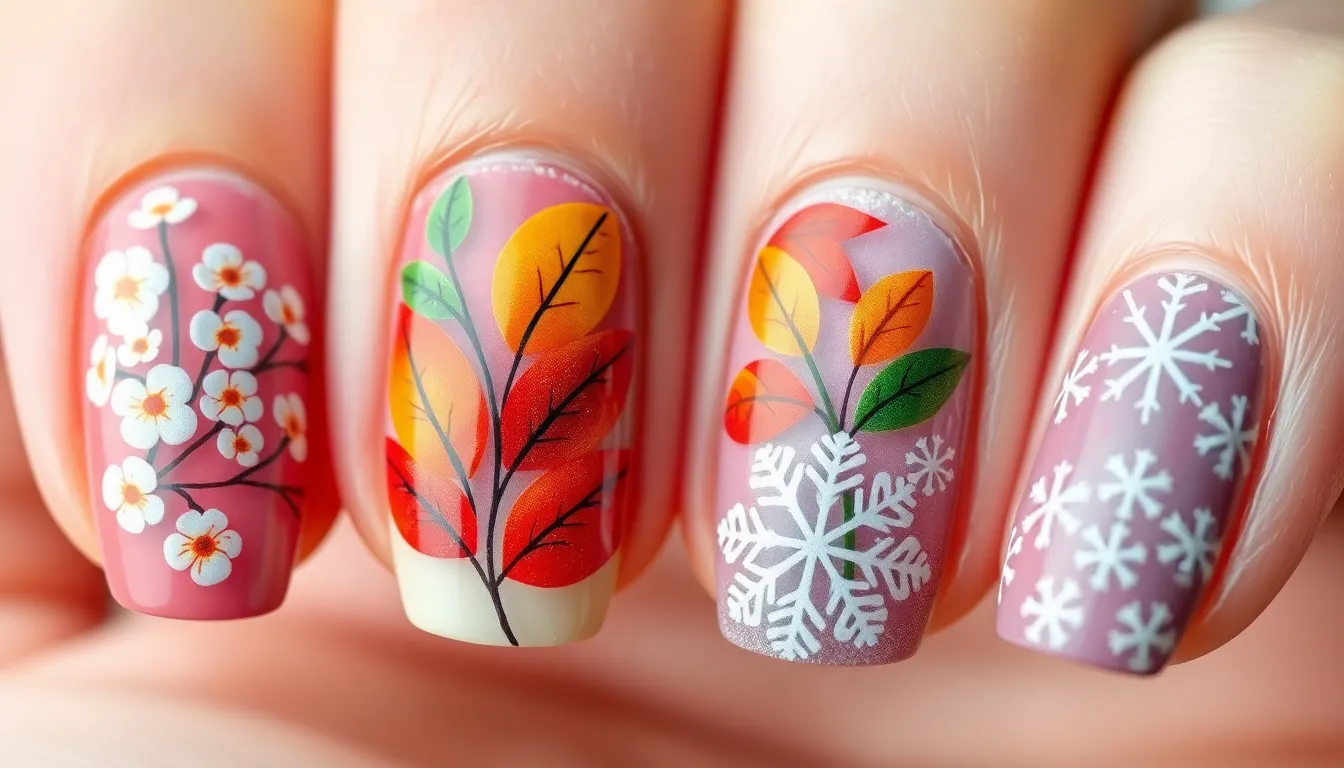
Seasonal nail art allows us to celebrate nature’s changing beauty while keeping our style fresh throughout the year. Each season brings unique color palettes and design elements that perfectly complement the mood and energy of different times.
Spring Floral Patterns
Delicate cherry blossoms create stunning spring nail designs with soft pink petals and thin brown branches. We recommend using a light pink base with white dotting tools to create small flower clusters along the nail edges.
Tulip designs work beautifully on shorter nails using bright yellows, pinks, and purples. Simple tulip shapes paired with thin green stems give nails a fresh garden feel that captures spring’s awakening energy.
Daisy chains offer a playful approach with white petals and yellow centers scattered across pastel backgrounds. These cheerful flowers look especially gorgeous on accent nails when paired with solid spring colors like mint green or lavender.
Watercolor florals blend multiple spring shades together for an artistic, painterly effect. Using a makeup sponge to dab colors like coral, yellow, and soft pink creates beautiful bleeding effects that mimic watercolor paintings.
Summer Beach Vibes
Ocean wave designs capture summer’s essence using blue and white marble techniques. We create these by swirling navy, turquoise, and white polish together while wet, then adding small white dots for sea foam.
Tropical palm leaves bring vacation vibes to any summer look using vibrant greens and gold accents. These designs work perfectly on longer nails where we have space to paint detailed frond patterns.
Sunset ombre effects blend warm oranges, pinks, and yellows from cuticle to tip. This gradient technique requires a makeup sponge to blend colors while they’re still wet, creating smooth transitions that mirror summer evening skies.
Seashell accents add texture and dimension using iridescent polishes and small gems. We recommend painting shell shapes in pearl white or soft pink, then adding tiny crystals to create that authentic beach glass sparkle.
Fall Autumn Leaves
Maple leaf designs showcase autumn’s rich color palette using deep reds, burnt oranges, and golden yellows. Hand painting individual leaves requires thin brushes, but the detailed results perfectly capture fall’s natural beauty.
Plaid patterns bring cozy autumn vibes using traditional fall colors in checkered designs. We create these by painting horizontal and vertical lines in alternating colors like burgundy, forest green, and mustard yellow.
Pumpkin spice themes incorporate warm oranges and browns with small pumpkin accents. These seasonal designs look especially festive when we add tiny painted stems and swirling vine details.
Woodland creatures like foxes and owls add whimsical touches to fall nail art. Simple silhouettes in brown and orange tones work well on accent nails, paired with solid autumn colors on remaining fingers.
Winter Holiday Themes
Snowflake designs create magical winter wonderlands using white polish on dark blue or black backgrounds. Each snowflake should be unique, just like in nature, using dotting tools and thin brushes for intricate patterns.
Christmas trees bring festive cheer using classic green triangles with colorful ornament dots. We recommend adding tiny gold stars at the top and small rhinestones as ornaments for extra sparkle.
Holiday glitter gradients blend red and green glitters from the nail base upward. This technique creates stunning depth when we layer different glitter sizes and add gold accents for luxurious holiday shine.
Candy cane stripes offer a playful twist using traditional red and white diagonal patterns. These work beautifully as accent nails when paired with solid red or green polish on remaining fingers for balanced holiday style.
Minimalist Nail Design Trends
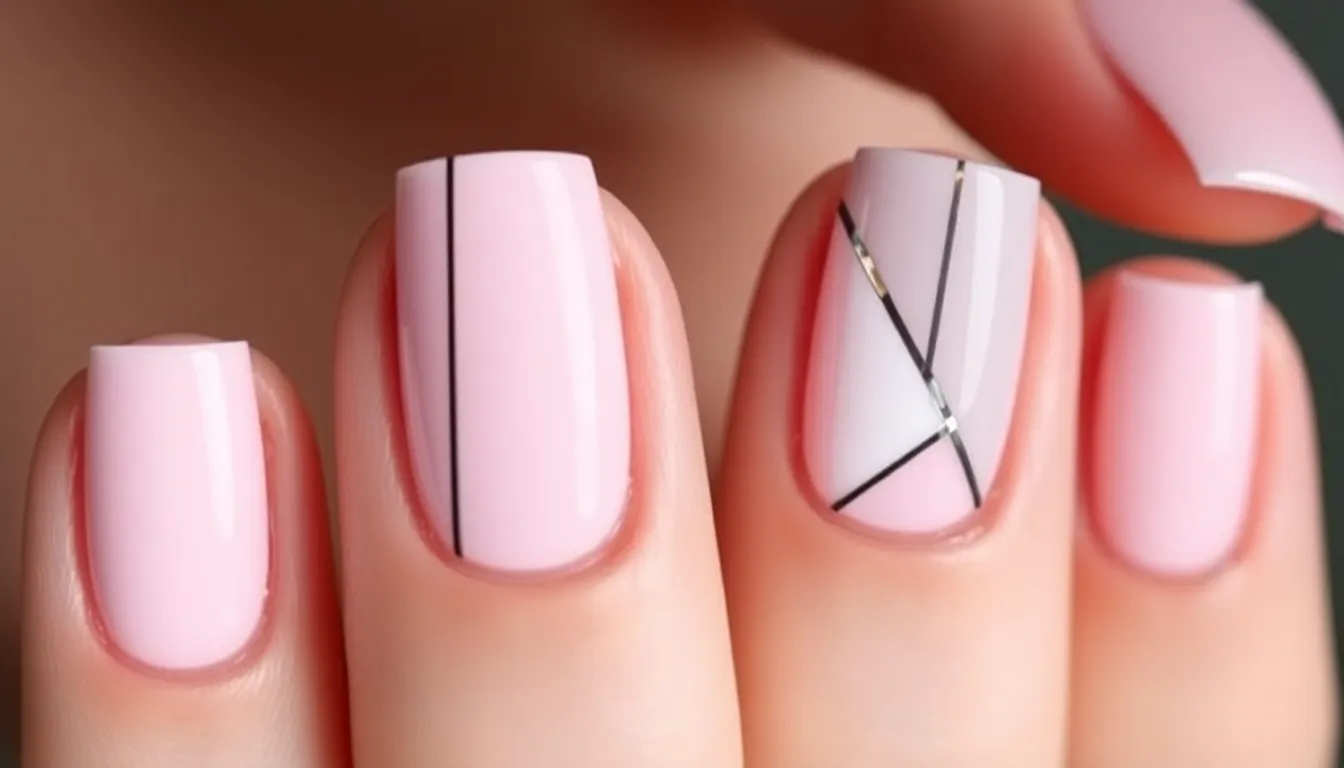
We’re embracing the beauty of simplicity as minimalist nail designs continue dominating the nail art industry. These refined looks prove that less is more when creating sophisticated manicures that complement any style.
Simple Geometric Shapes
Geometric shapes bring modern sophistication to minimalist nail art through clean lines and precise angles. We love creating triangular patterns using tape as a guide, painting crisp points that add visual interest without overwhelming the nail. Square patterns work beautifully for those preferring structured designs, while circles offer a softer geometric approach that’s perfect for everyday wear.
Diagonal lines create ever-changing movement across the nail bed, making fingers appear longer and more elegant. We recommend using thin nail art brushes to achieve perfectly straight edges, or investing in striping tape for foolproof results. Diamond shapes positioned at the nail’s center create stunning focal points, especially when executed in contrasting colors against nude bases.
Negative Space Designs
Negative space manicures showcase the natural nail while incorporating artistic elements that feel fresh and contemporary. We create these designs by leaving strategic portions of the nail unpainted, forming intentional gaps that become part of the overall aesthetic. Crescent shapes at the nail base offer a modern twist on traditional half moon manicures.
Cutout designs using geometric shapes like triangles or rectangles add architectural interest to the nail canvas. We achieve these looks by applying base coats, then carefully painting around desired shapes using thin brushes or nail tape. Linear negative space designs create striking patterns by alternating painted and unpainted sections across the nail width.
Window pane effects divide the nail into sections, with some areas painted and others left natural. We find these designs particularly effective when using sheer polishes that allow the natural nail to show through subtly.
Single Accent Nail Ideas
Single accent nails provide the perfect balance between simplicity and statement making in minimalist designs. We typically choose the ring finger for accent placement, though any finger works depending on personal preference. Metallic accents using gold or silver polish create luxurious touches that elevate the entire manicure.
Textured accent nails incorporate matte topcoats over glossy base colors, creating subtle contrast that catches light beautifully. We love adding single rhinestones or small nail gems to accent nails for special occasions. Glitter gradients starting at the nail tip and fading toward the cuticle create elegant sparkle without overwhelming other nails.
Color blocking on accent nails uses bold hues against neutral backgrounds, making the design pop while maintaining overall sophistication. We recommend choosing accent colors that complement your skin tone and wardrobe for maximum versatility.
Bold Statement Nail Art
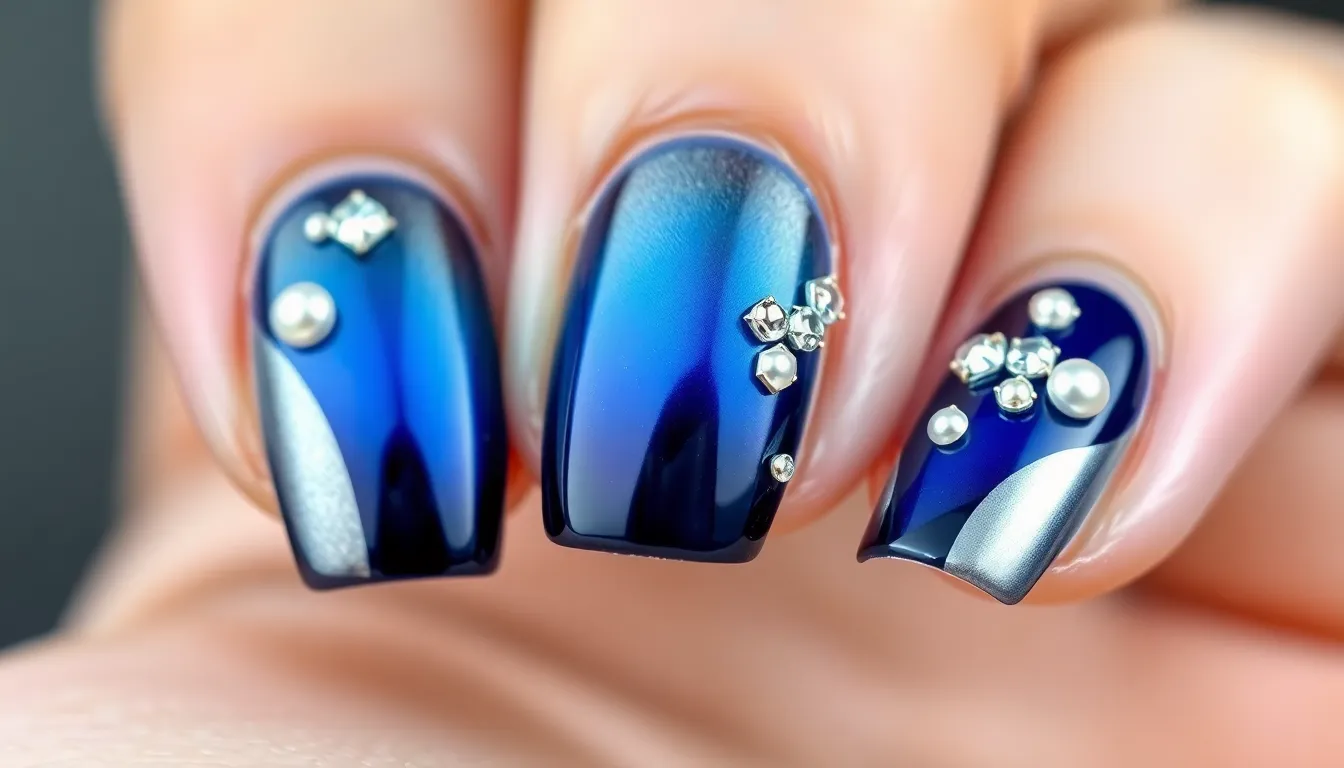
When we want our nails to command attention, bold statement designs become our artistic canvas for self-expression.
Ombre and Gradient Effects
Creating stunning ombre nail effects transforms ordinary manicures into mesmerizing gradients that catch light beautifully. We achieve the most dramatic results by blending contrasting colors like deep midnight blue fading to silver, or vibrant magenta melting into soft lavender. Popular techniques include using makeup sponges to dab and blend colors seamlessly, creating that perfect gradient transition across each nail.
Vertical gradients work exceptionally well on longer nails, allowing colors to flow from cuticle to tip in elegant waves. Horizontal ombre effects spread across all five fingers, creating a sunset-inspired rainbow that makes our entire hand a work of art. Glitter gradient overlays add sparkle dimension, with fine glitter concentrated at the tips and gradually fading toward the base for sophisticated shine.
Temperature-changing ombre polishes react to heat, shifting from one color family to another as our body temperature fluctuates throughout the day. We recommend starting with lighter shades at the base and building darker tones toward the tips for the most flattering visual elongation effect.
3D Embellishments and Textures
Dimensional nail art elevates our designs beyond flat surfaces, creating tactile masterpieces that demand closer inspection. Rhinestone clusters form intricate patterns like flower petals or geometric mandalas, with each crystal catching light at different angles for maximum sparkle impact. Pearl accents offer elegant sophistication, whether arranged in delicate lines or clustered at accent points for vintage-inspired glamour.
Caviar beads create unique textured surfaces that feel like tiny bumps under fingertips, perfect for covering entire accent nails or creating bordered designs. 3D nail charms include miniature bows, hearts, and abstract shapes that attach securely with nail glue for long-lasting dimension. Raised gel techniques build sculptural elements directly onto the nail surface, forming flowers, leaves, or abstract artistic swirls.
Wire nail art incorporates thin metallic wires shaped into spirals, hearts, or abstract designs that float above the nail surface. We secure these dimensional elements with multiple top coat layers, ensuring they stay attached while maintaining their striking three-dimensional effect.
Metallic Chrome Finishes
Chrome nail finishes deliver mirror-like reflectivity that transforms our nails into liquid metal masterpieces. Silver chrome creates the classic high-shine finish that reflects light like polished steel, working beautifully with both short and long nail lengths. Gold chrome offers warm luxury appeal, especially stunning when paired with geometric accent designs or negative space cutouts.
Rainbow chrome powders shift through multiple color spectrums depending on viewing angles, creating holographic effects that seem to move with our hands. Copper chrome provides rich warmth that complements autumn color palettes and works exceptionally well with matte accent nails for contrast. Rose gold chrome delivers romantic elegance that pairs beautifully with blush tones and neutral color schemes.
Application requires gel base coats cured under UV light, followed by chrome powder rubbed directly onto the tacky surface for maximum reflectivity. Color-shifting chrome combines multiple metallic tones in single applications, creating ever-changing finishes that appear different under various lighting conditions. We seal chrome effects with specialized top coats designed to maintain their mirror-like intensity without dulling the metallic shine.
Color-Blocking Nail Combinations
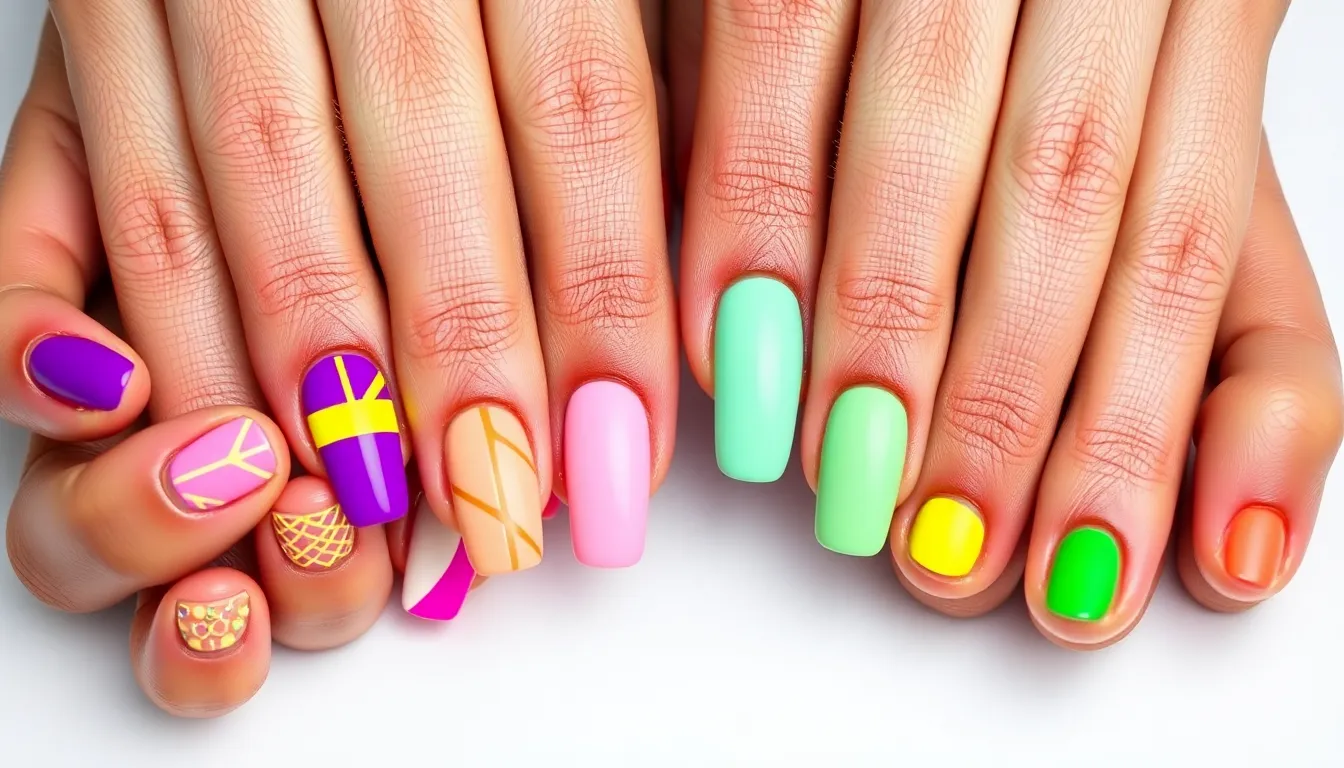
Color blocking creates striking visual impact by pairing distinct shades in bold geometric patterns. We’ll explore how strategic color placement transforms nails into modern art pieces.
Complementary Color Schemes
Purple and yellow combinations deliver maximum visual impact when applied in alternating blocks across fingertips. Orange pairs beautifully with deep blue shades, creating electric contrast that photographs wonderfully under any lighting. Red and green color blocks offer classic holiday appeal while maintaining year round sophistication.
Split diagonal designs work exceptionally well with complementary pairs like pink and mint green. We recommend using tape guides to achieve crisp lines between contrasting sections. Navy blue combined with coral creates nautical inspired elegance that suits both professional and casual settings.
Vertical color blocking allows complementary shades to share equal nail space. Turquoise paired with warm orange produces tropical vibes perfect for summer occasions. Deep plum combined with bright yellow generates dramatic contrast suitable for evening events.
Monochromatic Palettes
Tonal blue variations create sophisticated depth using navy, royal blue, and powder blue across different fingers. Gradient transitions between similar shades produce seamless color flow while maintaining distinct blocking sections. Light blue base coats paired with darker blue tips generate subtle yet noticeable dimension.
Pink spectrum blocking incorporates dusty rose, fuchsia, and ballet pink for romantic appeal. We suggest alternating between warm and cool pink tones to create visual interest without overwhelming contrast. Blush pink combined with deep magenta offers perfect balance for professional environments.
Grey scale combinations use charcoal, silver, and pearl shades for timeless elegance. Metallic grey accents enhance matte grey bases, adding luxurious texture variation. Warm grey paired with cool grey tones creates sophisticated neutrality suitable for any wardrobe.
Neon Pop Combinations
Electric lime and hot pink blocks command attention with their vibrant energy and bold personality. Neon orange paired with bright purple creates festival ready designs perfect for concerts and summer events. Fluorescent yellow combined with electric blue generates retro inspired appeal reminiscent of 1980s fashion.
Alternating neon patterns work best when limited to two or three colors maximum per manicure. We recommend using neon pink, electric green, and bright orange in geometric triangle formations. Checkerboard patterns using neon yellow and hot pink create playful designs ideal for casual outings.
Neon accent placement transforms neutral bases with strategic bright color positioning. Electric blue tips over nude bases create subtle yet striking contrast. Neon green half moon designs paired with black backgrounds generate dramatic nighttime appeal perfect for special occasions.
Textured Nail Art Techniques
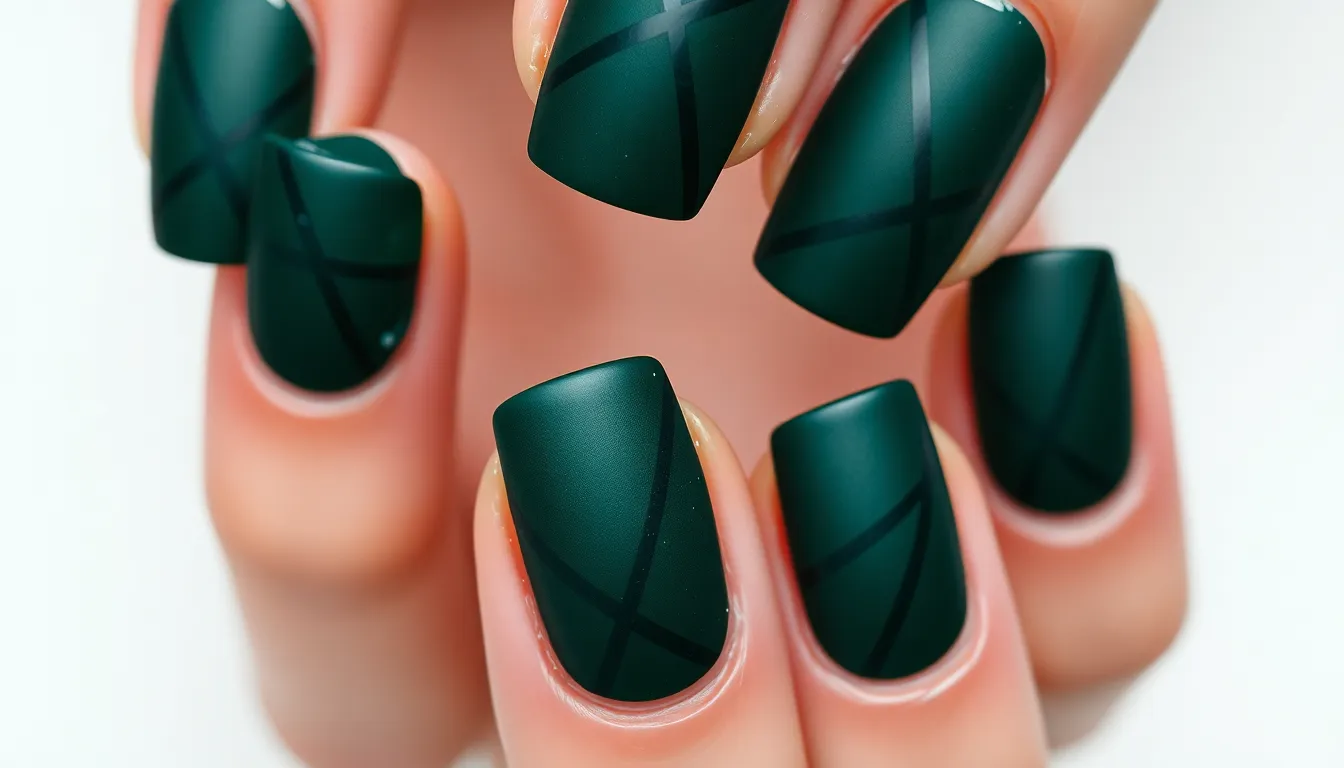
Textured nail art opens up endless creative possibilities beyond traditional polish finishes. These techniques transform your nails into dimensional artworks that catch light and attention in unique ways.
Matte Finish Designs
Matte nail designs create sophisticated elegance through their velvety appearance and subtle depth. We achieve this stunning effect by applying a matte top coat over any base color, instantly transforming glossy finishes into chic statement pieces.
Color combinations work beautifully with matte finishes, particularly deep jewel tones like emerald green, sapphire blue, and burgundy red. Neutral shades such as dusty rose, taupe, and charcoal gray also shine in matte formulations. Geometric patterns pop dramatically when we combine matte and glossy sections on the same nail, creating striking contrast through texture variation.
Application techniques require exact steps for professional results. We start with a smooth base coat, apply two thin layers of color polish, then finish with matte top coat using gentle strokes. Maintenance stays simple since matte finishes hide minor imperfections while lasting up to two weeks with proper care.
Glitter and Sparkle Applications
Glitter applications transform ordinary manicures into dazzling displays of light and movement. Fine glitter creates subtle shimmer perfect for everyday wear, while chunky hexagonal pieces deliver bold party ready drama.
Placement strategies maximize visual impact through strategic application methods. We concentrate glitter at nail tips for elegant fade effects, create accent nails with full glitter coverage, or apply delicate scattered sparkles across entire nail surfaces. Gradient techniques blend multiple glitter sizes, starting with fine particles at the base and building to larger pieces toward tips.
Color coordination enhances overall design harmony by matching glitter tones to base colors or choosing complementary shades. Silver glitter pairs beautifully with cool tones like blue and purple, while gold sparkles complement warm colors such as coral and peach. Mixing different glitter shapes including stars, hearts, and holographic pieces adds playful dimension to any design.
Velvet Powder Effects
Velvet powder creates luxurious textured surfaces that feel as amazing as they look. Application requires exact timing since we must work quickly before base polish dries completely.
Powder colors range from classic black and navy to vibrant options like hot pink, electric blue, and rich purple. Neutral tones including cream, beige, and soft gray provide sophisticated alternatives for professional settings. Layering different powder shades creates ombre effects and dimensional color transitions.
Technique mastery involves precise steps for flawless results. We apply base color polish, immediately dip wet nails into velvet powder, then gently tap off excess particles. Sealing becomes crucial using specialized top coats designed for textured finishes, ensuring longevity without flattening the velvet effect.
Design possibilities expand through creative applications like velvet French tips, accent nail combinations, or geometric patterns using tape guides. Maintenance requires gentle handling since velvet textures can collect debris more easily than smooth finishes.
Abstract and Artistic Patterns
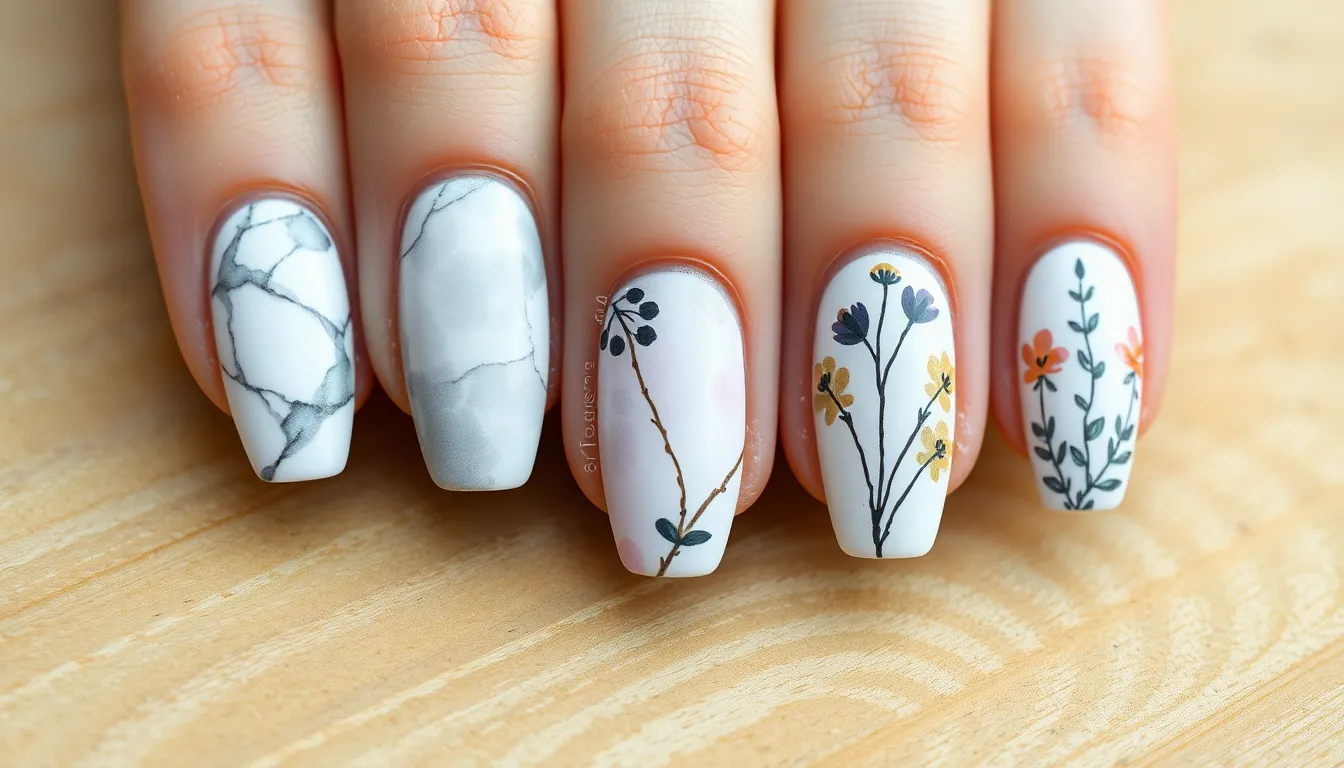
Abstract nail designs transform your fingertips into miniature canvases, celebrating creative expression through flowing forms and artistic techniques. We’ve discovered these patterns offer endless possibilities for showcasing personal style while incorporating sophisticated artistic elements.
Marble Effect Designs
Marble patterns create luxurious sophistication through swirling veins and organic movement across each nail. We achieve this stunning effect by dropping different colored polishes into water and gently swirling with a toothpick before dipping our nails.
Classic marble combinations include white and gray for timeless elegance, black and gold for dramatic luxury, and pink and white for feminine charm. We recommend starting with two contrasting colors to master the technique before experimenting with multiple shades.
Water marbling technique requires room temperature water and quick polish drops to prevent spreading too rapidly. We’ve found that adding one drop of each color alternately creates the most balanced patterns, while gentle circular motions with a toothpick produce natural marble veining.
Dry brush marbling offers more control for beginners, using a fan brush to blend colors directly on the nail surface. We apply a base color first, then drag a barely damp brush loaded with contrasting polish across the nail in sweeping motions.
Watercolor Nail Art
Watercolor effects capture the dreamy, translucent quality of traditional watercolor paintings through soft color blending. We create these artistic looks using diluted polishes or specialized watercolor nail paints that flow naturally across the nail surface.
Wet on wet technique involves applying colors while the base is still slightly damp, allowing pigments to bloom and spread organically. We’ve discovered this method works best with gel polishes that remain workable longer than traditional lacquers.
Color bleeding effects produce stunning gradients by placing different colored drops near each other and letting them naturally merge. We use alcohol or polish thinner to encourage color movement and create ethereal transitions between hues.
Floral watercolor patterns combine soft petal shapes with flowing color washes for romantic appeal. We paint basic flower outlines first, then add watercolor washes around and through the design using a damp brush loaded with diluted polish.
Abstract wash backgrounds serve as beautiful bases for other nail art elements, created by applying multiple thin color layers with varying transparency levels. We blend colors while wet to achieve seamless transitions that mimic traditional watercolor paper effects.
Hand-Painted Illustrations
Hand painted nail art showcases artistic skill through detailed illustrations created with fine brushes and steady hands. We transform nails into tiny masterpieces featuring everything from botanical elements to whimsical characters.
Fine line work requires specialized nail art brushes with pointed tips for creating intricate details and precise outlines. We’ve found that quality brushes make the difference between amateur and professional looking results, investing in various sizes from 0 to 2.
Botanical illustrations capture nature’s beauty through detailed leaf patterns, flower studies, and tree branches painted directly on the nail surface. We start with basic shapes and gradually add layers of detail, using different green tones to create depth and dimension.
Portrait and figure work challenges advanced artists to create recognizable faces or silhouettes within the small nail canvas. We recommend practicing on paper first and using reference photos to ensure proper proportions and facial features.
Miniature industry scenes tell complete stories across single nails or nail sets, featuring mountains, forests, or cityscapes. We build these compositions in layers, starting with backgrounds and gradually adding foreground elements for proper depth perception.
Abstract expressionist styles embrace free form painting with bold strokes and emotional color choices rather than realistic representation. We encourage experimentation with brush techniques, color combinations, and spontaneous mark making to develop personal artistic voice.
Special Occasion Nail Ideas
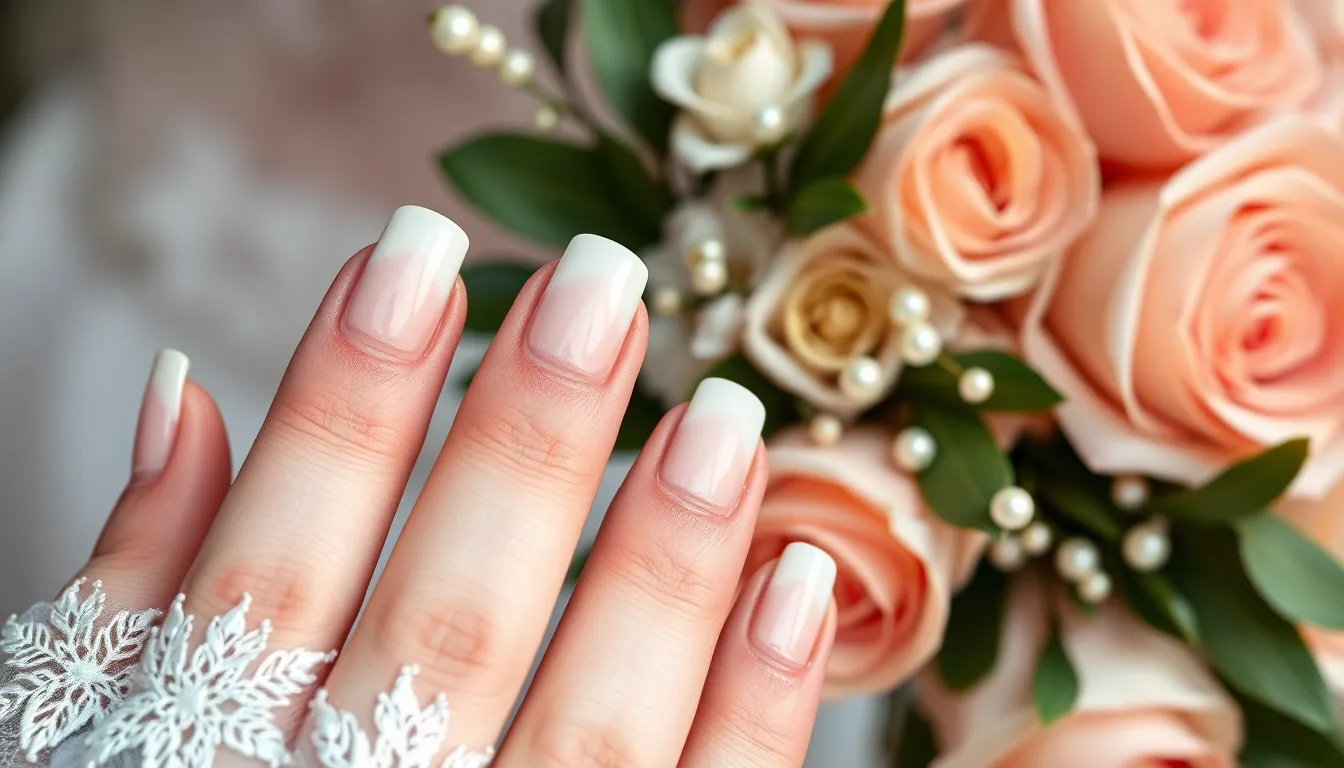
Life’s special moments deserve nail designs that capture the significance of each celebration. We’ll explore stunning manicure ideas perfectly suited for weddings, parties, and professional settings.
Wedding and Bridal Designs
Bridal designs require timeless elegance that complements your wedding day vision. Classic white French tips remain the most popular choice among brides, offering sophistication that photographs beautifully. Soft pink bases with pearl accents create romantic charm perfect for traditional ceremonies. Delicate lace patterns painted in white or nude shades mirror the intricate details of wedding gowns.
Neutral ombre effects blend seamlessly with any bridal style. Champagne to nude gradients add subtle glamour without overwhelming your overall look. Rose gold chrome finishes provide modern luxury while maintaining bridal appropriateness. Minimalist designs featuring small rhinestone accents on ring fingers create focal points that highlight wedding bands.
Vintage inspired motifs transport your manicure to romantic eras. Art deco patterns in gold and nude tones complement vintage wedding themes perfectly. Subtle floral vines painted along nail edges echo garden party ceremonies. Matte finishes in dusty rose or lavender shades create understated elegance for outdoor weddings.
Party and Event Looks
Party nails demand bold creativity that matches celebratory energy. Holographic chrome finishes catch light beautifully under party lighting, creating mesmerizing rainbow effects. Glitter gradients starting from cuticles and fading toward tips add sparkle without overwhelming smaller nail beds. Black bases with metallic geometric patterns create sophisticated nighttime glamour.
Festival and concert designs embrace vibrant self expression. Neon color blocking in electric blue, hot pink, and lime green combinations create eye catching statements. Glow in the dark polishes charge under lights and illuminate dance floors. Caviar bead textures in multiple colors add tactile interest that photographs dynamically.
Holiday party themes incorporate seasonal celebration elements. Gold foil accents shaped like stars or crescents add celestial magic to deep burgundy bases. Velvet powder effects in emerald green create luxurious texture perfect for formal gatherings. Alternating metallic and matte finishes on different nails add visual complexity to party looks.
Professional Work Appropriate Styles
Corporate environments require polished designs that maintain professional standards. Nude shades in taupe, beige, and soft pink tones complement business attire seamlessly. Short square shapes with glossy topcoats create clean, maintained appearances. Single accent nails in subtle metallics add personality without disrupting workplace dress codes.
Conservative offices appreciate classic sophistication with minimal embellishment. French manicures with slightly rounded tips appear timeless and well groomed. Soft gray or mushroom tones provide modern alternatives to traditional nude shades. Matte topcoats over neutral colors create contemporary finishes that remain workplace appropriate.
Client facing roles benefit from understated elegance that inspires confidence. Monochromatic schemes using different shades of the same color family create depth without distraction. Negative space designs incorporating thin geometric lines add modern sophistication. Clear bases with minimal white tips maintain professionalism while showing attention to personal grooming details.
DIY Nail Design Tips and Tricks
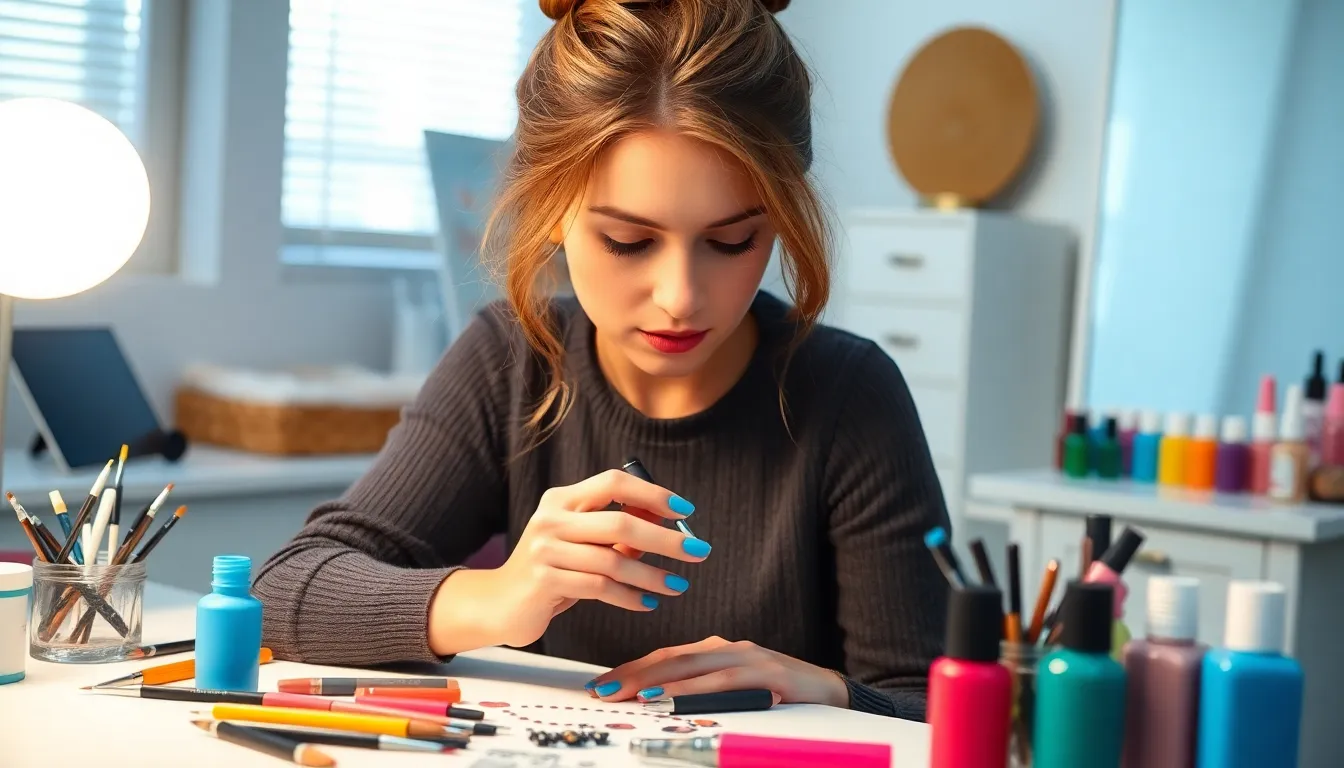
Mastering nail art at home becomes achievable when you understand the fundamental techniques and tools. We’ll guide you through the essential elements that transform basic manicures into professional-looking designs.
Essential Tools and Supplies
Base coat and top coat form the foundation of every successful nail design. We recommend investing in high-quality formulas that protect your natural nails and extend design longevity to 7-10 days.
Detail brushes in various sizes enable precise artwork creation. Fine liner brushes work perfectly for intricate patterns, while flat brushes excel at color blocking and geometric shapes.
Dotting tools create perfect circles and decorative patterns effortlessly. These inexpensive tools come in multiple tip sizes, allowing you to create everything from tiny polka dots to large accent circles.
Nail tapes and stencils ensure crisp, clean lines in your designs. Striping tape creates perfect geometric patterns, while curve stencils help achieve flawless French tip applications.
Quality nail polish collection should include essential colors like black, white, nude, and metallic shades. We suggest building your collection gradually, focusing on versatile colors that work across multiple design styles.
UV or LED lamp becomes necessary for gel polish applications that offer superior durability. Gel systems provide chip-resistant wear for up to 2-3 weeks compared to traditional polish.
Step-by-Step Application Techniques
Prepare your nails by pushing back cuticles, filing to your desired shape, and gently buffing the surface. Clean nails with rubbing alcohol to remove oils and ensure better polish adhesion.
Apply thin base coat layers rather than thick applications that can bubble or peel. We recommend waiting 2-3 minutes between each layer to prevent smudging and achieve smooth coverage.
Use the three-stroke method for even polish application: one stroke down the center, followed by strokes on each side. This technique minimizes streaking and ensures consistent color distribution.
Create designs while polish remains slightly tacky for better adherence of additional elements. Rhinestones, glitter, and decals bond more securely to semi-wet surfaces.
Work systematically from thumb to pinky on one hand before switching to the other. This approach prevents accidental smudging and allows adequate drying time between applications.
Seal everything with top coat to lock in your design and add protective shine. Apply top coat around nail edges to prevent chipping and extend wear time.
Common Mistakes to Avoid
Skipping base coat leads to staining and poor polish adhesion that causes premature chipping. Base coats also smooth ridges and create an even surface for color application.
Applying thick polish layers results in bubbling, extended drying times, and uneven texture. Multiple thin coats provide better coverage and professional-looking results.
Rushing the drying process causes smudges, dents, and imprints that ruin your design. We recommend waiting at least 10 minutes between coats and using quick-dry drops when necessary.
Neglecting cuticle care creates messy, unprofessional appearances around nail edges. Push back cuticles gently and use cuticle oil regularly to maintain healthy nail beds.
Forgetting to clean up mistakes leaves polish on skin that makes designs appear sloppy. Use a small brush dipped in acetone to clean edges and perfect your nail art.
Using old or thick polish creates streaky, difficult-to-apply coverage that frustrates your design efforts. Add nail polish thinner to restore proper consistency rather than using acetone, which breaks down the formula.
Conclusion
We’ve explored countless nail design possibilities that showcase creativity and personal style. From elegant minimalist approaches to bold statement pieces, there’s truly something for every preference and skill level.
Whether you’re drawn to seasonal inspirations, textured finishes, or abstract artistry, the key is experimenting with techniques that speak to your individual aesthetic. Remember that practice makes perfect, and even simple designs can create stunning results when executed thoughtfully.
Your nails are a canvas for self-expression, so don’t be afraid to mix trends and create unique combinations. With the right tools and techniques, you’ll consistently achieve professional-looking manicures that reflect your personality and complement any occasion.
Frequently Asked Questions
What are the most popular nail design trends right now?
Current nail design trends range from minimalist elegance to bold statement pieces. Popular styles include floral patterns, geometric shapes, ombre effects, and metallic accents. French manicure variations with colored tips, negative space designs, and textured finishes like matte and glitter are also trending. These designs offer options for every style preference, from subtle sophistication to eye-catching statements.
How can beginners achieve professional-looking nail art at home?
Start with essential tools like quality base and top coats, detail brushes, dotting tools, and nail tape. Focus on proper nail preparation, apply thin coats systematically, and allow adequate drying time between layers. Begin with simple designs like geometric shapes or single accent nails before progressing to more complex techniques. Practice and patience are key to mastering DIY nail art.
What are some easy seasonal nail art ideas?
Spring: Delicate cherry blossoms and watercolor florals. Summer: Ocean waves, tropical palm leaves, and sunset ombre. Fall: Maple leaves, cozy plaid patterns, and pumpkin spice themes. Winter: Snowflake designs, Christmas trees, and holiday glitter gradients. These seasonal designs capture nature’s beauty and can be adapted for various skill levels.
How do I create perfect ombre and gradient effects?
Use makeup sponges for seamless blending between contrasting colors. Apply your chosen colors to the sponge in overlapping strokes, then dab gently onto the nail. Work quickly while polish is wet, and blend the transition area with light dabbing motions. Finish with a top coat to smooth the texture and enhance the gradient effect.
What nail designs work best for professional settings?
Professional nail designs should be polished yet understated. Opt for nude shades, classic French manicures, or minimalist geometric accents. Single accent nails with subtle metallic details or negative space designs maintain sophistication. Avoid overly bright colors, excessive embellishments, or textured finishes that might appear distracting in workplace environments.
How can I make my textured nail art last longer?
For matte finishes, avoid touching nails frequently and reapply matte top coat weekly. Glitter designs benefit from extra base coat layers and proper sealing with top coat. Velvet powder effects require gentle handling and touch-ups as needed. Always start with proper nail preparation and use quality base coats to ensure better adhesion and longevity.
What are the common mistakes to avoid in nail art?
Never skip the base coat, which protects nails and improves polish adhesion. Avoid applying thick layers that cause bubbling and extended drying times. Don’t rush between coats—allow proper drying time. Neglecting cuticle care creates messy results, and using old, thick polish leads to streaky application. Patience and proper preparation are essential.
How do I choose the right color combinations for nail art?
Use complementary colors like purple and yellow or navy and coral for striking contrast. Monochromatic palettes with tonal variations create sophisticated depth. For bold statements, experiment with neon combinations. Consider the occasion—subtle combinations for professional settings, vibrant choices for parties. Color wheels and online palette generators can provide inspiration for harmonious combinations.

