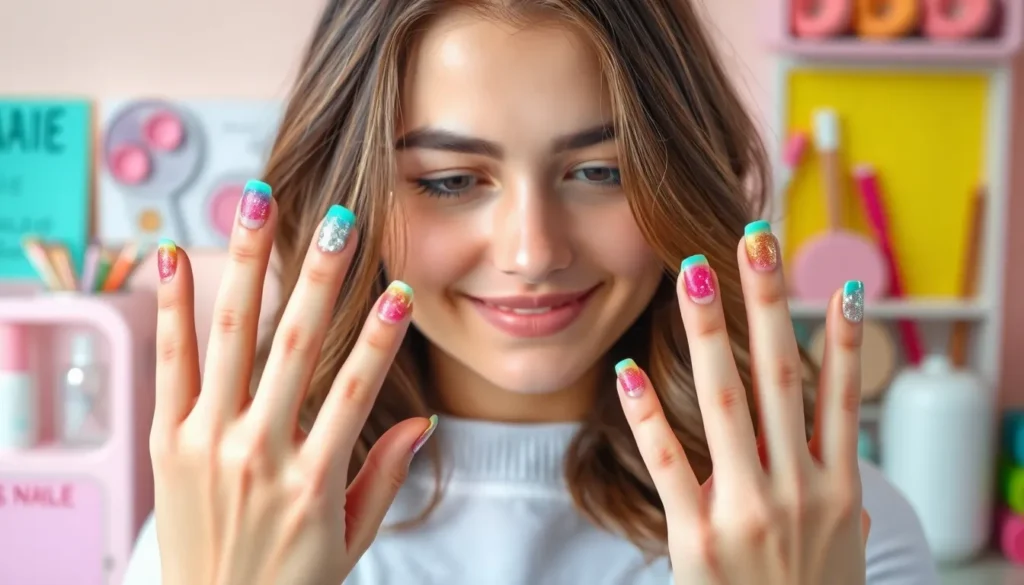
When it comes to expressing our personality and style, few things make a statement quite like perfectly manicured nails. Whether we’re heading to a special event or simply want to brighten our everyday look, cute nail designs have become the ultimate form of self-expression that fits right at our fingertips.
We’ve all scrolled through social media and felt that spark of inspiration when spotting an adorable nail art design. From minimalist dots and delicate florals to bold geometric patterns and seasonal themes, the industry of nail art offers endless possibilities to match our mood and outfit. The best part? Many of these stunning looks are surprisingly achievable at home with just a few basic tools and techniques.
Ready to transform your nails from ordinary to extraordinary? We’ll explore the most trendy and achievable nail ideas that’ll have everyone asking where you got your manicure done – even when you did it yourself.
Classic French Manicure With a Twist
The traditional French manicure gets a modern makeover with creative variations that maintain elegance while adding personality. We’ve discovered that subtle changes to this timeless look create stunning results perfect for any nail enthusiast.
Colored Tips Instead of White
Pink tips bring a soft romantic touch to your French manicure while maintaining the classic silhouette. We recommend using coral shades for summer months and deeper rose tones during fall to complement seasonal wardrobes. Navy blue tips create a sophisticated look that pairs beautifully with professional attire and evening wear.
Mint green offers a fresh alternative that brightens up spring outfits and casual weekend looks. Bold red tips transform the French manicure into a statement piece perfect for special occasions or when you want to make an impression. These colored variations work exceptionally well on both short and medium length nails.
Glitter French Tips
Silver glitter creates an elegant sparkle that catches light beautifully during evening events and holiday celebrations. We love how fine glitter particles blend seamlessly with the natural nail bed for a subtle shimmer effect. Gold glitter tips add warmth and luxury to your manicure while complementing jewelry and accessories perfectly.
Holographic glitter brings a futuristic element to the classic French design with rainbow reflections that change with movement and lighting. Rose gold glitter offers the perfect balance between pink and metallic tones for a romantic yet modern appearance. Apply glitter polish in thin layers to avoid chunky texture and ensure smooth application.
Double French Lines
Thin parallel lines create depth and visual interest while maintaining the French manicure’s clean aesthetic. We suggest using contrasting colors like white and black or nude and gold for maximum impact. The spacing between lines should remain consistent across all nails for a professional finish.
Gradient double lines transition from one color to another for a sophisticated ombre effect that’s surprisingly easy to achieve. Metallic double lines using silver and rose gold combinations add luxury without overwhelming the overall design. This technique works best on longer nails where there’s adequate space to showcase both lines clearly.
Minimalist Nail Art Designs
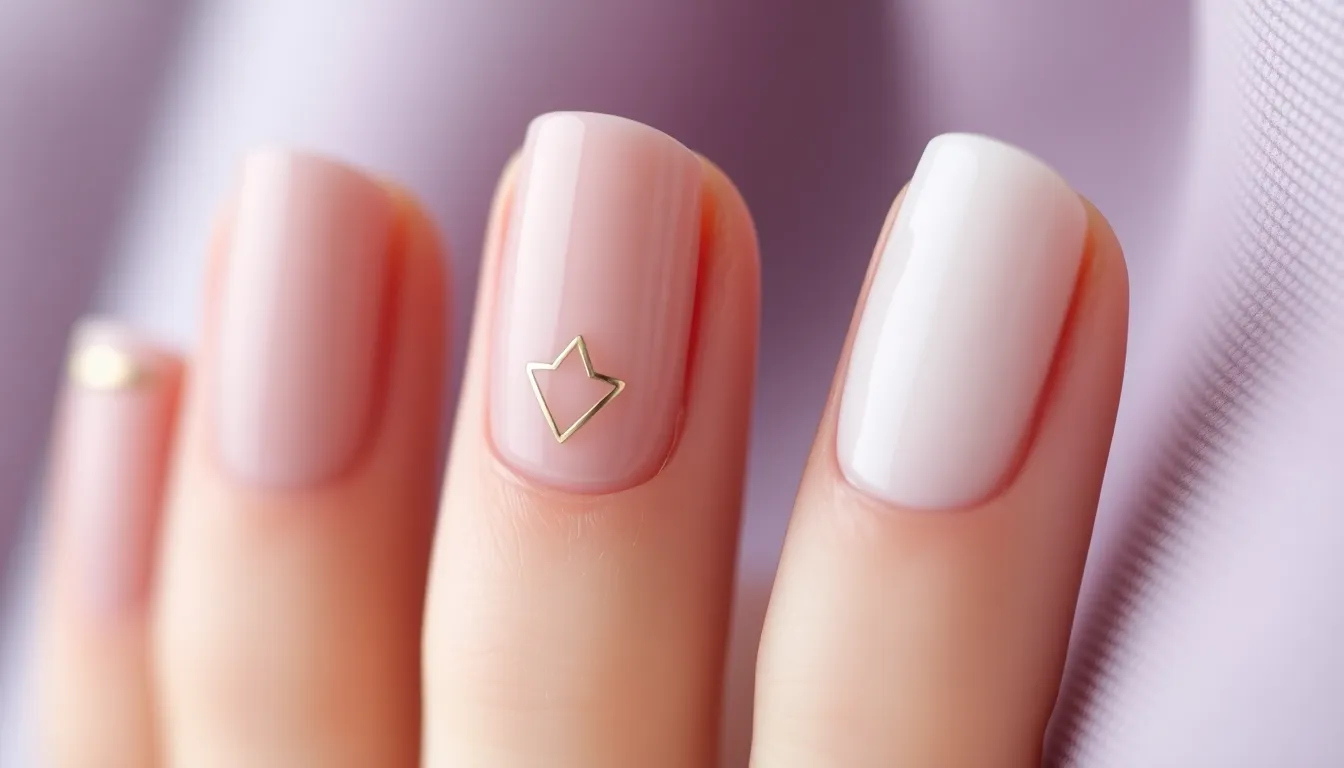
Moving from the elegance of French manicures, we’re exploring the beauty of simplicity with minimalist nail art that creates stunning impact through subtle details.
Single Accent Nail
Creating a focal point with one decorated nail transforms an ordinary manicure into something special. We love choosing the ring finger as our canvas for a delicate design while keeping other nails in a coordinating solid color. Painting a simple geometric shape like a triangle or half moon adds visual interest without overwhelming the overall look.
Selecting metallic accents in gold or silver creates sophistication that works for both casual and formal settings. We recommend using nail tape to achieve clean lines when creating stripes or color blocking designs. Adding a single rhinestone or small dot pattern keeps the design minimal yet eye catching.
Thin Line Designs
Drawing ultra thin lines across nails creates modern geometric patterns that feel fresh and contemporary. We use striping tape or a thin brush to create parallel lines in contrasting colors like black on nude or white on pastels. Positioning vertical lines makes fingers appear longer while horizontal lines create width.
Combining multiple thin lines in varying spacing creates rhythm and movement across the nail surface. We suggest practicing the technique on a nail wheel first to perfect steady hand control. Experimenting with curved lines or subtle waves adds organic flow to the geometric base.
Negative Space Patterns
Leaving portions of the natural nail exposed creates striking contrast with painted areas. We use nail tape to mask off sections before applying color to achieve crisp edges and professional looking results. Designing cut out shapes like circles, triangles, or crescents allows the natural nail to become part of the artwork.
Layering sheer polish over negative space areas creates depth while maintaining the minimalist aesthetic. We recommend starting with simple geometric shapes before advancing to more complex patterns. Highlighting the natural nail with a clear top coat ensures the exposed areas look polished and intentional rather than unfinished.
Floral and Nature-Inspired Cute Nail Ideas
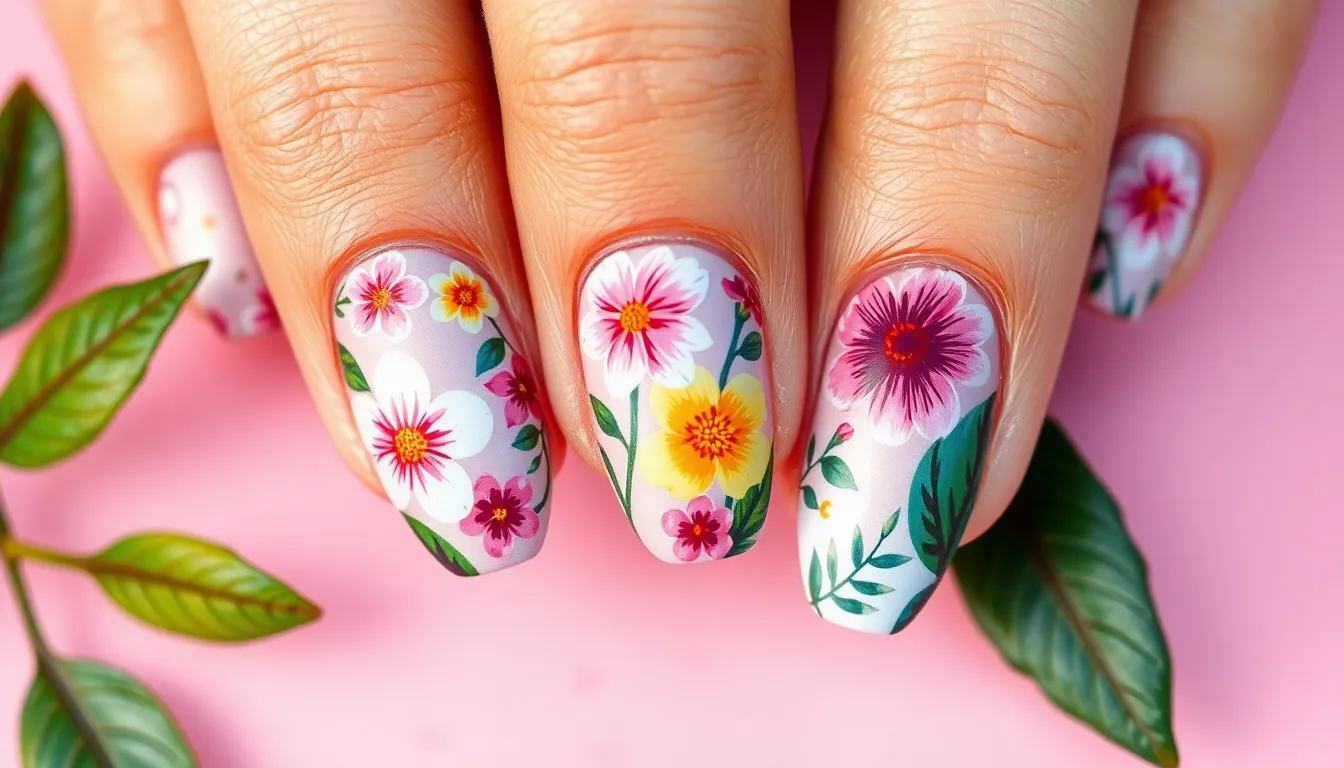
Nature brings endless inspiration for creating delicate and romantic nail designs that celebrate the beauty of the outdoors. Floral patterns and botanical motifs transform ordinary manicures into stunning works of art that feel fresh and feminine.
Hand-Painted Flowers
Delicate daisies create the perfect starting point for beginners exploring floral nail art. We recommend using a dotting tool to place white petals around a yellow center on a soft pink or nude base. Small roses offer another achievable option using a thin brush to create layered petals in shades of coral, blush, or classic red.
Cherry blossoms bring springtime elegance to your fingertips with their signature five-petaled blooms. Create these Japanese-inspired flowers using white or pale pink polish dotted along brown branches for an authentic look. Tiny forget-me-nots work beautifully as accent details, requiring only a small brush to dot blue petals with white centers.
Sunflower designs make bold statements on longer nails using golden yellow petals radiating from dark brown centers. Paint the petals using downward strokes from the center outward for the most realistic effect. Lavender sprigs offer a more subtle approach, created by dotting purple flowers along thin green stems using a striping brush.
Leaf and Vine Patterns
Simple leaf outlines provide elegant alternatives to complex floral designs while maintaining that natural aesthetic. Use a thin brush to paint individual leaves in various shades of green, from sage to forest, positioning them randomly across the nail for organic placement. Eucalyptus leaves create particularly trendy looks with their distinctive oval shape and blue-green coloring.
Climbing vine patterns work exceptionally well on accent nails or as connecting elements across multiple fingers. Start with thin green lines using a striping brush, then add small leaves at regular intervals. Ivy patterns offer classic appeal, especially when painted in deep emerald green with subtle highlights.
Tropical leaf motifs bring vacation vibes to your manicure using broad, dramatic shapes like monstera or palm fronds. These larger designs work best on thumb or middle finger nails where there’s adequate space. Create depth by layering different shades of green and adding white veining details with a fine brush.
Butterfly Accents
Monarch butterfly wings create striking focal points using orange and black color combinations on clear or nude bases. Paint the basic wing shape first, then add the characteristic black veining and white spotted details using a dotting tool. Position butterflies asymmetrically on accent nails for the most natural appearance.
Delicate butterfly silhouettes offer subtler approaches perfect for professional settings or everyday wear. Use metallic polishes like rose gold or silver to paint simple butterfly outlines on neutral backgrounds. These minimalist designs work beautifully when scattered across multiple nails in varying sizes.
Colorful butterfly collections allow creative freedom with rainbow wing combinations and glitter accents. Experiment with blue morpho inspired designs using electric blue and purple gradients, or create garden variety butterflies in yellow, pink, and coral tones. Add tiny rhinestones or micro glitter to wing centers for extra sparkle and dimension.
Seasonal and Holiday Themed Nails
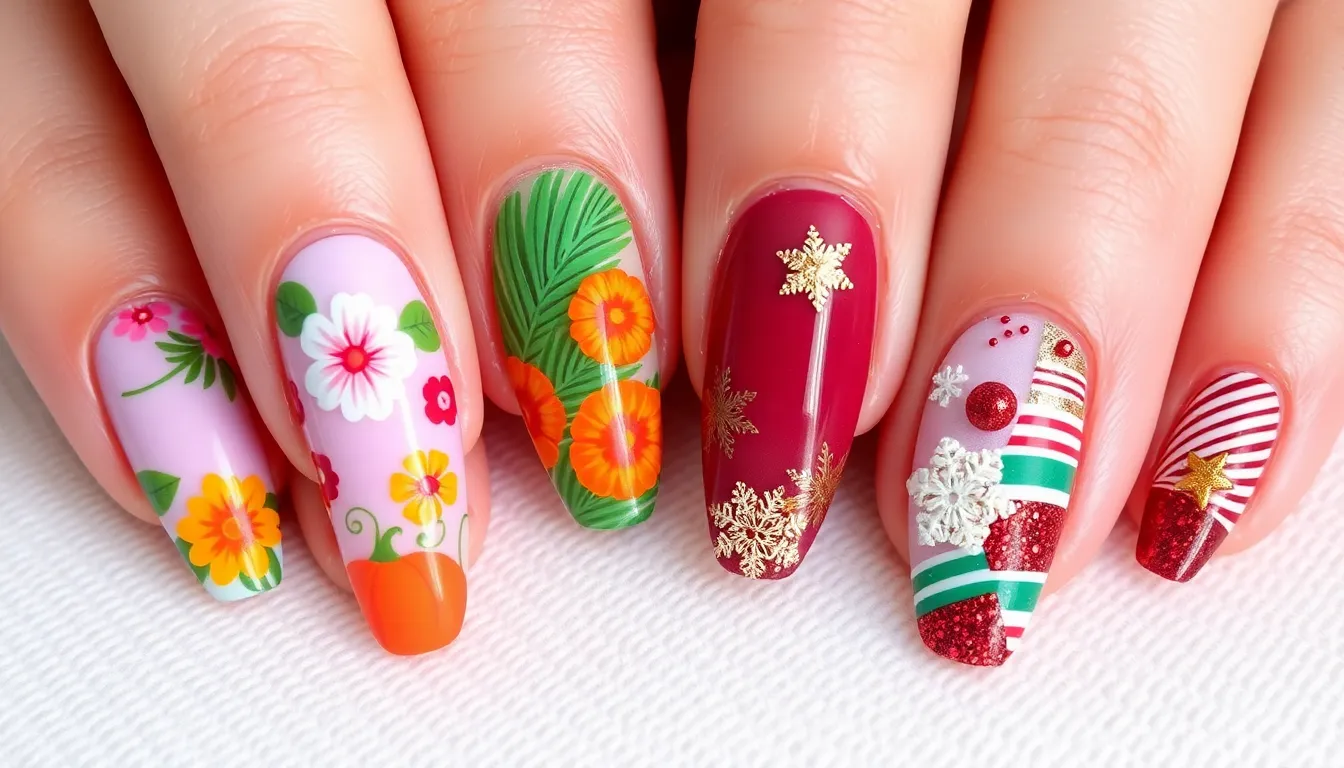
Celebrating each season with themed nail art transforms our manicures into wearable expressions of the year’s natural beauty. These designs capture the essence of changing seasons and special holidays.
Spring Pastel Combinations
Soft pastel shades embody the fresh renewal of springtime perfectly. We recommend pairing baby pink with mint green for a delicate garden-inspired look that complements any spring outfit. Lavender and cream combinations create sophisticated elegance, while coral and peach tones bring warmth to cooler spring days.
Easter celebrations call for special touches like tiny painted eggs or bunny silhouettes on accent nails. Gradient techniques work beautifully with pastels, blending colors like powder blue into white for an ombre cloud effect. Cherry blossom accents using light pink dots and thin brown branches add artistic flair to neutral bases.
Summer Tropical Vibes
Vibrant tropical colors capture the energy and warmth of summer adventures. We love combining turquoise with sunset orange for beach-inspired designs that radiate vacation vibes. Palm leaf patterns painted in forest green over coral bases create instant tropical paradise on our fingertips. Watermelon designs featuring pink and green stripes with tiny black seeds make playful summer statements.
Pineapple accents work wonderfully as single nail art pieces using yellow bases with crosshatch patterns and green tops. Ocean wave designs using various blue shades create movement and depth reminiscent of seaside getaways. Flamingo silhouettes on bright backgrounds add whimsical touches perfect for summer parties.
Fall Autumn Colors
Rich autumn hues reflect the cozy warmth of changing leaves and harvest seasons. We embrace deep burgundy paired with golden yellow for sophisticated fall elegance that complements seasonal wardrobes. Burnt orange combined with chocolate brown creates earthy combinations perfect for October celebrations. Forest green with copper accents brings outdoor autumn beauty to our fingertips.
Thanksgiving nail art features painted turkey feathers, tiny acorns, or maple leaf silhouettes on warm neutral bases. Pumpkin designs using orange gradients and green stem details celebrate the harvest season beautifully. Plaid patterns in autumn colors create cozy cabin vibes using thin brushes or nail tape for clean lines.
Winter Holiday Designs
Festive winter themes bring sparkle and joy to the coldest months of the year. We create magical Christmas designs using red and green combinations with gold accents for traditional holiday elegance. Snowflake patterns painted in white or silver over dark blue bases capture winter’s crystalline beauty perfectly. Christmas tree silhouettes with tiny star toppers make charming accent nail designs.
New Year celebrations call for maximum glamour with glittery champagne shades and metallic accents that catch party lights beautifully. Winter wonderland themes using icy blues and whites with silver details create sophisticated seasonal style. Candy cane stripes and holly leaf patterns bring playful holiday cheer to our manicures throughout December.
Geometric and Abstract Nail Art
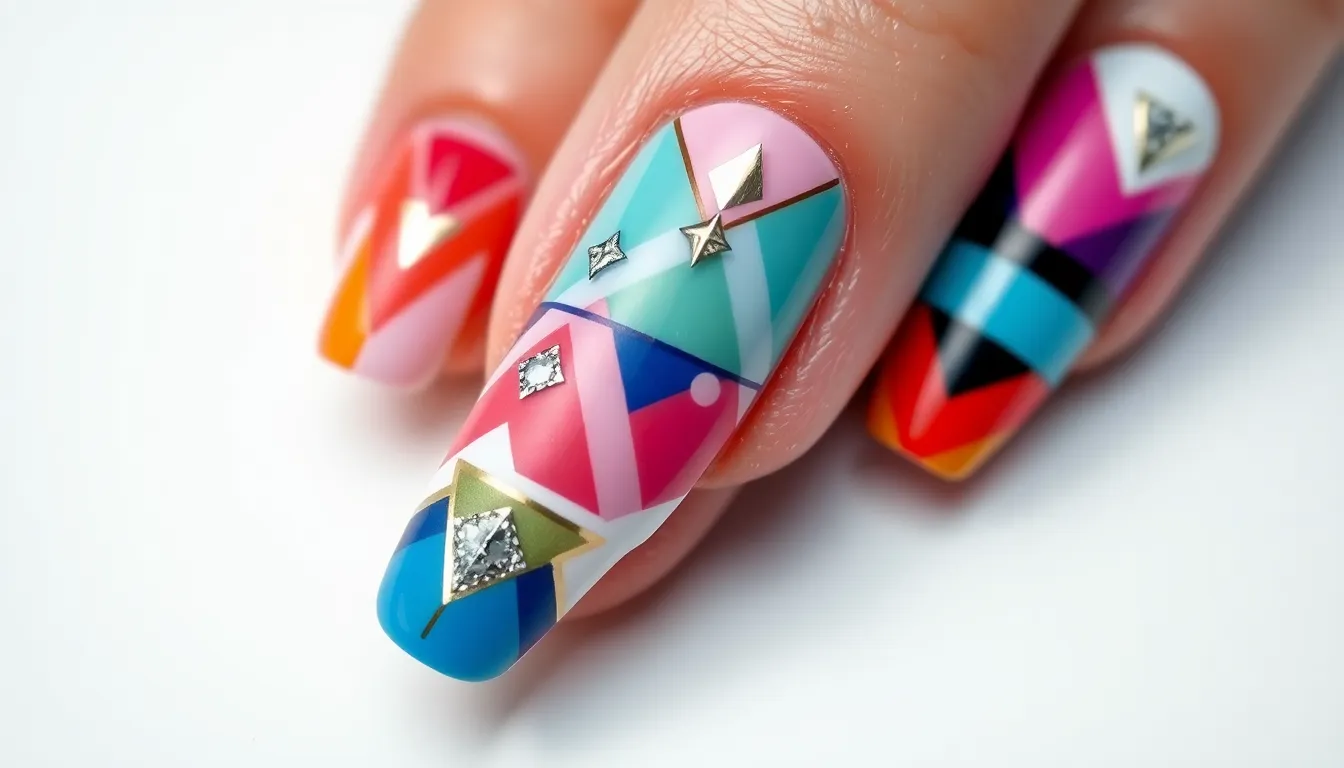
Geometric patterns bring a modern edge to cute nail designs, creating sharp lines and bold shapes that make a striking statement. Abstract art allows endless creativity while maintaining sophisticated appeal.
Triangle and Diamond Shapes
Triangle designs offer versatility with their clean angles and contemporary feel. We recommend starting with negative space triangles using striping tape to create precise edges on a colored base. Metallic triangles in gold or silver create luxury against neutral backgrounds like nude or white. Stacked triangle patterns work beautifully as accent nails, building from the cuticle upward in graduated sizes.
Diamond shapes elevate geometric nail art with their elegant symmetry. Single large diamonds positioned at the nail center become stunning focal points, especially when outlined in contrasting colors. Multiple mini diamonds scattered across each nail create playful sparkle without overwhelming the design. We suggest using nail guides or stencils for perfect diamond proportions, then filling with metallics, pastels, or bold hues like emerald green or sapphire blue.
Combination patterns merge triangles and diamonds for sophisticated complexity. Alternating triangle and diamond accents across fingers creates balanced visual interest. Interlocking geometric shapes in complementary colors produce modern art effects that photograph beautifully for social media.
Color Block Designs
Bold color blocking transforms nails into miniature canvases of contemporary art. We love horizontal blocks dividing nails into equal sections using tape for crisp lines. Vertical color blocks work especially well on longer nails, creating lengthening effects with two or three coordinating shades. Diagonal blocks add ever-changing movement, particularly striking when using opposite colors like coral and teal.
Monochrome blocking maintains sophistication while embracing the trend. Different shades of the same color family create depth without overwhelming brightness. We recommend pink variations from blush to fuchsia, or blue tones ranging from powder to navy. Matte and glossy finishes within the same color add textural interest to monochrome designs.
Rainbow blocks bring playful energy to geometric nail art. Each nail can feature different color combinations, or single nails can display multiple rainbow sections. Pastel rainbow blocks work beautifully for spring, while jewel tones create autumn sophistication. We suggest using a white base to make colors pop more vibrantly.
Marble Effect Patterns
Classic marble recreates natural stone patterns with swirling veins and organic movement. We achieve this look using the water marble technique, dropping polish into water and swirling with a toothpick before dipping nails. White marble with gray veining remains timelessly elegant, while colored marbles in pink, blue, or purple offer contemporary twists.
Dry brush marbling provides easier control for beginners wanting marble effects. Loading a dry fan brush with polish and lightly sweeping across colored bases creates authentic veining patterns. We recommend practicing pressure and direction on paper before applying to nails. Gold or silver metallic veining over dark bases creates luxury marble effects.
Abstract marble combines marble techniques with artistic freedom. Alcohol drops on wet polish create organic burst patterns resembling natural stone formations. Multiple colors swirled together produce galaxy marble effects, especially stunning with dark bases and metallic accents. We love adding tiny rhinestones or glitter to marble designs for extra dimension and sparkle.
Animal Print and Character Nails
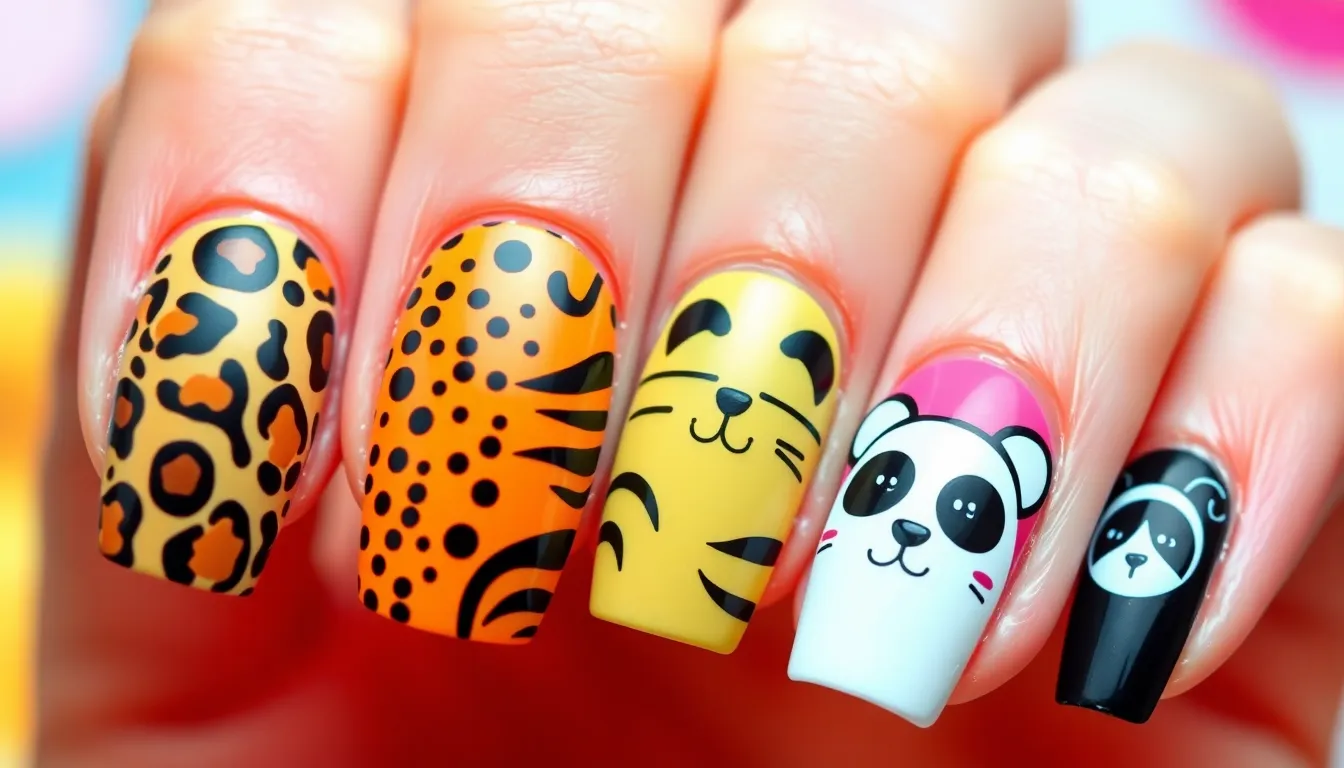
Animal prints and character designs bring playful personality to your manicure while showcasing your creative side. These fun themes create conversation starters that express your unique style.
Leopard and Zebra Prints
Leopard print nails transform your fingertips into wild fashion statements using just three colors. Start with a nude or tan base coat and let it dry completely. Apply irregular black spots using a dotting tool or toothpick, then add smaller brown spots inside each black mark. We recommend practicing the pattern on paper first to master the organic, asymmetrical shape.
Zebra stripe designs require steady hands but deliver stunning results with high contrast appeal. Paint your nails white as the base color and allow them to cure properly. Use a thin striping brush or nail art pen to create curved black lines across each nail. Keep stripes uneven and organic looking rather than perfectly straight for authentic zebra texture.
Animal print accent nails offer a subtle way to incorporate these bold patterns into your look. Choose one or two nails per hand for the print while keeping others in coordinating solid colors like black, white, or nude. This approach balances the design without overwhelming your overall aesthetic.
Cute Animal Faces
Cat face designs bring adorable feline charm to your nails using simple shapes and lines. Paint a base color like pink or gray, then use a black nail art pen to draw two triangle ears at the top. Add whiskers, a small triangle nose, and dot eyes to complete the sweet kitty expression. We suggest using the ring finger as your canvas for maximum impact.
Panda nail art creates irresistible charm with its distinctive black and white markings. Start with a white base and paint two black semicircles at the top for ears. Add oval shaped black patches around small white circles for the signature panda eyes. Finish with a tiny black dot for the nose and you’ll have an instantly recognizable design.
Bear and puppy faces work beautifully on shorter nails and offer endless customization options. Use brown, tan, or golden base colors for different animal variations. Draw rounded ears, button noses, and simple dot eyes to create these loveable creatures. Add tiny pink tongues or rosy cheeks for extra cuteness factor.
Cartoon Character Designs
Disney character nails let you showcase beloved animated favorites with recognizable color schemes and features. Mickey Mouse ears work perfectly as simple black circles on red backgrounds. Minnie Mouse adds polka dots and a bow detail for feminine flair. We recommend choosing characters with distinctive shapes that translate well to the small nail canvas.
Anime inspired designs capture the essence of popular characters through strategic color placement and detail work. Use bright colors like pink, blue, and yellow to represent sailor uniforms or magical girl themes. Simple line work can suggest facial features or clothing elements without requiring advanced artistic skills.
Hello Kitty and kawaii themes embrace Japanese cute culture with soft pastels and charming details. Paint white bases with pink bows, whiskers, and simple facial features using black dots and lines. Add small hearts, stars, or flower accents around the characters for extra sweetness. These designs work especially well on longer nail shapes that provide more decorating space.
Glitter and Metallic Accent Nails
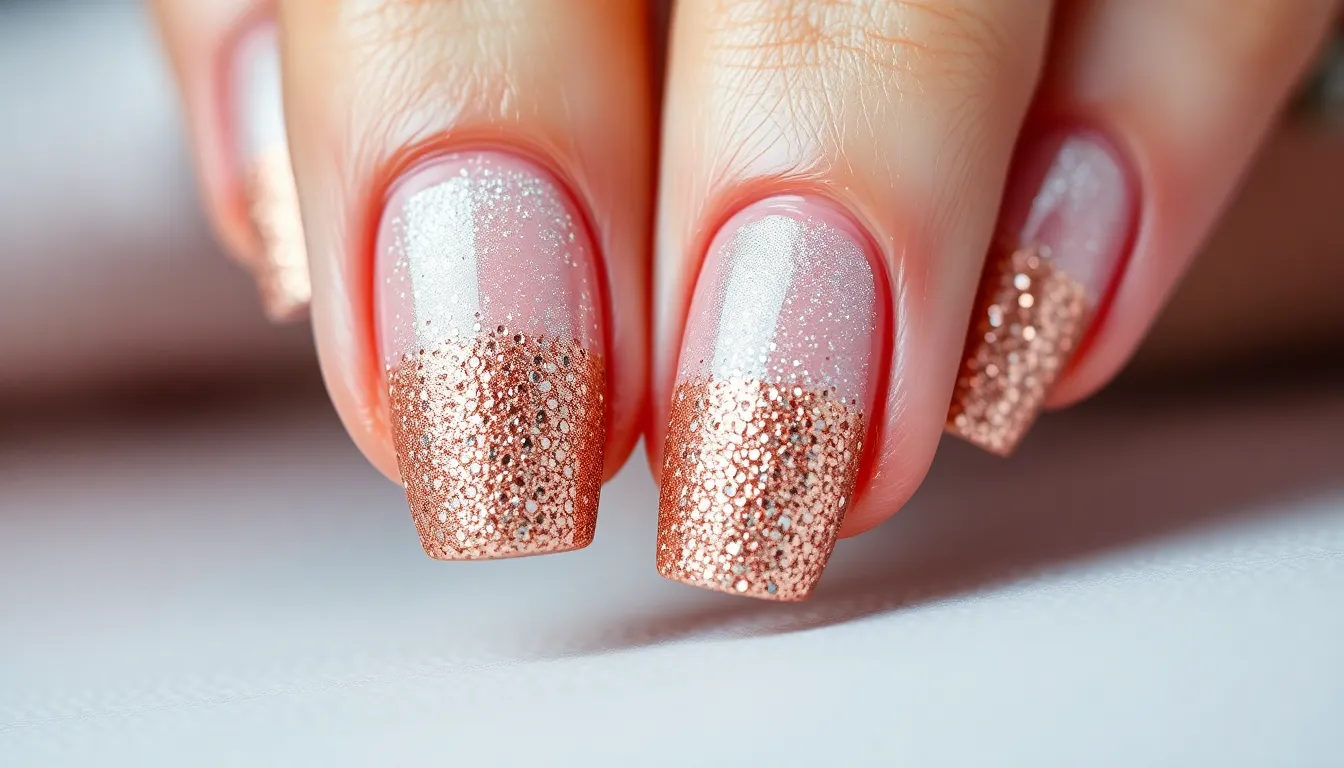
Sparkle transforms ordinary manicures into dazzling masterpieces that catch light with every movement. Metallic elements add luxurious sophistication while maintaining the cute factor we all love.
Ombre Glitter Fade
Creating seamless glitter transitions requires strategic layering techniques. Start with your base color at the cuticle area, then gradually blend glitter polish toward the nail tips using a makeup sponge. We recommend using fine glitter polishes like Essie’s “Set in Stones” or OPI’s “Bring on the Bling” for smooth application.
Building intensity happens through multiple thin coats rather than one thick layer. Apply your first glitter coat lightly, focusing on the tip area. Let it dry completely, then add a second coat that extends slightly further down the nail. Continue this process until you achieve your desired fade effect.
Color combinations create stunning visual impact when chosen thoughtfully. Rose gold glitter over nude bases creates romantic elegance, while silver glitter on black delivers dramatic contrast. We’ve found that complementary colors like blue bases with gold glitter produce unexpected beauty.
Metallic Foil Details
Nail foils deliver mirror like finishes that regular polish can’t achieve. Apply a thin layer of foil adhesive to clean, dry nails, then gently press metallic foil sheets onto the tacky surface. Chrome, rose gold, and holographic foils create the most striking effects.
Strategic placement transforms simple manicures into artistic statements. Cover just the ring finger for subtle glamour, or create geometric patterns using nail tape as guides. We love combining foil strips with regular polish to frame nail edges or create accent lines.
Transfer techniques determine the final look’s quality and durability. Press foil firmly with a silicone tool or orange stick, then peel away slowly to reveal crisp edges. Seal immediately with a high quality top coat like Seche Vite to prevent chipping and extend wear time.
Chunky Glitter Topcoats
Large particle glitters create textured finishes that demand attention. Products like China Glaze’s “Luxe and Lush” or Zoya’s “Magical Pixie” contain hexagonal and star shaped pieces that reflect light beautifully. Apply over any base color to instantly elevate your manicure.
Layering methods affect both appearance and comfort during wear. Start with one thin coat to distribute particles evenly, then add a second coat for full coverage. We always finish with two layers of thick top coat to smooth the surface and prevent snagging.
Removal preparation saves time and protects your natural nails. Wrap each nail in foil with acetone soaked cotton for 10 minutes before gently pushing off the softened glitter. This method prevents excessive scrubbing that can damage nail beds and surrounding skin.
Short Nail Cute Ideas
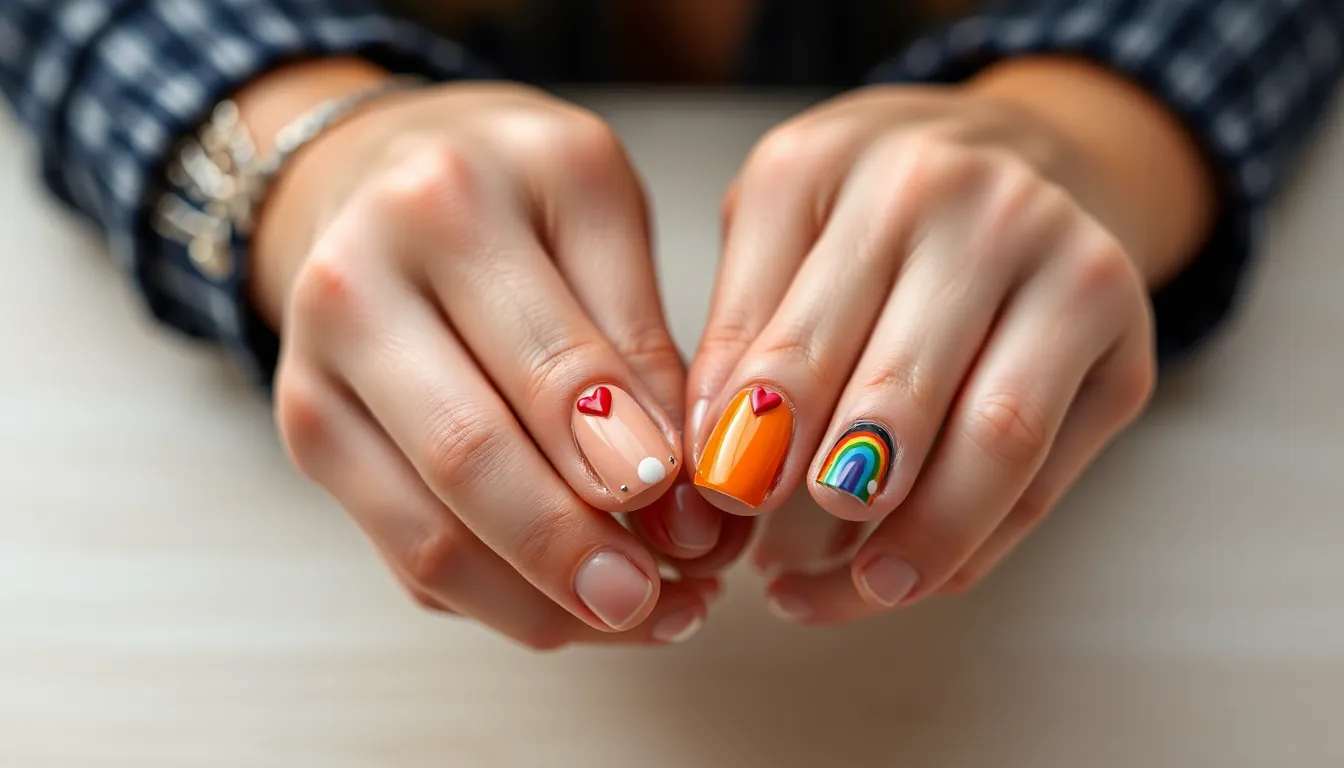
Short nails don’t limit your creative possibilities when it comes to adorable nail art. We’ve discovered that compact nail canvases actually showcase intricate details more effectively than longer lengths.
Perfect Designs for Stubby Nails
Polka dots create instant charm on shorter nail beds without overwhelming the limited space. We recommend using a dotting tool or bobby pin to place small dots in contrasting colors like white on pink or gold on navy blue. These playful patterns work especially well when you alternate between solid and dotted nails.
Tiny heart accents transform stubby nails into sweet statements that catch everyone’s attention. Place a single small heart near the cuticle area using red or pink polish over a neutral base. We’ve found that positioning hearts asymmetrically creates more visual interest than centering them perfectly.
Mini rainbow stripes bring vibrant energy to compact nail surfaces through horizontal color bands. Apply thin lines of red, orange, yellow, green, blue, and purple across each nail using striping tape for clean edges. This technique works particularly well on ring fingers as accent nails.
Vertical Patterns to Elongate
Thin vertical lines create the illusion of length while maintaining elegant simplicity on short nails. We suggest using metallic gold or silver striping polish to draw single lines from cuticle to tip. These slimming effects work best when you vary the line placement across different fingers.
Gradient ombre effects applied vertically stretch the appearance of nail beds through seamless color transitions. Start with a light shade at the cuticle and blend to a darker tone at the tips using makeup sponges. Popular combinations include nude to rose gold or white to lavender.
Chevron patterns pointing upward draw the eye along the nail length for an elongating effect. Create these angular designs using nail tape to form V-shaped sections in alternating colors. We recommend keeping the patterns small and precise to avoid crowding short nail surfaces.
Simple Yet Stunning Options
Single rhinestone placement adds glamour without requiring complex application techniques or extensive drying time. Position one small crystal at the base of each ring finger nail over dried base color. We’ve discovered that clear or AB crystals complement any color scheme beautifully.
French tip variations work wonderfully on short nails when you adjust the proportions to match nail length. Try thin colored tips in pastels like mint green or coral instead of traditional white. These modified French styles create sophistication while celebrating your natural nail shape.
Negative space crescents near the cuticle area showcase natural nail color while adding modern geometric interest. Use circular nail vinyls to mask crescent shapes before applying your chosen polish color. This technique creates clean, professional looking results that appear more complex than the simple application process.
DIY Nail Art Techniques for Beginners
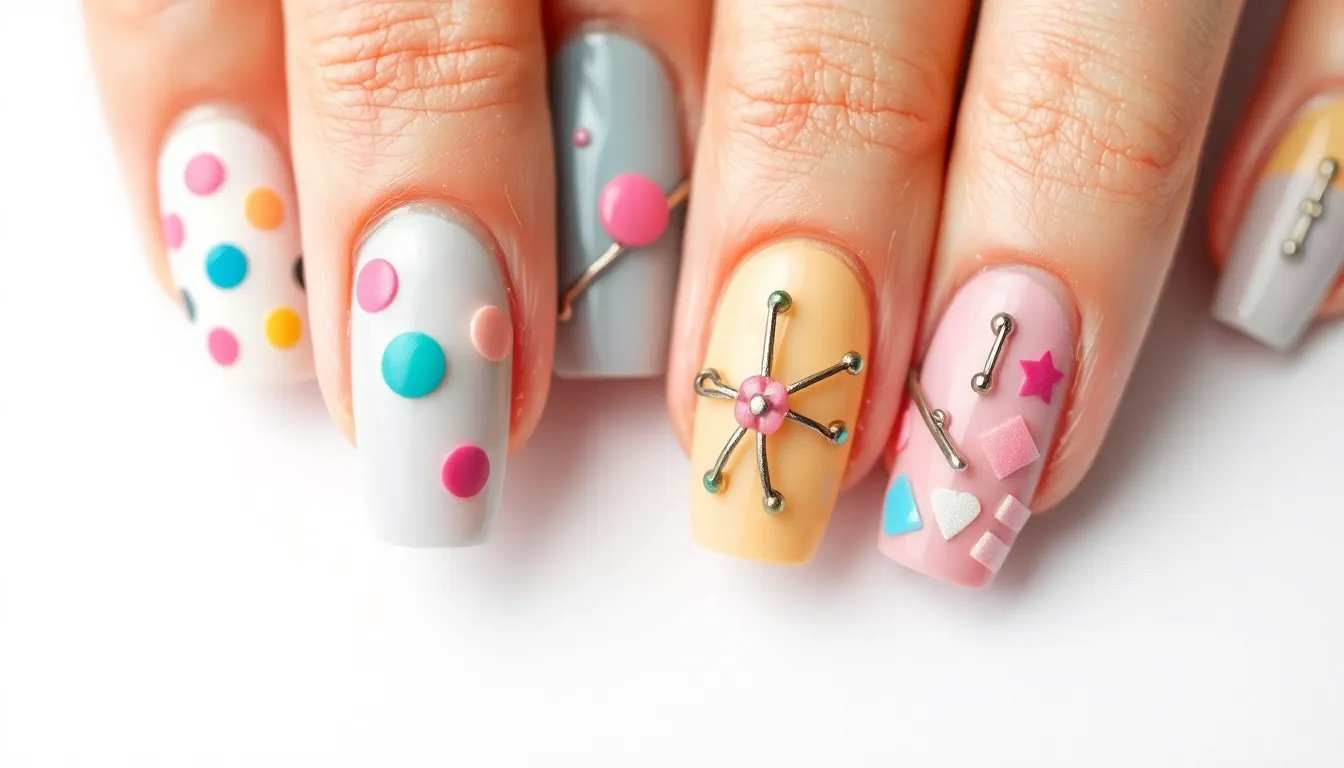
Creating beautiful nail art doesn’t require expensive professional tools or years of practice. We’ll show you simple techniques that transform everyday items into powerful nail art weapons.
Using Household Items as Tools
Bobby pins create perfect polka dots when dipped in polish and pressed onto nails. The rounded end produces small dots while the flat side makes larger circles for varied patterns.
Toothpicks work wonderfully for detailed line work and marble effects. We recommend using them to drag polish through wet base coats, creating swirled patterns that rival professional water marble techniques.
Scotch tape becomes your best friend for creating clean geometric lines and color blocking designs. Simply apply strips to dry nails, paint over them, and remove while the polish is still slightly wet for crisp edges.
Sponges from your kitchen drawer excel at creating gradient ombre effects. Dab different colored polishes onto a makeup sponge, then press it onto your nails for seamless color transitions.
Cotton swabs dipped in nail polish remover help clean up mistakes around your cuticles. The pointed tips reach into corners while the cotton absorbs excess polish without smudging your design.
Easy Dotting and Striping Methods
Dotting tools can be made from bobby pins, pencil erasers, or even the tip of a ballpoint pen. Start with larger dots using the eraser end, then add smaller accent dots with bobby pins for layered flower petals or abstract patterns.
Striping tape creates professional looking lines without steady hands. Apply thin strips across dry base color, paint your design, then carefully remove the tape to reveal perfect stripes and geometric shapes.
Brush dragging techniques produce organic lines and swirls using regular nail polish brushes. Load the brush with contrasting color, then lightly drag it across wet polish to create feathered effects or marble veining.
Water drop methods work by dropping polish into water and swirling with toothpicks. Dip your nail through the floating design to transfer intricate patterns that would be impossible to paint by hand.
Stencil and Sticker Applications
Nail stencils from beauty supply stores offer foolproof pattern placement. We suggest starting with simple shapes like hearts or stars, positioning them on dry base color before applying contrasting polish over top.
Regular stickers from office supplies create interesting negative space designs. Apply star stickers or hole reinforcement labels, paint over them, then remove to reveal clean shapes underneath.
Vinyl decals designed for nail art provide intricate patterns that look hand painted. Press them firmly onto dry polish, ensuring no air bubbles, then apply topcoat to seal the edges and prevent lifting.
French tip guides help achieve perfect curved lines every time. Position the curved stickers at your desired tip length, paint the exposed area, then remove immediately for professional looking French manicures.
Color Combinations That Always Work
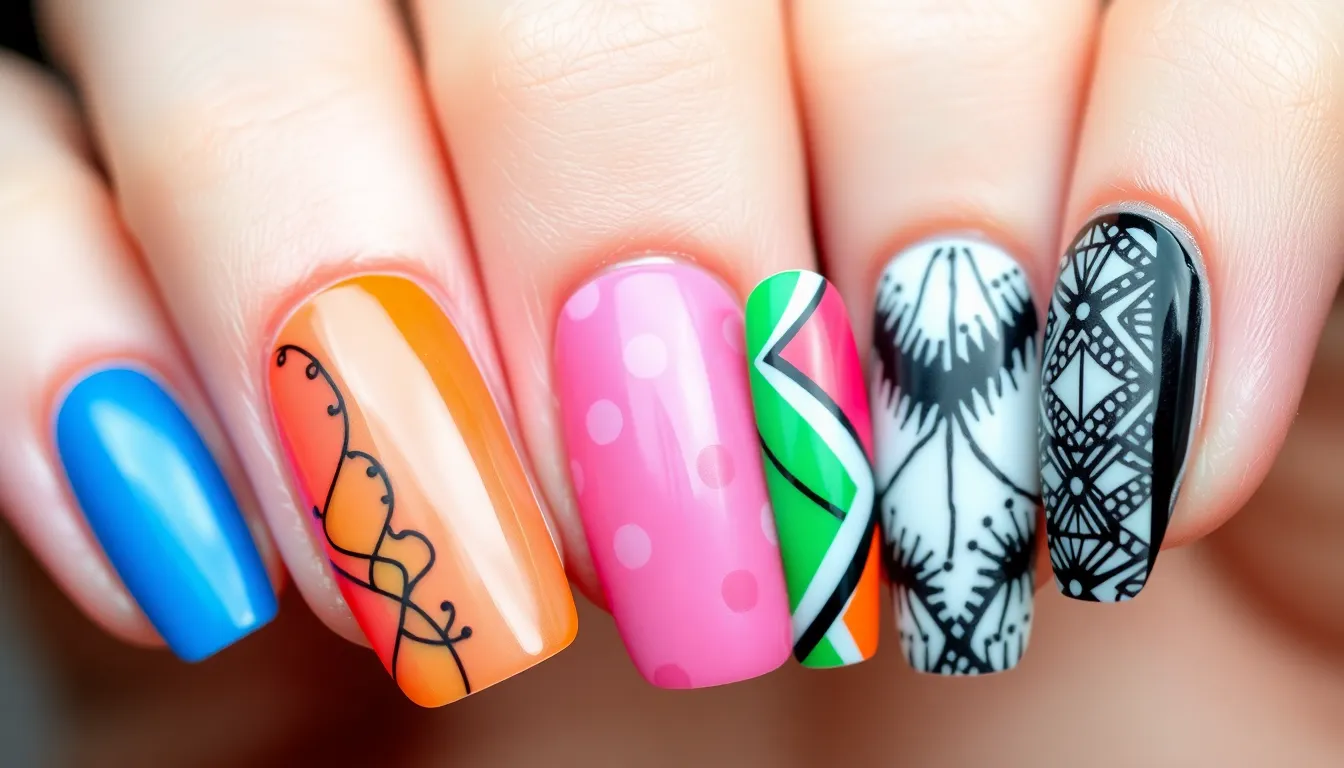
Choosing the right color combinations can make or break your nail art design. We’ve compiled the most foolproof color pairings that guarantee stunning results every time.
Complementary Color Schemes
Blue and orange create striking visual impact when paired together on nails. We love combining navy blue with soft peach for a sophisticated twist, or bright cobalt with warm coral for summer vibes. Purple and yellow offer another winning combination, especially when you use lavender with buttery yellow for spring designs.
Red and green deliver classic elegance that works year-round. We recommend pairing deep burgundy with sage green for fall looks, or bright cherry red with mint green for festive occasions. These opposite colors on the color wheel naturally enhance each other’s vibrancy.
Pink and green combinations bring feminine charm to any manicure. We suggest trying dusty rose with eucalyptus green for a vintage feel, or hot pink with lime green for bold summer statements. These pairings create perfect balance between warmth and coolness.
Monochromatic Palettes
Pink variations create cohesive harmony across all nail designs. We start with baby pink as our base, then add blush, dusty rose, and deep magenta for gradient effects or accent nails. This approach ensures your manicure looks intentional and polished.
Blue family combinations offer endless possibilities for sophisticated looks. We layer powder blue, periwinkle, navy, and midnight blue to create depth and interest. These tonal variations work especially well for ombre designs and geometric patterns.
Neutral monochromatic schemes provide versatile elegance for any occasion. We combine cream, beige, taupe, and chocolate brown for warm undertones, or mix white, gray, charcoal, and black for cool sophistication. These palettes complement every skin tone beautifully.
Bold Contrast Pairings
Black and white combinations deliver timeless drama that never goes out of style. We create striking checkerboard patterns, elegant French tips with black instead of white, or geometric designs that pop against any outfit. This high-contrast pairing photographs beautifully and suits every occasion.
Neon against dark bases creates electric energy perfect for statement nails. We apply bright pink over black, electric blue over charcoal, or lime green over deep purple for maximum impact. These combinations work best as accent nails or gradient designs.
Metallic and matte contrasts add luxurious texture to your nail art. We pair gold foil with matte black, silver chrome with matte navy, or rose gold with matte burgundy for sophisticated dimension. These combinations catch light beautifully and elevate simple designs into editorial looks.
Conclusion
We’ve explored countless ways to transform your nails into tiny canvases of creativity. From elegant French variations to playful animal prints these designs prove that stunning nail art is accessible to everyone regardless of skill level.
The beauty of cute nail ideas lies in their versatility. Whether you’re drawn to minimalist geometric patterns or bold seasonal themes there’s always a design that matches your mood and personality.
Remember that practice makes perfect and even simple techniques can create impressive results. With basic tools and the color combinations we’ve shared you’re ready to experiment and discover your signature nail style. Your nails are waiting to become your next favorite accessory.
Frequently Asked Questions
What nail art supplies do I need to get started at home?
You can create beautiful nail art with basic household items! Use bobby pins for polka dots, toothpicks for detailed line work, and makeup sponges for gradient effects. Essential supplies include nail polish in various colors, striping tape, dotting tools, and a thin brush. Many stunning designs can be achieved without expensive professional equipment.
How can I make my short nails look longer with nail art?
Create the illusion of length with thin vertical lines, gradient ombre effects from light to dark, and strategic placement of designs. Try modified French tips with colored bands, single rhinestone accents, or geometric patterns that incorporate negative space. These techniques draw the eye upward and make short nails appear more elongated.
What are the best color combinations for nail art beginners?
Start with complementary color schemes like blue and orange or red and green for striking visual impact. Monochromatic palettes using different shades of the same color create cohesive, elegant looks. Bold contrasts like black and white or neon colors against dark bases add drama while remaining easy to execute.
How do I create a perfect French manicure variation at home?
Modern French manicures go beyond white tips. Try colored tips in pink, navy blue, or mint green for a romantic touch. Add glitter in silver, gold, or holographic shades for sparkle. Create double French lines with contrasting colors or gradient effects for depth and visual interest while maintaining the classic elegance.
What’s the easiest way to create floral nail art for beginners?
Start with simple hand-painted daisies using a dotting tool for the center and thin brush for petals. Practice basic roses by creating small spirals with a toothpick. Use nail stickers or stencils for more complex designs like cherry blossoms. Begin with one accent nail before attempting full floral patterns on all fingers.
How can I achieve clean geometric nail art lines?
Use striping tape as a guide for perfectly straight lines and sharp edges. Apply base color, place tape in desired pattern, paint over with contrasting color, then remove tape while polish is slightly wet. For triangles and diamonds, use nail stencils or create templates with regular tape cut into shapes.
What’s the best technique for glitter gradient nails?
Start with a base color and let it dry completely. Apply glitter polish heavily at the tip, then use a makeup sponge to dab and blend the glitter toward the cuticle, creating a fade effect. Build up layers gradually for seamless blending. Finish with a top coat to smooth the texture.
How do I create marble effect nails at home?
Drop different colored polishes into a bowl of room temperature water, creating rings. Use a toothpick to create marbled patterns by dragging through the colors. Dip your nail into the design, clean excess polish from skin with a brush dipped in acetone, and seal with top coat for a professional marble finish.
What are some easy animal print techniques for beginners?
For leopard print, apply a base coat, then use a makeup sponge to dab on irregular spots in brown or black. Add smaller accent spots with a dotting tool. For zebra stripes, use striping tape or freehand wavy lines with a thin brush over a light base color. Practice organic, imperfect shapes for authentic animal patterns.
How long should I wait between nail art layers?
Allow each layer to dry for 2-3 minutes before applying the next. Base coats and color polishes typically need 5-10 minutes to fully set. For detailed work like dots or lines, ensure the base is completely dry to prevent smudging. Use quick-dry top coats to speed up the process and protect your finished design.

