Mickey Mouse nail art has become one of the hottest trends in nail design and we’re absolutely obsessed with the endless creative possibilities! Whether you’re planning a Disney vacation or simply want to add some magical charm to your everyday look these adorable nail ideas will transform your fingertips into tiny works of art.
From classic black and white polka dots to colorful character-inspired designs there’s a Mickey Mouse nail style for every personality and skill level. We’ve discovered that these playful patterns work beautifully for special occasions birthday parties or when you just want to embrace your inner child.
Classic Mickey Mouse Silhouette Nail Designs
These timeless designs form the foundation of Disney nail art and offer the perfect starting point for Mickey Mouse enthusiasts. Classic silhouette styles capture the iconic three-circle shape that instantly identifies Mickey’s unmistakable head and ears.
Simple Black Mickey Head on White Base
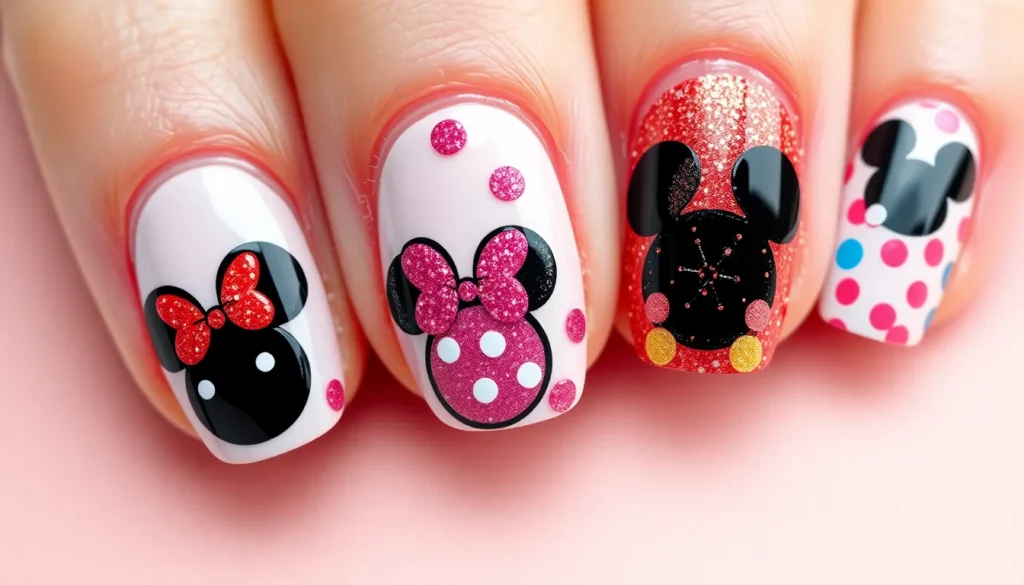
Black polish creates the most recognizable Mickey Mouse design when applied over a clean white base coat. We recommend using a small nail art brush or dotting tool to form the three circles that make up Mickey’s head. Start with the larger center circle and add two smaller circles positioned as ears on top.
Matte black polish provides better coverage and creates sharper edges for this design. The contrast between the stark white background and deep black silhouette makes the Mickey shape pop beautifully. This combination works exceptionally well on shorter nails where intricate details might be challenging.
Practice makes perfect with this fundamental Mickey Mouse nail technique. Begin by creating the design on your ring finger as an accent nail before attempting a full set. The simple two-color approach allows the iconic shape to take center stage without competing elements.
Red and Black Traditional Mickey Color Scheme
Red accents transform the basic black Mickey silhouette into Mickey’s classic outfit colors. We suggest painting the Mickey head in black and adding red elements like tiny bows ties or shorts to complete the character reference. This color combination instantly evokes Mickey’s traditional appearance from decades of Disney animation.
Bold red bases create striking backdrops for black Mickey silhouettes throughout your manicure. Alternate between red and black base colors across different nails to create a cohesive Mickey-themed look. The high contrast between these primary colors ensures your Mickey mouse nail art remains visible and eye-catching.
Traditional Mickey colors work beautifully for themed events and Disney park visits. These classic shades complement most outfits while maintaining that authentic Disney character aesthetic. The red and black combination photographs exceptionally well against different skin tones and lighting conditions.
Glitter Mickey Silhouette Variations
Glitter outlines add sparkle while maintaining the classic Mickey mouse shape recognition. We create these designs by first painting the Mickey silhouette in your chosen base color then carefully outlining each circle with fine glitter polish. Gold and silver glitter work particularly well for elegant occasions.
Holographic glitter creates rainbow effects within Mickey’s iconic three-circle formation. This technique involves filling the entire Mickey shape with holographic glitter polish that shifts colors in different lighting. The multidimensional sparkle adds luxury to the simple Mickey mouse design.
Gradient glitter effects transform basic Mickey silhouettes into stunning focal points. Apply dense glitter at the bottom of each Mickey circle and fade it upward for an ombre effect. This technique works especially well with pink, purple, or blue glitter over black Mickey shapes.
Disney Castle and Mickey Mouse Combination Nails
 1")
Combining Disney’s iconic castle with Mickey Mouse creates magical nail art that transports you straight to the heart of Disney magic. These designs elevate your Mickey Mouse manicure by incorporating beloved Disney landmarks and elements.
Cinderella Castle with Mickey Ears
Create a stunning focal point by painting Cinderella Castle on your accent nail using light blue and pink gradients. We recommend starting with a pale blue base and adding delicate pink details for the castle towers. Position tiny Mickey ears above the castle spires to blend both iconic Disney symbols seamlessly.
Paint the remaining nails with complementary colors like soft pastels or classic Disney red. Small rhinestones placed strategically on the castle towers add sparkle that mimics the real castle’s magical glow. This design works beautifully for Disney park visits or princess themed events.
Detail work becomes easier when you use a fine liner brush for castle outlines and windows. Consider adding small white clouds around the castle base to create depth and whimsy.
Fireworks and Mickey Silhouette Design
Design dramatic fireworks bursting behind Mickey’s silhouette using metallic gold and silver polishes on a dark navy base. We suggest creating the fireworks pattern first, then adding the Mickey head silhouette in solid black over the display. This technique creates a stunning contrast that captures the magic of Disney’s nightly firework shows.
Layer different sized dots and streaks radiating from central points to mimic authentic firework explosions. Glitter topcoat enhances the sparkling effect and makes your nails catch light beautifully. The Mickey silhouette should remain crisp and bold against the colorful background.
Apply this design to one or two accent nails while keeping others simple with coordinating solid colors. Deep purples, midnight blues, and rich blacks work perfectly as supporting shades.
Magic Kingdom Inspired Nail Art
Incorporate multiple Magic Kingdom elements across all ten nails for a comprehensive Disney park experience. We love featuring different attractions like Space Mountain, the Haunted Mansion, and It’s a Small Industry alongside Mickey Mouse elements. Each nail becomes a tiny canvas celebrating different park areas.
Use park exact color schemes to maintain authenticity in your designs. Tomorrowland inspired nails might feature silver and blue tones, while Fantasyland nails could showcase pastels and gold accents. Mickey ears can appear on several nails to tie the entire look together cohesively.
Add tiny details like castle turrets, attraction silhouettes, and Disney character elements using nail art pens or small brushes. This comprehensive approach creates a wearable tribute to the entire Magic Kingdom experience while keeping Mickey Mouse as the central theme.
Mickey Mouse French Tip Nail Ideas
 2")
French tip manicures get a playful Disney makeover with these creative Mickey Mouse variations. These designs combine the elegance of classic French nails with whimsical Disney charm.
Mickey Ears French Tip Design
Create your Mickey ears French tip by painting traditional white tips first, then adding small black circles above each tip to form Mickey’s iconic ears. We recommend using a fine detail brush or dotting tool for precision when placing the ear circles.
Position the Mickey ears slightly overlapping the white French tip for the most authentic look. This technique creates depth and dimension while maintaining the classic French manicure foundation.
Enhance your Mickey ears design by adding tiny white dots on the ears to create a subtle polka dot pattern. The contrast makes each nail pop while keeping the overall design sophisticated enough for professional settings.
Experiment with different base colors beyond the traditional pink or nude French manicure base. We’ve found that light gray or soft yellow bases create stunning backdrops for the white tips and black Mickey ears.
Polka Dot French Tips with Mickey Accent
Transform your French tips into playful polka dot patterns by dotting white circles across colored French tips in red, black, or yellow. This design captures Mickey’s classic color scheme while maintaining the French manicure structure.
Focus on creating one accent nail featuring a full Mickey Mouse silhouette while keeping the remaining nails in coordinating polka dot French tips. We suggest using your ring finger as the accent nail for optimal visual balance.
Space your polka dots evenly across each French tip using a dotting tool or the end of a bobby pin. Consistent dot sizes create a professional finish that elevates the overall manicure appearance.
Layer different sized dots for added visual interest, placing larger dots as your base pattern and smaller accent dots to fill gaps. This technique creates depth while maintaining the playful Mickey Mouse aesthetic.
Gradient Mickey Mouse French Manicure
Blend two or three Mickey Mouse inspired colors into a gradient French tip, transitioning from red at the cuticle to yellow at the tip with black Mickey silhouettes overlaid. We achieve the smoothest gradients using makeup sponges to dab and blend colors.
Start your gradient with the darkest color at the base, gradually lightening toward the tips for a sunset effect that mimics Mickey’s classic color palette. This creates a sophisticated take on traditional Disney nail art.
Add small Mickey head silhouettes in contrasting colors once your gradient base completely dries. White Mickey heads over red to yellow gradients create stunning contrast that photographs beautifully.
Finish gradient Mickey French tips with a high quality top coat to seal your design and create lasting wear. We recommend applying thin coats to prevent smudging the delicate gradient work underneath.
3D Mickey Mouse Nail Art Techniques
 3")
Moving beyond flat designs, we’ll explore dimensional techniques that bring Mickey Mouse to life on your nails. These three-dimensional approaches create stunning visual depth and tactile appeal.
Raised Mickey Head Decorations
Creating elevated Mickey heads transforms ordinary nail art into sculptural masterpieces. We recommend using acrylic powder mixed with clear nail glue to build up the iconic three-circle shape. Start by outlining Mickey’s head with a small dotting tool, then gradually layer the mixture to achieve the desired height.
Sculpting gel offers another excellent method for raised decorations. Apply a base coat first, then use a fine brush to build up layers of clear sculpting gel in Mickey’s silhouette. Cure each layer under UV or LED light for 30 seconds to ensure proper hardening.
Nail gems and rhinestones provide instant dimensional Mickey heads. Choose black round gems in graduated sizes – one large for the head and two smaller ones for the ears. Position them carefully using tweezers and secure with a strong topcoat for lasting wear.
Textured Mickey Ears Using Gel
Textured gel creates captivating Mickey ear surfaces that catch light beautifully. We suggest using matte gel polish mixed with fine glitter particles to achieve a velvety texture reminiscent of Mickey’s actual ears. Apply this mixture only to the ear areas using a small detailing brush.
Sand texture gel produces a realistic fabric-like appearance on Mickey’s ears. This technique involves mixing clear gel with micro sand particles, creating an authentic plush toy effect. Cure thoroughly between coats to prevent chipping and ensure the texture remains intact.
Velvet powder dusting over wet gel creates the ultimate Mickey ear texture. Apply black gel polish to the ear areas, then immediately dust with velvet flocking powder using a soft brush. Cure under your lamp, then gently brush away excess powder for a luxurious finish.
Dimensional Mickey Bow Tie Accents
Building raised bow ties adds sophisticated charm to Mickey Mouse nail designs. We create these accents using red acrylic paint mixed with texture medium, shaping the bow with a fine liner brush. The three-dimensional effect makes the bow tie appear to float above the nail surface.
Layered gel technique produces stunning dimensional bow tie effects. Start with a base layer of red gel polish, then build up the bow shape using multiple thin coats. Add white polka dots with a dotting tool while the final layer remains tacky for better adhesion.
Polymer clay bow ties offer the most dramatic dimensional results. Shape tiny bow ties from red polymer clay, bake according to manufacturer instructions, then attach to cured nails using strong nail glue. This method creates permanent, highly detailed accessories that won’t wear off during daily activities.
Minnie Mouse and Mickey Mouse Couple Nails
 4")
We’re taking Mickey Mouse nail art to the next level with romantic couple designs that celebrate both Mickey and Minnie together. These coordinated styles create perfect his and hers manicures for Disney loving couples.
His and Hers Mickey and Minnie Design
We recommend creating complementary designs where one partner showcases Mickey’s classic black ears while the other features Minnie’s signature red bow and polka dots. Start with a neutral base color like soft pink or classic white on both hands for cohesion.
Paint Mickey’s iconic silhouette on the ring finger using black polish and a detail brush for precision. Add small white dots around the design to mirror Mickey’s classic shorts pattern. For the Minnie version, create her bow shape using bright red polish on the accent nail and surround it with cheerful polka dots.
Coordinate the remaining nails by alternating between solid colors and simple patterns. Use black polish on some nails for Mickey’s aesthetic and red accents for Minnie’s charm. This approach creates visual balance while maintaining each character’s distinct personality.
Matching Red Bow and Mickey Ears
We love combining Minnie’s signature red bow with Mickey’s ears for a unified romantic look that works beautifully across both partners’ nails. Create the bow design using a deep red polish and add dimension with a slightly darker red for shading.
Paint the classic Mickey ear silhouette on alternating nails using glossy black polish. Position small red bows at the base of each Mickey head to create an adorable hybrid design. Use a fine nail art brush to add delicate bow details including center knots and ribbon tails.
Apply small rhinestones or nail gems at the bow centers for extra sparkle that catches light beautifully. Finish with a high gloss top coat to make both the black ears and red bows pop with vibrant shine. This technique creates stunning couple nails that celebrate both characters simultaneously.
Date Night Disney Nail Art
We’re elevating romantic Mickey and Minnie designs with sophisticated color palettes perfect for special occasions and date nights. Choose elegant base colors like deep burgundy, soft champagne, or classic nude that complement formal attire.
Create subtle Mickey and Minnie silhouettes using metallic gold or silver polish instead of traditional black and red. Add tiny heart shapes between the character designs using a contrasting metallic shade. This approach maintains Disney magic while achieving grown up elegance.
Incorporate gradient techniques that blend romantic colors like rose gold into champagne or deep purple into silver. Layer the Mickey and Minnie designs over these gradients for depth and sophistication. Finish each nail with delicate glitter accents that sparkle under restaurant lighting, making these designs perfect for romantic Disney themed evenings.
Mickey Mouse Holiday Themed Nail Designs
 5")
Transform your Mickey Mouse nail art into festive masterpieces that capture the magic of every holiday season. We’ve curated stunning seasonal designs that blend Disney charm with holiday spirit.
Christmas Mickey Mouse Nails
Create magical Christmas Mickey designs by combining classic red and green color schemes with the beloved mouse ears silhouette. We recommend starting with a deep forest green base coat and adding Mickey heads in metallic gold for an elegant holiday look. Paint tiny white snowflakes around the Mickey silhouettes using a fine detail brush to enhance the winter wonderland effect.
Transform Mickey’s ears into Christmas ornaments by painting them in traditional holiday colors like burgundy, gold, and silver. We suggest adding delicate white dots to mimic the classic ornament patterns and finishing with a glossy topcoat for that glass ornament shine. Add miniature holly leaves near the base of each Mickey head using dark green polish and tiny red berry dots for authentic Christmas charm.
Incorporate festive plaid patterns into your Mickey Mouse design by creating a Scottish tartan background in red and green before overlaying the black Mickey silhouette. We’ve found that using striping tape helps achieve perfectly straight plaid lines. Paint candy cane stripes on accent nails while keeping Mickey as the focal point on your ring finger for a balanced holiday manicure.
Halloween Mickey Mouse Pumpkin Art
Design spooky Mickey pumpkin nails by painting classic orange pumpkins with black Mickey ear cutouts on the surface. We recommend using a small round brush to create the distinctive ear shapes and adding darker orange shading for dimension. Create glowing jack o’lantern faces inside the Mickey silhouettes using bright yellow polish and black detailing for eyes and mouth.
Paint Mickey’s head in deep purple against a midnight black background to achieve that perfect Halloween gothic atmosphere. We suggest adding silver or holographic polish to create a mystical shimmer effect across the design. Add tiny orange bats flying around the Mickey silhouettes using a fine liner brush for extra spooky appeal.
Transform traditional Halloween colors into Mickey magic by painting gradient nails that transition from deep purple to bright orange. We’ve discovered that sponge application creates the smoothest color blending. Overlay black Mickey heads on the gradient base and finish with matte topcoat for a sophisticated Halloween look that maintains Disney charm.
Valentine’s Day Mickey Heart Designs
Create romantic Mickey heart nails by replacing the traditional round ears with pink and red heart shapes. We recommend using different shades of pink for each heart ear to add visual interest and dimension. Paint the main Mickey head in deep burgundy or classic black for striking contrast against the colorful heart ears.
Design ombre Mickey silhouettes that blend from light pink at the base to deep red at the tips while maintaining the iconic three circle shape. We suggest using makeup sponges for seamless color transitions. Add delicate white polka dots throughout the design to echo Minnie’s classic pattern while keeping the romantic color palette.
Paint matching couple designs with Mickey and Minnie facing each other surrounded by tiny floating hearts in various shades of pink and red. We’ve found that painting one character per nail creates better visual balance. Enhance the romantic theme by adding rose gold glitter accents around the characters and finishing with glossy topcoat for that perfect Valentine’s Day shine.
Colorful Mickey Mouse Rainbow Nail Ideas
 6")
Rainbow Mickey Mouse nail art transforms the classic Disney character into vibrant, eye-catching designs that celebrate every color of the spectrum. These colorful variations let us express our creativity while maintaining the beloved Mickey silhouette we all recognize and love.
Pastel Mickey Mouse Collection
Soft pastel shades create dreamy Mickey Mouse nail designs that feel both whimsical and sophisticated. We recommend starting with a light pink base coat, then adding Mickey’s ears in complementary lavender or mint green tones for a cohesive pastel palette.
Baby blue Mickey heads paired with peachy pink accents deliver a cotton candy inspired look that’s perfect for spring celebrations. Creating this effect requires steady hands and a detail brush to paint precise circular shapes in alternating pastel colors across each nail.
Gradient pastel backgrounds work beautifully when topped with white Mickey silhouettes that seem to float on clouds of color. Blending techniques using makeup sponges help achieve seamless transitions from pale yellow to soft purple, creating a sunset inspired base for our Disney nail art.
Multiple pastel Mickey heads in different sizes scattered across neutral nude bases create playful compositions without overwhelming the design. Varying the placement and scale of each Mickey shape adds visual interest while maintaining the gentle, dreamy aesthetic that pastel colors provide.
Neon Bright Mickey Silhouettes
Electric neon colors transform Mickey Mouse nail art into bold statements that demand attention and showcase our fearless style. Bright pink Mickey heads on electric blue bases create stunning contrast that captures the energy of Disney’s most exciting attractions.
Neon yellow outlines around traditional black Mickey silhouettes add unexpected pops of brightness while maintaining the character’s classic recognition factor. This technique works especially well on dark purple or deep teal base colors that make the yellow glow appear more intense.
Multiple neon shades can create rainbow Mickey collections where each nail features a different bright color combination. Pairing lime green Mickey heads with hot pink backgrounds, or orange silhouettes on electric purple bases, gives us endless possibilities for vibrant self expression.
Glow in the dark topcoats applied over neon Mickey designs create magical effects that surprise and delight in low light conditions. These special polishes charge under regular lighting and emit a soft glow that makes our Mickey Mouse nail art truly enchanting during evening events.
Ombre Mickey Mouse Gradient Effects
Gradient techniques applied to Mickey Mouse shapes create dimensional effects that make the character appear to emerge from colorful backgrounds. We achieve this by blending multiple rainbow shades within each Mickey silhouette, starting with deep purple at the base and transitioning to bright yellow at the top.
Rainbow ombre backgrounds provide stunning canvases for solid black Mickey silhouettes that appear to dance across the spectrum of colors. Creating smooth color transitions requires patience and multiple thin coats, but the final result showcases professional looking nail art that celebrates both Disney magic and rainbow beauty.
Individual Mickey ears can feature their own gradient effects, with one ear transitioning from red to orange while the other blends from blue to purple. This technique adds complexity and visual interest while maintaining the overall Mickey Mouse shape that makes these designs instantly recognizable.
Reverse ombre effects place the darkest colors at the cuticle line and fade to lighter shades at the nail tips, creating depth that makes Mickey silhouettes appear three dimensional. Applying glitter topcoats over these gradient bases adds sparkle that catches light and enhances the rainbow effect throughout the day.
Mickey Mouse Negative Space Nail Art
 7")
Negative space nail art transforms traditional Mickey Mouse designs by using the natural nail as part of the overall aesthetic. We’ll explore sophisticated techniques that create stunning visual effects through strategic polish placement.
Clear Base with Mickey Cutouts
We recommend starting with a completely clear base coat to showcase your natural nail bed through Mickey Mouse shaped cutouts. Professional nail artists achieve this look by applying vinyl stencils or hand cutting Mickey head shapes from tape before painting the surrounding area with bold colors like deep navy, emerald green, or classic black.
Creating precise cutouts requires steady hands and quality tools including a sharp create knife, tweezers for stencil removal, and a cleanup brush dipped in acetone. We suggest practicing the Mickey head proportions on paper first, ensuring the ears maintain their classic circular shape at roughly one third the size of the main head circle.
Advanced techniques involve layering multiple colors around the negative space Mickey heads, creating gradient effects or geometric patterns. We’ve found that metallic polishes like rose gold or silver create particularly striking contrasts against clear negative space areas.
Nude Nails with Mickey Outline
We create sophisticated Mickey Mouse designs by outlining the character’s silhouette on nude base colors that complement various skin tones. This approach works beautifully for professional settings where subtle Disney references are preferred over bold character art.
Selecting the perfect nude shade involves matching your natural nail bed color or choosing slightly pinker tones for a healthy glow effect. We recommend testing shades like “Ballet Slippers,” “Mademoiselle,” or “Bubble Bath” to find your ideal nude base before adding Mickey outlines.
Fine liner brushes allow us to paint delicate Mickey head outlines in contrasting colors such as soft brown, taupe, or even subtle metallic shades. We often enhance these designs with tiny pearl accents placed strategically on Mickey’s ears or add minimal polka dot details using a dotting tool.
Minimalist Mickey Mouse Designs
We embrace the beauty of simplicity through minimalist Mickey Mouse nail art that focuses on clean lines and strategic placement. Single accent nails featuring small Mickey heads positioned near the cuticle area create elegant focal points without overwhelming the overall manicure.
Modern minimalist approaches include creating Mickey silhouettes using only thin outline strokes rather than filled shapes. We achieve this look by carefully drawing the iconic three circle formation with ultra thin nail art brushes, leaving the interior completely transparent to showcase the natural nail underneath.
Geometric interpretations of Mickey Mouse heads offer contemporary twists on classic designs, incorporating triangular ears or angular head shapes while maintaining recognizable proportions. We recommend using matte top coats over these minimalist designs to enhance their modern aesthetic and prevent unwanted shine that might distract from the clean lines.
Disney Park Inspired Mickey Mouse Nails
 8")
Disney parks offer endless inspiration for Mickey Mouse nail designs that capture the magic of your favorite attractions and lands.
Main Street USA Themed Nails
Main Street USA nail designs transport you straight to the heart of Disney’s charming Victorian era streetscape. We recommend starting with a warm cream or soft yellow base that mimics the nostalgic street lamps and building facades. Create Mickey silhouettes using deep burgundy polish to match the classic awnings and signage throughout Main Street.
Vintage Mickey Mouse designs work beautifully with antique gold accents and small pearl details. Paint tiny streetlamp shapes on your ring fingers while keeping Mickey heads prominent on your thumbs and middle fingers. We suggest adding delicate scrollwork details using a thin nail art brush and metallic bronze polish.
Barbershop quartet inspired nails feature classic red and white striped patterns with Mickey heads positioned at the base of each nail. Create the stripes using nail tape for clean lines, then add small black Mickey silhouettes over the white sections. Finish with a glossy top coat to achieve that polished Main Street storefront shine.
Fantasyland Mickey Mouse Art
Fantasyland Mickey Mouse nail art captures the whimsical magic of classic Disney fairy tales and attractions. We love creating castle inspired backgrounds using soft pastels like lavender, pink, and baby blue, then overlaying Mickey silhouettes in shimmering silver or gold. Add tiny star details around each Mickey head using a dotting tool and white polish.
It’s a Small Industry themed nails feature colorful geometric patterns with Mickey heads incorporated into the design. Paint each nail a different bright color like turquoise, coral, sunny yellow, and vibrant green. Create small Mickey silhouettes using white polish, then add delicate line work in contrasting colors to mimic the attraction’s cheerful aesthetic.
Carousel horse inspired Mickey designs combine elegant swirls and flourishes with classic Mickey silhouettes. Start with a pearl white or soft pink base, then paint ornate carousel details using metallic gold polish. Position Mickey heads strategically within the decorative swirls, creating a sophisticated yet playful design that captures Fantasyland’s enchanting atmosphere.
Tomorrowland Futuristic Mickey Design
Tomorrowland Mickey Mouse nails embrace sleek, modern aesthetics with metallic finishes and geometric shapes. We recommend using chrome or holographic base polishes in silver, electric blue, or iridescent purple to create that futuristic space age feel. Apply Mickey silhouettes using matte black polish for striking contrast against the shimmery backgrounds.
Space Mountain inspired designs feature deep navy or black bases with tiny white dots representing stars scattered across each nail. Create Mickey heads using metallic silver polish, then add small rocket ship details using a fine tip brush. We suggest finishing with a high gloss top coat to enhance the cosmic effect.
Circuit board Mickey designs incorporate thin metallic lines in gold or silver that crisscross each nail like electronic pathways. Position Mickey silhouettes at intersection points where the lines meet, creating a tech savvy pattern that perfectly captures Tomorrowland’s innovative spirit. Add small LED light effects using tiny rhinestones or metallic dots to complete the futuristic look.
Mickey Mouse Nail Ideas for Special Occasions
 9")
Transform your special moments into magical memories with Mickey Mouse nail designs that celebrate life’s most important occasions.
Disney Wedding Mickey Mouse Nails
Bridal Mickey Mouse nail designs blend elegance with Disney enchantment for your fairytale wedding day. We recommend starting with a sophisticated nude or soft pink base color, then adding delicate white Mickey silhouettes using a fine detail brush for a romantic touch. Pearl accents around each Mickey head create stunning bridal elegance that photographs beautifully in wedding portraits.
Wedding party coordination becomes effortless when bridesmaids wear complementary Mickey designs in your chosen color palette. Consider rose gold Mickey heads on dusty rose bases, or champagne glitter outlines on mauve backgrounds to match your wedding theme. French tip Mickey variations work exceptionally well for bridesmaids who prefer subtle Disney touches.
Honeymoon Mickey nails deserve special attention with luxurious details like Swarovski crystals forming Mickey’s ears or delicate lace patterns surrounding each silhouette. We suggest incorporating your wedding colors into gradient Mickey designs that transition from ceremony elegance to honeymoon playfulness. Metallic gold Mickey heads on ivory bases create timeless sophistication that complements both wedding gowns and honeymoon attire.
Birthday Party Mickey Celebration Nails
Birthday Mickey Mouse nail art transforms ordinary celebrations into Disney spectaculars with vibrant colors and festive elements. Create party ready nails by painting rainbow Mickey heads across each finger, using bright primary colors like electric blue, sunshine yellow, and cherry red for maximum birthday joy. Confetti nail art surrounding Mickey silhouettes adds extra celebration flair using colorful glitter dots and small rhinestones.
Age exact Mickey designs make birthdays even more personalized with number incorporation into each Mickey head design. We love painting the birthday age inside Mickey’s silhouette using contrasting colors, or creating balloon shaped Mickey ears in party colors. Candle flame accents on Mickey’s ears bring birthday cake inspiration directly to your fingertips.
Party theme Mickey nails coordinate perfectly with exact birthday celebrations like princess parties, superhero themes, or carnival fun. Transform Mickey heads into princess crowns using pink and gold, or add superhero capes flowing from Mickey’s ears in bold primary colors. Carnival Mickey nails feature striped patterns and bright circus colors that capture the festive party atmosphere.
Disney Vacation Trip Nail Art
Disney vacation Mickey nails document your magical journey with park inspired designs that celebrate every moment of your trip. Pre vacation nail preparation includes creating Mickey passport stamps on each nail using different Disney park logos and dates, building excitement before you even arrive at the gates. We recommend using a clear base coat with colorful Mickey stamps representing each park you plan to visit.
Souvenir Mickey nail designs capture favorite attractions and experiences throughout your Disney adventure. Paint Spaceship Earth Mickey heads for Epcot memories, or create Mickey ears shaped like different country pavilions using their flag colors. Magic Kingdom nails feature fireworks exploding from Mickey silhouettes, while Hollywood Studios designs incorporate movie themed Mickey variations.
Memory keeping Mickey manicures preserve special vacation moments with photo realistic details and personalized touches. Document character meet and greets by painting Mickey heads in the colors of characters you met, or create dining reservation nails featuring restaurant themed Mickey designs. We suggest taking photos of your Disney vacation nails at iconic park locations to create lasting memories that combine your love for both Disney and nail art.
Conclusion
Mickey Mouse nail art offers endless creative possibilities that we’ve explored throughout this comprehensive guide. From simple silhouettes to elaborate 3D designs we’ve covered techniques that work for every skill level and occasion.
Whether you’re planning a Disney vacation creating romantic couple designs or celebrating holidays these versatile nail art ideas let you carry a touch of Disney magic wherever you go. The beauty lies in how adaptable these designs are – from professional negative space looks to vibrant rainbow creations.
We encourage you to experiment with different techniques and make each design your own. Start with basic Mickey silhouettes and gradually work your way up to more complex park-inspired or dimensional designs. Remember that practice makes perfect and every Disney fan deserves to showcase their love through beautiful nail art.
Your nails become a canvas for celebrating the timeless charm of Mickey Mouse while expressing your unique style and creativity.
Frequently Asked Questions
What makes Mickey Mouse nail art perfect for beginners?
Mickey Mouse nail art is ideal for beginners because it starts with simple shapes like circles and silhouettes. The basic design only requires painting a black circle with two smaller circles for ears, making it achievable with minimal nail art experience. You can create stunning looks using just basic polishes and a small detail brush.
How can I create a classic Mickey Mouse silhouette on my nails?
Start with a white or clear base coat, then use a small nail art brush to paint a black circle for Mickey’s head. Add two smaller black circles above for the ears. For precision, let each layer dry completely before adding details. You can enhance with red accents to match Mickey’s classic outfit.
What are some elegant Mickey Mouse nail designs for special occasions?
Try Mickey Mouse French tips by adding small black ear circles above traditional white tips, or opt for gradient Mickey silhouettes using metallic polishes on nude bases. For weddings, use soft pastels with pearl accents. These sophisticated designs blend Disney magic with elegant styling perfect for formal events.
How do I make 3D Mickey Mouse nail art?
Create raised Mickey heads using acrylic powder or sculpting gel, building up layers for dimension. Add nail gems and rhinestones for sparkle. For textured ears, use matte gel polish, sand texture gel, or velvet powder dusting. These techniques create tactile appeal and stunning visual depth beyond flat designs.
What holiday themes work well with Mickey Mouse nails?
Christmas designs use forest green bases with gold Mickey heads and snowflake accents. Halloween features spooky orange-to-purple gradients with Mickey ear pumpkins. Valentine’s Day incorporates heart-shaped ears and romantic pink-red color schemes. Each holiday theme maintains Mickey’s iconic silhouette while embracing seasonal colors and elements.
Can I create Mickey Mouse nails for professional settings?
Yes! Use negative space designs with nude bases and subtle Mickey outlines for sophistication. Try minimalist approaches with clean lines and strategic Mickey placements. Metallic accents on neutral backgrounds or geometric interpretations of Mickey heads maintain professionalism while expressing your Disney love in workplace-appropriate ways.
How do I make colorful rainbow Mickey Mouse nails?
Start with pastel Mickey collections using soft shades for whimsical looks, or go bold with neon Mickey silhouettes. Create gradient effects by blending colors within each Mickey head or across all nails. Use ombre techniques from light to dark shades while maintaining the recognizable three-circle Mickey shape throughout.
What supplies do I need for Mickey Mouse nail art?
Essential supplies include various nail polish colors (especially black for silhouettes), small detail brushes for precision, dotting tools for perfect circles, and a good base coat. For advanced designs, consider nail gems, rhinestones, acrylic powder, sculpting gel, and stencils or tape for clean negative space designs.


