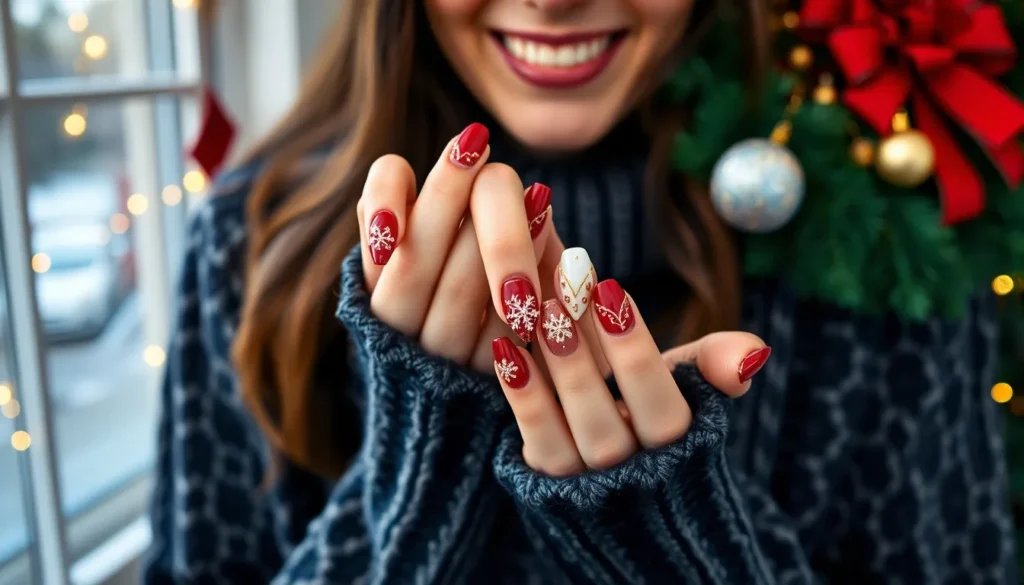
The holiday season’s almost here and we’re already dreaming of the perfect festive manicure! Christmas acrylic nails offer endless possibilities to showcase your holiday spirit while keeping your nails strong and beautiful throughout all those holiday parties and family gatherings.
From classic red and gold combinations to trendy winter wonderland designs there’s a Christmas acrylic look that’ll match your personality perfectly. Whether you’re drawn to elegant snowflake patterns minimalist holiday colors or bold statement nails with 3D embellishments we’ve got the inspiration you need.
We’ve curated the most stunning Christmas acrylic nail ideas that’ll have everyone asking where you got your nails done. These designs aren’t just gorgeous – they’re also practical enough to last through all your holiday celebrations while keeping your hands looking absolutely flawless.
Classic Christmas Colors for Acrylic Nails
Classic color combinations form the foundation of timeless Christmas nail art. We’ve compiled the most popular traditional palettes that never go out of style.
Traditional Red and Green Combinations
Red and green designs create the ultimate festive statement for your acrylic nails. We recommend using deep burgundy reds paired with forest greens for a sophisticated holiday look that complements any outfit. Cherry red combined with emerald green creates a vibrant combination that captures the classic Christmas spirit perfectly.
Alternating color patterns work beautifully when you paint each nail a different color in the red and green palette. Try painting your thumb and ring finger deep red while keeping your index and pinky fingers in rich green tones. We suggest adding small gold dots or stars to tie the alternating colors together for a cohesive design.
Ombre techniques blend red and green seamlessly from cuticle to tip for a modern twist on traditional colors. Start with a deep red base at the cuticle area and gradually blend into emerald green toward the nail tips. This gradient effect creates visual interest while maintaining the classic Christmas color story.
Elegant Gold and Silver Accents
Gold accent nails transform simple manicures into luxurious holiday statements. We love adding gold foil details over deep red or green base colors to create premium Christmas designs. French tips in metallic gold paired with clear or nude base colors offer understated elegance for professional holiday events.
Silver chrome finishes provide modern sophistication that reflects light beautifully during holiday gatherings. Apply silver chrome powder over black or white base colors for dramatic contrast that photographs well. We recommend combining silver accents with navy blue or deep purple for unexpected color combinations that still feel festive.
Mixed metallic details create ever-changing visual interest when you combine gold and silver elements thoughtfully. Paint your accent nails in alternating gold and silver while keeping the remaining nails in neutral tones. Add small rhinestones in both gold and silver tones to create a cohesive metallic theme across all ten nails.
Winter White and Silver Pairings
Pure white bases serve as perfect canvases for intricate silver detailing and winter themed nail art. We suggest using bright white acrylic as your foundation and adding silver glitter gradients from the cuticle area. This combination mimics fresh snowfall and creates an elegant winter wonderland effect on your nails.
Silver glitter overlays add sparkle and dimension to white acrylic nails without overwhelming the clean aesthetic. Apply fine silver glitter in geometric patterns or create accent nails with full silver glitter coverage. We recommend using different sizes of silver glitter particles to create depth and visual texture.
Frosty pearl effects combine white and silver tones to create sophisticated winter nail designs. Use white acrylic with pearl powder mixed in for a subtle iridescent finish that catches light beautifully. Add silver striping tape or thin silver lines to create elegant geometric patterns that enhance the frosty pearl base color.
Festive Holiday Patterns and Designs
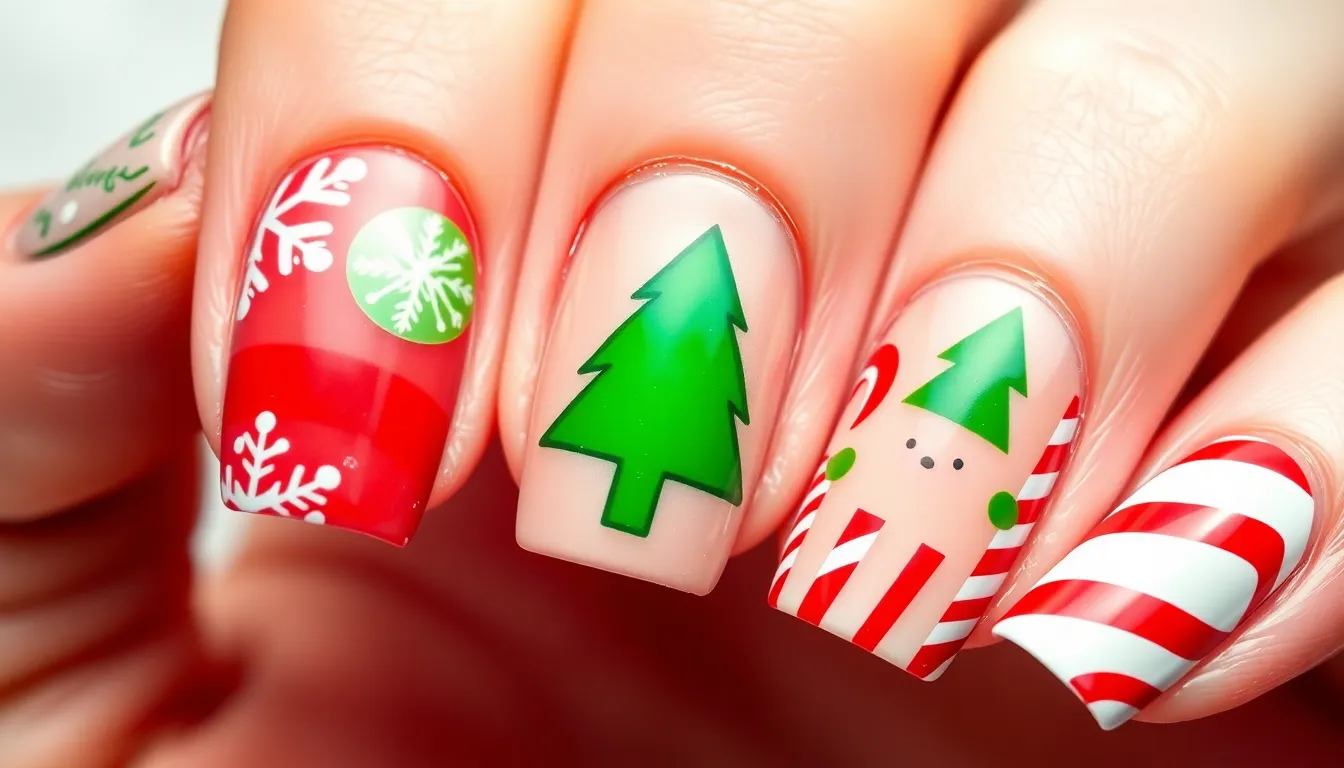
Transform your holiday manicure with iconic Christmas patterns that capture the magic of the season. Each design brings its own charm and personality to your festive nail art collection.
Snowflake Nail Art Techniques
Delicate snowflake patterns create an enchanting winter wonderland effect on your acrylic nails. We recommend using fine detail brushes to hand paint intricate snowflake designs with white or silver polish over dark bases like navy blue or forest green. Stamping plates offer another excellent option for achieving consistent snowflake patterns across all ten nails.
White gel paint provides the most opaque coverage for crisp snowflake details that won’t fade during application. Professional nail artists suggest creating various snowflake sizes on different nails to add visual interest and depth. Silver glitter accents enhance the frozen crystal appearance and catch light beautifully under holiday party lighting.
Dotting tools help create perfect snowflake centers before adding delicate branches with thin liner brushes. Each snowflake should have unique characteristics since no two real snowflakes are identical in nature.
Christmas Tree Silhouettes
Bold Christmas tree silhouettes make stunning focal points on accent nails while complementing simpler designs on remaining fingers. Dark green polish creates classic tree shapes that we outline with gold or silver for added definition. Geometric triangle stacking produces modern Christmas tree interpretations that suit contemporary nail art preferences.
Ombre techniques blend multiple green shades from light to dark to create dimensional tree effects. We suggest painting tree trunks with brown polish and adding tiny star toppers using gold leaf or metallic polish. Glitter gradients from base to tip mimic sparkling Christmas lights draped across evergreen branches.
Negative space designs allow natural nail color to show through tree cutouts for minimalist holiday elegance. French tip modifications can incorporate Christmas tree shapes along the smile line for subtle festive touches.
Candy Cane Stripes and Swirls
Classic red and white candy cane stripes bring playful holiday spirit to acrylic nail designs. Striping tape creates perfectly straight lines for traditional candy cane patterns that we alternate between nails for balanced visual appeal. Curved striping brushes help achieve authentic candy cane swirl effects that mimic the beloved holiday treat.
Diagonal stripe placement adds ever-changing movement while maintaining the iconic candy cane aesthetic. We recommend using high quality red polish that won’t streak during application over white base coats. Clear top coat sealing prevents color bleeding between red and white sections.
Reverse candy cane designs feature white stripes over red bases for bold holiday statements. Glitter accent stripes replace solid colors for sparkling candy cane variations that catch festive lighting. Corner accent applications limit candy cane patterns to nail tips for subtle holiday nods.
Glitter and Sparkle Christmas Acrylic Nails
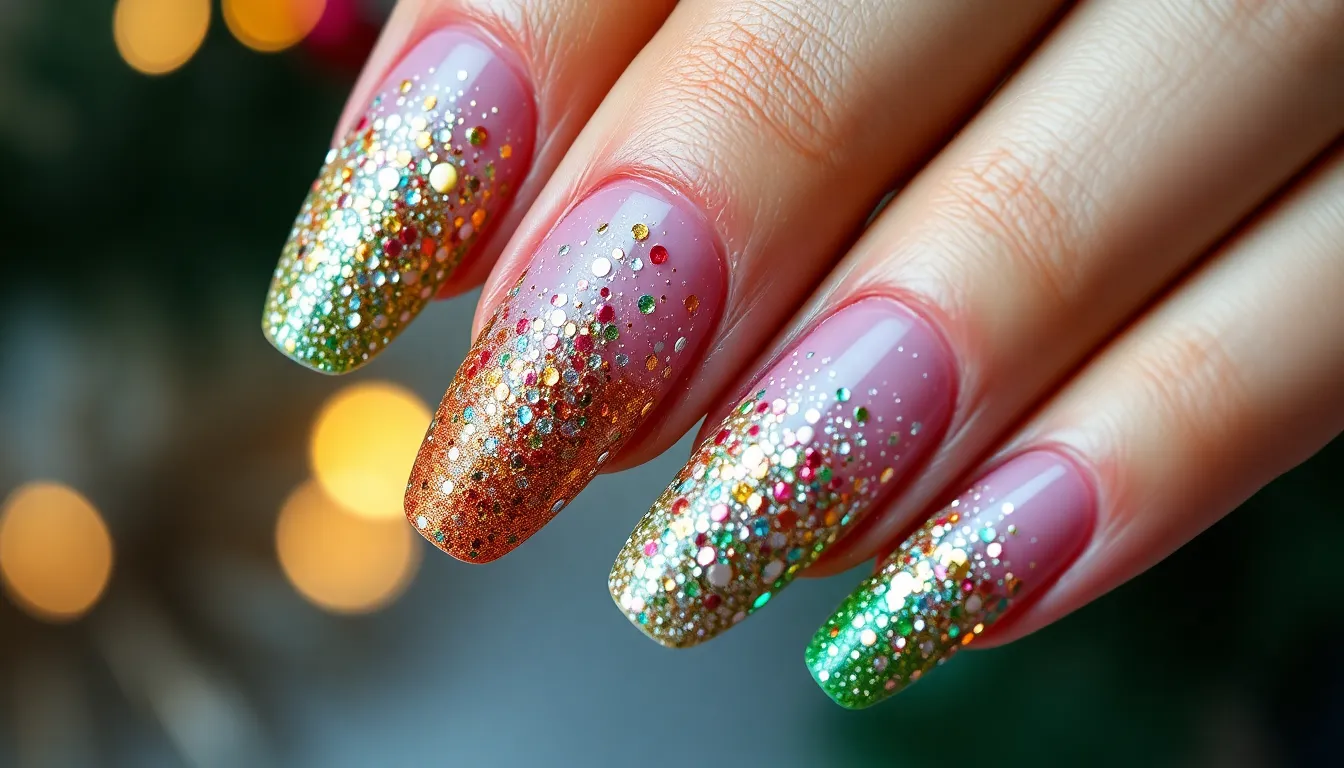
Nothing captures the festive magic quite like glittery nails that catch every light and reflect the joy of the season. We’ve curated the most dazzling sparkle options that’ll make your holiday manicure absolutely unforgettable.
Full Glitter Coverage Options
Complete coverage transforms your nails into sparkling holiday masterpieces. Dense glitter application creates maximum impact for Christmas parties and special events. We recommend using fine holographic glitter in gold or silver for an elegant finish that complements any festive outfit.
Chunky glitter combinations deliver bold festive statements. Mix large hexagonal pieces with micro glitter for textural depth and visual interest. Popular combinations include red and gold chunks over clear bases or silver and white pieces for winter wonderland effects.
Colored glitter bases offer vibrant holiday alternatives. Green glitter with gold accents creates rich Christmas tree effects while burgundy glitter with silver flecks delivers sophisticated elegance. These full coverage options work perfectly with both traditional and modern holiday color schemes.
Glitter Gradient Effects
Gradient techniques create stunning transitional sparkle effects. Start with heavy glitter concentration at the nail tips and fade toward the cuticle area for professional ombre results. This method works exceptionally well with gold to clear gradients or silver to white transitions.
Rainbow gradients bring playful Christmas magic to your fingertips. Blend red glitter into green for traditional holiday colors or create winter wonderland effects using blue to silver transitions. Each nail can feature different gradient combinations for a festive nail art collection.
Reverse gradients offer unique sparkle placement options. Begin with dense glitter near the cuticle and fade toward the tips for unexpected visual appeal. This technique pairs beautifully with French tip designs where clear tips meet glittery bases.
Accent Nail Sparkle Ideas
Single accent nails create balanced festive focal points. Choose your ring finger or thumb for maximum glitter impact while keeping other nails in complementary solid colors. This approach works perfectly when you want sparkle without overwhelming your overall look.
Multiple accent combinations offer creative design flexibility. Alternate glitter and solid nails in checkerboard patterns or create diagonal sparkle placements across your hands. These combinations work especially well with traditional Christmas colors like red and green bases.
Themed accent designs incorporate exact holiday elements. Add glitter snowflakes to one nail while keeping others solid or create sparkly Christmas tree shapes on accent fingers. These targeted approaches allow for creative expression while maintaining sophisticated holiday elegance.
Christmas Character and Icon Nail Art
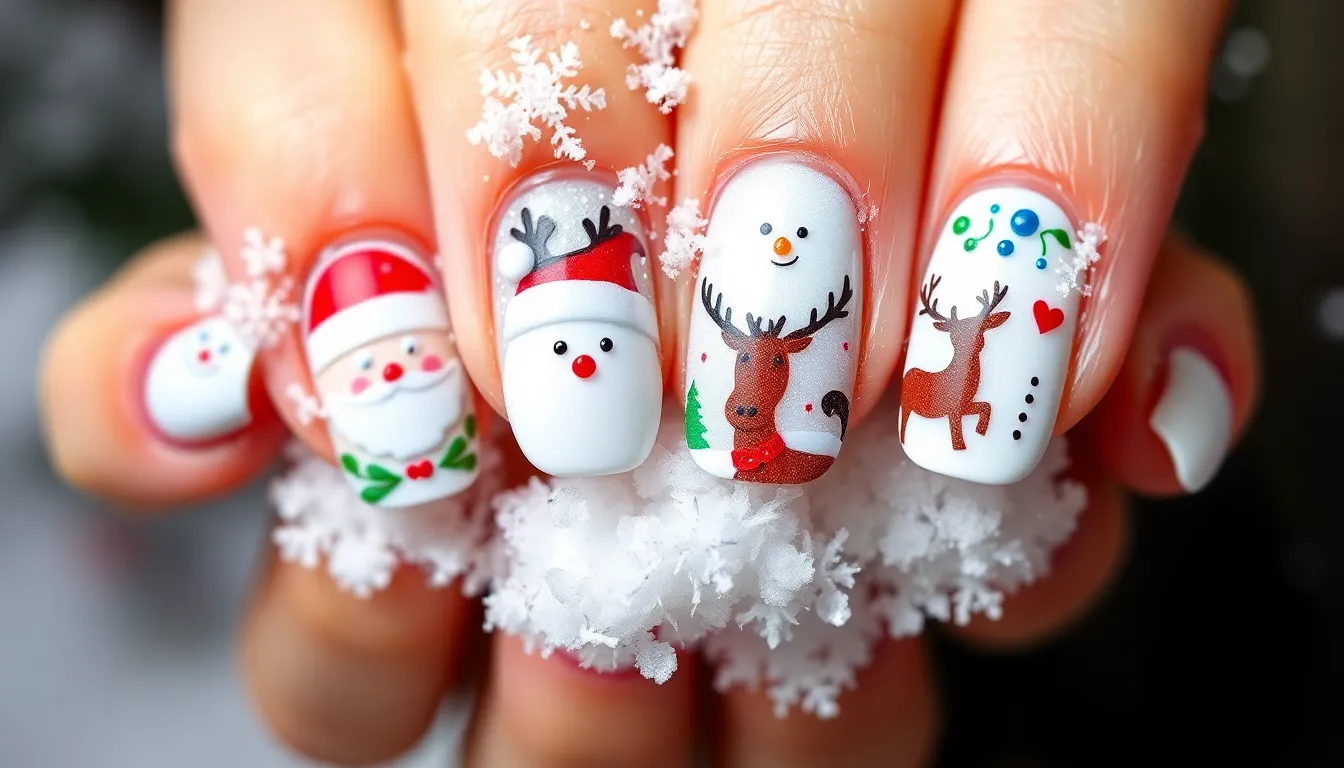
Creating beloved Christmas characters and festive icons on your nails brings whimsical charm to your holiday manicures. These playful designs showcase your personality while celebrating the season’s most cherished symbols.
Santa Claus Face Designs
Santa’s jolly face transforms any nail into a miniature holiday masterpiece that captures the spirit of Christmas magic. Red acrylic bases paired with white tips create the perfect foundation for Santa’s iconic hat and beard combination. We recommend using fine detail brushes to paint rosy cheeks, twinkling blue eyes, and that signature warm smile that makes Santa so beloved.
Dimensional Santa designs add texture and visual interest through carefully layered acrylic application techniques. White acrylic sculpting creates realistic beard textures while red gems positioned strategically mimic Santa’s traditional hat details. Professional nail artists suggest practicing Santa’s facial proportions on practice wheels before attempting full manicure applications.
Minimalist Santa interpretations work beautifully for those preferring subtle character references over detailed portraits. Simple red and white color blocking represents Santa’s hat while small black dots create his coal black eyes. These simplified versions maintain festive appeal without overwhelming smaller nail surfaces or busy holiday schedules.
Reindeer and Snowman Motifs
Reindeer silhouettes create elegant wildlife inspired designs that capture winter woodland magic perfectly. Brown gradient techniques from light tan to deep chocolate establish realistic reindeer coloring while maintaining sophisticated holiday aesthetics. We love adding gold antler details using striping brushes and metallic polish for luxurious finishing touches.
Rudolph themed nails incorporate that famous red nose through strategic gem placement or glossy red polish dots. Traditional brown base colors pair beautifully with white accent details that highlight reindeer facial features naturally. Adding small silver bells as 3D embellishments creates movement and authentic reindeer collar references.
Snowman faces bring childhood winter memories directly to your fingertips through charming circular white designs. Orange carrot noses created with fine brushes and black coal button eyes establish classic snowman characteristics instantly. We suggest using matte top coats on snowman designs to achieve authentic snow texture effects that photograph beautifully.
Frosty winter scenes combine multiple snowmen figures across several nails for cohesive storytelling manicures. Different sized snowmen create depth while maintaining balanced compositions that work harmoniously together. Blue gradient backgrounds suggest winter skies while white glitter adds falling snow effects naturally.
Holly and Mistletoe Patterns
Holly leaf designs showcase nature’s festive beauty through rich green acrylic applications and vibrant red berry accents. Traditional holly patterns feature pointed leaf shapes painted in deep forest green with distinctive serrated edges that define authentic holly characteristics. We recommend using small dotting tools for perfect red berry placement that maintains balanced holly cluster compositions.
Realistic holly textures emerge through careful layering techniques that create dimensional leaf appearances on flat nail surfaces. Light green highlights applied along leaf centers suggest natural holly shine while darker green shadows add depth perception naturally. Professional techniques include using fan brushes for delicate leaf vein details that enhance botanical accuracy.
Mistletoe motifs create romantic holiday nail art through soft green rounded leaves and pearl white berry clusters. Gentle ombre techniques from pale to medium green establish mistletoe’s characteristic coloring while maintaining feminine appeal. We love positioning mistletoe designs asymmetrically across accent nails for balanced yet unexpected focal points.
Combined holly and mistletoe manicures blend these traditional Christmas plants into cohesive botanical themes that celebrate nature’s holiday offerings. Alternating holly and mistletoe patterns across different fingers creates visual rhythm while maintaining botanical authenticity throughout your manicure design. Gold accent details tie both plant motifs together beautifully.
Elegant Winter Wedding Christmas Nails
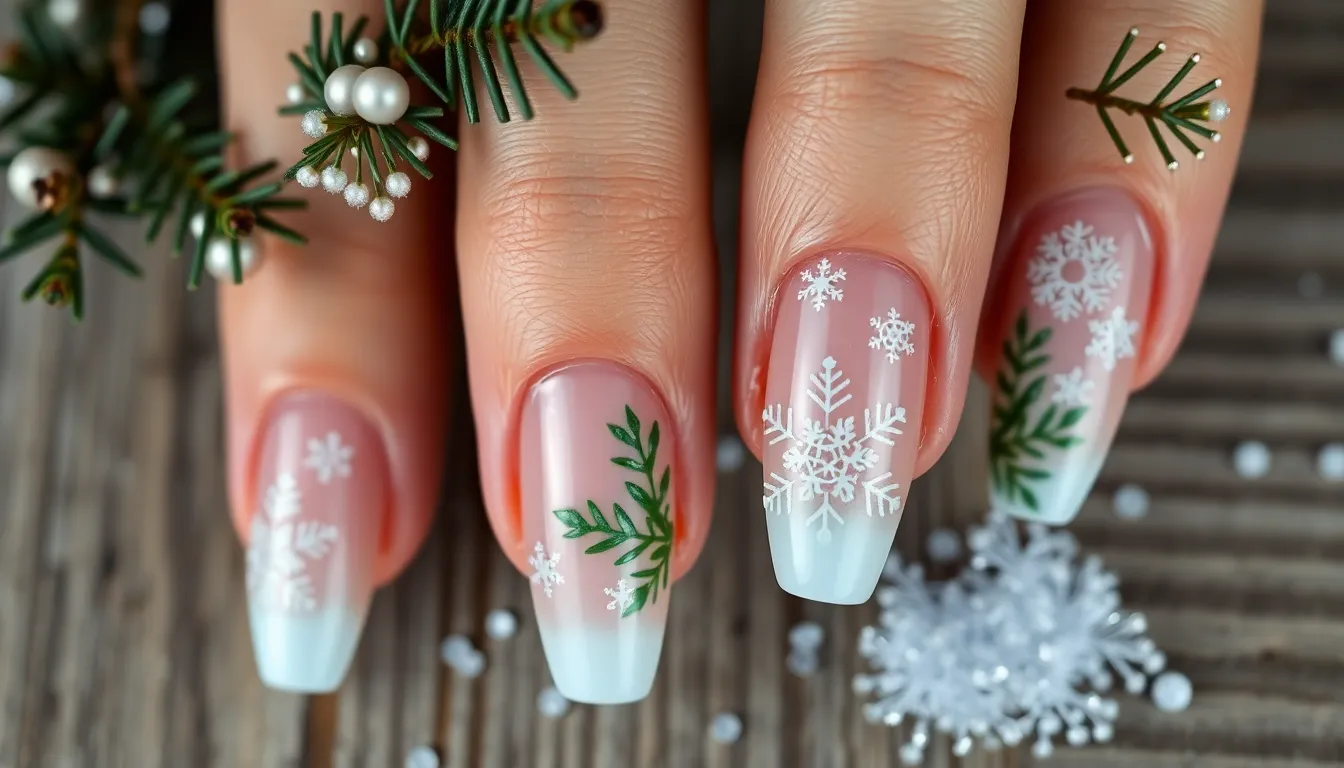
We believe that winter brides deserve nail designs that capture both Christmas magic and bridal sophistication. These elegant Christmas acrylic nail ideas perfectly balance festive elements with refined beauty for your special day.
Subtle Christmas Themed Designs
Delicate snowflake motifs create the perfect winter wedding nail art without overwhelming your bridal look. We recommend using white or silver acrylic as your base color and adding hand-painted snowflakes in pearl or champagne tones. Fine detail brushes help you create intricate snowflake patterns that resemble real ice crystals on each nail.
Soft evergreen branches make another stunning choice for subtle Christmas wedding nails. Paint thin green branches along one side of each nail using sage or eucalyptus green acrylic. Add tiny white dots to represent snow dusting for an authentic winter forest effect.
Understated holly leaf designs work beautifully when painted in muted green tones with small pearl berries. We suggest placing single holly leaves near the cuticle area of accent nails only. This approach maintains elegance while honoring Christmas traditions.
Sophisticated Holiday Color Palettes
Dusty rose and champagne combinations create the most romantic Christmas wedding nail palette. We love pairing soft pink acrylic bases with champagne gold accents for a luxurious finish. Rose gold foil details add extra sparkle that complements winter lighting perfectly.
Burgundy and cream pairings offer rich sophistication for December brides. Deep wine burgundy serves as an excellent base color while cream accents provide elegant contrast. Silver chrome details enhance this palette’s luxury appeal significantly.
Sage green and silver create a modern twist on traditional Christmas colors. We recommend using muted sage green acrylic with subtle silver striping or geometric patterns. Pearl topcoats add dimension without appearing too flashy for wedding photography.
Minimalist Festive Accents
Single rhinestone placements transform simple nude nails into festive wedding art. We suggest placing one quality rhinestone at the base of each ring finger nail. Choose clear or champagne colored stones that won’t compete with your engagement ring’s sparkle.
Thin metallic stripes create sophisticated holiday references without obvious Christmas imagery. Paint single gold or silver lines diagonally across accent nails using fine striping brushes. This technique adds festive shimmer while maintaining bridal elegance.
Tiny star accents scattered sparingly across neutral bases capture winter night sky magic. We recommend using white or silver acrylic paint to create small five pointed stars on just two accent nails. Seal everything with glossy topcoat for professional wedding day durability.
DIY Christmas Acrylic Nail Tutorials
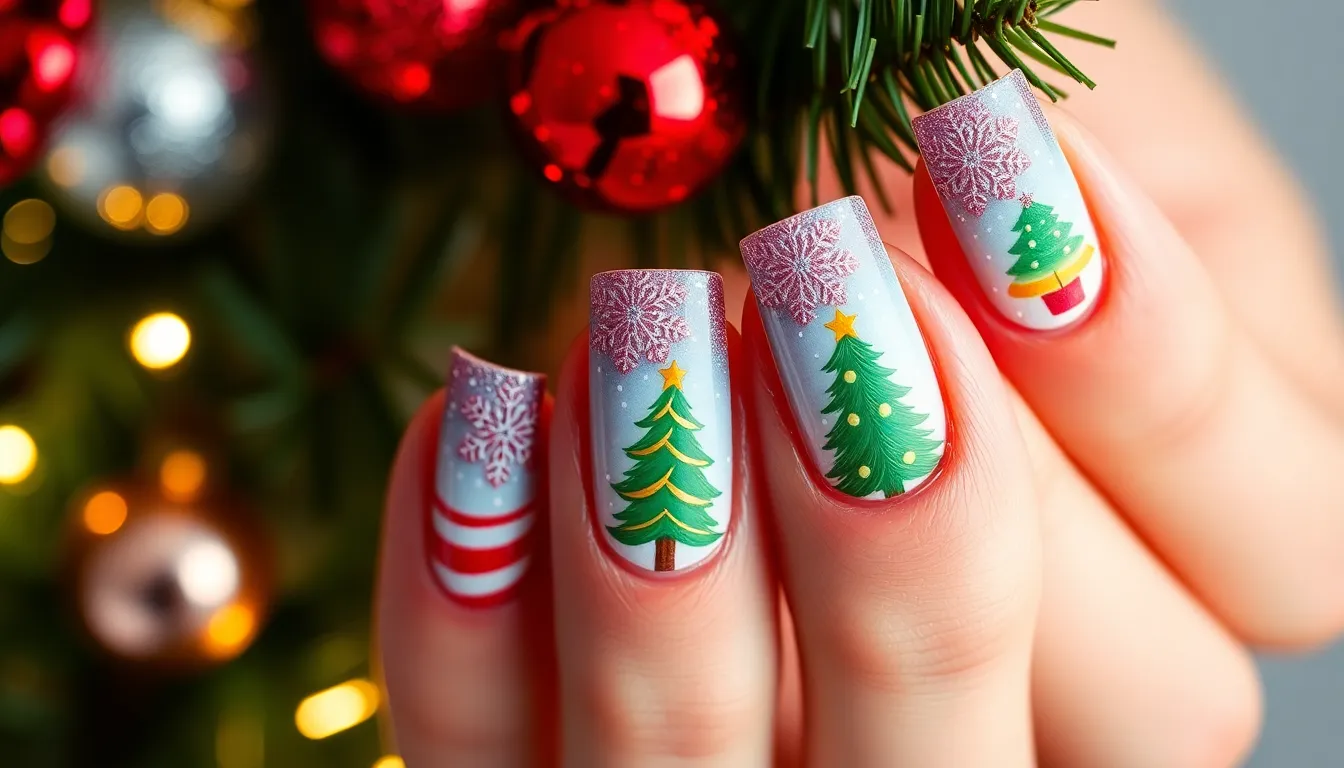
Creating stunning Christmas acrylic nails at home becomes achievable with the right guidance and techniques. We’ll walk you through everything needed to master these festive designs.
Essential Tools and Supplies Needed
Acrylic nail basics form the foundation of every Christmas design we’ll create together. Acrylic powder in white, clear, red, green, and gold provides the base colors for most holiday patterns. Monomer liquid activates the powder and creates the workable acrylic mixture we need for application.
Application tools ensure professional results at home. Acrylic brushes in sizes 6, 8, and 10 handle different design elements from base application to fine details. Cuticle pushers prepare the nail bed properly before acrylic application. Files in 100/180 and 240/240 grit smooth and shape the nails to perfection.
Design enhancement supplies bring Christmas magic to life on our nails. Detail brushes in sizes 0, 2, and 4 create intricate snowflakes, holly leaves, and candy cane stripes. Dotting tools in multiple sizes form perfect circles for ornament designs and snowman features. Striping tape produces clean lines for geometric Christmas tree patterns and gift box designs.
Finishing materials protect and enhance our festive creations. Base coat creates proper adhesion between natural nails and acrylic application. Top coat seals designs and provides lasting shine throughout holiday celebrations. Nail dehydrator removes oils and moisture for optimal acrylic bonding.
Step-by-Step Design Instructions
Snowflake accent nails capture winter’s delicate beauty with precise technique. Start by applying a white or light blue acrylic base and allowing complete curing. Mix silver or white acrylic paint with a touch of water for smooth brush flow. Create the main snowflake structure using intersecting lines at 60-degree angles with a size 2 detail brush. Add smaller branches and decorative elements to each main line using gentle brush strokes.
Christmas tree gradient nails showcase festive colors in stunning dimensional effects. Apply a nude or clear base coat and cure completely under LED light. Create the tree shape using dark green acrylic at the cuticle area, blending upward with lighter green shades. Work the gradient from dark to light using small circular motions with a makeup sponge. Add a small star at the tip using gold acrylic and a dotting tool for the perfect finishing touch.
Candy cane striping technique requires patience and steady hands for professional results. Prepare nails with a white acrylic base and ensure complete drying before proceeding. Apply striping tape in diagonal lines across each nail, pressing edges firmly to prevent bleeding. Paint red acrylic between tape sections using thin, even coats for consistent coverage. Remove tape immediately after painting while acrylic remains slightly wet for crisp lines.
Santa hat corner designs add playful character to any Christmas manicure. Begin with a nude or pink base coat and allow proper curing time. Paint a triangular red section in the upper corner using smooth, controlled brush strokes. Add the white fur trim using a small brush and dabbing motions for texture. Complete the design with a white pom pom at the triangle’s tip using a dotting tool.
Common Mistakes to Avoid
Rushing the curing process leads to smudged designs and poor adhesion throughout wear. Always allow each acrylic layer to cure completely before adding additional elements or colors. Check for tackiness by gently touching the surface with a clean fingertip. Plan extra time between steps to ensure professional lasting results.
Overloading brushes with product creates uneven application and messy design lines. Dip brushes lightly into acrylic paint or polish, removing excess on the bottle rim. Practice brush control on practice nails or paper before working on actual designs. Clean brushes frequently during detailed work to maintain precise control.
Skipping nail preparation steps causes lifting, chipping, and shortened wear time. Push back cuticles and remove all oils using nail dehydrator before acrylic application. File natural nails to desired length and shape before beginning any design work. Remove old polish completely and ensure nail beds are clean and dry.
Applying designs too thickly results in raised, uneven surfaces that catch and chip easily. Build designs in thin layers, allowing each to cure before adding the next. Use light pressure when applying decorative elements like glitter or rhinestones. Seal all designs with thin top coat layers rather than one thick application.
Professional Christmas Nail Salon Ideas
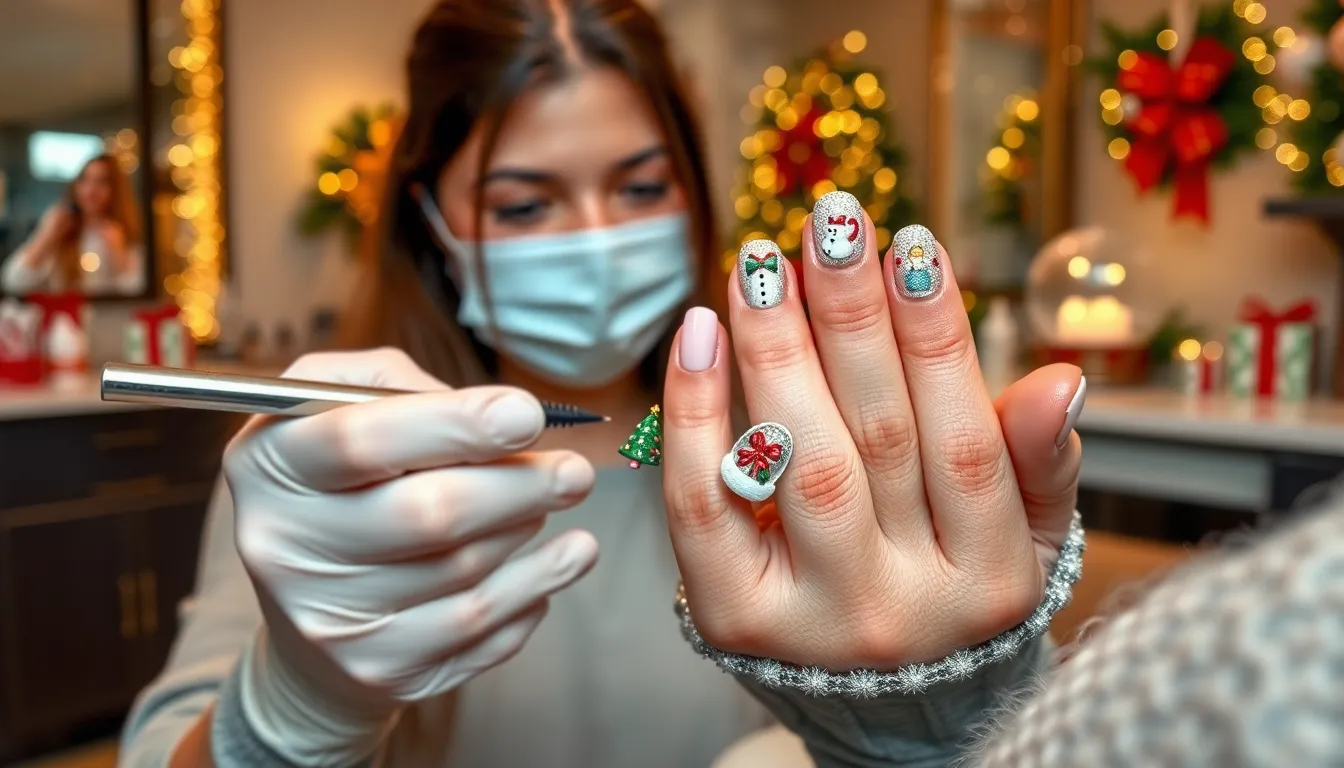
Professional nail salons offer sophisticated Christmas acrylic designs that elevate holiday manicures beyond simple DIY attempts. We’ve seen an incredible surge in client demand for elaborate festive nail art during the holiday season.
Complex 3D Christmas Designs
Salon artists create stunning three dimensional Christmas wreaths using sculpted acrylic flowers and berries. We recommend incorporating tiny pearls and gold wire details to achieve realistic texture and depth. Professional techniques include layering multiple shades of green acrylic to mimic natural evergreen variations.
Miniature Christmas ornament designs showcase advanced sculpting skills through raised spherical shapes. Artists typically use chrome powders and holographic top coats to replicate the reflective quality of real glass baubles. We’ve observed that clients particularly love cluster arrangements of different sized ornaments across multiple nails.
Sculptured Christmas presents transform nails into tiny gift boxes complete with dimensional ribbons and bows. Skilled technicians build up rectangular shapes using structured acrylic application methods. Color combinations like deep emerald with gold ribbons or classic red with silver bows create the most striking visual impact.
Snow globe effects require precise layering techniques to create the illusion of floating elements within clear acrylic domes. We suggest using fine glitter particles suspended in clear gel to simulate swirling snow. Professional artists often incorporate tiny Christmas trees or snowmen as central focal points.
Advanced Nail Art Techniques
Hand painted Christmas murals showcase artistic talent through detailed industry scenes across extended nail tips. We’ve seen breathtaking winter village designs that span all ten nails to create cohesive storytelling. Master artists use ultra fine brushes and high quality acrylic paints to achieve photorealistic details.
Reverse stamping techniques allow salon professionals to create intricate Christmas patterns with precise color placement. Artists fill stamped designs with multiple colors before transferring to create complex multicolored images. We recommend this method for achieving detailed Santa faces or elaborate Christmas tree ornaments.
Encapsulated Christmas elements involve embedding real dried botanicals or decorative pieces within clear acrylic layers. Professional technicians carefully position tiny holly leaves or gold foil pieces between acrylic applications. This technique creates stunning depth while protecting delicate decorative elements from damage.
Chrome and mirror finish applications require specialized powders and precise application timing for flawless results. We’ve observed that burgundy chrome with gold accents creates particularly elegant Christmas looks. Professional grade chrome powders produce superior reflective qualities compared to consumer versions.
Luxury Holiday Nail Treatments
Heated paraffin treatments infused with Christmas scented oils provide therapeutic benefits during extended nail appointments. We recommend peppermint and cinnamon blends to enhance the festive experience while softening cuticles. Professional spas often incorporate these aromatherapy elements into comprehensive holiday nail packages.
Japanese gel base systems offer superior adhesion and longevity for elaborate Christmas nail art designs. High end salons typically use these premium products to ensure intricate artwork remains intact through holiday celebrations. We’ve found that clients appreciate the investment when their detailed designs last three to four weeks without chipping.
Crystallized Christmas nail jewelry adds genuine sparkle through professionally applied Swarovski crystals and gems. Expert technicians use specialized adhesives and placement tools to create stunning patterns with emerald and ruby colored stones. Custom crystal placement services allow clients to incorporate their birthstones into festive designs.
Cuticle artistry services include detailed Christmas themed painting around the nail bed area. We’ve seen incredible holly vine patterns that extend from the cuticle line to create seamless integration with nail art. Professional artists use medical grade brushes to ensure precision in these delicate skin areas.
Christmas Acrylic Nail Care and Maintenance
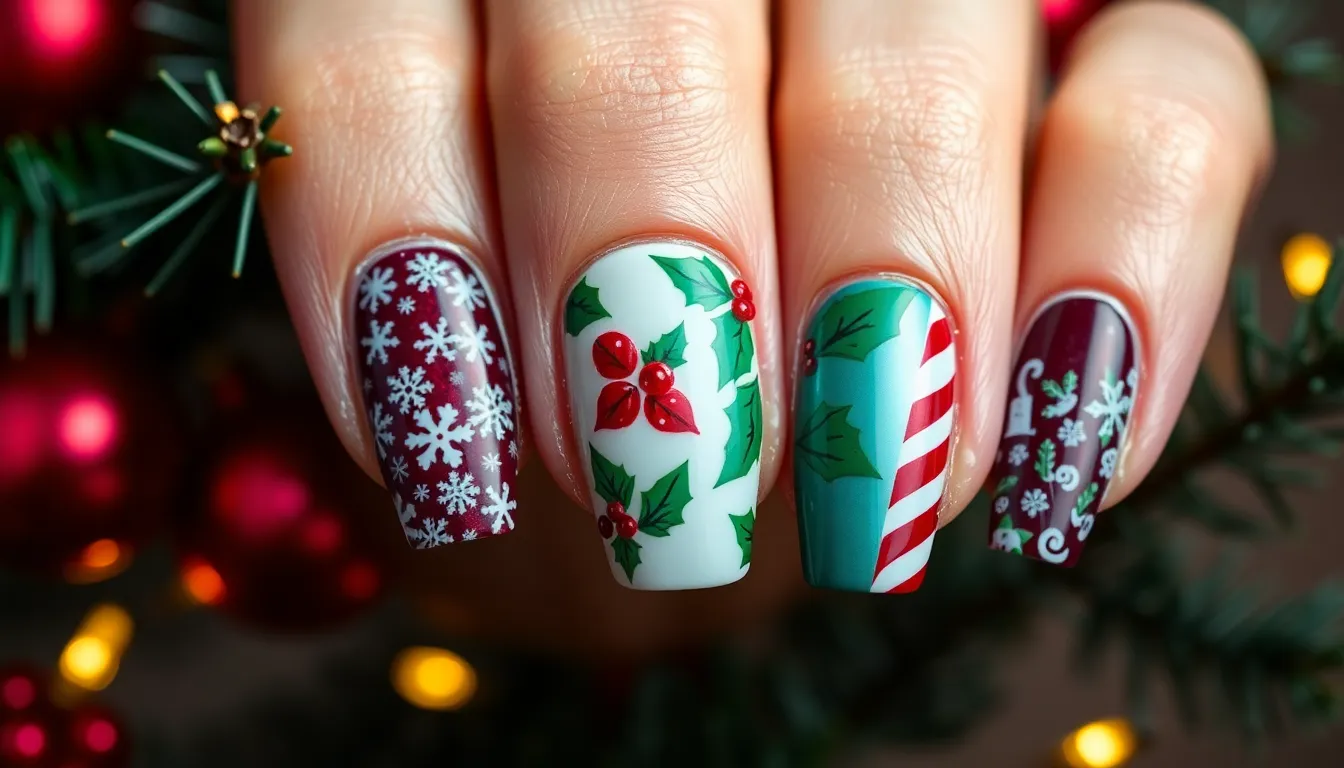
Proper maintenance ensures your festive acrylic designs stay beautiful throughout the entire holiday season. Following these essential care practices will help you maximize both the longevity and appearance of your Christmas nail art.
Protecting Holiday Nail Art
Cuticle oil application becomes crucial for maintaining healthy nail beds around intricate Christmas designs. Apply vitamin E or jojoba oil daily to prevent dryness that can cause lifting around detailed snowflake patterns or 3D embellishments. Use a small brush to work oil gently around delicate holly motifs and candy cane stripes without disturbing the artwork.
Base coat protection serves as your first line of defense against holiday wear and tear. Choose a high quality strengthening base coat before applying Christmas colors like deep burgundy or emerald green. Two thin layers provide better adhesion than one thick application, especially under glitter gradients and metallic accents.
Top coat maintenance requires reapplication every 3-4 days to preserve your festive designs’ vibrant appearance. Use quick dry formulas to refresh Santa Claus faces and reindeer motifs without smudging fine details. Focus extra attention on accent nails featuring heavy sparkle or 3D Christmas trees that experience more surface wear.
Extending Wear Time During Festivities
Gentle handling protects your Christmas acrylic investment during holiday activities. Wear rubber gloves while wrapping presents to prevent scratching delicate snowman designs and holly patterns. Use tools instead of nails for opening packages, removing tape, and handling ornaments that could chip your festive manicure.
Activity modifications help preserve intricate holiday nail art during seasonal celebrations. Delegate dishwashing duties to protect glittery winter wonderland effects and crystallized embellishments. Avoid direct contact with rough surfaces when decorating trees or arranging holiday centerpieces that could damage your carefully crafted designs.
Environmental considerations play a vital role in maintaining Christmas nail longevity during winter months. Keep hands moisturized in cold weather to prevent brittleness that leads to chipping around detailed patterns. Limit exposure to extremely hot water during holiday cooking and cleaning that can weaken acrylic bonds and fade metallic accents.
Safe Removal After the Holidays
Professional removal offers the safest approach for complex Christmas designs featuring 3D elements and heavy embellishments. Schedule appointments with qualified nail technicians who can safely dissolve acrylics without damaging your natural nails. Specialized removal techniques protect nail beds from trauma associated with intricate holiday artwork.
At home removal requires patience and proper supplies to avoid nail damage after your festive celebration ends. Soak cotton balls in pure acetone and secure them over each nail with aluminum foil for 15-20 minutes. File away softened acrylic gently, working in small sections to preserve your natural nail integrity underneath elaborate Christmas designs.
Post removal care becomes essential for restoring nail health after wearing heavy holiday acrylics for extended periods. Apply strengthening treatments containing keratin and calcium to rebuild natural nail structure. Massage cuticle oil into nail beds daily and avoid harsh polish removers for at least one week to allow complete recovery from your festive manicure experience.
Conclusion
Christmas acrylic nails offer endless possibilities to express our holiday spirit while maintaining gorgeous hands throughout the festive season. Whether we choose classic red and gold elegance or embrace playful character designs the key lies in selecting styles that reflect our personality and lifestyle.
The durability of acrylics makes them perfect for holiday celebrations allowing us to enjoy beautiful nails from Christmas Eve through New Year’s Day. With proper care and maintenance techniques our festive manicures can look salon-fresh for weeks.
From DIY enthusiasts to professional salon clients we all deserve nails that sparkle as bright as our holiday joy. These Christmas acrylic ideas ensure we’ll have stunning hands ready for every holiday photo cookie decorating session and celebration that comes our way.
Frequently Asked Questions
What are the most popular Christmas acrylic nail colors?
Classic Christmas colors include traditional red and green combinations, elegant gold and silver accents, and winter white with silver detailing. Deep burgundy paired with forest green offers sophistication, while cherry red and emerald green create bold festive statements. Gold foil details and silver chrome finishes add luxury to any holiday manicure.
How long do Christmas acrylic nails typically last?
Christmas acrylic nails can last 2-3 weeks with proper care and maintenance. Regular application of cuticle oil, gentle handling during holiday activities, and weekly top coat touch-ups help preserve intricate designs. Professional application and quality materials ensure maximum durability throughout the holiday season.
What are some easy DIY Christmas nail designs for beginners?
Beginners can try candy cane stripes using striping tape, simple snowflake designs with dotting tools, or Santa hat corners with red and white polish. Christmas tree silhouettes and gradient sparkle effects are also achievable at home with basic tools like detail brushes and sponges.
How do I remove Christmas acrylic nails safely?
Professional removal is recommended for complex 3D designs. For at-home removal, soak nails in acetone for 15-20 minutes, gently push off softened acrylic, and avoid forceful pulling. Follow with cuticle oil and moisturizer to restore nail health. Never peel or bite off acrylics to prevent damage.
Can I wear Christmas acrylic nails to a winter wedding?
Yes! Choose subtle Christmas-themed designs like delicate snowflakes or soft evergreen branches. Opt for sophisticated color palettes such as dusty rose and champagne, burgundy and cream, or sage green with silver. Minimalist festive accents like single rhinestones maintain bridal elegance while adding holiday spirit.
What tools do I need for DIY Christmas acrylic nails?
Essential tools include acrylic powder and liquid, nail files, buffers, cuticle pushers, detail brushes, and dotting tools. For designs, you’ll need striping tape, stamping plates, glitter, rhinestones, and various polish colors. A good base coat, top coat, and UV/LED lamp are crucial for professional-looking results.
How can I make my Christmas nail glitter last longer?
Apply glitter over a tacky base coat for better adhesion. Use fine holographic glitter for elegant finishes or chunky combinations for bold statements. Seal with a quality top coat and reapply weekly. Avoid harsh chemicals and wear gloves when cleaning to preserve the sparkle throughout the holiday season.
What are the latest Christmas nail art trends?
Current trends include 3D Christmas wreaths, crystallized nail jewelry, gradient sparkle effects, and minimalist holiday icons. Holographic finishes, reverse candy cane designs, and sophisticated botanical themes like holly and mistletoe are also popular. Professional salons offer luxury treatments combining heated paraffin with intricate festive designs.

