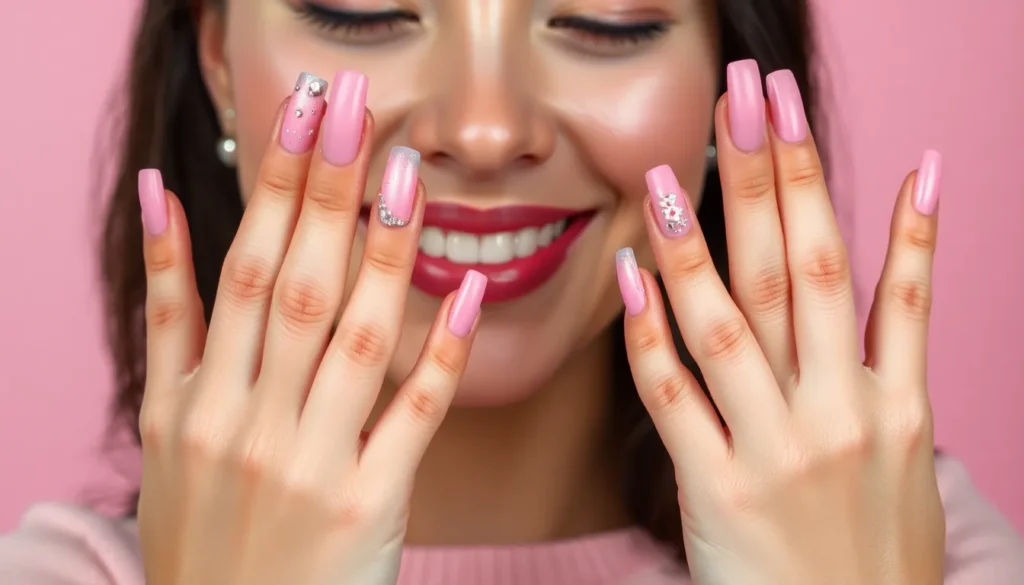
We’ve all fallen under the spell of Barbie’s iconic pink aesthetic, and what better way to channel that glamorous energy than through stunning nail art? Whether you’re preparing for a special event or simply want to embrace your inner fashionista, Barbie-inspired nails offer endless possibilities to express your playful side.
From classic bubblegum pink gradients to sparkly rhinestone accents, we’ll explore the most captivating nail designs that capture Barbie’s timeless elegance. These aren’t just ordinary manicures – they’re statement pieces that transform your fingertips into miniature works of art.
Ready to discover nail ideas that’ll make you feel like you’ve stepped straight out of Barbie’s dream house? We’ve curated the most eye-catching designs that blend sophistication with that signature Barbie magic, ensuring your nails become the ultimate conversation starter wherever you go.
Classic Pink Perfection: Hot Pink Barbie Nails
Hot pink embodies the quintessential Barbie nail aesthetic that never goes out of style. This vibrant shade captures our favorite doll’s signature color while offering versatile finishing options to suit different occasions.
Matte Hot Pink Finish
Matte hot pink nails deliver a sophisticated twist on Barbie’s classic color palette. We love how this velvety finish creates depth and dimension that catches the eye without overwhelming shine. Apply a high quality hot pink base coat in two thin layers for even coverage. Seal your manicure with a matte topcoat to achieve that coveted soft texture finish.
Professional nail artists recommend brands like OPI’s “Pink Flamenco” or Essie’s “Watermelon” for rich pigmentation. These polishes provide excellent opacity and smooth application that lasts up to seven days. Touch up your matte finish with a light buffing using a fine grit nail file to maintain that perfect velvety appearance.
Glossy Bubblegum Pink
Glossy bubblegum pink channels Barbie’s playful spirit with maximum shine and vibrancy. This ultra feminine shade reflects light beautifully and creates an eye catching mirror like finish. Choose bubble gum inspired pinks such as China Glaze’s “Pink Voltage” or Sally Hansen’s “Bubblegum Pink” for authentic Barbie vibes.
Apply your base coat followed by two coats of bubblegum pink polish for optimal color saturation. We recommend using a high shine topcoat like Seche Vite or Essie’s “Good to Go” for that glass like finish. This glossy treatment makes your nails appear longer and more elegant while maintaining the fun Barbie aesthetic.
Pink Ombre Gradient
Pink ombre gradients create stunning dimensional effects that transition from light to dark pink tones. We achieve this look by blending multiple pink shades seamlessly across each nail surface. Start with a pale pink base like OPI’s “Bubble Bath” and gradually build intensity toward the nail tips using deeper shades.
Professional makeup sponges work best for creating smooth gradient transitions between colors. Dab your sponge with both light and medium pink polishes then gently press onto your nail surface. Repeat this process three to four times for seamless blending. Finish with a glossy topcoat to unify the gradient and add professional polish to your Barbie inspired manicure.
Glamorous Glitter: Sparkly Barbie-Inspired Designs

Sparkle transforms ordinary nails into dazzling accessories that capture Barbie’s love for all things glamorous. Glitter applications offer endless possibilities for creating show-stopping manicures that shimmer with every movement.
Pink Glitter Accent Nails
Accent nails featuring pink glitter create stunning focal points without overwhelming the entire manicure. We recommend painting three nails in a solid pink shade while covering the ring finger in fine pink glitter polish. Strategic placement of glitter on accent nails allows the sparkle to catch light beautifully throughout the day.
Chunky pink glitter mixed with fine particles adds dimensional texture that mirrors Barbie’s playful sophistication. Apply a clear base coat before adding glitter to ensure smooth application and easy removal later. Dense glitter coverage on accent nails creates maximum impact while maintaining an elegant balance across all fingers.
Full Coverage Holographic Glitter
Holographic glitter polish delivers mesmerizing rainbow effects that shift colors under different lighting conditions. Full coverage application requires two thin coats of holographic polish over a pink base for optimal sparkle intensity. We suggest using a makeup sponge to dab additional glitter onto areas that need extra coverage.
Prismatic effects from holographic particles create an otherworldly shimmer that perfectly embodies Barbie’s magical aesthetic. Quality holographic polishes contain multiple particle sizes that reflect light at various angles for maximum visual impact. Sealing holographic nails with a glossy top coat enhances the rainbow effect while protecting the glitter from chipping.
Rose Gold Sparkle Tips
Rose gold glitter tips offer a sophisticated twist on traditional French manicures with warm metallic undertones. We create these looks by applying rose gold glitter polish along the nail tips in a curved line reminiscent of classic French nail designs. Blending the glitter edge softly into the pink base creates seamless transitions.
Metallic rose gold particles complement pink nail beds beautifully while adding luxurious sparkle to fingertips. Precision brushes help achieve clean lines when applying glitter tips for professional-looking results. Graduated sparkle intensity from dense coverage at tips to subtle shimmer toward cuticles creates elegant dimensional effects.
Dreamy Pastel Paradise: Soft Barbie Color Palette

Building on those glamorous looks, we’re diving into softer territory with pastel nail ideas that capture Barbie’s gentler side. These delicate hues create an ethereal beauty that’s perfect for everyday elegance or special occasions.
Baby Pink and Lavender Combo
Baby pink and lavender combinations create the ultimate feminine nail art that screams modern Barbie vibes. We love painting alternating nails in these complementary shades, starting with a creamy baby pink base on the thumb, middle finger, and pinky. Lavender polish fills in the index and ring fingers, creating a balanced color story that’s both playful and sophisticated.
Ombre techniques work beautifully with this color pairing, allowing us to blend baby pink into lavender seamlessly. We recommend starting with the lighter baby pink at the cuticle and gradually transitioning to lavender at the tips using a makeup sponge. This gradient effect mimics cotton candy clouds and delivers that dreamy Barbie aesthetic we’re after.
Accent details elevate this combination even further when we add tiny white pearls or silver studs to one nail per hand. The contrast between soft pastels and metallic elements creates visual interest without overwhelming the delicate color palette.
Mint Green and Pink Swirls
Mint green and pink swirls transport us straight into Barbie’s dreamhouse with their whimsical, candy-inspired appearance. We create these mesmerizing designs by applying a mint green base coat and allowing it to dry completely before adding pink swirl patterns with a fine nail art brush.
Marble techniques produce stunning results when we drop pink polish onto wet mint green base and use a toothpick to create organic swirl patterns. The key lies in working quickly before the base coat sets, allowing both colors to blend naturally while maintaining distinct swirl formations.
Water marble methods offer another approach for achieving perfect swirls when we drop alternating colors into room temperature water and drag a toothpick through them. We then dip each nail into the design, creating unique swirl patterns that capture Barbie’s playful spirit with every movement.
Peachy Pink Sunset Nails
Peachy pink sunset nails capture the romantic essence of Barbie’s California dream lifestyle with their warm, glowing tones. We blend coral, peach, and soft pink shades to create gradient effects that mimic breathtaking sunset skies over Malibu beaches.
Sponge application techniques help us achieve seamless color transitions by dabbing different shades onto a makeup sponge and pressing it onto the nail surface. Starting with the lightest peachy pink at the base, we gradually build intensity toward coral tones at the tips, creating depth and dimension.
Shimmer topcoats enhance the sunset effect when we apply iridescent glitters that catch light like ocean waves at golden hour. These subtle sparkles add movement to the design without overpowering the soft peachy pink foundation, resulting in nails that glow with Barbie’s signature warmth and optimism.
Bold Statement Nails: Vibrant Barbie Colors

Electric colors and bold contrasts take our Barbie nail game to the next level. These daring combinations capture Barbie’s fearless fashion sense and love for making unforgettable impressions.
Electric Pink and Neon Yellow
Electric pink paired with neon yellow creates one of the most eye-catching Barbie nail combinations we can achieve. Start by painting your thumb and ring finger in electric pink while coating your index and middle fingers in vibrant neon yellow. Leave your pinky finger in electric pink to maintain visual balance across your hand.
We recommend using a white base coat under these neon shades to make the colors pop with maximum intensity. Apply thin layers of each polish to prevent streaking and ensure even coverage. The contrast between these two bold hues mimics Barbie’s playful wardrobe choices and creates an instant conversation starter.
For added dimension, consider creating geometric patterns by taping off sections and alternating the colors on individual nails. This technique transforms simple color blocking into ever-changing nail art that screams confidence and creativity.
Magenta and Purple Color Blocking
Magenta and purple color blocking delivers sophisticated drama that embodies Barbie’s glamorous side. Paint your thumb, middle finger, and pinky in rich magenta while adorning your index and ring fingers in deep purple. This alternating pattern creates visual interest without overwhelming the overall look.
We suggest choosing a magenta with pink undertones and a purple with blue undertones to maximize the contrast between shades. Apply each color in two thin coats for optimal opacity and finish with a high-gloss topcoat to enhance the vibrant appearance.
Create clean lines between colors by using nail tape or steady brush strokes for precise application. The key to successful color blocking lies in maintaining crisp edges that define each color section clearly.
Hot Pink with White Polka Dots
Hot pink nails adorned with white polka dots channel Barbie’s retro charm and playful personality. Begin with a hot pink base coat applied evenly across all nails and allow it to dry completely before adding the dotted details.
We create perfect polka dots using a dotting tool or the rounded end of a bobby pin dipped in white polish. Start with larger dots on your thumb and ring finger while adding smaller dots to the remaining nails for varied visual texture. Space the dots randomly rather than in perfect rows to achieve a more organic and whimsical appearance.
Seal your polka dot design with a clear topcoat to prevent chipping and maintain the crisp contrast between the hot pink base and white dots. This classic combination works beautifully for both casual outings and special occasions where you want to showcase your fun-loving spirit.
Elegant French Tips: Barbie-Style Manicures

French manicures get a glamorous Barbie makeover with these sophisticated pink variations. We’ll transform the timeless classic into stunning nail art that captures Barbie’s refined elegance.
Pink French Tips on Clear Base
Pink French tips create a soft and feminine look that perfectly embodies Barbie’s graceful style. We recommend using a sheer pink shade like ballet slipper or rose quartz for the tips instead of traditional white. This subtle variation adds warmth while maintaining the classic French manicure’s sophistication.
Start with a clear or nude base coat for the perfect foundation. Apply thin coats of your chosen pink shade to the tips using steady strokes from one side to the other. We suggest using a French tip guide or striping tape to achieve clean, professional lines. Finish with a high gloss topcoat to enhance the pink’s luminosity and create that signature Barbie shine.
Reverse French with Hot Pink
Reverse French manicures flip the traditional design by placing color at the cuticle area instead of the tips. We love using vibrant hot pink for this modern twist that screams Barbie glamour. This bold approach creates a striking contrast against nude or clear nail beds.
Begin by applying your base color to the entire nail in a soft nude or clear shade. Use a thin nail art brush to carefully paint a hot pink crescent at the base of each nail near the cuticle. We find that working slowly and using steady pressure creates the smoothest curves. Clean up any uneven edges with a small brush dipped in nail polish remover for precision.
Double French Tip Design
Double French tips feature two distinct lines that create dimensional depth and visual interest. We typically use a soft pink for the first line closest to the nail bed and a deeper rose or magenta for the outer tip. This layered approach adds complexity while staying true to Barbie’s pink palette.
Apply your base coat and let it dry completely before starting the design. Create the first French tip line using light pink polish about halfway down from the nail tip. Once dry, add the second line using deeper pink at the very edge of the nail. We recommend using different brush sizes to vary the thickness of each line for a more ever-changing look.
Trendy Nail Art: Modern Barbie-Inspired Patterns

Contemporary nail artists are revolutionizing traditional Barbie themes with sophisticated patterns that capture her iconic style. These modern interpretations blend classic femininity with artistic flair to create truly stunning nail art.
Barbie Silhouette Designs
Barbie Silhouette Designs transform your nails into miniature works of art featuring the doll’s iconic figure. We recommend starting with a soft pink base coat, then using a thin nail art brush to paint delicate black silhouettes of Barbie’s profile on your accent nails. Position the silhouette slightly off center for a more artistic composition that draws the eye naturally.
Create variations by painting Barbie in different poses like sitting elegantly or striking her classic runway stance. Add tiny rhinestones around the silhouette to represent jewelry or sparkles in her hair. Professional nail artists suggest using high quality acrylic paint for the cleanest lines, as it won’t bleed into the base color like some nail polishes might.
Finish these designs with a glossy top coat to protect the artwork and create depth. The contrast between the feminine pink background and bold black silhouette creates a sophisticated look that’s perfect for special occasions or when you want to make a statement.
Pink Marble Effect
Pink Marble Effect nails capture luxury and elegance while maintaining that signature Barbie aesthetic. Start by applying a light pink base coat, then drop small amounts of white and deeper pink polish onto the wet nail. Use a fine detail brush or toothpick to gently swirl the colors together, creating natural marble veining patterns.
Work quickly while the polish remains workable, as marble effects look most authentic when the colors blend organically. Focus on creating irregular veining patterns rather than perfect swirls, since real marble has random formations that make each nail unique. Some nail artists recommend adding a touch of gold or silver polish to certain veins for an extra luxurious appearance.
Allow each nail to dry completely before applying a high gloss topcoat that enhances the marble’s natural shine. The finished result mimics expensive marble surfaces while maintaining the playful pink palette that defines Barbie’s industry. This technique works beautifully on longer nails where there’s more surface area to showcase the intricate patterns.
Abstract Pink Brushstrokes
Abstract Pink Brushstrokes offer an artistic interpretation of Barbie nail ideas that feels fresh and contemporary. Begin with a nude or clear base to let the pink brushstrokes take center stage. Load a flat brush with various shades of pink polish, from soft blush to vibrant magenta, and create bold strokes across each nail.
Vary the direction and thickness of your brushstrokes to achieve an authentic abstract art appearance. Layer different pink tones to create depth and visual interest, allowing some strokes to overlap while others stand alone. Contemporary nail artists often incorporate metallic pink or rose gold accents within the brushstrokes for added dimension.
Consider painting each nail differently to create a cohesive yet varied look across your entire manicure. Some nails might feature vertical strokes while others showcase diagonal or curved movements. Seal the design with a matte topcoat for a modern gallery worthy finish, or choose glossy for a more traditional polished appearance that reflects light beautifully.
Chrome and Metallic: Futuristic Barbie Nails

These modern metallic finishes elevate traditional Barbie nail ideas with space age sophistication. We’re showcasing chrome and metallic techniques that transform your nails into mirror like masterpieces worthy of future Barbie.
Pink Chrome Mirror Finish
Chrome polish creates an ultra reflective surface that mirrors everything around you with stunning clarity. We apply a black base coat first because dark colors enhance the chrome’s reflective properties. The chrome powder gets rubbed onto tacky gel polish using a silicone tool or makeup sponge for even coverage.
Buffing the chrome powder creates that perfect mirror finish that makes your nails look like liquid metal. We seal the chrome with a no wipe top coat to prevent tarnishing and maintain the reflective quality. This futuristic Barbie nail design catches light from every angle and creates an almost holographic effect.
Professional chrome powders deliver better results than drugstore alternatives and last up to two weeks without chipping. We recommend practicing the application technique on nail wheels before attempting it on natural nails.
Metallic Rose Gold Base
Rose gold combines the warmth of copper with the elegance of pink in a sophisticated metallic finish. We choose high quality metallic polishes that contain real metal flakes for authentic shimmer and depth. The application requires thin even coats to prevent streaking and ensure smooth coverage.
Building up the color gradually creates more intensity without compromising the metallic sheen that makes these nails special. We apply each coat in the same direction to maintain consistent brush strokes and professional appearance. The rose gold base serves as a perfect foundation for additional nail art elements like rhinestones or decals.
Temperature changes can affect the metallic particles so we store these polishes at room temperature for best results. Metallic formulas dry slower than regular polish so patience during application prevents smudging and ensures longevity.
Iridescent Pink Powder
Iridescent powder shifts colors as you move your hands creating a mesmerizing rainbow effect over pink base coats. We dust the powder over tacky gel polish using a fluffy eyeshadow brush for seamless blending. The technique requires gentle circular motions to distribute the particles evenly across the nail surface.
Different lighting conditions reveal various color shifts from purple to green to gold depending on the angle. We layer multiple iridescent powders to create custom color combinations that match exact outfits or moods. The powder adheres better when applied over slightly warm gel polish so we work quickly after curing.
Sealing iridescent powder requires a gentle dabbing motion with top coat to avoid disturbing the delicate particles underneath. We cure each layer completely to lock in the color shifting effect and prevent the powder from lifting during wear.
Textured Barbie Nails: Adding Dimension

Texture transforms ordinary Barbie nail designs into tactile masterpieces that catch light and attention from every angle. We’ll explore dimensional techniques that elevate your manicure beyond traditional polish applications.
Pink Velvet Flocking
Velvet flocking powder creates an ultra-soft, luxurious finish that mimics Barbie’s favorite fabric textures. Apply a base coat in soft pink, then brush on a thin layer of clear topcoat while it’s still tacky. Dip each nail into fine pink velvet flocking powder, ensuring complete coverage. Gently tap off excess powder and seal with a matte topcoat to preserve the velvety texture.
Quality flocking powder makes all the difference in achieving that authentic velvet appearance. Choose ultra-fine particles in bubblegum pink or rose shades for the most realistic effect. Press the powder firmly into the tacky topcoat using a small brush to eliminate any bare spots. Allow the design to cure completely before applying the final protective layer.
3D Pink Flower Appliques
Three-dimensional flower appliques transform nails into miniature gardens worthy of Barbie’s dreamhouse. Position delicate pink roses, peonies, or cherry blossoms on accent nails using nail glue for secure attachment. Mix different flower sizes to create visual interest, placing larger blooms near the cuticle and smaller ones toward the tip.
Layering multiple flower elements creates depth and sophistication in your design. Start with flat petal pieces as your base, then add dimensional centers and leaves for realistic texture. Seal everything with a generous coat of clear topcoat, building up thin layers to encapsulate the appliques completely. Cure each layer thoroughly to prevent lifting or bubbling around the raised elements.
Quilted Pink Pattern
Quilted patterns bring cozy elegance to Barbie nails through strategic line work and dimensional polish techniques. Create diamond or square grid patterns using thin striping brushes and slightly darker pink polish. Build up the intersecting lines with multiple coats to achieve raised, quilted texture that catches light beautifully.
Advanced quilting effects emerge when you combine matte and glossy finishes strategically. Paint your base in matte dusty rose, then add glossy pink lines in a diagonal crosshatch pattern. Fill alternating diamond sections with glossy topcoat while leaving others matte for maximum contrast. Finish with rhinestones or tiny pearls at intersection points to mimic traditional quilting details and enhance the luxurious Barbie aesthetic.
Mix and Match: Creative Barbie Color Combinations

Now let’s explore ever-changing color pairing techniques that showcase Barbie’s signature style through strategic polish combinations.
Pink and White Checkerboard
Pink and white checkerboard patterns create a playful geometric design that channels Barbie’s retro fashion sense. We recommend using a bright bubblegum pink as your base color and crisp white polish for the checkerboard squares. Start by applying two coats of pink polish to all nails and allow them to dry completely.
Create the checkerboard effect using thin nail art brushes or striping tape to section off small squares. Paint alternating squares in white polish, leaving the pink base visible in between. We suggest keeping the squares small and uniform for the most polished appearance. Seal your design with a clear topcoat to prevent chipping and enhance the contrast between colors.
This design works particularly well on shorter nail lengths where the pattern remains crisp and readable. Consider applying this look to accent nails while keeping the remaining nails in solid pink for a balanced appearance.
Alternating Pink Shades
Alternating pink shades across your fingers creates a sophisticated rainbow effect that celebrates Barbie’s extensive wardrobe palette. We love combining five different pink tones: baby pink, rose pink, hot pink, magenta, and coral pink for maximum visual impact. Apply each shade to a different finger, creating a gradient flow from thumb to pinky.
Start with the lightest shade on your thumb and gradually progress to deeper tones. This technique creates natural depth and dimension across your entire manicure. We recommend choosing pink shades within the same undertone family (either cool or warm) to maintain harmony throughout the design.
For best results, apply two thin coats of each polish rather than one thick coat. This approach ensures even color saturation and prevents streaking. Add a glossy topcoat to unify all the different shades and create a cohesive finished look.
Pink with Silver Accents
Pink with silver accents delivers a glamorous combination that captures Barbie’s love for luxurious details. We suggest using a medium pink base and incorporating silver through various accent techniques like striping tape, rhinestones, or metallic polish details. Apply your pink base color in two even coats and allow it to cure completely.
Add silver accents using thin striping brushes to create delicate lines along the cuticle or nail tips. Alternatively, apply small silver rhinestones in strategic patterns or use silver leaf for abstract accent designs. We find that silver complements pink beautifully without overwhelming the feminine aesthetic.
Consider creating silver French tips over your pink base for an elegant twist on classic designs. You can also use silver striping tape to create geometric patterns or diagonal lines across select nails. Finish with a protective topcoat to secure all accent elements and maintain the metallic shine of your silver details.
Conclusion
We’ve explored an incredible range of Barbie-inspired nail designs that truly capture the magic of this timeless icon. From chrome finishes to textured techniques these looks prove that nail art can be both playful and sophisticated.
The beauty of Barbie nails lies in their versatility – whether you’re drawn to subtle pastels or bold statement colors there’s a perfect design waiting for you. These techniques allow you to channel your inner creativity while maintaining that signature Barbie glamour.
Remember that achieving stunning results comes down to using quality products and taking your time with application. With the right tools and techniques you’ll be able to recreate these gorgeous looks at home.
Your nails are the perfect canvas for expressing your personality so don’t be afraid to experiment and make these designs your own!
Frequently Asked Questions
What makes a nail design “Barbie-inspired”?
Barbie-inspired nail designs typically feature pink color palettes, glamorous finishes, and playful elements that reflect the iconic doll’s aesthetic. These designs often include hot pink shades, glitter accents, sparkly details, and feminine patterns that embody Barbie’s timeless elegance and fun-loving spirit.
What are the most popular pink shades for Barbie nails?
The most popular pink shades include hot pink, bubblegum pink, baby pink, and magenta. Matte hot pink offers sophistication, while glossy bubblegum pink captures playful vibes. Pink ombre gradients and rose gold accents also create stunning dimensional effects that perfectly embody the Barbie aesthetic.
How do I create a pink ombre gradient effect?
To create a pink ombre gradient, apply a light pink base coat, then use a makeup sponge to dab darker pink shades from the cuticle toward the tip. Blend the colors while wet, seal with a top coat, and clean up edges with a small brush dipped in nail polish remover.
What glitter techniques work best for Barbie nails?
Popular glitter techniques include pink glitter accent nails (solid pink on three fingers, glitter on ring finger), full coverage holographic glitter for rainbow effects, and rose gold sparkle tips. Use quality glitter polishes and apply thin layers for best results, finishing with a top coat for durability.
Can I create Barbie nails with pastel colors?
Yes! Pastel Barbie nails include baby pink and lavender combinations, mint green and pink swirls, and peachy pink sunset designs. These softer shades capture Barbie’s gentler side while maintaining the playful aesthetic. Use ombre techniques and shimmer topcoats for dreamy, glowing finishes.
How do I make bold statement Barbie nails?
Create bold statement nails using vibrant color combinations like electric pink and neon yellow, magenta and purple color blocking, or hot pink with white polka dots. Apply thin, even coats and use quality brushes for clean lines and maximum color intensity.
What’s a Barbie French manicure?
A Barbie French manicure features pink tips instead of traditional white, reverse French with hot pink at the cuticle, or double French tips layering different pink shades. These variations maintain classic elegance while incorporating Barbie’s signature pink palette for a feminine, sophisticated look.
How do I achieve chrome and metallic Barbie nails?
For chrome effects, apply black base coat, then pink chrome powder with a silicone tool, sealing with gel top coat. For metallic finishes, use high-quality rose gold or pink metallic polishes, applying thin coats for streak-free coverage and maximum shine.
What textured techniques work for Barbie nails?
Textured Barbie techniques include velvet flocking for fabric-like feel, 3D pink flower appliques, and quilted patterns using dimensional polish. These techniques add luxury and sophistication while maintaining the playful Barbie aesthetic through creative application methods and quality materials.
How long do Barbie nail designs typically last?
With proper application and quality products, Barbie nail designs can last 7-14 days. Use base coat, thin polish layers, and top coat for longevity. Glitter and textured designs may require touch-ups. Avoid harsh chemicals and wear gloves for household tasks to extend wear time.


