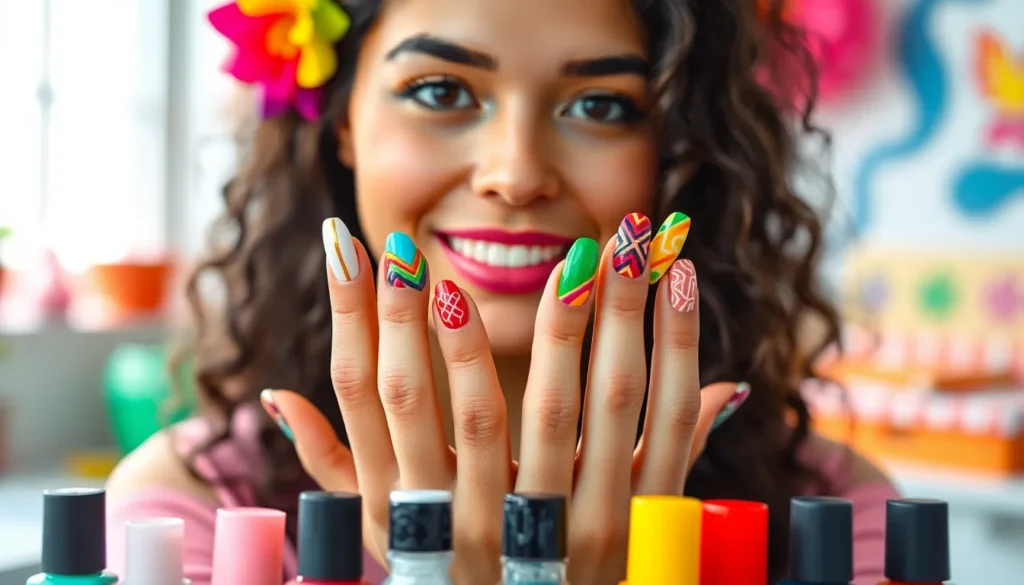
We’ve all experienced that moment when our nails feel boring and desperately need a vibrant makeover. Colorful nail art has become more than just a beauty trend – it’s a powerful form of self-expression that allows us to showcase our personality through our fingertips.
From bold rainbow gradients to intricate geometric patterns in electric hues, the industry of colorful nail designs offers endless possibilities for creativity. Whether you’re preparing for a special occasion or simply want to brighten your everyday look, the right color combination can instantly boost your confidence and make a lasting impression.
Bold Rainbow Gradient Designs
Rainbow gradient nails transform ordinary manicures into stunning works of art that capture every color of the spectrum. These vibrant designs create seamless color transitions that flow beautifully across your fingertips.
Classic Rainbow Ombré Technique
Blending creates the most stunning rainbow gradients when you use a makeup sponge to achieve smooth color transitions. Start with red at the base of your nail and gradually blend through orange, yellow, green, blue, indigo, and violet toward the tip. Dampen your makeup sponge slightly before dabbing the polish to prevent streaky applications.
Apply each color in small sections to maintain control over the blending process. Work quickly while the polish remains wet, as dried polish won’t blend properly with fresh layers. Use a high-quality base coat to protect your natural nails and create a smooth surface for better color payoff.
Finish with multiple thin topcoat layers to seal the gradient and create a glossy, professional appearance. Allow each layer to dry completely before applying the next to prevent smudging or color bleeding.
Vertical Rainbow Stripes
Striping creates bold rainbow patterns that make each nail a miniature work of art. Use nail art brushes or striping tape to create clean, even lines running from base to tip. Apply each color stripe separately, allowing proper drying time between applications.
Space your stripes evenly across the nail surface for the most balanced visual impact. Seven stripes work perfectly for standard nail widths, giving each rainbow color adequate space to shine. Use white or clear base colors to make the rainbow stripes pop more dramatically.
Vary stripe widths on different nails to create an interesting ever-changing across your entire manicure. Alternate between thin and thick stripes, or create accent nails with single bold stripes surrounded by thinner complementary lines.
Rainbow French Tips
Transform classic French manicures by replacing traditional white tips with vibrant rainbow crescents. Apply each color of the rainbow in thin horizontal bands across the nail tip, creating a curved rainbow effect. Use striping brushes for precise application and clean color separation.
Layer transparent rainbow colors over white tips for a subtle prismatic effect that catches light beautifully. This technique works especially well for professional settings where bold colors might be inappropriate but you still want colorful nail art.
Create reverse rainbow French tips by applying rainbow colors at the nail base instead of the tips. This modern twist on the classic French manicure draws attention to your cuticle area and creates an unexpected pop of color that’s perfect for special occasions.
Vibrant Tropical Sunset Themes
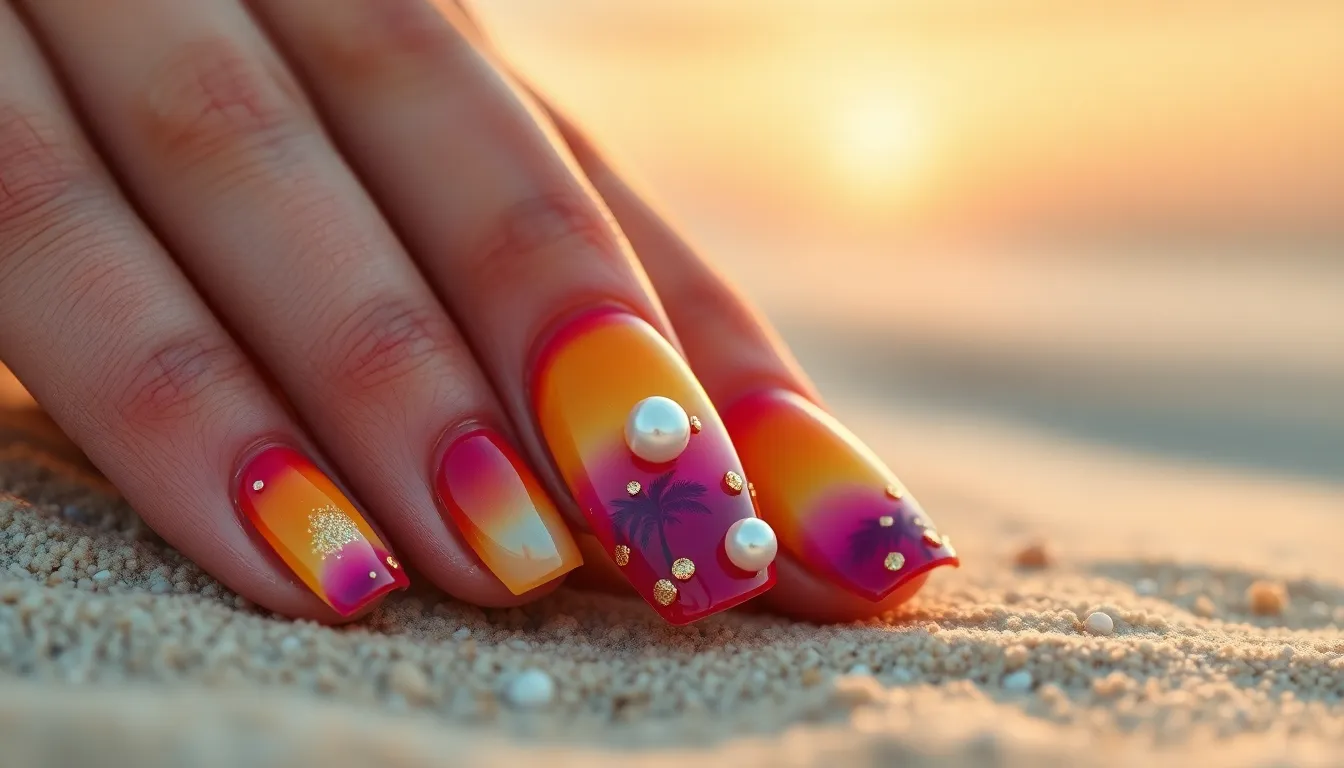
Tropical sunset nail designs transport us to paradise while maintaining the vibrant energy from our rainbow creations. These warm color combinations capture nature’s most breathtaking moments right on our fingertips.
Orange and Pink Sunset Blends
Orange and pink sunset nail designs create the perfect warm weather aesthetic that radiates positivity and warmth. We recommend starting with a peachy orange base coat and gradually blending in hot pink shades using a damp makeup sponge for seamless transitions. The key lies in working quickly while the polish remains wet to achieve those dreamy gradient effects.
Coral undertones work beautifully as bridge colors between the orange and pink shades. Apply the darker orange shade near the cuticle area and blend upward with lighter pink tones toward the nail tips. Finish with golden shimmer accents to mimic the sun’s reflection on water.
Purple and Yellow Twilight Colors
Purple and yellow twilight combinations offer a dramatic contrast that captures those magical dusk moments. We start with a deep purple base and strategically place bright yellow accents to create stunning visual impact. The complementary nature of these colors makes them naturally eye catching when paired together.
Lavender serves as an excellent transition shade between the bold purple and sunshine yellow tones. Create horizontal gradient bands that mirror how twilight colors naturally layer in the sky. Add tiny white dots with a dotting tool to represent stars emerging in the evening sky.
Coral and Turquoise Beach Vibes
Coral and turquoise beach nail designs instantly evoke tropical waters meeting sandy shores. We blend soft coral shades with bright turquoise blues to create that perfect ocean inspired look. The contrast between warm coral and cool turquoise creates visual depth that mimics crystal clear Caribbean waters.
Seafoam green acts as our perfect transitional color between the coral and turquoise shades. Apply coral polish to the lower portion of each nail and blend turquoise from the tips downward using gentle dabbing motions. Small pearl accents placed strategically across the design add that authentic beachy sparkle we love.
Electric Neon Color Combinations
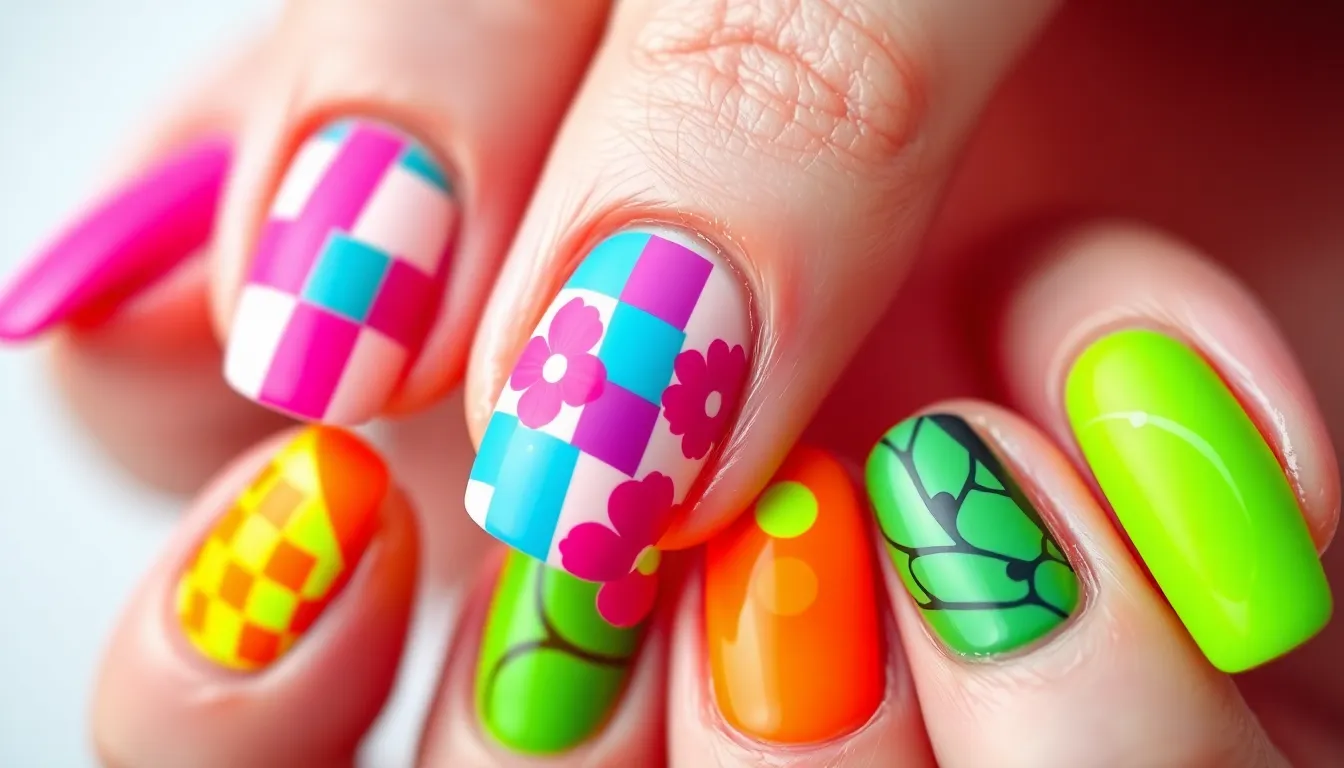
Electric neon shades bring an instant energy boost to your manicure that’s impossible to ignore. These ultra-bright combinations create show-stopping nail art that demands attention and showcases your bold personality.
Hot Pink and Electric Blue Pairings
Hot pink and electric blue create the ultimate high-voltage nail combination that screams confidence and creativity. We love alternating these colors across your nails for a playful checkerboard effect that catches light from every angle. The stark contrast between warm pink and cool blue creates visual depth that makes each shade pop more intensely.
Create stunning gradient effects by blending hot pink into electric blue using a damp makeup sponge for seamless transitions. Start with hot pink at the cuticle and gradually blend upward to electric blue at the tips. This technique produces an electrifying ombré that shifts colors as you move your hands.
Try geometric nail art patterns using both shades for modern designs that look professionally done. Paint electric blue as your base color and add hot pink triangles, stripes, or dots using a fine nail art brush. The combination works perfectly for festival season or whenever you want to make a statement.
Lime Green and Neon Orange Mixes
Lime green and neon orange deliver maximum impact with their vibrant citrus energy that brightens any outfit. These colors work exceptionally well together because they sit adjacent on the color wheel, creating harmony while maintaining electric intensity. We recommend using lime green as your base and adding neon orange accent details for balanced visual weight.
Design tropical inspired nail art by creating palm leaf patterns in lime green over neon orange bases. Use a thin brush to paint simple leaf shapes that overlap slightly for dimension. This combination instantly transports you to summer vibes regardless of the season.
Experiment with color blocking techniques that divide each nail into sections using both shades. Paint half of each nail lime green and half neon orange, or create diagonal splits for ever-changing geometric designs. These bold blocks create modern art pieces on your fingertips.
Bright Yellow and Magenta Contrasts
Bright yellow and magenta form the most energetic color pairing in the neon spectrum, delivering maximum visual impact through their complementary relationship. This combination works best when you balance the intensity by using one shade as the dominant color and the other as an accent. We find that magenta bases with bright yellow details create stunning focal points.
Create electric flower designs using bright yellow centers with magenta petals for cheerful nail art that never fails to spark conversations. Paint simple daisy shapes or abstract floral patterns that showcase both colors equally. These designs work particularly well on accent nails paired with solid colored companions.
Try lightning bolt patterns by painting bright yellow zigzag shapes over magenta bases for dramatic electric effects. Use striping tape to create clean lines, then fill in with bright yellow polish for professional results. This technique creates movement and energy that captures the electric theme perfectly.
Pastel Rainbow Nail Art Styles
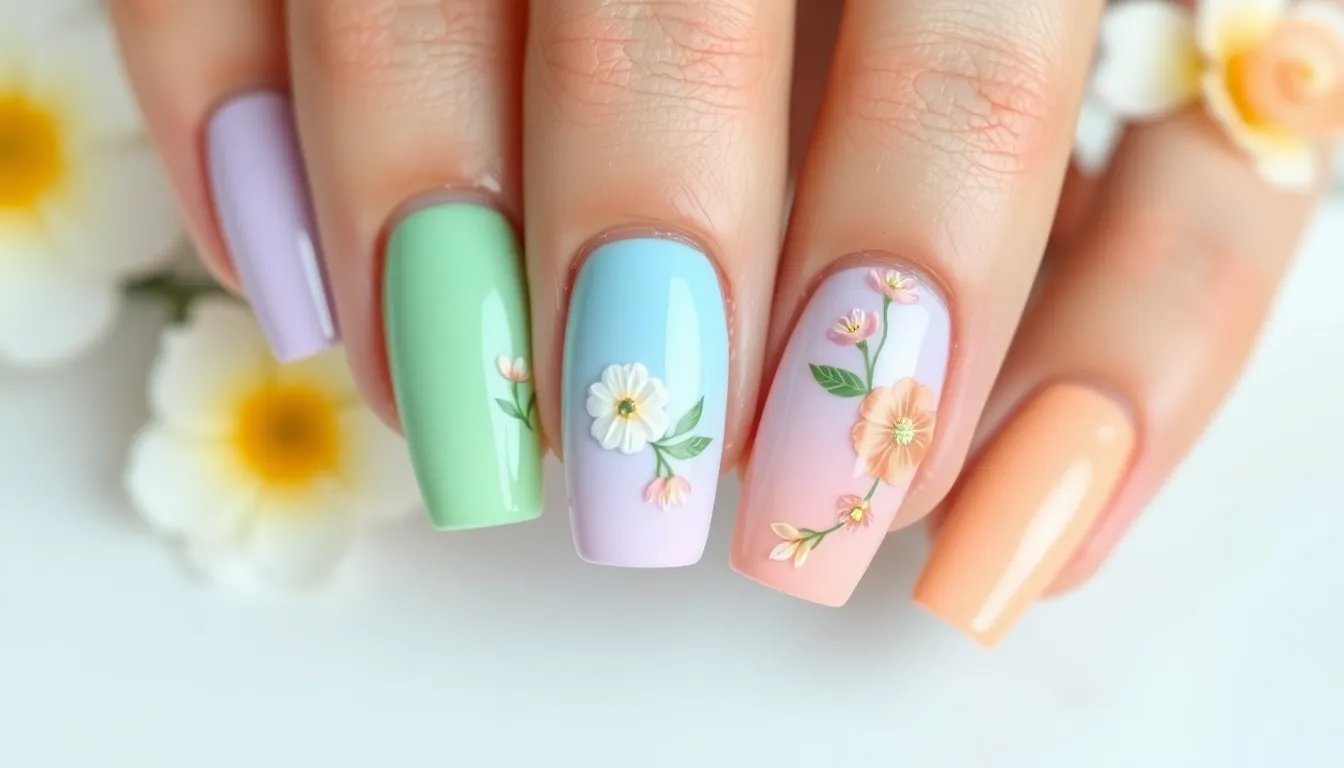
Pastel rainbow nail art offers a dreamy alternative to bold neon combinations, creating soft and ethereal manicures perfect for spring and summer. These gentle color palettes provide sophisticated nail designs that complement any outfit while still making a beautiful statement.
Soft Lavender and Mint Green Designs
Lavender and mint green create the most soothing pastel combination for nail art enthusiasts seeking tranquil designs. We recommend starting with a soft lavender base on alternating nails, then applying mint green to the remaining fingers for a balanced look. Ombré techniques work beautifully with these colors, blending from deep lavender at the cuticle to pale mint at the tips.
Marbled effects showcase both colors simultaneously, creating unique patterns on each nail using a water marbling technique. Geometric designs like triangles and diamonds look stunning when outlined in white polish over these pastel shades. Floral nail art becomes particularly elegant with lavender petals and mint green leaves painted using fine detail brushes.
Baby Pink and Sky Blue Combinations
Baby pink and sky blue deliver the sweetest pastel pairing that evokes cotton candy clouds and spring skies. Cloud nail art works exceptionally well with this color duo, using white polish to create fluffy cloud shapes over the blue base. We suggest applying baby pink as a gradient fade from the middle of each nail, creating a sunset effect.
Polka dot patterns look charming when alternating between pink dots on blue nails and blue dots on pink nails. Watercolor techniques create dreamy washes of color that blend seamlessly together using a damp brush. Heart designs painted in baby pink over sky blue backgrounds add romantic touches perfect for date nights or special occasions.
Peachy Coral and Lemon Yellow Blends
Peachy coral and lemon yellow bring warmth to pastel rainbow collections with their sunny disposition and cheerful energy. Gradient techniques shine with these colors, starting with peachy coral at the base and fading to lemon yellow at the tips. We create stunning sunrise effects by blending these shades horizontally across the nail surface.
Citrus inspired designs work perfectly with this color combination, featuring painted oranges and lemons as accent art. Chevron patterns look modern when alternating between peachy coral and lemon yellow stripes. Negative space manicures become eye catching when using these warm pastels to frame natural nail sections, creating contemporary geometric shapes.
Multi-Color Geometric Patterns
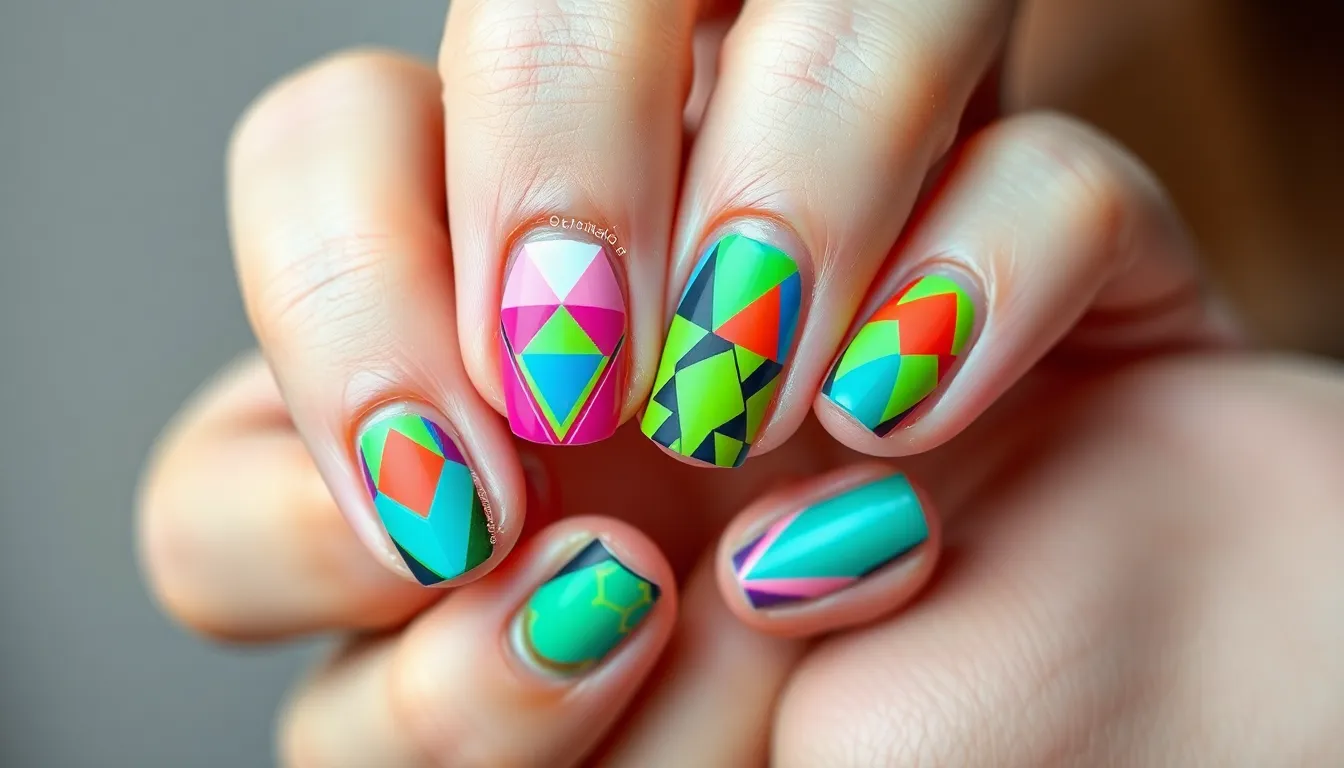
Geometric nail art transforms colorful nail ideas into sophisticated modern designs. Sharp lines and bold shapes create stunning visual impact when combined with vibrant color palettes.
Colorful Triangle and Diamond Shapes
Triangle patterns bring ever-changing energy to geometric nail designs through their angular appeal. We recommend using three contrasting colors like electric blue, hot pink, and lime green for maximum visual impact. Start with a white base coat to make colors pop, then use striping tape to create perfect triangle outlines. Fill each section with a different shade, allowing each color to dry completely before removing the tape.
Diamond formations offer sophisticated elegance with their symmetrical structure. Create stunning diamond nail art by combining jewel tones such as emerald green, sapphire blue, and ruby red. Use a thin nail art brush to outline each diamond shape, then fill with alternating colors. Add a layer of holographic topcoat to mimic the sparkle of real gemstones.
Negative space triangles provide modern minimalist appeal while showcasing multiple colors. Leave portions of your natural nail visible between colored triangular sections. This technique works exceptionally well with neon shades like bright orange, electric purple, and sunshine yellow.
Rainbow Chevron and Zigzag Designs
Chevron patterns create eye-catching movement across your nails using rainbow color sequences. We suggest starting with a gradient base from pink to purple, then adding white chevron lines using striping tape. Remove the tape while polish is still slightly wet for clean, sharp edges. Layer different chevron sizes for added dimension.
Zigzag rainbow stripes deliver playful energy through their bouncy, energetic lines. Use a steady hand or zigzag nail vinyls to create consistent patterns. Alternate between warm colors like red, orange, and yellow on some nails, then cool colors like blue, green, and purple on others. This creates beautiful contrast across your manicure.
Multi directional chevrons offer creative versatility by combining horizontal and vertical elements. Paint different chevron angles on each nail using complementary color pairs. Try pairing coral with mint green, or lavender with peach for softer geometric looks.
Vibrant Color Block Techniques
Classic color blocking delivers bold geometric impact through strategic color placement. We recommend dividing each nail into two or three sections using striping tape. Choose high contrast combinations like bright yellow and deep purple, or electric blue and hot pink. Apply colors in clean sections, ensuring each shade is completely opaque.
Asymmetrical blocking creates modern artistic flair through irregular geometric divisions. Use diagonal lines or curved sections instead of straight horizontal or vertical splits. Combine three to four colors per nail, such as turquoise, coral, lime green, and magenta for tropical vibes.
Gradient color blocks merge geometric precision with smooth color transitions. Start with distinct color blocks, then blend the edges where colors meet using a makeup sponge. This technique works beautifully with sunset color combinations like orange, pink, and purple, creating geometric nail art with soft, dreamy edges.
Seasonal Colorful Nail Inspirations
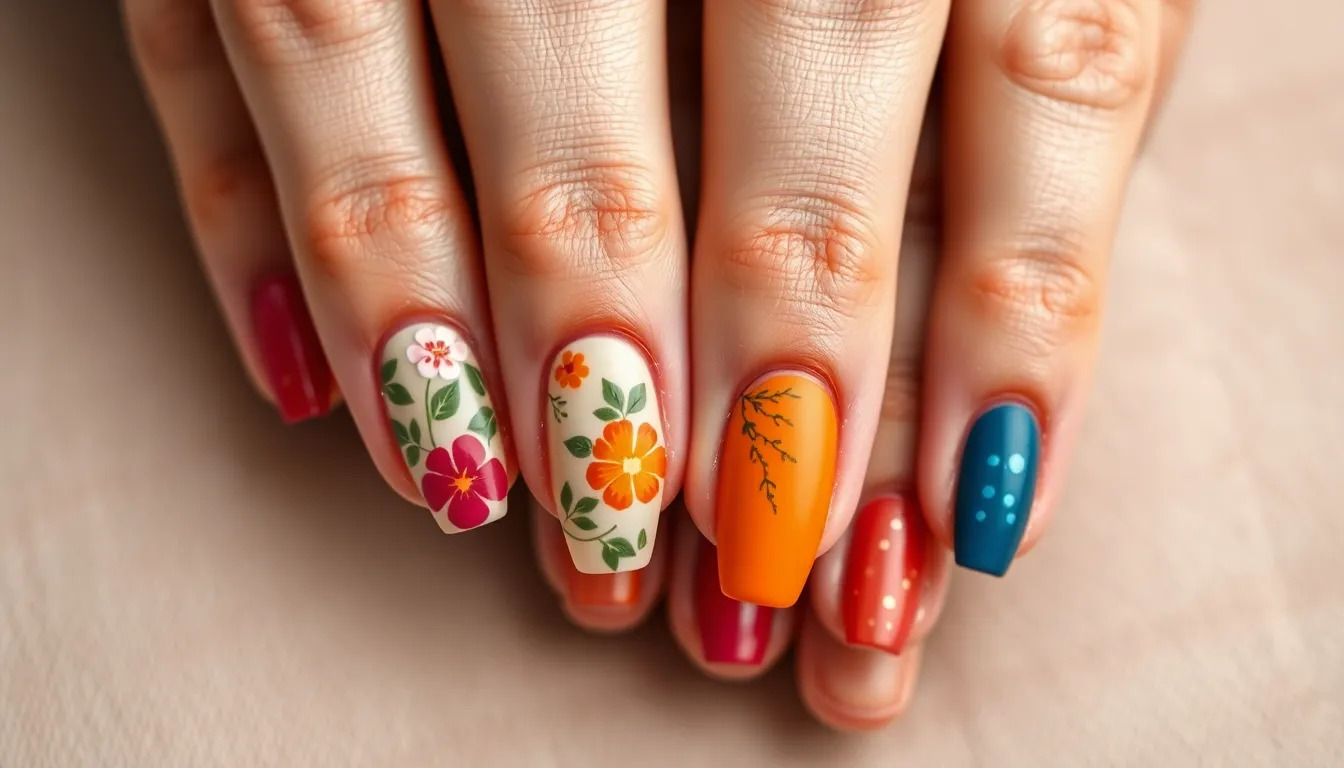
Each season brings its own palette of inspiring colors that perfectly complement our colorful nail art journey. Let’s explore how seasonal transitions offer fresh opportunities to experiment with nature’s most beautiful color combinations.
Spring Flower Power Colors
Blooming pastels capture spring’s essence with soft pink cherry blossoms paired with fresh mint green leaves. We recommend creating delicate floral patterns using these gentle hues, adding tiny white dots as flower centers for authentic botanical details.
Tulip inspired combinations feature vibrant purple and sunny yellow gradients that mirror early spring gardens. Apply purple as your base color, then blend yellow at the tips using a damp makeup sponge for seamless transitions that mimic real tulip petals.
Daffodil bright designs showcase cheerful yellow bases with crisp white accents, creating classic spring nail art that never goes out of style. Paint small white flowers over the yellow background, or try reverse techniques with white bases and yellow floral details.
Lavender field gradients combine soft purple tones with sage green undertones, evoking peaceful spring meadows. Use a sea sponge to dab these colors together, creating organic textures that resemble actual lavender stems swaying in gentle breezes.
Summer Festival Bright Shades
Electric coral combinations pair vibrant orange coral with hot pink accents, creating energetic festival ready manicures perfect for outdoor concerts. Apply coral as your main shade, then add geometric pink stripes or dots for ever-changing visual interest.
Tropical lime palettes feature bright green bases with turquoise blue details that scream summer vacation vibes. We suggest painting alternating nails in each color, or creating palm leaf patterns using thin nail art brushes for authentic tropical themes.
Sunset orange blends incorporate fiery orange gradients with deep magenta tips, mimicking spectacular summer evening skies. Start with orange at the cuticle area, then blend upward to magenta using gentle dabbing motions for smooth color transitions.
Beach party blues combine electric blue with sunny yellow accents, creating playful combinations that match summer festival energy. Try painting blue bases with yellow lightning bolts, or create checkerboard patterns alternating between these vibrant complementary colors.
Fall Harvest Warm Tones
Pumpkin spice gradients feature rich orange bases blending into deep burgundy tips, capturing autumn’s cozy warmth perfectly. Apply orange polish first, then use a makeup sponge to blend burgundy from the tips downward for seamless harvest inspired transitions.
Maple leaf combinations showcase burnt orange paired with golden yellow accents, creating sophisticated fall manicures that complement seasonal wardrobes. Paint leaf shapes using thin brushes, or try stamping techniques with autumn themed nail art plates.
Cranberry wine shades incorporate deep red bases with copper metallic details, offering elegant options for fall celebrations. We recommend adding copper foil accents or painting delicate copper vines across the deep red background for luxurious autumn appeal.
Amber honey tones blend warm golden yellow with rich brown undertones, evoking cozy autumn afternoons spent indoors. Create gradient effects using these warm tones, or paint alternating nails in each shade for subtle yet striking seasonal coordination.
Winter Holiday Jewel Tones
Emerald elegance features deep forest green bases with gold glitter accents, creating sophisticated holiday manicures perfect for festive celebrations. Apply two coats of emerald polish, then add gold glitter at the tips or paint delicate gold snowflake patterns.
Ruby red glamour combines classic Christmas red with silver metallic details, offering timeless holiday nail art that never disappoints. We suggest creating silver accent nails, or painting thin silver stripes across the red base for modern geometric holiday styles.
Sapphire winter blues showcase deep navy bases with silver or white snowflake designs, capturing winter’s crystalline beauty. Use dotting tools to create intricate snowflake patterns, or apply silver glitter gradients from the cuticle area for subtle winter sparkle.
Amethyst purple royalty pairs rich violet shades with gold accents, creating luxurious winter manicures fit for holiday parties. Paint purple bases, then add gold geometric patterns or create gradient effects blending purple with deeper plum tones for sophisticated seasonal elegance.
Glitter and Holographic Color Effects
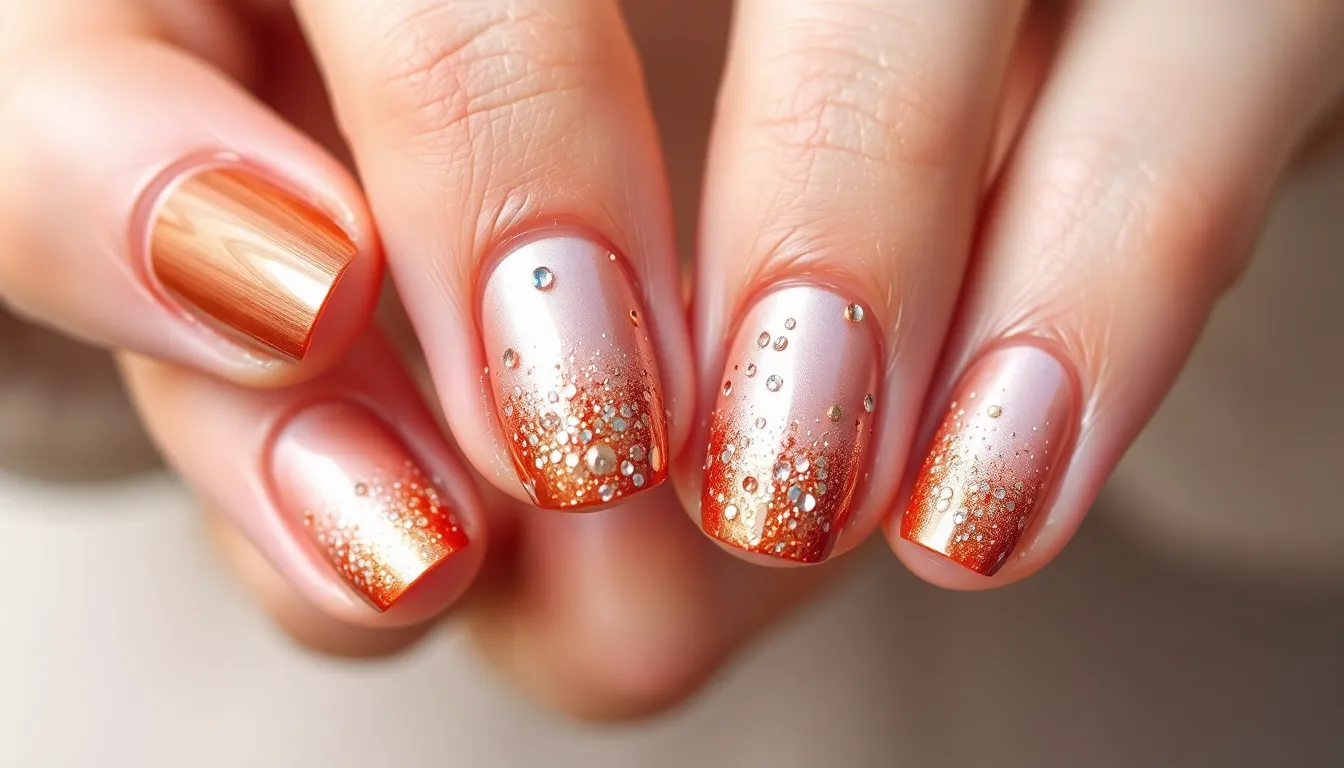
Holographic and glitter finishes transform ordinary colorful nail designs into mesmerizing light catchers that shift and sparkle with every movement. These dazzling effects add dimensional depth to your nail art while creating an otherworldly appearance that demands attention.
Rainbow Holographic Finishes
Rainbow holographic polishes create spectacular prismatic effects that display every color of the spectrum as light hits the nail surface. We recommend starting with a black or white base coat to intensify the holographic shift, then applying two thin coats of rainbow holo polish for maximum impact. Linear holographic formulas produce sharp rainbow lines that move across the nail, while scattered holographic particles create a more subtle, twinkling effect throughout the entire surface.
Premium holographic topcoats work over any colored base to instantly transform regular polish into a rainbow spectacle. Apply your favorite bright color like electric blue or hot pink, seal with base topcoat, then add holographic topcoat for customized color combinations. Major brands like ILNP, Cirque Colors, and Fun Lacquer offer exceptional linear holographic formulas that deliver intense rainbow shifts in direct sunlight.
Layering techniques amplify holographic intensity by combining different holo finishes for complex light reflection patterns. Try applying scattered holo over linear holo for depth, or use holographic microglitter between holo coats to create texture variation. These layering methods produce nail art that changes dramatically under different lighting conditions.
Multi-Color Glitter Gradients
Multi color glitter gradients blend various sized sparkles from cuticle to tip for stunning ombré effects that transition between different metallic tones. Start with complementary colored glitters like rose gold and copper, or contrasting combinations such as silver and gold for bold statement nails. Apply the heaviest concentration at the nail tip, then feather the glitter toward the cuticle using a fan brush or makeup sponge.
Chunky hexagonal glitters mixed with fine microglitter create textural depth in gradient applications. We suggest using three different glitter sizes: large hex pieces for focal points, medium squares for fill, and fine dust for seamless blending between colors. Popular color combinations include purple and teal gradients, rainbow pride blends, and sunset themed orange to pink transitions.
Glitter placement techniques determine the final gradient appearance and overall polish longevity. Pat glitter onto wet topcoat rather than mixing directly with polish to prevent clumping and ensure even distribution. Allow each glitter layer to dry completely before adding the next color, then seal everything with two coats of high quality topcoat to smooth the surface.
Iridescent Shimmer Combinations
Iridescent shimmer polishes shift between multiple colors depending on viewing angle, creating subtle color changes that complement bold nail art designs. These polishes contain microscopic mica particles that reflect different wavelengths of light, producing effects like blue to purple shifts, green to gold transitions, and pink to orange color changes. Apply over colored bases to enhance the shift intensity.
Color shifting flakes add dramatic iridescent effects when layered over contrasting base colors for maximum visual impact. Green to purple flakes over black create an oil slick appearance, while blue to pink flakes over white produce a mother of pearl effect. Apply flakes with an eyeshadow applicator or silicone tool, then press gently into wet topcoat for secure adhesion.
Duochrome combinations layer multiple shifting shades to create complex color transitions that change throughout the day. Pair complementary duochromes like teal to purple with gold to green for multidimensional effects. These sophisticated finishes work especially well for special occasions when you want nails that photograph beautifully under various lighting conditions.
Creative Color Mixing Techniques
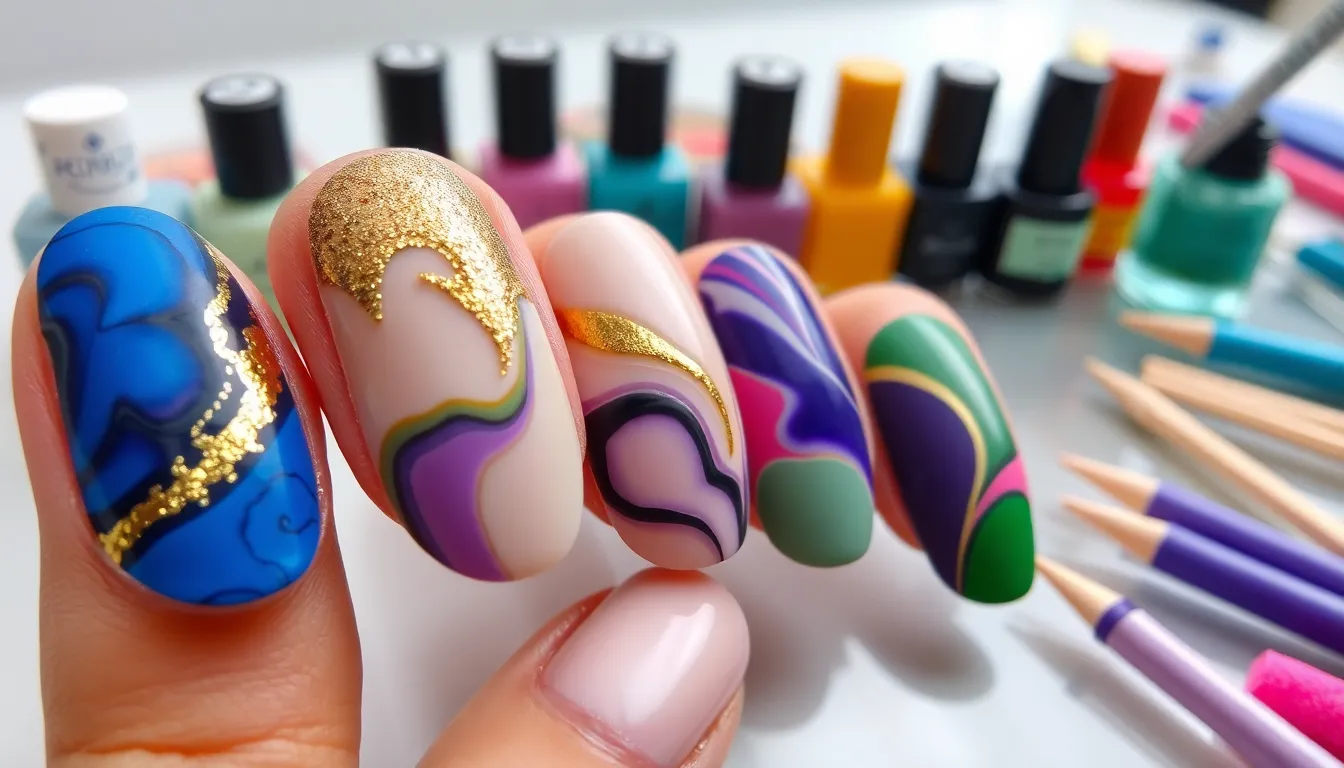
Mastering color mixing techniques opens doors to endless creative possibilities in colorful nail art. We’ll explore three fundamental methods that professionals use to achieve stunning multi-color effects.
Marble Effect Color Blending
Marble techniques create sophisticated swirled patterns that mimic natural stone formations. We drop different colored polishes directly onto wet base coats and use a toothpick or dotting tool to swirl them together. Start with 2-3 complementary colors like navy blue, gold, and cream for elegant marble veining.
Water marbling offers another approach where we float polishes on room-temperature water and create patterns with a toothpick. Dip each nail carefully into the design and clean excess polish from skin immediately. This technique works best with polishes that spread easily on water surfaces, such as Sally Hansen or Essie formulas.
Dry marble effects involve applying colors to nails individually and blending while slightly tacky. We use a small brush or sponge to soften harsh lines between colors, creating organic flowing patterns. Multiple thin coats produce better results than single thick applications.
Watercolor Wash Methods
Watercolor effects bring dreamy transparency to colorful nail designs through diluted polish applications. We mix regular nail polish with clear base coat or specialized thinning answers to create translucent washes. Start with a 1:1 ratio and adjust opacity as needed.
Layer different colored washes while each coat remains slightly wet for seamless blending. Apply the lightest shade first, then gradually build depth with medium and dark tones. Popular combinations include purple and pink gradients or blue and green ocean waves.
Alcohol mixing creates unique watercolor effects when we add a drop of rubbing alcohol to wet polish. This technique causes colors to separate and bloom naturally, producing organic cloud-like patterns. Work quickly as alcohol evaporates rapidly and effects set within seconds.
Sponge Application Techniques
Sponge gradients deliver smooth color transitions that rival professional salon work. We apply different colors to a damp makeup sponge in vertical stripes and dab gently onto nails. Press rather than drag to avoid streaking and maintain clean color boundaries.
Triangle sponging creates geometric color blocking effects using wedge-shaped sponge pieces. Cut regular makeup sponges into triangular sections and apply single colors to each piece. This technique works perfectly for creating colorful abstract patterns or rainbow flag designs.
Stippling methods involve using dense sponges to create textured color mixing effects. We load sponges with multiple colors and press repeatedly onto nails for speckled or mottled finishes. Natural sea sponges produce more organic textures than synthetic versions, making them ideal for creating coral reef or moss-like effects.
Conclusion
We’ve explored countless ways to transform your nails into vibrant canvases that reflect your personality and mood. From electric neons to soft pastels and sophisticated geometric patterns each technique offers unique opportunities to showcase your creativity.
The beauty of colorful nail art lies in its versatility – whether you’re mastering gradient blends perfecting geometric shapes or experimenting with seasonal palettes there’s always something new to discover. These techniques work beautifully alone or combined for truly show-stopping results.
Remember that practice makes perfect when it comes to nail art. Start with simpler designs and gradually work your way up to more complex patterns as your skills develop. With the right tools patience and these proven techniques you’ll be creating salon-quality colorful nails that turn heads and boost your confidence every single day.
Frequently Asked Questions
What is the best technique for creating rainbow gradient nail art?
The classic rainbow ombré technique using a makeup sponge is most effective. Apply different rainbow colors to a makeup sponge and gently dab it onto your nails for smooth blending. Start with a high-quality base coat and finish with multiple topcoat layers for a professional look that captures seamless color transitions.
How do I create vibrant tropical sunset nail designs?
Start with a peachy orange base and blend in hot pink shades using a sponge for dreamy gradients. Add golden shimmer accents for extra dimension. For purple and yellow twilight effects, use lavender as a transition shade to create dramatic contrast and stunning sunset-inspired nail art.
What are the most popular electric neon color combinations for nail art?
Hot pink and electric blue create playful checkerboard effects and stunning gradients. Lime green and neon orange work beautifully for tropical-inspired designs and color blocking techniques. Bright yellow and magenta offer high contrast for dynamic lightning bolt patterns and electric flower designs that instantly energize any manicure.
How can I achieve professional-looking pastel rainbow nail art?
Focus on soft color combinations like lavender and mint green using ombré techniques for tranquil looks. Baby pink and sky blue create cotton candy cloud effects with polka dot patterns. Peachy coral and lemon yellow blends work well with gradient techniques and citrus-inspired designs for cheerful, modern manicures.
What tools do I need for geometric colorful nail patterns?
Essential tools include striping tape for precision lines, nail art brushes for detailed work, and contrasting colors for bold shapes. Use striping tape to create clean triangles and diamond shapes. For chevron and zigzag designs, steady hands and quality brushes will help achieve sharp, professional-looking geometric patterns.
Which seasonal colors work best for different times of year?
Spring calls for pastel flower power combinations, summer features electric coral and tropical lime shades, fall showcases pumpkin spice gradients and warm harvest tones, while winter highlights jewel tones like emerald elegance and ruby red glamour. Each season offers unique palettes that reflect nature’s beauty.
How do I apply holographic and glitter effects to colorful nail art?
Start with a black or white base coat to enhance holographic effects. For multi-color glitter gradients, layer different glitter shades from cuticle to tip. Apply iridescent shimmer combinations over solid colors for complex transitions. Duochrome finishes create dramatic visual impact perfect for special occasions and mesmerizing light-catching effects.
What is the water marbling technique for nail art?
Water marbling creates sophisticated swirled patterns by dropping different colored polishes into room temperature water. Use a toothpick to create marble patterns, then dip your nail through the design. This technique works best with polishes that spread easily on water and creates unique, unrepeatable patterns.
How can I create watercolor wash effects on my nails?
Dilute nail polish with a few drops of nail polish thinner or acetone to achieve dreamy transparency. Apply the thinned polish in light layers, allowing each layer to dry before adding the next. Use a fan brush or small sponge for soft, blended watercolor effects that mimic artistic painting techniques.
What are the best color blocking techniques for nail art?
Classic color blocking uses bold, contrasting colors in geometric shapes. Asymmetrical blocking creates modern, artistic flair with uneven color divisions. Gradient color blocks merge geometric precision with smooth transitions. Use striping tape for clean lines and experiment with different color combinations to achieve striking visual impact.

