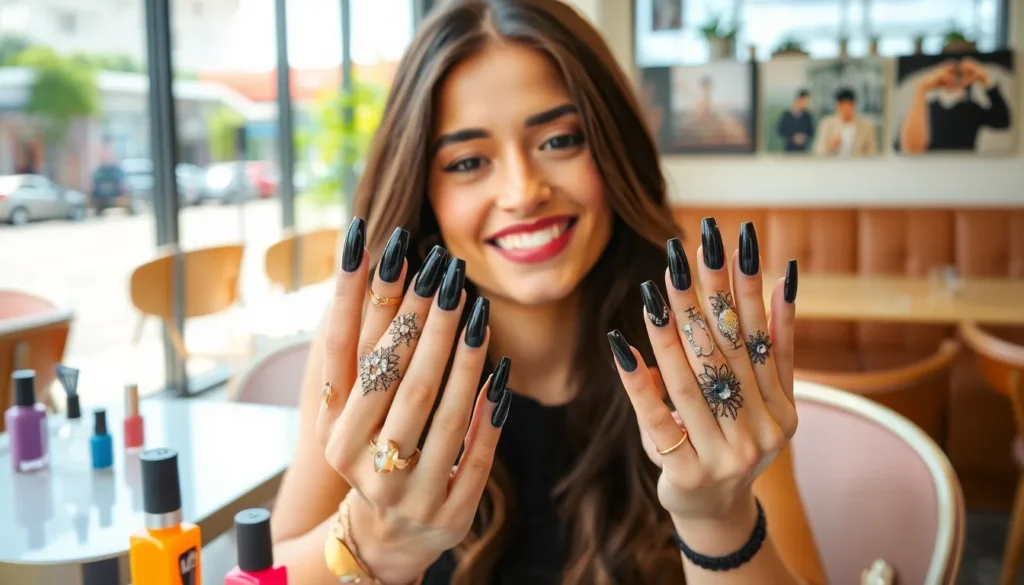
Black nail art isn’t just a trend – it’s a timeless statement that never goes out of style. We’ve seen this classic color evolve from simple solid coats to intricate masterpieces that showcase creativity and sophistication. Whether you’re preparing for a special event or simply want to elevate your everyday look, black nails offer endless possibilities for stunning designs.
The beauty of black nail art lies in its versatility. We can create everything from minimalist geometric patterns to bold gothic designs that turn heads. Black serves as the perfect canvas for metallic accents, glitter details, or contrasting colors that make your manicure pop.
Ready to discover nail art ideas that’ll transform your fingertips into works of art? We’ve curated the most captivating black nail designs that range from beginner-friendly to show-stopping creations. These ideas will inspire you to embrace the drama and elegance that only black nails can deliver.
Classic Black French Manicure With a Twist
Transform the traditional French manicure by swapping white tips for sophisticated black accents. We’ve curated three stunning variations that elevate this timeless style with contemporary flair.
Reverse French Tips
Flip the script on conventional French nails by painting your base black and adding white tips at the cuticle line. This dramatic inversion creates an edgy look that’s perfect for evening events or when you want to make a statement. Apply a glossy black base coat to all ten nails, then carefully paint thin white curves along each cuticle area using a fine detail brush. The contrast between dark and light creates visual interest while maintaining the classic French silhouette we all recognize.
Finish with a high-shine topcoat to enhance the stark contrast between colors. This reverse technique works beautifully on both short and long nail lengths, making it accessible for everyone’s lifestyle preferences.
Geometric French Lines
Replace curved French tips with sharp geometric lines that bring modern architecture to your fingertips. Create angular triangular tips using black polish over a nude or clear base, forming precise diagonal cuts across each nail tip. These geometric patterns add contemporary sophistication while honoring the French manicure foundation.
Experiment with different angles on each nail to create asymmetrical designs that catch light from multiple directions. Use striping tape to achieve perfectly straight lines, then fill in triangular sections with deep black polish. The result is a minimalist yet striking design that complements both casual and professional wardrobes.
Glitter Accent French
Combine classic black French tips with sparkling glitter accents for glamorous nail art that transitions seamlessly from day to night. Paint traditional black tips over a clear or nude base, then add a thin line of silver or gold glitter just above the black edge. This subtle sparkle catches light beautifully without overwhelming the sophisticated black foundation.
Apply glitter using a fine glitter polish or loose glitter pressed into wet topcoat for maximum sparkle control. Focus the glitter placement along the border between your natural nail and black tip to create a defined metallic accent line that enhances rather than competes with the main design.
Minimalist Black Nail Designs for Everyday Wear

Minimalist black nail designs offer the perfect balance between elegance and simplicity for your daily routine. These understated styles complement any outfit while maintaining a polished appearance that’s professional enough for work and stylish enough for social events.
Single Black Accent Nail
Single black accent nails create visual interest without overwhelming your overall look. We recommend painting one nail on each hand completely black while keeping the remaining nails in nude, clear, or soft pink shades. This technique works exceptionally well on ring fingers or thumbs, drawing subtle attention to your hands.
Application becomes effortless when you use a high-quality black polish with good opacity. Start with a base coat on all nails, then apply your chosen neutral shade to eight nails and black to your selected accent nails. The contrast creates a sophisticated focal point that’s perfect for business meetings or casual coffee dates.
Versatility makes this design suitable for any nail shape, from short rounded nails to longer almond styles. You can switch which finger serves as your accent nail based on your mood or outfit, making this one of the most adaptable black nail art ideas in your repertoire.
Thin Black Stripes
Thin black stripes transform simple manicures into geometric masterpieces with minimal effort. We love using striping tape or thin brushes to create precise lines across nude or white base colors. These delicate lines add structure and modern appeal to your everyday nail look.
Vertical stripes elongate shorter nails while horizontal stripes create width on narrow nail beds. You can apply single stripes down the center of each nail, create parallel lines for a bolder effect, or alternate stripe placement across different fingers for an asymmetrical design.
Tools make precision possible when creating these minimalist patterns. Nail art brushes, striping tape, or even toothpicks can help you achieve clean lines. We suggest practicing on a nail wheel first to perfect your technique before applying the design to your natural nails.
Black Dots and Minimalist Patterns
Black dots deliver maximum impact with minimal complexity, making them ideal for nail art beginners. Use dotting tools, bobby pins, or even the tip of a small brush to create perfectly round dots on your base color. These simple patterns work beautifully on short nails and busy lifestyles.
Pattern variations include single dots at the nail base, scattered dots across the nail surface, or organized dot formations like triangles or straight lines. We particularly love placing three small black dots near the cuticle area for a subtle yet noticeable design element.
Minimalist geometric patterns using black can include small triangles, thin diagonal lines, or negative space designs. These patterns maintain the understated elegance perfect for professional environments while adding just enough visual interest to keep your nails from looking plain.
Gothic and Edgy Black Nail Art Concepts
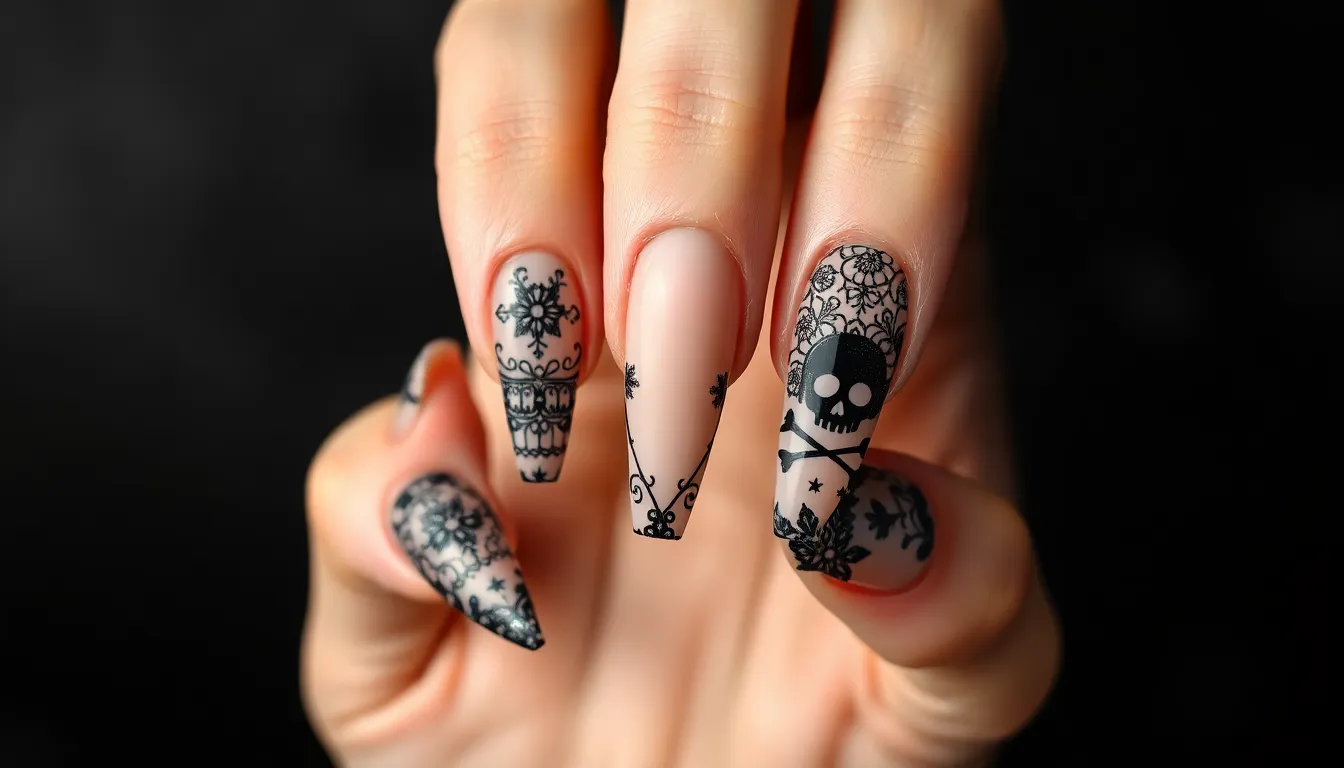
Gothic nail art transforms black polish into dramatic statements that channel dark elegance and rebellious sophistication. These bold designs push creative boundaries while maintaining the timeless appeal of black manicures.
Black Lace Patterns
Intricate lace patterns bring Victorian romance to modern nail artistry with delicate black detailing over contrasting bases. We love creating these feminine yet edgy designs using fine nail art brushes or lace pattern stamping plates for precision. The key lies in layering translucent black polish over nude or white bases to achieve that authentic lace transparency effect.
Creating lace patterns works beautifully on longer nails where intricate details can truly shine. Start with a light base coat in nude pink or pearl white, then use a fine brush to paint delicate swirls, dots, and geometric lace motifs. Finish with matte topcoat for that authentic textile appearance, or add glossy topcoat for modern sophistication.
Skull and Crossbones Designs
Bold skull motifs transform nails into edgy canvases that make powerful style statements. These designs range from simple silhouettes on accent nails to detailed skull art covering entire nail sets. We recommend starting with basic skull outlines using white polish over black bases before advancing to more complex shading techniques.
Crossbones add dramatic flair when positioned strategically across nail beds or used as accent elements. Practice drawing symmetrical bone shapes using thin brushes, focusing on clean lines and proper proportions. Adding small rhinestones or silver studs to eye sockets creates dimensional effects that catch light beautifully.
Dark Floral Motifs
Gothic florals blend natural beauty with dark romanticism through deep black blooms and thorny vine patterns. We create these sophisticated designs using black roses, dark dahlias, and twisted branch motifs that flow elegantly across nail surfaces. The contrast between delicate floral shapes and bold black execution produces stunning visual impact.
Layering techniques enhance depth in dark floral designs by building shadows and highlights within each bloom. Start with solid black flower silhouettes, then add dimension using charcoal gray for shadows and metallic silver for highlight accents. Incorporating tiny thorns or wilted petal details amplifies the gothic aesthetic while maintaining artistic elegance.
Black and Gold Luxury Nail Combinations
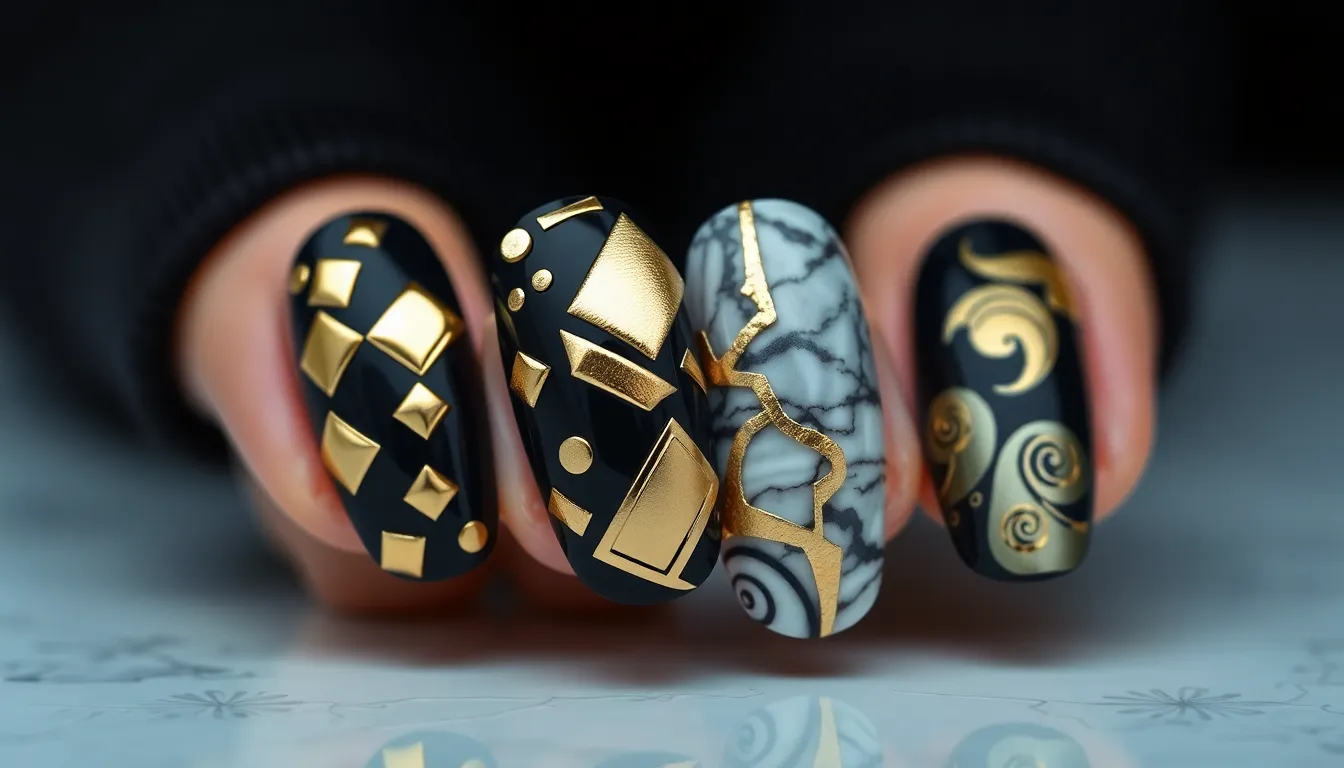
Gold transforms ordinary black manicures into opulent statements that command attention. We’ll explore three sophisticated approaches that elevate black nail art to luxury status.
Gold Foil Accents
Delicate gold foil pieces create stunning textural contrasts against glossy black bases. We apply these metallic fragments using nail glue or specialized foil adhesive for maximum durability.
Random placement techniques work best for achieving an organic, luxurious appearance. Apply the black base coat first, then press irregular gold foil pieces onto select areas while the top coat remains slightly tacky. Smaller foil fragments around the cuticle area add subtle elegance, while larger pieces near the nail tips create dramatic focal points.
Professional application tips include using tweezers for precise placement and sealing with two thin top coat layers. The technique works beautifully on both short and long nails, making it perfect for special occasions or everyday luxury looks.
Black Base With Gold Geometric Shapes
Geometric patterns in metallic gold create modern luxury that pairs perfectly with black polish. We recommend using gold striping tape or fine brushes to achieve crisp, clean lines that define sophisticated shapes.
Triangle arrangements at the base or tips add contemporary flair, while chevron patterns create ever-changing movement across the nail surface. Negative space techniques combine black polish with gold outlines, leaving portions of the natural nail visible for added dimension.
Application methods vary from using stencils for beginners to freehand techniques for advanced nail artists. Gold nail pens offer excellent control for detailed geometric work, while metallic polish provides richer color saturation. Layering strategies include applying gold shapes over dry black polish, then sealing with clear top coat for longevity.
Marble Effect in Black and Gold
Swirled marble patterns blend black and gold polishes into luxurious, one of a kind designs. We create these effects using water marbling techniques or direct polish manipulation on the nail surface.
Water marbling methods involve dropping alternating colors into room temperature water, then creating patterns with a toothpick before dipping the nail. Dry marbling techniques use makeup sponges to blend wet polishes directly on the nail, offering more control over the final pattern.
Color ratios typically favor black as the dominant shade, with gold serving as dramatic veining throughout the design. Finishing touches include matte top coats for sophisticated texture or glossy sealers for mirror like shine. Each nail develops unique patterns, ensuring no two manicures look identical while maintaining cohesive luxury appeal.
Matte Black Nail Art Ideas for Sophisticated Looks
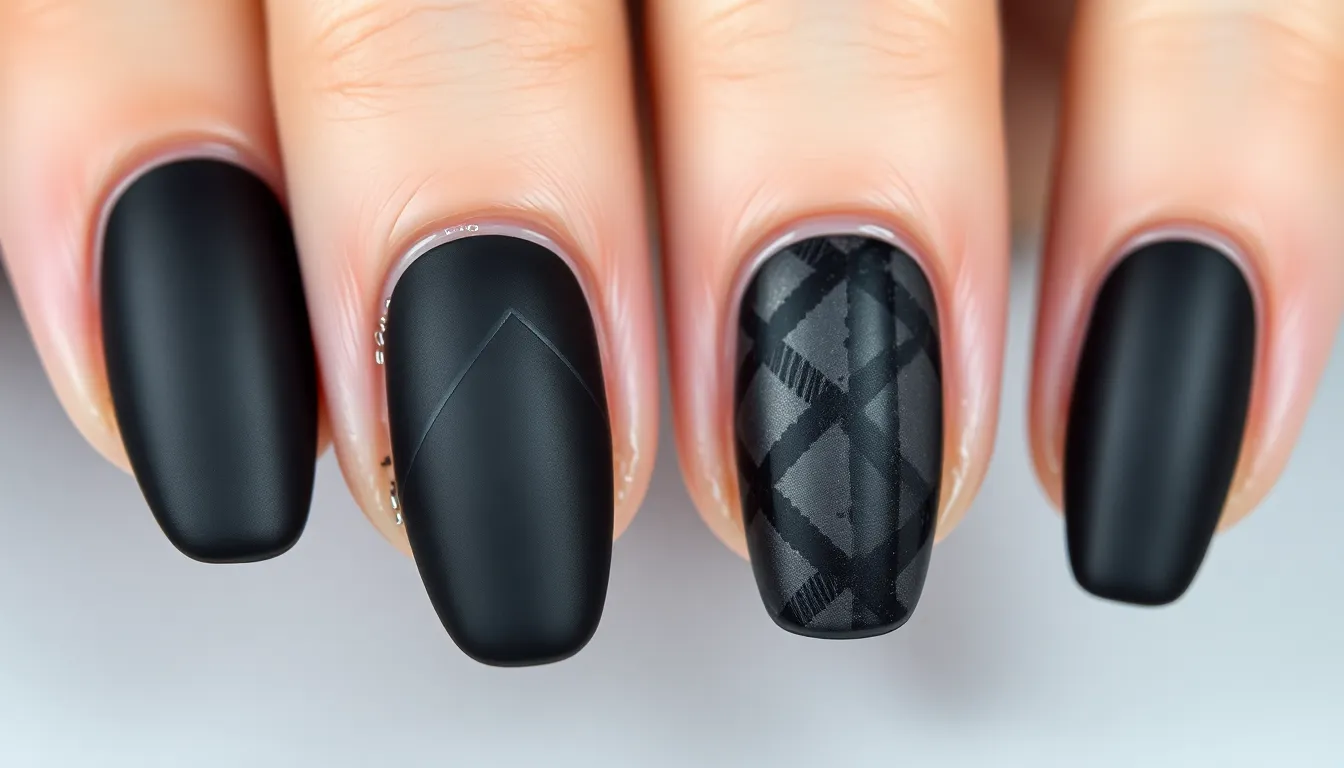
Matte black nail art brings an elevated elegance that glossy finishes simply can’t match. We’ll explore three sophisticated approaches that transform your manicure into a statement of refined style.
All-Black Matte Finish
Monochrome matte black nails create an instantly sophisticated look that works perfectly for professional settings and formal events. We recommend using a high-quality matte topcoat over your favorite black polish to achieve that velvety smooth finish that catches light beautifully without reflecting it.
Application begins with a solid black base coat, followed by two thin layers of black polish for even coverage. Finishing with a matte topcoat transforms the entire look, creating depth that appears almost fabric-like in texture. This design works exceptionally well on almond and coffin shaped nails, where the length enhances the dramatic effect.
Maintenance becomes crucial with matte finishes since they show fingerprints and oils more easily than glossy alternatives. We suggest using cuticle oil sparingly and avoiding hand creams directly on the nail surface to preserve that perfect matte appearance.
Matte and Glossy Black Contrast
Combining matte and glossy black finishes creates stunning visual interest through texture variation alone. We love pairing three matte nails with two glossy accent nails, typically on the ring finger and thumb, for a balanced sophisticated look.
Geometric patterns work beautifully with this contrast technique, where we can create stripes, triangles, or negative space designs using both finishes. The glossy sections appear to pop forward while matte areas recede, creating a three-dimensional effect that’s both modern and timeless.
Nail art enthusiasts often incorporate this contrast into French tip designs, using matte black for the base and glossy black for the tips. This approach offers a fresh take on classic styles while maintaining professional elegance suitable for any occasion.
Textured Matte Black Designs
Textured matte black nail art introduces tactile elements that elevate simple manicures into artistic statements. We can achieve various textures using techniques like sugar coating, velvet powder, or specialized textured polishes that create unique surface patterns.
Caviar bead applications over matte black create luxurious texture that resembles fine fabric or leather finishes. These tiny beads, available in black or metallic tones, adhere best when applied over slightly tacky polish before the final matte topcoat application.
Stamping techniques work exceptionally well with matte finishes, where we can create raised patterns using thicker stamping polishes. The contrast between smooth matte areas and raised textured designs creates sophisticated nail art that feels as interesting as it looks, perfect for those who appreciate both visual and tactile beauty.
Black Ombre and Gradient Nail Techniques
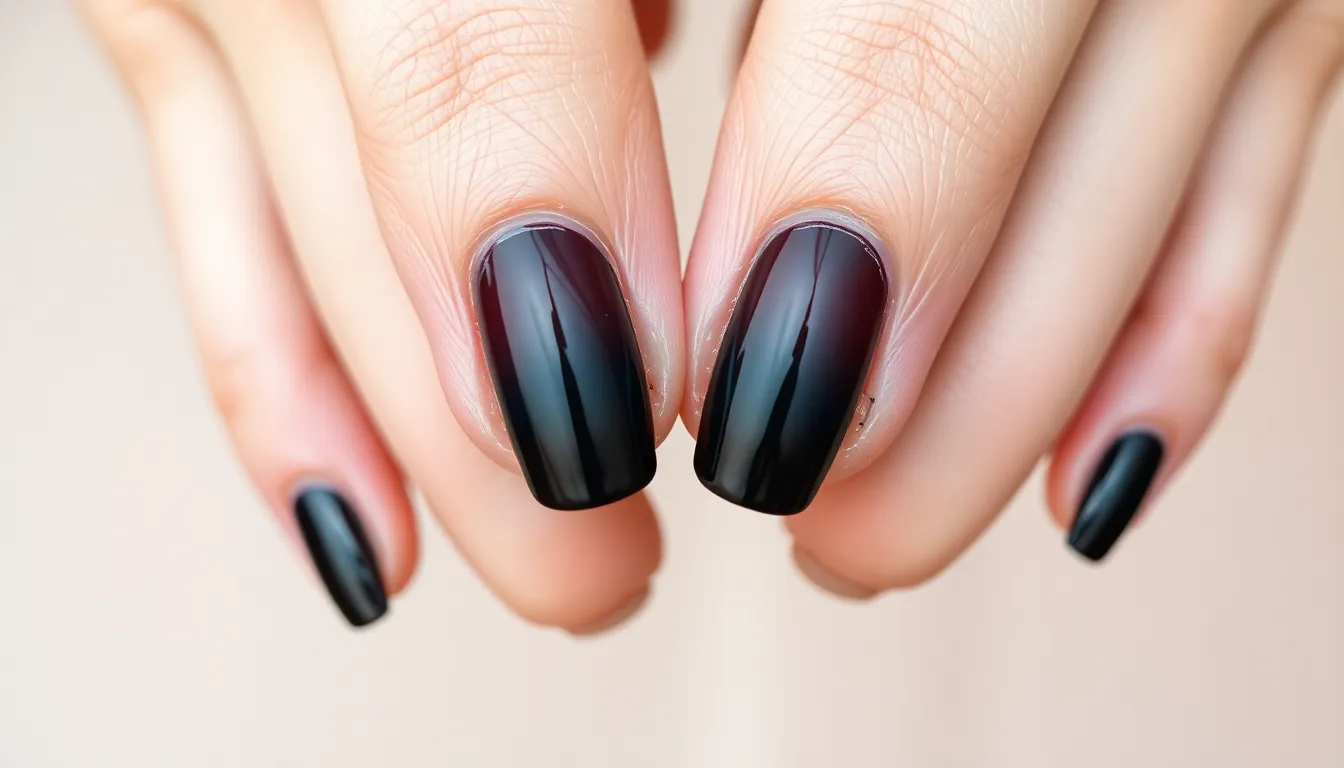
Gradient techniques transform black polish into stunning dimensional looks that seamlessly blend colors. These methods create sophisticated transitions that add depth and visual interest to your manicures.
Black to Clear Gradient
Black to clear gradients create an ethereal fading effect that’s perfect for elegant occasions and everyday wear. We start with a black base coat at the nail bed and gradually fade it toward the tip using a makeup sponge technique.
Application requires three key steps for professional results. First, apply two coats of clear base polish and let them dry completely. Second, dab black polish onto a makeup sponge and gently press it onto the lower third of each nail. Third, blend upward with light dabbing motions while the polish remains wet.
Maintenance becomes easier when you apply a quality top coat every few days. The gradient effect lasts longer when we avoid harsh chemicals and wear gloves during cleaning activities. Touch ups involve adding black polish to the base area and blending with the sponge technique.
Black to Silver Ombre
Black to Silver Ombre delivers a dramatic metallic transition that catches light beautifully. We achieve this look by blending jet black polish with silver chrome or metallic shades using overlapping application methods.
Creating smooth transitions requires working quickly while both polishes remain workable. Apply black polish to the nail bed area and silver polish to the tip section. Blend the meeting point using a clean brush in gentle back and forth motions. The key involves building up thin layers rather than applying thick coats.
Silver shade selection affects the final appearance significantly. Chrome silvers create mirror like finishes while metallic silvers offer subtle shimmer effects. Holographic silvers add rainbow undertones that complement the black base beautifully.
Multi-Tonal Black Fade
Multi tonal black fades incorporate different black shades to create sophisticated depth variations. We layer charcoal grays, deep blacks, and blue toned blacks to achieve complex dimensional effects.
Shade progression starts with the lightest black tone at the tip and gradually deepens toward the cuticle. Charcoal gray works perfectly for the tip area while true black anchors the base. Blue black or green black adds subtle undertones in the middle section.
Blending techniques vary based on the desired intensity level. Light pressure creates soft transitions while firmer application produces more defined color breaks. We recommend practicing the technique on nail wheels before applying it to natural nails for best results.
Dramatic Black Nail Art With Rhinestones and Gems
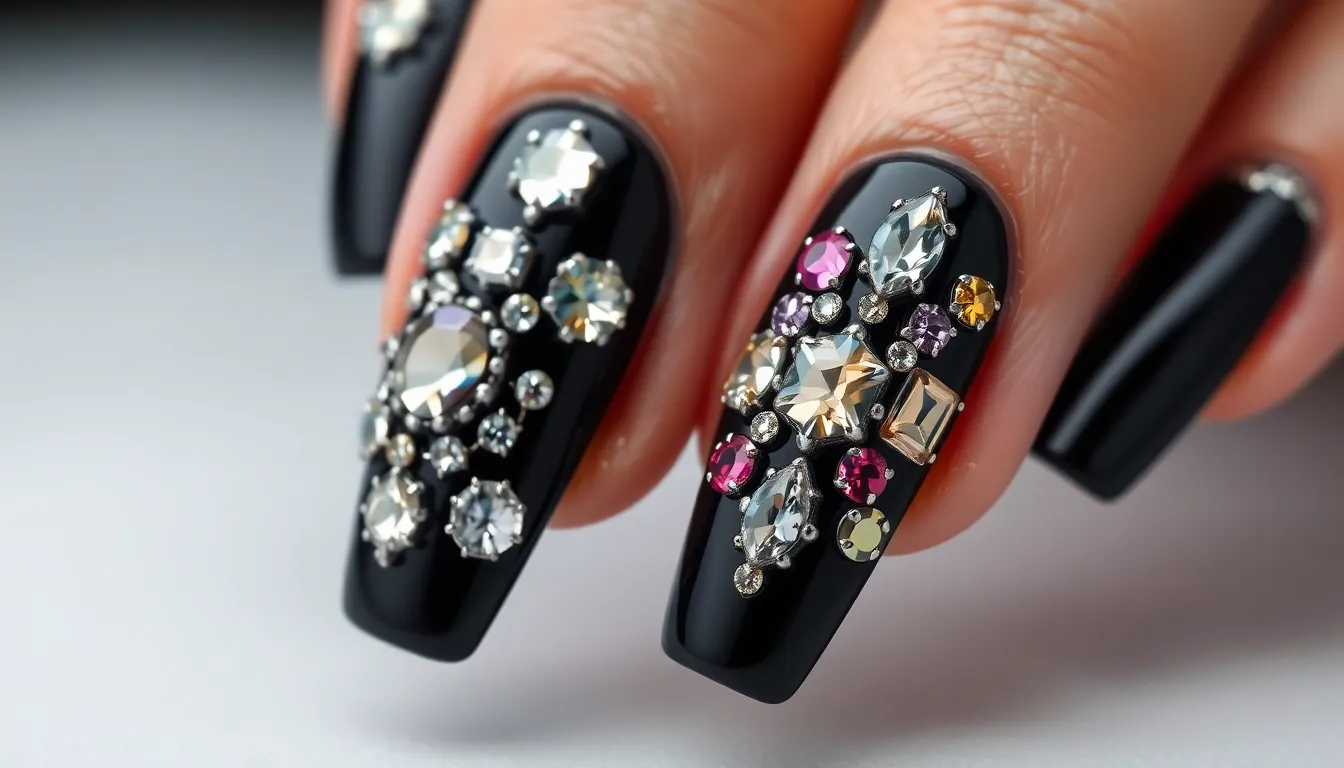
Adding dimensional elements to black nail art creates stunning focal points that catch light beautifully. These glamorous techniques transform simple black manicures into show-stopping designs perfect for special occasions.
Crystal-Encrusted Black Nails
Crystal embellishments elevate black nail art into luxury territory with their brilliant sparkle and sophisticated appeal. We recommend starting with a high-quality black base coat and allowing it to dry completely before applying adhesive gems.
Clear crystals create the most dramatic contrast against black polish, offering maximum light reflection and visual impact. Place larger crystals near the cuticle area for an elegant crescendo effect that draws the eye naturally toward the nail bed.
Strategic placement works better than random scattering when creating crystal patterns on black nails. Consider arranging stones in diagonal lines, forming delicate flowers, or creating gradient effects from dense to sparse coverage across each nail.
Application timing matters significantly for crystal adhesion and longevity on black polish. Wait until your base color reaches a tacky consistency before pressing gems into place, ensuring they embed slightly into the polish for better hold.
Black Base With Colored Gems
Colored gemstones against black backgrounds create striking contrast combinations that showcase each stone’s unique hue brilliantly. We’ve found that jewel tones like emerald, sapphire, and ruby work exceptionally well with black polish bases.
Emerald green stones provide rich contrast that evokes luxury jewelry aesthetics on black nails. Position these gems along the nail’s center line or create accent patterns on ring fingers for sophisticated pop without overwhelming the overall design.
Ruby red crystals offer bold drama when paired with glossy black polish, creating a classic color combination reminiscent of vintage glamour. These stones work particularly well for evening events and formal occasions where maximum impact is desired.
Mixed gem arrangements allow for creative expression while maintaining black nail art’s inherent elegance. Combine two to three complementary stone colors, ensuring one dominates while others provide accent highlights throughout your manicure design.
3D Rhinestone Applications
Three dimensional rhinestone techniques add sculptural elements that transform flat nail surfaces into miniature works of art. These advanced applications require patience and precision but deliver professional looking results.
Layered stone placement creates depth by building gems in multiple levels across the nail surface. Start with flat back crystals as your foundation layer, then add smaller stones on top to achieve dimensional pyramid or cluster effects.
Textural mixing combines different stone shapes and sizes for visually interesting 3D compositions on black nails. Pair round crystals with square cut gems, oval stones with teardrop shapes, creating ever-changing arrangements that catch light from multiple angles.
Gradient dimensionality builds height progressively across the nail surface using increasingly larger stones. Begin with tiny seed crystals near the cuticle, progress to medium gems in the center, and finish with statement stones near the nail tip for dramatic elevation effects.
Black Nail Art With Metallic Accents
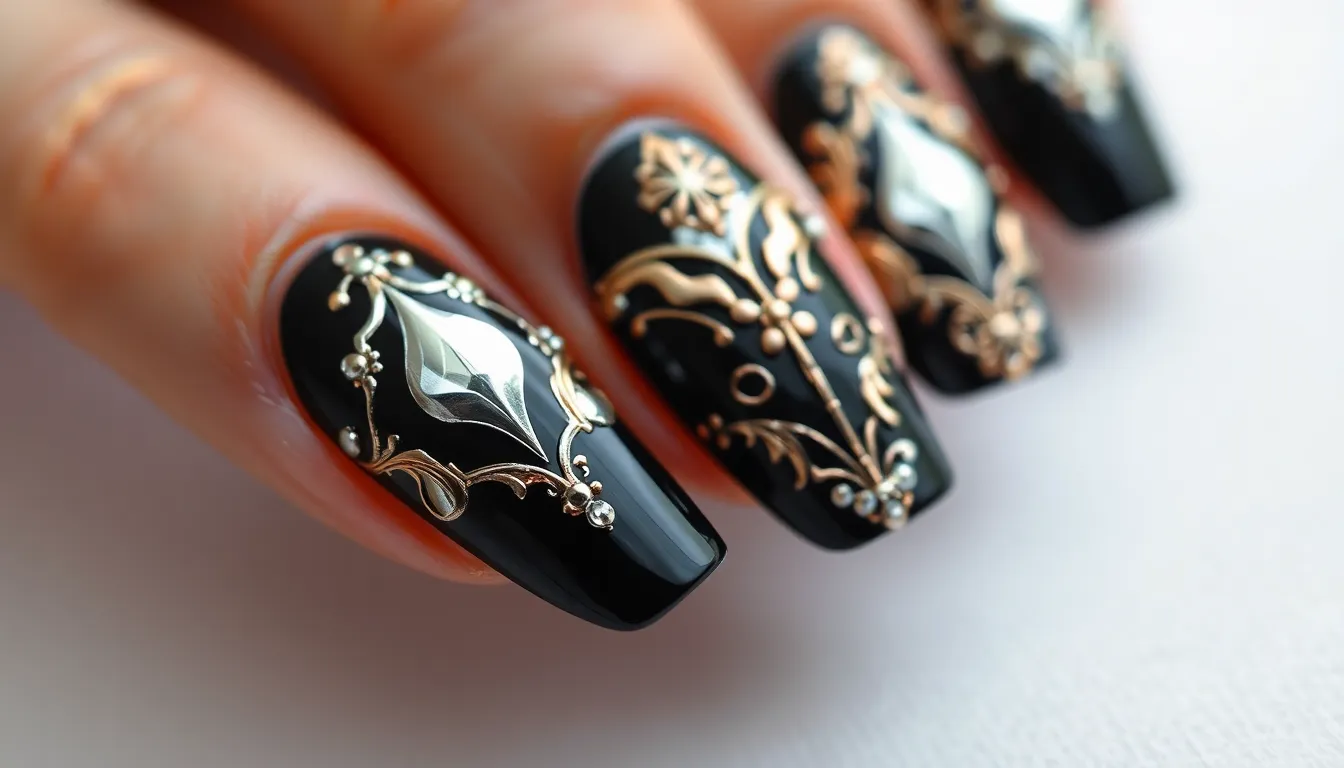
Metallic accents transform black nails into stunning masterpieces that catch light beautifully and create sophisticated contrast. These shimmer elements elevate basic black manicures into luxury designs perfect for both special occasions and everyday glamour.
Silver Chrome Details
Silver chrome finishes create mirror-like reflections that pair perfectly with deep black polish for an ultra-modern aesthetic. We recommend applying chrome powder over a black base using a makeup sponge for the smoothest finish possible. Strategic placement along the cuticle line or nail tips creates elegant accent areas without overwhelming the overall design.
Chrome stripes running vertically down black nails elongate fingers while maintaining sophistication for professional settings. The metallic contrast works exceptionally well on almond and coffin nail shapes where the length showcases both colors effectively. Sealing chrome details with a high-gloss topcoat ensures the mirror finish remains vibrant for up to two weeks.
Rose Gold Highlights
Rose gold accents bring warmth to black nail designs while maintaining an elevated luxury appeal that complements all skin tones beautifully. We suggest using rose gold foil strips along the nail bed edges or creating delicate geometric patterns for maximum visual impact. The copper undertones in rose gold create stunning depth when layered over matte black polish.
Gradient effects using rose gold shimmer polish create breathtaking sunset transitions from black bases to metallic tips. This technique works particularly well on shorter nail lengths where subtle color shifts appear more proportional. Applying rose gold highlights with a fine detail brush allows for precise line work and intricate pattern creation.
Copper and Bronze Elements
Copper accents deliver rich warmth that transforms black nails into autumn-inspired masterpieces with sophisticated earthy undertones. We recommend using copper leaf sheets for textural interest or bronze shimmer polish for subtle metallic catches throughout the design. These warm metallics create striking contrast against jet black polish while maintaining elegance.
Bronze gradient effects starting from the cuticle area and fading into black tips create dimensional depth that appears almost three-dimensional under different lighting conditions. Stamping techniques using copper polish over black bases allow for intricate pattern work including florals, geometric shapes, and abstract designs. Layering different copper tones creates complex metallic finishes that rival professional salon results.
Seasonal Black Nail Designs Throughout the Year
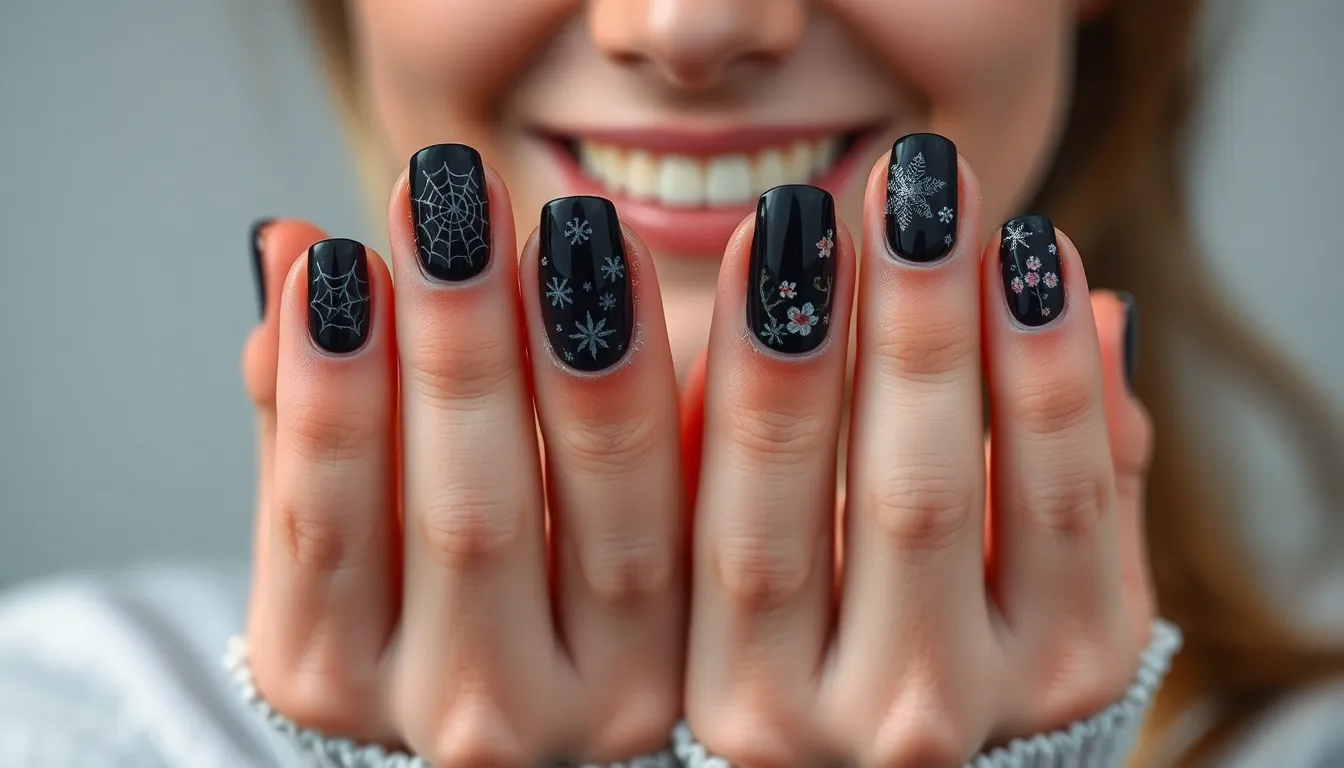
Black nail art transforms beautifully with each season, offering fresh inspiration while maintaining its timeless sophistication. We’ll explore how to adapt your favorite black manicures to complement seasonal celebrations and changing weather patterns.
Halloween-Themed Black Nails
Spider Web Designs create the perfect spooky atmosphere when applied over matte black polish. We recommend starting with two thin coats of black base color, then using a white or silver striping brush to draw intersecting lines from corner to corner. The web pattern works exceptionally well on accent nails paired with solid black on remaining fingers.
Haunted House Silhouettes transform your nails into miniature gothic masterpieces using black polish and negative space techniques. Apply black polish in jagged shapes to create rooflines and building outlines against a clear or dark purple background. Small dots of glow in the dark polish can represent windows, creating an enchanting effect under UV light.
Mystical Moon Phases capture Halloween’s supernatural energy through crescent and full moon designs. We paint different lunar phases on each nail using metallic silver or gold over matte black bases. The contrast between dark backgrounds and bright metallic moons creates striking visual impact perfect for October celebrations.
Winter Black and White Combinations
Snowflake Patterns bring elegant winter charm when applied over glossy black polish using white nail art pens. Each snowflake design becomes unique through varying the size and complexity of the crystalline patterns. We suggest focusing on one or two accent nails with detailed snowflakes while keeping other nails solid black for balance.
Geometric Winter Landscapes transform nails into abstract winter scenes using sharp black and white contrast. Triangular mountain shapes in white polish create dramatic silhouettes against black backgrounds. These minimalist designs work particularly well on longer nail shapes where there’s more canvas space for artistic expression.
Marble Winter Effects blend black and white polish using the water marbling technique for organic, ice-like patterns. The swirling motion creates unique designs on each nail that resemble frozen water or winter storm clouds. We recommend sealing these intricate patterns with a high quality top coat to preserve the detailed marble effects.
Black Spring Floral Patterns
Cherry Blossom Branches combine delicate pink florals with black polish for sophisticated spring elegance. Thin black lines create branch structures while small pink and white dots represent blossoms in various stages of bloom. The contrast between dark branches and soft petals captures spring’s renewal energy perfectly.
Abstract Botanical Silhouettes showcase spring flowers through negative space techniques where black polish forms the floral outlines. We paint around flower shapes using black polish, leaving the natural nail or a light base color to represent petals and leaves. This technique creates modern artistic interpretations of classic spring blooms.
Garden Shadow Effects use black polish to create depth and dimension in colorful spring flower designs. Black serves as the shadow and outline color while bright spring shades fill in petals and leaves. The layering technique creates three dimensional effects that make flowers appear to pop off the nail surface.
Creative Black Nail Art Techniques and Tools
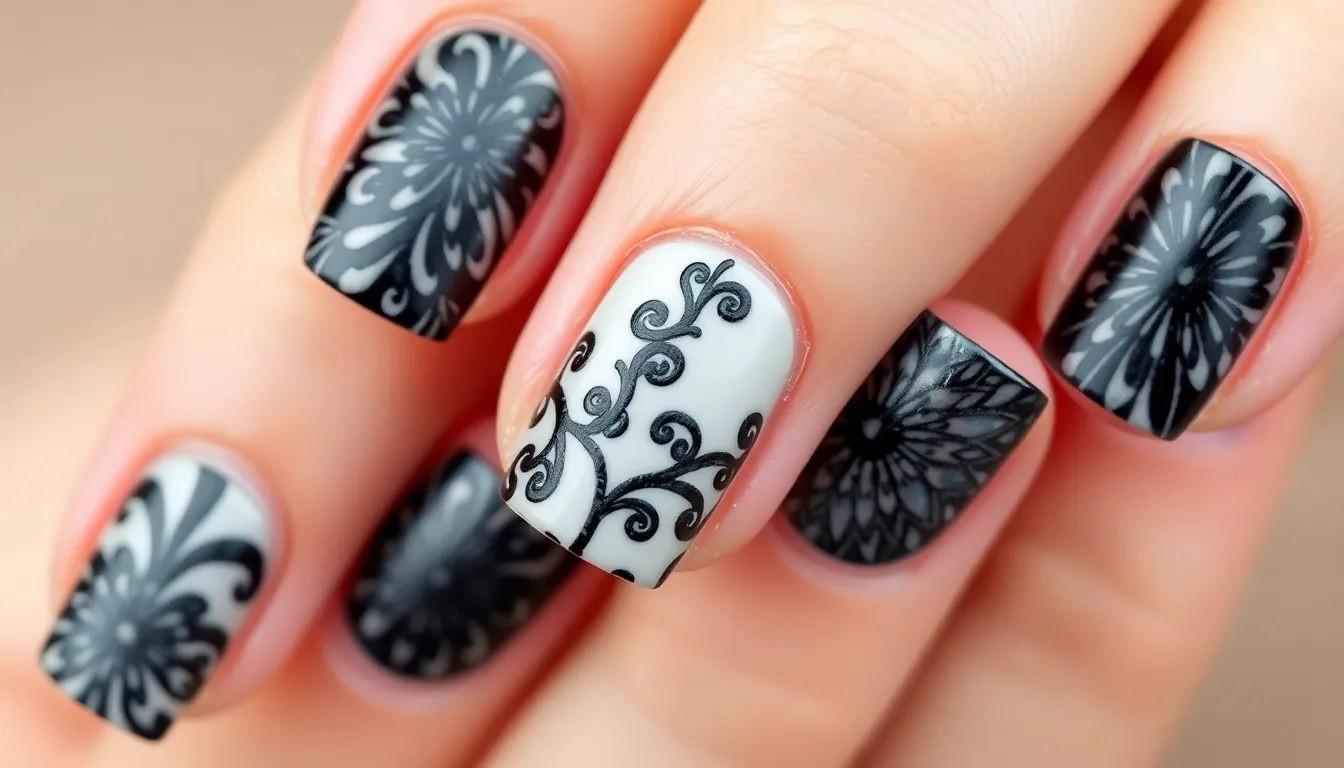
Mastering the right techniques and tools elevates your black nail art from basic to breathtaking. Professional methods and specialized equipment help achieve crisp, detailed designs that rival salon quality.
Stamping With Black Polish
Stamping transforms intricate patterns into effortless nail art using specialized plates and scrapers. We recommend starting with high-quality stamping polish that provides opaque coverage in a single transfer. Black stamping polish works exceptionally well because its rich pigmentation creates bold, defined patterns against any base color.
Choose stamping plates with deep etchings to ensure complete polish pickup. Floral designs, geometric patterns, and lace motifs show up beautifully when stamped with black polish over lighter base colors. The contrast creates stunning visual impact that’s impossible to achieve with freehand painting.
Apply a thin layer of base coat before stamping to prevent smudging. Work quickly when transferring the design, as black polish tends to dry faster than lighter shades. Clean your stamper between each nail to maintain crisp, clear impressions throughout the entire manicure.
Water Marble in Black Tones
Water marble technique creates organic, flowing patterns that blend black seamlessly with complementary colors. We suggest using room temperature filtered water in a small cup to achieve the smoothest polish dispersion. Black polish creates dramatic contrast when paired with white, silver, or deep burgundy shades.
Drop polish colors alternately into the water, starting with lighter shades followed by black. Create concentric circles by adding drops to the center of each ring. Use a toothpick to draw patterns through the floating polish, working from the outer edge toward the center for the most ever-changing designs.
Protect surrounding skin with liquid latex or tape before dipping your nail. The viscosity of black polish requires slightly more manipulation time than lighter colors. Remove excess polish from the water surface using a cotton swab before lifting your finger to prevent streaking.
Nail Art Brushes for Black Designs
Fine detail brushes enable precision work essential for intricate black nail art patterns. We use liner brushes with synthetic bristles for creating thin lines, geometric shapes, and delicate details. The dense pigmentation of black polish flows smoothly through quality brush tips without streaking or skipping.
Fan brushes create unique texture effects when working with black polish gradients. Dip the brush lightly in thinned black polish to achieve subtle shading and dimensional effects. These brushes work particularly well for creating realistic shadow effects in floral or industry designs.
Clean brushes immediately after use with acetone or specialized brush cleaner. Black polish stains brush bristles permanently if allowed to dry, making thorough cleaning essential for maintaining tool longevity. Store cleaned brushes with protective caps to preserve their shape and prevent bristle damage.
Conclusion
Black nail art continues to captivate us with its endless possibilities and timeless sophistication. From elegant minimalist designs to dramatic gothic masterpieces we’ve explored countless ways to make this classic color truly our own.
Whether you’re drawn to the subtle luxury of matte finishes or the bold statement of rhinestone-encrusted nails there’s a black nail design that perfectly matches your style. We’ve shown you that black isn’t just a color—it’s a canvas for creativity that adapts beautifully to every season occasion and skill level.
The techniques and ideas we’ve shared give you everything needed to transform your nails into stunning works of art. So grab your favorite black polish and let your creativity shine through these versatile and eternally chic designs.
Frequently Asked Questions
What makes black nail art so versatile and popular?
Black nail art offers incredible versatility as it serves as the perfect base for various styles, from minimalist patterns to bold gothic looks. It can be enhanced with metallic accents, contrasting colors, and intricate designs. Black nails work for both casual and formal occasions, making them a timeless choice that never goes out of style.
How can I create a modern twist on French manicure with black polish?
Try three stunning variations: Reverse French Tips (black base with clear/nude tips), Geometric French Lines (angular black accent lines), and Glitter Accent French (black tips with sparkly elements). These designs work on various nail lengths and are perfect for both everyday wear and special occasions.
Are black nail designs suitable for professional environments?
Yes! Minimalist black nail designs like Single Black Accent Nail, Thin Black Stripes, or subtle black dots are perfect for professional settings. These designs maintain elegance and sophistication while adding a polished touch that’s appropriate for workplace environments.
What’s the best way to apply gold accents to black nails?
Use gold foil for textural contrast, create geometric shapes with metallic gold polish, or try marble effects blending black and gold. Apply a base coat, let black polish dry completely, then add gold elements using detail brushes or foil application techniques for professional-looking results.
How do I achieve and maintain matte black nail art?
Apply your base coat, black polish, then finish with a matte top coat for an all-over matte look. For mixed finishes, use matte top coat selectively. To maintain matte nails, avoid oils and use gentle cleaning methods to preserve the texture and prevent unwanted shine.
What tools do I need for intricate black nail art designs?
Essential tools include detail brushes for precision work, stamping plates for intricate patterns, and dotting tools for geometric designs. For advanced techniques like water marble or 3D effects, you’ll also need specialized brushes, rhinestones, and quality top coats for durability.
How can I incorporate seasonal themes into black nail designs?
Black adapts beautifully to seasonal themes: Halloween designs with spider webs and moon phases, winter snowflake patterns, or spring cherry blossom silhouettes. Use black as your base and add seasonal elements with contrasting colors or metallic accents to create festive, stylish looks year-round.
What’s the difference between ombre and gradient black nail techniques?
Ombre creates smooth color transitions (like black to clear or black to silver), while gradients can incorporate multiple tonal variations of black. Both techniques use blending methods but ombre typically involves two colors, while gradients can include several shades for more complex dimensional effects.

