Two-color nail designs have revolutionized the way we express our creativity through manicures. We’ve discovered that combining just two complementary or contrasting shades can create stunning visual effects that rival even the most complex nail art. Whether you’re preparing for a special occasion or simply want to elevate your everyday look these dual-tone techniques offer endless possibilities.
From classic French tips with a modern twist to bold color-blocking patterns we’ll explore how strategic color pairing can transform your nails into miniature works of art. The beauty of two-color designs lies in their versatility – they’re sophisticated enough for professional settings yet playful enough for weekend adventures.
We’re excited to share our favorite two-color combinations and techniques that’ll help you achieve salon-quality results at home. These designs prove that you don’t need a rainbow of polishes to create eye-catching manicures that’ll have everyone asking about your nail artist.
Classic Black and White Combinations
Black and white combinations create stunning nail designs that work with every outfit and occasion. These high-contrast pairings offer endless possibilities for sophisticated manicures.
Timeless Monochrome Designs
Traditional checkerboard patterns transform nails into miniature chess boards with alternating black and white squares. We recommend using nail tape to create crisp lines between each square for professional-looking results. Apply white as your base color, then carefully place tape to section off every other square before painting with black polish.
Classic polka dots bring playful elegance to monochrome manicures using dotting tools or bobby pins. Paint your base in either black or white, then create uniform dots across each nail using the contrasting color. Small dots create subtle texture while larger ones make bold statements.
Diagonal split designs showcase both colors equally by dividing each nail from corner to corner. Use nail tape to mask half the nail, paint one section, remove the tape carefully while wet, then repeat for the opposite color. This technique creates clean geometric divisions that elongate shorter nails.
Modern Geometric Patterns
Abstract line work combines thick and thin strokes to create contemporary nail art masterpieces. Paint random intersecting lines, parallel stripes, or crossing patterns using fine nail brushes. Vary the width of each line to add visual interest and depth to your geometric design.
Triangle formations use negative space to showcase both colors in angular compositions. Create triangular shapes by painting pointed sections at the nail tips, cuticle areas, or corners. Multiple small triangles clustered together produce striking mosaic effects.
Minimalist accent walls feature one solid color with geometric shapes in the contrasting shade. Paint four nails in white and add black rectangles, circles, or diamond shapes to one accent nail per hand. This approach balances bold graphics with subtle sophistication.
Elegant French Tip Variations
Reverse French manicures flip traditional designs by painting nail beds black and tips white. This dramatic inversion creates modern elegance while maintaining the classic French silhouette. Use curved nail guides to achieve perfectly rounded tip lines.
Double-lined French tips feature thin black outlines around white tips for defined borders. Paint traditional white tips first, then use a fine brush to trace black lines along both edges of the white sections. This technique adds sophisticated detail to basic French manicures.
Asymmetrical tip designs break conventional rules with angled or curved tip lines instead of straight horizontal ones. Create diagonal tips, wavy edges, or pointed V-shapes using the two-color combination. These unexpected shapes modernize classic French manicures while maintaining timeless appeal.
Bold Red and Gold Pairings

Red and gold combinations create luxurious nail designs that exude confidence and elegance. These two colors complement each other beautifully, making them perfect for special occasions and festive celebrations.
Glamorous Holiday Looks
Holiday seasons call for show-stopping nail designs that capture the festive spirit. We love creating alternating red and gold nails for Christmas parties, where each nail showcases a different metallic gold shade paired with classic crimson. Glitter gradients work exceptionally well during winter holidays, starting with deep red at the cuticle and blending into gold sparkles at the tips.
Ombre effects between burgundy and rose gold deliver sophisticated holiday glamour that photographs beautifully. We recommend using a makeup sponge to blend these shades seamlessly, creating a gradient that catches light from every angle. Adding small rhinestones or gold foil accents to red base coats elevates simple holiday manicures into statement looks.
Sophisticated Evening Styles
Evening events require nail designs that complement formal attire while maintaining elegance. We prefer deep wine red bases with thin gold striping along the cuticle line for black-tie occasions. Negative space designs featuring gold geometric shapes against red backgrounds create modern sophistication that works with both vintage and contemporary styles.
Matte red nails with glossy gold tips offer a unique twist on traditional French manicures for dinner dates. We’ve found that metallic gold accent stripes placed diagonally across burgundy nails add movement and visual interest without overwhelming formal outfits. Chrome gold powder applied over red base coats creates mirror-like finishes that reflect light beautifully in dimly lit venues.
Accent Nail Techniques
Strategic accent placement maximizes the impact of red and gold combinations across all nail lengths. We suggest using gold on ring fingers while keeping remaining nails in classic red for subtle elegance. Reverse techniques work equally well, featuring four gold nails with one striking red accent that draws attention.
Half-moon designs using gold at the cuticle area against red bases create vintage-inspired looks that feel fresh and modern. We recommend practicing with nail tape to achieve clean lines between colors, especially when creating geometric patterns. Dotting tools help create precise gold polka dots on red backgrounds, while striping brushes enable thin metallic lines that add delicate detail to bold red manicures.
Soft Pink and Silver Harmonies

Soft pink and silver create the most romantic two-color combinations that work beautifully for everyday elegance and special occasions alike. This ethereal pairing offers endless possibilities for sophisticated nail art that feels both timeless and contemporary.
Romantic Gradient Effects
Blending soft pink with silver creates breathtaking sunset-inspired gradients on your nails. Start with a sheer pink base coat and gently sponge silver polish from the tips downward, creating a natural fade effect that mimics moonlight on rose petals.
Reverse gradients work equally well by applying silver as your base and blending soft pink from the cuticle area toward the center of each nail. This technique creates depth while maintaining the delicate nature of both colors.
Vertical gradients offer another stunning approach where we apply pink to one side of the nail and silver to the other, blending them in the center with a makeup sponge. The result resembles precious metal melting into pink quartz.
Delicate Shimmer Applications
Strategic shimmer placement elevates soft pink and silver combinations without overwhelming the overall design. Apply soft pink as your base color and use a fine shimmer brush to add silver sparkles along the cuticle line or nail tips for subtle glamour.
Dotting tools help create perfect shimmer accents by picking up silver polish and placing tiny dots randomly across pink nails or in exact patterns like flowers or stars. This technique works especially well for creating constellation-inspired designs.
Negative space techniques allow both colors to shine by leaving portions of the natural nail visible while painting geometric shapes in soft pink and filling others with silver shimmer. The contrast between matte pink, sparkling silver, and clear nail creates sophisticated visual interest.
Wedding Perfect Combinations
Bridal nail designs benefit from soft pink and silver’s naturally romantic qualities that complement white gowns and silver jewelry perfectly. Paint alternating nails in soft pink and silver, or choose pink for most nails with silver accent on ring fingers to match wedding bands.
French tip variations using these colors create modern bridal looks by applying soft pink bases with thin silver tip lines or reversing the combination for silver bases with pink tips. These designs photograph beautifully and coordinate with most wedding color schemes.
Lace-inspired patterns work wonderfully with soft pink bases and silver detailing using nail stamping plates or freehand techniques with thin brushes. The intricate silver designs over pink create texture that mimics actual lace fabrics found in wedding dresses.
Half-moon manicures in soft pink with silver crescents at the cuticle area offer vintage glamour perfect for classic wedding styles, while modern geometric patterns using both colors suit contemporary brides seeking unique nail art.
Navy Blue and Rose Gold Contrasts

Navy blue and rose gold create a sophisticated contrast that balances deep richness with warm metallic elegance. This striking combination works beautifully for both casual outings and formal events.
Chic Metallic Accents
Foil application techniques transform ordinary navy nails into luxurious masterpieces. We recommend applying navy as your base color and adding rose gold foil pieces while the topcoat remains tacky. Press the foil fragments gently with a cuticle pusher for seamless adhesion.
Glitter gradient effects blend rose gold sparkle into navy bases for stunning dimension. Start by painting all nails navy blue and allow complete drying. Apply rose gold glitter polish to nail tips using a makeup sponge for smooth blending. Build the gradient slowly with thin layers to avoid clumping.
Metallic striping designs add geometric interest to navy backgrounds. Use rose gold striping tape to create clean lines across navy nails. Remove the tape while the polish stays wet to prevent peeling. Seal your design with a quality topcoat for lasting wear.
Trendy Color Blocking
Half moon techniques showcase both colors in balanced proportions. Paint your entire nail rose gold first and let it dry completely. Place reinforcement stickers at the nail base to create curved shapes. Apply navy polish over the remaining nail surface and remove stickers immediately.
Diagonal split patterns create modern geometric appeal. Divide each nail diagonally using painter’s tape as your guide. Apply navy to one section and rose gold to the other for striking contrast. The sharp division line emphasizes the color difference beautifully.
Alternating nail schemes offer versatility for any occasion. Paint your thumb and ring fingers rose gold while keeping index, middle, and pinky nails navy. This pattern creates visual interest without overwhelming busy schedules or conservative dress codes.
Professional-Friendly Options
Subtle accent placements maintain workplace appropriateness while adding personality. We suggest keeping most nails navy blue and adding rose gold only to ring fingers. This approach provides sophistication without drawing excessive attention during meetings.
French tip variations modernize classic styles with navy and rose gold combinations. Apply navy as your base color and create thin rose gold tips using a steady hand. The metallic tips catch light subtly throughout your workday.
Negative space applications incorporate both colors through strategic placement. Leave portions of your natural nail visible while painting navy sections and rose gold details. This technique reduces color intensity while maintaining the elegant contrast between deep blue and warm metallic tones.
Nude and White Minimalist Styles

Nude and white combinations create effortlessly chic nail designs that complement any wardrobe while maintaining professional sophistication. These versatile color pairings offer the perfect balance between understated elegance and modern style.
Clean Negative Space Designs
Geometric cutouts transform nude bases into artistic statements by incorporating white negative space triangles, circles, or linear patterns. We create these designs using nail tape to mask exact areas before applying the base color, resulting in crisp geometric shapes.
Half moon manicures feature nude polish covering most of the nail while leaving the cuticle area in natural white or clear finish. Apply the nude shade first, then use curved nail guides to protect the moon area during application.
Vertical stripe patterns alternate between nude and white sections down the length of each nail, creating elongating effects. Use thin nail art brushes or striping tape to achieve perfectly straight lines that enhance finger length.
Floating dot designs place small white circles on nude backgrounds using dotting tools in various sizes. Space these dots strategically across different nails to create balanced, modern patterns that catch light beautifully.
Subtle Ombre Techniques
Gradient blending transitions from nude at the cuticle to white at the tips using makeup sponges for seamless color fusion. Dab the sponge lightly to build up the gradient effect gradually without creating harsh lines.
Cloud effect ombres create dreamy transitions by layering sheer white polish over nude bases in soft, irregular patterns. Apply the white shade with a dry brush technique to achieve natural, cloud like textures.
Reverse gradients start with white at the base and fade to nude toward the tips, offering a fresh twist on traditional ombre styles. This technique works particularly well on shorter nail lengths where the transition appears more dramatic.
Horizontal fade patterns blend nude and white across the width of each nail rather than lengthwise, creating unique visual interest. Use small makeup sponges to achieve smooth horizontal transitions that complement wider nail beds.
Everyday Wearable Looks
Single accent nails feature white polish on ring fingers while keeping other nails in nude shades for subtle workplace appropriate style. This approach adds personality without overwhelming professional dress codes.
French tip variations modernize classic manicures by using nude bases with thin white tips or reversing colors for contemporary appeal. Apply tips with steady brush strokes or use nail guides for consistent thickness.
Alternating color schemes paint nails in nude and white patterns across both hands, such as nude on thumbs and middle fingers with white on remaining nails. This creates visual balance while maintaining sophisticated simplicity.
Matte finish combinations apply matte top coats over nude and white polishes to create velvety textures perfect for casual settings. Matte finishes reduce shine while adding modern edge to classic color combinations.
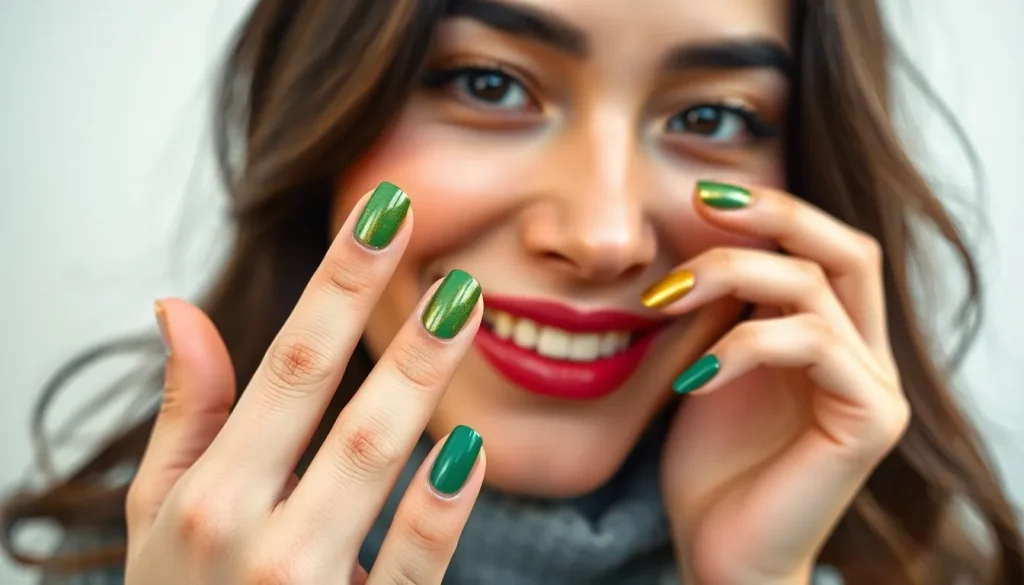
Emerald Green and Gold Luxe Looks

Emerald green and gold create one of the most opulent two-color combinations in nail art. This pairing channels luxury jewelry aesthetics while maintaining sophisticated elegance.
Rich Jewel Tone Combinations
Alternating emerald and gold nails deliver maximum impact for evening events and cocktail parties. We recommend using a deep forest green base with metallic gold accent nails on the ring fingers and thumbs. Chrome powder application over a gold base creates the most reflective finish that catches light beautifully.
Gradient blending techniques transform these colors into stunning sunset effects across your nails. Start with emerald green at the cuticle and blend upward into gold tips using a makeup sponge. Multiple thin coats ensure smooth color transitions without streaking or patchiness.
Half-moon designs showcase both colors equally while maintaining clean geometric lines. Paint the lunula area in gold foil and fill the rest with emerald green for a modern take on classic manicures. Nail tape helps achieve perfectly curved edges that look professionally done.
Statement Making Designs
Bold color-blocking patterns create eye-catching nail art perfect for special occasions and celebrations. We suggest diagonal splits that divide each nail between emerald green and gold sections. Use a thin brush to create clean separation lines and seal with top coat for durability.
Geometric stripe combinations offer endless design possibilities using these luxurious colors. Vertical stripes alternate between emerald and gold create an elongating effect on shorter nails. Horizontal stripes work better for wider nail beds and create visual interest.
Negative space designs incorporate both colors while allowing natural nail to show through. Create triangular cutouts filled with emerald green while keeping gold accents minimal for balance. This technique works exceptionally well for everyday wear.
Holiday Season Inspiration
Christmas party manicures shine with emerald green bases and gold glitter gradients starting from the tips. We love adding small gold studs or rhinestones to accent nails for extra sparkle. Matte emerald green with glossy gold details creates textural contrast.
New Year celebration designs feature bold emerald and gold chevron patterns that catch party lights perfectly. Alternate the colors on each nail or create intricate zigzag patterns using nail art brushes. Metallic gold striping tape adds precision to complex geometric designs.
Winter wedding looks combine soft emerald shimmer with champagne gold accents for romantic elegance. French tip variations using these colors complement formal attire while maintaining bridal sophistication. Pearl accents in gold tone enhance the luxurious feel without overwhelming the design.
Coral and Turquoise Summer Vibes

We’ve discovered that coral and turquoise create the perfect summer nail combination that captures the essence of tropical getaways and beach destinations.
Tropical Beach Themes
Sunset gradient designs transform your nails into miniature ocean vistas by blending coral bases into turquoise tips using a makeup sponge. We recommend starting with a coral base coat and dabbing turquoise polish onto a damp sponge for seamless color transitions.
Ocean wave patterns bring beach vibes to life through curved turquoise lines painted over coral backgrounds. Use a thin nail art brush to create flowing wave motions across each nail, varying the height and intensity for natural movement.
Palm leaf accents add tropical flair when painted in turquoise over coral bases or vice versa. We suggest using a detail brush to create simple palm frond shapes on accent nails, keeping the design minimal yet impactful.
Seashell inspired designs incorporate both colors through half moon techniques where coral creates the base and turquoise forms crescents near the cuticles. This creates a sophisticated beach theme perfect for summer occasions.
Bright Vacation Styles
Color blocking techniques maximize visual impact by alternating solid coral and turquoise nails throughout your manicure. We find this approach works exceptionally well for pool parties and beach outings where bold colors complement swimwear.
Geometric stripe patterns combine both colors through vertical or diagonal lines that create ever-changing vacation ready nails. Use nail tape to achieve crisp lines, painting coral bases first and adding turquoise stripes for contrast.
Polka dot applications feature turquoise dots on coral backgrounds or coral dots on turquoise bases using dotting tools. We recommend varying dot sizes across nails for playful vacation energy that captures summer spontaneity.
Half and half designs split each nail vertically or horizontally between coral and turquoise sections. This bold approach creates statement nails perfect for tropical vacations and summer festivals.
Fun Contrast Combinations
Checkerboard patterns alternate small squares of coral and turquoise across nail surfaces for retro summer vibes. We suggest using nail art brushes or stamping plates to achieve precise square formations that maintain clean edges.
Triangle formations combine both colors through geometric shapes that point upward or create abstract patterns. Paint coral bases first, then add turquoise triangles using tape guides for sharp, professional looking edges.
Negative space techniques incorporate clear nail sections between coral and turquoise elements for modern summer designs. We recommend leaving strategic gaps that showcase natural nails while highlighting both vibrant colors.
Ombre blending methods create smooth transitions between coral and turquoise using makeup sponges and blending techniques. Start with coral at the cuticle area and gradually transition to turquoise at the tips for stunning sunset effects.
Purple and Silver Mystical Designs

Purple and silver create an enchanting two-color combination that channels celestial magic into your nail art. These mystical shades transform ordinary manicures into ethereal masterpieces perfect for special occasions and everyday glamour.
Galaxy-Inspired Patterns
Cosmic swirl designs capture the mesmerizing beauty of distant nebulas using deep purple bases with silver metallic accents. We start with a dark plum shade and use a makeup sponge to dab silver polish in random patterns, creating the illusion of stardust across our nails. The key lies in layering different purple tones from lavender to deep violet for dimensional depth.
Constellation patterns feature strategic silver dot placements on purple backgrounds that mimic famous star formations. Using a dotting tool or toothpick, we connect silver points with thin lines to recreate patterns like the Big Dipper or Orion’s Belt. This technique works beautifully when we alternate solid purple nails with constellation designs.
Ombre galaxy effects blend multiple purple shades from light to dark with silver glitter concentrated at the tips. We apply the lightest purple at the cuticle and gradually build darker tones toward the nail tip, finishing with silver glitter for a twinkling star field effect. The blending technique requires a damp makeup sponge and patience for seamless transitions.
Glitter Integration Methods
Strategic glitter placement enhances purple and silver designs without overwhelming the base colors. We focus silver glitter on accent nails or exact areas like the cuticle line and nail tips for maximum impact. Fine glitter creates subtle sparkle while chunky pieces add dramatic texture to the overall design.
Gradient glitter applications transition from dense silver sparkle to sparse distribution across purple bases. Starting with heavy glitter at one end of the nail, we use a dry brush to sweep and blend the particles toward the opposite end. This creates a natural fade effect that mimics moonlight reflecting on water.
Layered shimmer techniques combine different silver finishes including holographic, chrome, and traditional glitter for complex visual interest. We apply a base coat of purple, add holographic silver in the center, and finish with chrome silver at the edges. The layering creates depth and movement as light hits the nails from different angles.
Creative Nail Art Ideas
Marble effect patterns swirl purple and silver together using the water marble technique for unique abstract designs. We drop alternating colors into room temperature water, create swirl patterns with a toothpick, then dip our nails into the design. Each nail produces a one of a kind marble pattern with flowing organic shapes.
Geometric moon phases showcase the lunar cycle using purple backgrounds with silver crescent shapes. We create templates using nail tape to achieve perfect crescent curves, filling them with metallic silver polish. The design works best when we show different moon phases across multiple nails for a complete celestial story.
Mystical symbol accents incorporate purple bases with silver foil transfers featuring stars, moons, and magical motifs. Using nail foil adhesive, we apply delicate silver symbols over cured purple polish for professional looking results. The contrast between matte purple and shiny silver foil creates striking visual impact perfect for special events.
Application Tips for Two-Color Designs

Mastering two-color nail designs requires the right tools and techniques to achieve salon-quality results at home. We’ve compiled essential methods that’ll help you create flawless color combinations every time.
Essential Tools and Techniques
Quality base coat application forms the foundation for long-lasting two-color designs. Apply thin, even layers to clean nails and allow complete drying before adding color. Striping brushes create precise lines for geometric patterns like the navy blue and rose gold contrasts we discussed earlier.
Nail tape serves as your best friend for clean color blocking and diagonal splits. Press edges firmly to prevent bleeding and remove tape while the polish remains slightly wet. Dotting tools help achieve perfect polka dots and intricate details in coral and turquoise combinations.
Makeup sponges blend colors seamlessly for gradient effects like those stunning purple and silver ombres. Cut sponges into small triangular pieces for better control when creating sunset blends or galaxy patterns. Clean brushes between colors to maintain crisp lines in black and white checkerboard designs.
Small detail brushes allow for precise application of accent colors and thin striping work. Keep acetone and cleanup brushes nearby for immediate correction of mistakes. Cuticle sticks wrapped in cotton help clean up edges without disturbing the main design.
Color Coordination Guidelines
Complementary colors create the most striking visual impact in two-color designs. Red and gold pairings work beautifully for holiday celebrations, while emerald green and gold combinations suit luxurious evening events. Test color combinations on a nail wheel before committing to your final design.
Temperature matching ensures your colors work harmoniously together. Cool tones like navy blue pair perfectly with silver accents, while warm coral shades complement turquoise for tropical vibes. Nude and white combinations offer versatility for professional settings.
Saturation levels should complement each other rather than compete for attention. Soft pink bases work beautifully with metallic silver accents, creating romantic elegance without overwhelming the design. Balance bold colors with neutral undertones for everyday wearability.
Finish coordination plays a crucial role in design success. Matte and glossy finishes create interesting contrasts when used strategically. Shimmer and glitter elements should enhance rather than overpower your base colors.
Professional Finishing Methods
Top coat application requires strategic timing for best results. Apply immediately after design completion while colors remain slightly tacky for better adhesion. Use quick-dry top coats to prevent smudging on intricate patterns like constellation designs or chevron stripes.
Cleanup techniques determine your final professional appearance. Dip small cleanup brushes in acetone to remove excess polish from cuticle areas. Work quickly to avoid disturbing surrounding nail art elements.
Drying methods affect both durability and appearance of your two-color designs. Allow each color layer to dry completely before adding the next element. Use fans or nail drying sprays to speed up the process between gradient applications.
Maintenance routines extend the life of your two-color manicure. Apply thin top coat layers every few days to maintain shine and prevent chipping. Touch up small imperfections immediately to prevent larger damage to your design.
Removal preparation protects your natural nails for future designs. Use acetone-free removers when possible and apply cuticle oil immediately after removal. Proper nail care between manicures ensures better application of your next two-color combination.
Conclusion
Two-color nail designs offer endless possibilities for expressing your personal style while keeping your manicure fresh and exciting. We’ve shown you that achieving professional-looking results doesn’t require expensive salon visits or an overwhelming collection of polishes.
Whether you’re drawn to classic monochrome elegance or bold metallic contrasts these versatile combinations work beautifully for any occasion. The key lies in choosing colors that complement each other and using the right techniques to create clean precise lines.
With the proper tools and a bit of practice you’ll master these stunning designs in no time. Remember that nail art is all about having fun and experimenting with different color stories that reflect your unique personality.
Start with simpler patterns and gradually work your way up to more complex geometric designs. Your nails will become the perfect canvas for showcasing your creativity while maintaining that polished sophisticated look you’ve been seeking.
Frequently Asked Questions
What are the most popular two-color nail design combinations?
The most popular two-color nail combinations include classic black and white for timeless elegance, bold red and gold for luxury occasions, soft pink and silver for romantic looks, navy blue and rose gold for sophistication, nude and white for minimalist chic, emerald green and gold for opulence, coral and turquoise for summer vibes, and purple and silver for mystical appeal. Each combination offers versatility for different occasions and personal styles.
How do I achieve salon-quality two-color nail designs at home?
To achieve professional results at home, invest in quality tools including striping brushes, nail tape, and dotting tools. Start with clean, prepped nails and apply a base coat. Use nail tape for clean lines, work with thin coats for even coverage, and allow proper drying time between colors. Finish with a quality top coat and clean up edges with a small brush dipped in acetone.
What techniques work best for creating two-color nail art?
Popular techniques include color-blocking for bold contrasts, gradient blending for smooth transitions, negative space designs for modern appeal, geometric patterns using tape, alternating nail schemes, accent nail placement, French tip variations, and ombre effects. Start with simpler techniques like alternating colors or single accent nails before progressing to more complex gradient and geometric designs.
How long do two-color nail designs typically last?
Two-color nail designs can last 7-14 days with proper application and care. Longevity depends on nail prep quality, base and top coat application, daily activities, and maintenance routine. To extend wear, apply cuticle oil daily, wear gloves during household tasks, avoid using nails as tools, and touch up chips promptly with matching polish.
Can two-color nail designs work for professional settings?
Yes, many two-color combinations are perfect for professional environments. Opt for subtle pairings like nude and white, soft pink and silver, or navy blue with minimal rose gold accents. Choose understated techniques like single accent nails, modern French tips, or clean geometric patterns. Avoid overly bold contrasts or excessive glitter for workplace-appropriate looks.
What tools are essential for creating two-color nail designs?
Essential tools include quality base and top coats, striping brushes for precise lines, nail tape for clean geometric shapes, dotting tools for patterns and gradients, small detail brushes for cleanup, cuticle oil for nail health, and acetone for corrections. Optional tools include nail foils, glitter, and stamping plates for more advanced designs.
How do I choose complementary colors for two-tone nails?
Consider color theory principles: complementary colors (opposite on color wheel) create bold contrasts, while analogous colors (next to each other) offer harmony. Think about the occasion, your skin tone, and wardrobe. Classic pairings like black/white, red/gold, or pink/silver are always safe choices. Test combinations on a nail wheel before committing to your full manicure.
What’s the best way to remove two-color nail designs?
Soak cotton pads in acetone-based nail polish remover and place on each nail. Wrap fingertips in foil and let sit for 10-15 minutes. Gently push off softened polish with a cuticle pusher, avoiding aggressive scraping. Moisturize nails and cuticles afterward with oil or cream to restore hydration and prepare for your next manicure.


